• TalkBass has been independent since 1998. Add your voice.
    Create a free account to reply to discussions, view embedded media, and browse with fewer display ads.
    Join freeLog in
    Want zero display ads or expanded classifieds tools? Compare plans.

New Build- My Eighth, and a challenge

I'm getting ready to start my eighth build, and I'm going to try a few new things (for me, anyway), so I figured I'd document this one. I'll do my best to get as many pix as possible along the way and not let everyone down by losing interest in the thread.
Anyway, here's the specs.

Thunderbird style 4 string, 34" scale. Yeah, yeah I know. I build ALOT of t-birds. I like em. Moving on.
3 piece curly maple neck, very highly figured. Should be sexy when finished.
Black Limba core.
Spalted maple top. (Maybe. The Limba is thick enough that I can skip a top, but for now it's getting the spalted.)
Quilted Birdseye maple fretboard (24 frets)

Here's the pieces.
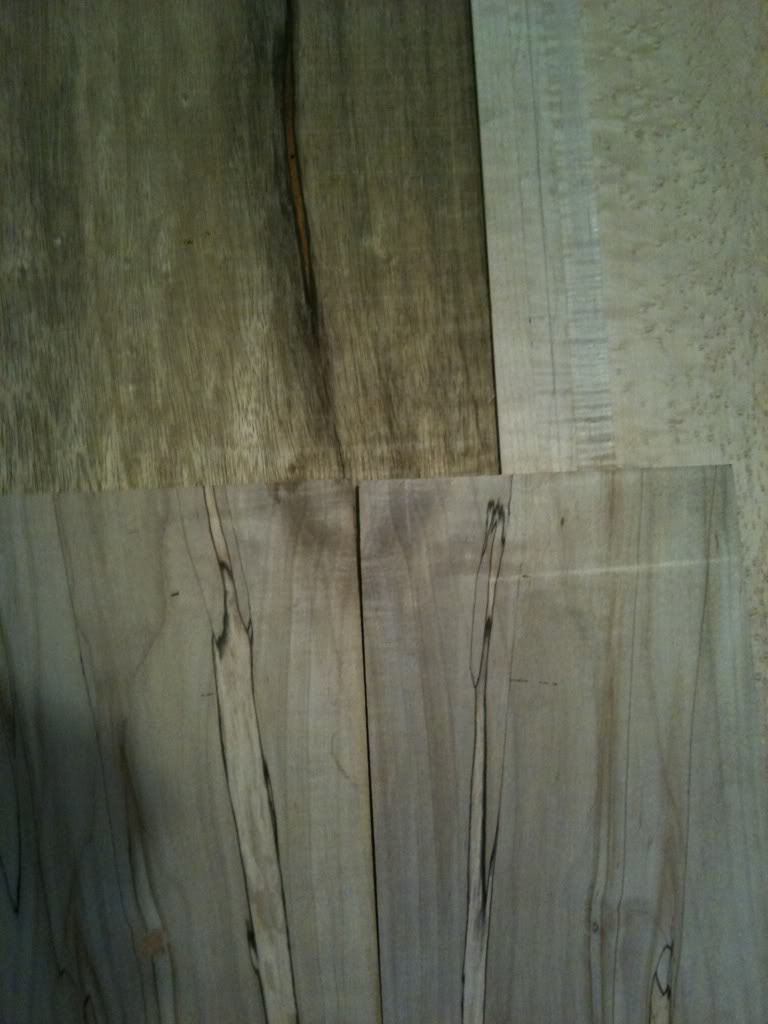
3cedd015.jpg

A close-up of the Birdseye cuz it's sexy.
9a6c567c.jpg


This bass is getting black hardware all around.
Grover tuners
Hipshot A bridge

Seymour Duncan SSB4 pickups.

Now for the FUN part. Inspired by the great tutorial by ScottyD, I'm going to attempt (and succeed) installing fiber optic side markers in the fretboard. It will be lit by a single red LED in it's own compartment.
Supplies for that. Check.
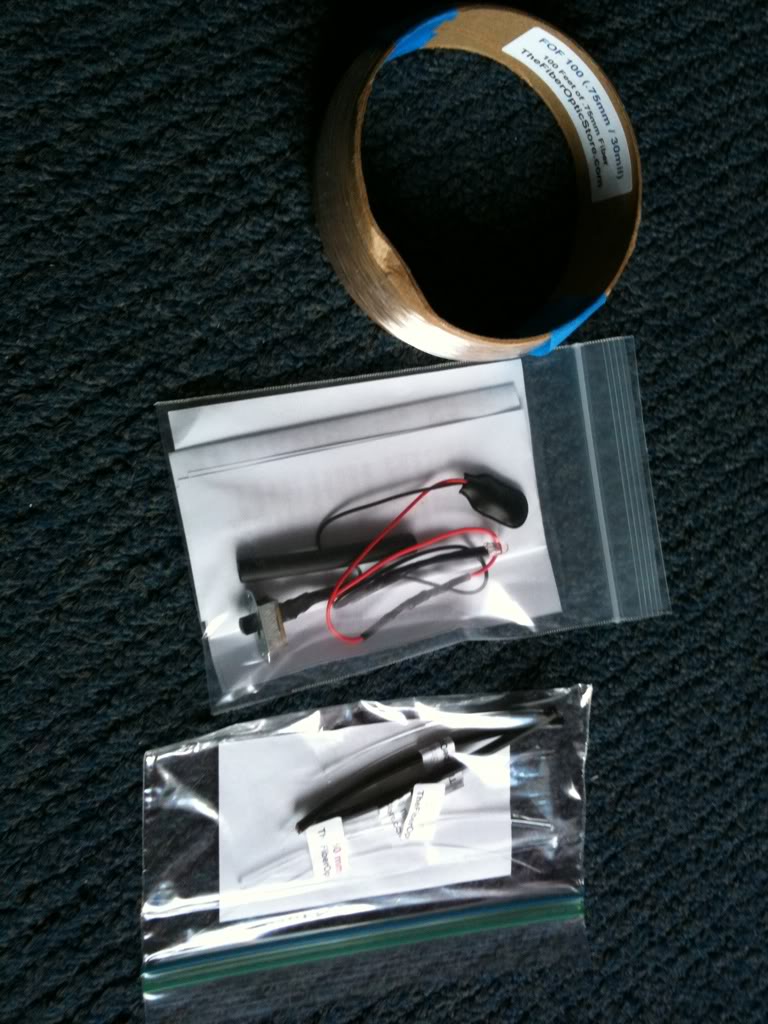
9155942a.jpg
I got the led assembly already made from www.fiberopticstore.com. It's prewired and solid, with an on/off switch already wired in. I'm trying to decide where I want the compartment for that. Either the spot where a pickguard would normally go or in the upper horn area.

As soon as the bridge gets here, I can begin. For now, I'll be planing down the black Limba and birdseye, and getting the fingerboard slotted and ready.

 
metalinthenight said:
this is going to be beautiful!

Thanks. I'm hoping that this will be the build where I finally put everything I've learned so far together, and create something that I can just look at and know that I made the right decision by getting into building. (not that there is any question, I love this sh!t.)

Here's a better shot of the top.
686bb873.jpg
 
And the pickups just showed up. Sweet.
6bc69ea6.jpg

This one will get a V/V/T configuration, just like normal birds. The only extra electronics will be the switch for the fiber optics. Since these pickups will be wired passive, I won't have a battery running to the output jack, so I have to supply power to the LED separately. Only downside will be that the lights won't turn on when you plug the bass in. I see that as a plus, because if you don't want them on, you don't have to.
 
Truss rod and tuners showed up today. I'm spending my day working on the fretboard. I'll post the progress when I'm done. I'm taking lots of pix along the way, so hopefully I'll do a good job this time of tracking my progress. My last build thread was kinda halfass, so I'm gonna try to make up for it with this thread.

Quick note, I've changed my mind on the bridge. I originally planned in using a Hipshot A, but have decided to go ahead and check out their new D style bridge instead. It's gonna take a few days to get here, so until then I'll be passing the time by getting the fretboard optics installed.
 
Today was a productive day. Since I changed my mind on the bridge, I have to wait to do alot on this build, but I decided to go ahead and get the fretboard ready.

I started by planing the birdseye down to just under 3/8". Then I broke out my handy Stewmac fretsaw and miter box, and worked up a bit of a sweat.
f778c876.jpg

Board slotted, then I cut the profile on the bandsaw, and radiused and leveled it.
7fe9fb1b.jpg

Next, I used my Dremel with it's router base and a 1/8" router bit to make a channel on the back of the fretboard for the fiber optics.
1c0b0569.jpg

The channel is slightly wider from the 12th to the 24th fret to give me enough room for all the fibers.
Next, I drilled and installed side markers. I went with white because the only black ones I had were way too small for this purpose.
After the glue dried on the markers, I cut them flush and drilled a .75mm hole through the center of each marker.
02116af5.jpg

Next came the fun part. Stringing fibers through each side marker, taping them in the channel as I went.
 
After all the fibers were strung, I used epoxy to seal them into their permanent homes.
f7fdaa59.jpg

Got a little wrapped up in the work at this point, so I forgot to take alot of pix.

Anywhooo, the fibers are all in place, and cut flush with the side dots. Let's take it into a dark room and hook it to a light source and see what we have.
a2fc5d8a.jpg


We have liftoff!!! All the markers work exactly how I'd planned, so tomorrow I get to work routing the truss rod and getting the neck blank ready.
 
Rip Topaz said:
After all the fibers were strung, I used epoxy to seal them into their permanent homes.
Got a little wrapped up in the work at this point, so I forgot to take alot of pix.

Anywhooo, the fibers are all in place, and cut flush with the side dots. Let's take it into a dark room and hook it to a light source and see what we have.

We have liftoff!!! All the markers work exactly how I'd planned, so tomorrow I get to work routing the truss rod and getting the neck blank ready.

Thanks to ScottyD for the tutorial. I followed it very closely, with the exception of using regular side markers.

Here a bit better of a pic.
deb703da.jpg

Sorry, this whole thread is being done with my iPhone and the Talkbass app.
 
Didn't get too much done today due to a call from the school telling me to come pick up our sick kid.
Managed to get the headstock angle cut on the neck, and the layout ready for further work in the next few days.
023748ae.jpg

Got the first body wing glued up, but I ran out of clamps (and I have alot of clamps) so I'll glue the second one tomorrow.
I decided not to use a maple veneer between the coco and the limba. When I did a dry clamp-up, the veneer just looked like a wide glue line so I changed my mind.

No real pix for today. Still waiting on the bridge and a few minor things like ferrules. The real cutting and carving will probably start next week.

Also, I need to spend some time on my headstock design. It'll be 2+2 to help alleviate some of the neck dive by shortening the headstock, but I'm not really happy with what I've come up with so far. You'd think making a headstock for a T-bird would be easy, but the everyday Ibanez style shape just doesn't look quite right. I'm gonna try a few things and I'll post pix when I have some drawings together. Then we can pick as a group.

Also need to make or find templates for the SSB4's. Hmm.... Google time.

I'm really happy with the change to coco. This top is gonna make a CRAZY looking Thunderbird. Can't wait to see it all glued up.
16633ced.jpg
 
I've been doing some reading up on working with cocobolo. Aside from the allergy issues which I'm hoping to avoid by taking the necessary precautions, alot of what I've read says that cocobolo doesn't play well with oil finishes.

I don't have spray capabilities in my shop, as I work in my garage and the family won't appreciate the fumes, so what are my options? Would a wipe-on poly work?

I normally use Formby's tung oil finish, but I'm not so sure that'll be a good idea with this bass.

Any suggestions? I'm going for clear, uncolored (as much as possible given the amber effects of most finishes) and preferably wipe-on or brushed(!?)
 
primesuspect said:
I will forever be utterly incapable of doing something like this; but as a spectator who also is a bass fanatic, I have to say:

Deep, mad, and total respect. Absolutely awesome.

Thanks, but I gotta say, I was terrified at the idea at first. My wife talked me into going for it. I'm still very new to building, and wouldn't have tried it if it weren't for her nagging at me to just go for it.
 
ive had finishing problems with cocobolo and ''oil'' wipe on poly etc. the natural oils dilute the finish too much for it to properly cure; as long as your not using a penetrating oil; (i know all that stuff penetrates a bit but i mean like 'real' tung oil that will travel thru end grain 30 cm long in a puddle (good test if you think you have real tung btw)) do a treatment of accetone, wait for it to flash off and then in a french polish manner aplly some dewaxed shellac; if you can find it in an aerosol its a plus, no wax and flashes quickly; that should make enough of a barrier to continue, a good test would be to apply another coat of shellac and push your finger into it; see if the orngey red dust is in the new coat of shellac if not, smooth it out and continue