• TalkBass has been independent since 1998. Add your voice.
    Create a free account to reply to discussions, view embedded media, and browse with fewer display ads.
    Join freeLog in
    Want zero display ads or expanded classifieds tools? Compare plans.

New Build- My Eighth, and a challenge

PDGood said:
Whenever wood looks that amazing BEFORE the finish goes on, you KNOW it's gonna be stunning afterwords. And the T-bird shape just really is well suited to grain with that much movement.

Thanks. I couldn't resist making this a 'bird. This will be the third one I've built, Ha! The third bird!!
Finishing this will be it's own adventure, I'm sure. From everything I've read, it's gonna be interesting finishing the coco.
While messing with inlay ideas earlier, I buffed out a scrap of the coco with micromesh. Very nice. Polishes better than purpleheart does.

This build has been alot of fun so far. The grain on the front has a hypnotizing effect after you look at it for awhile. Or maybe that's the dust.
 
PDGood said:
Rip,
Do you have photos of the other two? I'd love to see them.
But of course.
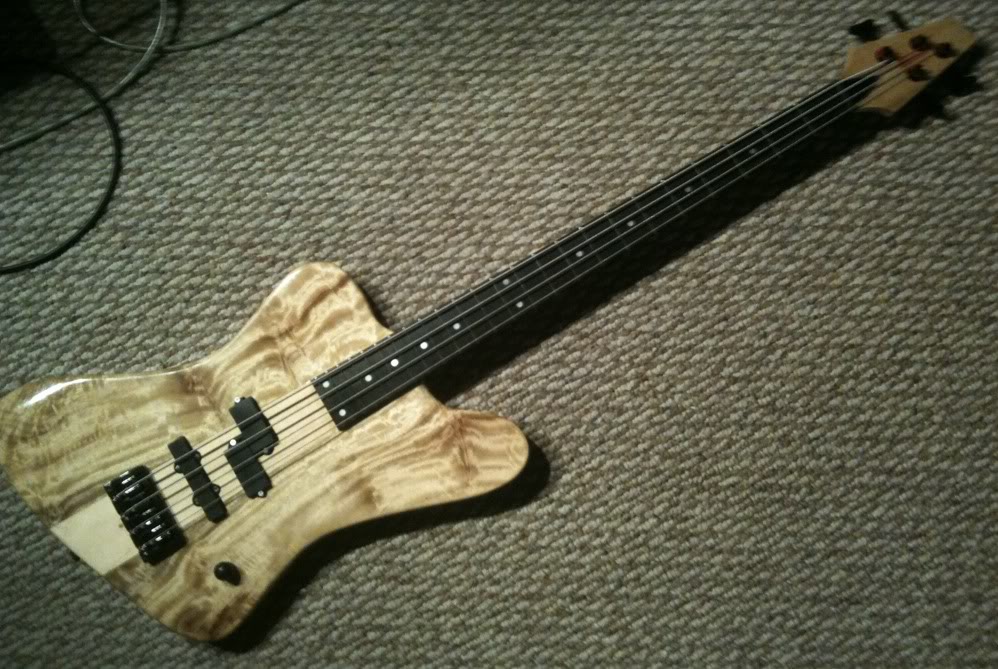
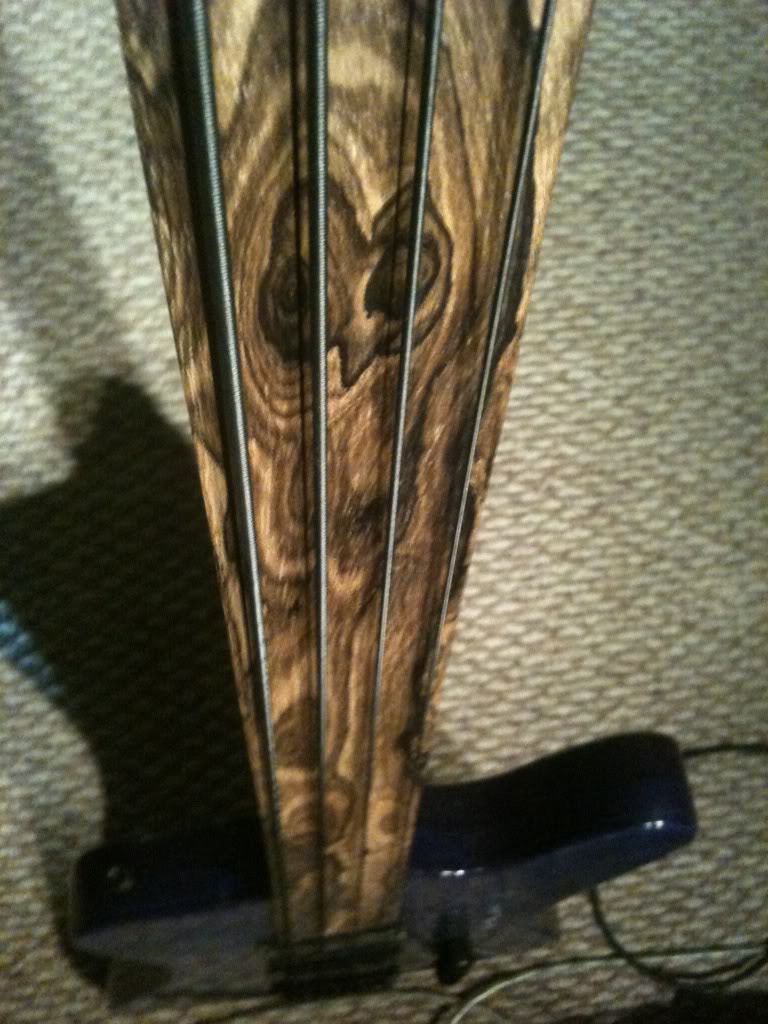
The first one I made was this one. Also my first successful scarf joint (yay!!) Fretless, African Mahogany back, quilted maple top. Ziricote fingerboard. Now resides in the Boston area.
97ce737d.jpg
c8e00f57.jpg


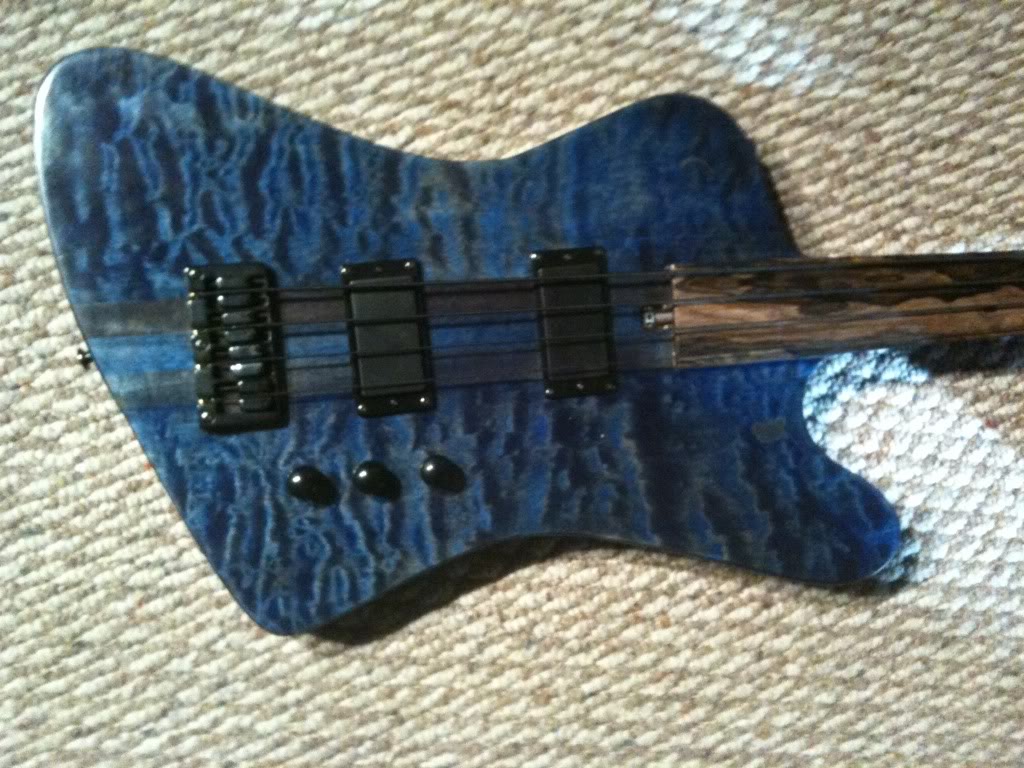
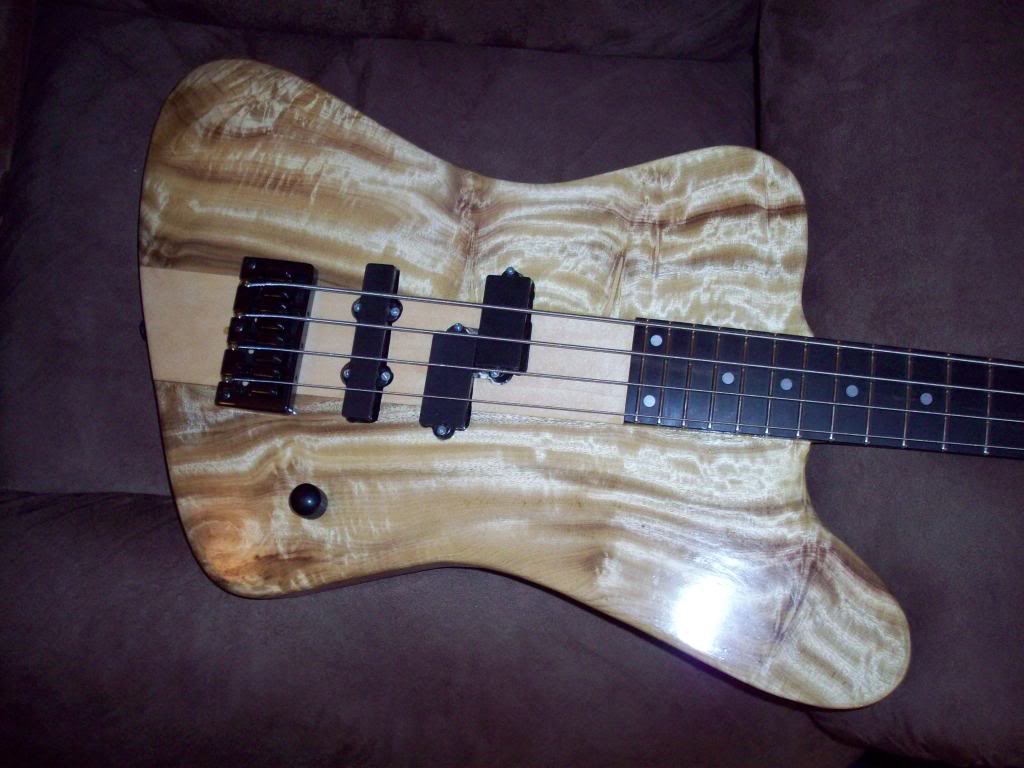
Then I decided that it was time for me to move on to making fretted instruments. I didn't have all the tools needed, and just wasn't ready to do my own fretwork yet, so this one used a Carvin neck through blank in solid maple. Again, African Mahogany (from the same board as the first bird) back, Myrtlewood top.
101_1378.jpg
1d35d1f0.jpg


The myrtlewood bird lives with me, and I play her as my backup bird. I need to add a tone control, because with both pups wires straight to a volume control it is a very bright bass. I'm guessing the lack of a tone capacitor causes the highs to be way too much. I keep putting it off because I can't bring myself to drill another hole in the front of that Myrtle.
 
Beautiful! The blue one in particular is to die for. I like the shape on it better and the Zircote fretboard with the blue body is a combination I've never seen before. The Myrtlewood top on the other one has pizzazzzzz. Good stuff.

I've been wondering if fretboards could be cut on a CNC router. The spacing probably already exists in a document of some sort (you can tell I haven't done any research on this subject) and if you can convert it to an Illustrator document then it might be do-able. Only question in my mind is how to do the arch. That might require a 3D CNC which is harder to find.
 
Today started out just wonderful. I finished the routing on the neck and was test fitting everything, when disaster struck. As I looked down, I noticed a single strand of fiber optic hanging by itself. SH!T!!!! I broke the strand running to the third fret marker!!!
So today when I get back from my doc's appointment, I'm gonna see if I can route the optics out and redo the whole mess.

Some days it's better to just stay in bed.
 
Update on everything.

I managed to save the fretboard, but all the optics will need replaced. Unfortunately, the one that broke was at the third fret, and was epoxied in place, so the only way to fix it is to replace them all.

On a personal note, I'm going Friday morning for surgery to fix the damaged SCS implant. So for the weekend and the beginning of the week, I'll be completely out of commission. Hopefully this will be the last surgery, and I can get back to a somewhat normal life.

So I have a few days to get some progress on this bass.

Fasten your seatbelts and hold on, everyone. We're about to rock this mutha!!
 
But of course.
The first one I made was this one. Also my first successful scarf joint (yay!!) Fretless, African Mahogany back, quilted maple top. Ziricote fingerboard. Now resides in the Boston area.
97ce737d.jpg
c8e00f57.jpg


Then I decided that it was time for me to move on to making fretted instruments. I didn't have all the tools needed, and just wasn't ready to do my own fretwork yet, so this one used a Carvin neck through blank in solid maple. Again, African Mahogany (from the same board as the first bird) back, Myrtlewood top.
101_1378.jpg
1d35d1f0.jpg


The myrtlewood bird lives with me, and I play her as my backup bird. I need to add a tone control, because with both pups wires straight to a volume control it is a very bright bass. I'm guessing the lack of a tone capacitor causes the highs to be way too much. I keep putting it off because I can't bring myself to drill another hole in the front of that Myrtle.

Just go with a stacked tone/volume setup! ;)

 
Back to the task at hand.

Today, I worked on the neck blank. Cut the headstock profile, applied two thin veneers to the back and one thicker veneer of cocobolo to the front. Matching headstock. The piece of coco I used for the headstock was a different board than the one for the body, but the color matches perfectly and it has a crazy grain pattern that goes well with the rest of the bass.
af89da36.jpg

I forgot to snap a picture till after I glued it up, so if you like, I can post a pic of twelve clamps covering it, or I can just show y'all when I take the clamps off. I mean, you can't really see much in a pic like this:
b262a3fd.jpg

The neck is all routed and ready for the truss rod to be installed and the fingerboard attached. I'm not looking forward to that, cuz that'll be a chance to break the optics again. Scary.
With any luck, tomorrow I'll glue the fretboard.

Everyone keep their fingers crossed that the headstock cap holds. So far all the glue joints of the coco really look great, and I haven't had any issues. Hope that continues.

I tried to get alot done today, but the stuff I did manage to accomplish came out well, so I guess it's for the best. Whatever caused me to slow down was for the best.
 
Got the clamps off the headstock this morning, and took it to the bandsaw to clean up and cut the shape. Did a little sanding, and I'm really liking the grain pattern on the headstock plate. The grain is even very prominent even on the edges. I just hope it doesn't explode when I drill the tuner holes.
7908209b.jpg
65281a79.jpg
 
clintotron said:
You could try scoring the tuner holes with a razor knife, before drilling.

Sent from my iPod touch using TalkBass

Thanks. I was thinking I would be best if I score, drill pilots, every little thing I can do to avoid cracking the headstock. The planer hit a knot while thicknessing, and I lost 1/3 of the board, so I gotta start being a little more careful.
 
PDGood said:
Put masking tape (or painter's tape) over it before you drill (both sides). Use a brad point bit. Support the back side with solid wood. After you drill, peel the tape off slowly in the direction of the grain.

Will do. I've learned alot of this while working on previous builds, so I really don't anticipate any problems, but I will be sure to take every precaution. This cocobolo is brittle since it's such a thin top (3/8").
 
One other thing I'm noticing on this build. Not sure if my joinery is improving or if it's just the cocobolo really gluing up nice, but all the glue lines on this bass are coming out completely invisible. I've read so much about the problems alot of people had when gluing coco, I was very apprehensive when starting this build. Turns out my fears were unwarranted, at least so far. Everything is looking great.

Couldn't sleep tonight so I took a little time and laid out the positions of my tuner holes.
How do you guys do it? Is there a system you use when laying out your headstocks, or do you just go with what looks good on a per build basis? Do you have specific rules you follow for every bass?

I'm getting alot more comfortable with each build, and I'm trying to develop little processes for each part of the build, so I get a system developed and follow it for each bass. Make sense?
 
Got almost nothing done today. My wife starts a new job next week, so she took this week off and as a result, my week didn't involve alot of shop time.

I did manage to get the headstock drilled and a quick test fit of the tuners. I like the way it worked out. I'm planning on something special for it, so this pic only really shows the basic shape. There's alot left to be done.
d8347287.jpg


Tomorrow, I'll be gluing the cocobolo veneer I spent the afternoon making to the back of the headstock. Whew. That was work!!

*Quick edit:

I got the cocobolo veneer for the back of the headstock finished. I hadn't originally planned on using a veneer on the back, but decided it just looked a little plain, so starting with a leftover piece from the front veneer, I thinned it even further using my mouse sander and a razor blade.
I really gotta get a proper set of scrapers. Even just using the razor blade I'm seeing the benefit of these simple tools.

So anyway, I got a few extra minutes late this evening, so I wiped the veneer with naphtha and let it dry, then glued it to the back of the headstock. Pix tomorrow when the clamps come off.
 
I've been letting this bass tell me how it wants to look, and it seems to be working. The grain patterns in the cocobolo keep giving me ideas of ways to pretty things up as the build progresses.
This build is different from my other builds so far, in that this is really the first bass I've built that I've spent so much time in the planning stages. Many times I've taken a step back to plan my next move, and sometimes even to replan my present task. One of the few good things about being forced to work at a snail's pace is the ability to spend a great portion of my time really examining my work and finding solutions to the problems I dealt with in my other builds. I'm really noticing a bit more confidence in my abilities this time around.

Or maybe I'm just spacing out.