
Enjoy the benefits of a premium membership!
Upgrade Account
-
TalkBass has been independent since 1998. Add your voice.
Create a free account to reply to discussions, view embedded media, and browse with fewer display ads.
Join free Log in
Want zero display ads or expanded classifieds tools? Compare plans.
You are using an out of date browser. It may not display this or other websites correctly.
You should upgrade or use an alternative browser.
You should upgrade or use an alternative browser.
New Build- My Eighth, and a challenge
- Thread starter Rip Topaz
- Start date
More options
Who Replied?
Just realized I posted to the wrong thread. Oops.
So anyway, it's the weekend. I'm doing other stuff. See y'all Monday.
So anyway, it's the weekend. I'm doing other stuff. See y'all Monday.
Well, as expected, in awake at 4am, realizing that going to a concert last night with all the pain I've been in might not have been a great idea. Lol. I've decided that after seeing the basses played last night (3 bands- two J's and a P), I'm gonna do a J bass as my neck build. As always, when I wake up this early, an idea hits me.
I was looking at some pix of basses online yesterday, and I saw several with straplocks countersunk into the body to make them sit flush with the edge of the bass.
Anyone ever do this with one of their builds? Any disadvantages, other than the possibility that the strap will rub against the finish, possibly mucking it up?
If I can manage to loosen up enough to be able to function today, the plan is to cut the neck profile and start attaching parts. I'm still debating whether it'll be easier to carve the upper portion of the neck before attaching the body wings or not. The fun part about this build is that soon after attaching the fretboard, I need to glue at least the upper wing, so there is a way of protecting the fiber optics from damage while carving the neck. I don't think that carving any of the neck without the fretboard glued on is a good idea.
Anyone have any thoughts on this, or the straplock idea?
I was looking at some pix of basses online yesterday, and I saw several with straplocks countersunk into the body to make them sit flush with the edge of the bass.
Anyone ever do this with one of their builds? Any disadvantages, other than the possibility that the strap will rub against the finish, possibly mucking it up?
If I can manage to loosen up enough to be able to function today, the plan is to cut the neck profile and start attaching parts. I'm still debating whether it'll be easier to carve the upper portion of the neck before attaching the body wings or not. The fun part about this build is that soon after attaching the fretboard, I need to glue at least the upper wing, so there is a way of protecting the fiber optics from damage while carving the neck. I don't think that carving any of the neck without the fretboard glued on is a good idea.
Anyone have any thoughts on this, or the straplock idea?

The main objection to countersunk straplocks that I've seen is that if you show up without your strap with the mating pieces, you're screwed. No way to use a standard strap.
pilotjones said:The main objection to countersunk straplocks that I've seen is that if you show up without your strap with the mating pieces, you're screwed. No way to use a standard strap.
I considered that. I'm trying to decided if I should even bother with straplocks. My main concern is that as soon as someone gets this bass, they'll drill into it to install their own straplocks. I'd rather be the guy doing the drilling, you know what I mean?
Didn't get as far as I'd hoped yesterday. First thing in the morning my mouse sander broke (again). Now this morning I get to spend another 45 minutes on the phone with their warranty division (I've done this before) to get them to send a replacement. This will be my third mouse sander in a year.
Can anyone recommend a ROS that holds up to the abuse of building basses?
Gonna hopefully get the neck cut today. My shop got filled up with little projects over the weekend, so I gotta work through them to make room for myself in the shop.
Can anyone recommend a ROS that holds up to the abuse of building basses?
Gonna hopefully get the neck cut today. My shop got filled up with little projects over the weekend, so I gotta work through them to make room for myself in the shop.

Dewalt. In fact I would recommend Dewalt for most power tool needs. I generally dont recommend craftsman power tools (I assume that is the mouse sander you are talking about) because I feel they make up for lower quality with a great return setup. I used to work with a contractor that swore by craftsman power tools because he could walk in to Sears and get a replacement for whatever was broken. This sounds great but that means everytime something went wrong you have to leave the jobsite for replacements costing time and money. Every time he would leave to get a tool replaced (generally once every week or two) I would stay at the jobsite and work with my Dewalt and Porter Cable stuff (old P.C., not the trash Lowes is selling now) and get the work knocked out while he was gone.
I really put the smackdown on my random orbital sander and I went through 3 Rigid sanders, a craftsman mouse (lasted 2 days ) and a new Porter Cable sander. After the last Rigid sander I bought a dewalt to match the rest of my setup and I have been riding it hard and putting it up wet for 2 years now and it still works great. If you really want the best sender on the market and price is no object do yourself a favor and get a Festool. With the Festool vacuum that sander's performance is incredible but so is the price.
DONT buy the Ryobi sander. The last shop I worked at bought one and I used it for 2 minutes before packing it up and taking it back to them. The thing was so out of balance that it literally jumped around the surface (I had to use 2 hands to keep it steady) and left as many scratches as it removed. Several people tried it and no one could get it to work. I found the Rigid orbital was actually the smoothest with the best finished surface (if you were wondering why I owned 3 of them) but the durability just wasnt there vs. the Dewalt. Also the Rigid pads wear out pretty quickly and have to be ordered from the company. Dewalt pads last longer and are on sale off the rack at Lowes. Just my $0.02 worth and in this economy we know what $0.02 is worth; jack squat.
I really put the smackdown on my random orbital sander and I went through 3 Rigid sanders, a craftsman mouse (lasted 2 days
) and a new Porter Cable sander. After the last Rigid sander I bought a dewalt to match the rest of my setup and I have been riding it hard and putting it up wet for 2 years now and it still works great. If you really want the best sender on the market and price is no object do yourself a favor and get a Festool. With the Festool vacuum that sander's performance is incredible but so is the price. DONT buy the Ryobi sander. The last shop I worked at bought one and I used it for 2 minutes before packing it up and taking it back to them. The thing was so out of balance that it literally jumped around the surface (I had to use 2 hands to keep it steady) and left as many scratches as it removed. Several people tried it and no one could get it to work. I found the Rigid orbital was actually the smoothest with the best finished surface (if you were wondering why I owned 3 of them) but the durability just wasnt there vs. the Dewalt. Also the Rigid pads wear out pretty quickly and have to be ordered from the company. Dewalt pads last longer and are on sale off the rack at Lowes. Just my $0.02 worth and in this economy we know what $0.02 is worth; jack squat.
Thanks. I'm doing my research today, but I can't live without my ROS, so I'll be buying sometime this week for sure.
I got the fingerboard glued since my last post. Everything went smoothly and nothing really to report.
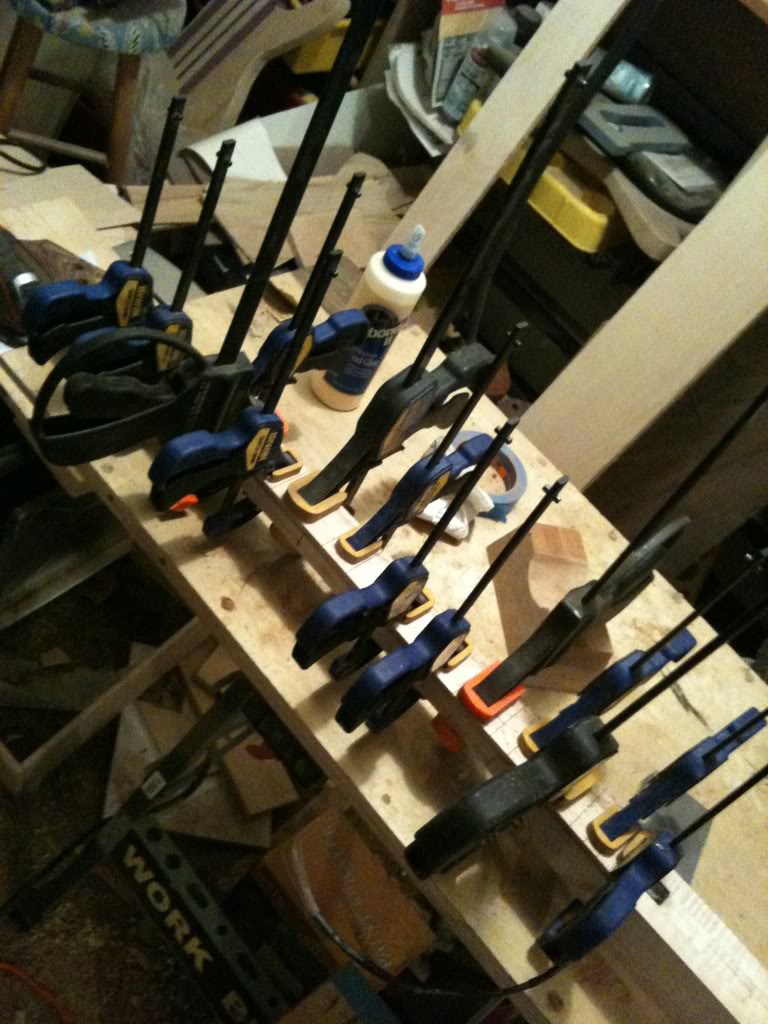
Then, on to the other side of the neck. I'm trying to be very careful of the order I'm doing things for this build, because I don't want any more issues with the fiber optics. One break is enough.
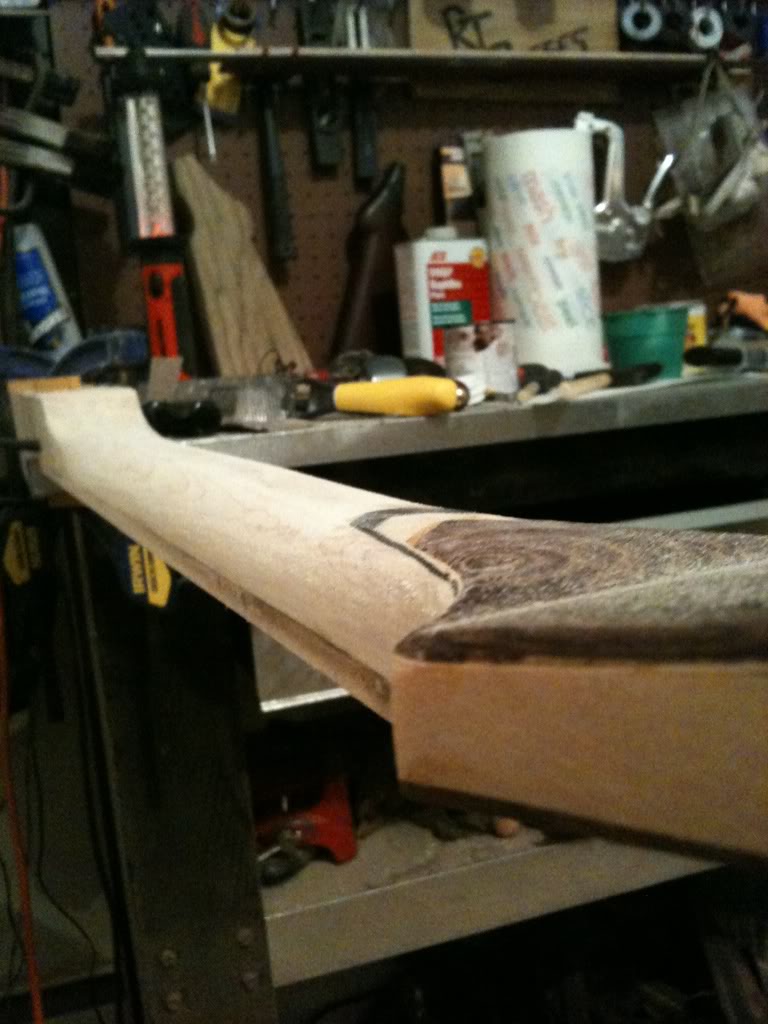
So I'm doing as much of the carving as I can before I glue on the wings. The top wing will be first so I have a safe place to put the optic strands while I'm working.
Obligatory neck carving shot.
Tomorrow I hit the local hardware stores and Lowe's and maybe Home Depot. Harbor Fright is right around the corner as well. Gotta find a sander quick.
I got the fingerboard glued since my last post. Everything went smoothly and nothing really to report.
Then, on to the other side of the neck. I'm trying to be very careful of the order I'm doing things for this build, because I don't want any more issues with the fiber optics. One break is enough.
So I'm doing as much of the carving as I can before I glue on the wings. The top wing will be first so I have a safe place to put the optic strands while I'm working.
Obligatory neck carving shot.
Tomorrow I hit the local hardware stores and Lowe's and maybe Home Depot. Harbor Fright is right around the corner as well. Gotta find a sander quick.
Got the wings glued on this morning after carving a good portion of the neck last night. Before I glued, I had to enlarge the cavity in the upper horn so I had enough room for the LED assembly and the battery.
The first wing went on without a problem. I let it sit in the clamps for about 5 hours, then I glued the second wing. That was a MAJOR pain, it kept wanting to slide. I even did the cut off staple thing and it still wanted to slide.
After alot of words I probably shouldn't use without putting a quarter into a jar, I got the second wing on.
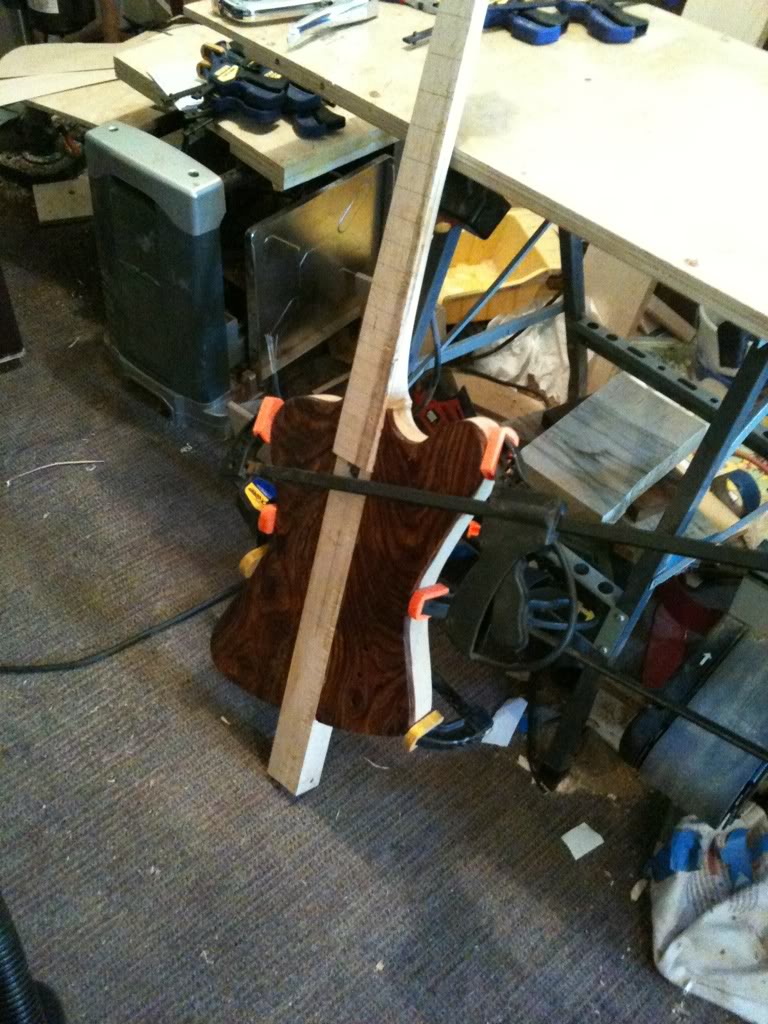
Now it'll sit till tomorrow morning, at which point I'll begin to carve and turn it into a bass.
Before gluing my body wings, I routed a small channel in each one for the wires to run through. I started doing that after seeing it in a thread here, and it makes things alot easier when you go to run the pickup wires to the control cavity. Just a short 1/4" channel down the middle of the glued edge of each wing.
So I'm off to watch Spongebob and wait for glue to cure. See y'all tomorrow.
Oh yeah, today was a bit of a NTD. The new shop vac arrived!!! My old one was on it's last legs so a replacement was in order. My son wouldn't let me use it though, so I put him to work.
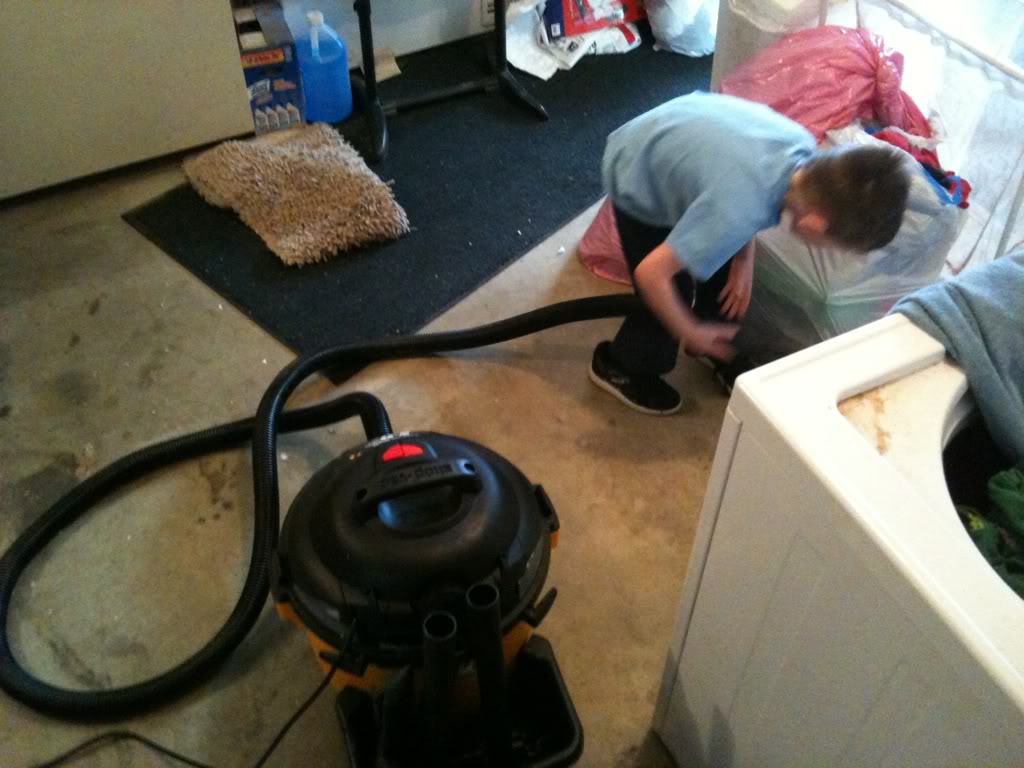
Cleanest the shop has been in WEEKS!!!!
The first wing went on without a problem. I let it sit in the clamps for about 5 hours, then I glued the second wing. That was a MAJOR pain, it kept wanting to slide. I even did the cut off staple thing and it still wanted to slide.
After alot of words I probably shouldn't use without putting a quarter into a jar, I got the second wing on.
Now it'll sit till tomorrow morning, at which point I'll begin to carve and turn it into a bass.
Before gluing my body wings, I routed a small channel in each one for the wires to run through. I started doing that after seeing it in a thread here, and it makes things alot easier when you go to run the pickup wires to the control cavity. Just a short 1/4" channel down the middle of the glued edge of each wing.
So I'm off to watch Spongebob and wait for glue to cure. See y'all tomorrow.
Oh yeah, today was a bit of a NTD. The new shop vac arrived!!! My old one was on it's last legs so a replacement was in order. My son wouldn't let me use it though, so I put him to work.
Cleanest the shop has been in WEEKS!!!!
The Korina, Cocobolo, and Birdseye are a good combination.
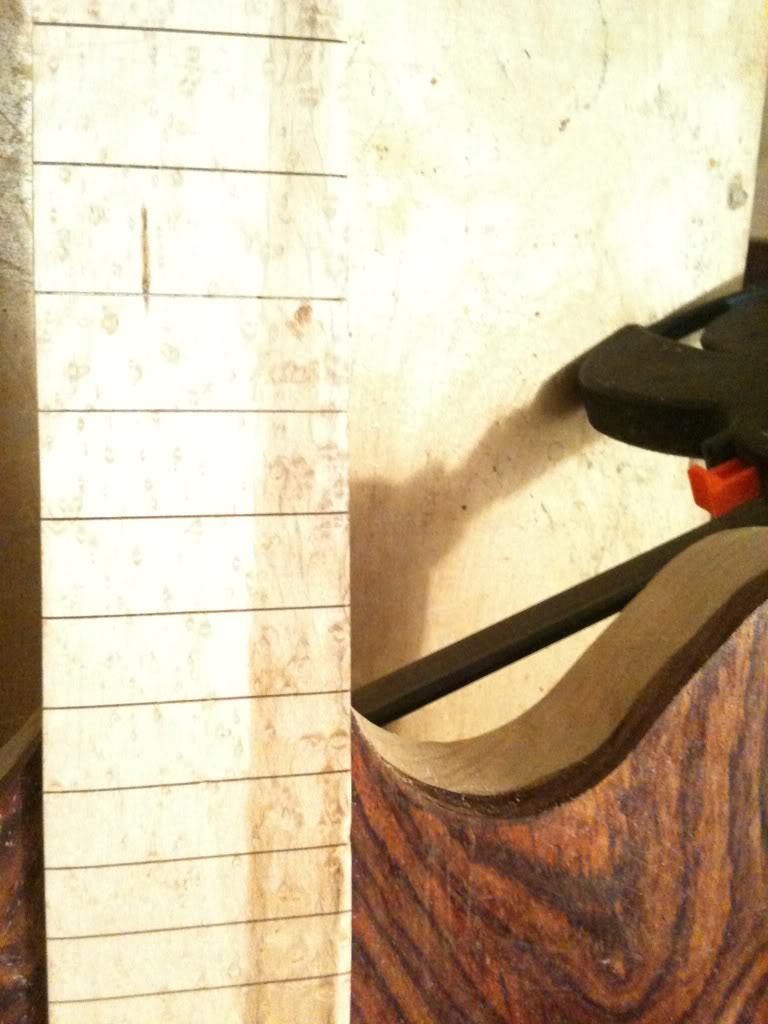
Here's a view of the whole thing so far.
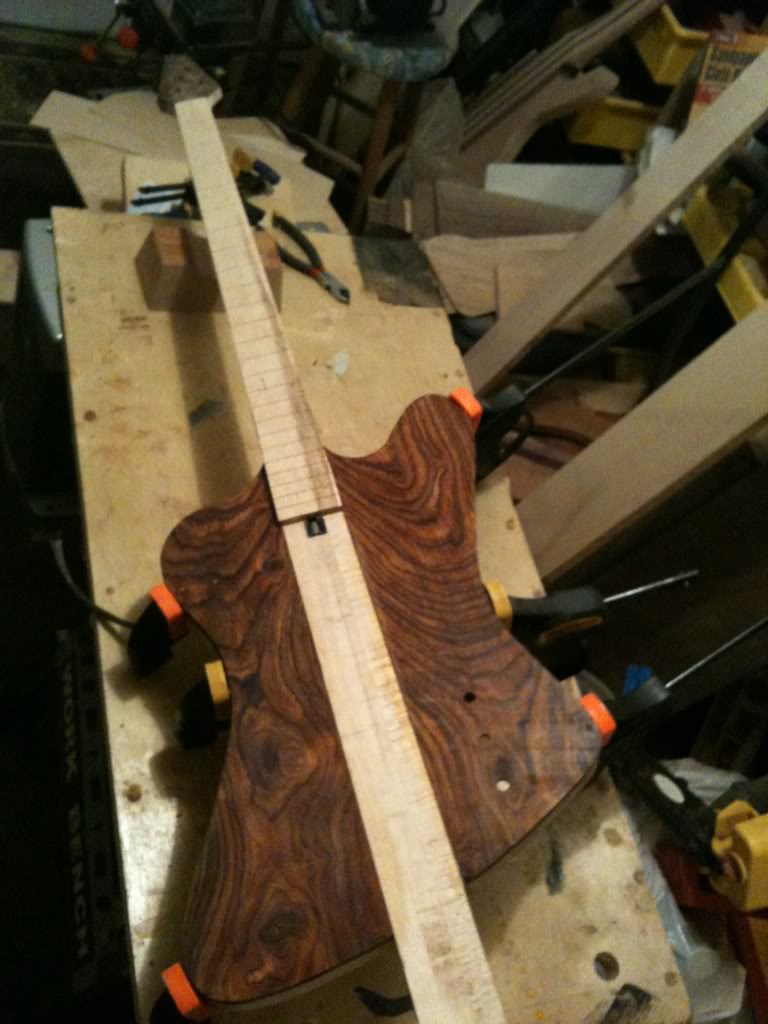
Oh yeah, I have been testing this like crazy to make sure nothing has broken in the process.
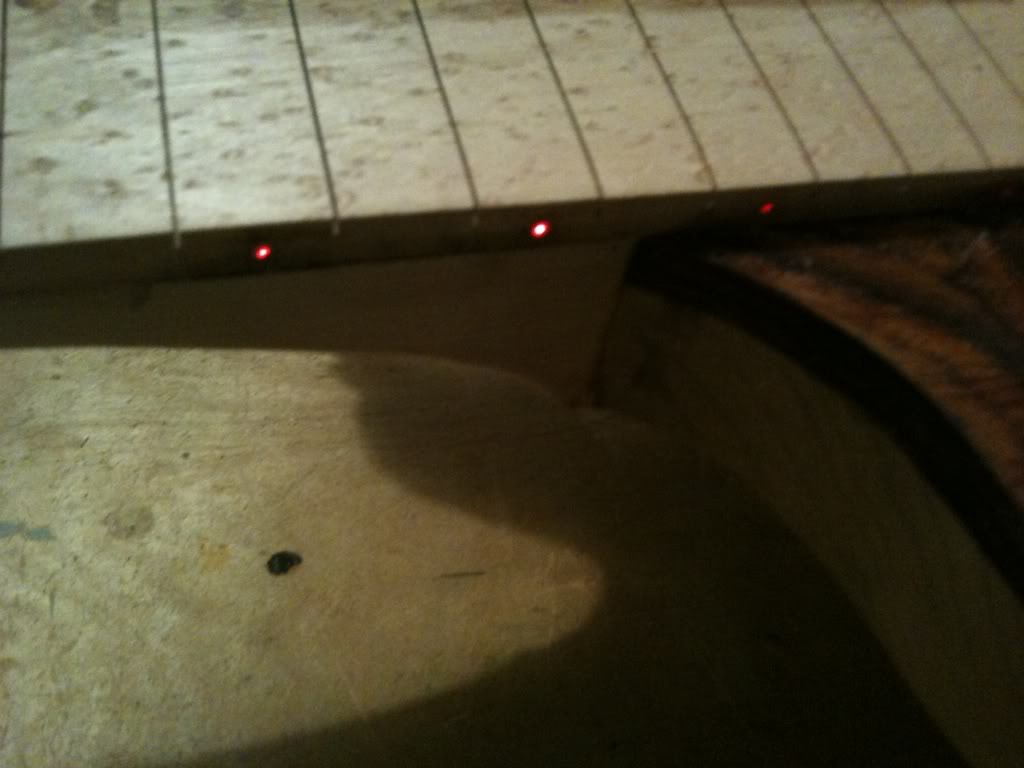
Everything works!!!
Here's a view of the whole thing so far.
Oh yeah, I have been testing this like crazy to make sure nothing has broken in the process.
Everything works!!!

Well, after a not so pleasant phone call regarding my mouse sander (not getting a replacement this time) and some good advice on this thread (thanks, BigB), I did a bit of shopping today.
Quick back story. My old shop vac died last week so I ordered a new, better one. Today, after some unexpected permission from the wife, I bought this:
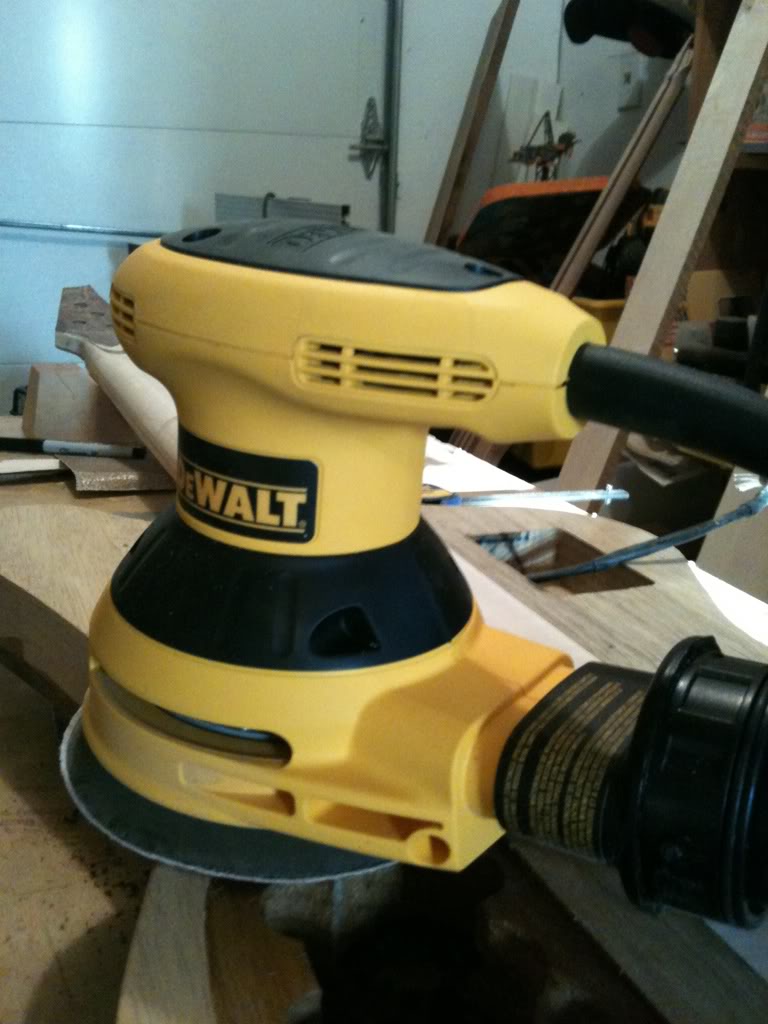
Hooks up to the shop vac for dust removal. Everybody's happy!!
I love my cleaner shop, and the wife likes the cleaner, less dusty house and garage.
So obviously, armed with my new sander, I'm cleaning up ensues and leveling the neck to the body today. Pix later if anything looks different enough to warrant pix.
Quick back story. My old shop vac died last week so I ordered a new, better one. Today, after some unexpected permission from the wife, I bought this:
Hooks up to the shop vac for dust removal. Everybody's happy!!
I love my cleaner shop, and the wife likes the cleaner, less dusty house and garage.
So obviously, armed with my new sander, I'm cleaning up ensues and leveling the neck to the body today. Pix later if anything looks different enough to warrant pix.
Lots of sanding this evening, and some thought about bridge placement. This is a different type of bridge than I am used to, some I'm really being careful about the placement.
The Hipshot D bridge is installed like a Tuneamatic, with the 2 studs that go into the body. The bridge gets screwed into the studs, and there is a separate tailpiece. I'm also installing ferrules for through body stringing on both the front and back of the bass.
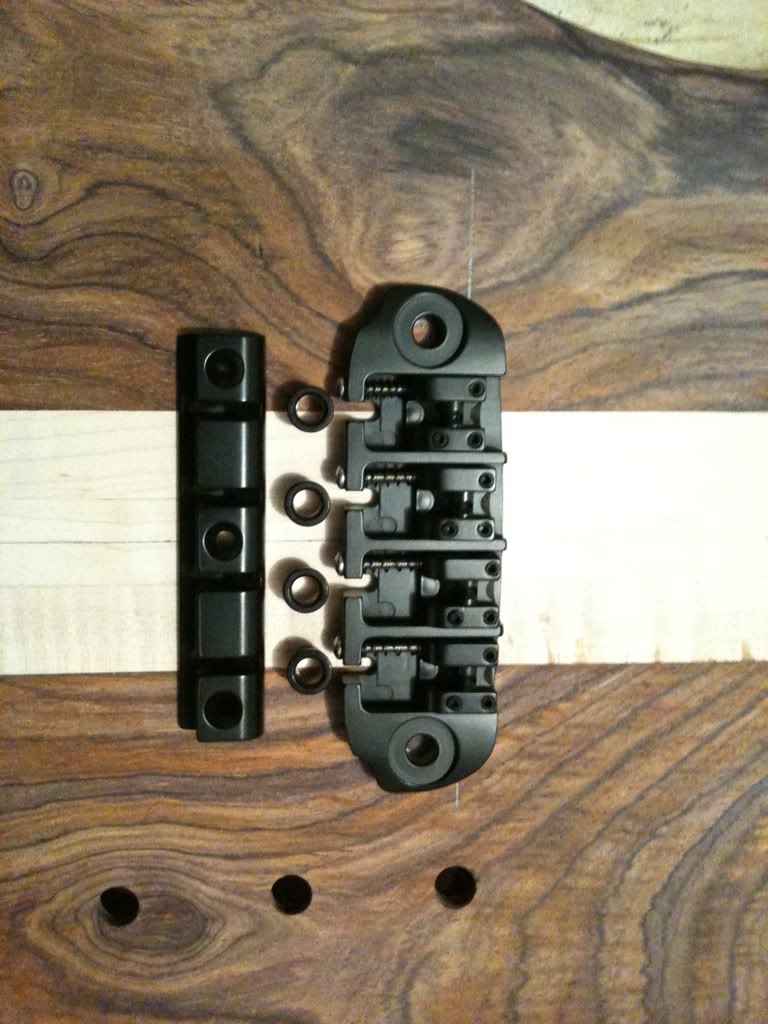
Anyone have any tips on installing either the bridge studs or the ferrules? I've done the latter before, but this is my first non-"fender" style bridge.
The Hipshot D bridge is installed like a Tuneamatic, with the 2 studs that go into the body. The bridge gets screwed into the studs, and there is a separate tailpiece. I'm also installing ferrules for through body stringing on both the front and back of the bass.
Anyone have any tips on installing either the bridge studs or the ferrules? I've done the latter before, but this is my first non-"fender" style bridge.
Ok so today was the big push day. I'm having my fourth back surgery in the morning, and I wanted to get as much done on this as I could. The surgery is to relocate the SCS battery implant. I'm a really skinny guy, and the battery pack requires a fatty area to be implanted into. Only problem is that I don't have one!! So in the morning, they move the battery from my back, near my hip, to the front, into my abdomen. Should be a few weeks recovery time, so I won't be getting alot done till I feel better.
Today, I drilled and routed. The bridge wasn't nearly as difficult to install as I had feared. It actually went in without a hitch.
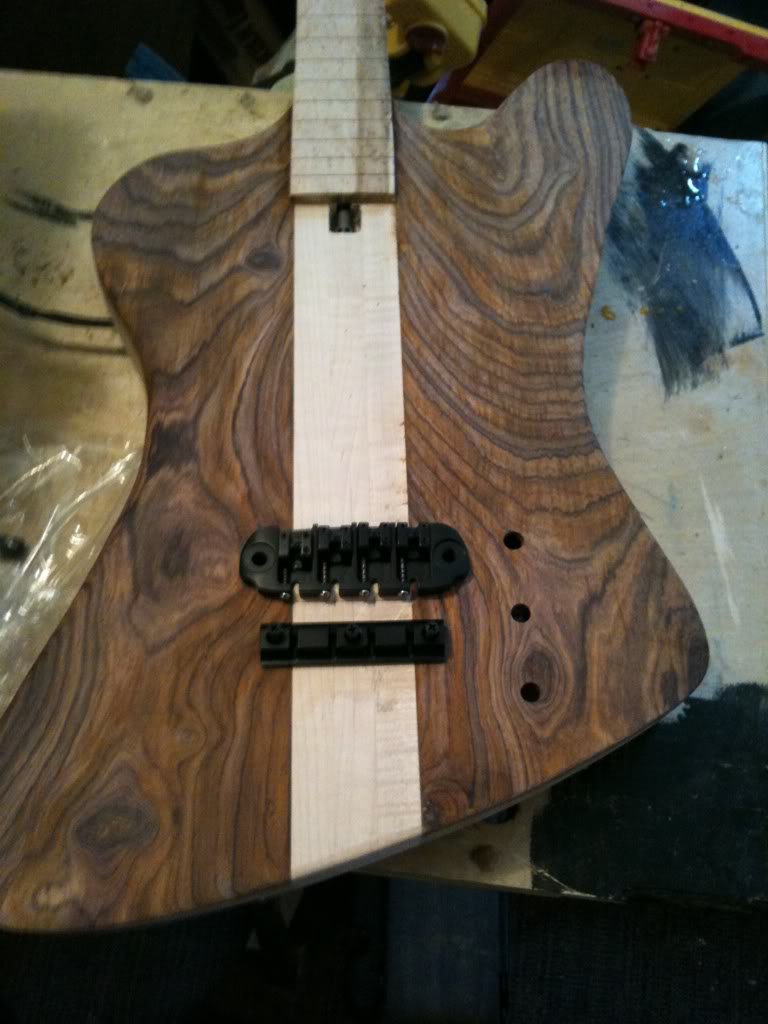
Not really much to see, but there are two holes for the bridge studs, like a Tuneamatic, and three small screw holes for the tailpiece. I think I'm gonna leave this one as a top load only. The original plan was to install the bridge and ferrules for stringing through the body if desired, but I really like how clean it looks without the extra holes. I still have time to change my mind and drill for the ferrules.
I also got started on the pickup routes. I got the bridge pickup routed without a hitch, but kinda painted myself into a corner with the neck pickup. Dang fretboard is in the way, so I cut a few pieces of 1/2" plywood and used double-sided tape to stick them to my router base to raise it up over the fretboard. Worked great, but ran out of time before I got it completely finished.
This bass is really starting to come together. The hardest part of the next couple of weeks is gonna be to see it sitting on the workbench and have to leave it alone. Hopefully the surgery doesn't taker out for too long, I'm really getting excited to get this thing done!!!
Today, I drilled and routed. The bridge wasn't nearly as difficult to install as I had feared. It actually went in without a hitch.
Not really much to see, but there are two holes for the bridge studs, like a Tuneamatic, and three small screw holes for the tailpiece. I think I'm gonna leave this one as a top load only. The original plan was to install the bridge and ferrules for stringing through the body if desired, but I really like how clean it looks without the extra holes. I still have time to change my mind and drill for the ferrules.
I also got started on the pickup routes. I got the bridge pickup routed without a hitch, but kinda painted myself into a corner with the neck pickup. Dang fretboard is in the way, so I cut a few pieces of 1/2" plywood and used double-sided tape to stick them to my router base to raise it up over the fretboard. Worked great, but ran out of time before I got it completely finished.
This bass is really starting to come together. The hardest part of the next couple of weeks is gonna be to see it sitting on the workbench and have to leave it alone. Hopefully the surgery doesn't taker out for too long, I'm really getting excited to get this thing done!!!
This is really coming together amazingly well. I've never owned a T-bird, but you're really making me want one. I really think the coolest thing you could do would be the tramp stamp idea. It's cool, it's original, it's... probably something else too; I say go for it.
PDGood said:Hope all goes well with your surgery, Rip.
Thanks, brother. The worst part is that last night I got one of the pickups routed, and about half of the other finished before I quit for the night. Now I gotta see a half routed pickup every time I look at it till I'm well enough to work on it again. Dangit!!!

I'm a new member and am preparing for my first build. Guys like you and threads like this are very inspiring and informative. Keep up the good work and good luck with your back.
Thanks, brother. The worst part is that last night I got one of the pickups routed, and about half of the other finished before I quit for the night. Now I gotta see a half routed pickup every time I look at it till I'm well enough to work on it again. Dangit!!!
Yeah, that's motivation alright. Maybe you should do that every time you work on it in the future - leave one thing unfinished so it will make you want to get in and fix it asap. LOL.
Galaxie5OO said:I'm a new member and am preparing for my first build. Guys like you and threads like this are very inspiring and informative. Keep up the good work and good luck with your back.
Thank you. Less than a year ago, I was in your situation. I actually got my start right after my first back surgery, when I was gifted a Wishbass. Making that bass playable inspired me to try it myself, and now this bass is my eighth build!!!
All it takes is the dedication to really do your research. Learn everything you can, and don't be afraid to ask alot of questions. There are some great people here on TB who are very helpful and really know their stuff. For instance, the fiber optics in this build are a direct result of a tutorial found here.
Oh yeah, it also takes ALOT of tools. And books. You will never finish studying. I learn something new every single day, even the days I'm not in the shop.
It also helps to have a wife with a really great job.
Latest posts
-
 I didn't need it but I bought it anyway new (to me) cab day...
- Latest: S-Bigbottom
-

-

-

