• TalkBass has been independent since 1998. Add your voice.
    Create a free account to reply to discussions, view embedded media, and browse with fewer display ads.
    Join freeLog in
    Want zero display ads or expanded classifieds tools? Compare plans.

Double Bass Palatino Megathread part I

Status
Not open for further replies.
Hi MKGriffs,

Thanks for your response! Is there any chance you could post some pictures of the wood rot here? That way I can keep an eye out for it or maybe even send the pics to the shop and tell them to ship me one that doesn't show any such signs.

Also maybe people here can confirm that it is wood rot, or might realize that theirs has it too.

Cheers,

Dan

p.s. I emailed the guy from the shop and he assured me they check all instruments before they ship them out and that in the event of a broken neck it would definately be exchanged.. Here's hoping...
Sure, here are a couple of pictures of the wood at the break... Not so obvious in the thumbnail pictures, but under the varnish & up the neck dark streaks continue.

A luthier & a local wood carver have both looked and agreed this wood really should not have been used in the instrument.
 

Attachments

  • Palatino neck 01.jpg
    Palatino neck 01.jpg
    56.9 KB · Views: 156
  • Palatino neck 02.jpg
    Palatino neck 02.jpg
    31.3 KB · Views: 148
Hi Folks,

I think I have finally worked out how to add PHOTOS to my messages, so I hope it will work!!!

First of all I need to say that after owning my Palatino for near on two years, I still have on the original Strings, and have not altered and still use the on-board pre-amp without any modifications.
The only changes I have done to the Bass is my original suggestion of the rubber pads under the bridge as most of you have tried, and now the following replacement that is easily done by most of us or by someone who can use a drill for a couple of pre drilled holes.

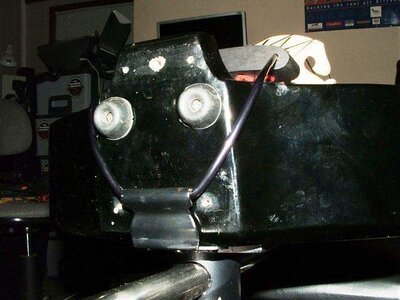
I recently suggested to replace the metal tail piece with something different to eliminate the harsh thin sound still coming from the Bass, and when as an alternative I temporarily replaced it with some nylon cord, I knew I was on the right track. The sound immediately improve beyond all my expectations!!!! The sound was more mellow, and much more as an acoustic bass should sound,longer sustain, and the strings had a much softer feel and became effortless to play even 4hours latter my fingers were as good as when I started. However it did not look professional and I had to find something better and commercially made.
I had also asked others to come up with suggestion and try it out for themselves, but sadly no one came back with any results! Yet we still have people not happy with the sound from this fabulous Bass.

I read with sadness on other posts when people are interested in the palatino, many write that there are major outlays to bring this bass to a playable conditions and that they should immediately replace the Strings and that the preamp is CRAP...etc. WELL ALL I CAN SAY IS THAT THIS ADVICE IS A LOAD OF CRAP!!!! YOU DO NOT HAVE TO REPLACE ALMOST ANYTHING ON THIS BASS, BUT DO SOME VERY INEXPENSIVE MODS and do just one replacement and that is the TAIL PIECE!!!!!!!!!!!!!

This is going to be my last post, as I have got this bass sounding as good as any of the best EUB out there! A few of my muso friends with NS basses and other upmarket units have played mine and have all remarked how excellent the sound is and how easy it is to play, and these are people that I have admired as musicians for a long time.

I leave it up to yourselves if you try my mod and hope you will finally have the sound you are looking for.

I have since found out you can only download two pictures per post so I may have to send a few posts.


You need to order a gut cord with adjuster screws as per the sample picture.

First remove the Tail Piece completely and use the holding bracket and attach to the rear of the bass by pre drilling the holes so that you don not crack the timber by force screwing the screws.
Unscrew the two adjuster screws off one end of the gut cord and thread through one side of the wood string block down through the tail piece bracket and back up to the string block and add the screw adjuster and thread down as far as they will go on both sides, by loosening the strings as much as possible.
The LONGER the length of the strings are between the bridge and the string wood block the softer the strings will be to play!!!!

I'll try and add a few more photo attachments, with a few more remarks.

Best wishes , Luke.

EXTRA PHOTOS

HERE IS SOME MORE

You must make sure that your bridge is set for optimum volume of natural sound by moving the bridge back or forward. NOTE the angle of my bridge, it is not at right angles to the body of the bass!
It is where the sweet spot is.

When you are happy with your setup you can cut off the excess at each end of the gut cord so as to make it neat.

I'm still experimenting and may drill two larger hole where the holding bracket use to be to thread the gut cord through to make it look neater.

Just a couple more, also show the soft rubber tube around the body bar, it'd sooo comfortable!!!

Oh, just thought I'd show off my three storey speaker stack, you know...... for those big outside jobs. HeHe..

Good Luck all,

Happy playing!!!!!
Luke.
 

Attachments

  • DSCF0690.JPG
    DSCF0690.JPG
    16.7 KB · Views: 214
  • DSCF0698.jpg
    DSCF0698.jpg
    26.4 KB · Views: 154
  • DSCF0677.jpg
    DSCF0677.jpg
    37.9 KB · Views: 181
  • DSCF0679.JPG
    DSCF0679.JPG
    22.3 KB · Views: 200
  • DSCF0705.JPG
    DSCF0705.JPG
    22.7 KB · Views: 164
  • DSCF0699.JPG
    DSCF0699.JPG
    16.1 KB · Views: 130
  • DSCF0672.JPG
    DSCF0672.JPG
    13.9 KB · Views: 145
  • DSCF0663.JPG
    DSCF0663.JPG
    4.9 KB · Views: 461
  • DSCF0673.JPG
    DSCF0673.JPG
    16.3 KB · Views: 152
  • DSCF0707.JPG
    DSCF0707.JPG
    32.2 KB · Views: 167
Hi again Folks,

Just thought I'd explain what's happened.

When I originally posted the thread I had a number of posts with two photos in each and this took up a fair amount of space on the page.
Fortunately, Francois came to the rescue and bundled all photos and the text together. So the last six or seven lines of text refers to various pairs of photos which you'll just have to workout what belongs where.

Hope you all continue to help each other out, and get the most out of this wonderful PALATINO BASS. I'm off to start other projects as time is running short, and much to do.

My dearest love to you all!
Luke.
 
Hi Dr D,

I'm about to hit the sack as it's after 2am here, but as others may ask the same question I best answer before retiring.

The part I used is available from most music stores or in their catalogues and it's called " Tail Piece Gut".
It is a set length and has only about 2" of thread on each end, so you are limited by it's length as to where you anchor it.
If you place it where you suggest, the ends would reach the bridge! As I said you want as much distance or length of string from the bridge to the wood block to give you a much softer feel and better sustain when playing.
You could try to anchor it around the bottom support of the endpin holding flange, but I'm not sure if there is enough string length to reach, but give it a try.
As the photos were taken a month ago they don't show the latest mod I did which was, I threaded the strings through the wood block from the top instead of the original way from the bottom up, but placed a rubber strip between wood and the strings. It helped to keep the block at a better angle than shown in the picture.
All I can say is experiment, but the sound you will achieve will far out way any screw holes!!!!!!

Good luck,
Luke
 
Final update on the "wood rot in the neck saga" (see the pictures postyed earlier)... Nearly three months after originally ordering our Palatino a new replacement has arrived from our dealer in Germany.

It plays fine, and so priorities now are a more substantial gig bag and stand. Thanks to all of you that posted support while we debated with & waited on the German dealer... He came good eventually !!!
 
Thanx Luke. Will try that asap! Appreciate U sharing that with us!
Rod.

Hey Rod,

I'm especially pleased to see you are going to try the mod!

You won't believe the difference, it really sounds so close to a full on amplified acoustic bass and you'll be amazed by the amount of extra volume you will now have. You will end up cutting the volume on the bass and also the amp, ( at least you will have more in reserve). All the harshness and artefacts in the sound are finally GONE. And I think you won't be needing any other sound modules or preamps, just the bass and the amp....!!!! I don't think there are too many EUB's out there that'll come close to this for natural sound.

God knows how good it will sound for those who have better quality strings, as mine are still stock standard and the sound is bloody awesome.....

What makes this all the more amazing is the Tail Piece Cord shouldn't cost you more than about $10 - $15 dollars each, so I bought two, one for back up or future mods.

I'm hoping that others may come up with a neater layout, I just wanted the right sound and was afraid that by re-routeing may restrict the resonance of the sound and be back where we were before, so if you do any changes, use your ears so the sound is not restricted. Use my way as a benchmark and go from there. I just don't have a lot of spare time to spend on this any further at this stage and I also want to see what others may come up with.

Rod, enjoy your new BASS, It'll seem like it is!!! Give us your feed back and suggestions, PLEASE.

Just remember..KEEP YOUR EYE ON THE BRIDGE as you RETIGHTEN the STRINGS as the bridge will creep forward and the suddenly slip...All of those new to the EUB, You have all been WARNED!!!

ROD, email me if you need any extra advise and I'll let you know my phone number, you know I,m just over the hill a little further North from you in Brisbane. HaHa!

Good luck mate,
Luke
 
Hi Luke,

I looked closely at your mods and I have a thought. Have you thought about garage door cable? You could use a much shorter length and loop it through the upper 2 holes. Then at the tailstock end it could get a crimp fitting to hold the tailstock in place. You could also use one piece and start at the tailstock loop it through and then incert the 2 ends through the 2 holes and use 2 wire road clips to hold it together. I did this on my Englehardt bass because it had a solid wire to hold the tailstock on. I used the garage door cable with heat shrink tubing around it. Made a huge difference in the sound of this bass and it looked better than the solid wire. Just a thought - Doug
 
I like the bridge idea and that is the next mod for me. I will also check out the soft tubing idea.

I'd take some time to enlighten you on what good strings, bridges and a decent preamp could do to improve the sound of your VE500 but your happy and that's what counts for you. ;) I'd also be happy to send you the strings that came with the bass so you'd have a spare set.:hmm:

To the rest of us who have spent some time and money on the somewhat more costly mods, I say ROCK ON!!!!!!! :bassist:

I am working on a piezo style pickup that would replace the stock pickup. I will post some pics on this when I get the time.
 
I'm 62yrs, and been playing Bass for more than Forty.
I have settled on Fifteen Elec Bass Guitars, in addition to acoustic, and uprights.
I use Nylon coated flat wounds, steel flat wounds, and round wound strings of various brands on various basses.
I have a cupboard full of effects pedals, pre-amps etc...

I am forever learning, and am most willing to be enlightened by anyone who will give constructive advice.

Now if I offended anyone I,m SORRY!!!!

When I first suggested the rubber pads under the bridge to eliminate the harsh tone being transmitted to the bridge and pickup, I was asked by Francois, our Mediator on this Website, was I using the stock strings, I said yes.
I said I bought this Bass because of price and did not want to spend mega dollars to upgrade with strings and pre amps, but would first TRY and find a LESS expensive way, as I may as well have purchased a more expensive Bass right from the start.

If you did do those changes, than that is fine and MORE POWER TO YOU!!!

I did not want this to discourage new musicians interested in this bass from at least giving it a try.

Bassbob,

What I was trying to say in the previous post, and should have written this way, as not to offend:....

"mine are still stock standard strings and the sound is bloody awesome.....God knows how MUCH BETTER it will sound for those who have better quality strings!!!"

Bassbob Truly, thank you for the offer, but hold onto those strings, they are not half that bad, but certainly not as good as the better quality ones.

Hi Doug (Nohandles),

I have tried various cords, including the metal with nylon tape tube, old Bass Strings, chains, yachting twine, nylon cloth hanger rope, but nothing bought out the full deep resonance of an acoustic bass as this nylon tail piece gut. This GUT cord is designed for proper acoustic Basses and can handle 10,000pound pressure, as safety was one of my first priorities. I'm not sure if crimping would be that safe in the hands of someone who may not know how to do it properly. (But PLEASE as to not offend, Try it on this Bass and see if it's the sound you want)

For all of you out there, just remember this is not a hollow body acoustic,resonating bass. It does not have a sound peg that transmits the sound vibrations to the bridge and pick-up.
It's not hollow as such, and gets the sound straight off the strings to the bridge and into the pick-up, but then ALSO the sound artefacts being picked up by the METAL tail piece and fed back to the bridge and that's being amplified into the overall mix.

Now that's what has been eliminated!!!! by using the nylon cord and you end up with pure sound of your strings.

This has been a little too stressful, to come up with an idea to help with improving the sound of the Palatino, without fear of offending anyone along the way.

So I'm leaving it up to the rest of you to come up with the solutions!

Best wishes and Good Luck,

Luke.
 
So..........

Now we're all past the crap stage and we can all get back to what really counts-playing the bass.:hyper:

As far as the megabuck mods you are referring to I'm not anywhere near what the list price of the VE500 goes for after several mods. The stock strings, bridge and electronics that come with the bass are basic crap and anyone is better off without them. Not everyone can get ahold of all the mod material or for that matter afford it all at once. I live in an area where I can find most anything I need either in town or on the net. I don't fault anyone who can't get better stuff but it is out there and it does improve the sound of the bass substantially.

I picked up the tailgut cable and put that on today. I made some grooves on the sides of the tail block to better seat the cable.. I also repositioned the bottom plate for the endpin to allow for switching the bracket around. I'll have to get some bigger rubber bumpers due to the height of the bracket and the cable at the end of the bass. I also got some pipe insulation and handlebar tape to wrap around the side support. ( I still need to work on that, the padding helps but still doesn't work for me yet. )

There is this multistrand braided nylon cord I almost used but that was $16 instead of $10 for the tailgut cable. I think the braided cord might work better cuz you would have the length to use the existing tail block and agaiin reduce the tension on the strings. That would give the bass an even more authentic look with grooves on the saddle.

Anyway, I say crap : you say craptacular..:hmm: if you're happy thats what counts. Long live the mods :bassist:

Yours in harmony and lower case discourse.

Bassbob
 
TOP and GENERAL VIEW.

I liked the sound a little better the old way, but this is still a major improvement but it just look neater.

Don't forget to adjust the angle of the bridge for optimum sound!

Goodbye.
 

Attachments

  • IMGP0625.JPG
    IMGP0625.JPG
    14.2 KB · Views: 150
  • IMGP0626.JPG
    IMGP0626.JPG
    21.9 KB · Views: 174
I've found a tailpiece cord for a cello - nylon (the bass ones I found were all coated steel) - and it's exactly 28cm, which should mean that it's the right length to replace the tailpiece without having to move the bracket. I'll let you know if it works.
 
Okay,

If you've seen the endpin on the Eminence bass it has a T shaped end with a pin so the bassist can lean the bass from side to side but not swivel. This approach would lessen the need for the side brace which is uncomfortable at best IMO. :hmm:

I am working on this kind of endpin for the VE500 and I should have a workable prototype ready to go this weekend. I've been tuning the bass up every few hours now that I put the tail gut cable on and I can hardly wait to plug it in.

Just a passing note on the preamp/tones controls that come with the bass. If you compare the amount of hiss you get especially when the gain is up anywhere past 1/4 ( same for the tone control also ) it only makes sense to get rid of the junk and clean up the signal.

Running a rev solo or K and K type pickup straight to most good bass amps will more than enough for most people. I have also tried some of the piezo film pickups with some good results. (they need some more EQ help compared to the K and K or rev solo. )

So we continue on in harmony with the goal of better signal to noise ratio..........................
 
Status
Not open for further replies.

Latest posts