I had threatened to start a build thread for my first scratch built body, store bought neck project. I had to take a little break from working on it the last several weeks but am back in action. I am waiting for the first coat of 2K Poly to dry so between coats, I can catch up on the build. Because I would not likely build something that you could go to the store and buy, I tried to come up with something that you can't buy off the shelf. For the most part, I liked the looks and styling of the Music Man Sting Ray BUT, I wanted a bit more flexibility on pups and tone control. I decided to combine some different pickups and came up with the name Sting-Jay (instead of StingRay as my bass has a J pickup as well. Here is what I set out to do:
Before I could pull off my first scratch build, I needed tools and a workspace. In a single weekend, I cleaned, re-organized and wired outlets and lights into a 12X14ft corner of my basement. I added a drill press, Rigid spindle/belt sander, and set up some tools that I borrowed. I have, on loan a joiner, thickness planer and a decent router. I am saving money to buy a band saw! I can see how invaluable that tool is.
I began with a decent piece of poplar. I chose it because it is easy to work, easy on tools and inexpensive. I planned to veneer the top in any event so it did not matter. I went to a local cabinet shop and for the mere sum of $15, walked out with enough board feet to make a bass body.
I worked for a long time to create a body design that was to my liking and accomplished the goal of hiding all of the controls a recessed edge. The body design is a bit radical and I asked what people thought. I got great advice and coaching from Hopkins on controls and ended up with some thumbwheel pots.
I will say that I never begin a project unless I can afford and am totally willing to scrap it at any point. So in this case I wanted no more than $50 in raw wood materials. I lucked out and found an unfinished neck for $28 shipped!
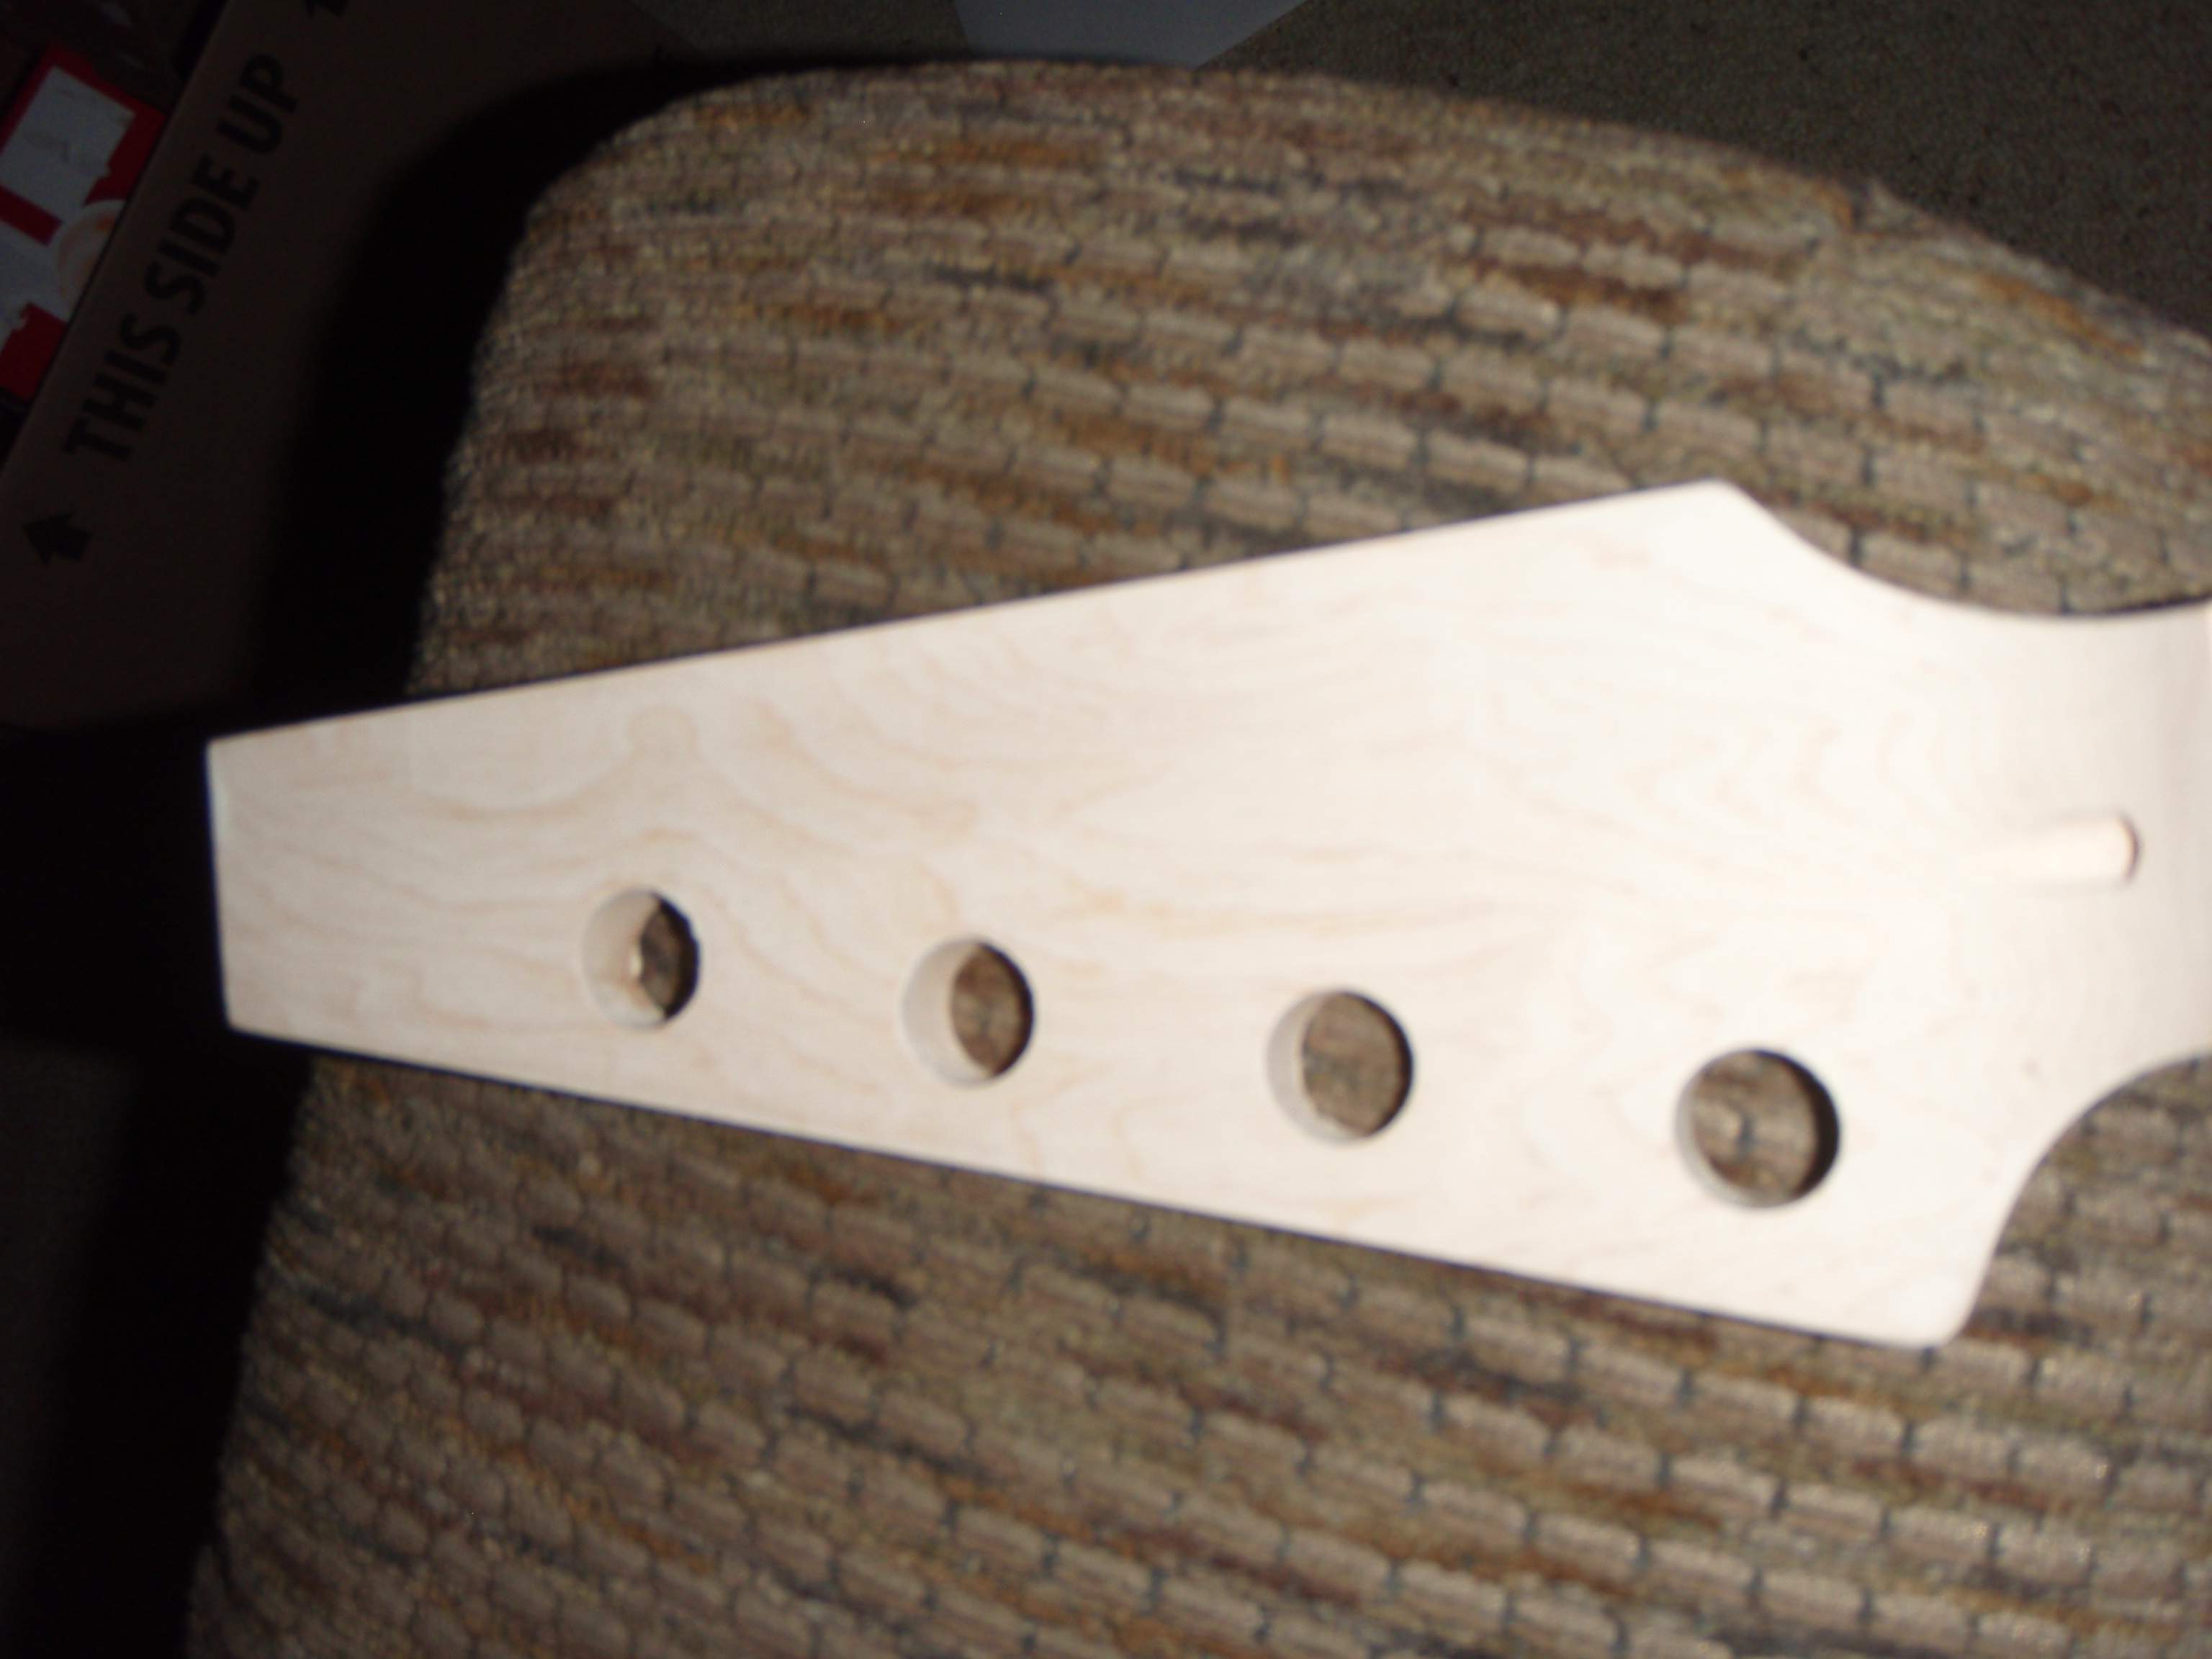
When I got it, it looked like this:
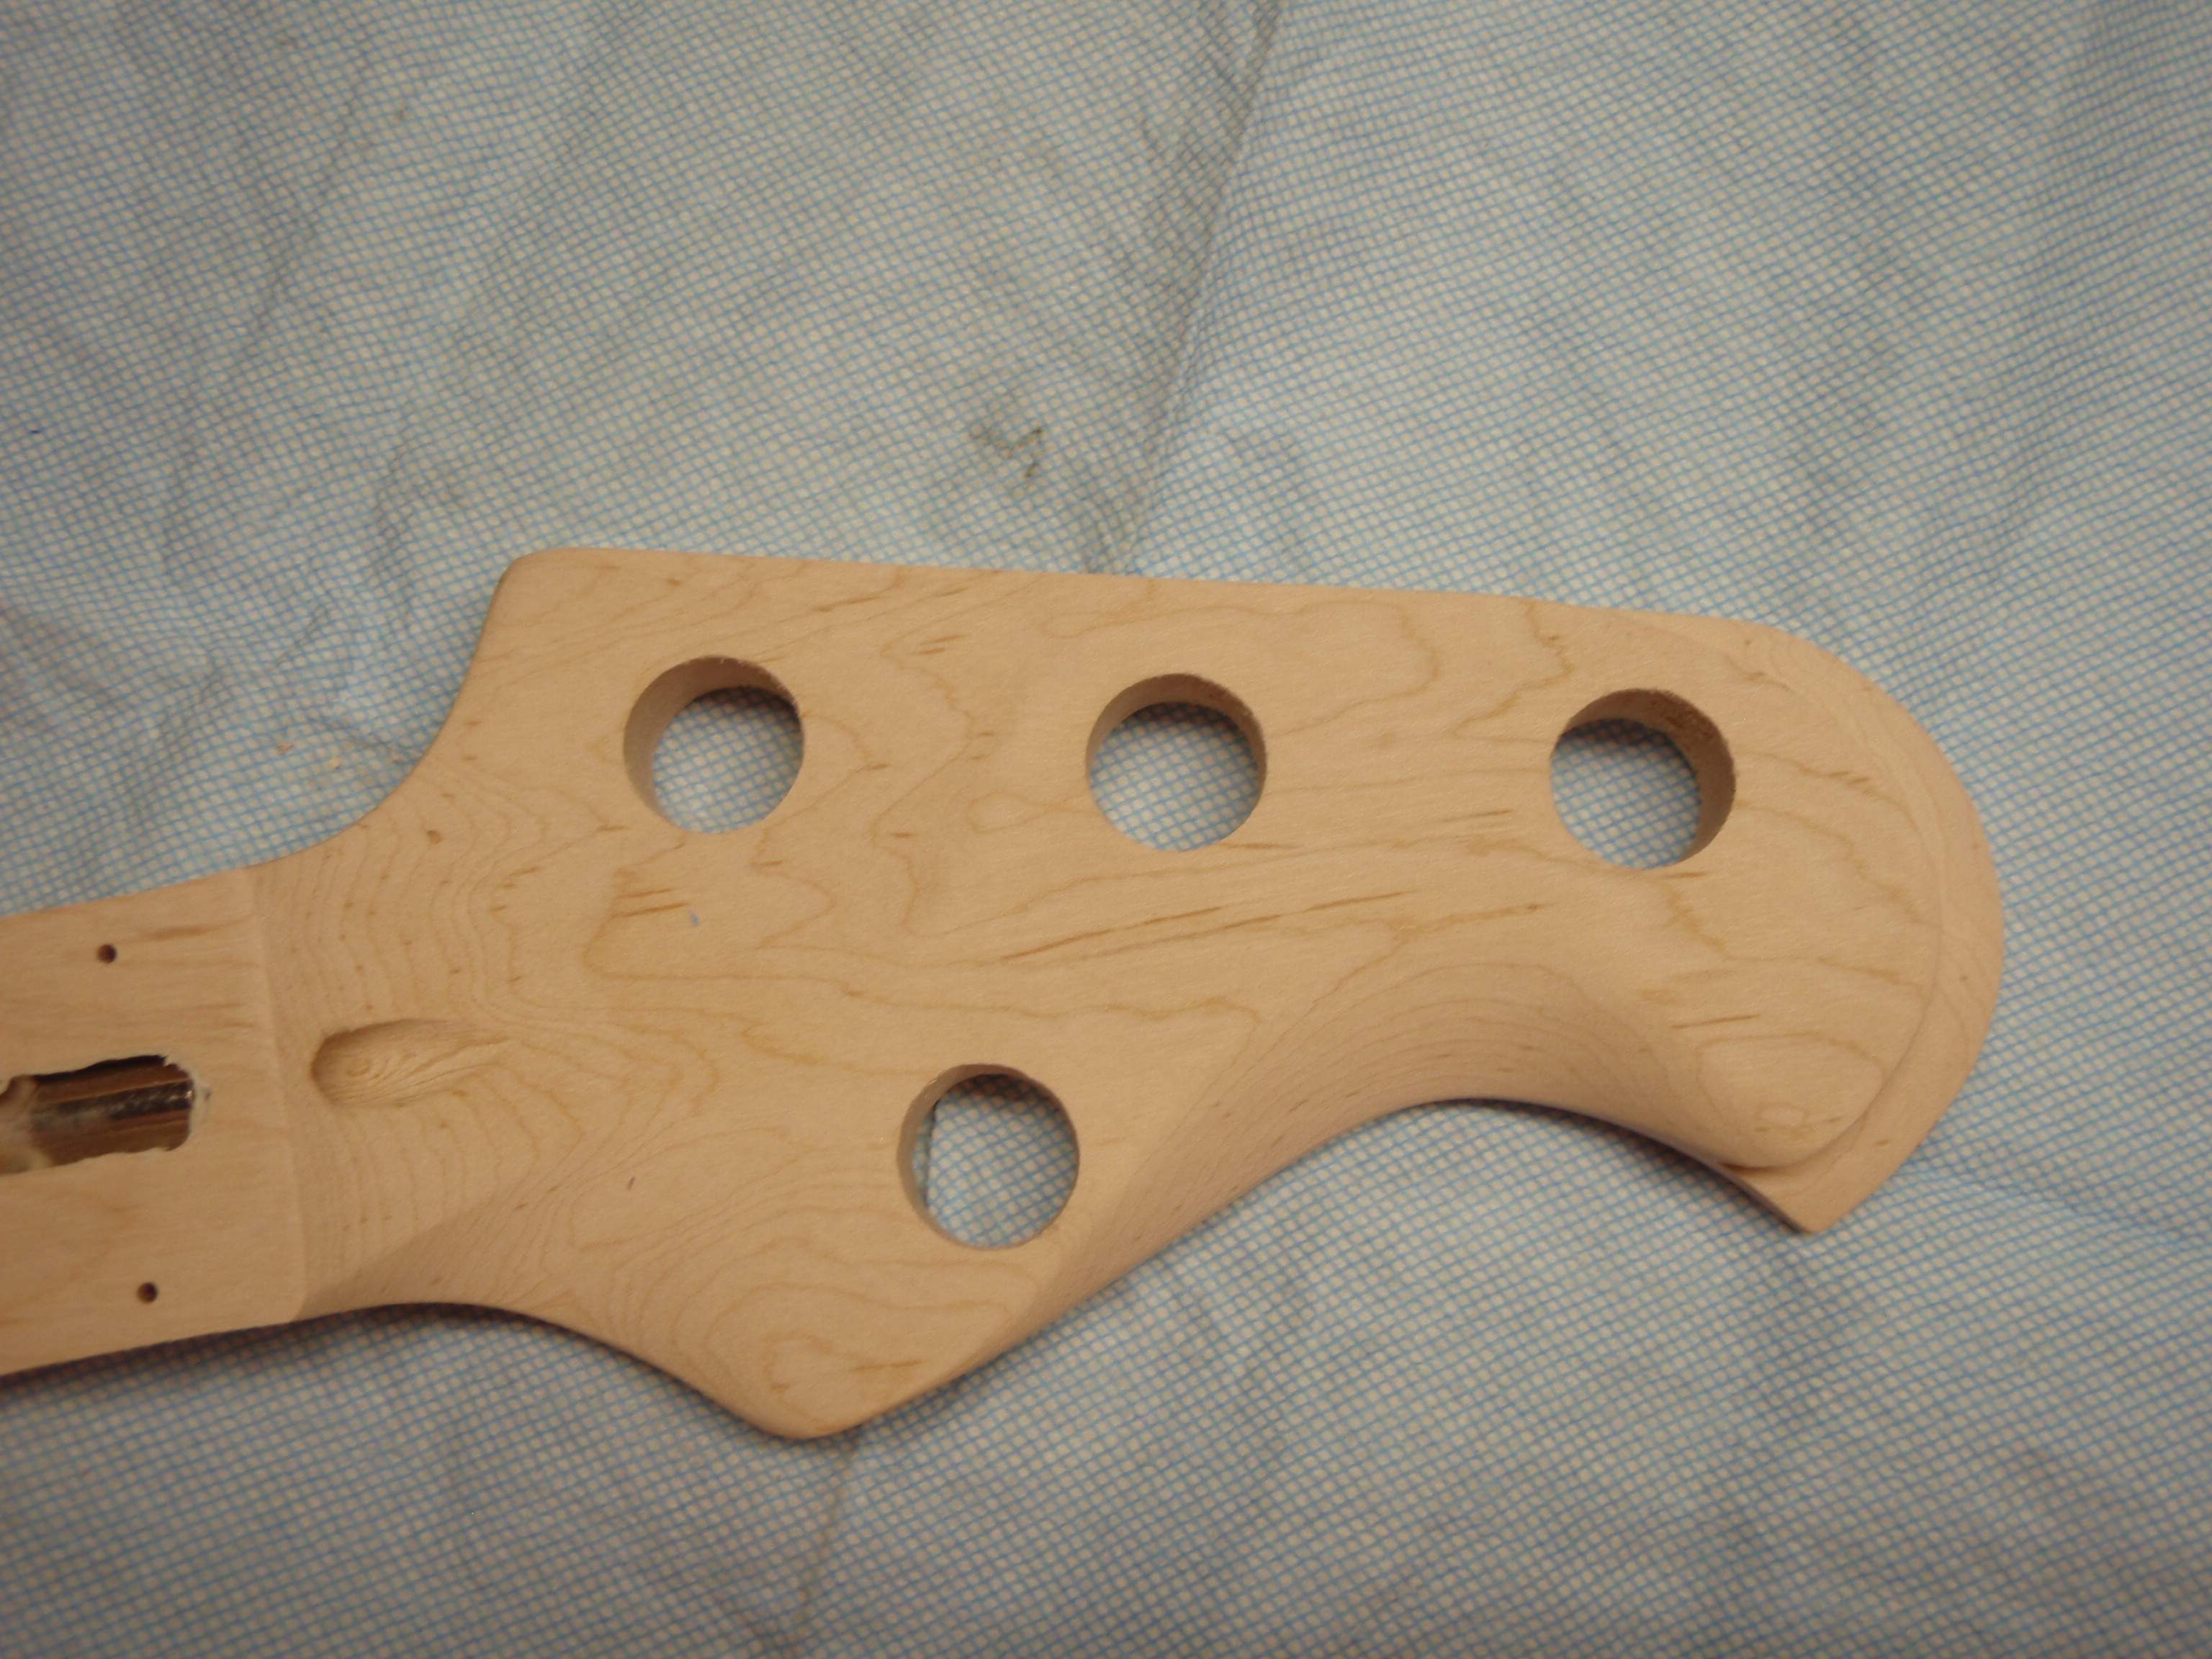
I reshaped the headstock to accommodate my 3X1 plan and came up with this:
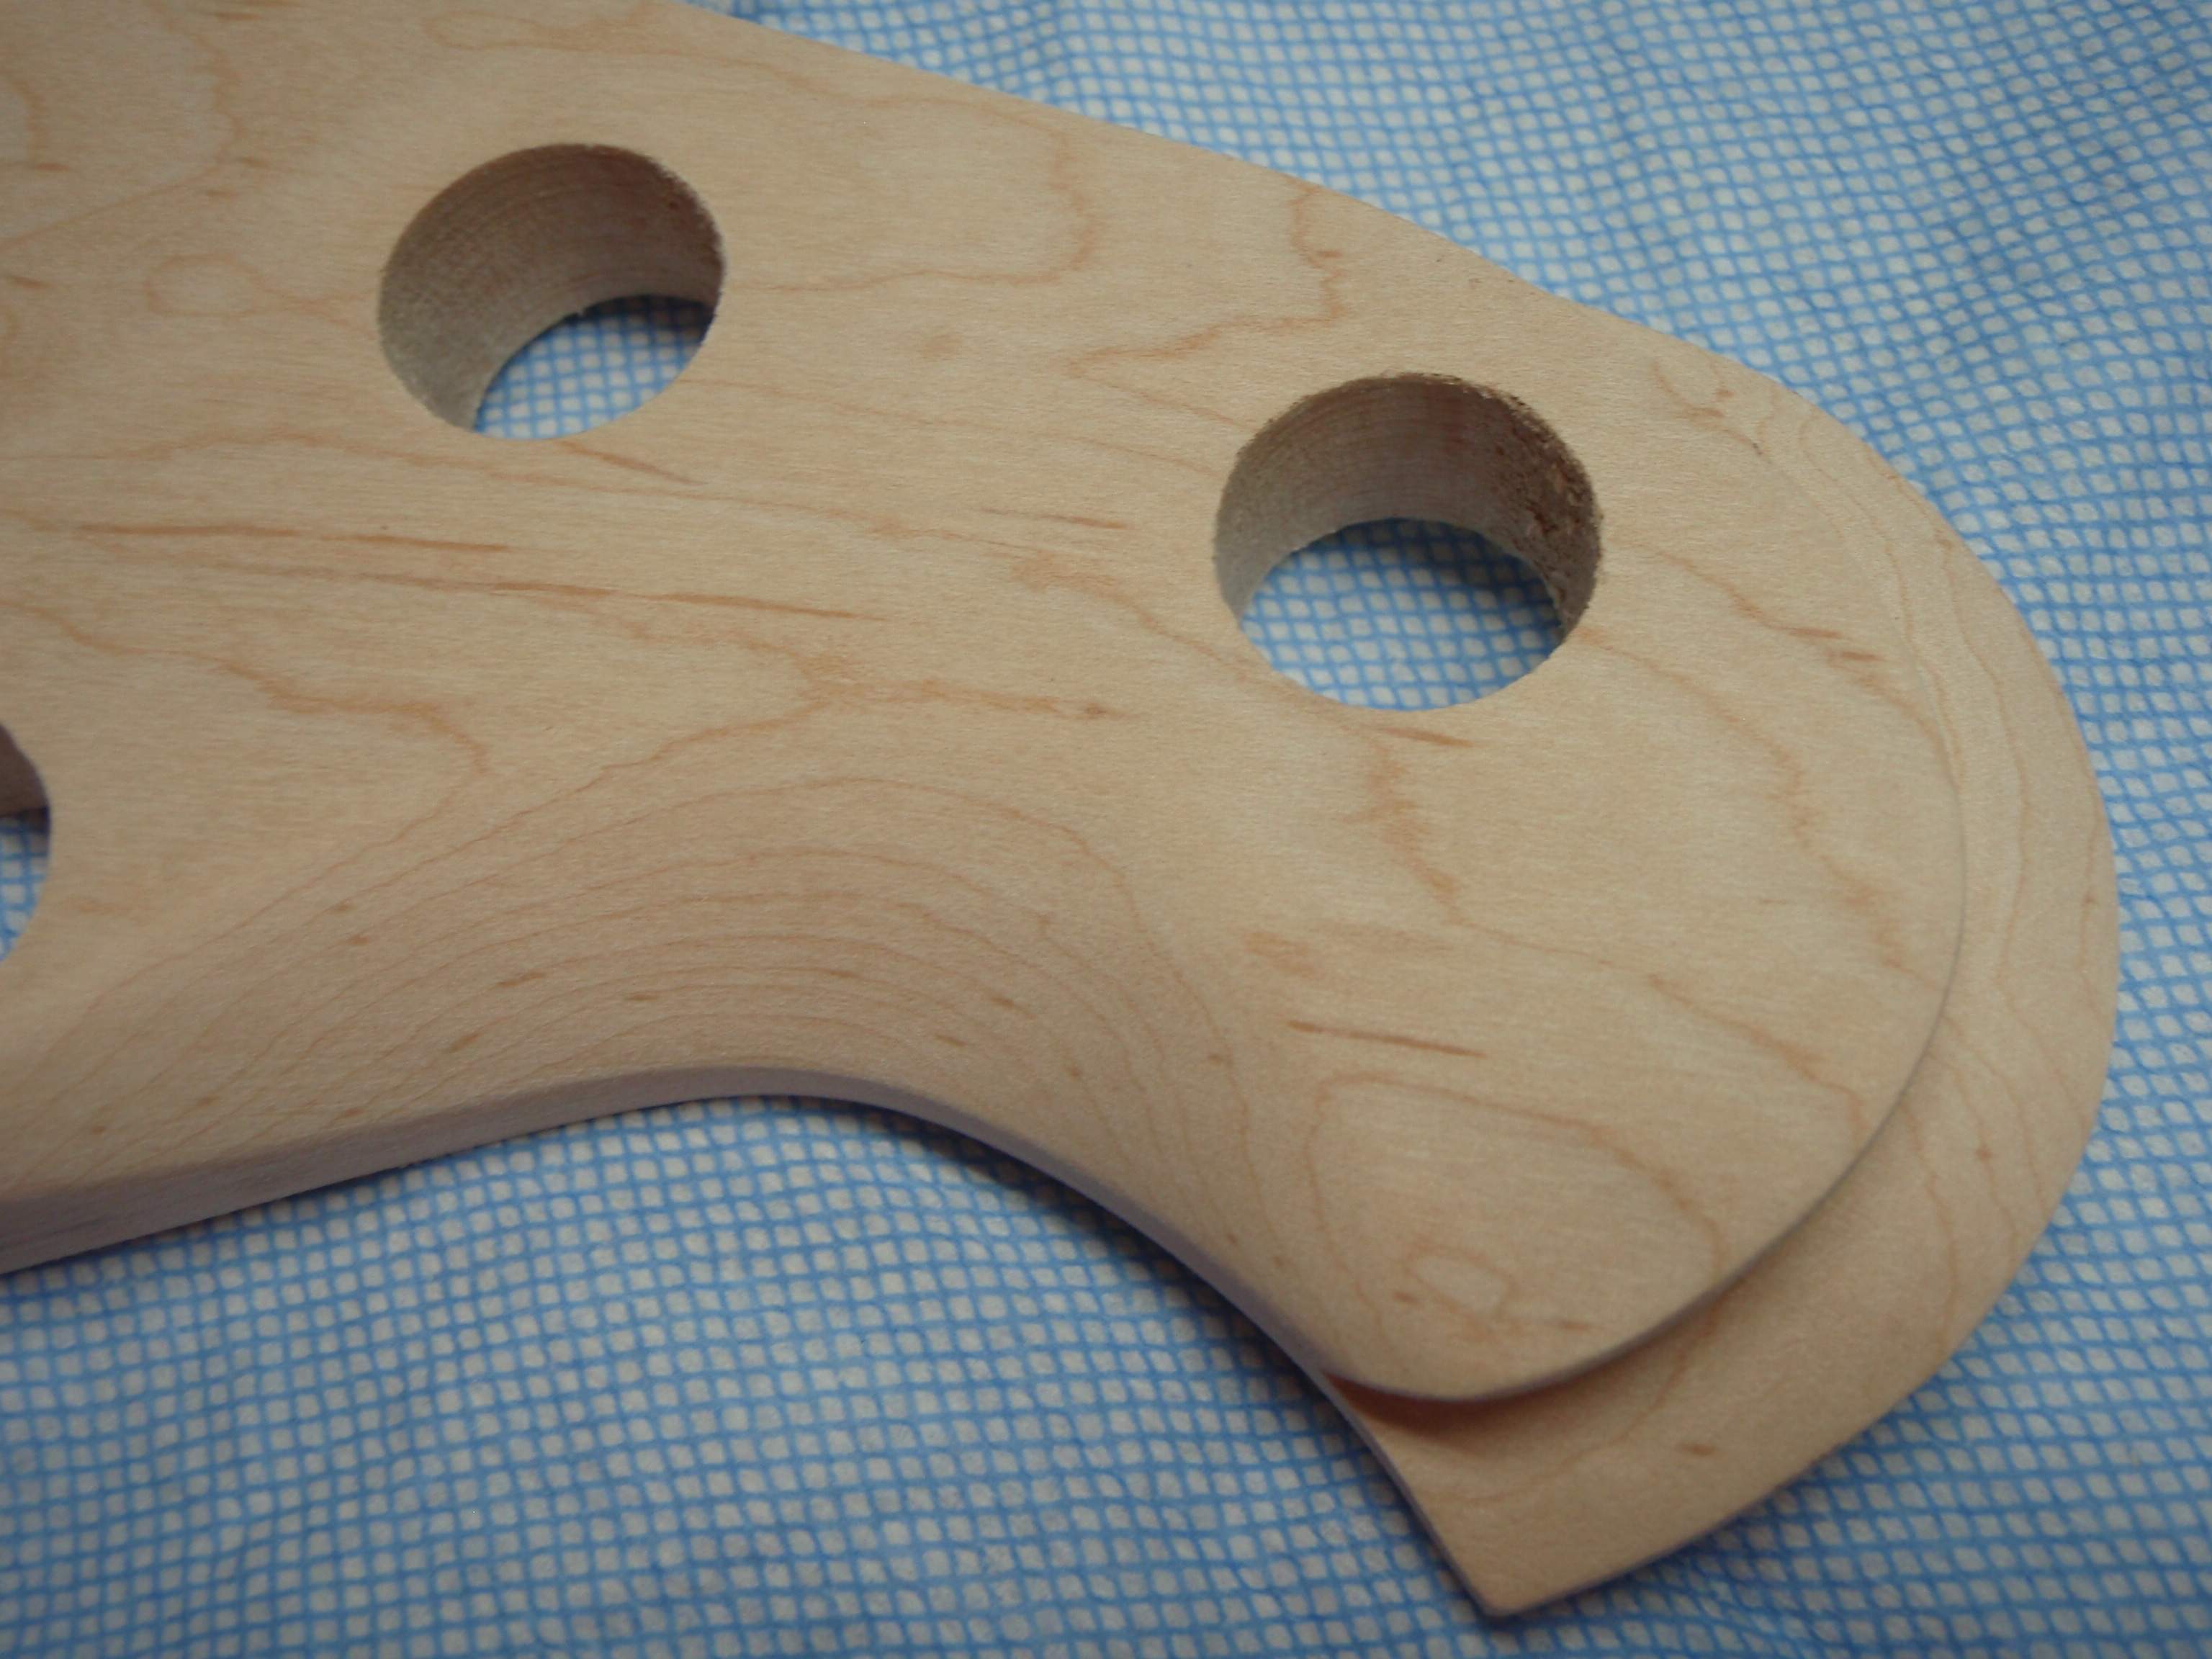
Here is another detailed shot of the sculpting:
The body seemed to take me FOREVER to complete. In the process I had to teach myself how to run a router, created templates and shape a body out of a slab of glued pieces.
I don't have any pictures available of that process.
The single item which has taken the most time is my desire for complicating the control panel. Ultimately, I had to resort to some metal fab skills, including welding to pull off the mounting of the thumbwheels. I am still not entirely satisfied with the control face as I did a poor job cutting in the thumbwheel slots but I will share that later when I assemble the guitar.
Additionally, I will save my pictures of my LED fret board, which is switchable, for my final build pics.
In the meantime. I was able to final sand and get color and clear on today. I spray all of what I apply and my very first coats are boring! The creative magic and fun comes in the flexibility of auto paint for various effects in the mid coats before the clear.
So I started with some red dye in denatured alcohol on my sepella (so) striped top. I had several areas of heavy sculpting on the body and decided to mask them and let them finish the light color of the poplar body. First steps today came out like this:
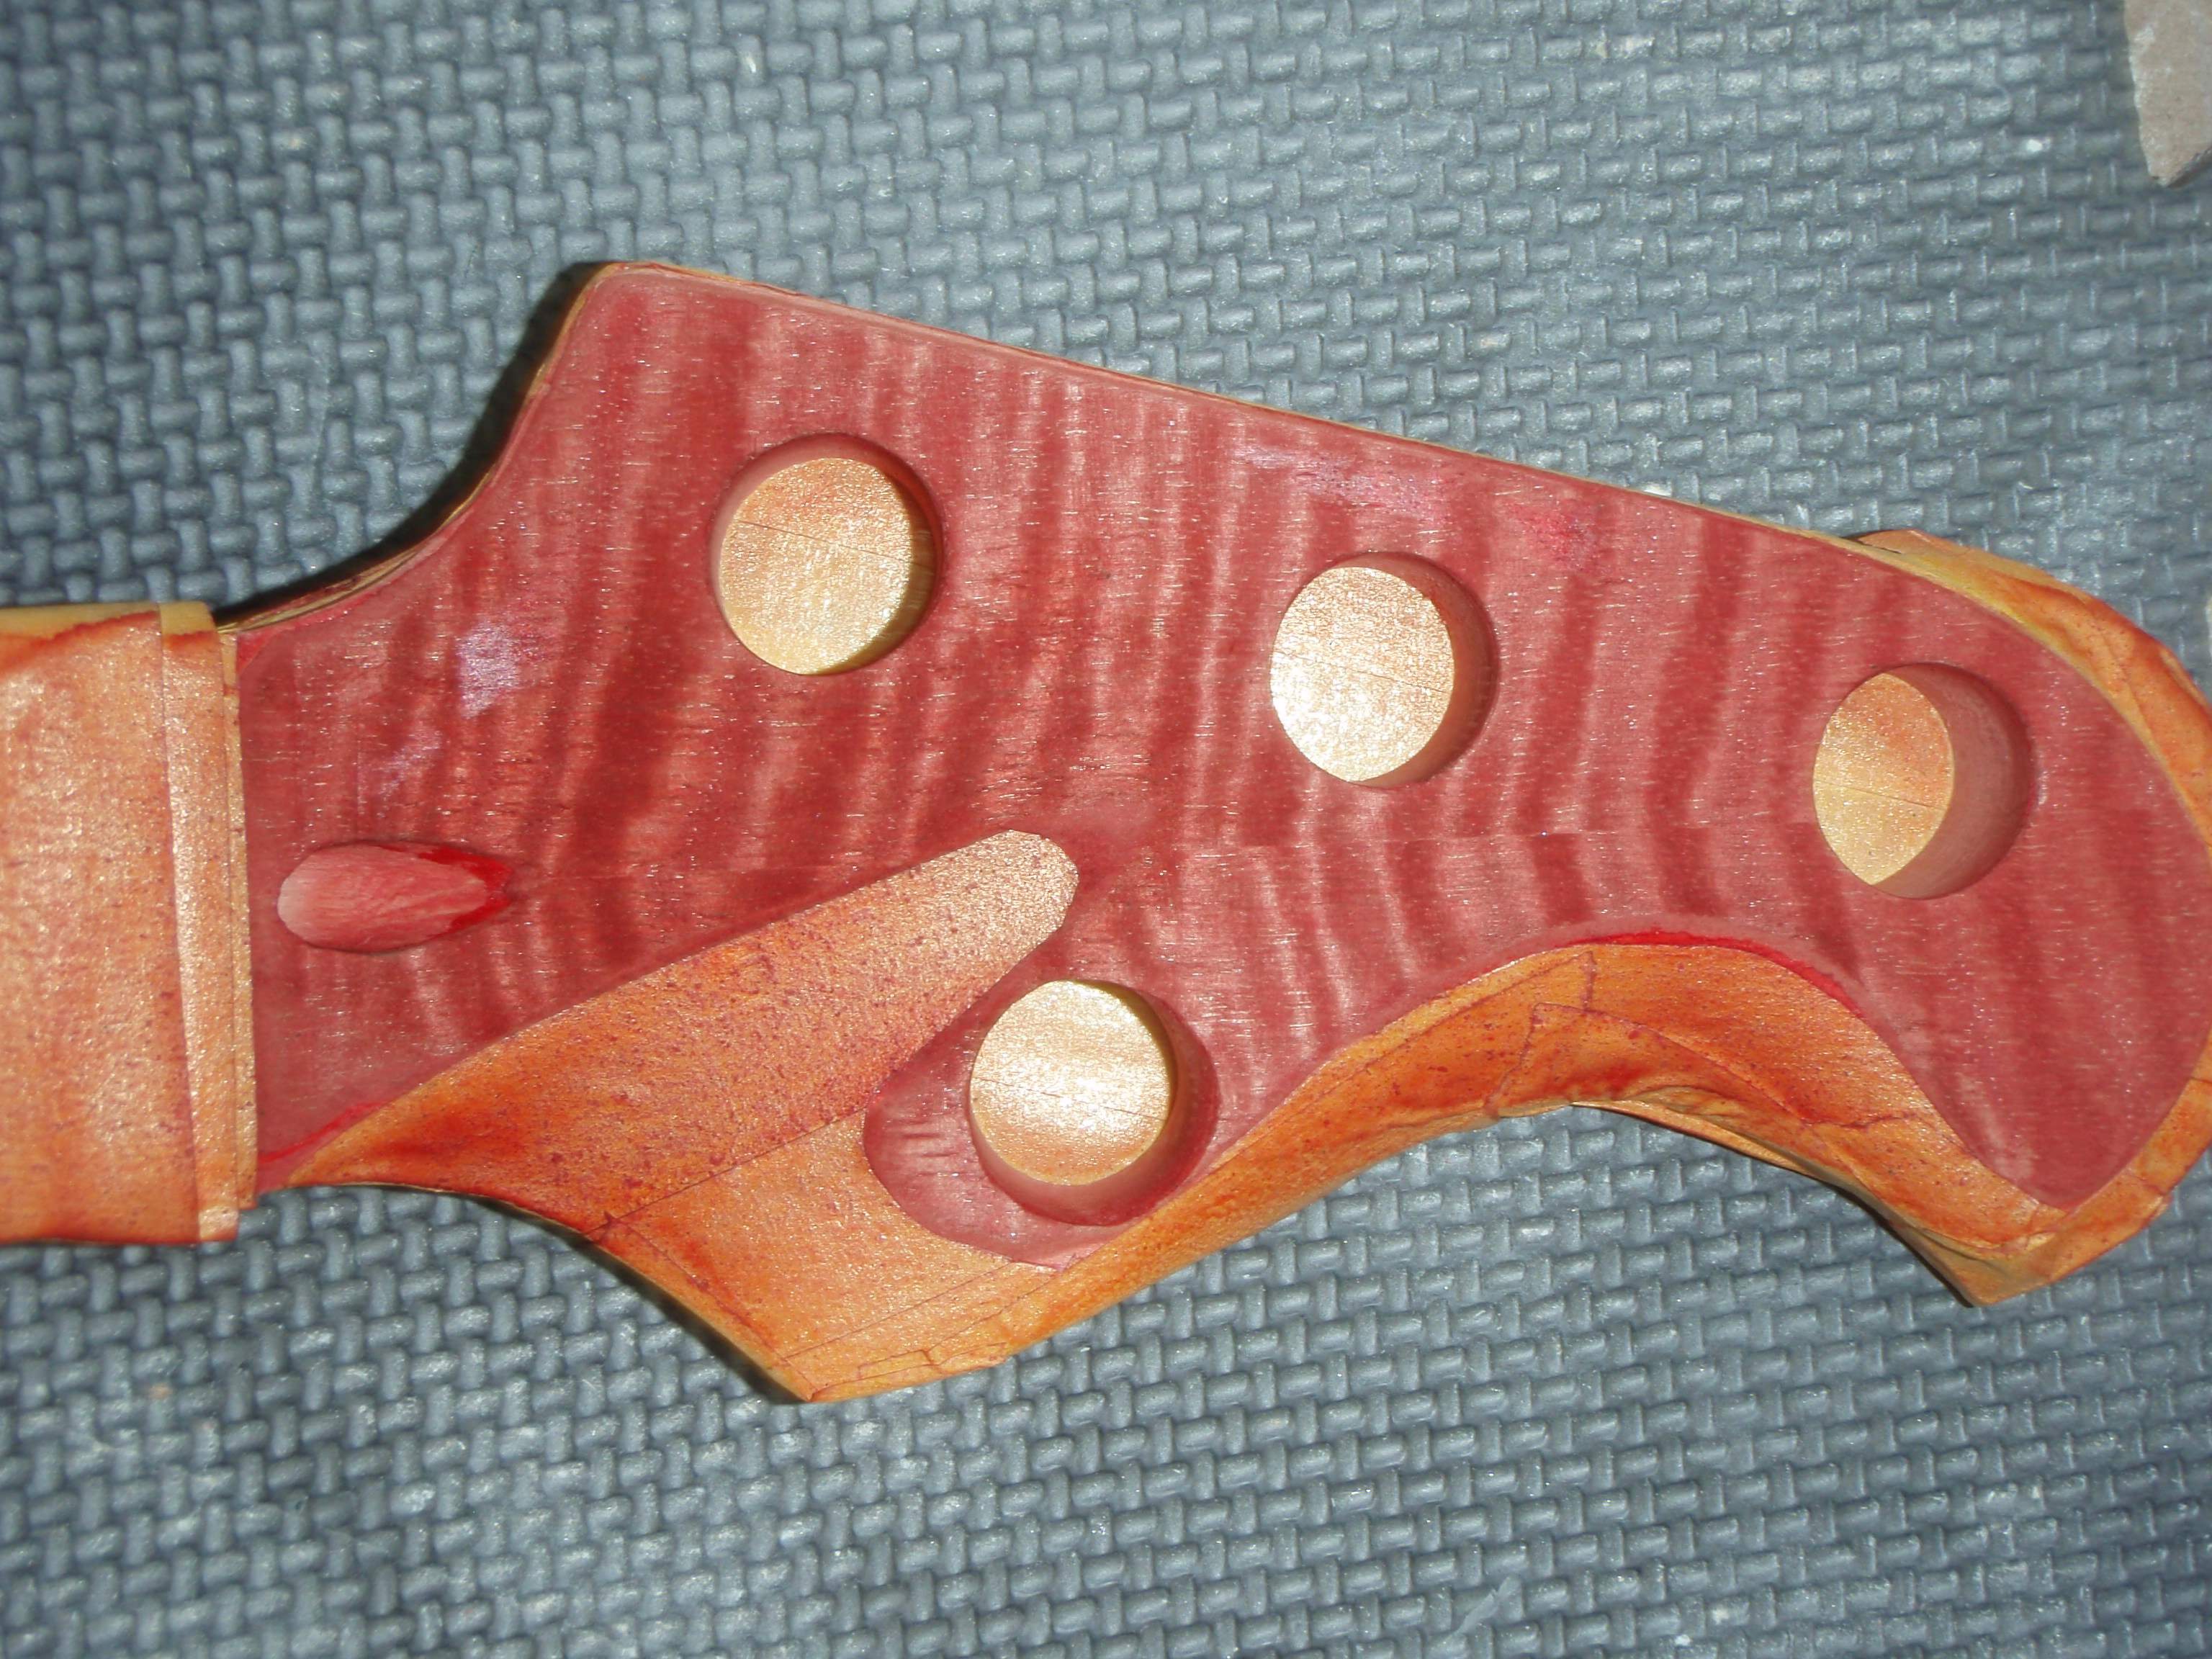
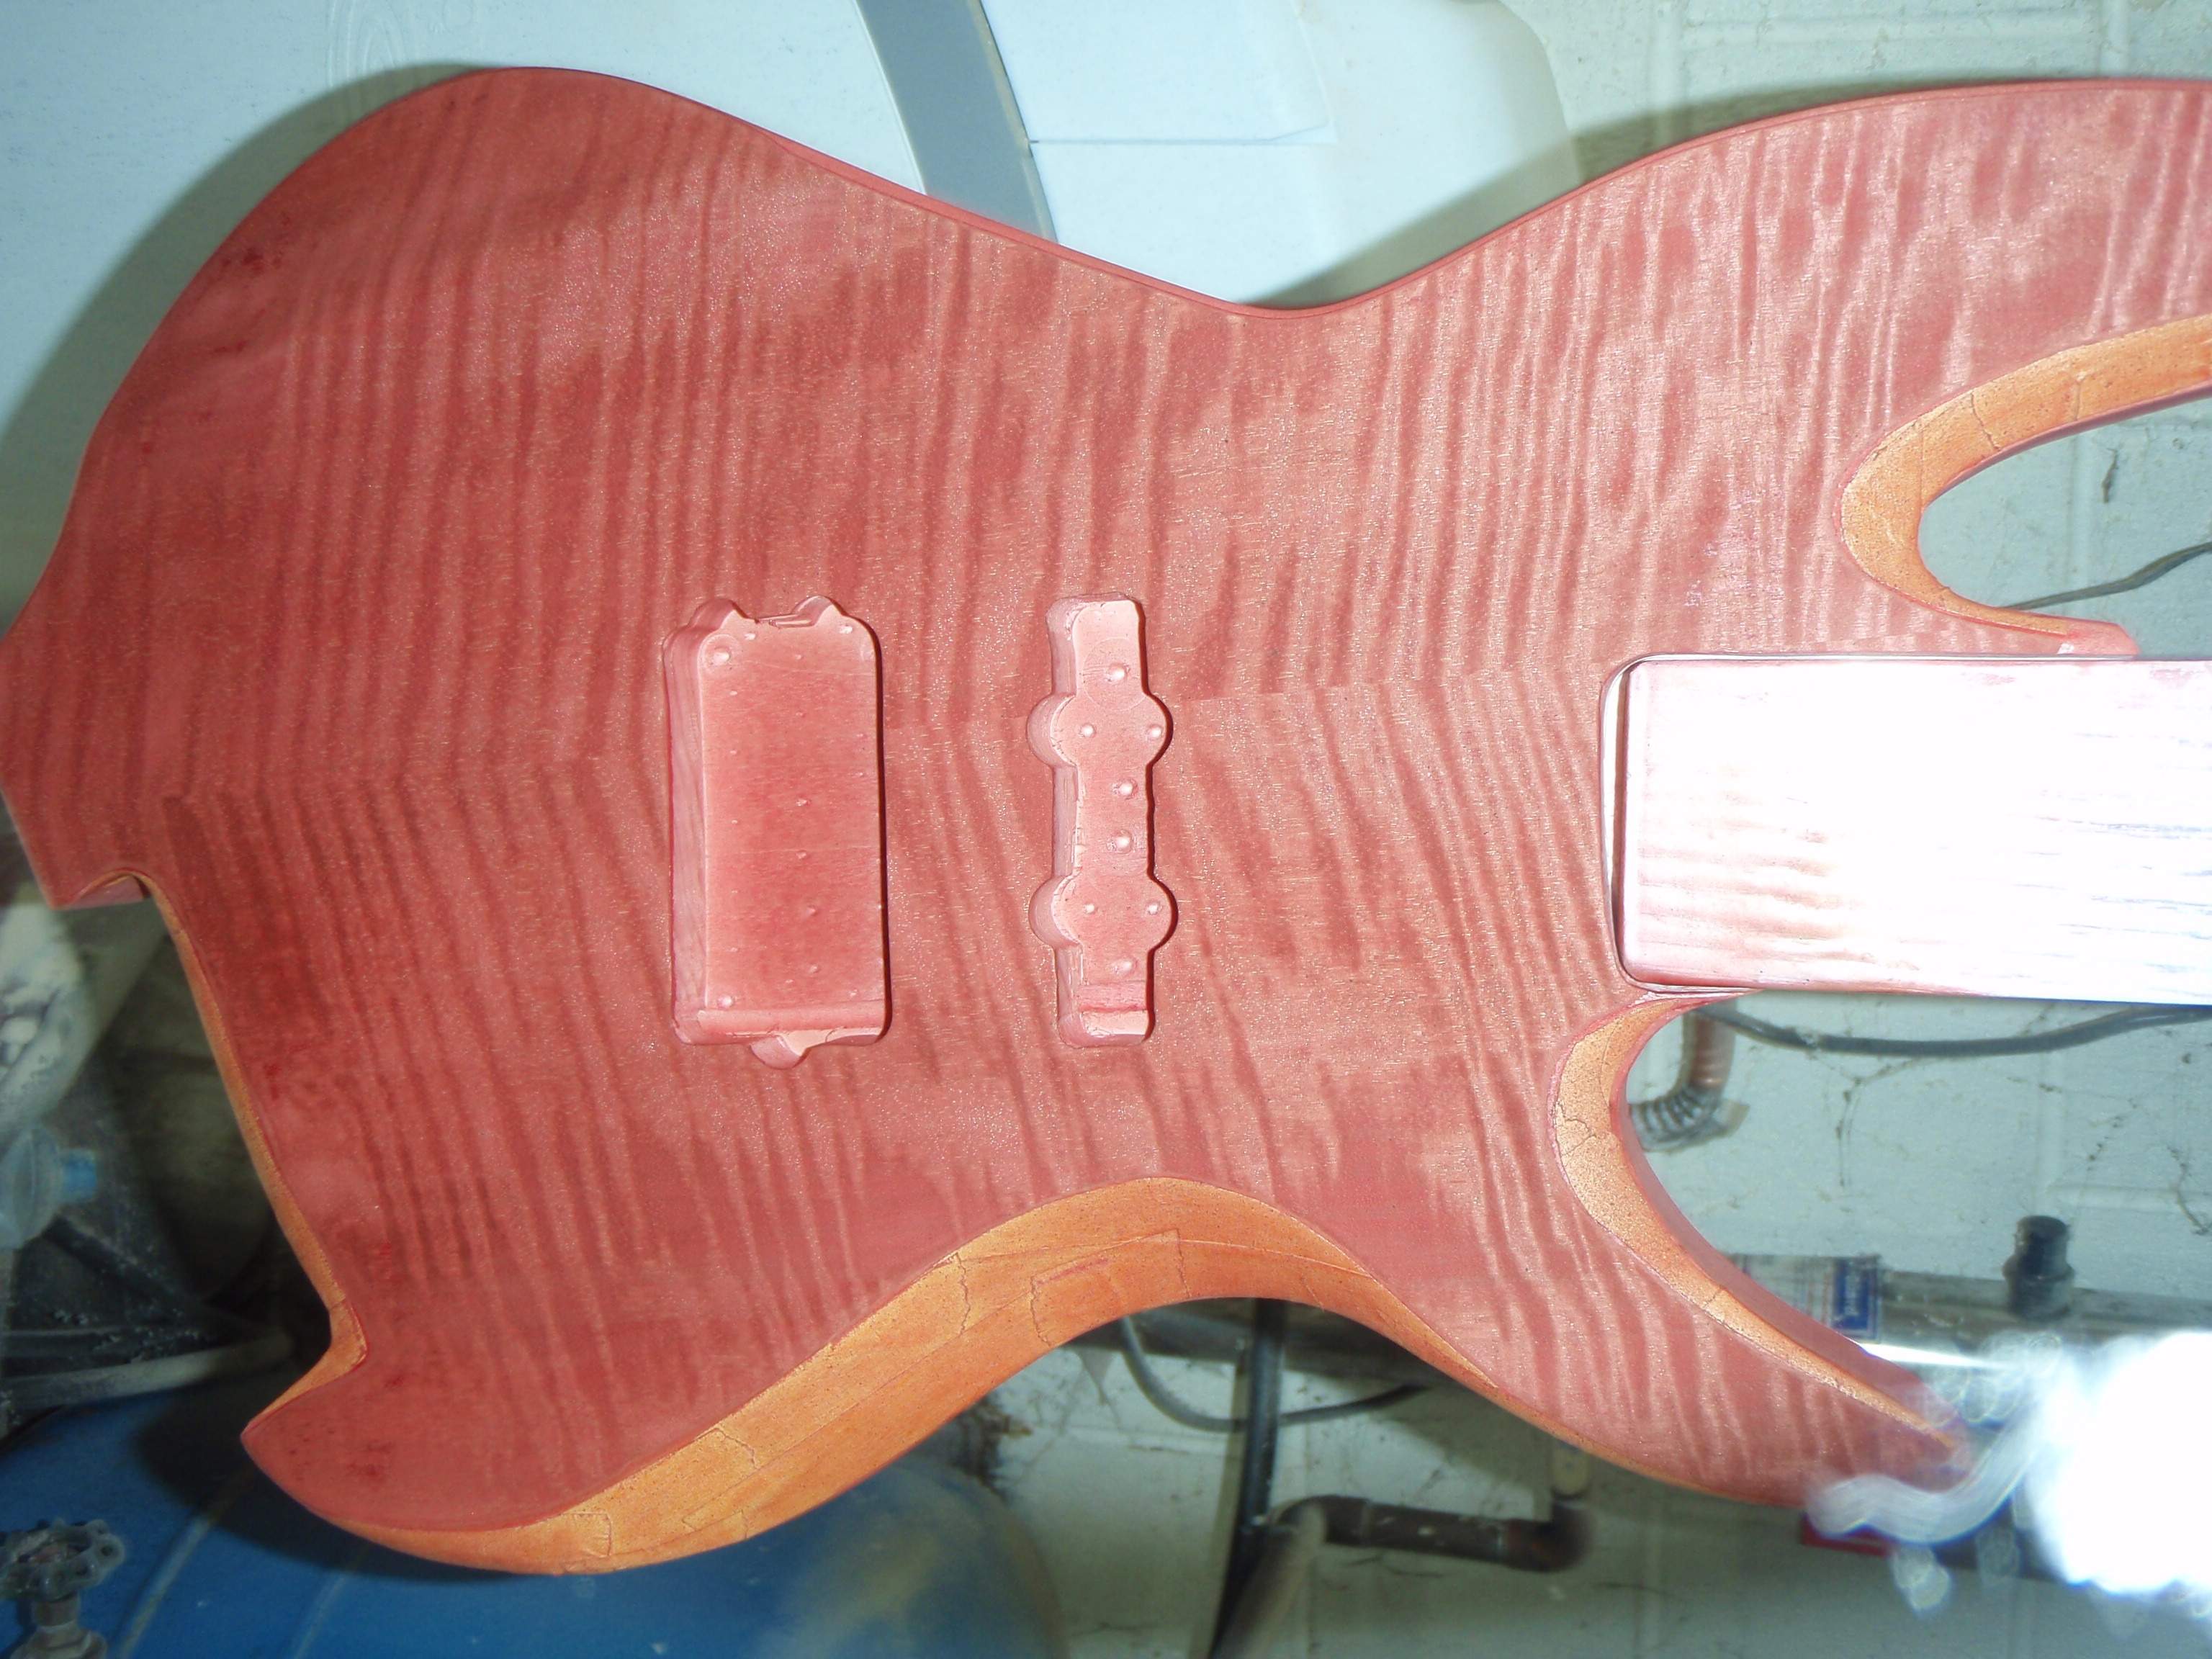
With the masking peeled the dye "leaks" under the tape cleaned up and 1 coat of clear, it looks like this right now:
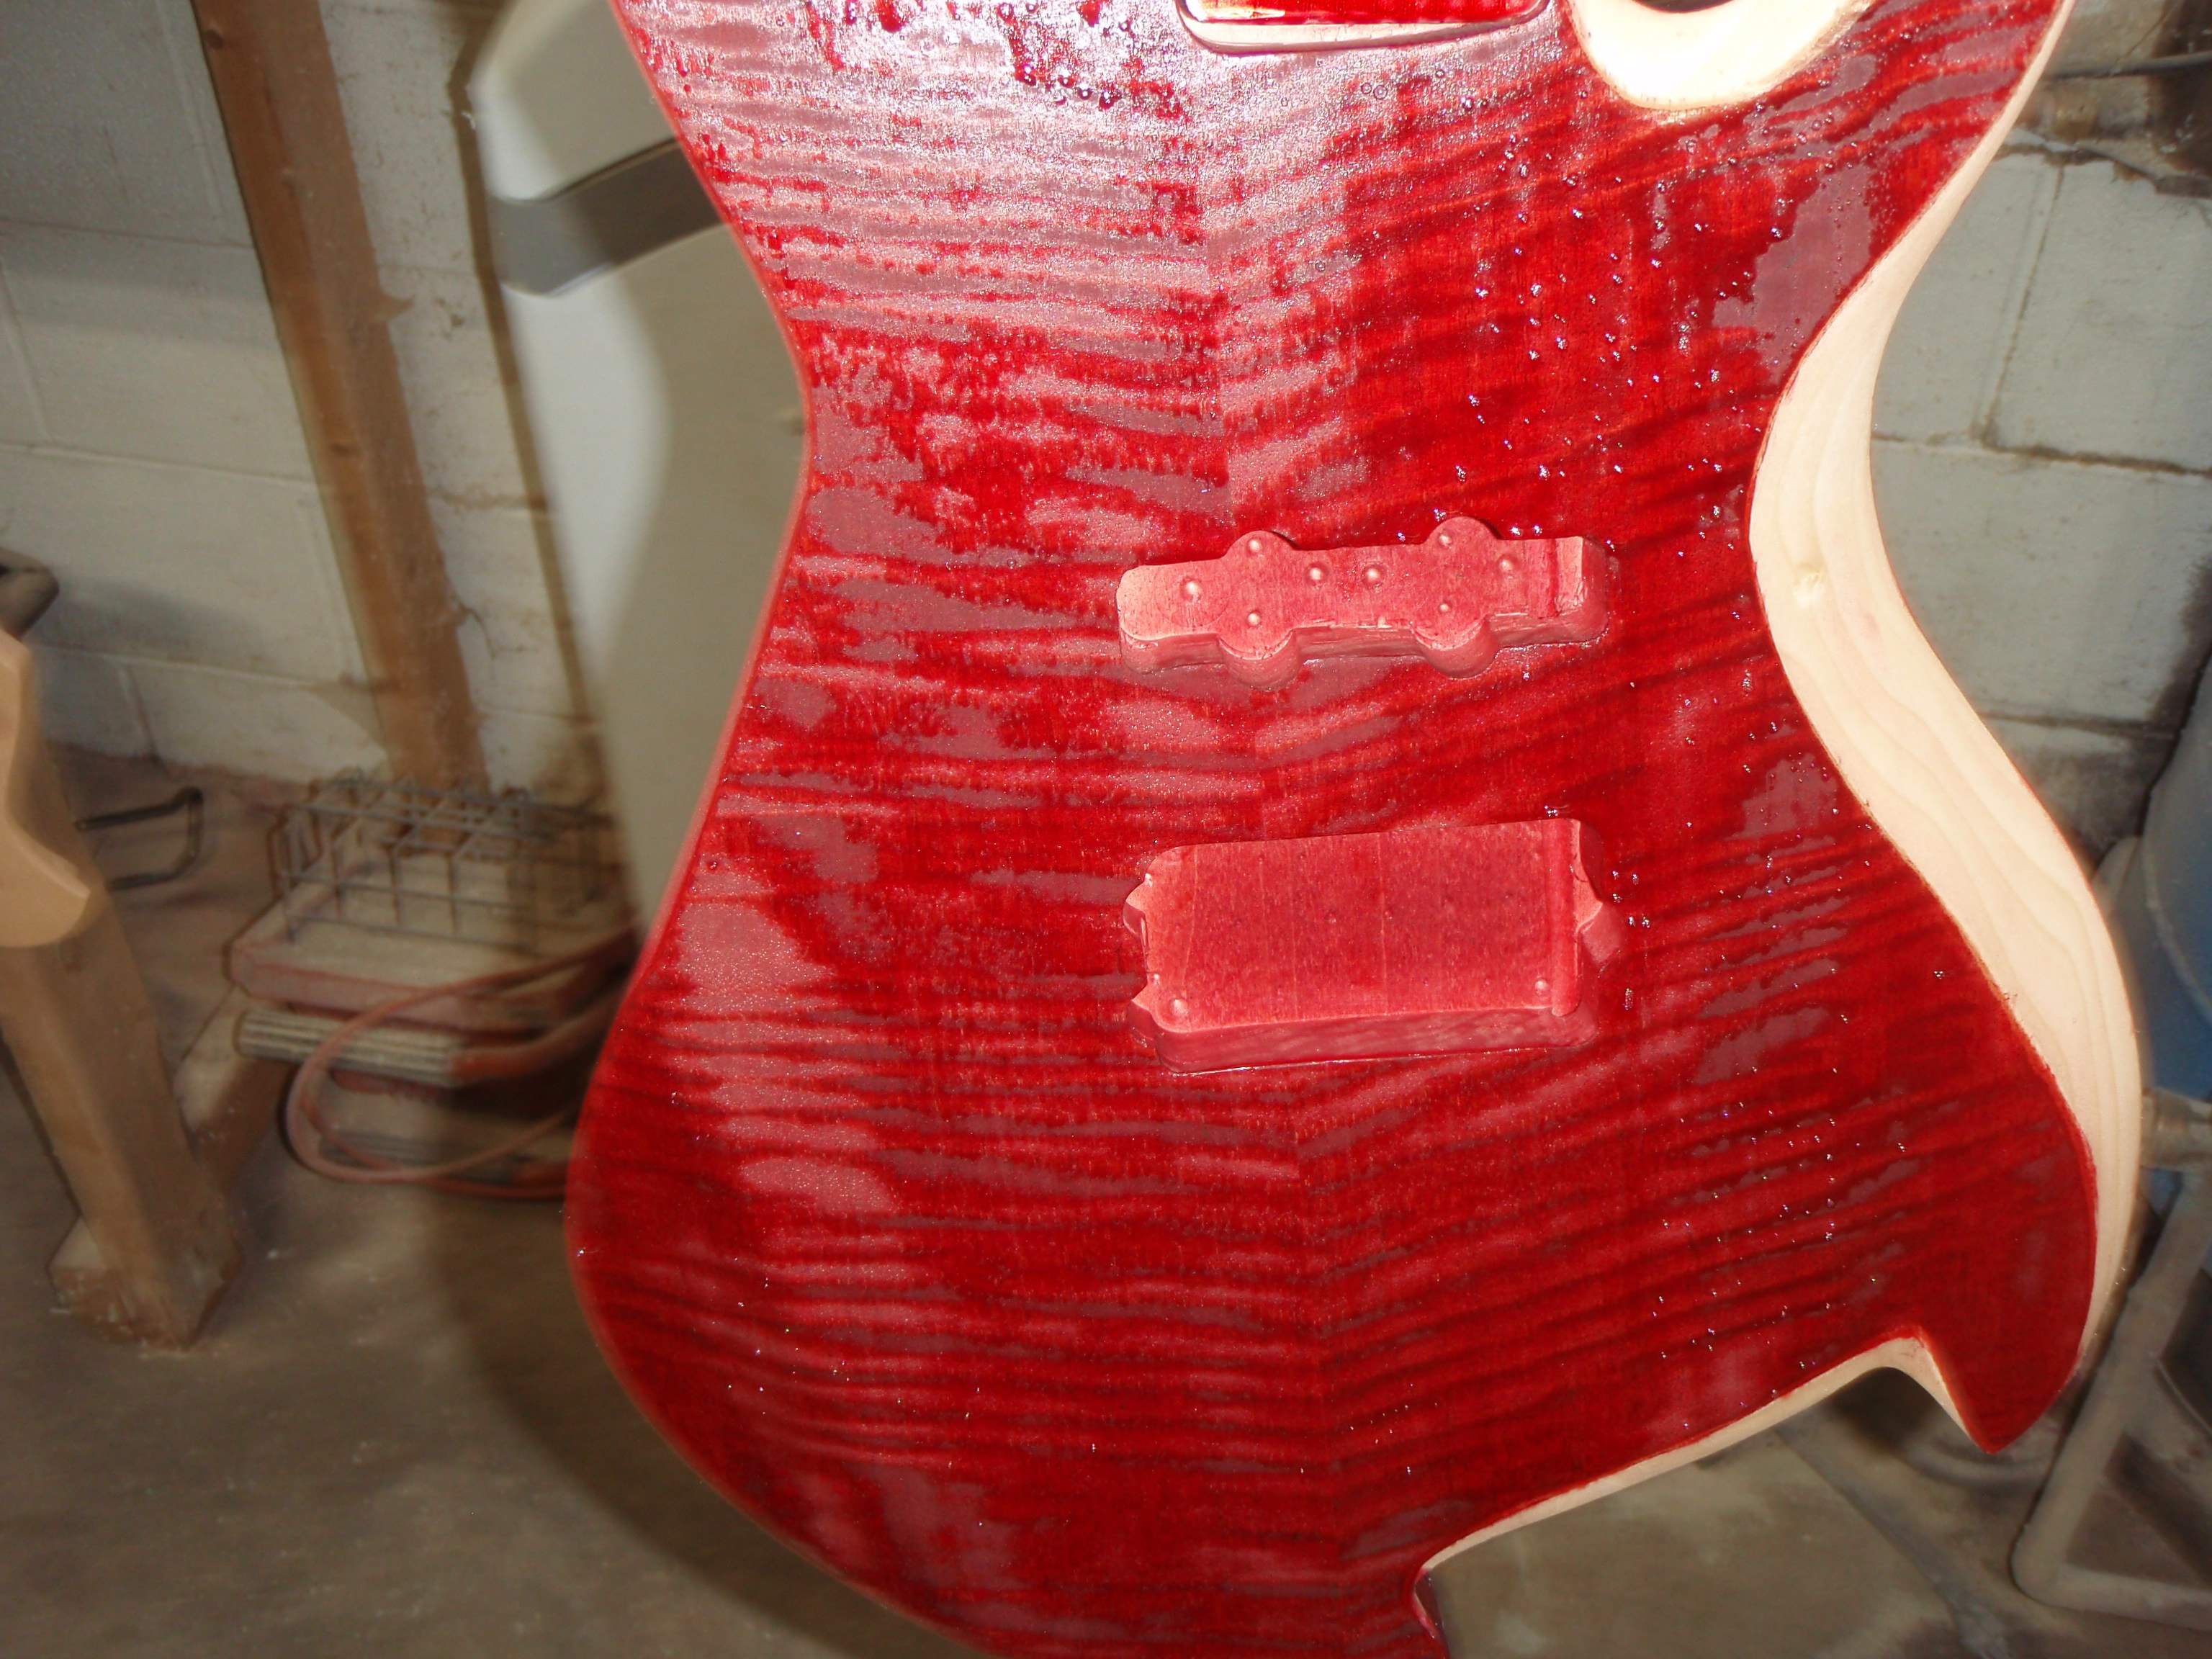
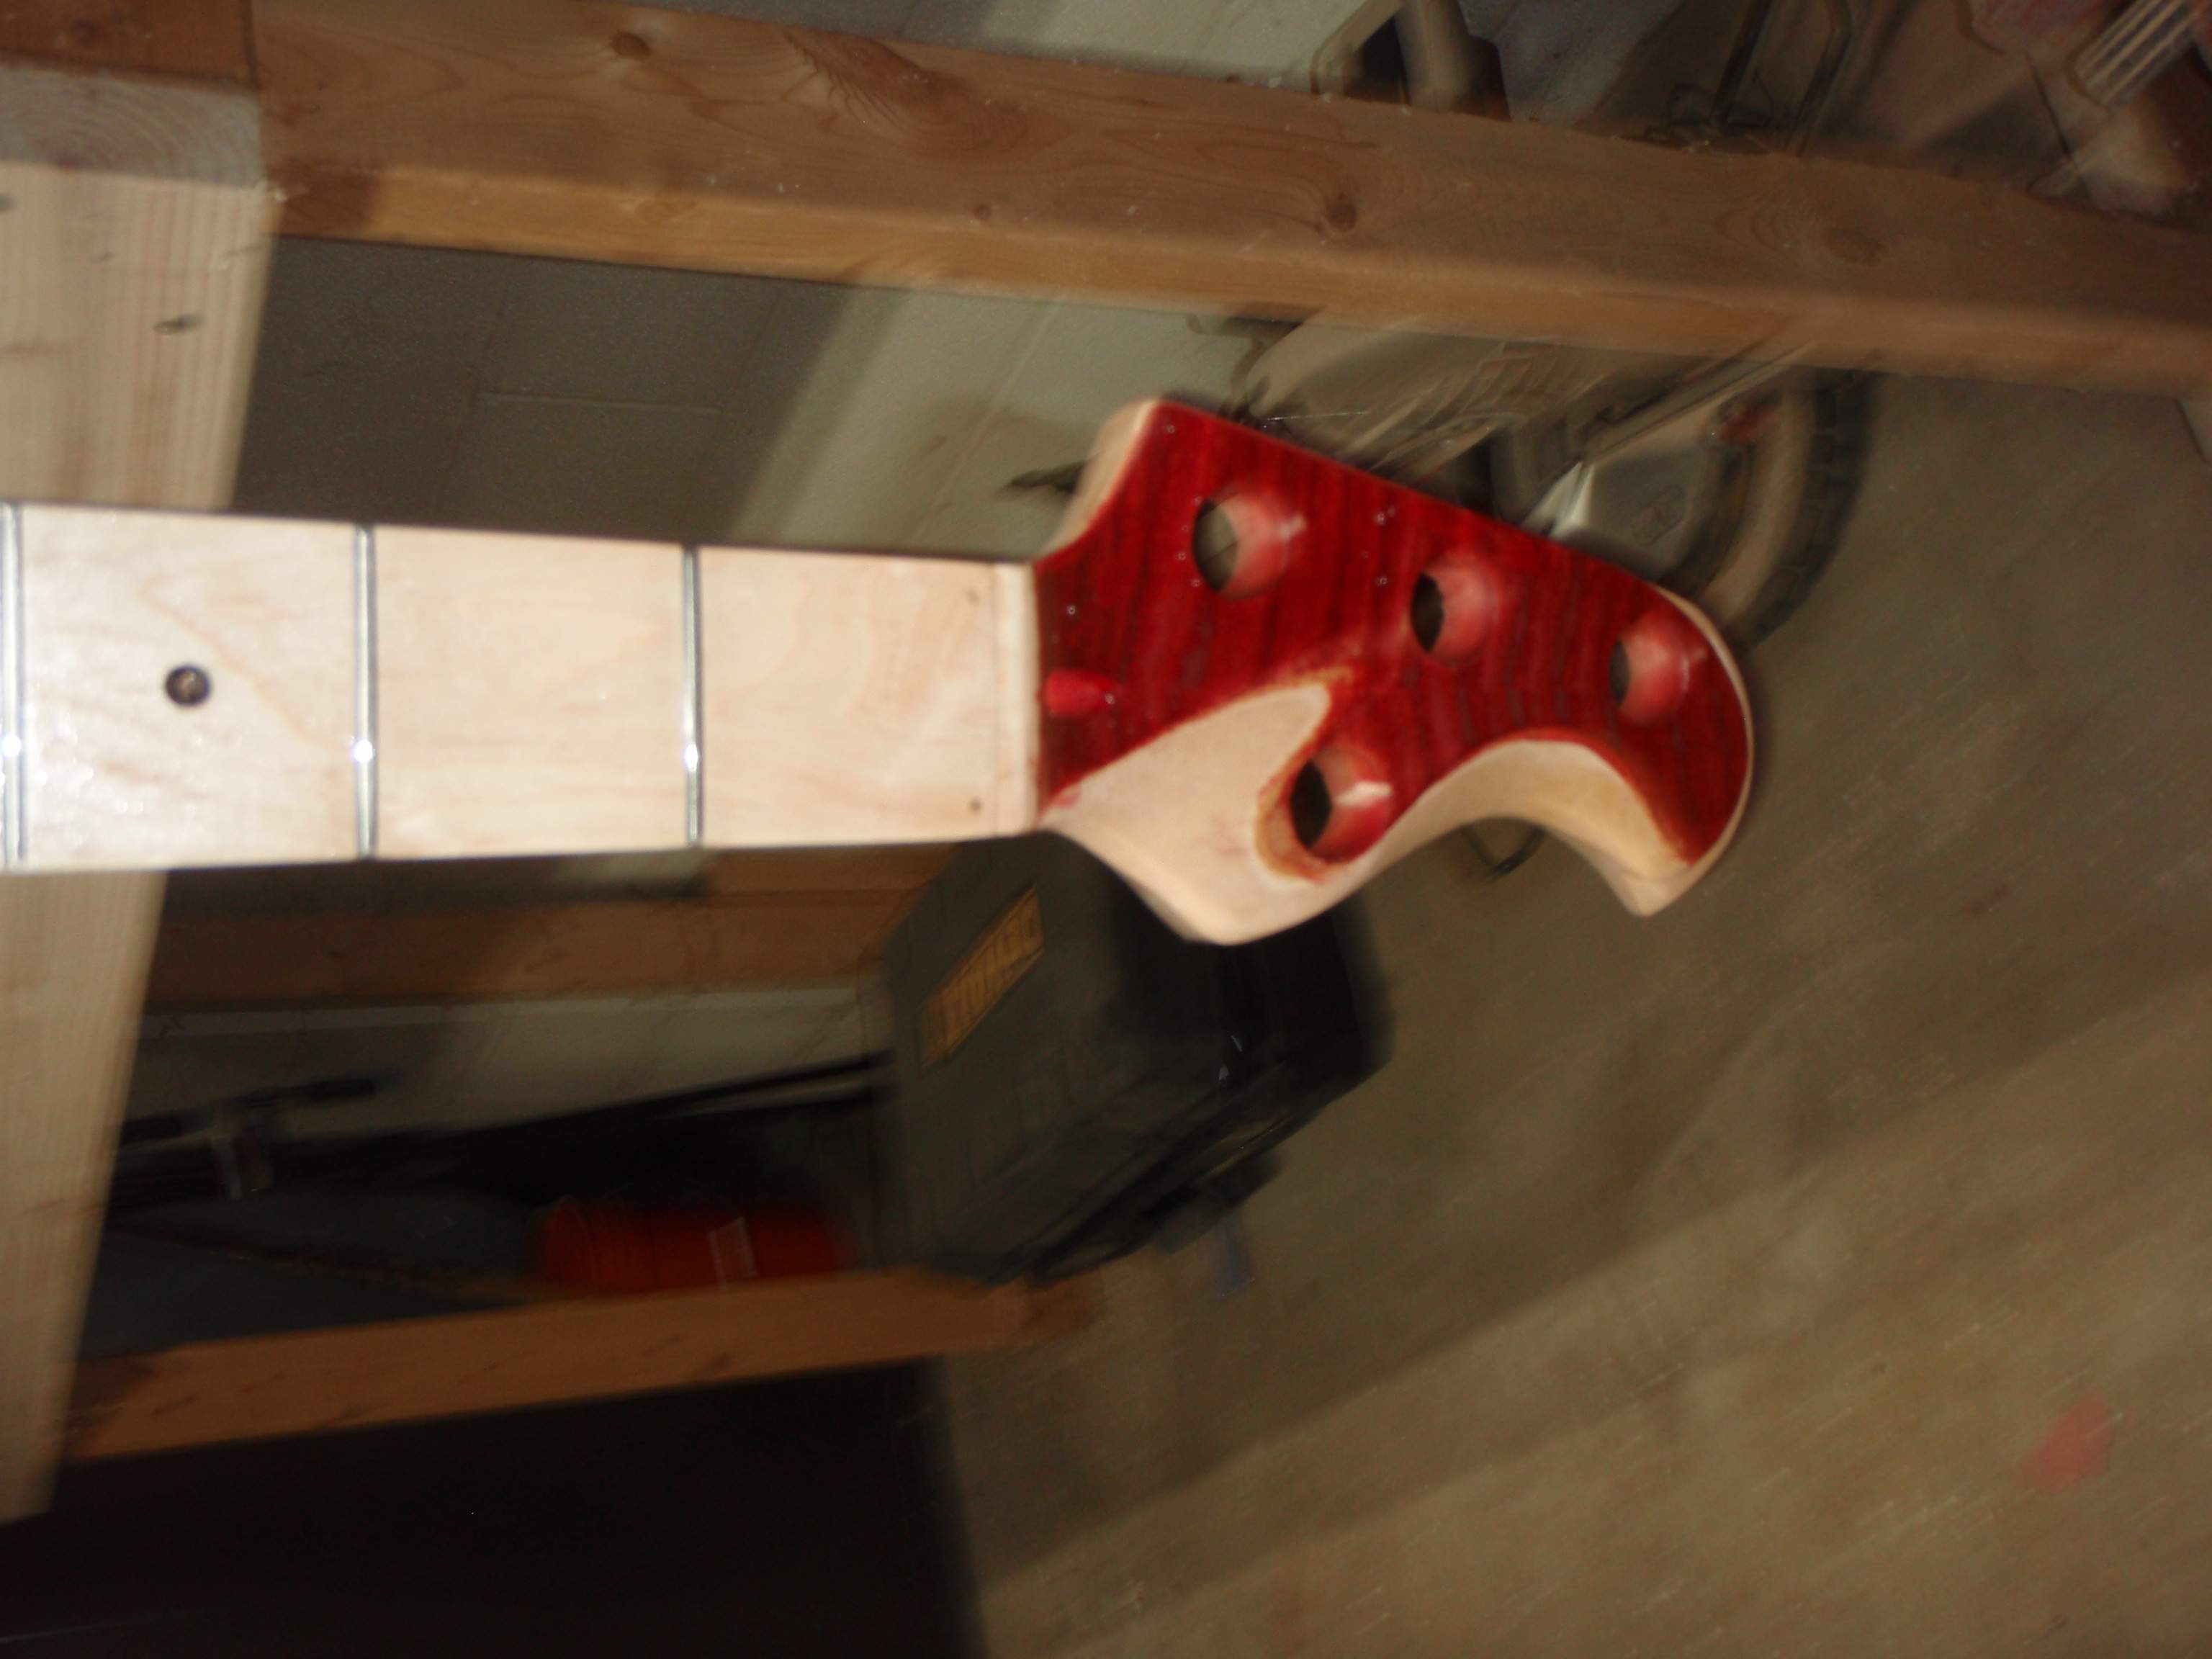
Hopefully more to come very soon. After I apply 3 coats of clear. I allow the body and neck to cure for 12 hours then I level sand the clear and begin the fun of spicing up the effects. For this finish job, I will have at my disposal. Black tint, white ghost pear, red ghost pearl and red metal flake. I am honestly not yet sure exactly what I will try to do AND it never comes out exactly as I have planned! haha
Stay tuned!
Brent
- 4 string bass
- Poplar body with veneer top
- Super J 55 neck Pickup
- Music Man dual coil bridge Pickup
- Passive pickups
- Recessed/Hidden controls 2 Volume 1 tone
- NO controls on the top surface of the bass
- Maple neck with customized and veneered headstock 3X1 config ala Music Man
- LED lit position markers top and side of fretboard
Before I could pull off my first scratch build, I needed tools and a workspace. In a single weekend, I cleaned, re-organized and wired outlets and lights into a 12X14ft corner of my basement. I added a drill press, Rigid spindle/belt sander, and set up some tools that I borrowed. I have, on loan a joiner, thickness planer and a decent router. I am saving money to buy a band saw! I can see how invaluable that tool is.
I began with a decent piece of poplar. I chose it because it is easy to work, easy on tools and inexpensive. I planned to veneer the top in any event so it did not matter. I went to a local cabinet shop and for the mere sum of $15, walked out with enough board feet to make a bass body.
I worked for a long time to create a body design that was to my liking and accomplished the goal of hiding all of the controls a recessed edge. The body design is a bit radical and I asked what people thought. I got great advice and coaching from Hopkins on controls and ended up with some thumbwheel pots.
I will say that I never begin a project unless I can afford and am totally willing to scrap it at any point. So in this case I wanted no more than $50 in raw wood materials. I lucked out and found an unfinished neck for $28 shipped!
When I got it, it looked like this:
I reshaped the headstock to accommodate my 3X1 plan and came up with this:
Here is another detailed shot of the sculpting:
The body seemed to take me FOREVER to complete. In the process I had to teach myself how to run a router, created templates and shape a body out of a slab of glued pieces.
I don't have any pictures available of that process.
The single item which has taken the most time is my desire for complicating the control panel. Ultimately, I had to resort to some metal fab skills, including welding to pull off the mounting of the thumbwheels. I am still not entirely satisfied with the control face as I did a poor job cutting in the thumbwheel slots but I will share that later when I assemble the guitar.
Additionally, I will save my pictures of my LED fret board, which is switchable, for my final build pics.
In the meantime. I was able to final sand and get color and clear on today. I spray all of what I apply and my very first coats are boring! The creative magic and fun comes in the flexibility of auto paint for various effects in the mid coats before the clear.
So I started with some red dye in denatured alcohol on my sepella (so) striped top. I had several areas of heavy sculpting on the body and decided to mask them and let them finish the light color of the poplar body. First steps today came out like this:
With the masking peeled the dye "leaks" under the tape cleaned up and 1 coat of clear, it looks like this right now:
Hopefully more to come very soon. After I apply 3 coats of clear. I allow the body and neck to cure for 12 hours then I level sand the clear and begin the fun of spicing up the effects. For this finish job, I will have at my disposal. Black tint, white ghost pear, red ghost pearl and red metal flake. I am honestly not yet sure exactly what I will try to do AND it never comes out exactly as I have planned! haha
Stay tuned!
Brent