
Enjoy the benefits of a premium membership!
Upgrade Account
-
TalkBass has been independent since 1998. Add your voice.
Create a free account to reply to discussions, view embedded media, and browse with fewer display ads.
Join free Log in
Want zero display ads or expanded classifieds tools? Compare plans.
You are using an out of date browser. It may not display this or other websites correctly.
You should upgrade or use an alternative browser.
You should upgrade or use an alternative browser.
Rattle Can Refinish Club
- Thread starter redlikejazz
- Start date
-
- Tags
- club
More options
Who Replied?

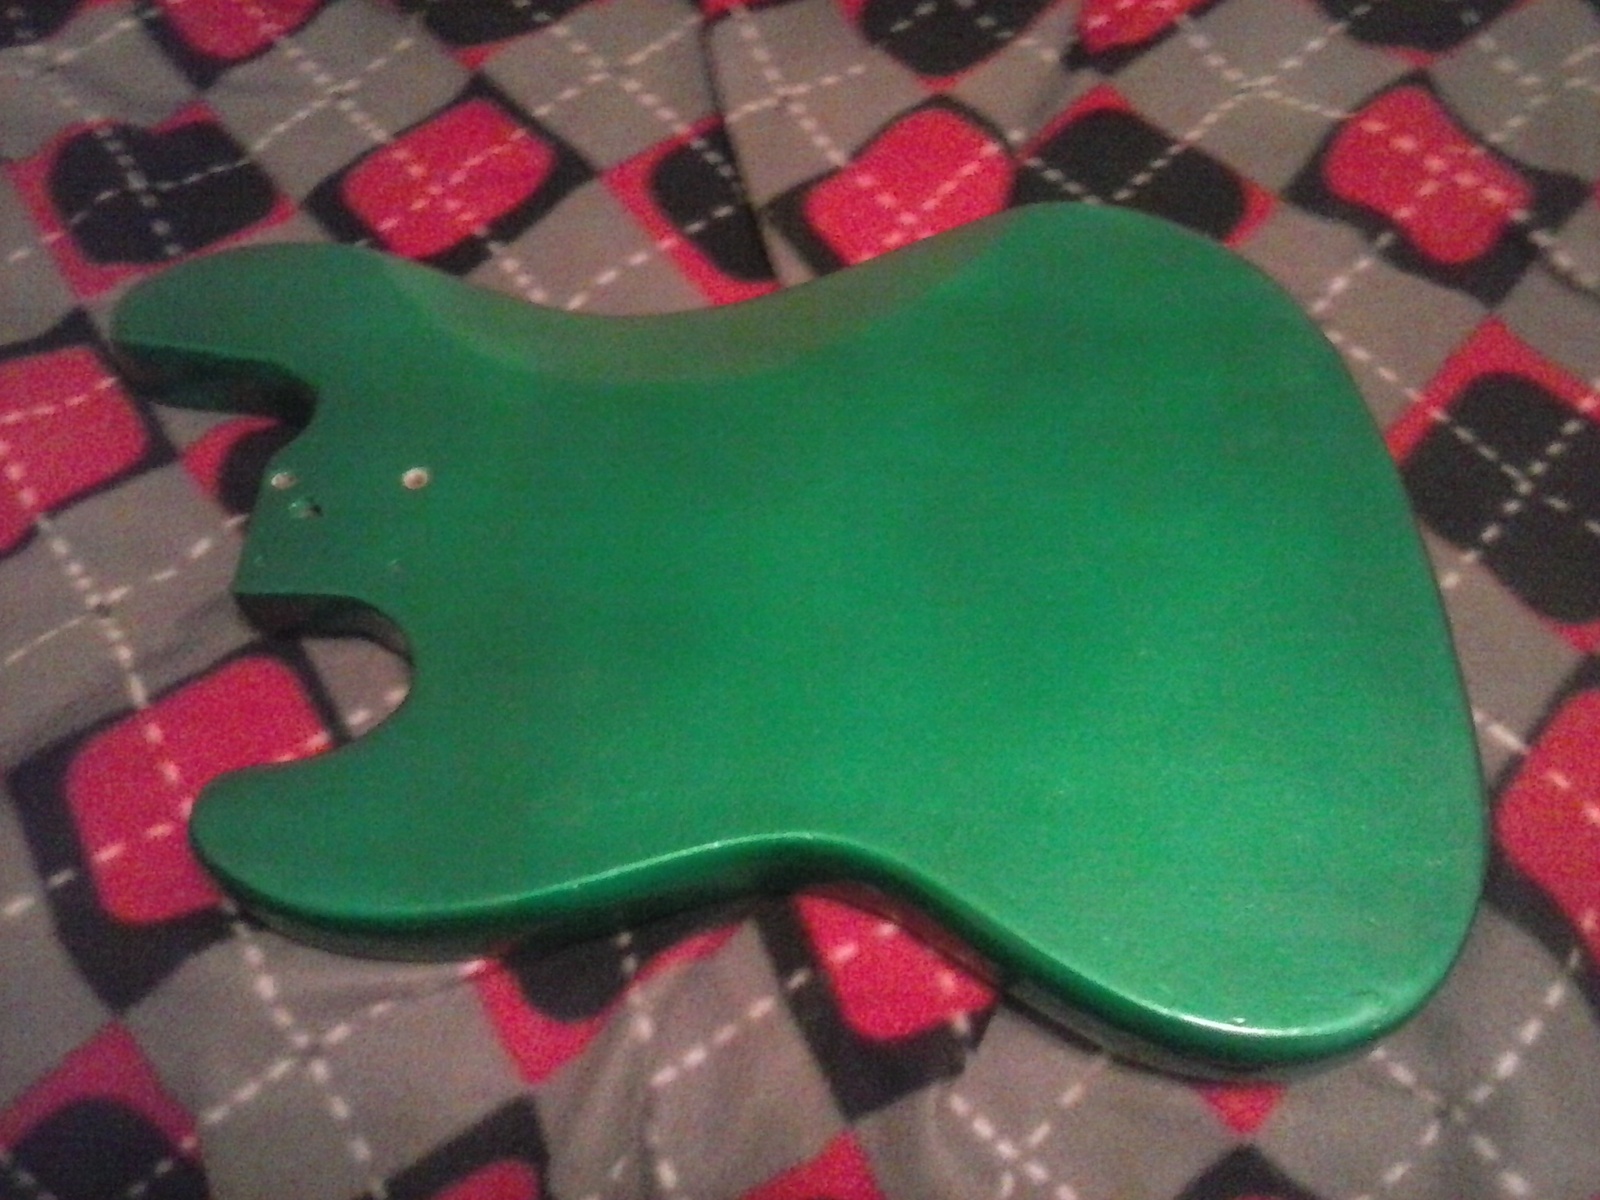
Here's what I did. Not finished yet, just the body. And even that is getting more coats, I was using Ed Roth rattlebomb base and flake, and was disappointed my how small the 4 mm flakes (only size available in the can) looked when I was finished. Going to get another can of base and shake on larger 12 mm flakes when its wet.

Hello all rattle canners, new to the forum, and new to forums in general, so not sure if I'm doing this the right way.....but need some advice.
Finally getting around to rattle can finishing my homebuilt Ric 300 lookalike, chambered solid with maple tops. I dyed the maple tops amber first, then sprayed 3 or 4 coats of clear lacquer over that. Used light gray lacquer auto primer, then Duplicolor Flame red for the solid back and my first attempt at sunbursting. It actually looks OK, I think (I would have preferred the red a shade or two closer to brown, it's pretty bright, but hey....I'll be refining it several times throughout the years)....except the obvious places I used rattle can lids to suspend the spray shield over the top. Generally, that technique helped a lot getting the sunburst onto the edges, and protecting from drips (some Duplicolor cans do, some don't), but I did not count on that much "underspray", so you can clearly see where the lids were.
If I can sand the overspray out WITHOUT getting into the amber dye, then the second attempt will be easy, and I won't use can lids again!
Question is: what grit should I start with to try to sand out the red over/underspray, but without cutting below the clearcoat and into the amber dye? Should I wet or dry sand? Circular motion or straight, with the grain?
Thanks!
Finally getting around to rattle can finishing my homebuilt Ric 300 lookalike, chambered solid with maple tops. I dyed the maple tops amber first, then sprayed 3 or 4 coats of clear lacquer over that. Used light gray lacquer auto primer, then Duplicolor Flame red for the solid back and my first attempt at sunbursting. It actually looks OK, I think (I would have preferred the red a shade or two closer to brown, it's pretty bright, but hey....I'll be refining it several times throughout the years)....except the obvious places I used rattle can lids to suspend the spray shield over the top. Generally, that technique helped a lot getting the sunburst onto the edges, and protecting from drips (some Duplicolor cans do, some don't), but I did not count on that much "underspray", so you can clearly see where the lids were.
If I can sand the overspray out WITHOUT getting into the amber dye, then the second attempt will be easy, and I won't use can lids again!
Question is: what grit should I start with to try to sand out the red over/underspray, but without cutting below the clearcoat and into the amber dye? Should I wet or dry sand? Circular motion or straight, with the grain?
Thanks!
Attachments


USA Music Man S.U.B. stripped of its truck bed liner and reshot with burgundy mist Reranch rattle cans.
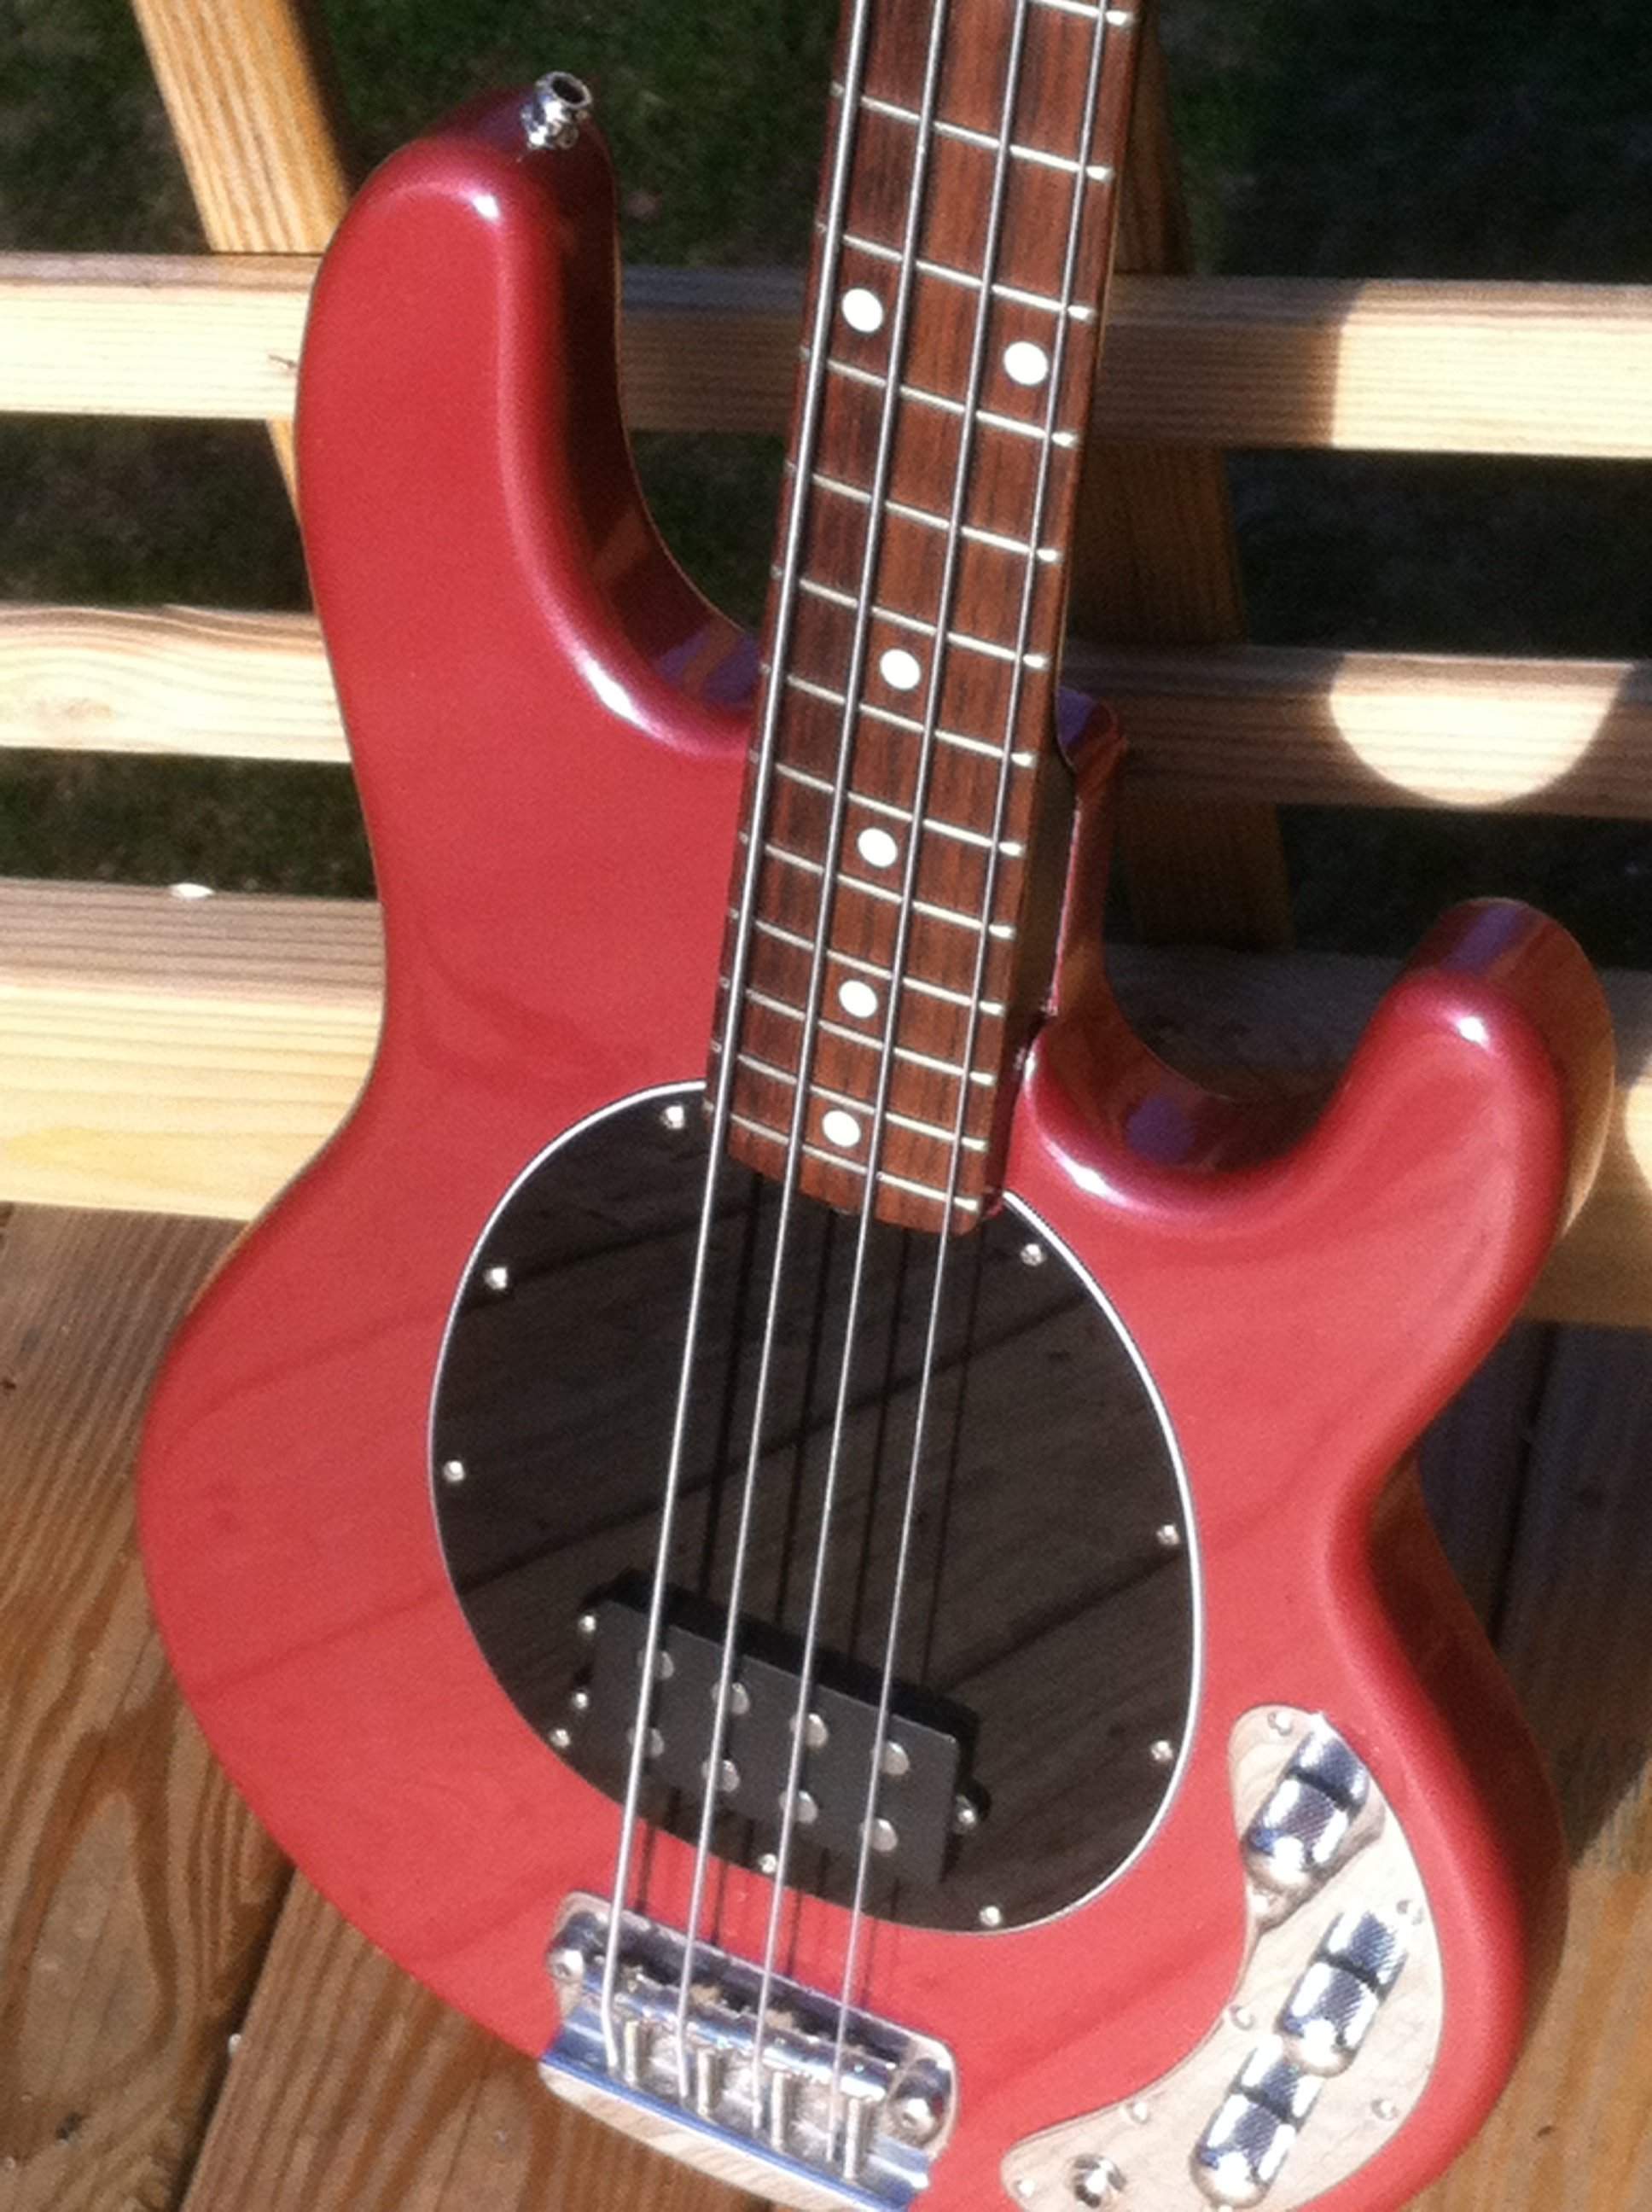

Thats nice lookin!USA Music Man S.U.B. stripped of its truck bed liner and reshot with burgundy mist Reranch rattle cans.
View attachment 771994
Hello all rattle canners, new to the forum, and new to forums in general, so not sure if I'm doing this the right way.....but need some advice.
Finally getting around to rattle can finishing my homebuilt Ric 300 lookalike, chambered solid with maple tops. I dyed the maple tops amber first, then sprayed 3 or 4 coats of clear lacquer over that. Used light gray lacquer auto primer, then Duplicolor Flame red for the solid back and my first attempt at sunbursting. It actually looks OK, I think (I would have preferred the red a shade or two closer to brown, it's pretty bright, but hey....I'll be refining it several times throughout the years)....except the obvious places I used rattle can lids to suspend the spray shield over the top. Generally, that technique helped a lot getting the sunburst onto the edges, and protecting from drips (some Duplicolor cans do, some don't), but I did not count on that much "underspray", so you can clearly see where the lids were.
If I can sand the overspray out WITHOUT getting into the amber dye, then the second attempt will be easy, and I won't use can lids again!
Question is: what grit should I start with to try to sand out the red over/underspray, but without cutting below the clearcoat and into the amber dye? Should I wet or dry sand? Circular motion or straight, with the grain?
Thanks!
I dont have a lot of experience with guitars and I am definitely NOT a luthier bit I am pretty good at being handy and have pkenty if common sence. Lol
I assume that you painted the red over(?) the clear?? IF that is the case I would definitely be wet sanding. Maybe 2k or even 3k to prevent fromcutting the clear. That edge will only require minimal sanding at best but in the end you will want to be using a rubbing compound over the entire bass so everything has a good clean shine. Then clear over the whole thing.
Klondike - it turns out most of it was just dust, it wiped right off with a soft cloth! I did end up wet sanding the whole thing with 600 and then 1000 wet, to get rid of some drips, so of course now I have to respray the burst to get it back to right (fingers crossed), but I'm relieved it was easy to get that overspray off.I dont have a lot of experience with guitars and I am definitely NOT a luthier bit I am pretty good at being handy and have pkenty if common sence. Lol
I assume that you painted the red over(?) the clear?? IF that is the case I would definitely be wet sanding. Maybe 2k or even 3k to prevent fromcutting the clear. That edge will only require minimal sanding at best but in the end you will want to be using a rubbing compound over the entire bass so everything has a good clean shine. Then clear over the whole thing.
OK, getting close to finished on this what I call "Prototype" Ric 330 bass. Body is chambered alder with 1/8" maple tops. Made the pickguard from scratch, and used the pickups and wiring harness from my Jazz bass (until I can get the time to do a 4-pot build).
My first attempt at a rattle can sunburst "Fireglo", using Duplicolor "Flame Red" from Pep Boys (too bright) and aniline dye on the maple top. The burst pattern isn't great, but from 20 away in a dark bar it probably looks OK. Waiting until it gets warm again to put a can of gloss clear on then start the sanding/polishing. I learned a lot about what not to do for the next attempt, after my grandkids grow up or go back to live with their real parents and I have the time to do it right.
My first attempt at a rattle can sunburst "Fireglo", using Duplicolor "Flame Red" from Pep Boys (too bright) and aniline dye on the maple top. The burst pattern isn't great, but from 20 away in a dark bar it probably looks OK. Waiting until it gets warm again to put a can of gloss clear on then start the sanding/polishing. I learned a lot about what not to do for the next attempt, after my grandkids grow up or go back to live with their real parents and I have the time to do it right.
Attachments

Thinking of doing the same thing. How hard was that baked on finish to get off?USA Music Man S.U.B. stripped of its truck bed liner and reshot with burgundy mist Reranch rattle cans.
View attachment 771994
Real easy with a heat gun and 250 grit sand paper.Thinking of doing the same thing. How hard was that baked on finish to get off?

OK, getting close to finished on this what I call "Prototype" Ric 330 bass. Body is chambered alder with 1/8" maple tops. Made the pickguard from scratch, and used the pickups and wiring harness from my Jazz bass (until I can get the time to do a 4-pot build).
My first attempt at a rattle can sunburst "Fireglo", using Duplicolor "Flame Red" from Pep Boys (too bright) and aniline dye on the maple top. The burst pattern isn't great, but from 20 away in a dark bar it probably looks OK. Waiting until it gets warm again to put a can of gloss clear on then start the sanding/polishing. I learned a lot about what not to do for the next attempt, after my grandkids grow up or go back to live with their real parents and I have the time to do it right.
I like it. A little abrupt for a slow-fade, but it's good for the dimensions you're working with.
I did about the same thing, but after I got the body all built, I soaked a few of my wife's Cherry Spice teabags in Everclear and after they soaked in that for a few days, I applied that liquid stain to the edges of a bass I built.
I kept on adding more and more to the edges until they got a deep cherry color to them, and then since it was alcohol-based stain, I just covered it in clear lacquer. The untinted wood took on an orange-ish hue that made the cherry color pop really nicely.
Stains can come from a lot of oddball places, and if you can draw the colorant out of something with alcohol, then it's useable for a wood stain.



Surfer Joe have you ever used beer and chicken blood??
Only in exorcisms.
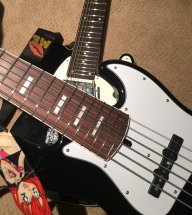
Not a bass but painted with rattle cans in my yard. I have some of the fabric left over and am thinking of doing it to a P-bass...
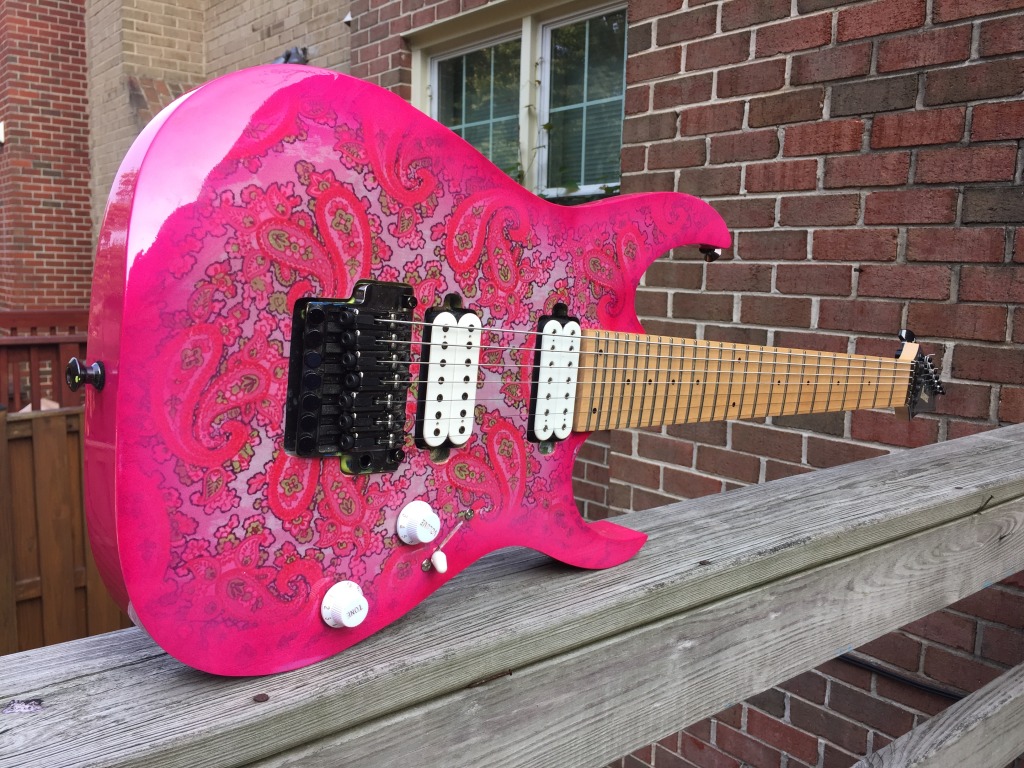

Not a bass but painted with rattle cans in my yard. I have some of the fabric left over and am thinking of doing it to a P-bass...
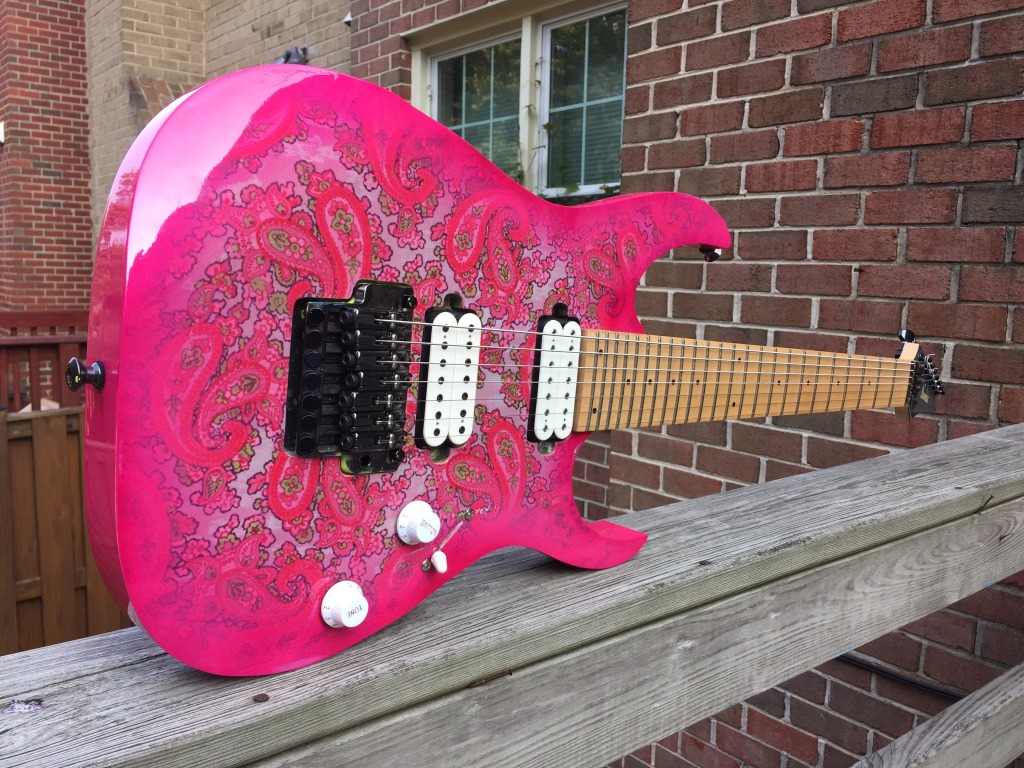
I'd love some details on how to do a "finish-over-fabric" job... Looks excellent!!!
-robert

Latest rattle can project. My acquisition cost was $0.00. A buddy of mine likes cruising thrift shops and he ran across this PJ in need of help for very small bucks, so he turned over to me to do what I wish. It was a badly painted white on white with a also badly painted black headstock and black painted back of the neck. For about a $15 investment in Rustoleum spray cans and a lot of man-hours, this is what I came up with. The color is called Ocean Mist and the pickguard is sprayed Ivory.
My acquisition cost was $0.00. A buddy of mine likes cruising thrift shops and he ran across this PJ in need of help for very small bucks, so he turned over to me to do what I wish. It was a badly painted white on white with a also badly painted black headstock and black painted back of the neck. For about a $15 investment in Rustoleum and a lot of man-hours, this is what I came up with.
I have no idea what brand this is, so I named it after myself. A little tweaking and it plays pretty well. Weight is a reasonable 8 3/4 lbs with perfect balance. I probably take it out and mess with for a couple of weeks and continue tweaking. Ultimately, I'll donate it for raffle for a fundraiser.
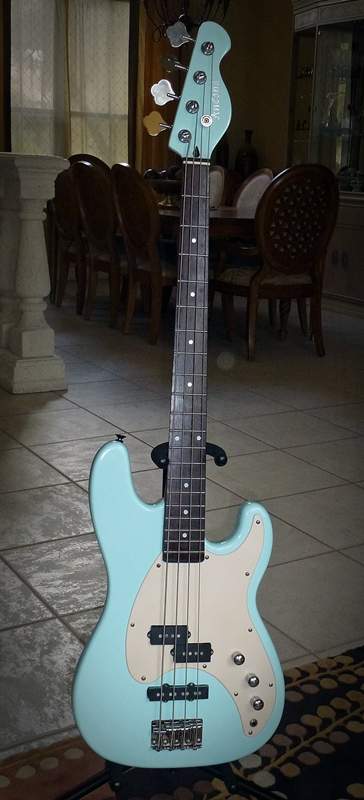
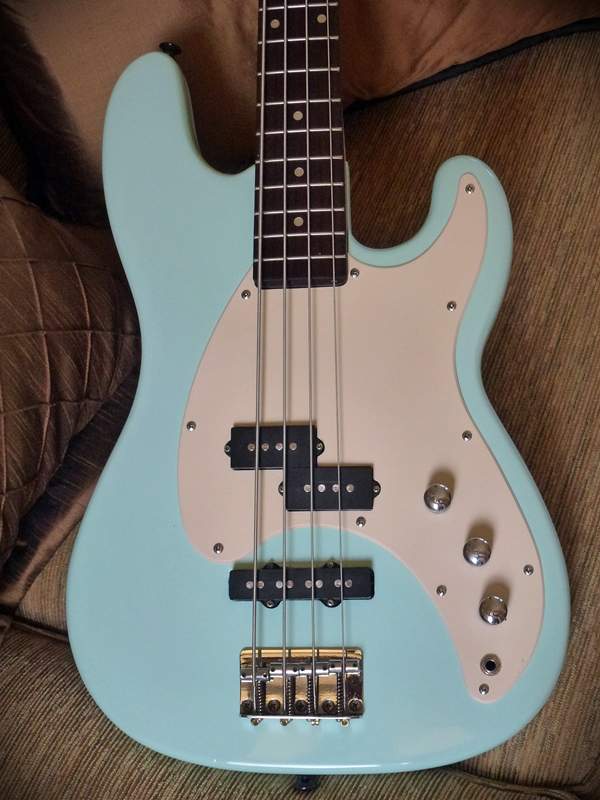
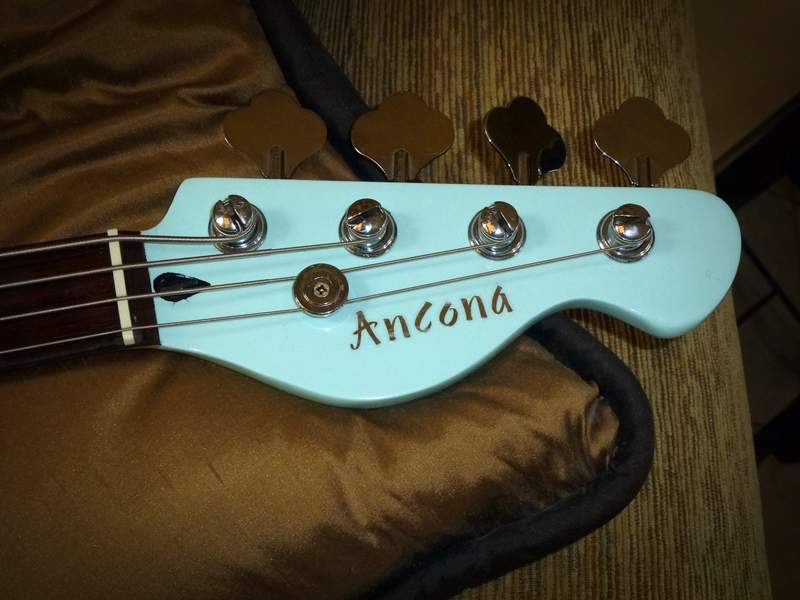
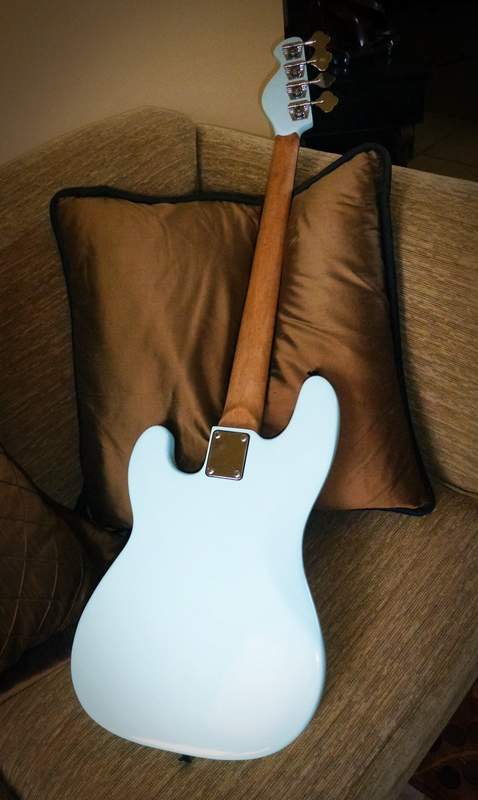
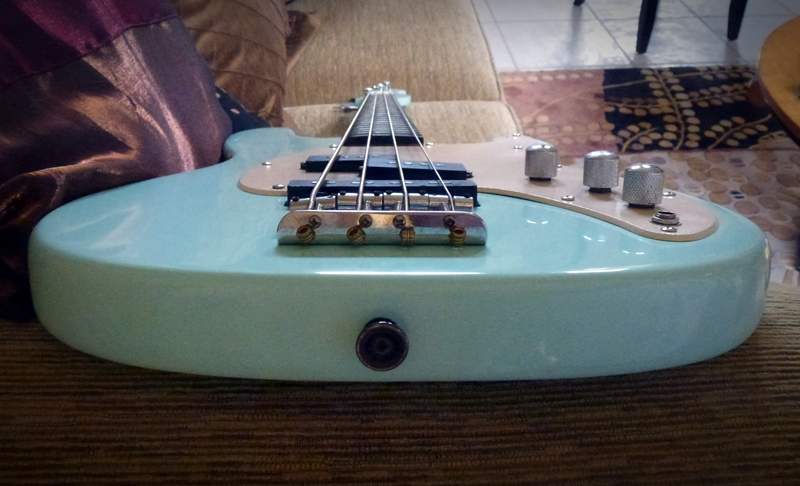
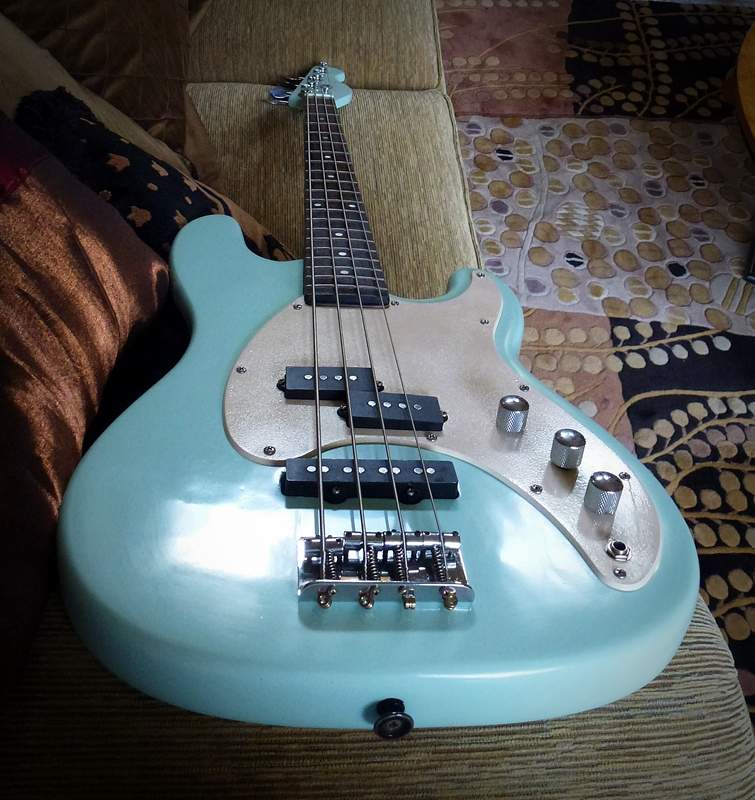
My acquisition cost was $0.00. A buddy of mine likes cruising thrift shops and he ran across this PJ in need of help for very small bucks, so he turned over to me to do what I wish. It was a badly painted white on white with a also badly painted black headstock and black painted back of the neck. For about a $15 investment in Rustoleum and a lot of man-hours, this is what I came up with.
I have no idea what brand this is, so I named it after myself. A little tweaking and it plays pretty well. Weight is a reasonable 8 3/4 lbs with perfect balance. I probably take it out and mess with for a couple of weeks and continue tweaking. Ultimately, I'll donate it for raffle for a fundraiser.
I'd love some details on how to do a "finish-over-fabric" job... Looks excellent!!!
-robert
The Project Guitar tutorial probably is the best one. But here's roughly what I did:
1) get the body down to bare wood
2) Cut the fabric roughly to shape
3) use matte Modge Podge on the body and back of the fabric to glue the fabric down. Use a LOT of glue. I don't think you can use too much here because you don't want to miss any spots
4) use a squeegee to flatted the fabric and squeeze out extra glue (this is why you can't use too much in the step above)
5) let it dry for a few minutes and apply for Modge Podge over the top. Repeat til you get tired of it
6) Let dry over night, then use a sharp razor to trim the edges back to the body
7) sand the surface and edges. If the edges are frying instead of sanding, brush with super glue and let that harden. That will sand well.
8) some I think use a clear filler. I just buried it under a lot of clear coat.


