• TalkBass has been independent since 1998. Add your voice.
    Create a free account to reply to discussions, view embedded media, and browse with fewer display ads.
    Join freeLog in
    Want zero display ads or expanded classifieds tools? Compare plans.

Rattle Can Refinish Club


My next Refin is getting the Roth Rattlebomb treatment. It's a little pricy for the paint because you need 3 or 4 different cans of the stuff but I'm going for one of those old school big flake paint jobs. If I feel real sporty I might even match the headstock but that depends on the neck I use.
 
My next Refin is getting the Roth Rattlebomb treatment. It's a little pricy for the paint because you need 3 or 4 different cans of the stuff but I'm going for one of those old school big flake paint jobs. If I feel real sporty I might even match the headstock but that depends on the neck I use.

I was thinking going the same route, but they don’t offer a flake and candy in a bronze.
 
View attachment 3415300

I don't do paint, but I do my own finishes. I'm king of the Minwax satin finish - no buffing - much easier than gloss, and it doesn't blind people in the audience or show fingerprints.

In the DIY spirit of this thread, I also baked the wood for the thumb rest so it'd match the baked body wood better.


Couple things:

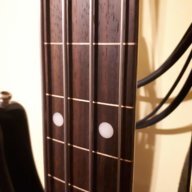
1- That Finger board is simply magnificent! Any idea what the wood is?

2- by "bake it" you do mean you put it in the oven right? temp, time? Super nice looking bass!
 
Couple things:

1- That Finger board is simply magnificent! Any idea what the wood is?

2- by "bake it" you do mean you put it in the oven right? temp, time? Super nice looking bass!

The fretboard is Pau Ferro - I picked out one that looked the least like rosewood from Warmoth’s options. My rationale was to stay as far away from CITES issues as possible should I need to cross a border.

The thumb rest was baked in a regular oven - 400F for an hour or two - forget the exact time. I was going for color - baking got me closer to the baked ash cap than any stain I had.

And thanks - I like the look, too.
 
  • Like
Reactions: Klondike
20190523_164453.jpg
20190523_165237.jpg
20190523_165340.jpg


Finished!
 
Bringing this back from the dead just to ask you- that fiesta red looking one in the picture with 3 basses... what where who when is that paint?!
 
  • Like
Reactions: Funkinthetrunk
Something happened to me tonight that had never happened before. I was doing some wet sanding to do of finish top paint coat before Poly on a project and I didn't pay a whole lot of attention on how much water I was getting in some a my channel holes. This project was one that I had cut down and filled in channel and control cavities. Long story short basswood body and filler swollen areas that I now have to allow to dry out and re sand and repaint.
 
20190628_190609.jpg
20190628_190539.jpg
A new crack from my new Jack cavity on the top. Sealer an paint apparently created a difference in drying rates which is why one gets cracks in logs etc.. forced wood glue in this morning. Will fill and re sand to repaint having learned something. Posting to keep others from doing the same
 
Last edited:
Just finished my first refin on this Peavey Fury. It got it's own thread but I figured I'd put the pics in here as well. Paint is base / clear hardware store lacquer (I assume acrylic lacquer but the cans didn't actually specify). I went through 2 cans of the copper trying to get the metalic to lay down evenly but finally had to settle for good enough so there's a bit of tiger striping in it. Did a bit of artificial relicing to draw attention away from the less than perfect paint.
This will likely get stripped again at some point to correct some of the flaws but for now, this is what it looks like.
20190626_135009.jpg
20190626_134750.jpg
 

Latest posts