Enjoy the benefits of a premium membership!
Upgrade Account
-
TalkBass has been independent since 1998. Add your voice.
Create a free account to reply to discussions, view embedded media, and browse with fewer display ads.
Join free Log in
Want zero display ads or expanded classifieds tools? Compare plans.
You are using an out of date browser. It may not display this or other websites correctly.
You should upgrade or use an alternative browser.
You should upgrade or use an alternative browser.
SBO 2022 - Minimalist Medium Scale - Scratch Build
- Thread starter BishopJP
- Start date
More options
Who Replied?

The Illuminati moved the turret on my router's depth stop...
...all part of the "Master Plan"!
...all part of the "Master Plan"!

Fixing truss rod channels..
I only needed to fix one of them, but I wanted them to be the same and use the same process, so I did both of them.
Routed out the end of the channel with a 1/2" router bit and glued in some scrap material...
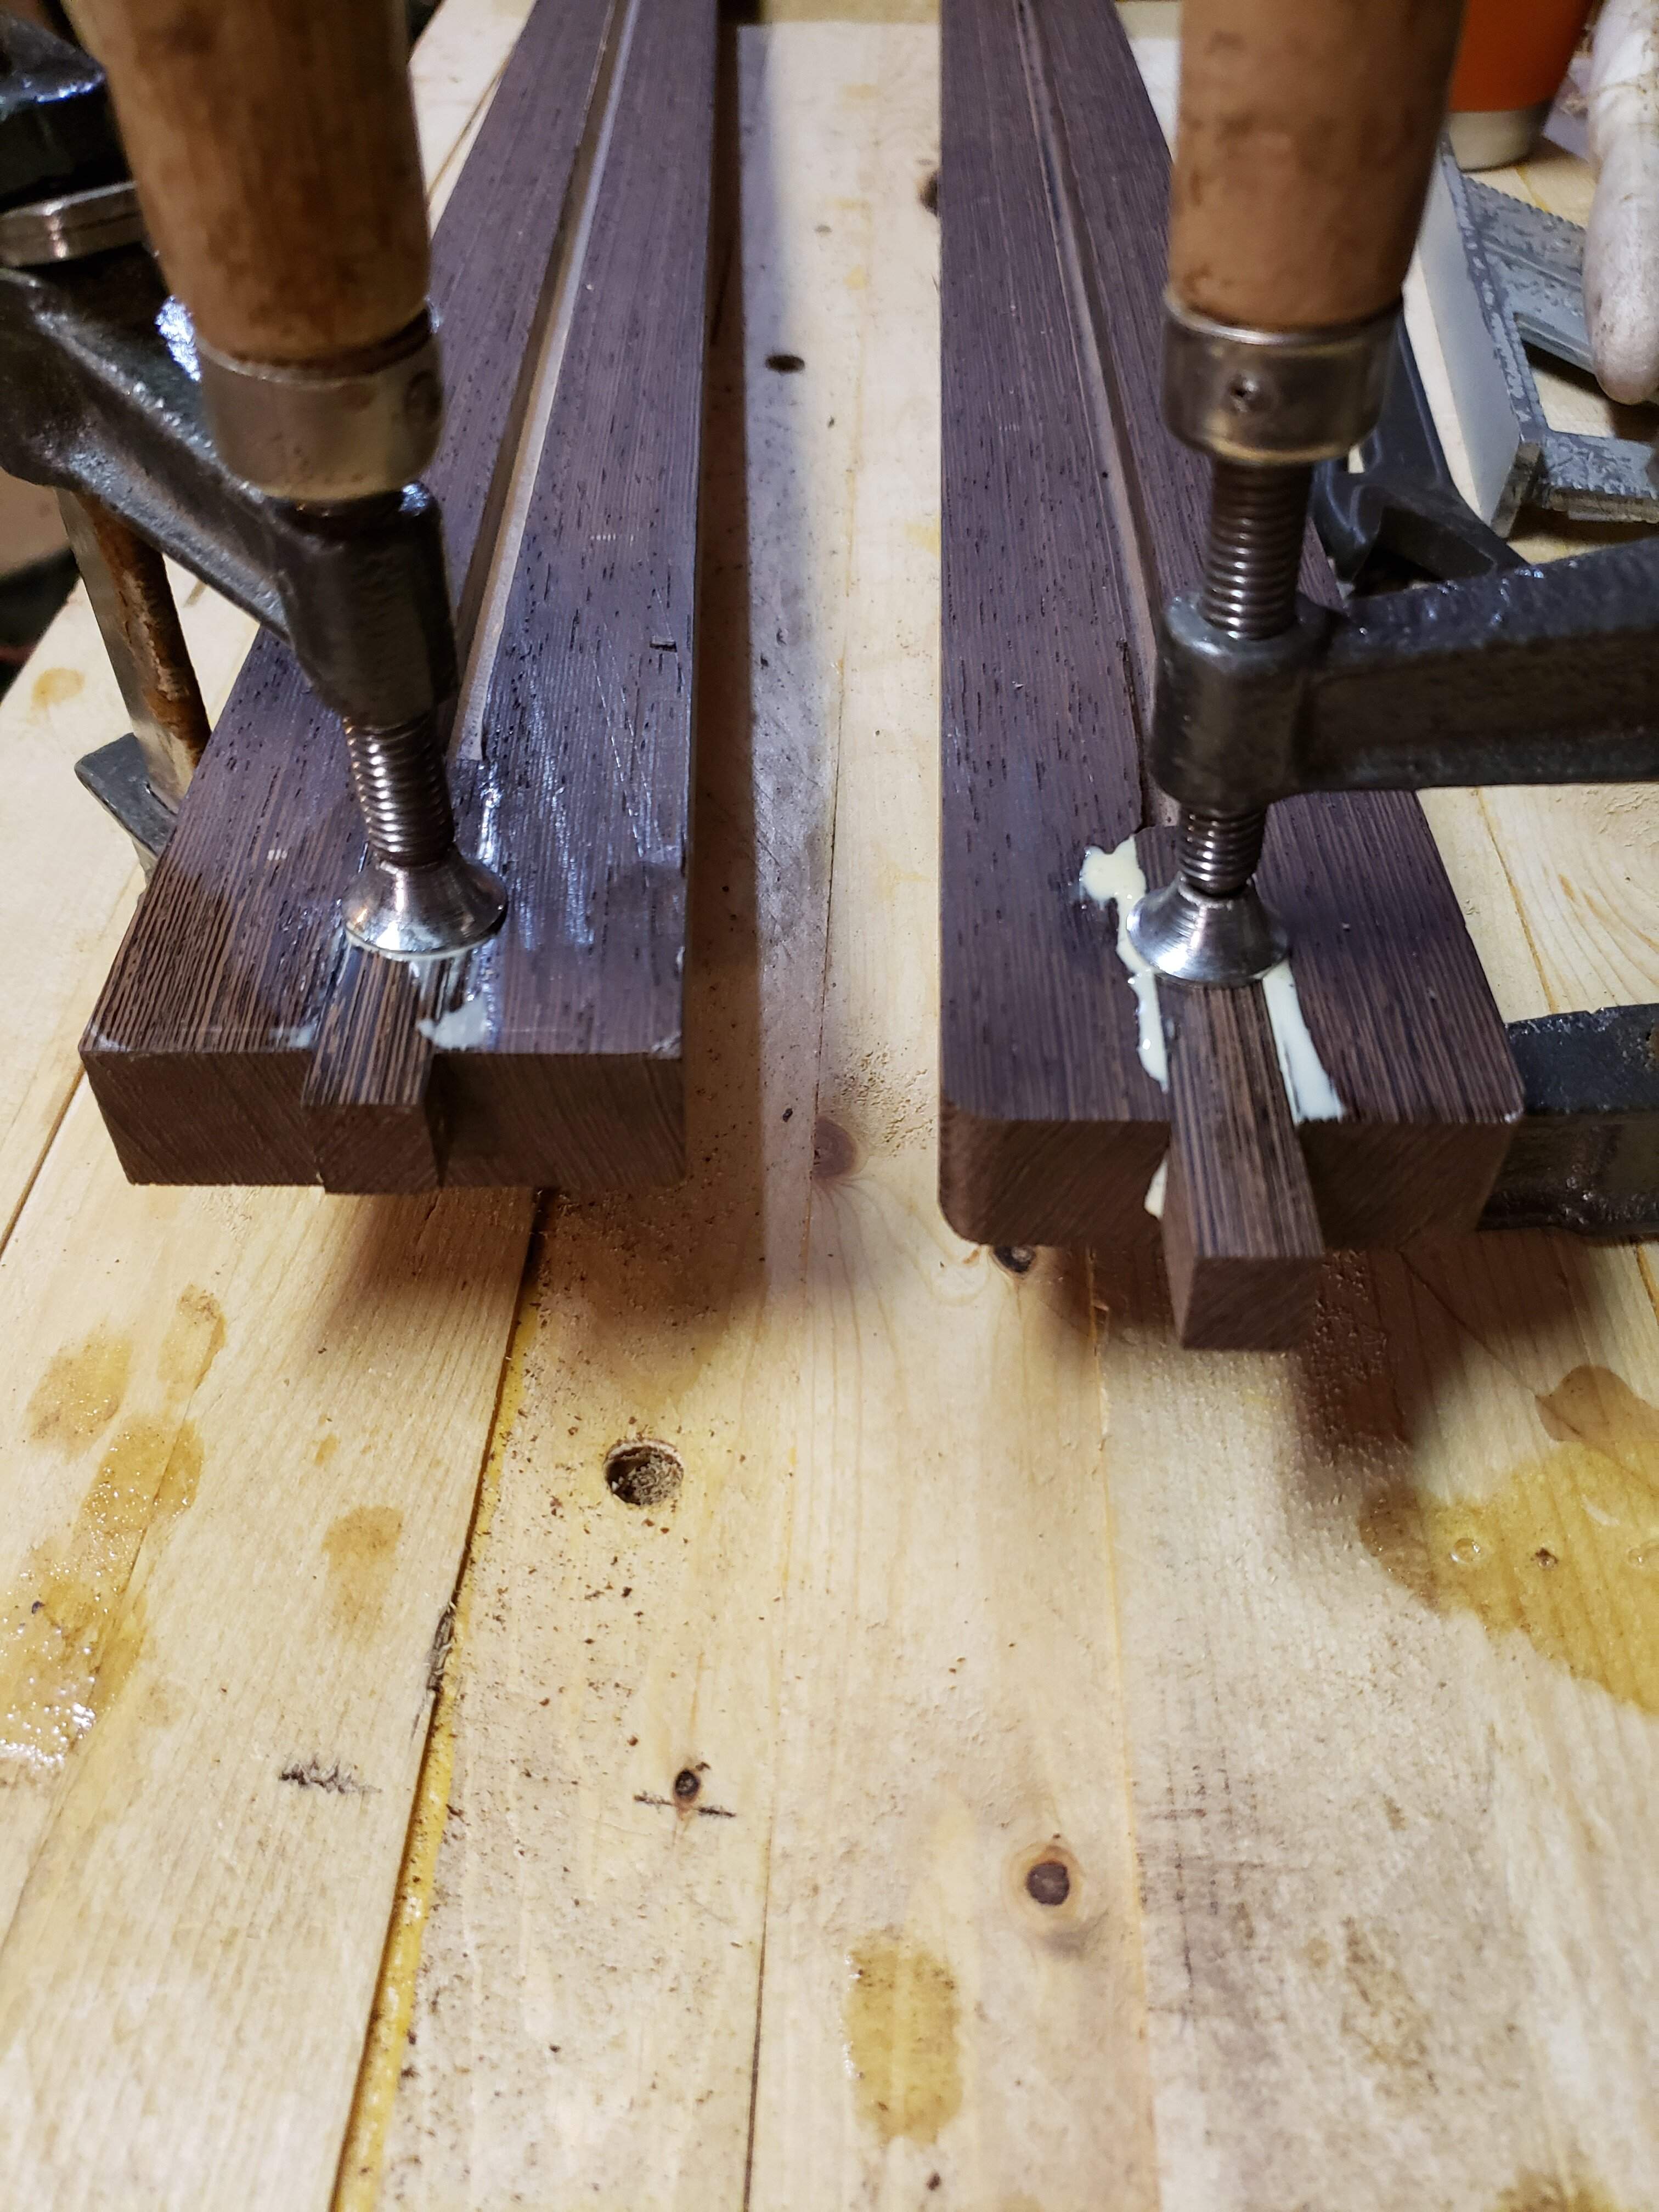
Using the same template and 1/4" ball-nose bit, I re-routed the end of the channel through the end. Then, I used a 3/8" bit to widen and deepen the end of the channel...
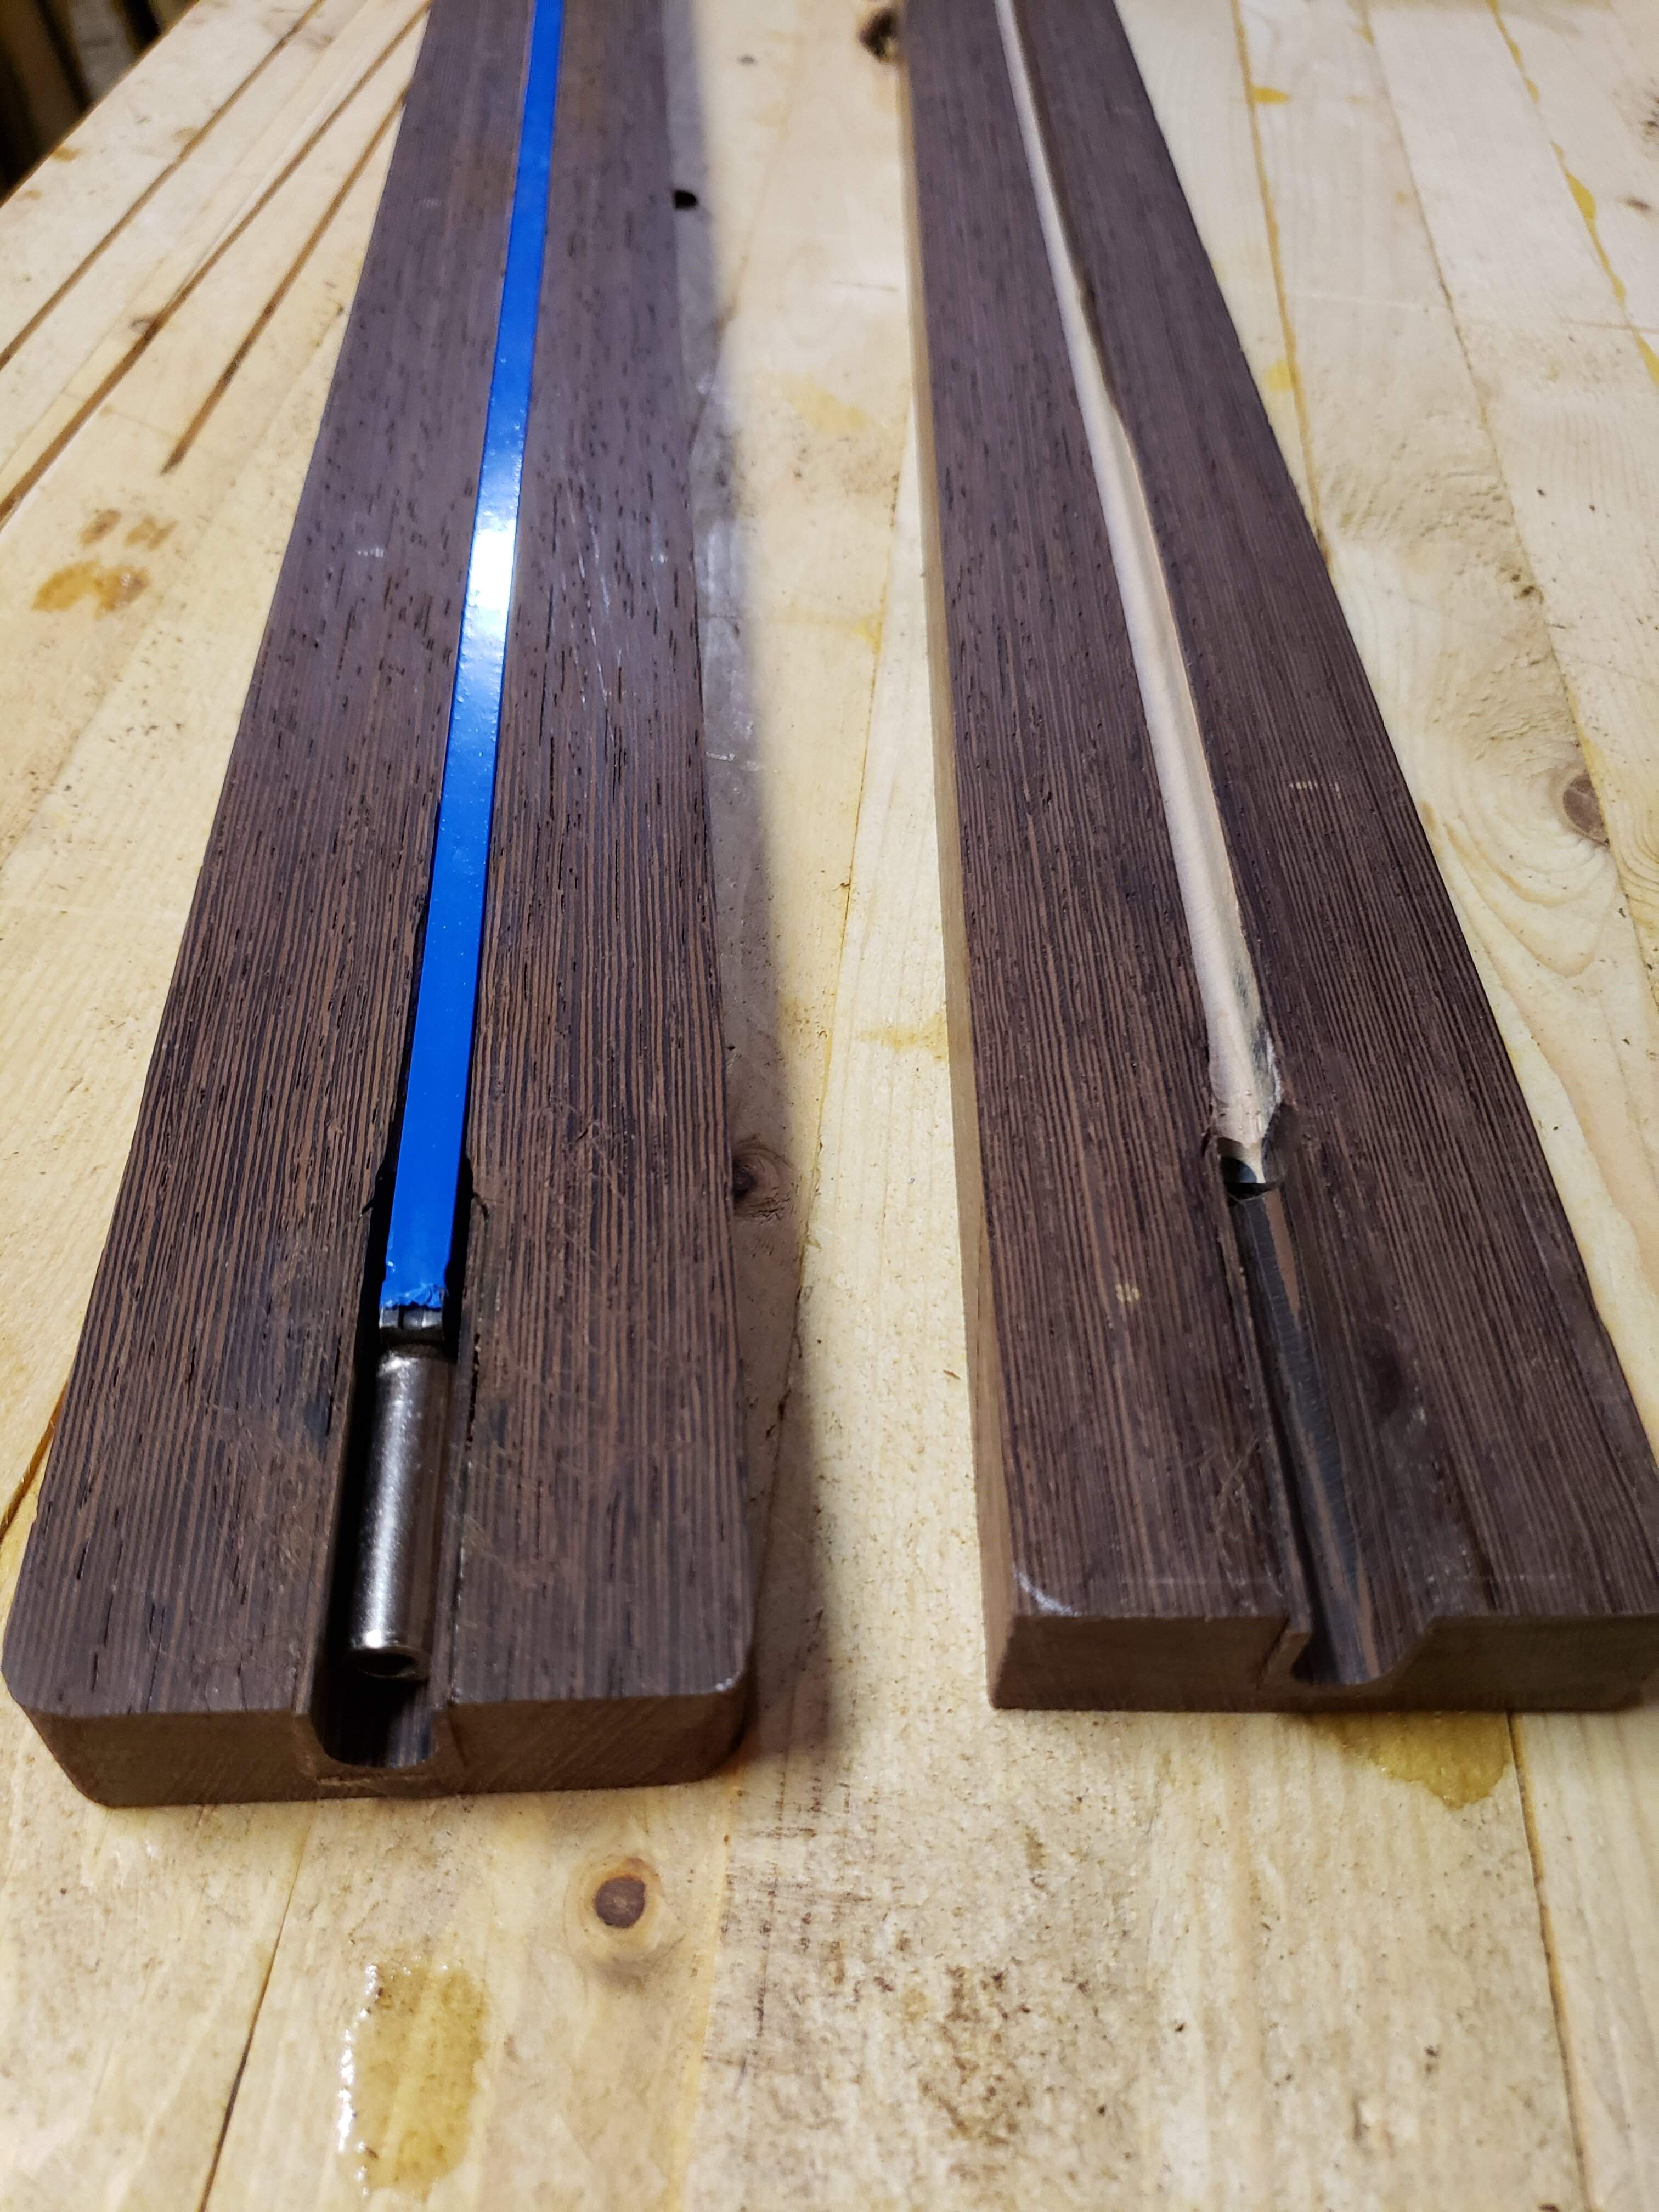
...snug fit!
The access port to the truss rod channel will not be the clean, circular hole I wanted, but it will be good enough. And it's a lot easier (and more accurate) to install the rods this way.
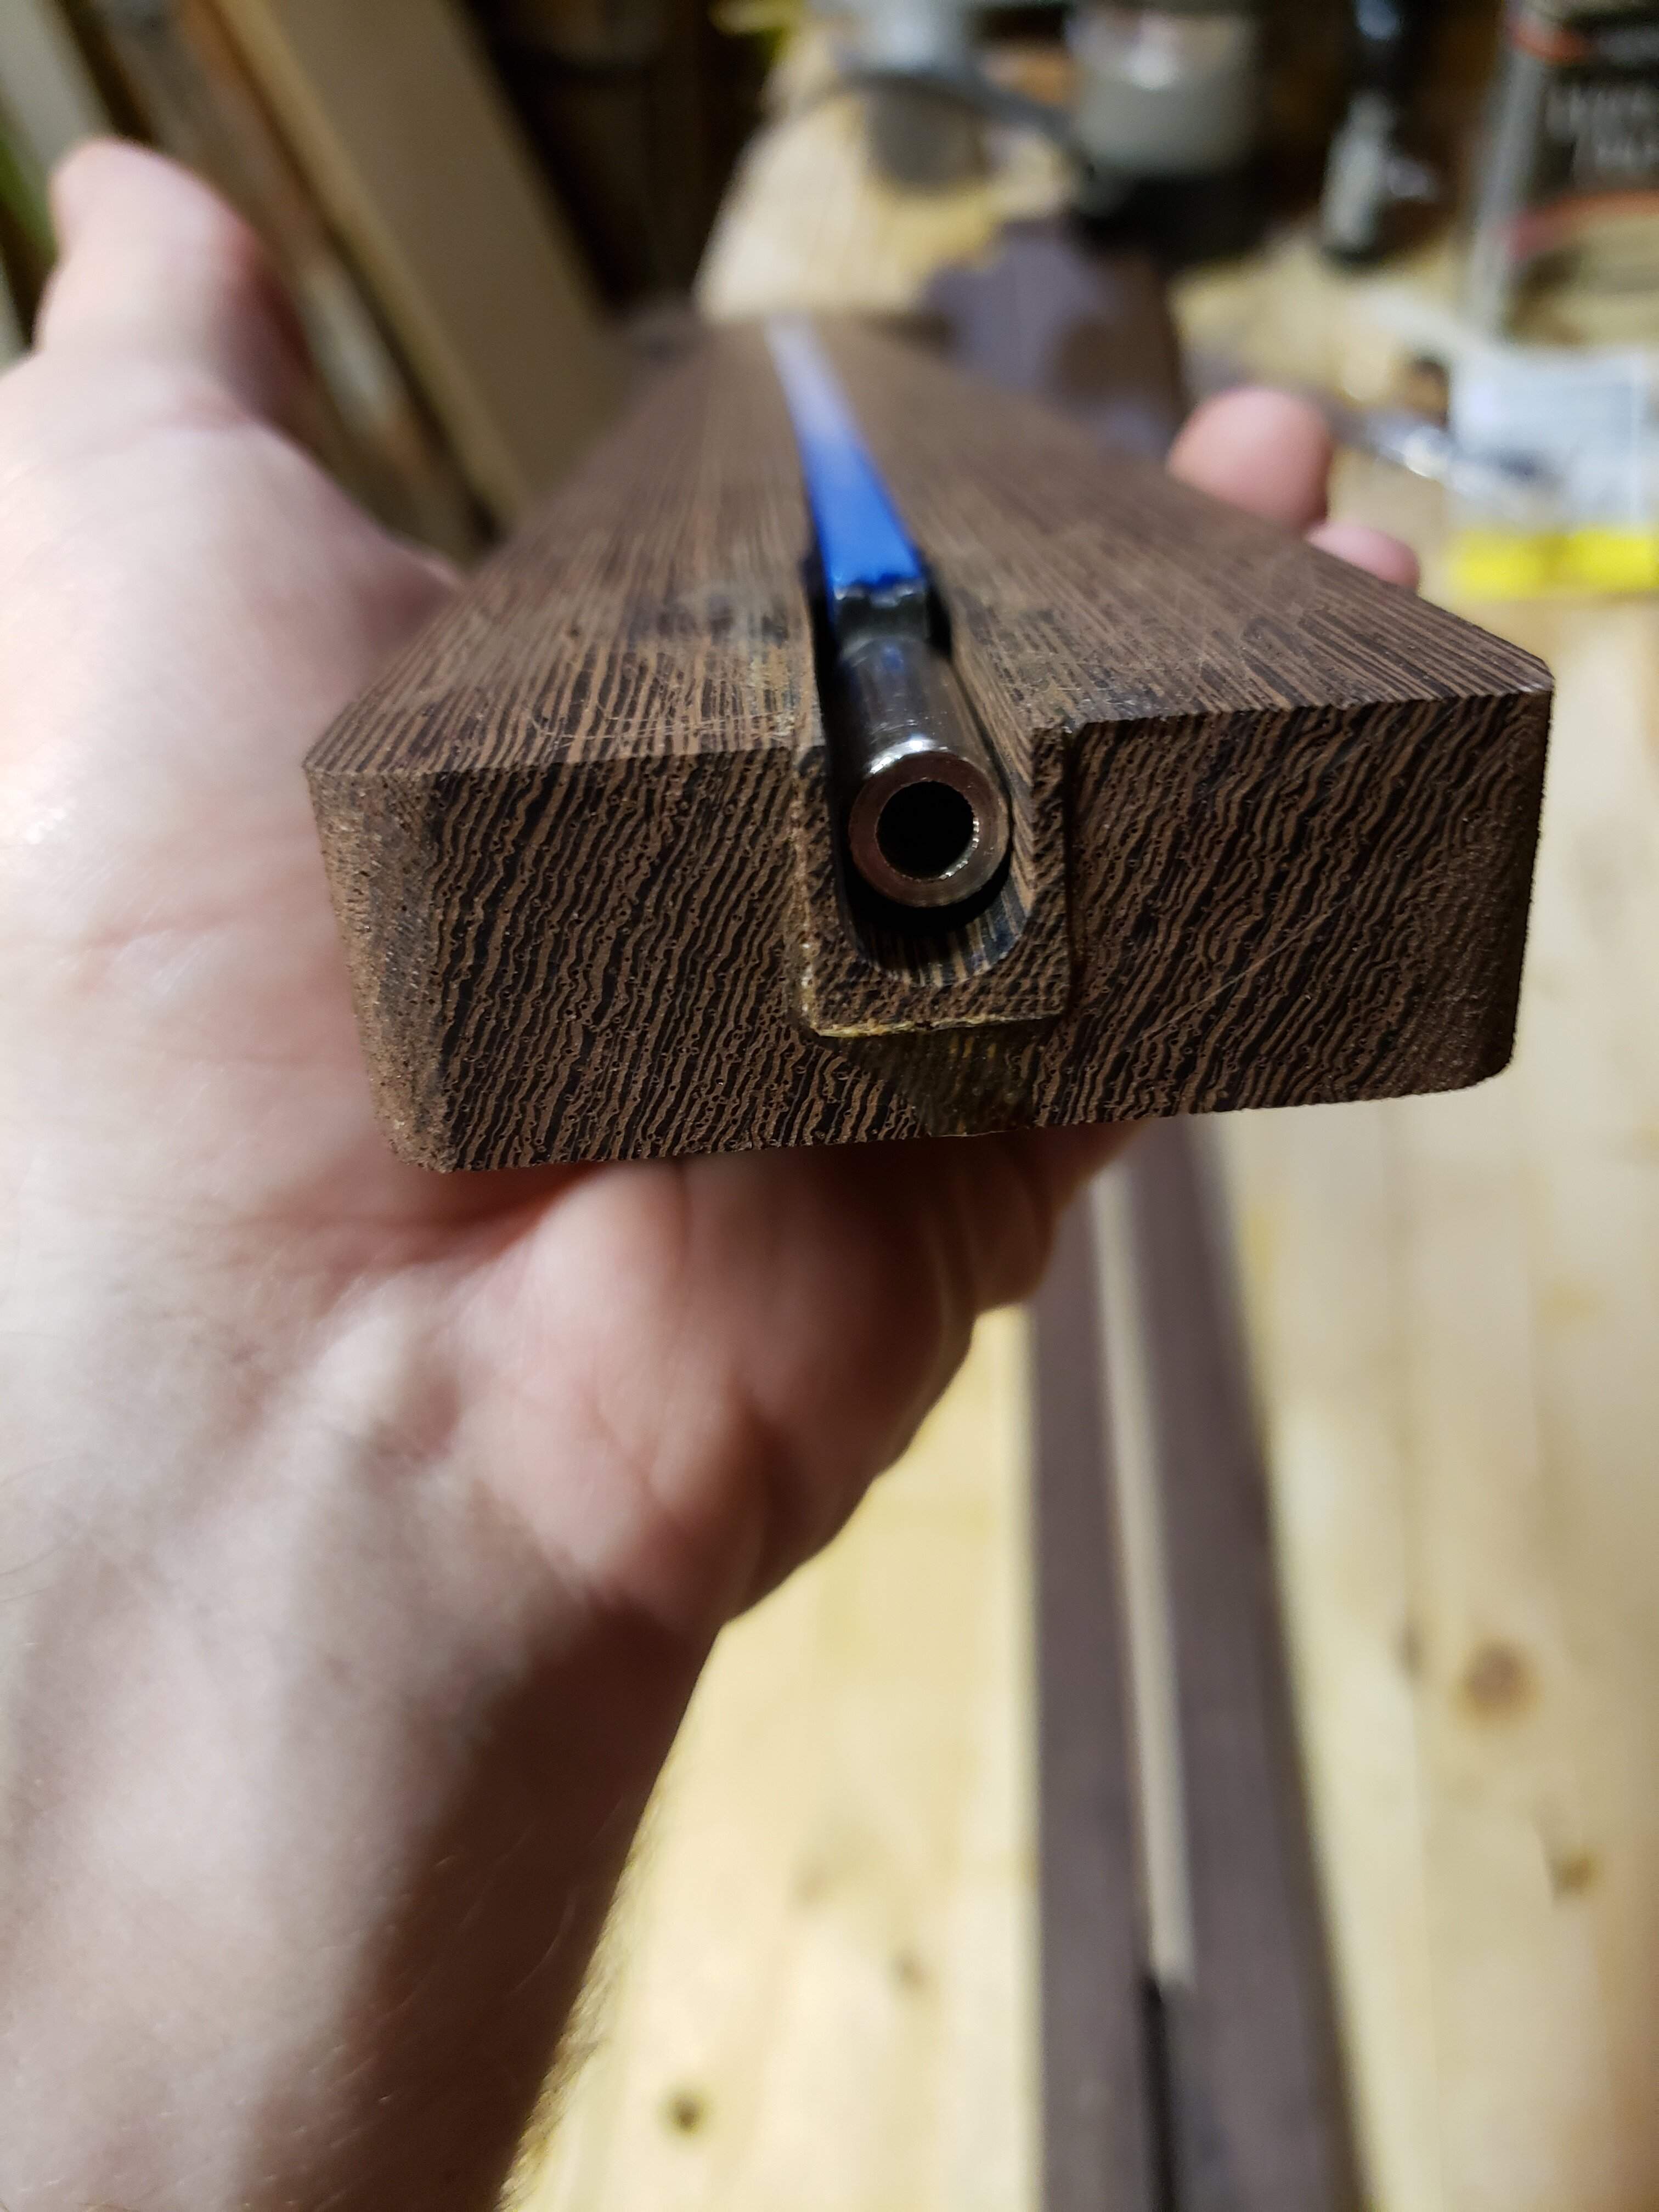 ...once the fretboard is glued on, there will be a small gap of the adjuster nut, but I can live with that.
Also, the patch I glued in is not sanded flush yet, so it will be less obvious. Should be darn close to invisible, if I do say so myself!
That's all I got at the moment.
I only needed to fix one of them, but I wanted them to be the same and use the same process, so I did both of them.
Routed out the end of the channel with a 1/2" router bit and glued in some scrap material...
Using the same template and 1/4" ball-nose bit, I re-routed the end of the channel through the end. Then, I used a 3/8" bit to widen and deepen the end of the channel...
...snug fit!
The access port to the truss rod channel will not be the clean, circular hole I wanted, but it will be good enough. And it's a lot easier (and more accurate) to install the rods this way.
Also, the patch I glued in is not sanded flush yet, so it will be less obvious. Should be darn close to invisible, if I do say so myself!
That's all I got at the moment.
I umm... totally did that on purpose!You even matched the grain direction.
Nice.
Have not posted in a bit, but there has been a fair amount of progress. Due to my recently hired manager-in-training, I was able to get another day off last week! That's 2 days in the same week!
So I got some more work on the builds; prepare for the picture dump!
Continuing with the necks, I cut the headstocks to shape same as I did the bodies; jig saw followed by template routing...
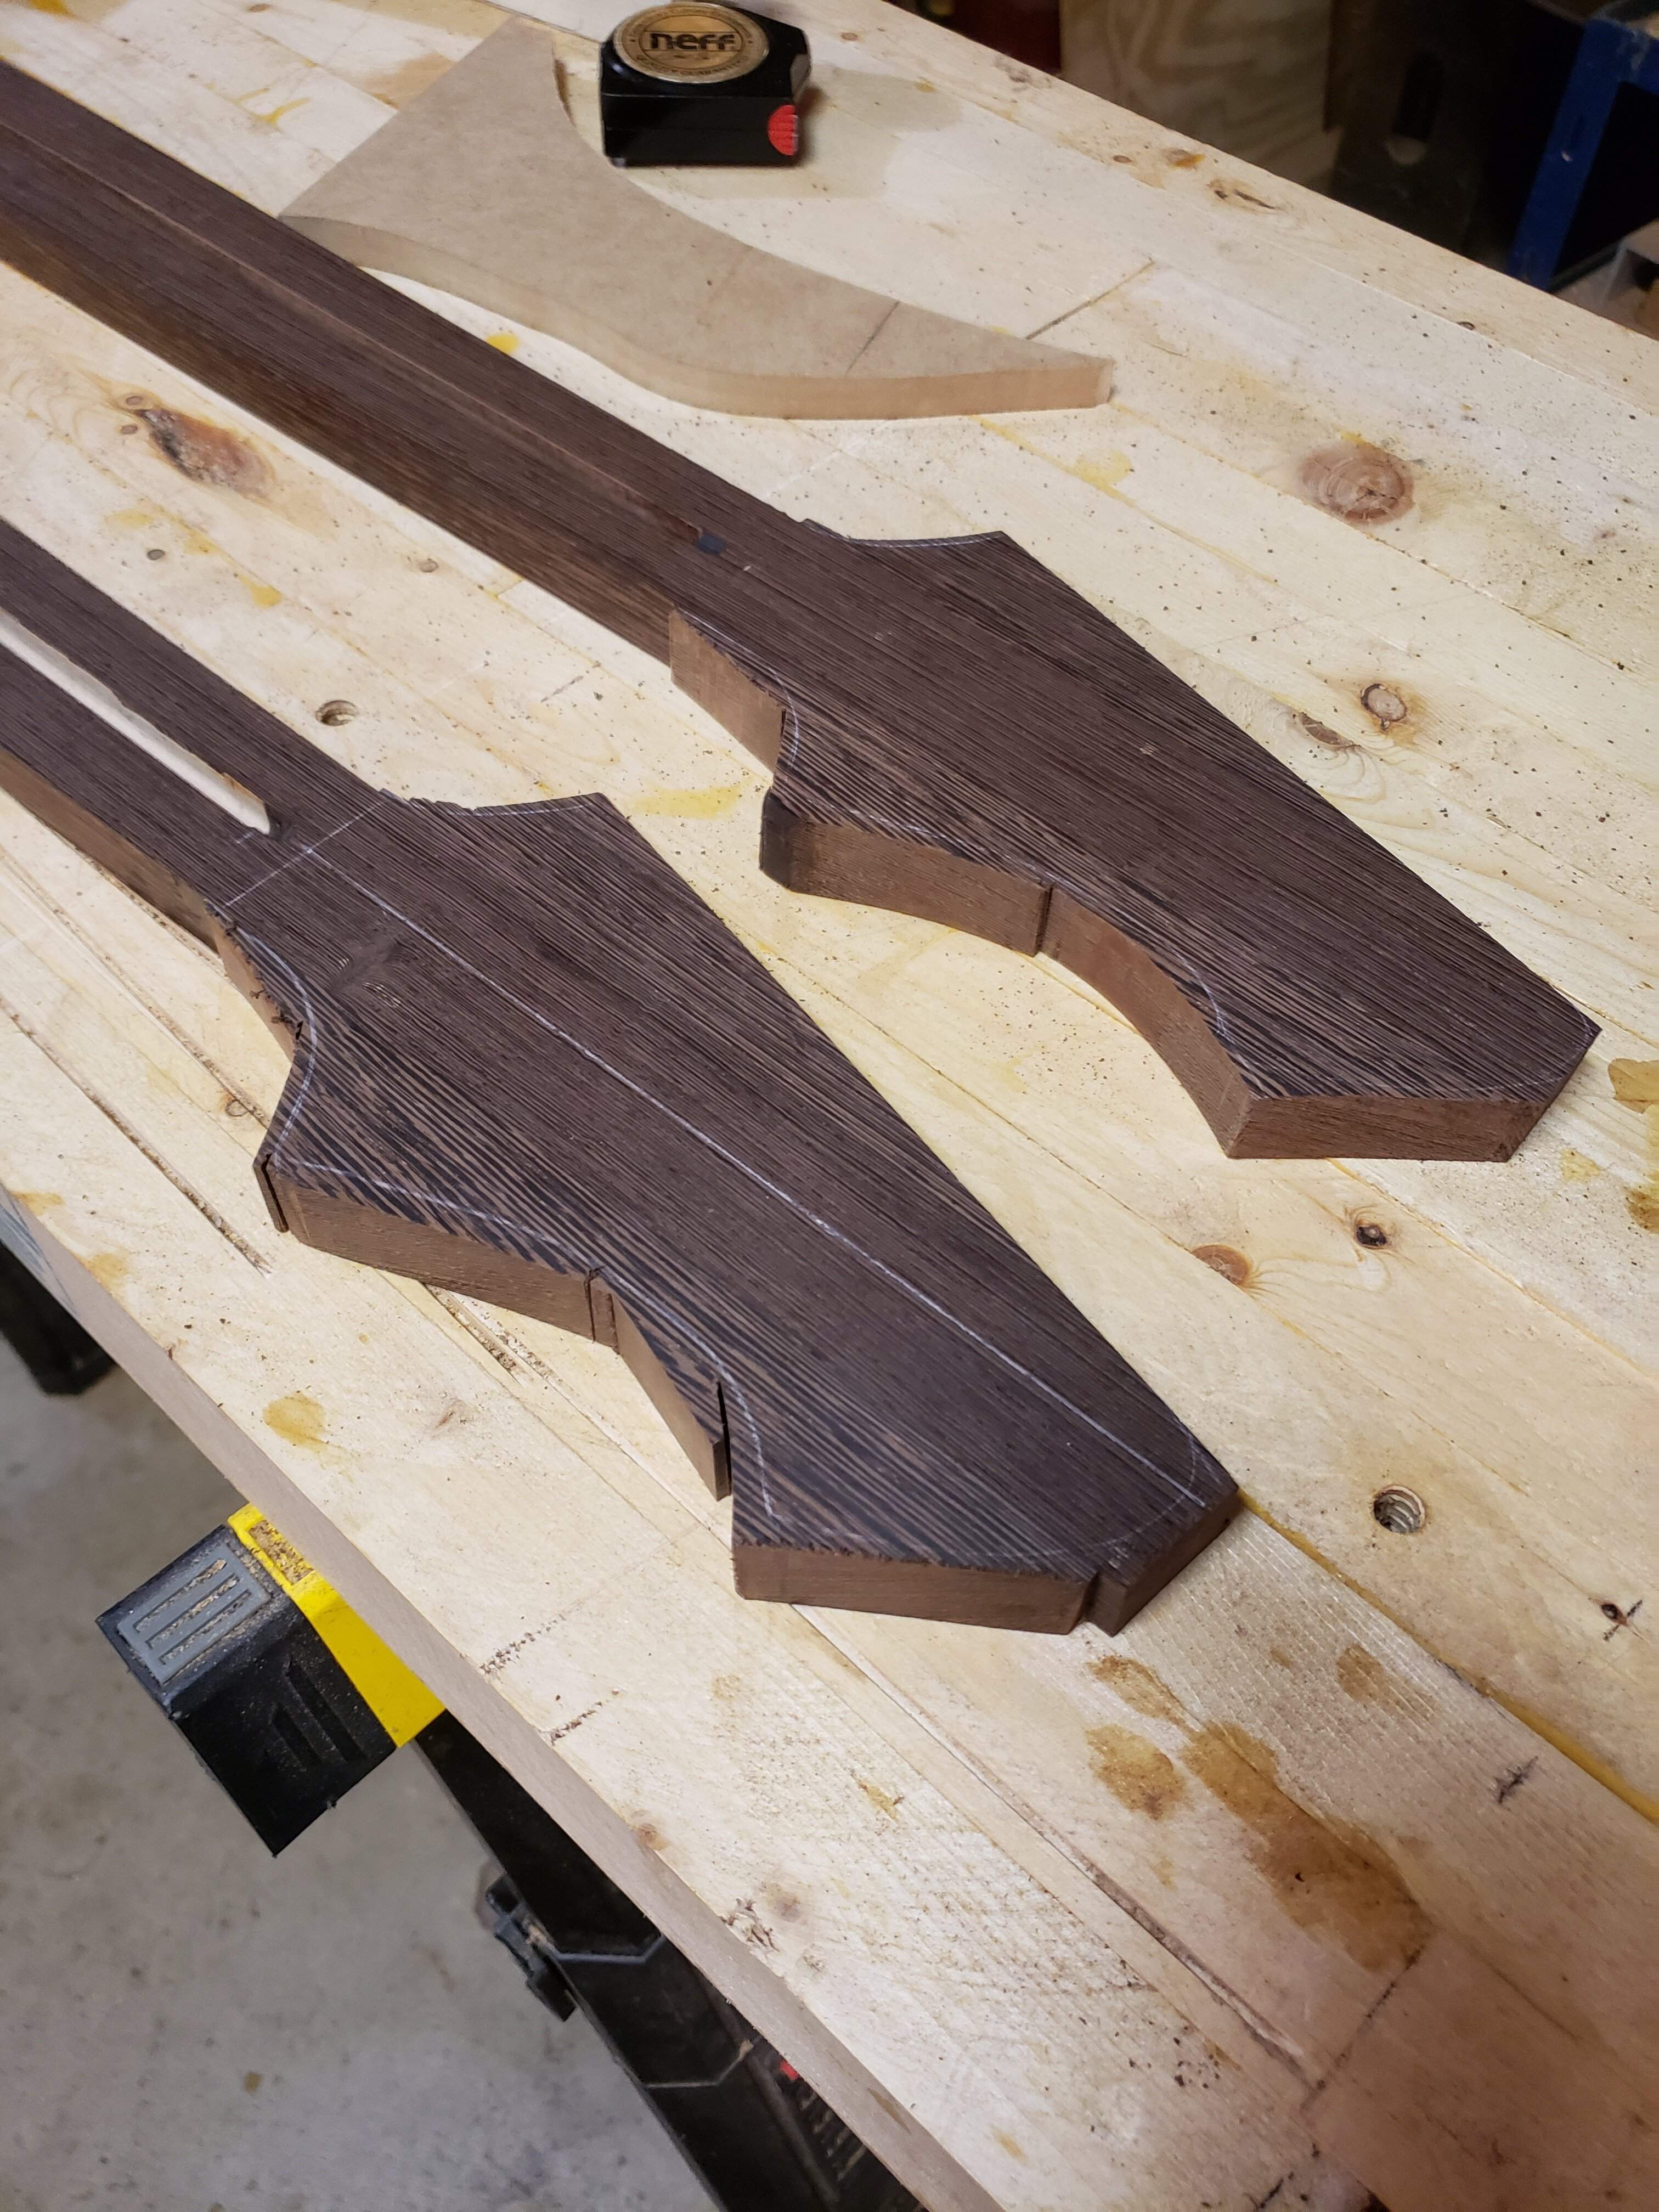
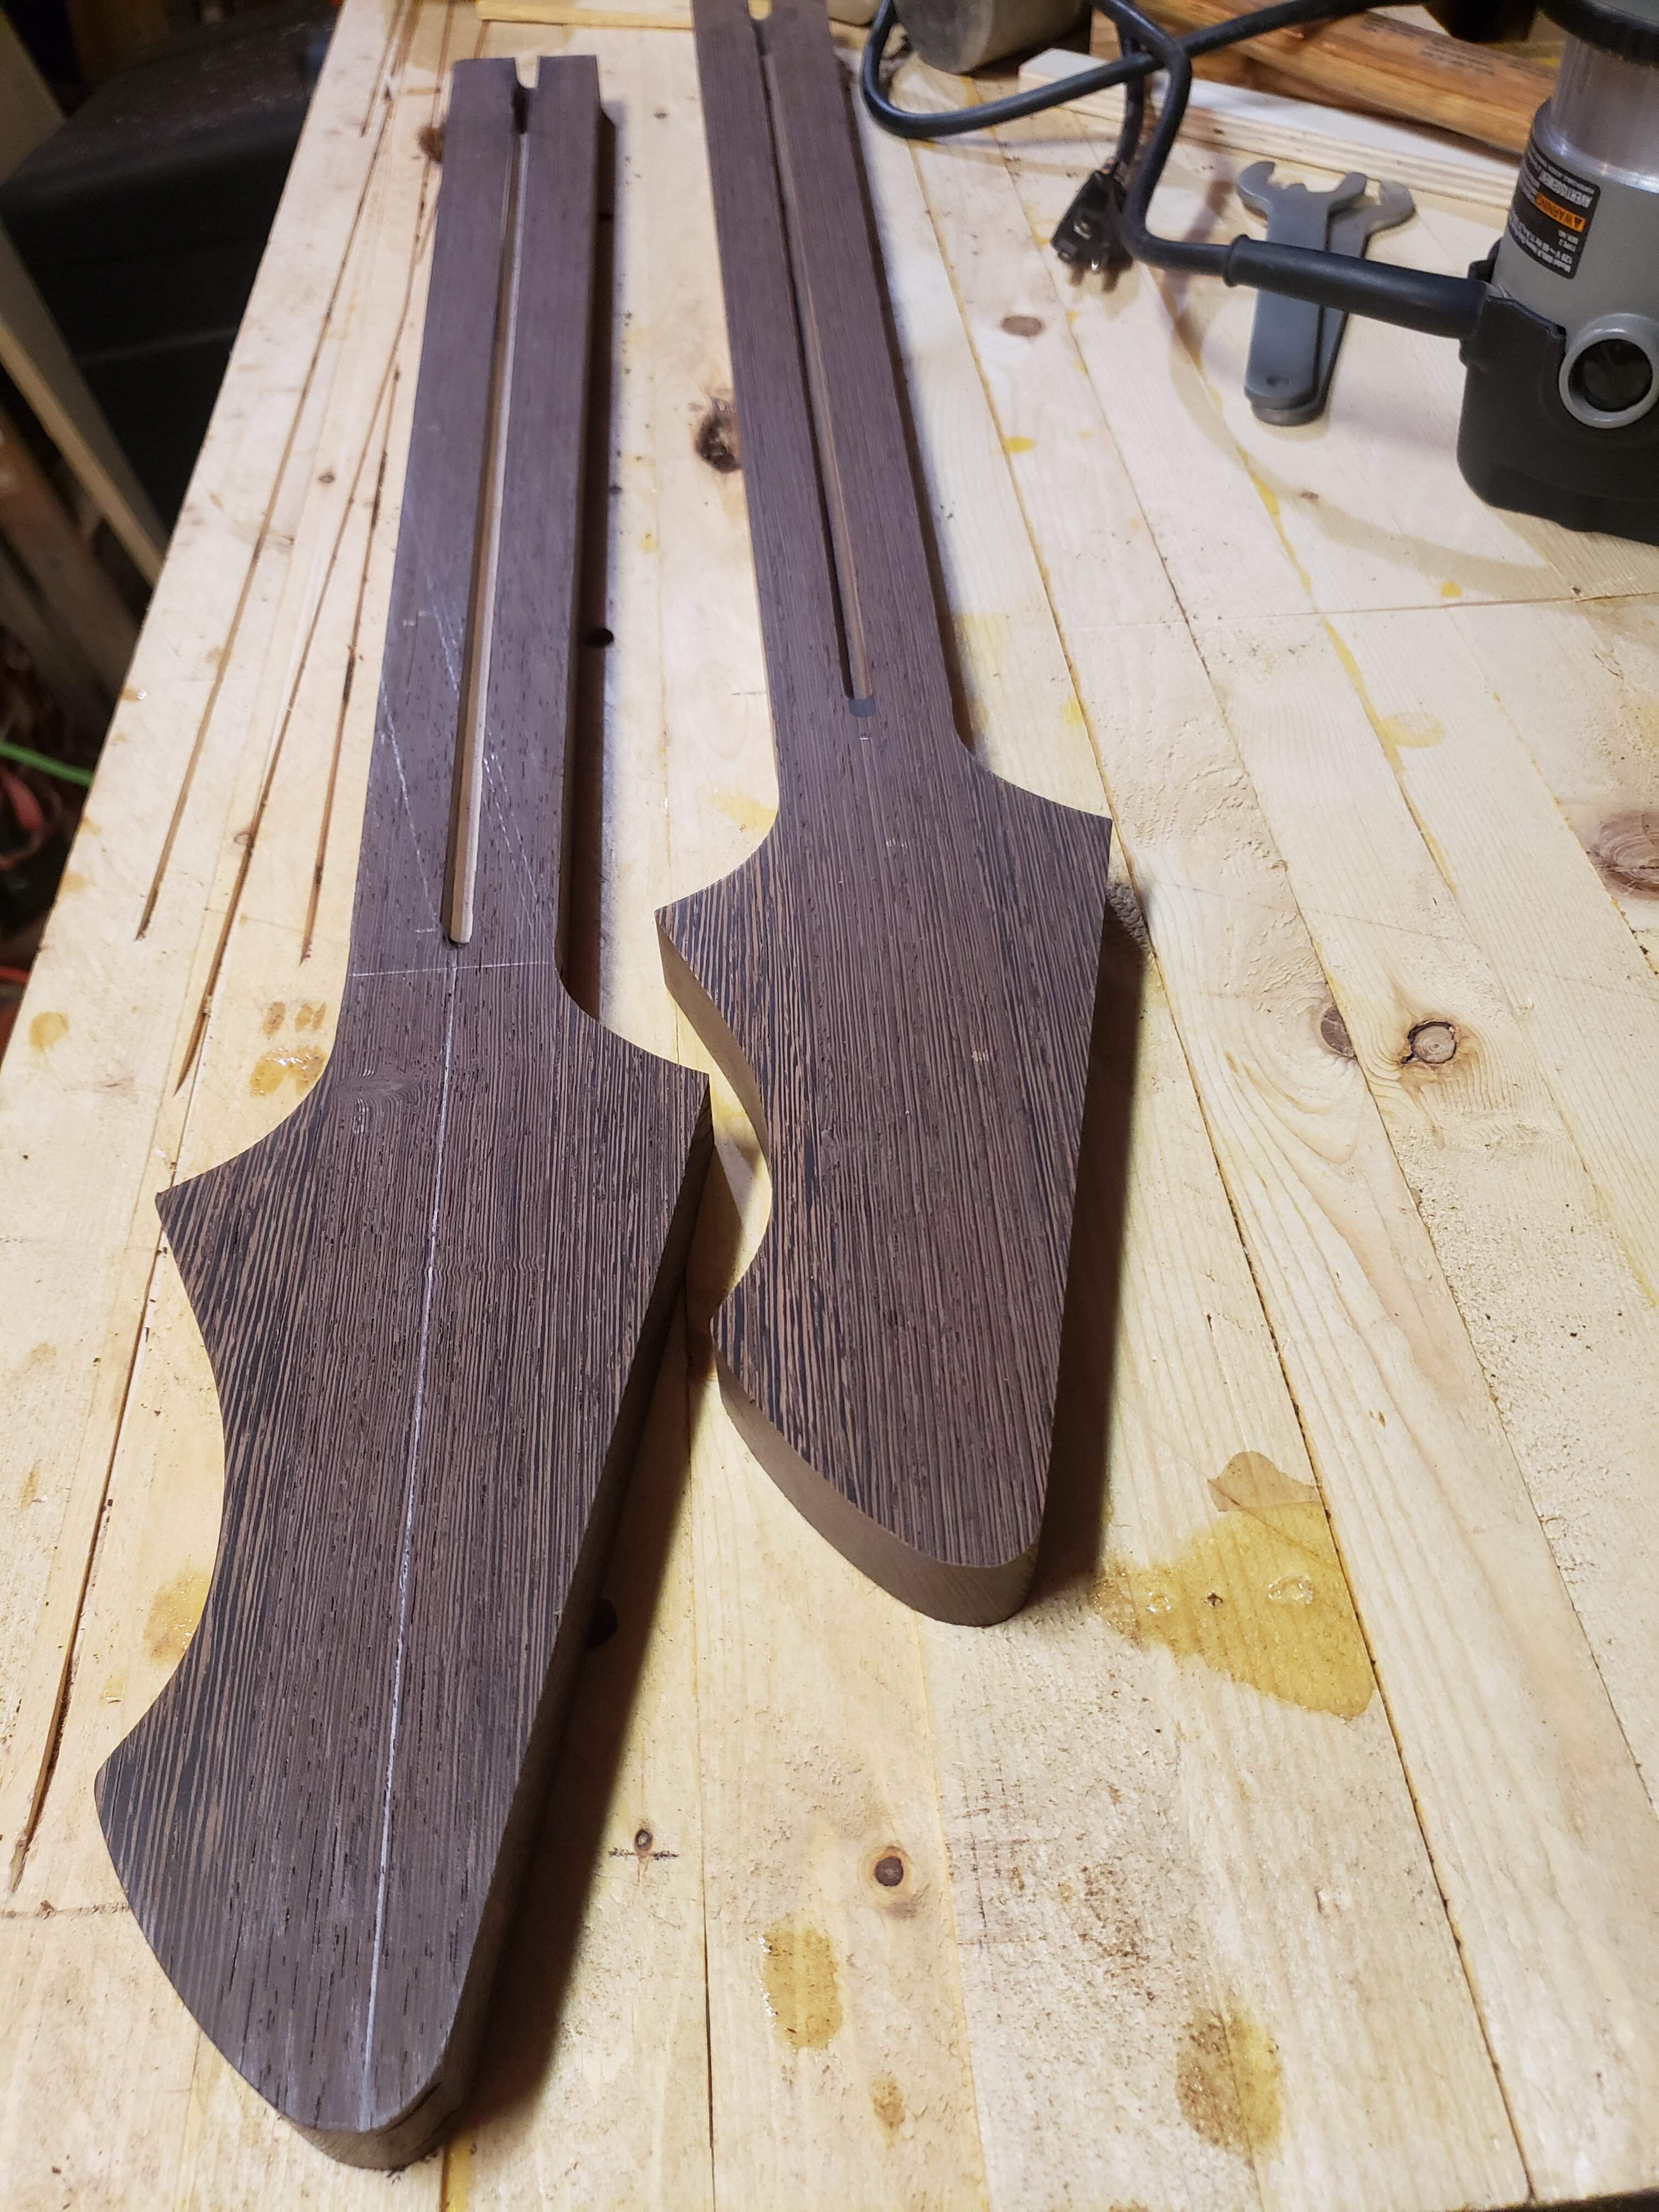
Having finalized the shape, it was time to get the necks fastened to the bodies.
I made a drill template that fits into the neck pocket...
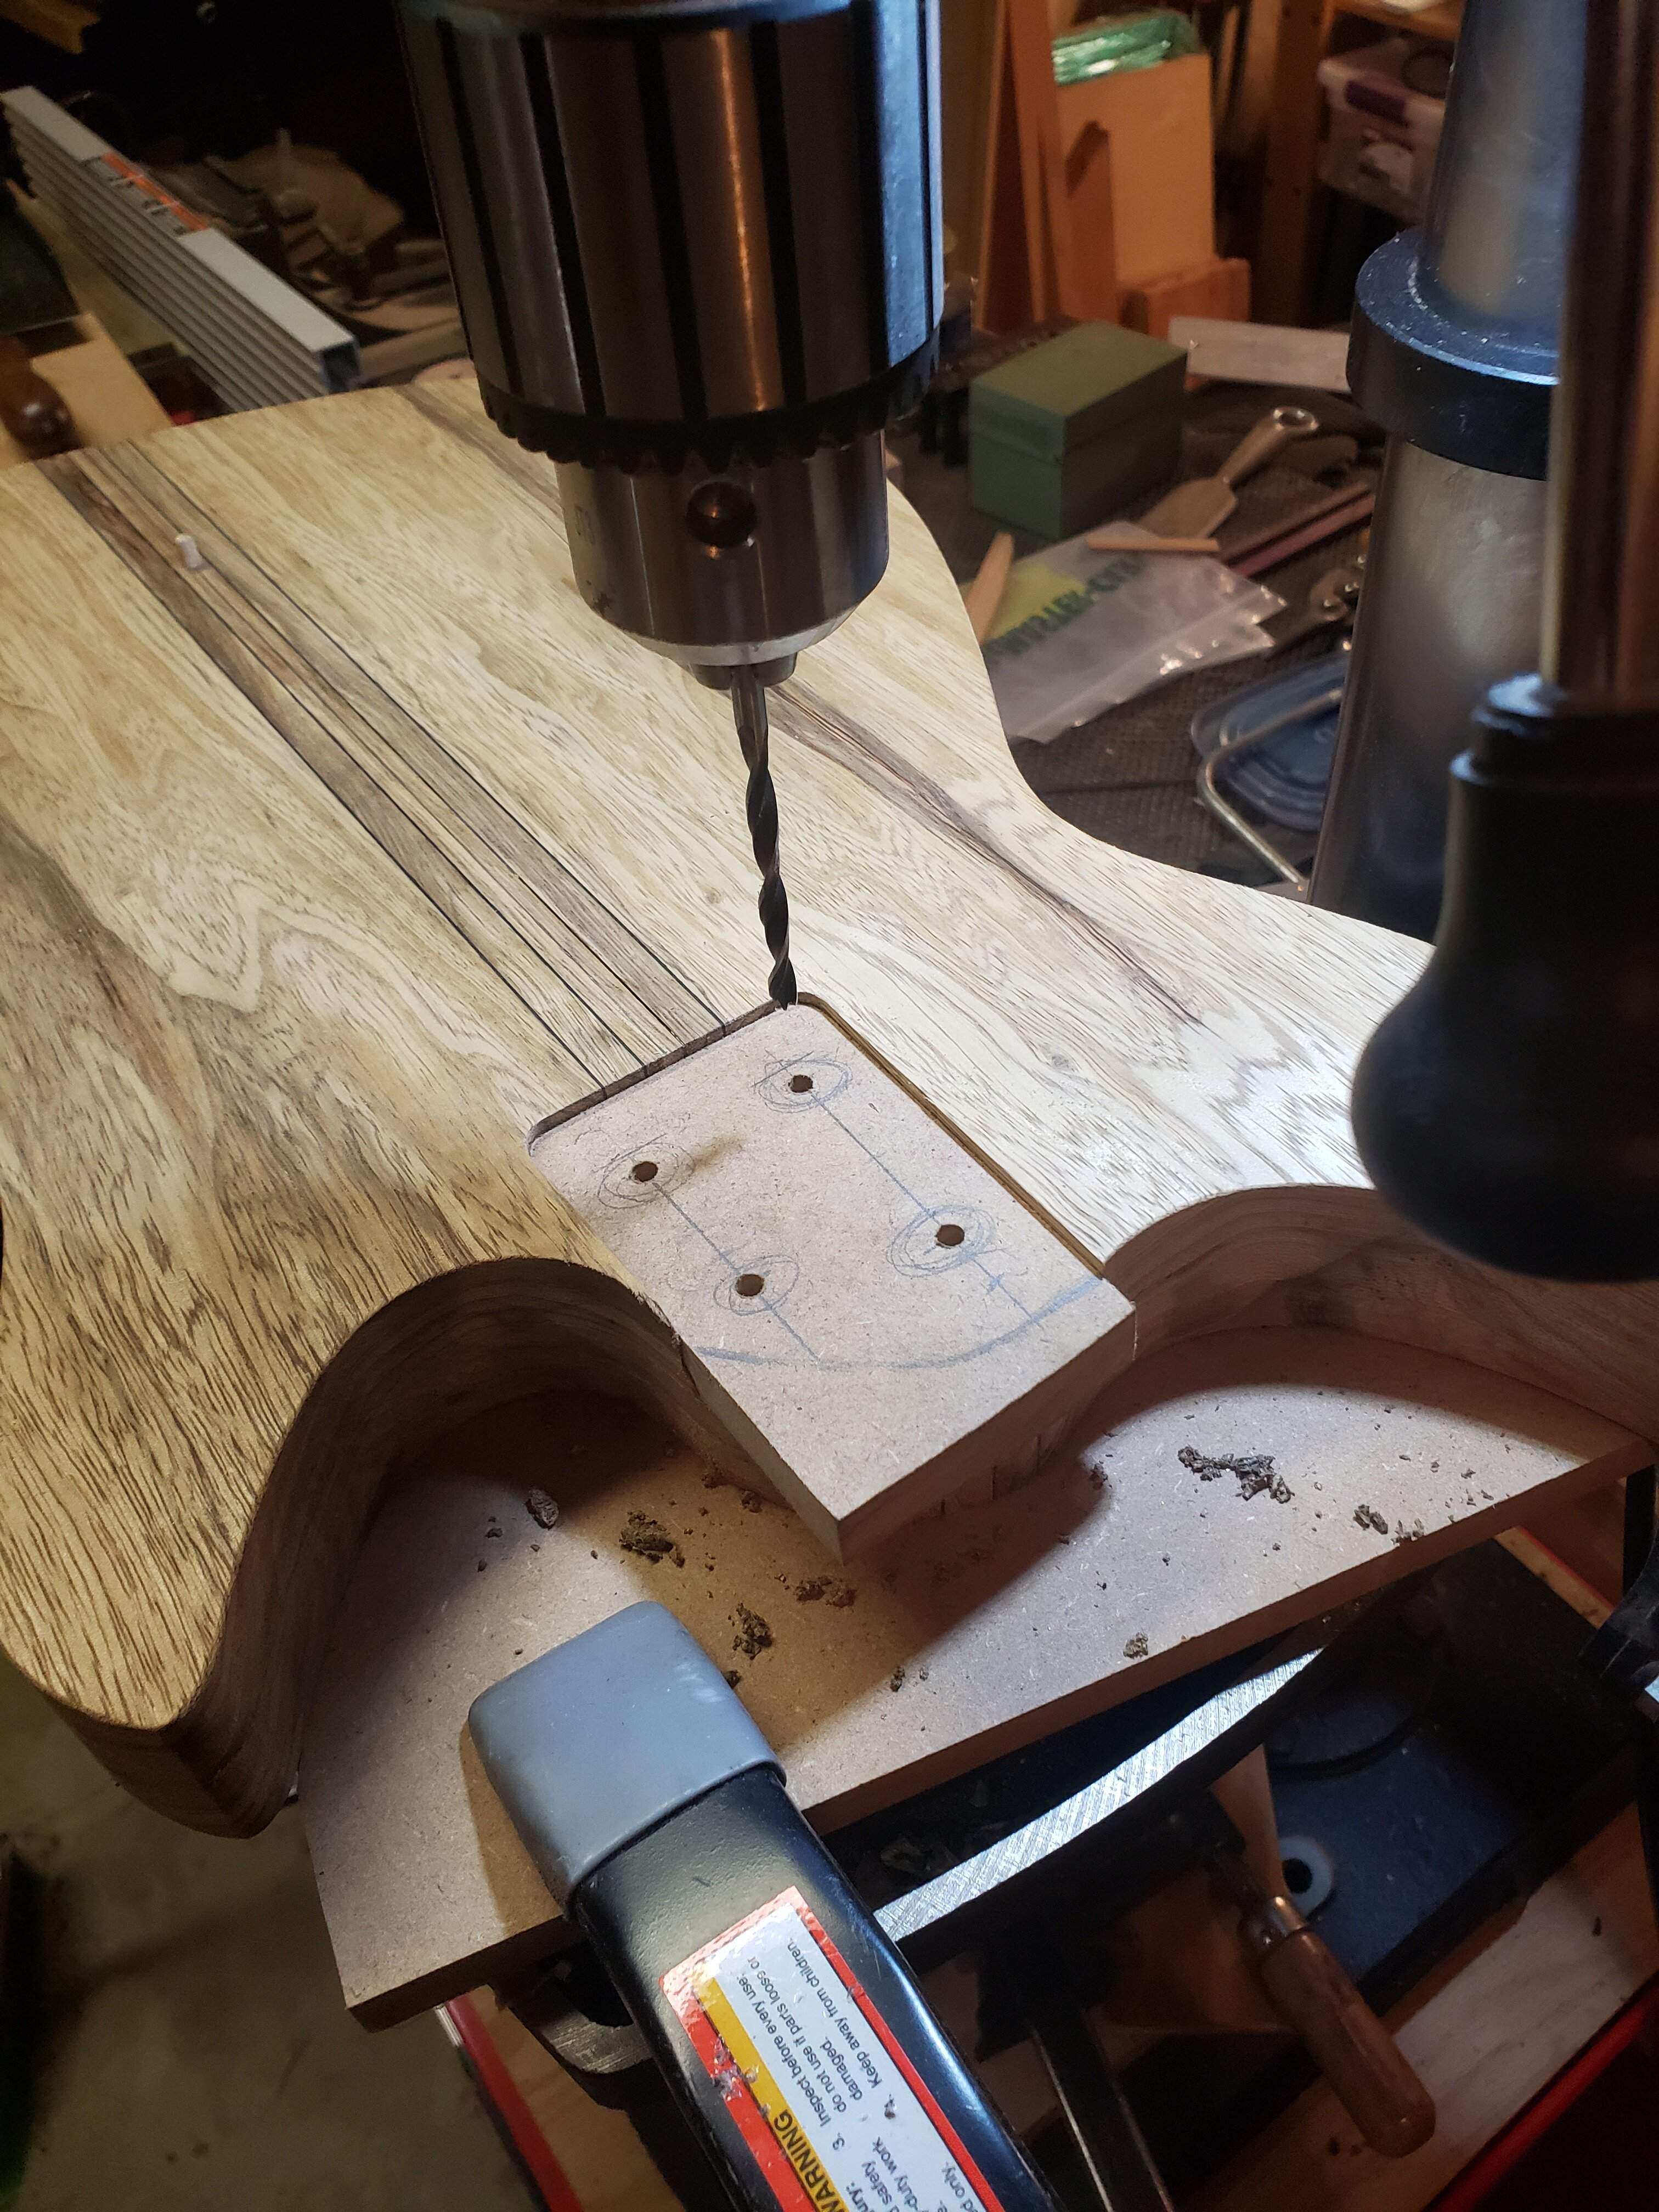 ...and drilled the screw holes using a brad-point bit. I set the stop on the drill press so the point of the bit would just barely poke through the other side.
Then I flipped the body over, using the holes drilled from the other side as a center and another brad point bit, I drilled holes for the recessed ferrules.
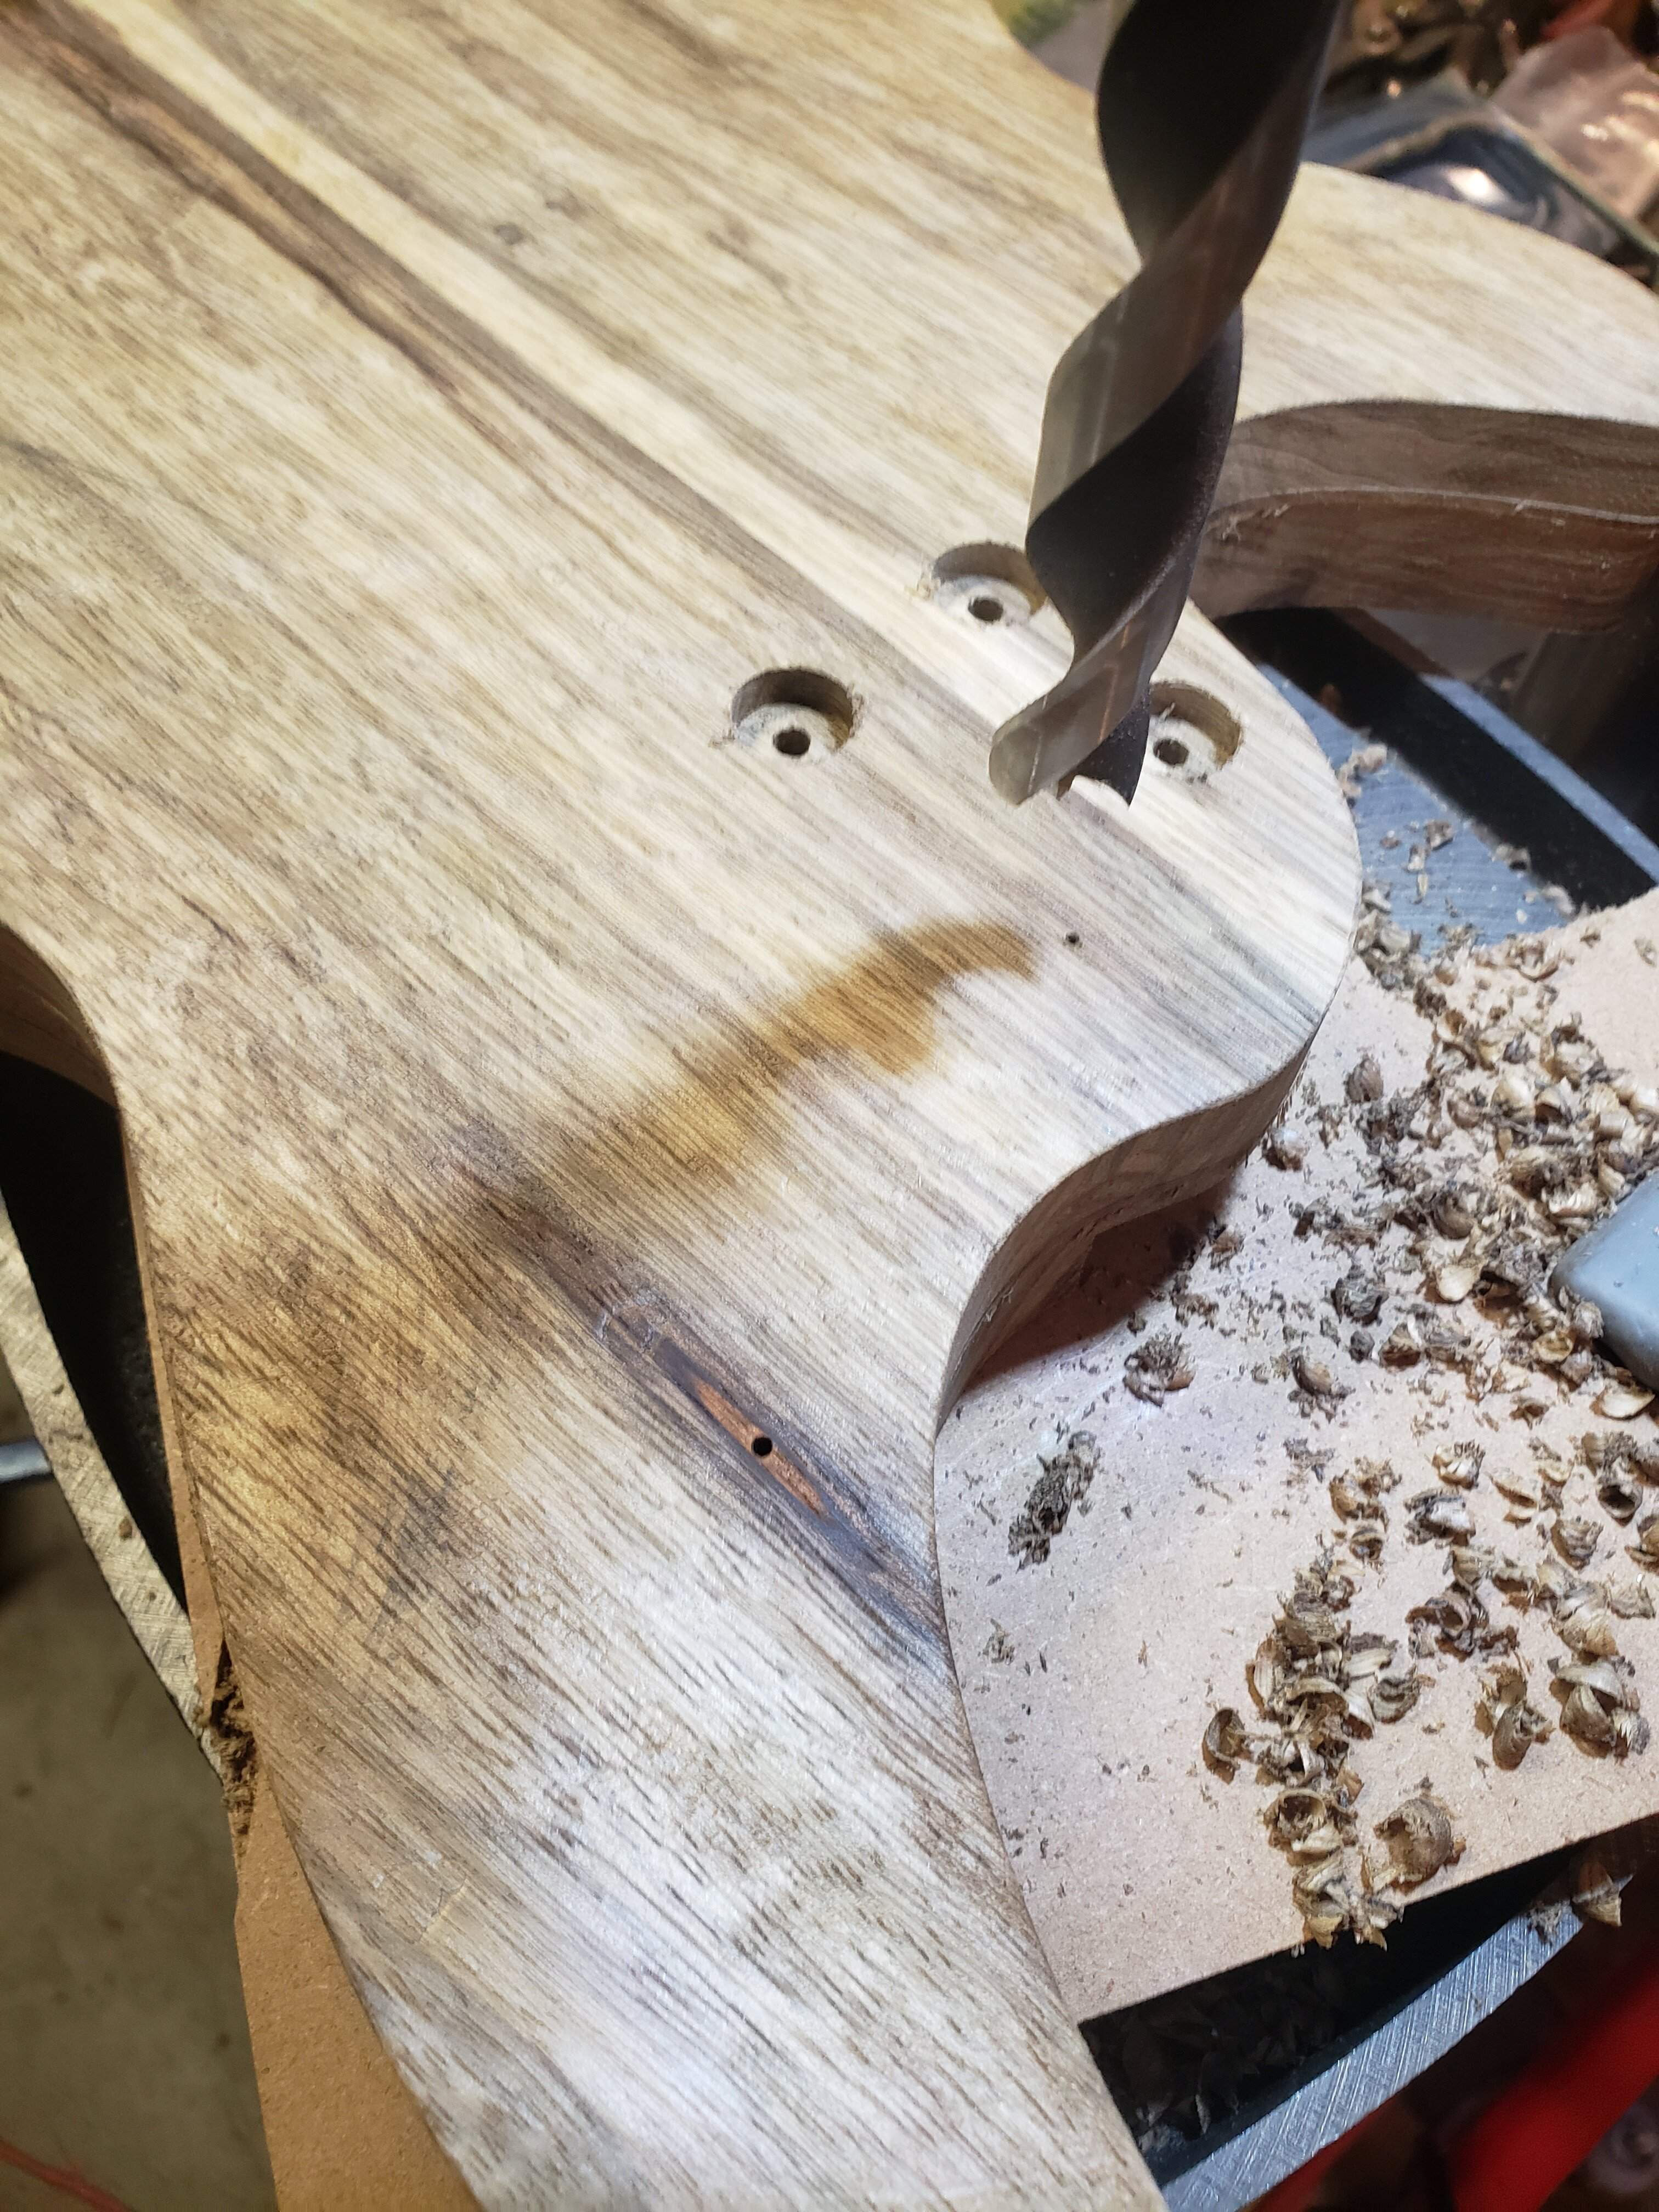
Moving onto the necks, I put the neck in the neck pocket and clamped to the drill press table...
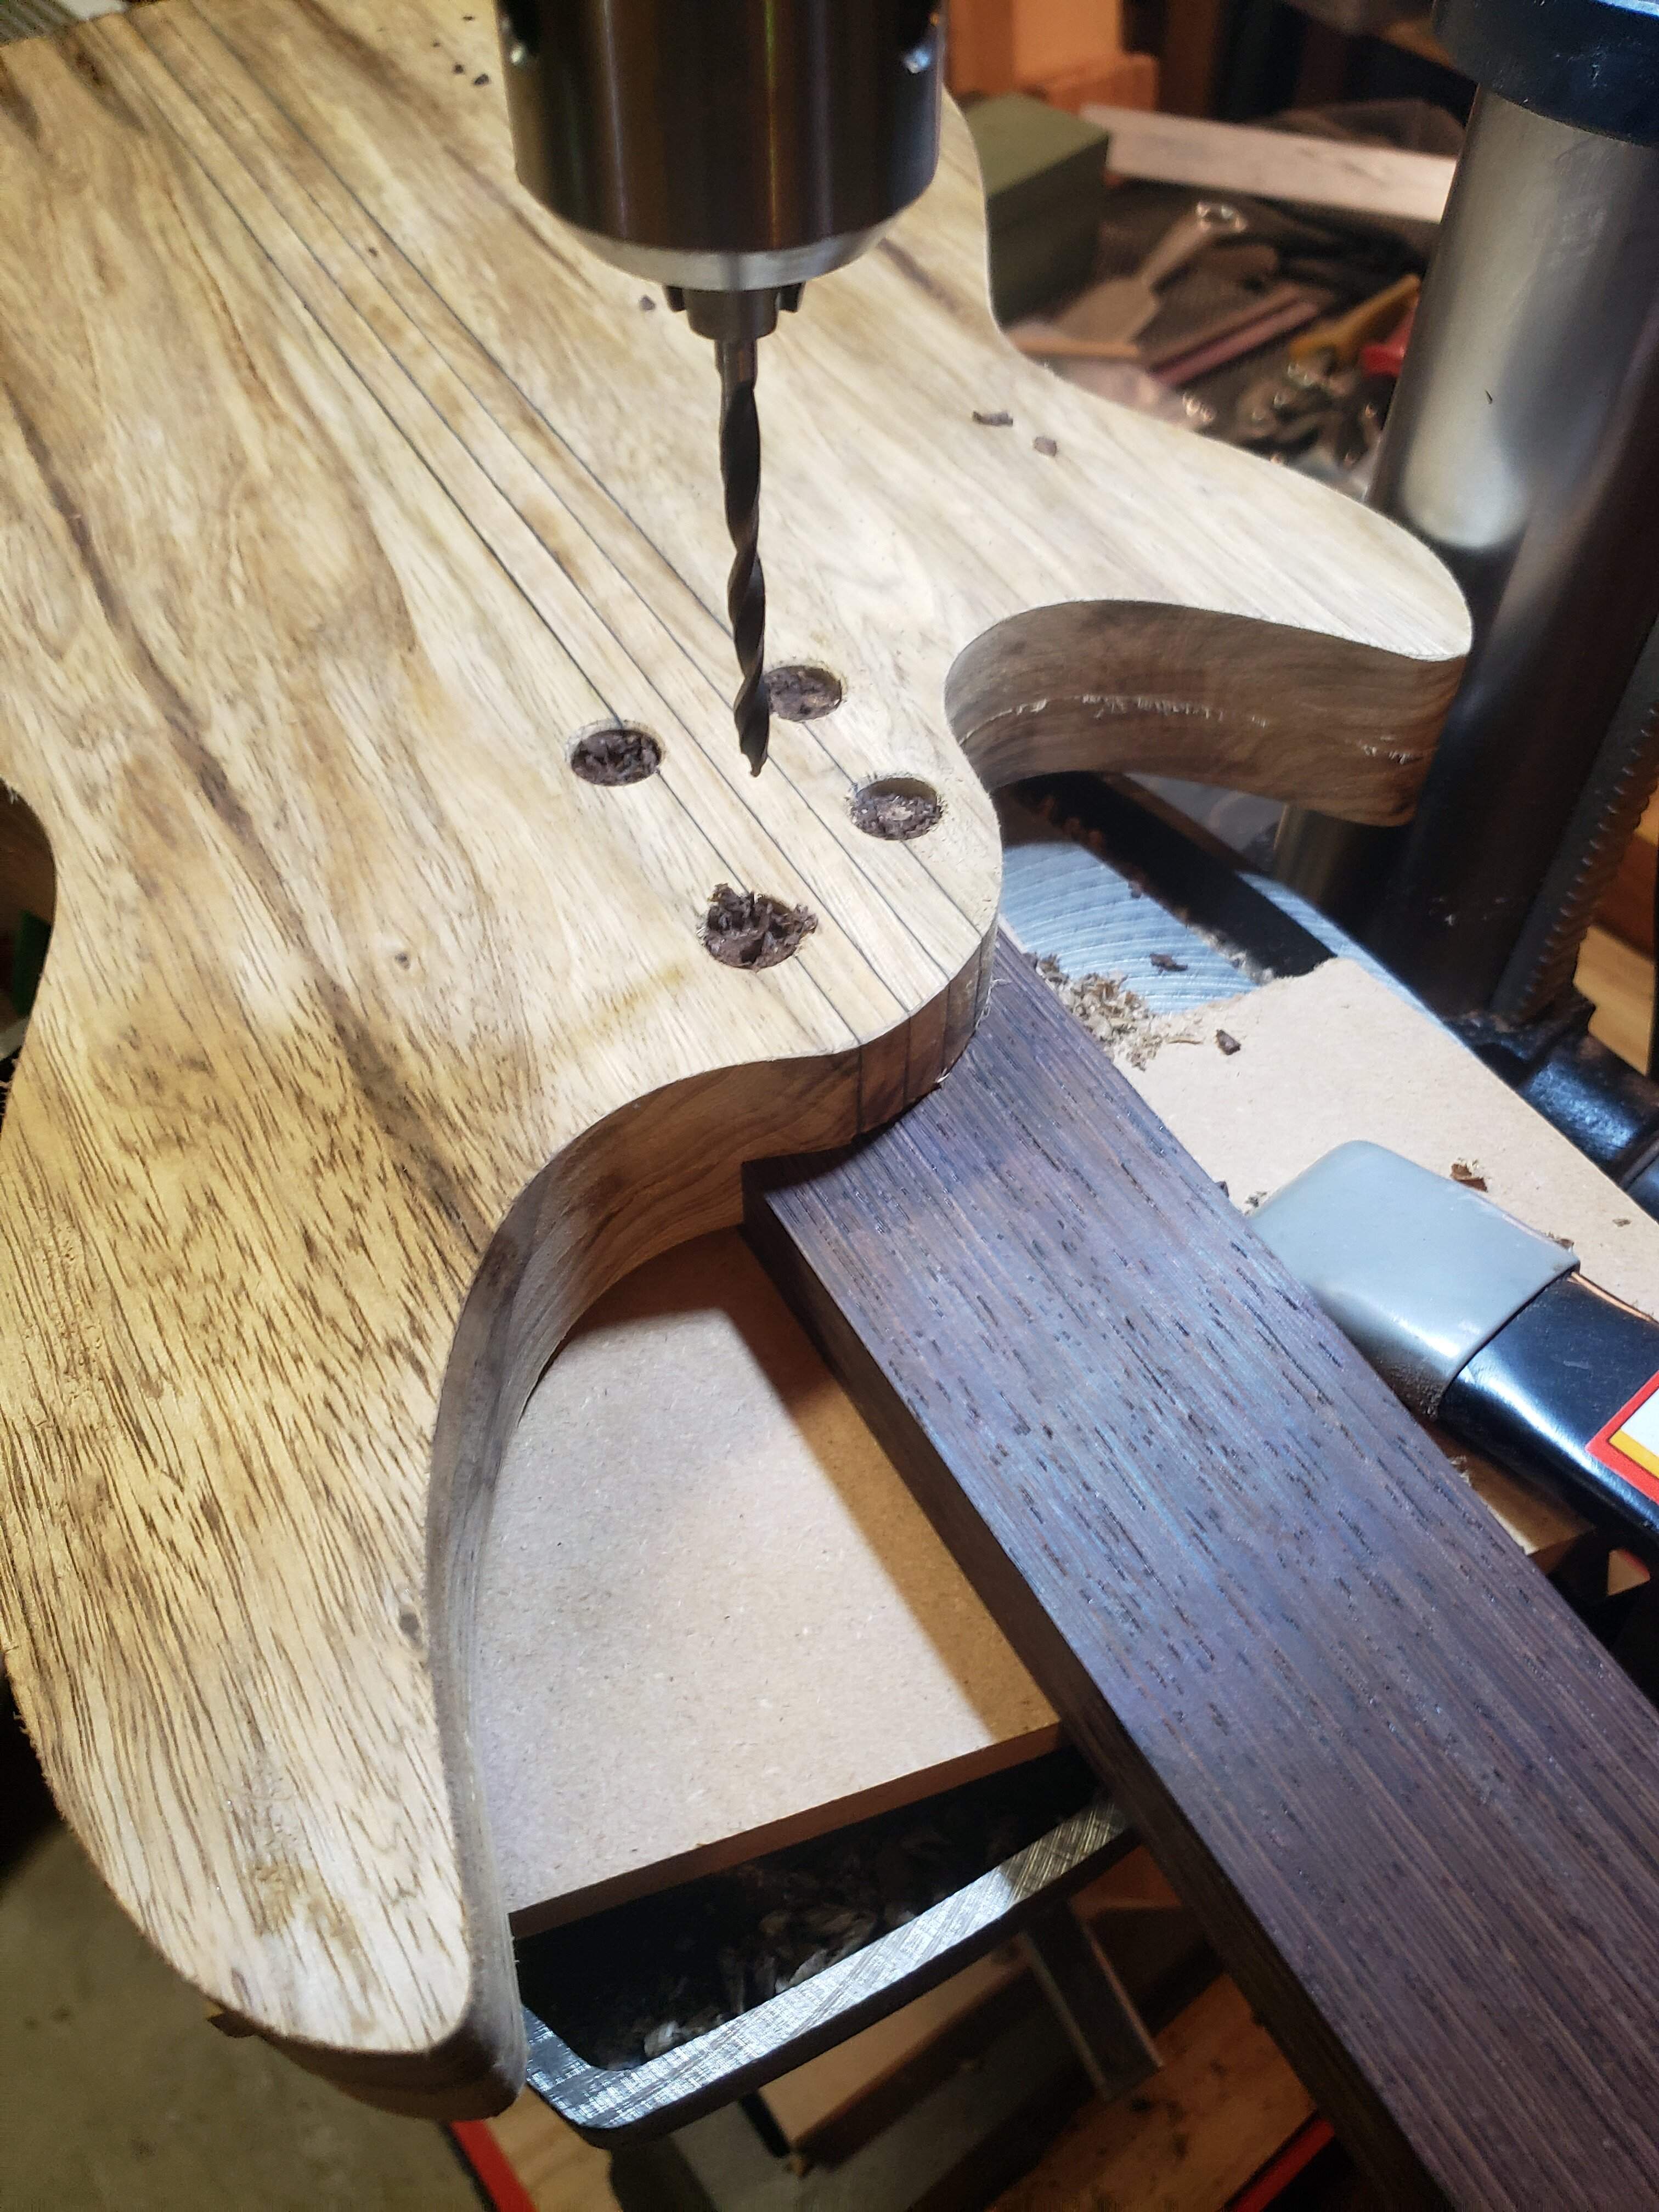
...using the screw holes in the body as a guide, I drilled through the neck. Again with a brad point, with just the tip poking through.
And again, using the hole from the the other side to line up the point of forstner bit...
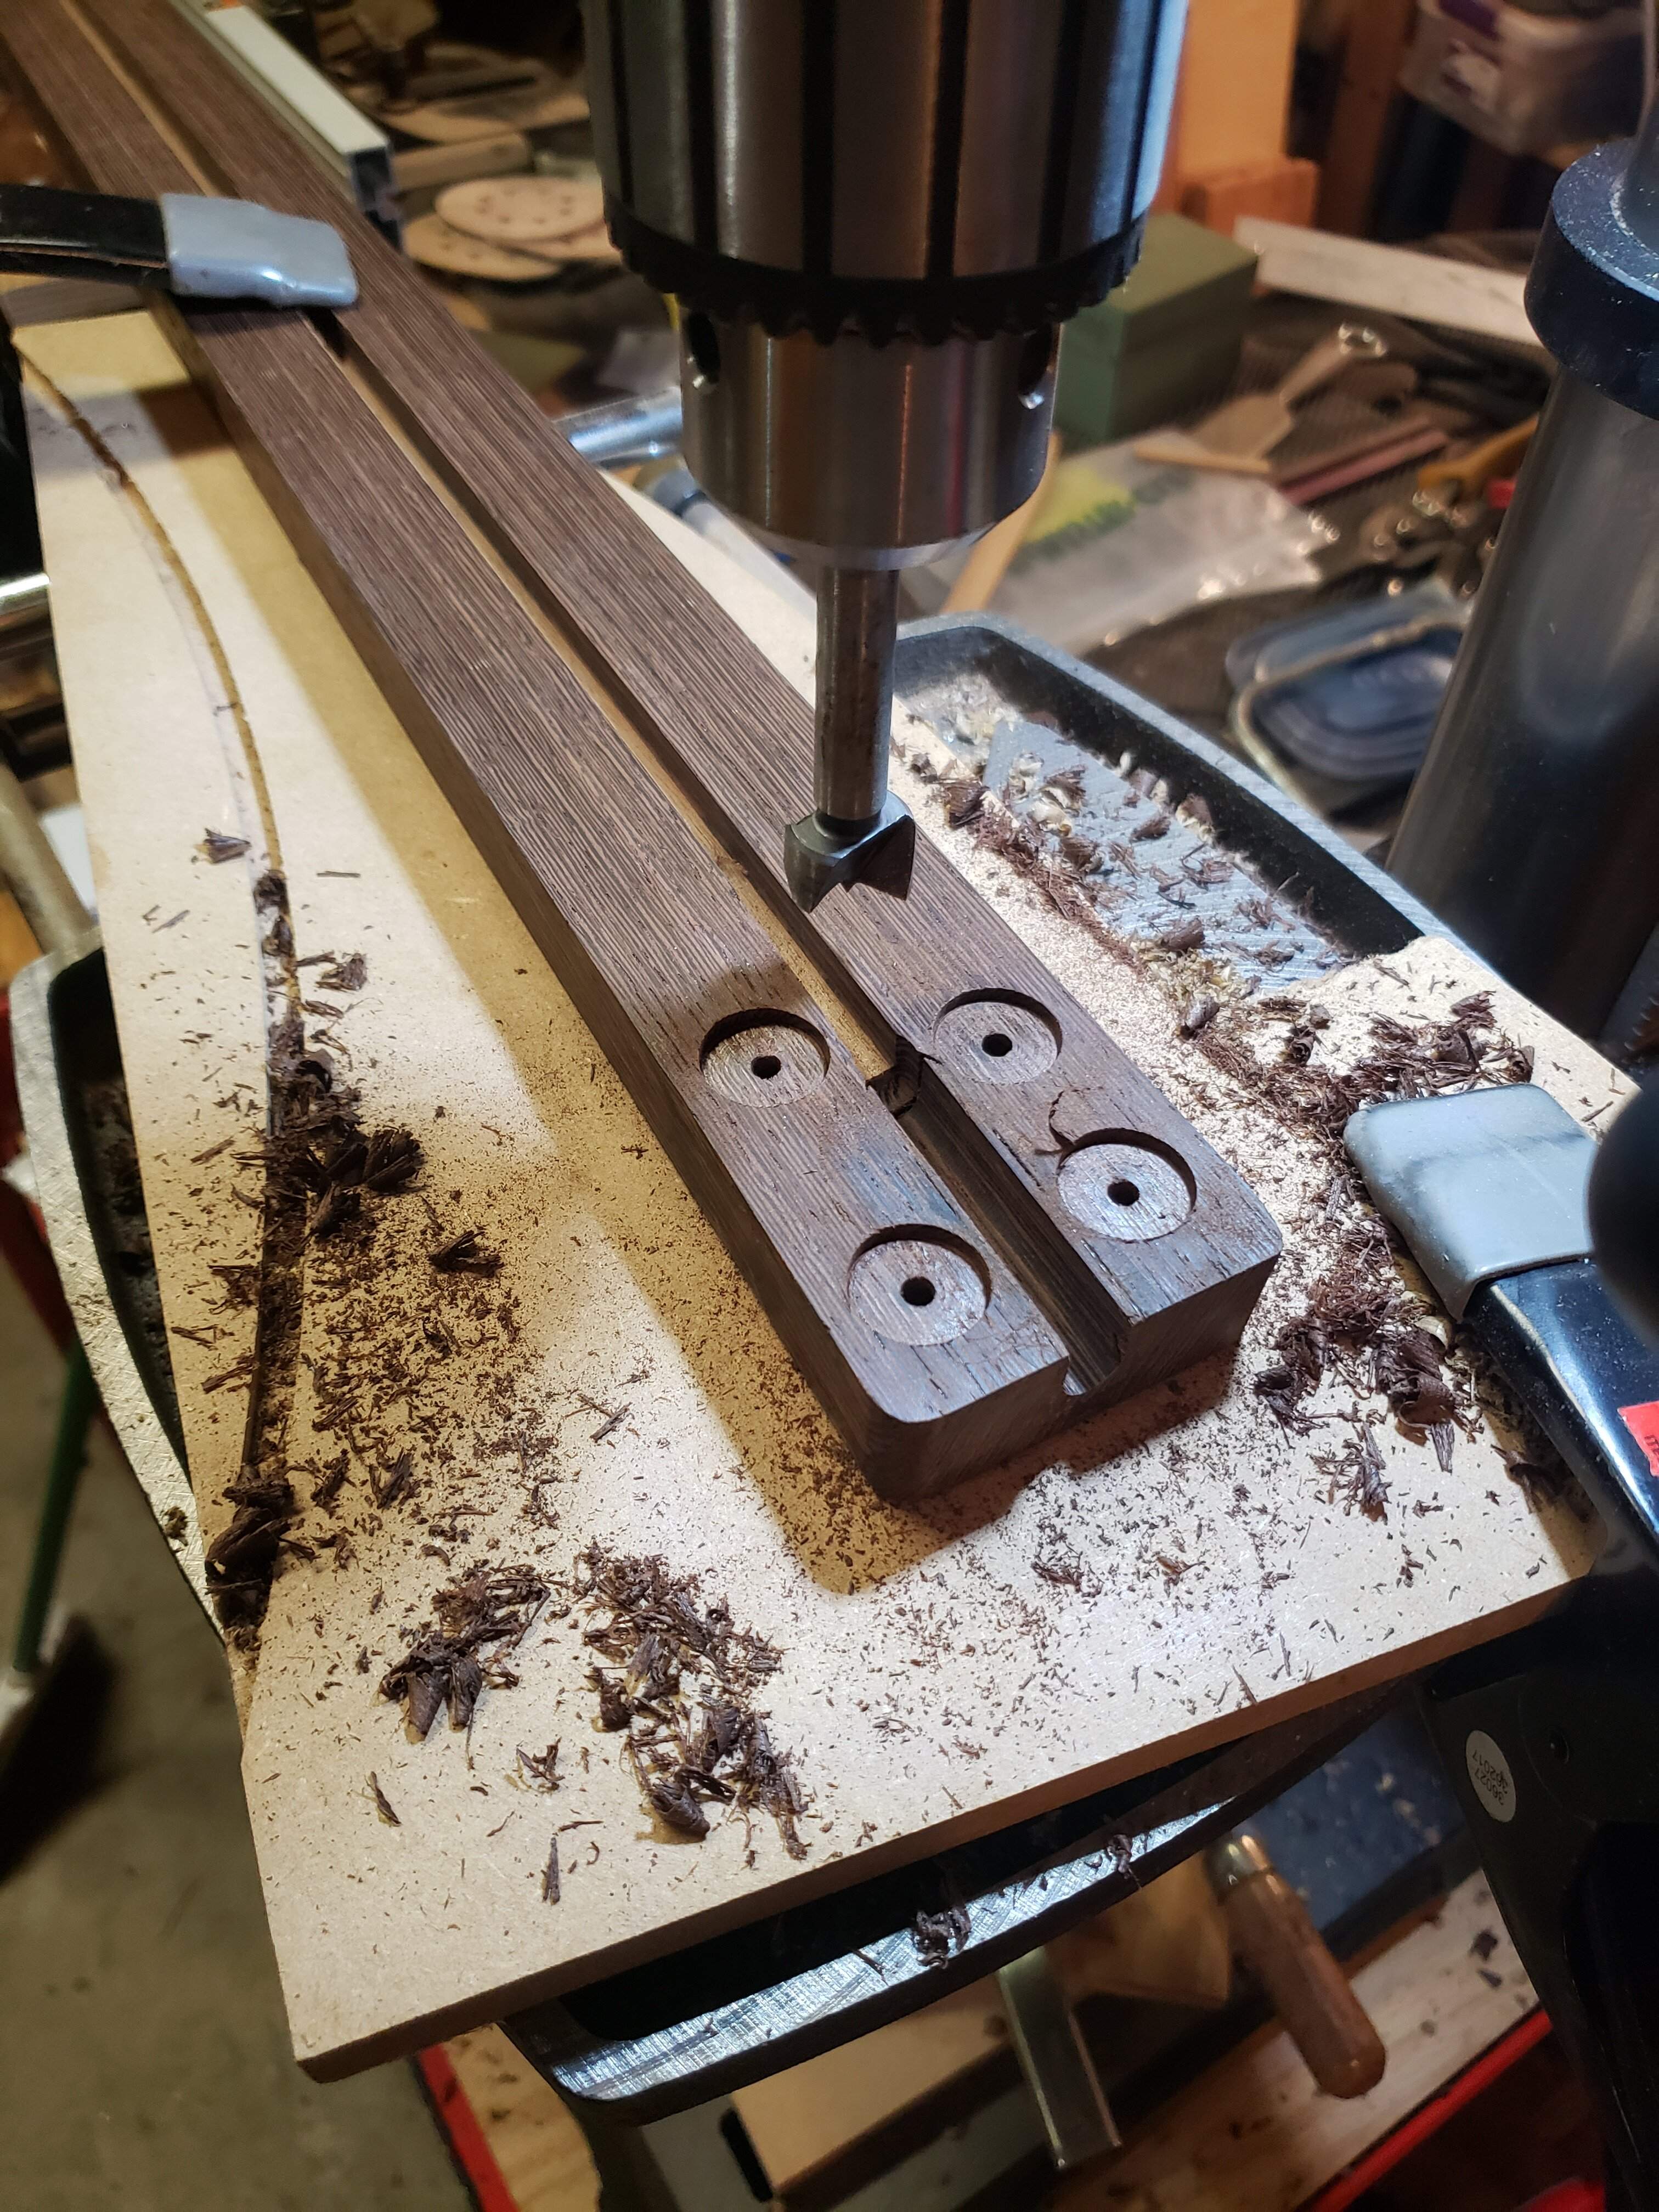 ...and drilled recesses for the t-nuts.
Then I used a step-bit or a Uni-bit to enlarge the holes for the shaft of the t-nuts...
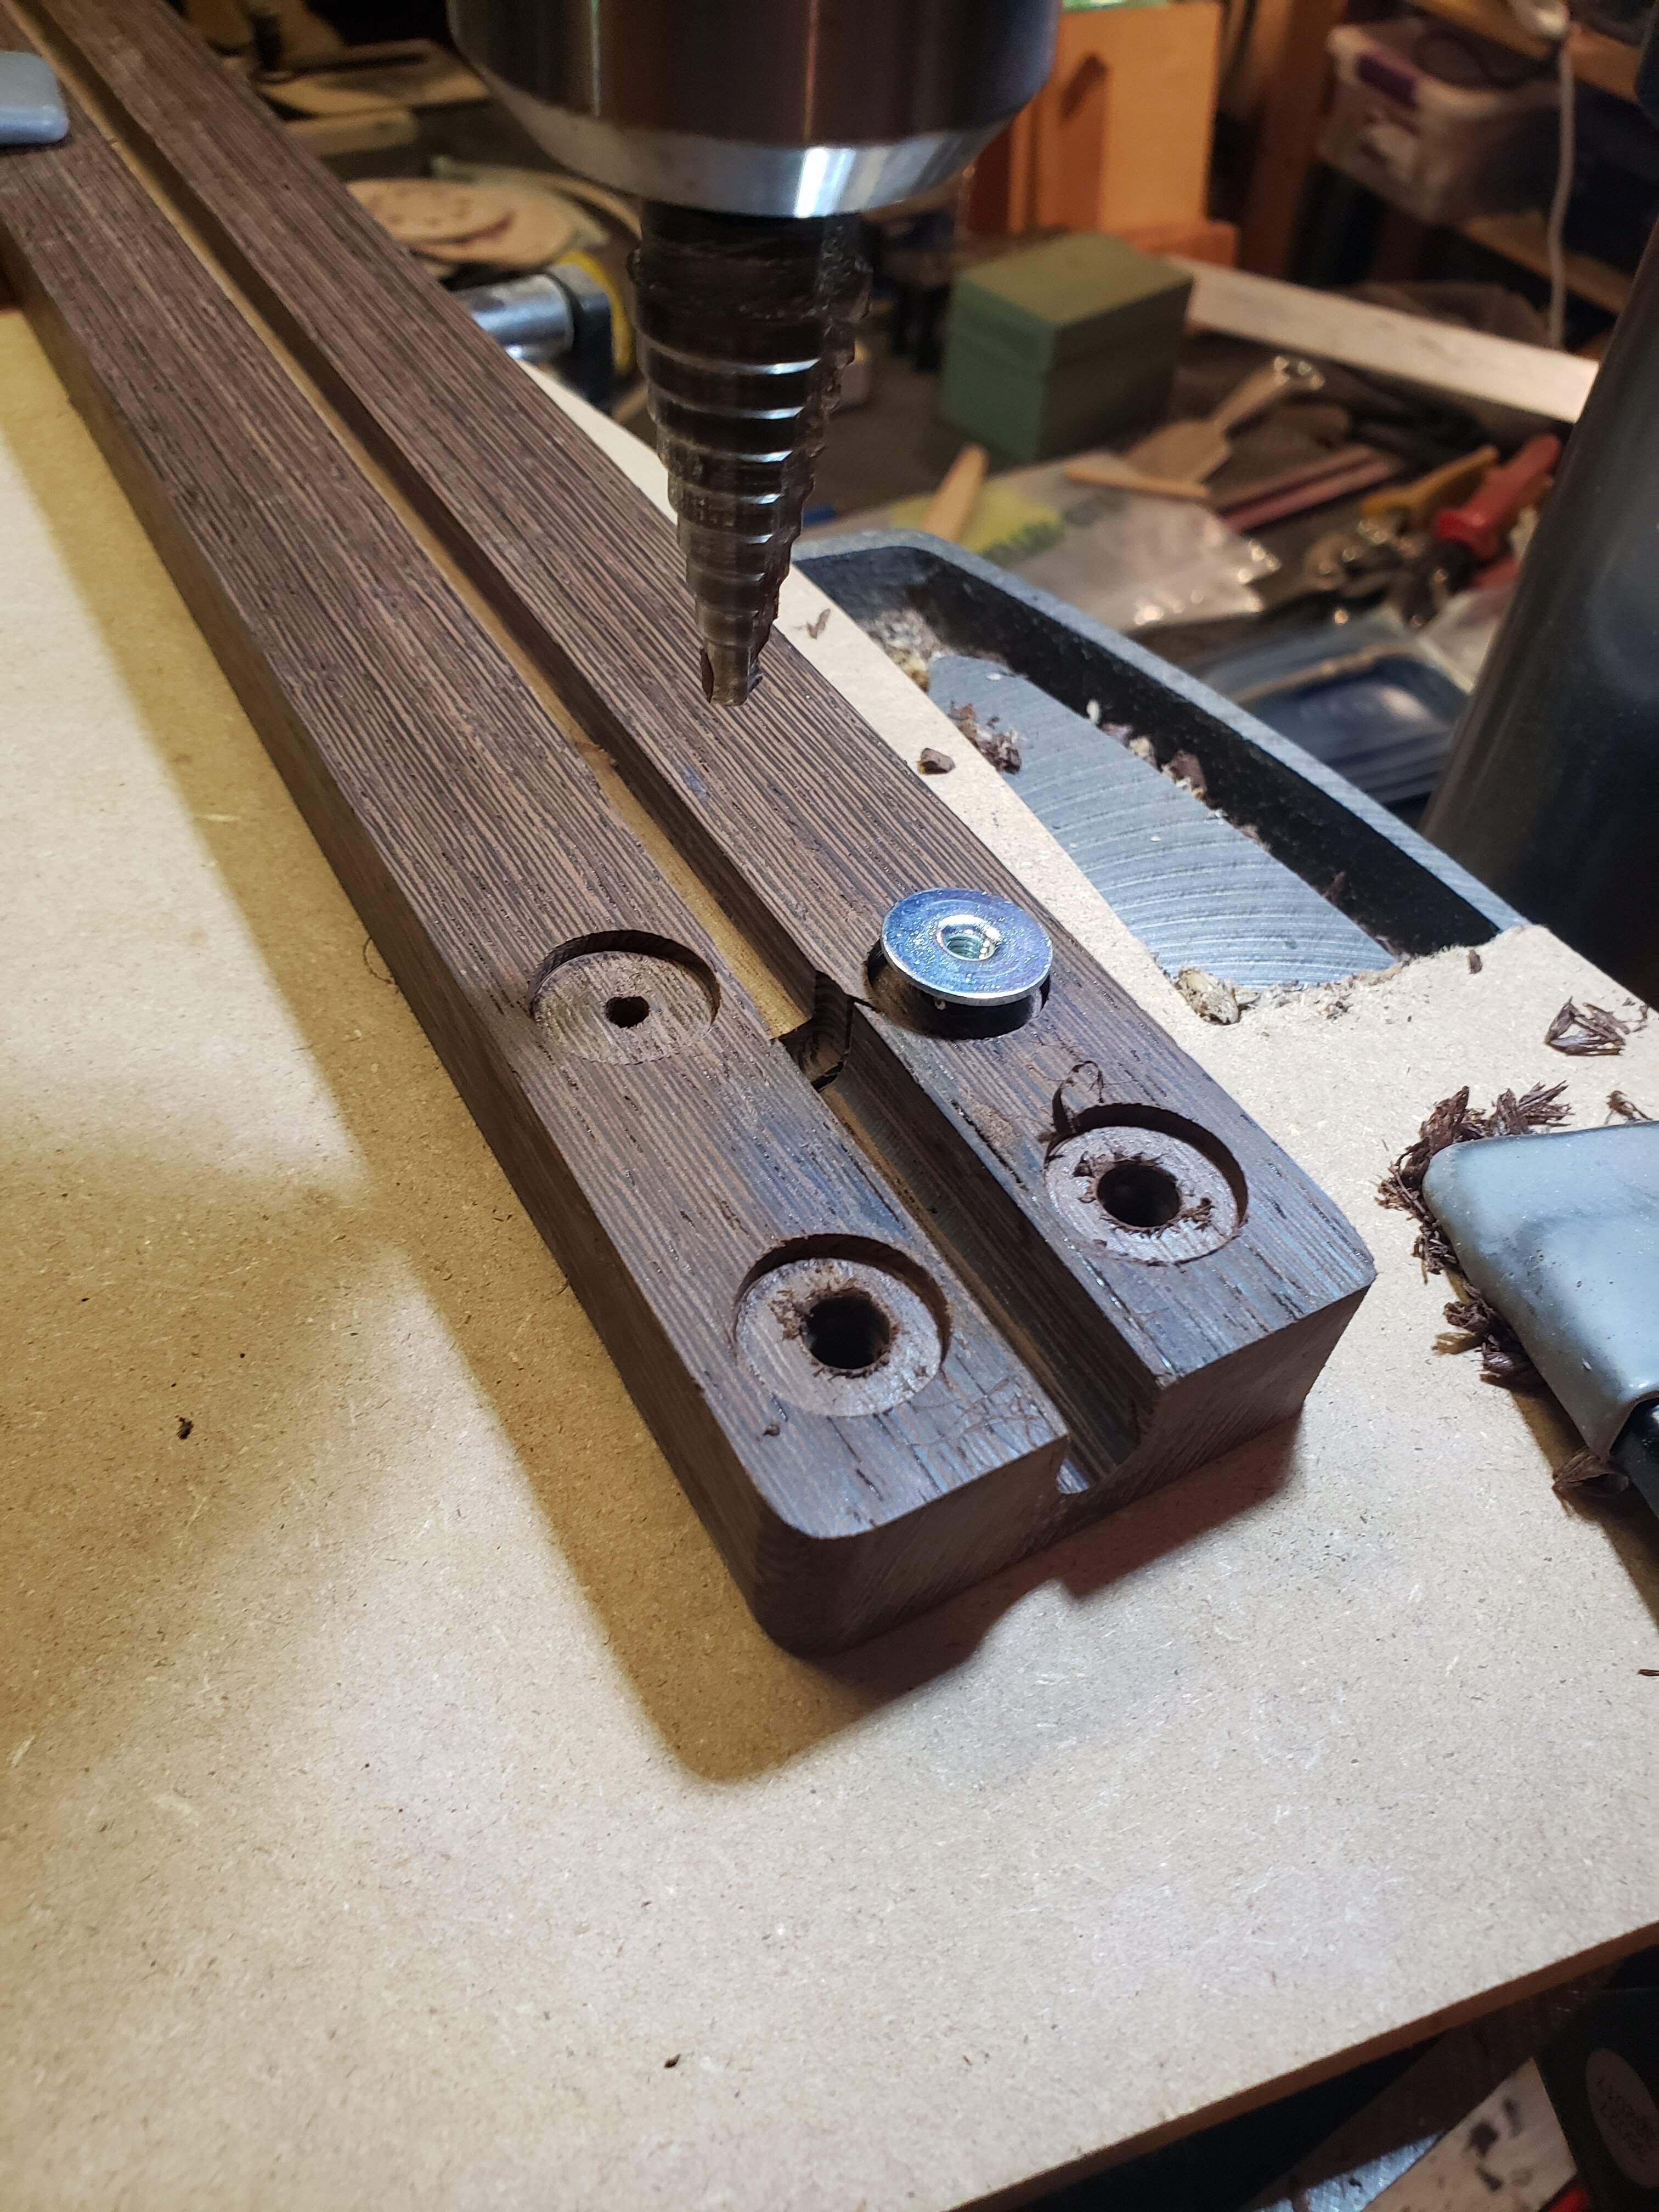
...then used a different uni-bit to slight enlarge the holes for the screws.
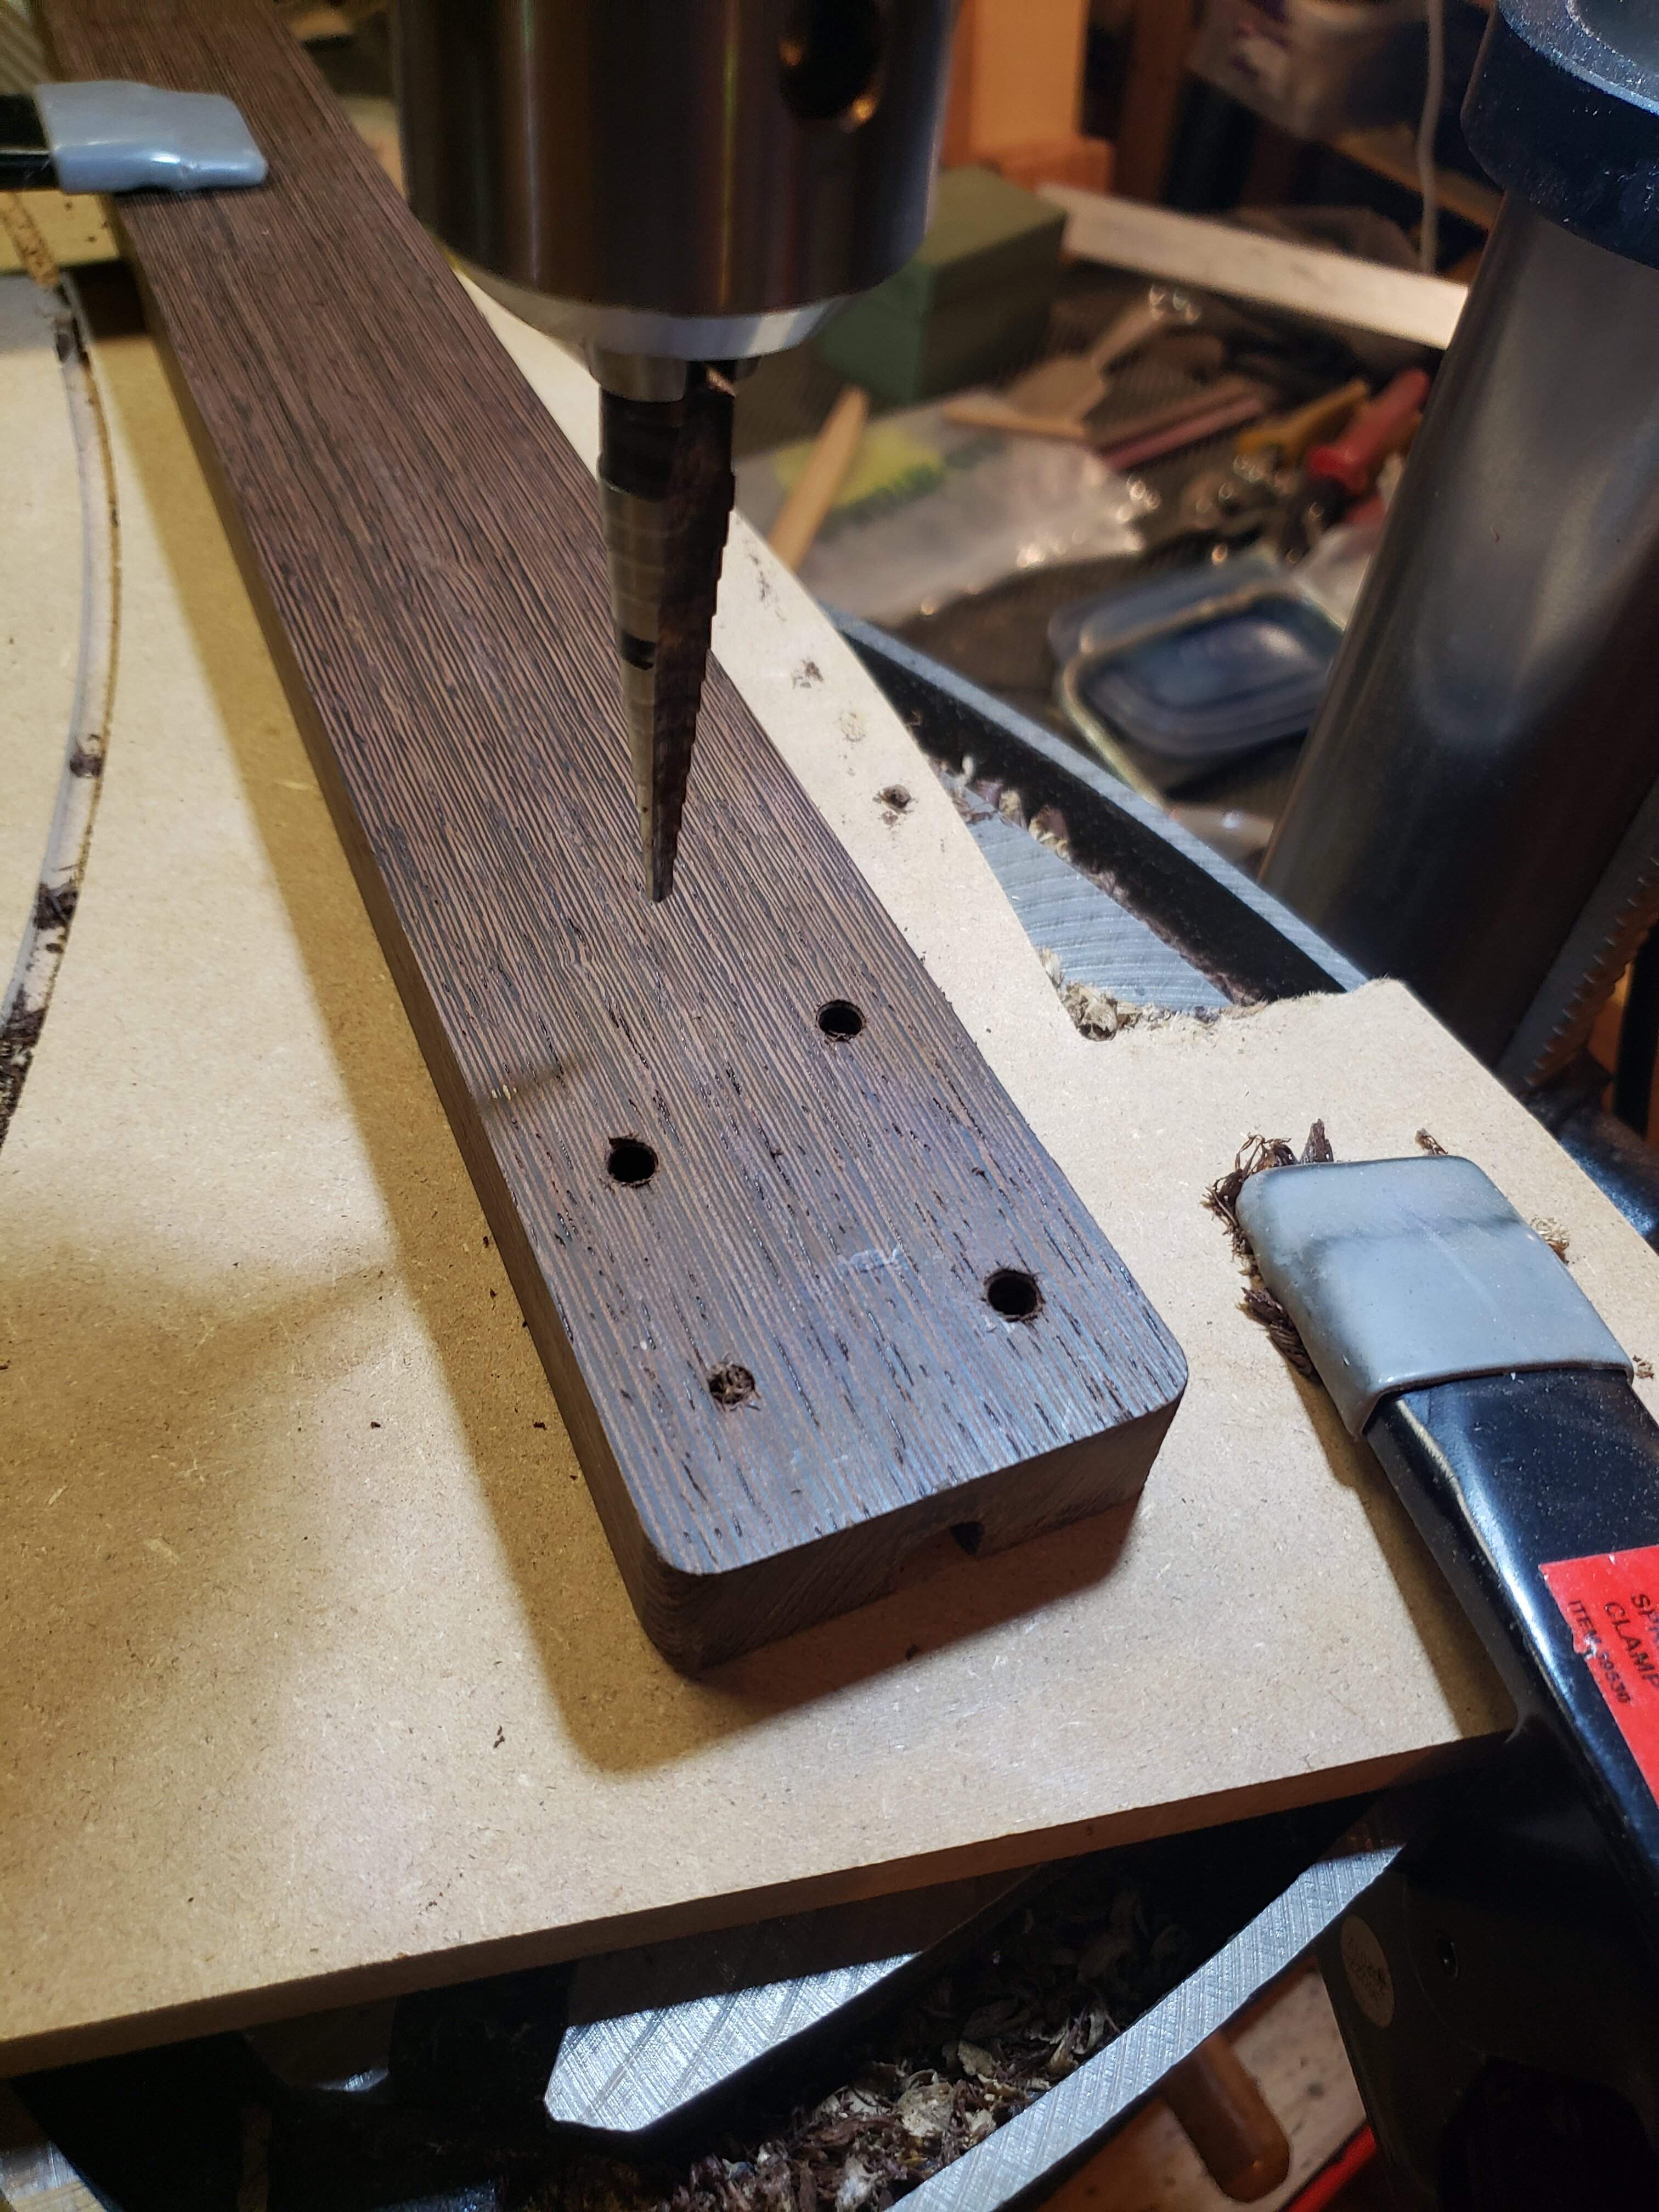
once all the drilling is done, I tap the t-nuts into place, then fit the necks to the bodies and tighten down the neck screws to bed the t-nuts into their sockets.
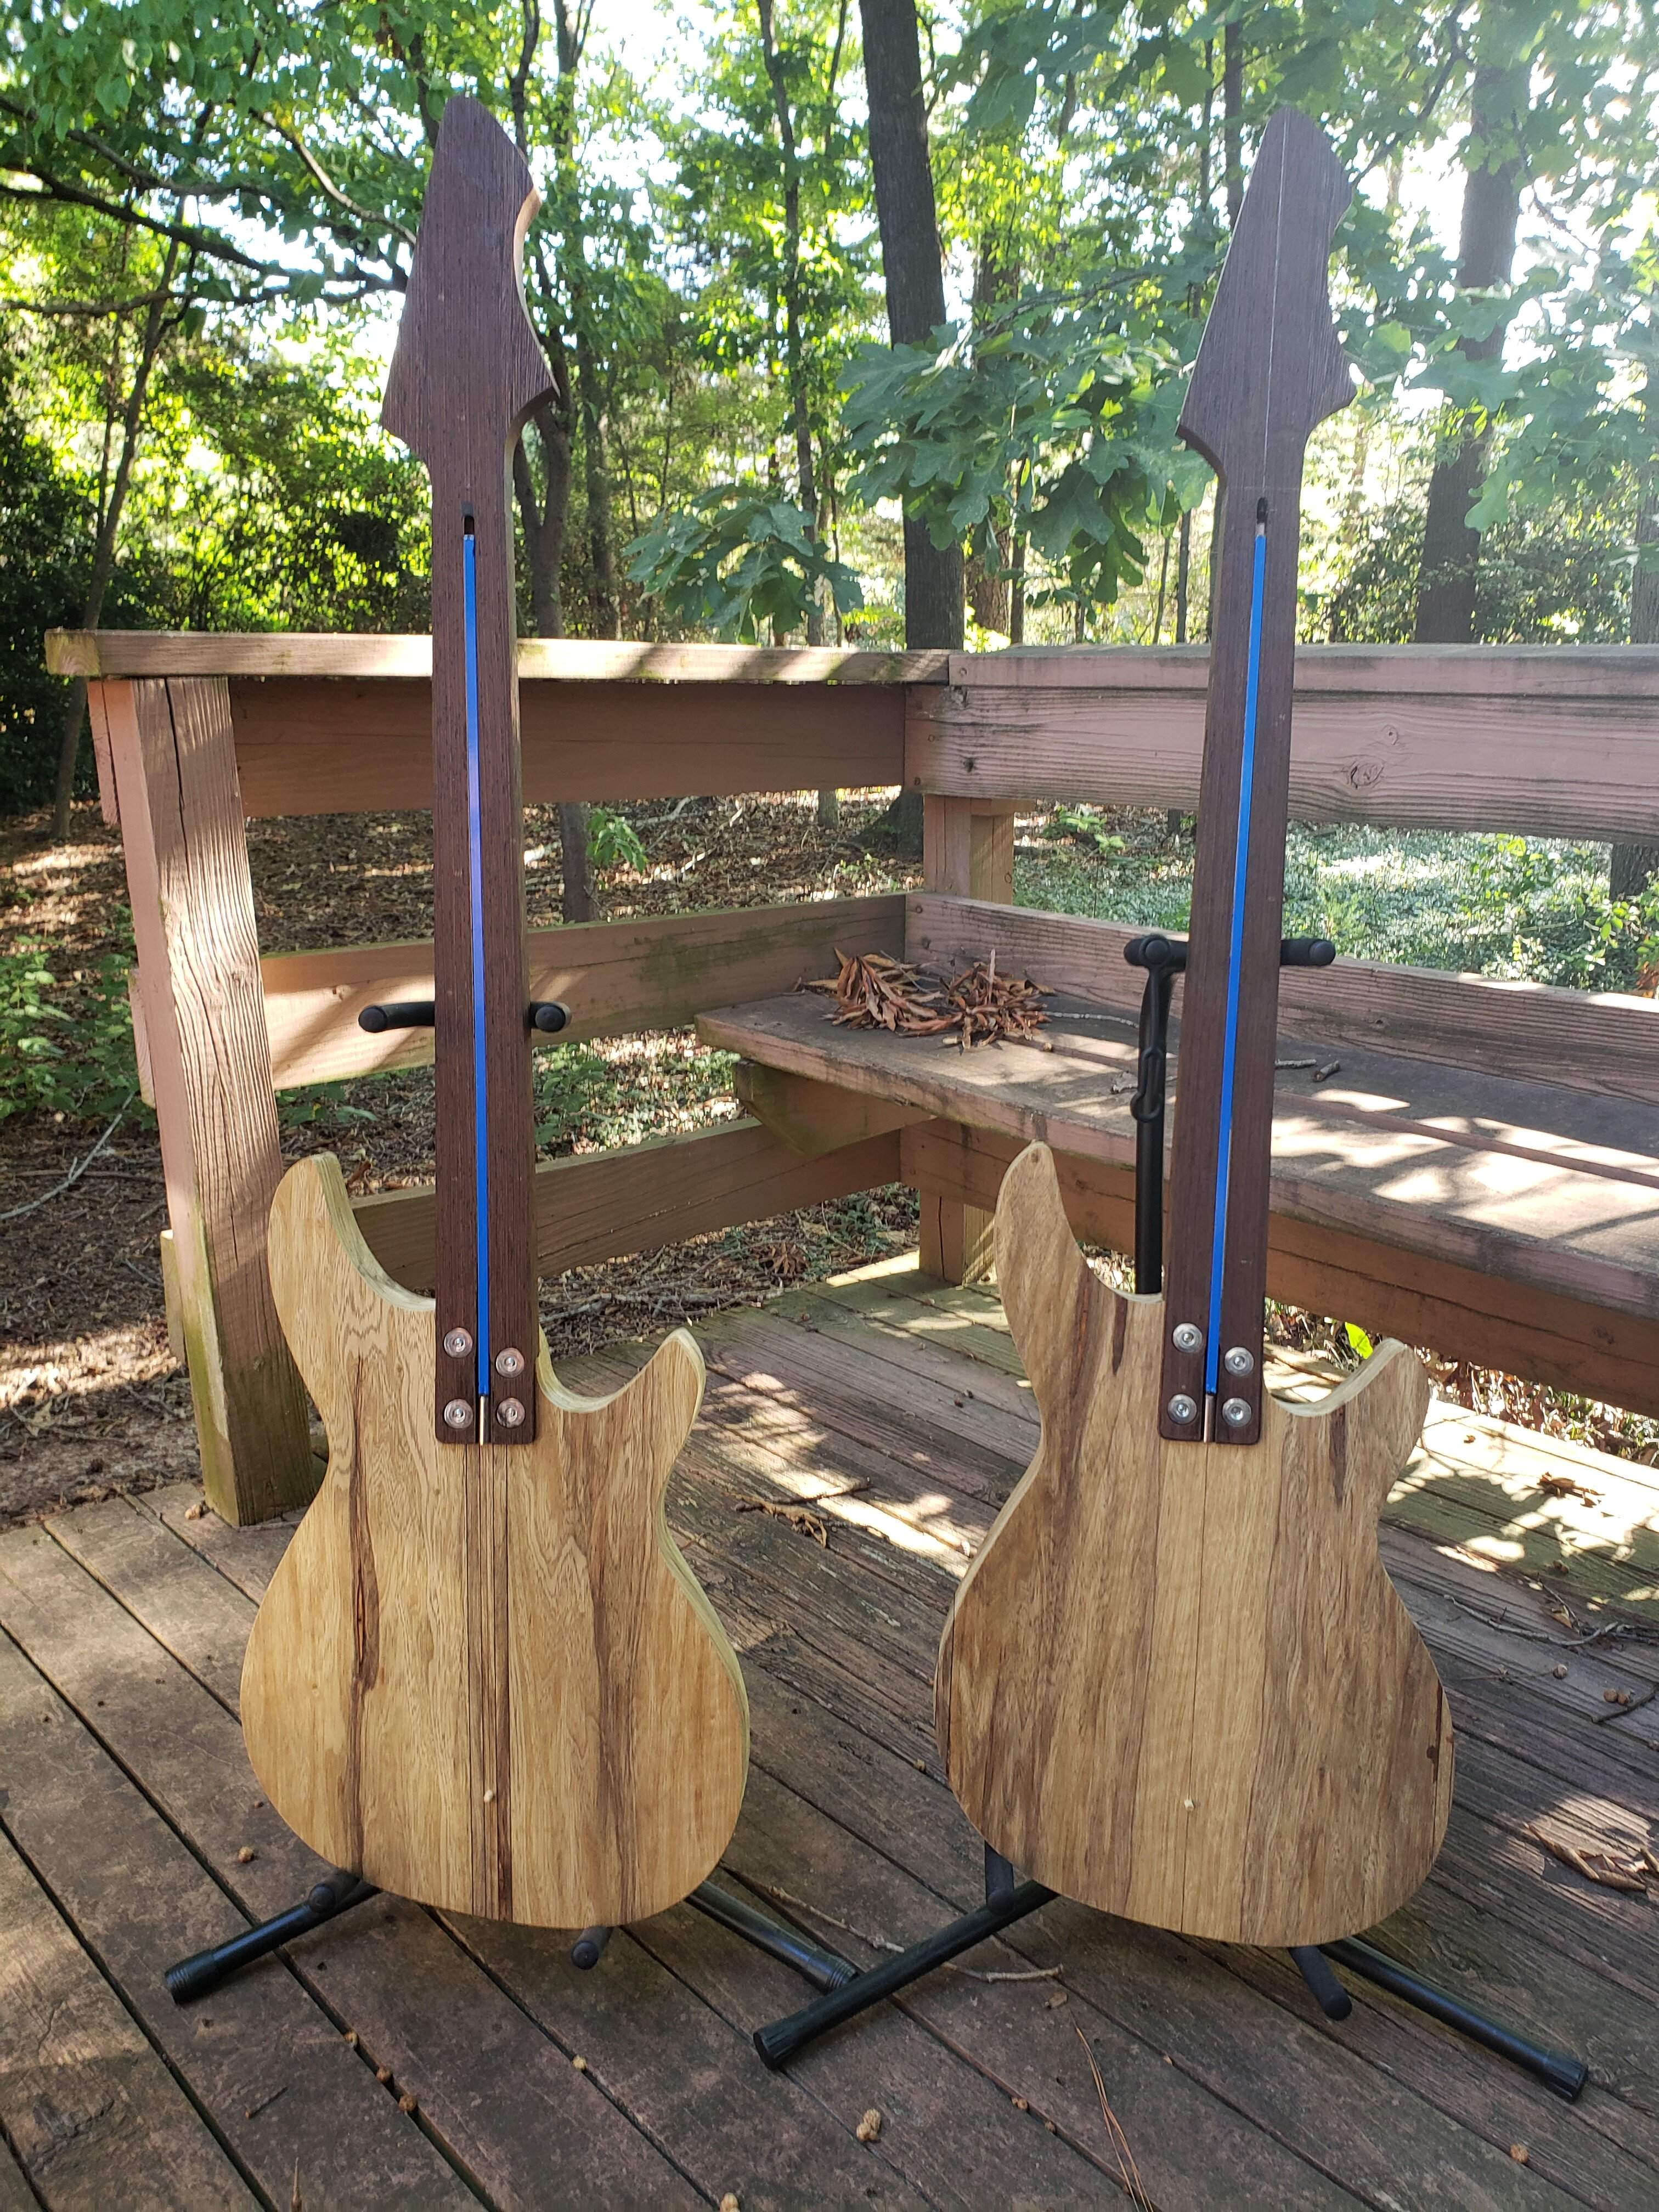
And we have two bass-shaped-objects!
So I got some more work on the builds; prepare for the picture dump!
Continuing with the necks, I cut the headstocks to shape same as I did the bodies; jig saw followed by template routing...
Having finalized the shape, it was time to get the necks fastened to the bodies.
I made a drill template that fits into the neck pocket...
Then I flipped the body over, using the holes drilled from the other side as a center and another brad point bit, I drilled holes for the recessed ferrules.
Moving onto the necks, I put the neck in the neck pocket and clamped to the drill press table...
...using the screw holes in the body as a guide, I drilled through the neck. Again with a brad point, with just the tip poking through.
And again, using the hole from the the other side to line up the point of forstner bit...
Then I used a step-bit or a Uni-bit to enlarge the holes for the shaft of the t-nuts...
...then used a different uni-bit to slight enlarge the holes for the screws.
once all the drilling is done, I tap the t-nuts into place, then fit the necks to the bodies and tighten down the neck screws to bed the t-nuts into their sockets.
And we have two bass-shaped-objects!
Now, I did have an issue with the t-nuts that have me reconsidering my hardware choice.
One of the t-nuts was not sitting straight and when I tried to thread in the screw it bound a little. I tried to unscrew the screw, this led to the screw and nut heating up (they were hot to the touch) and the screw seized in the nut! This is exactly the issue the @Bruce Johnson has described as one reason he does not use steel nuts in his necks! Luckily for me, I had not glued the fretboard on yet!
I was able to extract both the screw and nut with the aid of vice-grips and judicious use of force, threw away the screw and nut and installed new hardware. I had no further issues and everything screws in smooth, but I will be looking into other options for future builds.
One of the t-nuts was not sitting straight and when I tried to thread in the screw it bound a little. I tried to unscrew the screw, this led to the screw and nut heating up (they were hot to the touch) and the screw seized in the nut! This is exactly the issue the @Bruce Johnson has described as one reason he does not use steel nuts in his necks! Luckily for me, I had not glued the fretboard on yet!
I was able to extract both the screw and nut with the aid of vice-grips and judicious use of force, threw away the screw and nut and installed new hardware. I had no further issues and everything screws in smooth, but I will be looking into other options for future builds.

Now, I did have an issue with the t-nuts that have me reconsidering my hardware choice.
One of the t-nuts was not sitting straight and when I tried to thread in the screw it bound a little. I tried to unscrew the screw, this led to the screw and nut heating up (they were hot to the touch) and the screw seized in the nut! This is exactly the issue the @Bruce Johnson has described as one reason he does not use steel nuts in his necks! Luckily for me, I had not glued the fretboard on yet!
I was able to extract both the screw and nut with the aid of vice-grips and judicious use of force, threw away the screw and nut and installed new hardware. I had no further issues and everything screws in smooth, but I will be looking into other options for future builds.
Sorry to hear that!
In defense of tee nuts, there's no reason why they shouldn't work perfectly fine if installed correctly.
Misalignment or other factors that might make them bind or spin isn't really the fault of the hardware. I do agree if you have problems with their use then it's probably best to look at other hardware options.
It sounds like the alignment was off far enough that there was actual cross-threading of the hardware. Not much you can do when things go that far south.

Now, I did have an issue with the t-nuts that have me reconsidering my hardware choice.
One of the t-nuts was not sitting straight and when I tried to thread in the screw it bound a little. I tried to unscrew the screw, this led to the screw and nut heating up (they were hot to the touch) and the screw seized in the nut! This is exactly the issue the @Bruce Johnson has described as one reason he does not use steel nuts in his necks! Luckily for me, I had not glued the fretboard on yet!
I was able to extract both the screw and nut with the aid of vice-grips and judicious use of force, threw away the screw and nut and installed new hardware. I had no further issues and everything screws in smooth, but I will be looking into other options for future builds.
Yep, that's how it happens. If the screw starts binding in the threads, for whatever reason, it quickly galls, heats up and locks up. Then they often won't come apart without snapping off the screw.
If you feel a screw starting to tighten up, and if it starts to chatter or squeak, stop turning it immediately! Try backing it up gently, maybe a little fore and back. If it starts getting tighter when backing it out, stop! You are in trouble. Let it cool down. Try dripping a few drops of WD40 or Kroil down onto the threads. Let it soak in and try turning the screw gently.
If you can get it apart successfully, you can turn a bottoming-type tap down into the T-nut to clean out the threads. But it's going to be risky to use the T-nut again. The threads will be rough, and more likely to gall again on a new screw.
This is why I don't recommend using steel T-nuts for neck bolts in basses. If you've ever had to deal with one that has seized up, you'l know what a disaster it can become.
It sounds like the alignment was off far enough that there was actual cross-threading of the hardware. Not much you can do when things go that far south.
Rudy;
I've had T-nuts start seizing up where the screws weren't cross threaded, but there was enough misalignment of the holes that the screw was being pushed to one side in the threads. Anything that creates friction in the threads can start the galling.
Sorry to hear that!
In defense of tee nuts, there's no reason why they shouldn't work perfectly fine if installed correctly.
Misalignment or other factors that might make them bind or spin isn't really the fault of the hardware. I do agree if you have problems with their use then it's probably best to look at other hardware options.
It sounds like the alignment was off far enough that there was actual cross-threading of the hardware. Not much you can do when things go that far south.
Nothing against t-nuts; this will be my 6th and 7th(?) build using them and the first time I've had an issue! And I know that it was absolutely the fault of the installer that something went sideways.
However, my concern is how easy it was for it to go from bad to worse and I am thinking about if one of my instruments ever makes it out into the wild, how easy would it be for someone else to make a bad situation catastrophic!
Not that t-nuts are bad, but I'm wondering if I can do better.
Yep, that's how it happens. If the screw starts binding in the threads, for whatever reason, it quickly galls, heats up and locks up. Then they often won't come apart without snapping off the screw.
If you feel a screw starting to tighten up, and if it starts to chatter or squeak, stop turning it immediately! Try backing it up gently, maybe a little fore and back. If it starts getting tighter when backing it out, stop! You are in trouble. Let it cool down. Try dripping a few drops of WD40 or Kroil down onto the threads. Let it soak in and try turning the screw gently.
If you can get it apart successfully, you can turn a bottoming-type tap down into the T-nut to clean out the threads. But it's going to be risky to use the T-nut again. The threads will be rough, and more likely to gall again on a new screw.
This is why I don't recommend using steel T-nuts for neck bolts in basses. If you've ever had to deal with one that has seized up, you'l know what a disaster it can become.
Yeah, the real problem started when I tried to unscrew the bolt and the t-nut twisted out of it's socket! If that happened with the fretboard glued on, I'd be in trouble!
Yeah, the real problem started when I tried to unscrew the bolt and the t-nut twisted out of it's socket! If that happened with the fretboard glued on, I'd be in trouble!
Yes, that's exactly what happened in my worst horror story. One of my buddy Jon Wilson's GuitarViols, about a year old, worth about 5K, belonging to a Rock Star, who was about to head out on tour with it. It was in for some fairly minor service by Jon. When he tried to take the neck off, one of the T-nuts seized up and spun inside the neck. We couldn't even get it apart! It was a horrifying situation. Jon was freaking out.
Fortunately, the screw had backed out about 1/8" before seizing. I was able to slip a hacksaw blade in between the neck heel and neck pocket and gently saw through the bolt. Then put the neck in the mill and replace the T-nut from the bottom with a maple plug. An expensive scary repair job, on a tight deadline.
That incident sealed it for me. No more steel T-nuts for neck bolts.

Freekmagnet
Commercial User
Not that t-nuts are bad, but I'm wondering if I can do better.
…cough… …Bruce Bars… …cough cough…
…cough… …Bruce Bars… …cough cough…
 yeah, I've got some 1/4"x1/4" brass stock and 10-32 tap I've been experimenting with...
Thought I might use up the hardware I have before I start trying a new process, but we'll see.
What worries me is problems in the future. My first 48 Scroll Basses, from '97 to '03, have steel T-nuts. Most of them have never had their necks removed. And they will probably be fine. But I live in fear of the day I get a phone call from some poor guitar tech, who tried to remove the neck from one of my early instruments and.....
I have to live with that fear.
Use the BruceBlocks. Or something similar of your own design.
I have to live with that fear.
Use the BruceBlocks. Or something similar of your own design.
Made some wenge knobs from the neck offcuts.
Marked and and centers located with an awl...
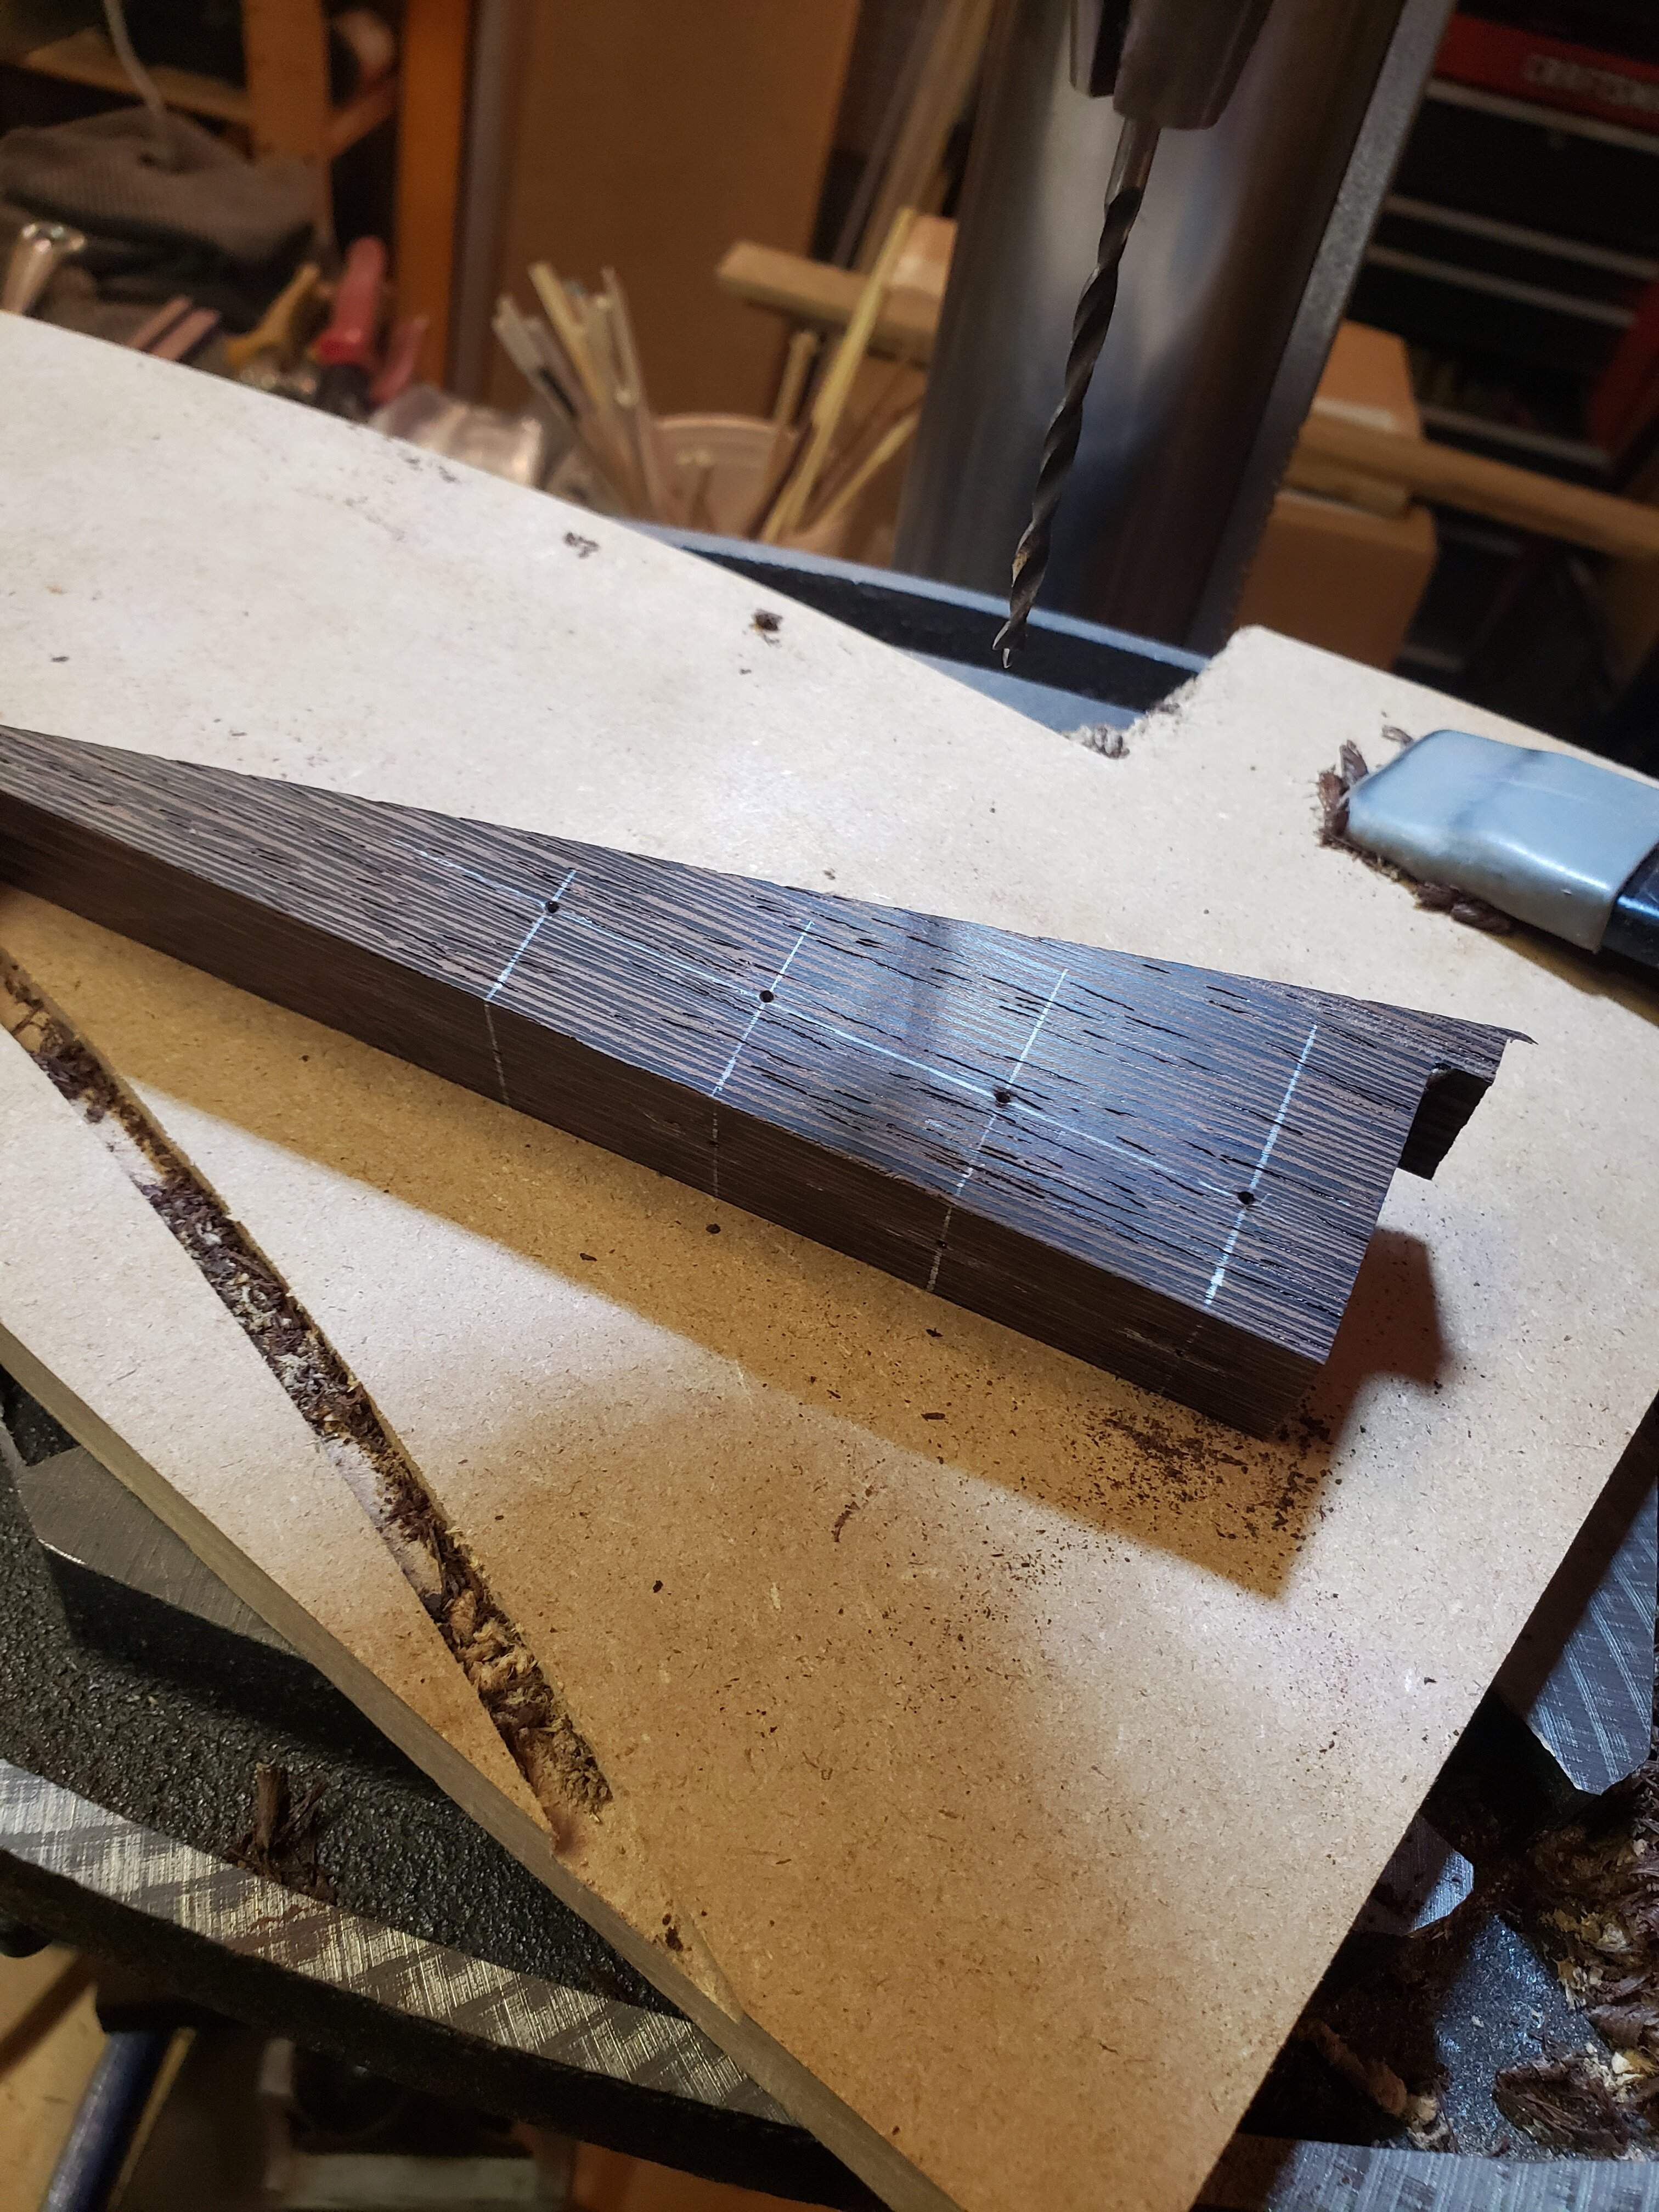
...nevermind the one that is slightly off-center.
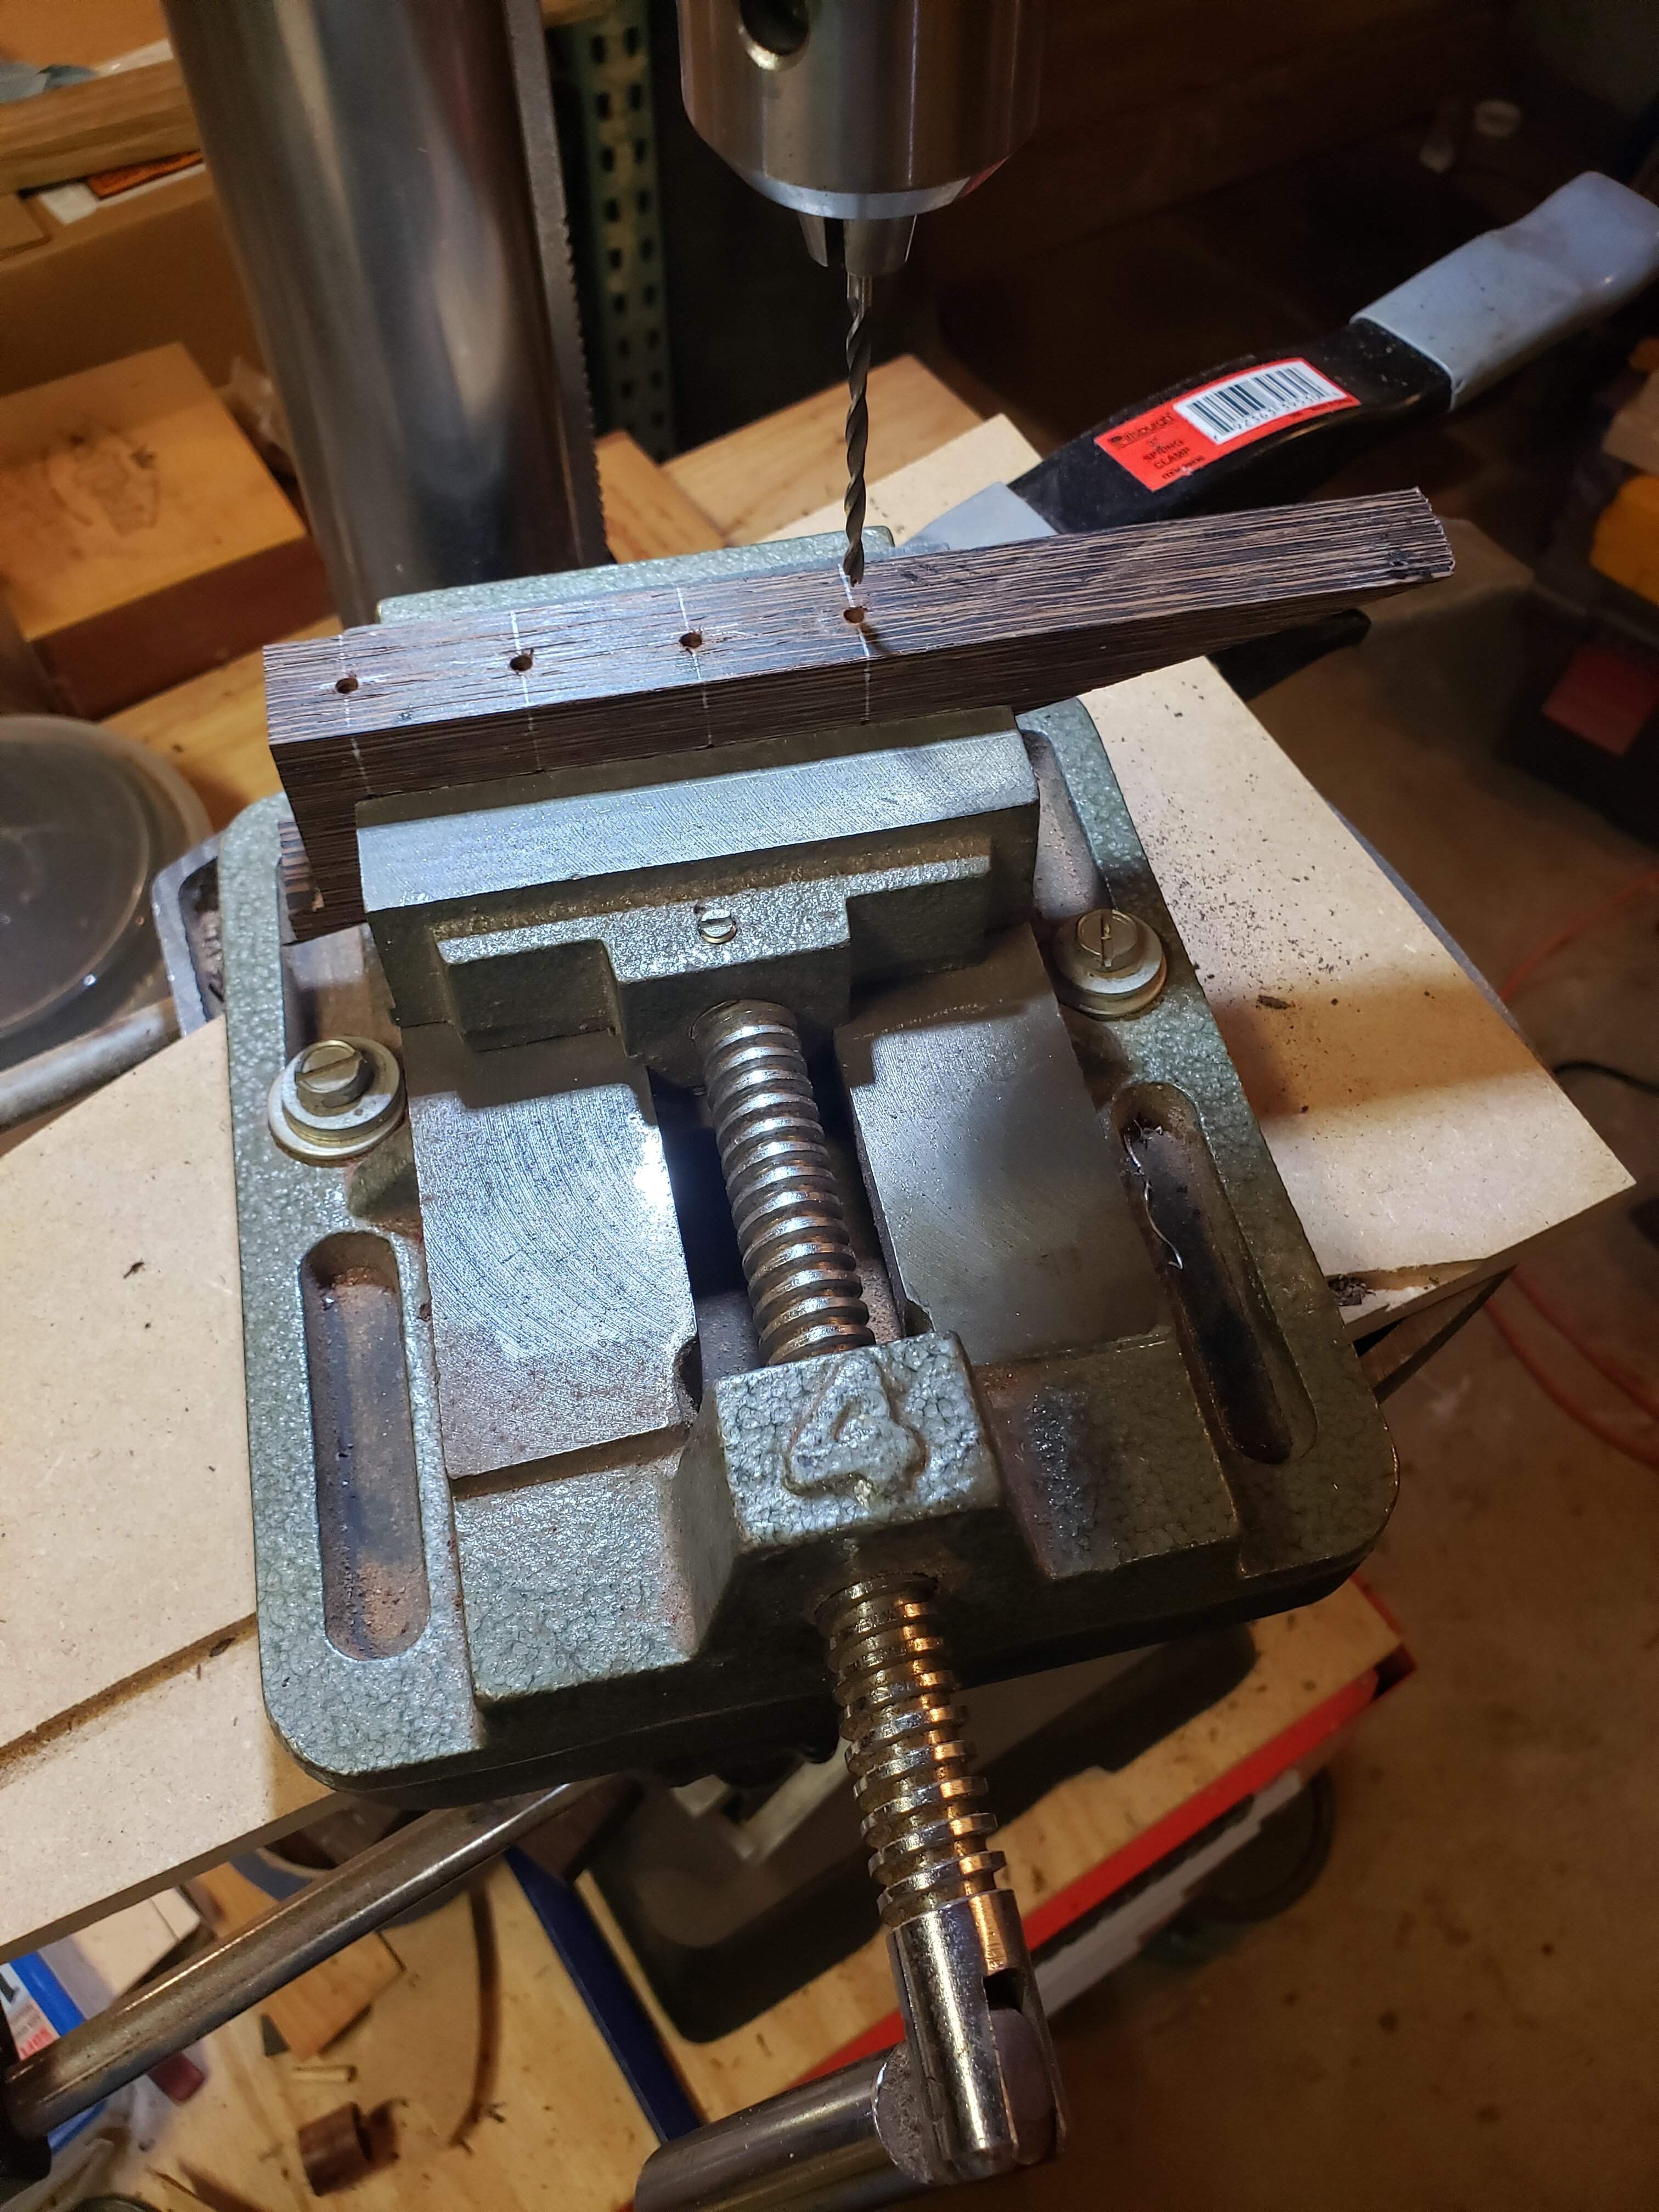
Holes drilled for the set screws while the scrap still has square sides to clamp in the vise...
Holes tapped...
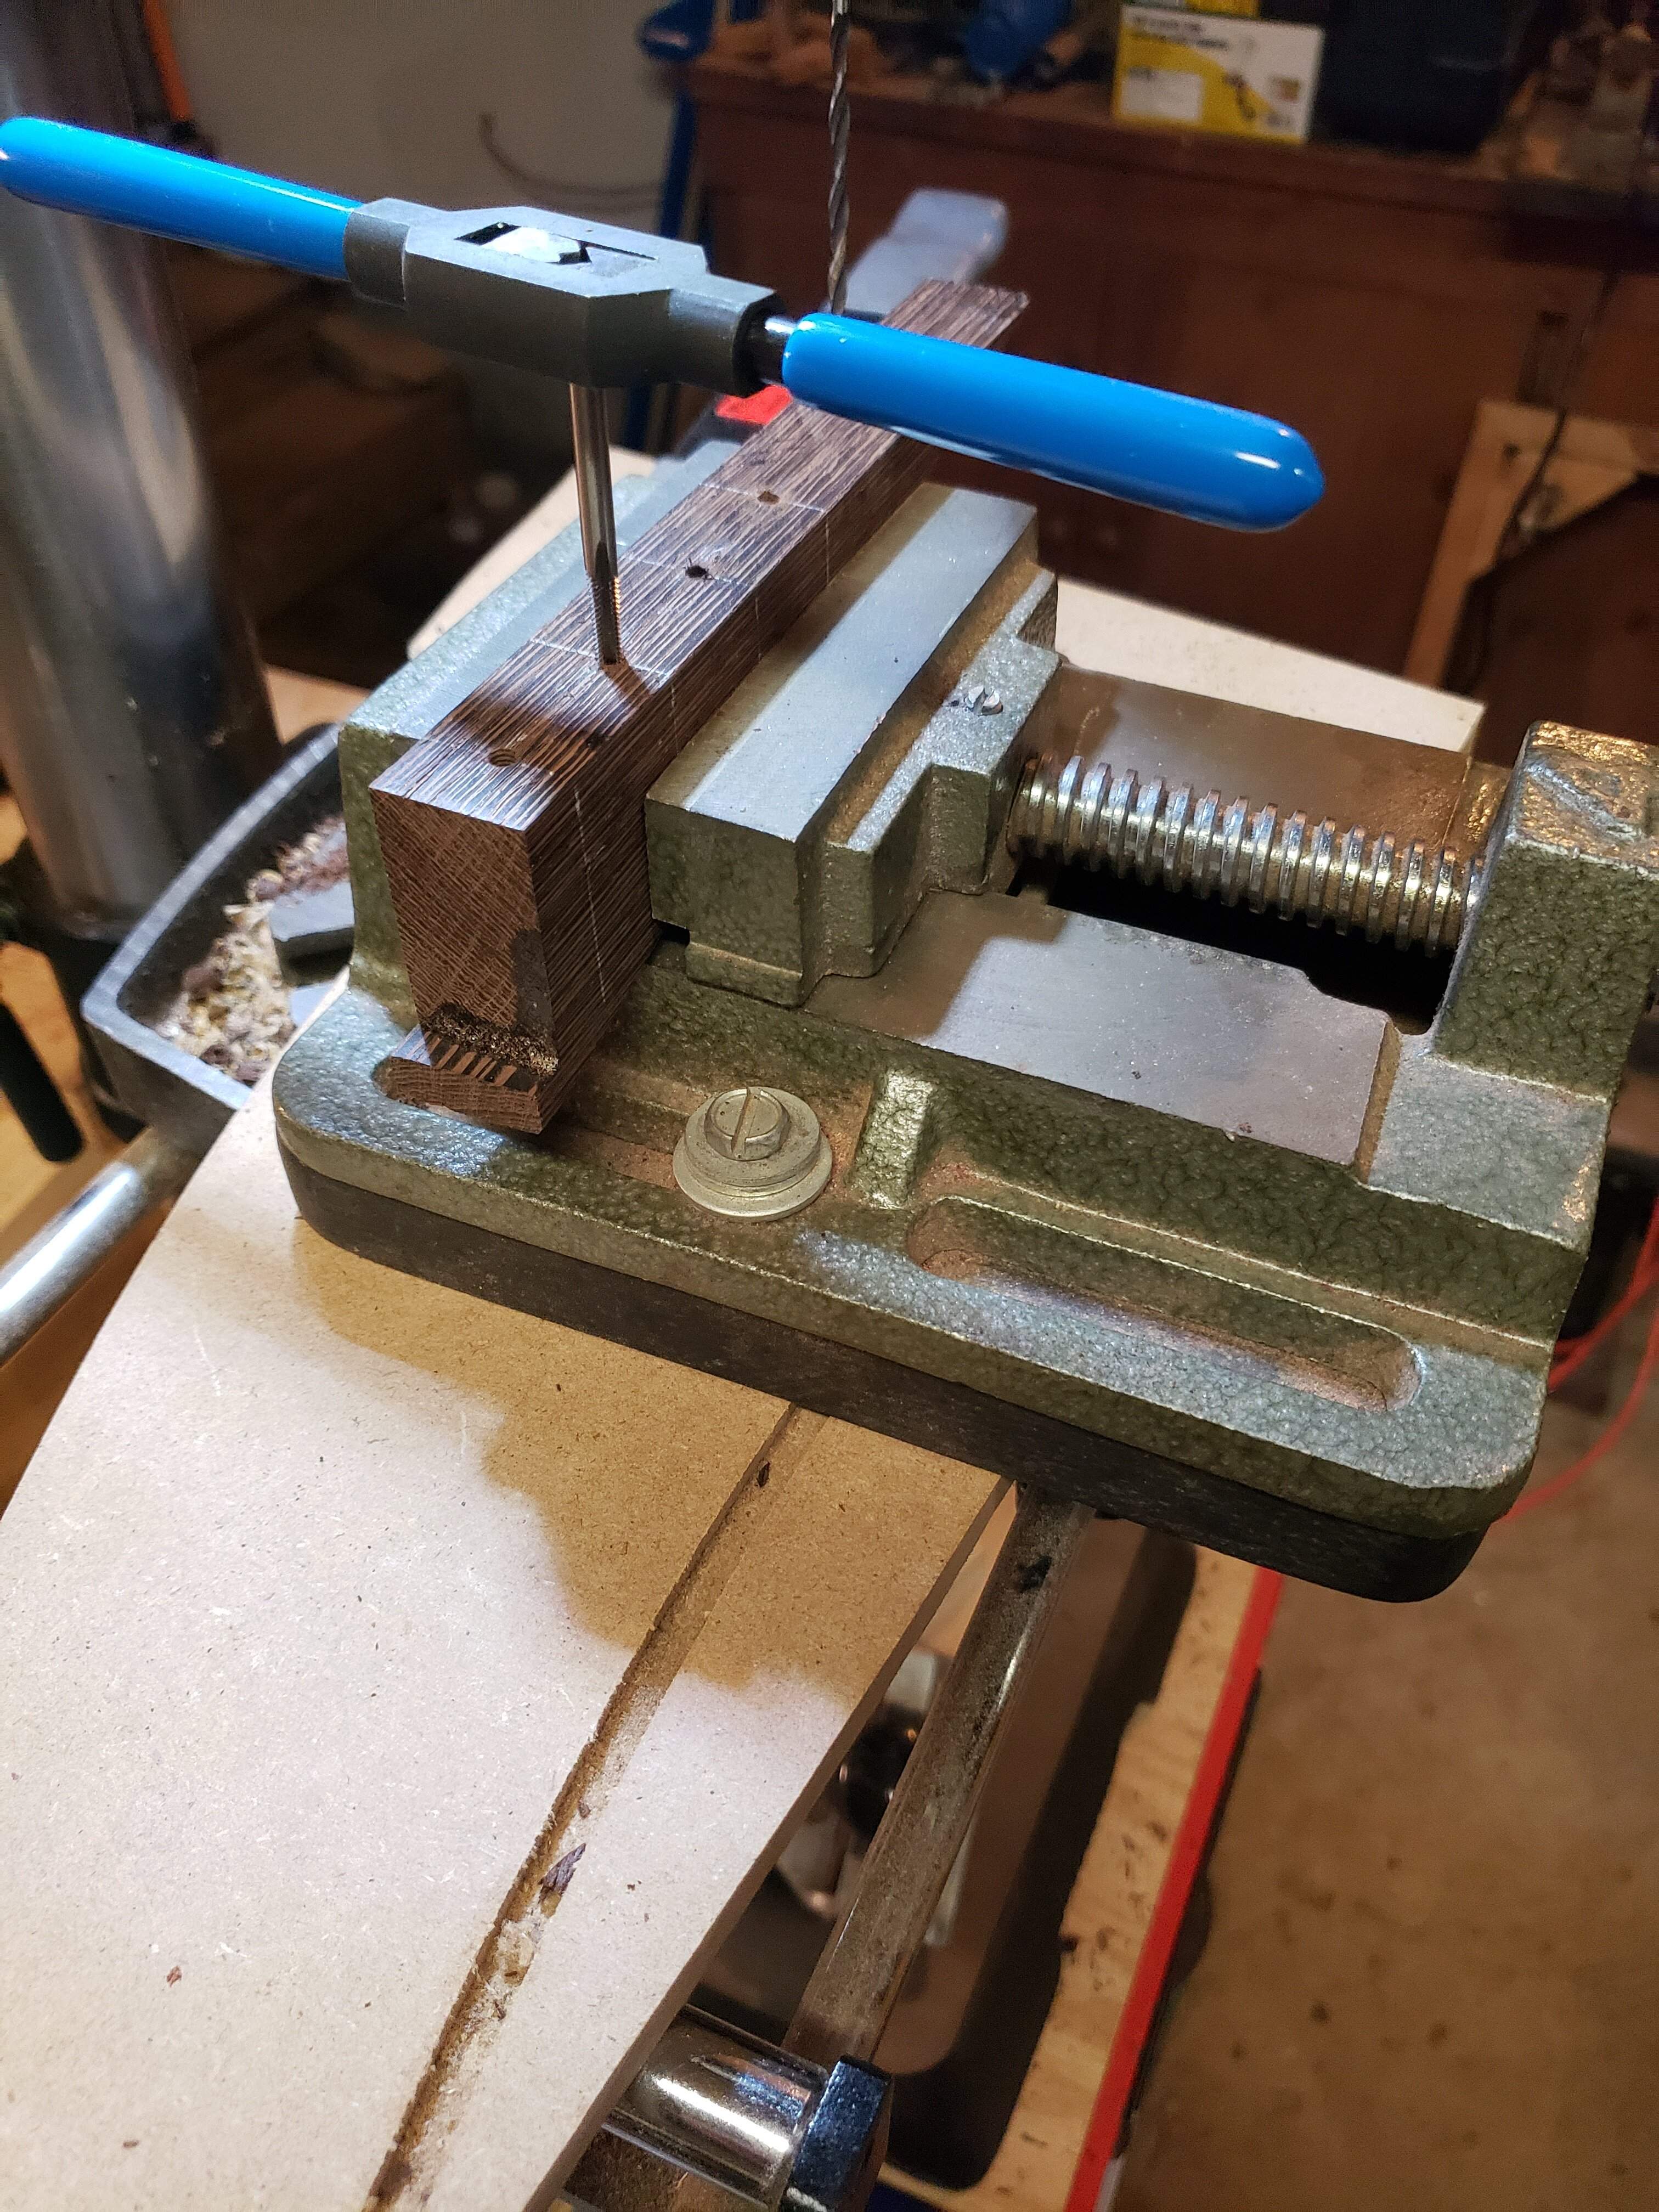 ...then CA glue is applied to harden the threads.
Recesses drilled with a forstner...
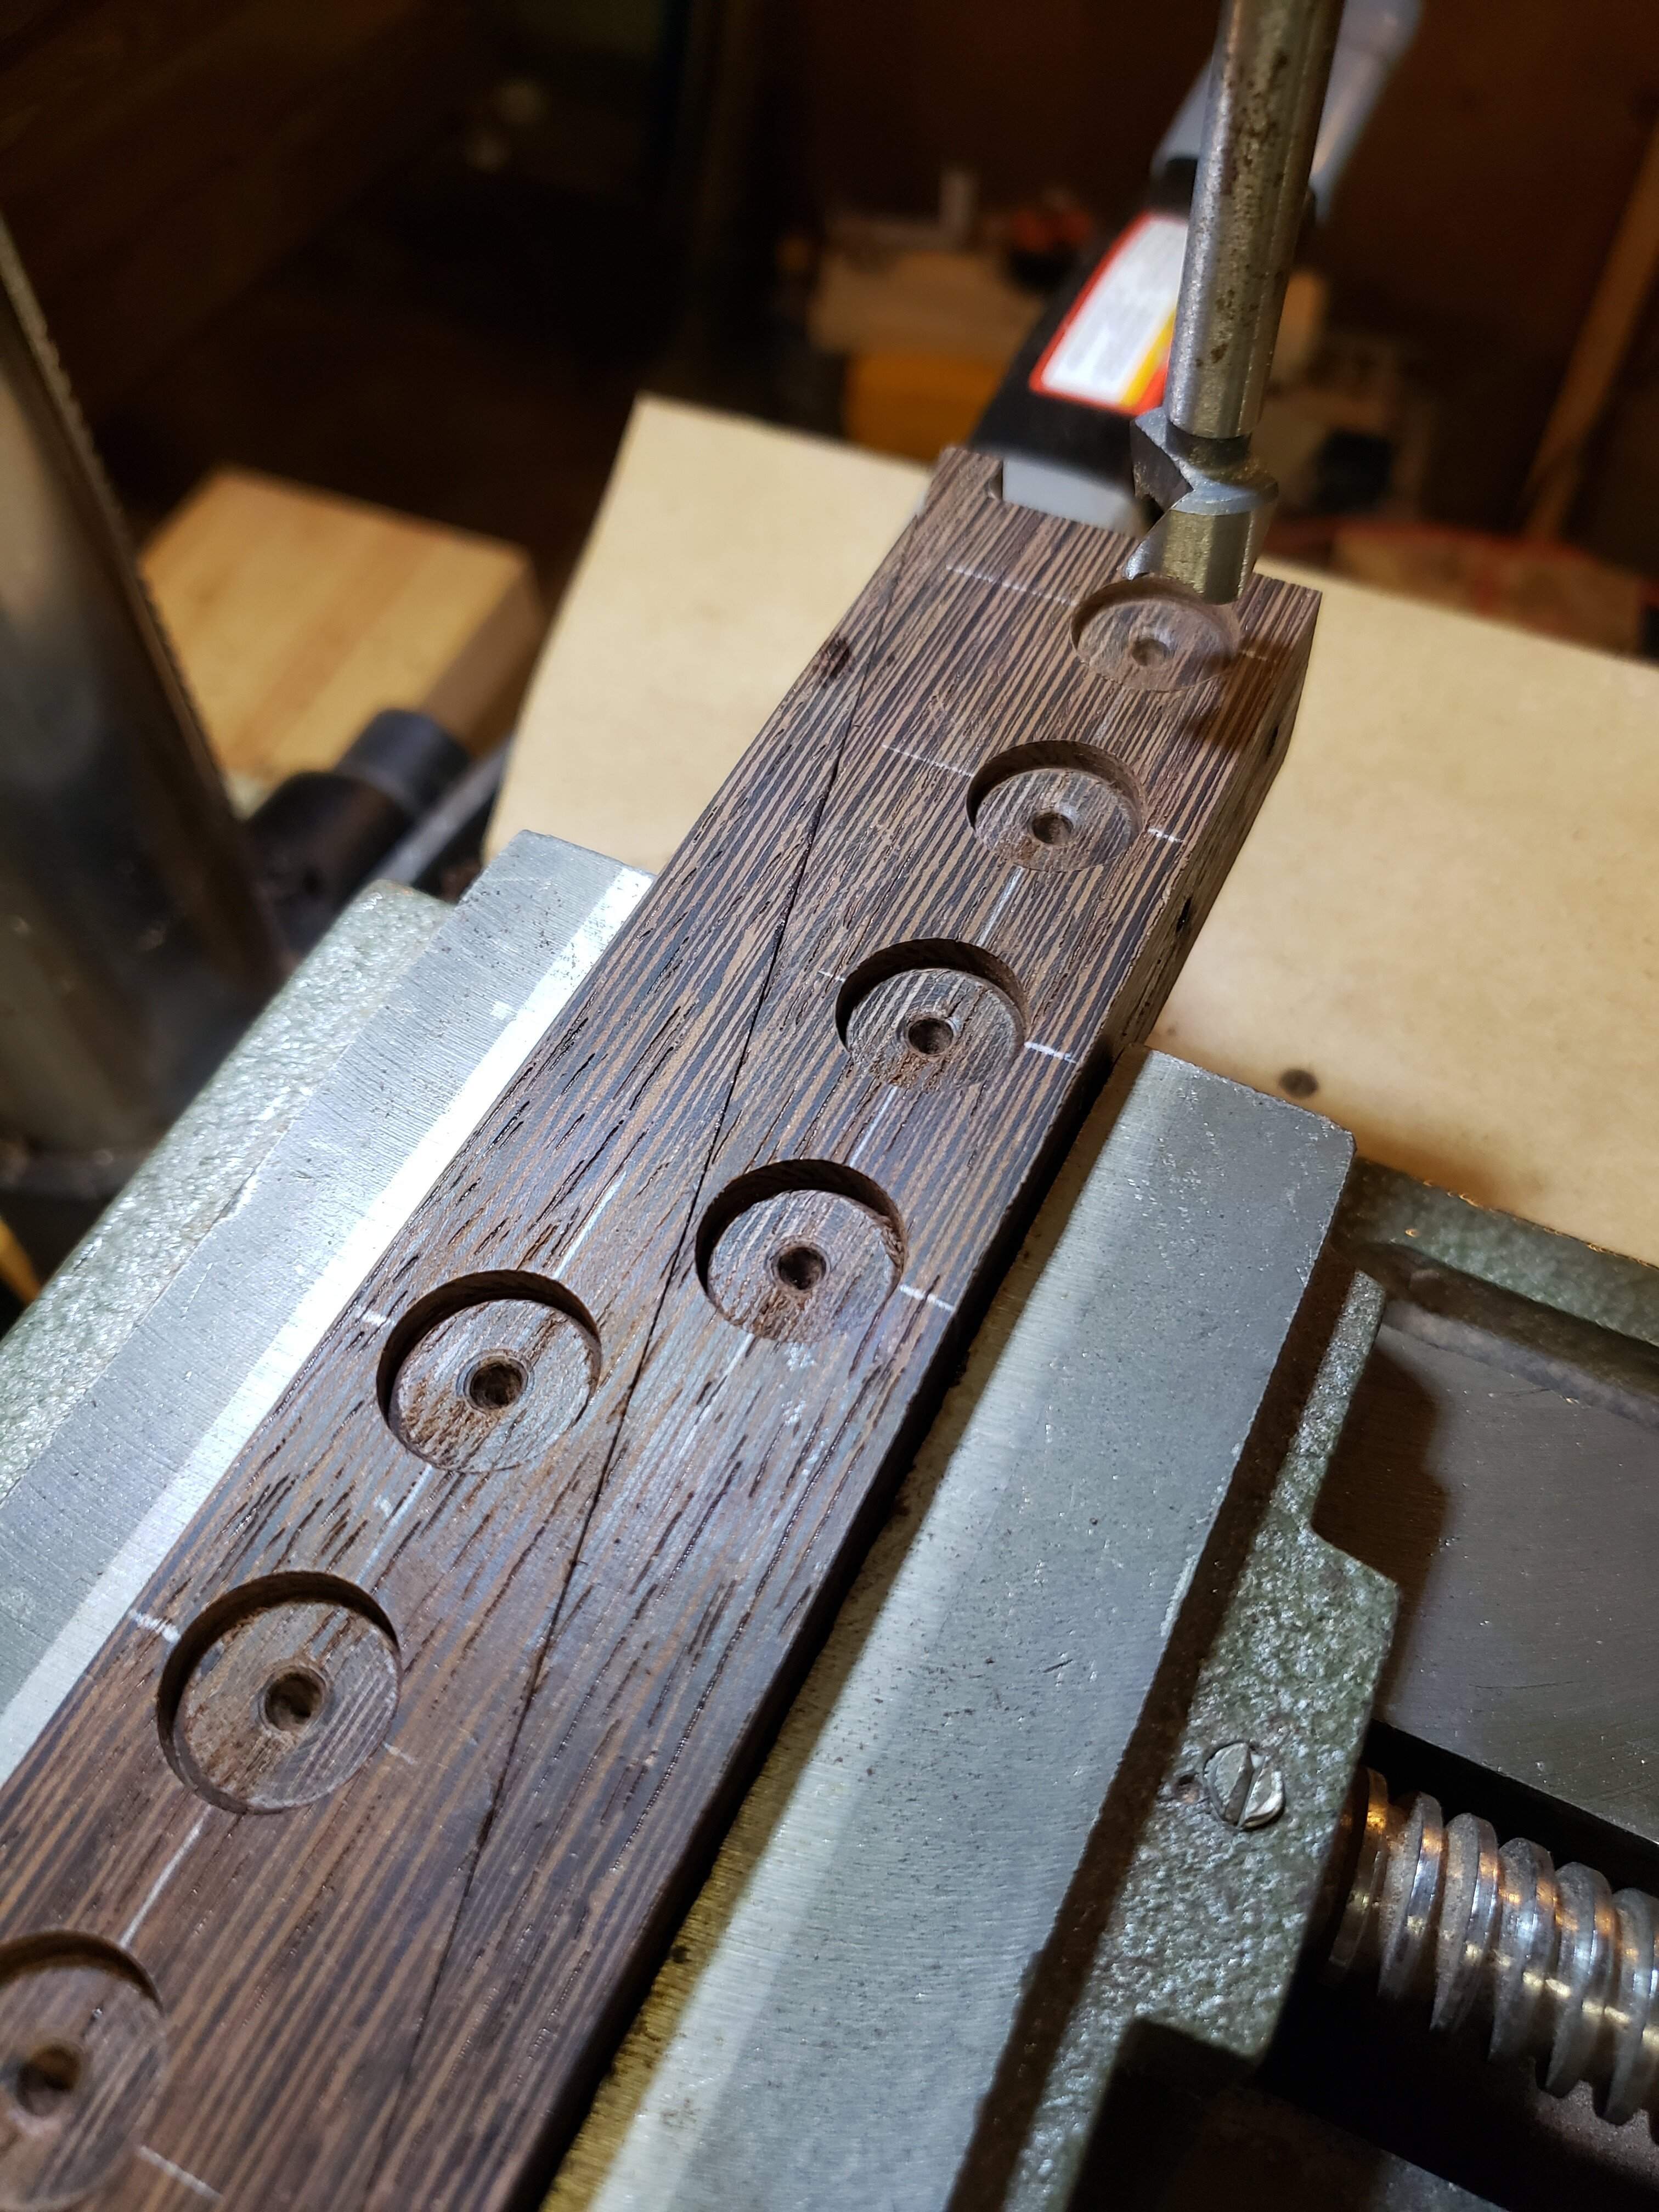
Using the center from the forstner bit, drilled the hole for the pot shaft and started the perimeter cut with a hole saw with a 1/4" center bit...
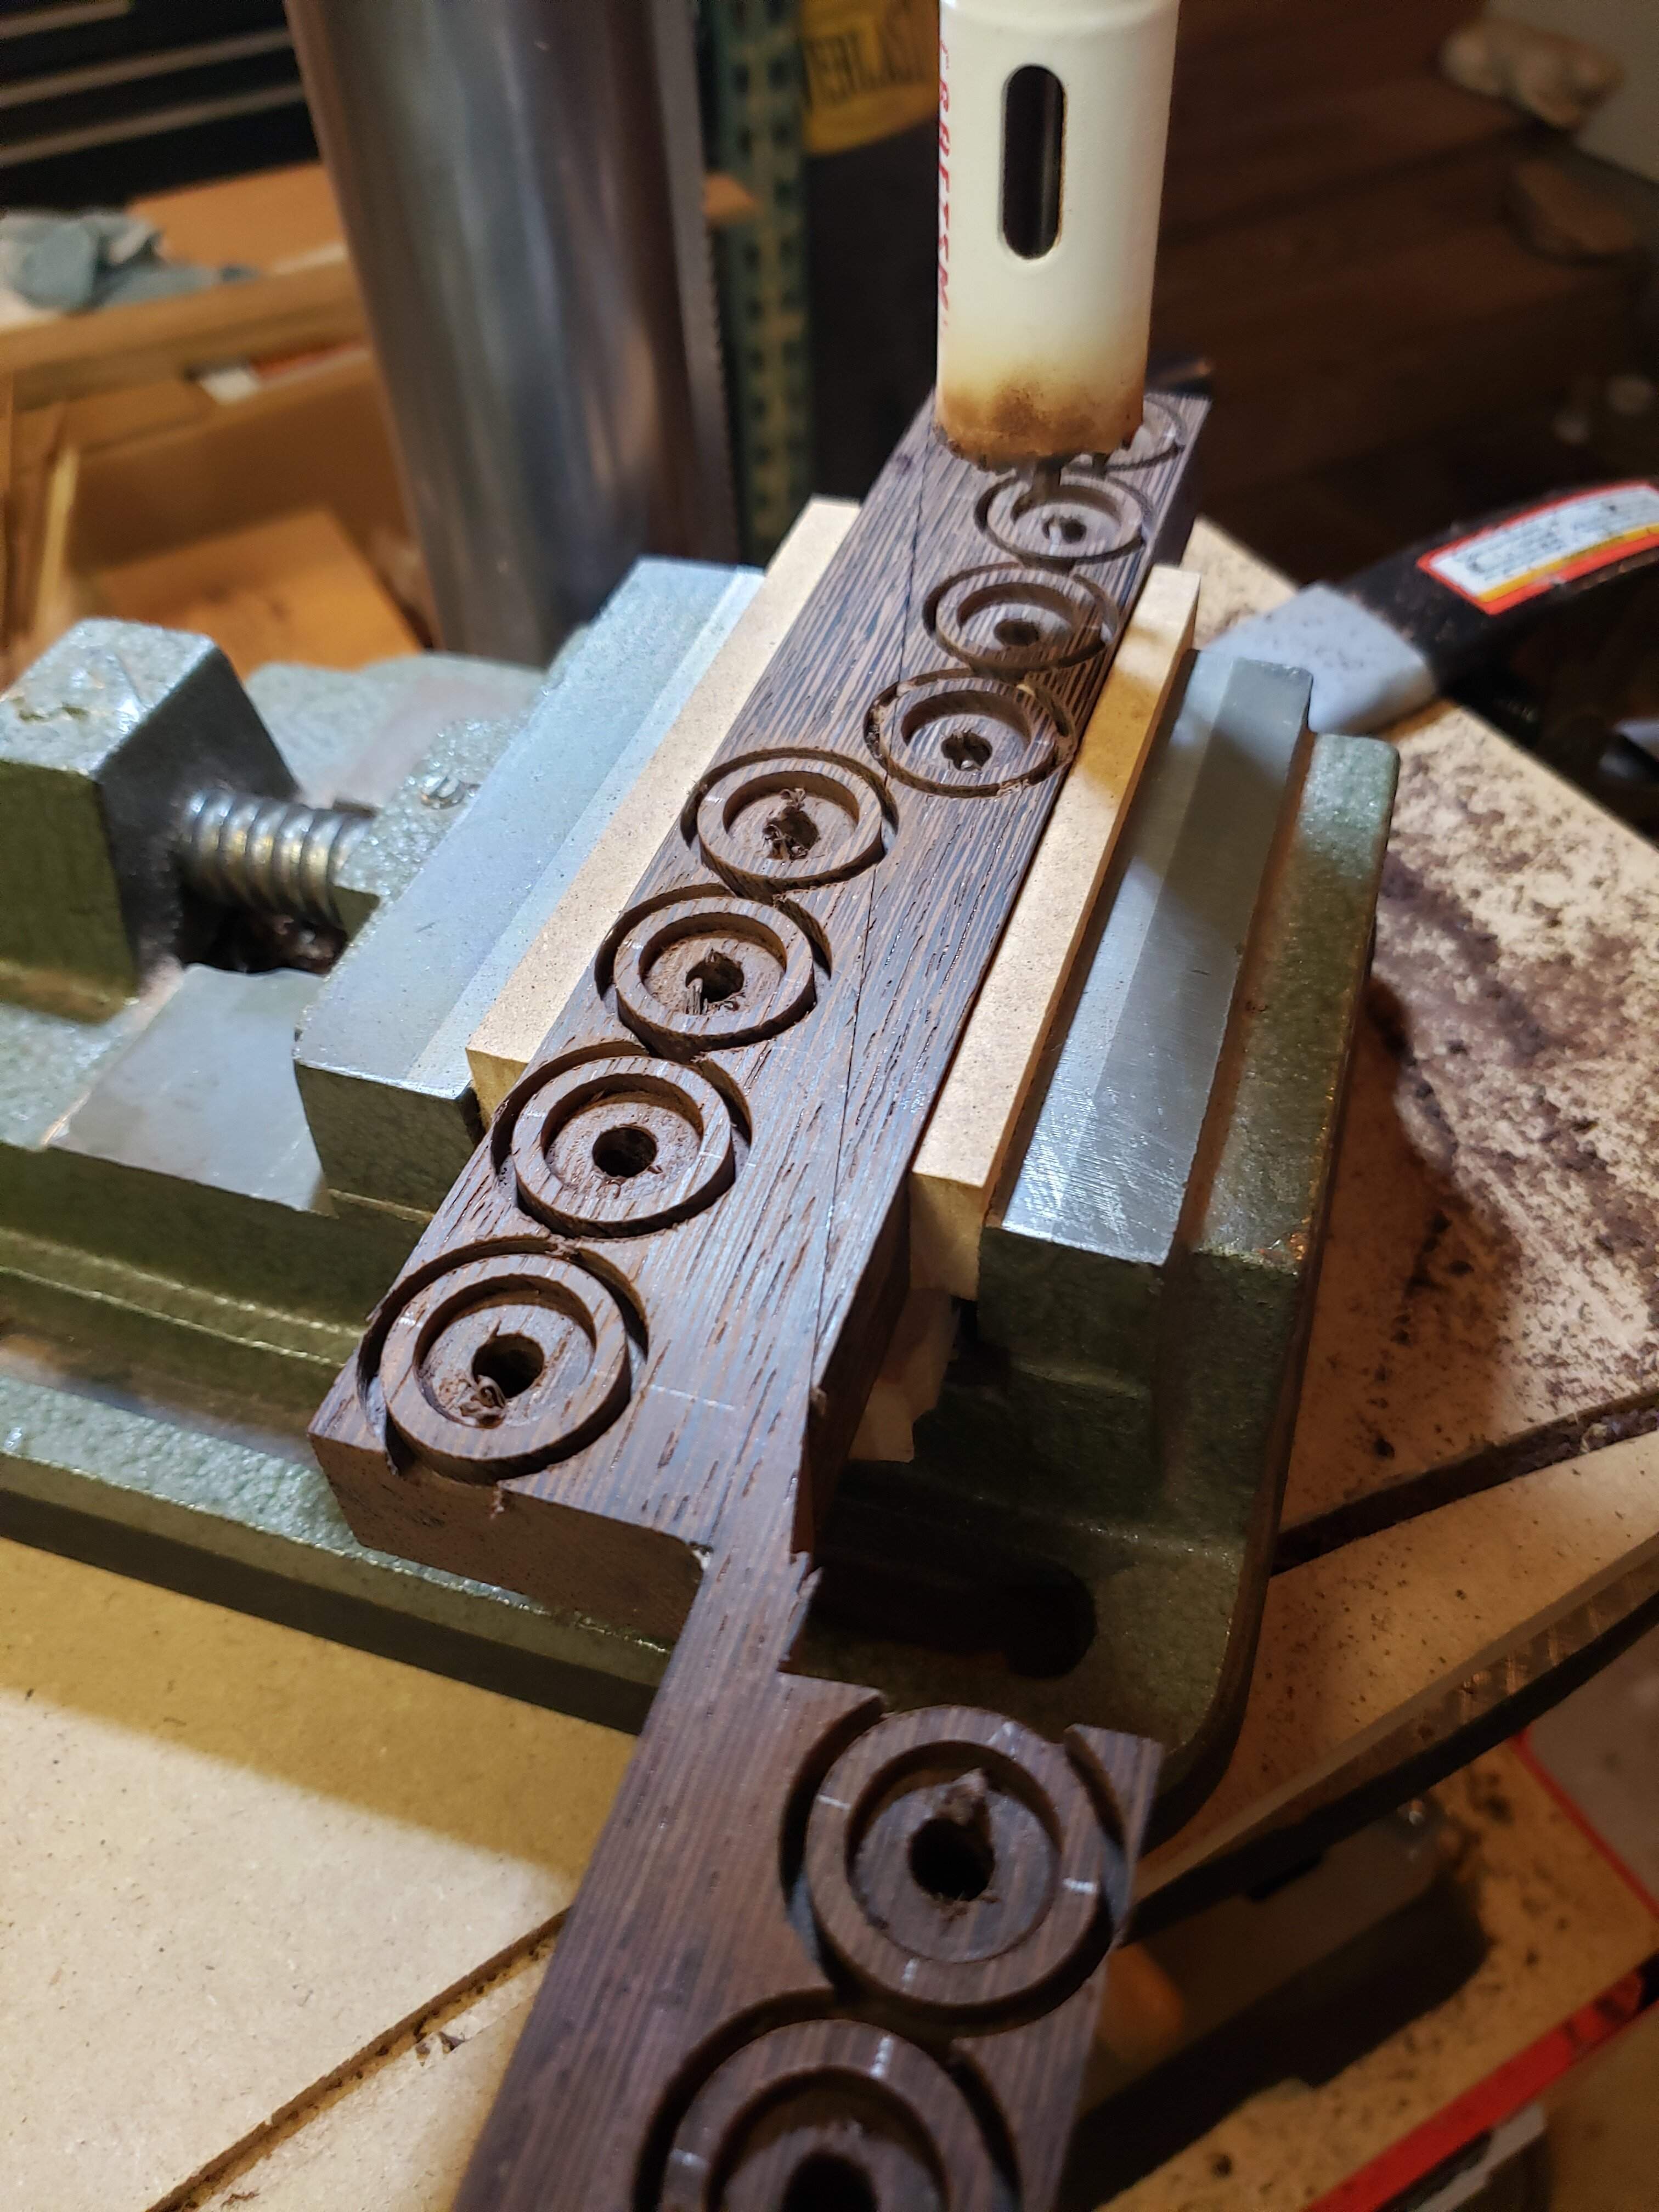 Those aren't burn marks on the hole saw, just wenge dust!
Didn't get any pictures of the next couple steps...
I removed the center bit and finished cutting out the knobs. Then I used a short section of 1/4" rod as a mandrel, inserted into a hand drill and knocked the burrs off each knob.
I also re-tapped the holes for the set screws.
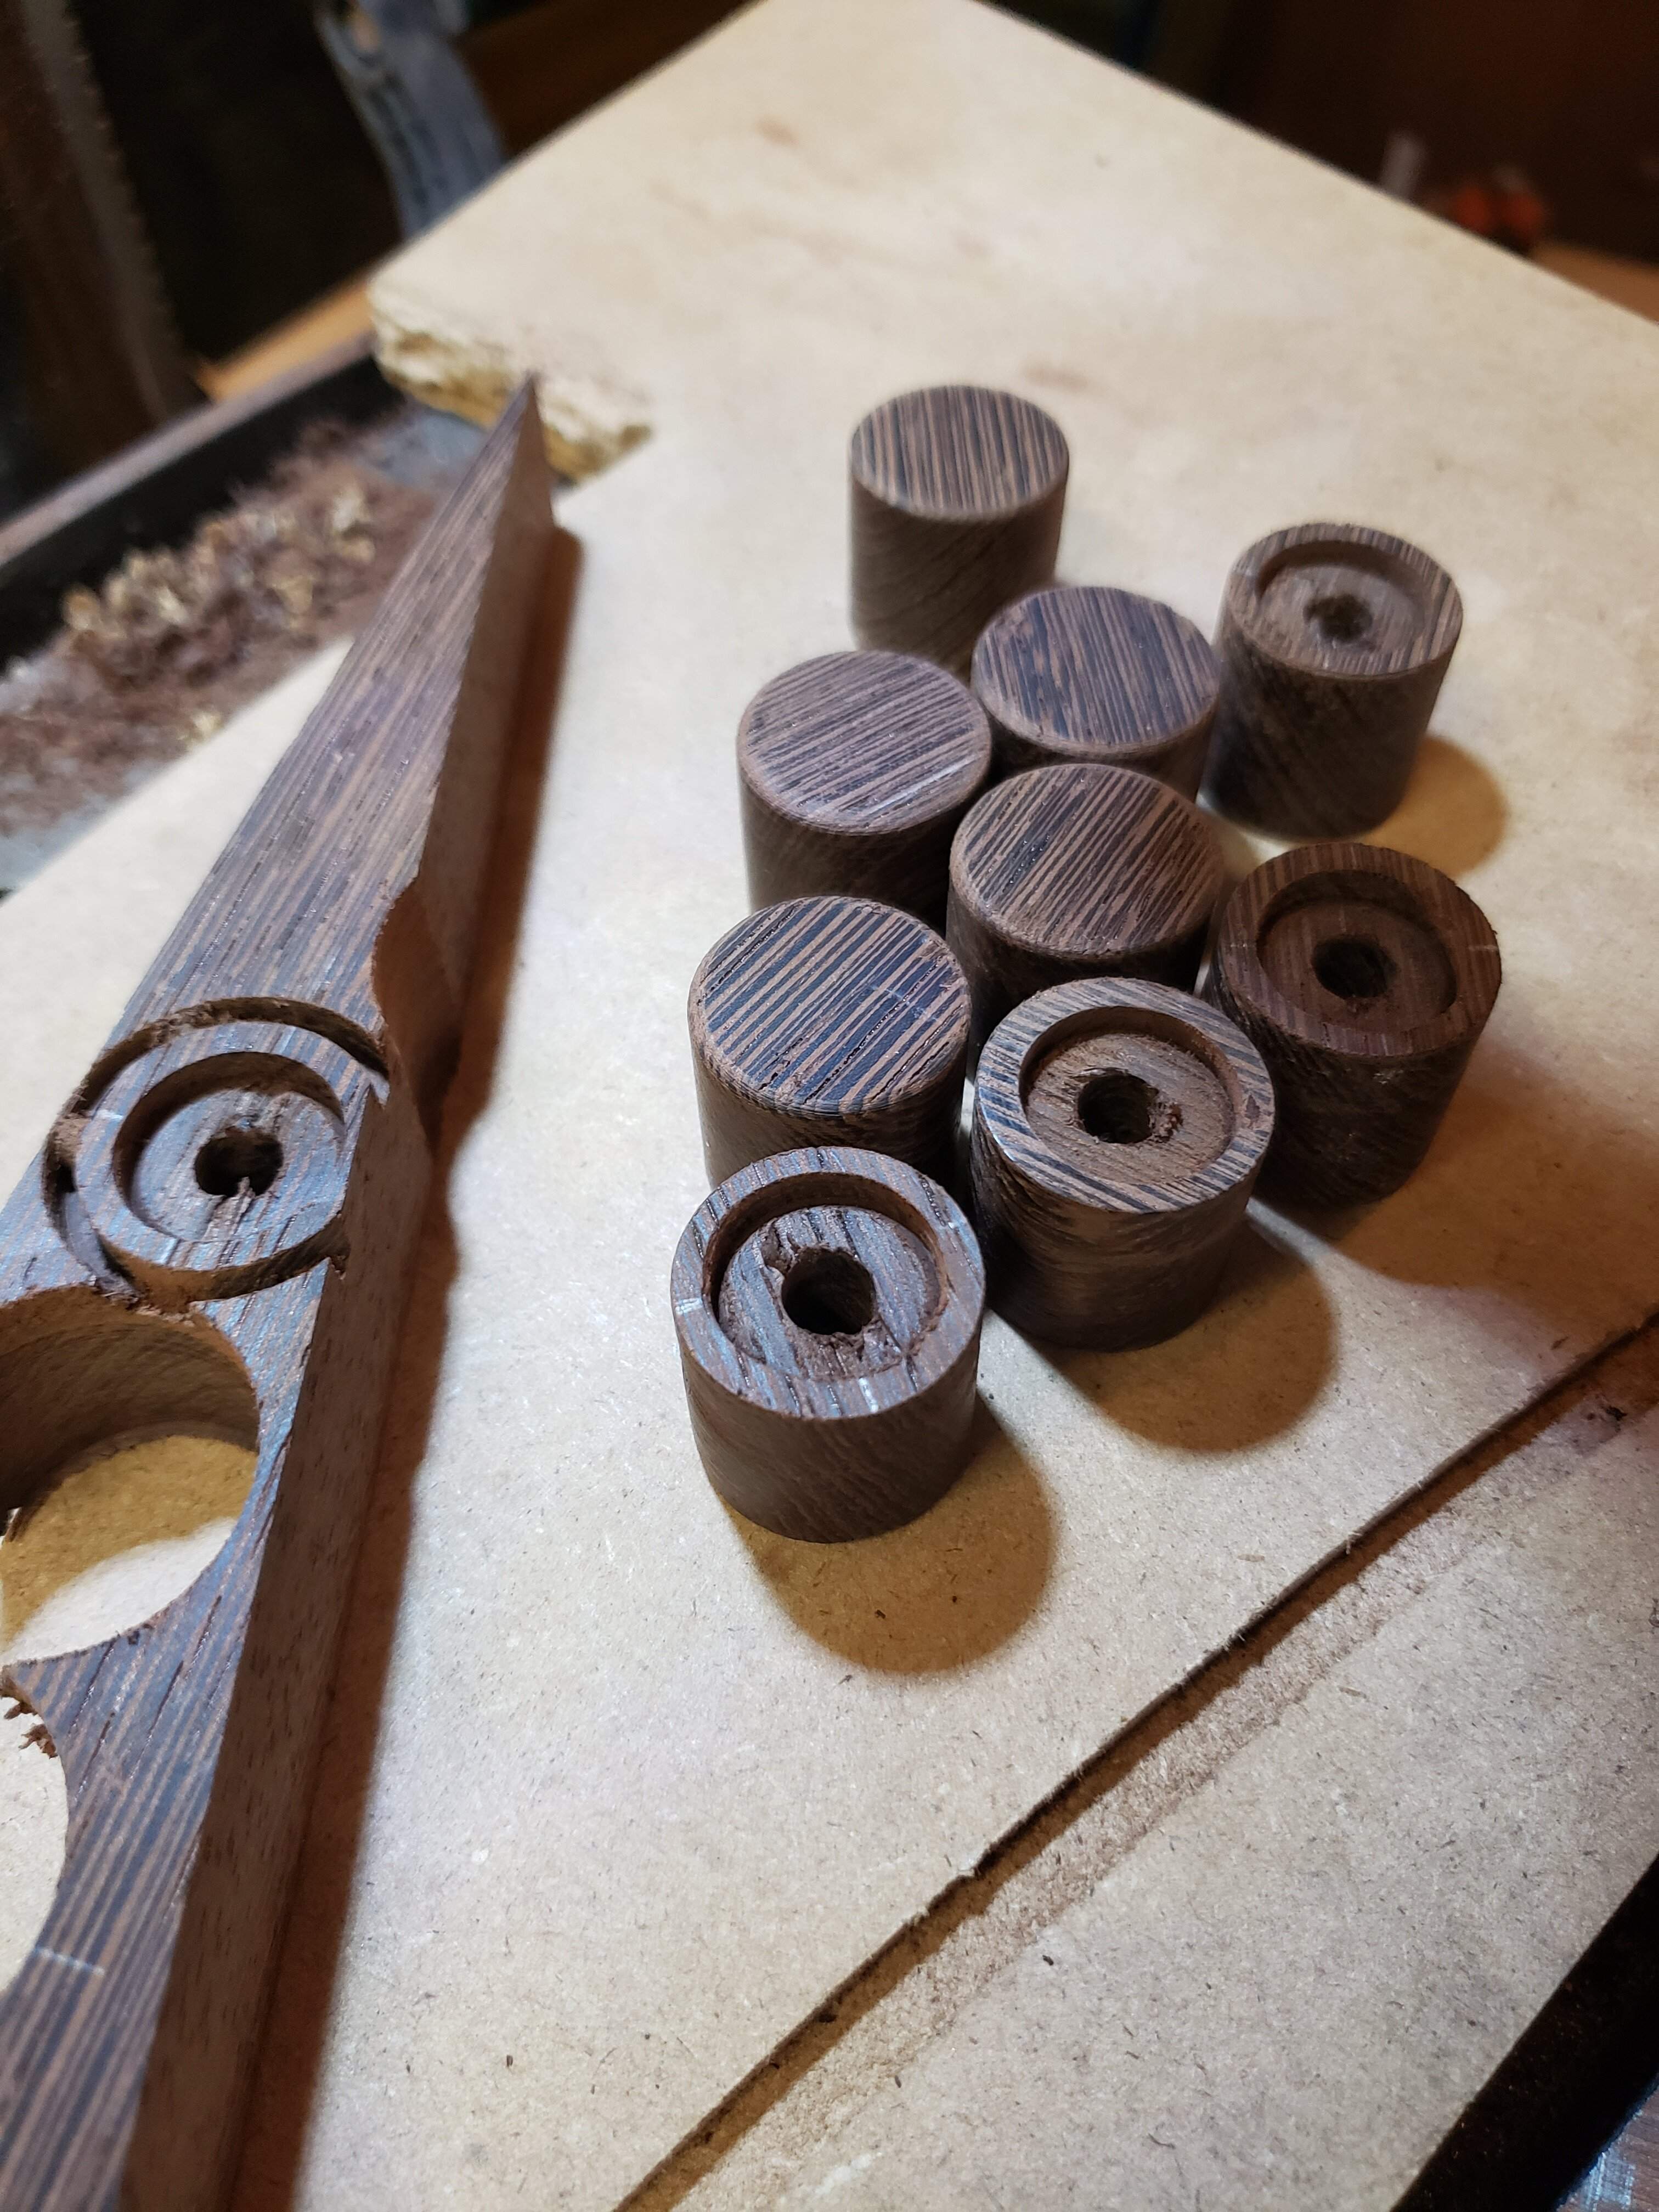
Nine finished knobs, the 10th didn't make the cut, ready for sanding and finishing!
Marked and and centers located with an awl...
...nevermind the one that is slightly off-center.
Holes drilled for the set screws while the scrap still has square sides to clamp in the vise...
Holes tapped...
Recesses drilled with a forstner...
Using the center from the forstner bit, drilled the hole for the pot shaft and started the perimeter cut with a hole saw with a 1/4" center bit...
Didn't get any pictures of the next couple steps...
I removed the center bit and finished cutting out the knobs. Then I used a short section of 1/4" rod as a mandrel, inserted into a hand drill and knocked the burrs off each knob.
I also re-tapped the holes for the set screws.
Nine finished knobs, the 10th didn't make the cut, ready for sanding and finishing!

Man, such an inspiring build thread - thank you for sharing all this. Makes me want to learn how to do this myself!
Thanks!Man, such an inspiring build thread - thank you for sharing all this. Makes me want to learn how to do this myself!
Give it a shot! There aren't many corners of the interwebs where the people are as helpful, supportive and knowledgeable as in the Luthier's Corner. This "place" has been invaluable in my own learning process.