
Enjoy the benefits of a premium membership!
Upgrade Account
-
TalkBass has been independent since 1998. Add your voice.
Create a free account to reply to discussions, view embedded media, and browse with fewer display ads.
Join free Log in
Want zero display ads or expanded classifieds tools? Compare plans.
You are using an out of date browser. It may not display this or other websites correctly.
You should upgrade or use an alternative browser.
You should upgrade or use an alternative browser.
Second bass: Maple/cherry fretless piezo, plus some side projects
- Thread starter dwizum
- Start date
More options
Who Replied?

Routed the top for the neck pocket and "soundhole" last night. I was going to file the soundhole corners square but left them at the 1/4" radius from the router bit for now.

Then I sawed the outline and tried it in place on the body:

I want to get the electronics and hardware sorted before gluing it on. Next up after that, fingerboard and bridge...
Then I sawed the outline and tried it in place on the body:
I want to get the electronics and hardware sorted before gluing it on. Next up after that, fingerboard and bridge...
The only thing I really ended up doing before gluing the top on was drilling the endpin jack hole and test-fitting the preamp, since it is built in to the jack.

It won't be easy to fit that once the top is on but I did a dry run and thought it would be OK. So I took it back out and glued the top on.
That was last night. My son was home sick from school today, so I took the day off and spent a few hours in the shop. Lots of pics, stay tuned for another update once I sort them out. Turns out I'm not super good at taking photos of things while I build them, I think I'm deleting 80% of the photos I took today...
It won't be easy to fit that once the top is on but I did a dry run and thought it would be OK. So I took it back out and glued the top on.
That was last night. My son was home sick from school today, so I took the day off and spent a few hours in the shop. Lots of pics, stay tuned for another update once I sort them out. Turns out I'm not super good at taking photos of things while I build them, I think I'm deleting 80% of the photos I took today...
After gluing the top on, I fired up my drill press drum sander and trued up the body. Just going for dimensional sanding here, not a good finish.

Some of you may have noticed that there's a gap between the body wings at the tail of the instrument:

Some of you may also remember I mentioned having an idea on how to incorporate a butterfly similar to the butterfly tenon in the table at the beginning of the thread. Well, that hole is where I intend to use the butterfly.
First step, I cut the butterfly out of a piece of quilted maple in my scrap bin. Just a rectangle of maple with a 13 degree cut in each side. Here it is laid on the end of the bass:

Next up, a quick router template made to match the tenon. Cut the same 13 degree angle into two pieces of plywood, then screw them to plywood rails with the tenon in between them to set the spacing between them. Then I clamped the rails to the bass:

Couple minutes with a pattern bit and the cutout is done:

And whaddya know, it fits! I brought it back to the sander next. The top of the butterfly is proud of the top of the bass by 3/8th or so, I gave it a subtle curve on the sander, then put the tenon in the body and sanded a curve in the face of the tenon to match the body's curve.

My goal is that the edge of the tenon that's proud of the top of the bass will serve as a tailpiece for the strings. Next up, bridge layout. I marked the scale length and made a paper template:

Then I plunge routed the slot in a piece of 1/4" thick birdseye maple, and cut the outline of the bridge. My first slot wasn't very good so I ended up abandoning the first bridge and cutting a second one. After cutting the blank out, I took it to the sander and made the bevels. This was really fun and I think it turned out OK, for my first ever bridge.


The bridge will eventually get glued down. The tenon will not be glued or otherwise fixed in place. It's a tight friction fit, so it stays put - and once the strings are on, string tension will hold it in place anyways.
With the tenon removable, I have an "access hole" for the electronics and the 9v battery, which will get velcro'd to the inside face of the tenon, and I don't need to have an ugly cover plate anywhere! I suppose I could have done battery access through the soundhole, but I really liked this tenon idea anyways - it fits with my original goal of having an organic, clean design without a lot of visible hardware or controls.
Before I quit, a few more gratuitous photos of the tenon, because I'm just so happy with how it turned out. This is my favorite part of woodworking - having a vague idea in your head, and then making it a reality. For me, this is much more rewarding than following a plan or otherwise building something that doesn't require thought while you're working on it.


Some of you may have noticed that there's a gap between the body wings at the tail of the instrument:
Some of you may also remember I mentioned having an idea on how to incorporate a butterfly similar to the butterfly tenon in the table at the beginning of the thread. Well, that hole is where I intend to use the butterfly.
First step, I cut the butterfly out of a piece of quilted maple in my scrap bin. Just a rectangle of maple with a 13 degree cut in each side. Here it is laid on the end of the bass:
Next up, a quick router template made to match the tenon. Cut the same 13 degree angle into two pieces of plywood, then screw them to plywood rails with the tenon in between them to set the spacing between them. Then I clamped the rails to the bass:
Couple minutes with a pattern bit and the cutout is done:
And whaddya know, it fits! I brought it back to the sander next. The top of the butterfly is proud of the top of the bass by 3/8th or so, I gave it a subtle curve on the sander, then put the tenon in the body and sanded a curve in the face of the tenon to match the body's curve.
My goal is that the edge of the tenon that's proud of the top of the bass will serve as a tailpiece for the strings. Next up, bridge layout. I marked the scale length and made a paper template:
Then I plunge routed the slot in a piece of 1/4" thick birdseye maple, and cut the outline of the bridge. My first slot wasn't very good so I ended up abandoning the first bridge and cutting a second one. After cutting the blank out, I took it to the sander and made the bevels. This was really fun and I think it turned out OK, for my first ever bridge.
The bridge will eventually get glued down. The tenon will not be glued or otherwise fixed in place. It's a tight friction fit, so it stays put - and once the strings are on, string tension will hold it in place anyways.
With the tenon removable, I have an "access hole" for the electronics and the 9v battery, which will get velcro'd to the inside face of the tenon, and I don't need to have an ugly cover plate anywhere! I suppose I could have done battery access through the soundhole, but I really liked this tenon idea anyways - it fits with my original goal of having an organic, clean design without a lot of visible hardware or controls.
Before I quit, a few more gratuitous photos of the tenon, because I'm just so happy with how it turned out. This is my favorite part of woodworking - having a vague idea in your head, and then making it a reality. For me, this is much more rewarding than following a plan or otherwise building something that doesn't require thought while you're working on it.


Great work. Very organic. Are you going to add some metal where the string ends will ride or will the maple hold up ?
@Jisch - looking forward to seeing what you do. I've been mentally doing these steps over and over for the last week or so. I like to make mistakes in my head vs in wood.
@Matt Liebenau No plans to use ferrules or any other sort of reinforcement, just going to do angled holes drilled through the maple, countersunk to give the balls on the ends of the strings somewhere to sit. It's flatsawn hard maple, should be plenty durable. I guess if it turns out I'm wrong, I can easily build another tenon and reinforce it!
In one of my daydreams about this design, I was thinking about putting the endpin jack in the tenon as well, but I felt like that would be too many holes and a lot of extra stress. And in my most extreme daydream, I was thinking about putting not just the endpin in the tenon, but also a slot into which I could recess big thumbwheels or slider pots for the controls. Then you'd have all the electronics except the pickup stuck on the tenon. That would have definitely been too much going on structurally, unless the tenon was a lot wider, which I didn't want. Plus I think the soundhole mounted controls are going to be more practical - less damage prone than controls on the tail of the bass, at least.
Since I've got everyone's attention - the next (maybe last?) big thing I'm trying to decide is what to do with the edges of the body. I don't think I want the labor of binding them, but I like the crisp look of a sharp corner. Although it probably wouldn't be that comfortable to leave them sharp. I'm thinking about a big gradual curve across the whole side profile. I guess what I don't want is just a boring plain old roundover.
Probably won't get to work on this bass until the weekend at this point. I think the fingerboard is going to be next. I have to glue it on, put veneer in the fret lines, bind it, and put in position markers. Also at some point I have to get back to my daughter's guitar...
@Matt Liebenau No plans to use ferrules or any other sort of reinforcement, just going to do angled holes drilled through the maple, countersunk to give the balls on the ends of the strings somewhere to sit. It's flatsawn hard maple, should be plenty durable. I guess if it turns out I'm wrong, I can easily build another tenon and reinforce it!
In one of my daydreams about this design, I was thinking about putting the endpin jack in the tenon as well, but I felt like that would be too many holes and a lot of extra stress. And in my most extreme daydream, I was thinking about putting not just the endpin in the tenon, but also a slot into which I could recess big thumbwheels or slider pots for the controls. Then you'd have all the electronics except the pickup stuck on the tenon. That would have definitely been too much going on structurally, unless the tenon was a lot wider, which I didn't want. Plus I think the soundhole mounted controls are going to be more practical - less damage prone than controls on the tail of the bass, at least.
Since I've got everyone's attention - the next (maybe last?) big thing I'm trying to decide is what to do with the edges of the body. I don't think I want the labor of binding them, but I like the crisp look of a sharp corner. Although it probably wouldn't be that comfortable to leave them sharp. I'm thinking about a big gradual curve across the whole side profile. I guess what I don't want is just a boring plain old roundover.
Probably won't get to work on this bass until the weekend at this point. I think the fingerboard is going to be next. I have to glue it on, put veneer in the fret lines, bind it, and put in position markers. Also at some point I have to get back to my daughter's guitar...
I haven't even started thinking about what the tailpiece will look like yet. I probably will put a control cavity cover in though, I'm not sure mine will be removable like that one - very clever!
I don't think this style of removable tailpiece access would work for an instrument with typical control knobs etc as you really wouldn't have good access to them at all. I'd want a "normal" cover if I had the possibility of having to replace a pot through the top or anything. At any rate, the way you do your covers out of the same chunk of wood as the back is pretty nice too.
I had a few minutes to do some shaping on the headstock and body over the weekend. While I was working on the headstock, I noticed something curious (and promising) - I could hear the usual raspy sounds from the file against the wood, but the sound was loudest coming from the soundhole, not directly from where the file was touching the headstock - I guess the vibrations were traveling down the neck and taking advantage of the (albeit small) natural amplification of a hollow body.
I'm pretty sure I figured the contouring out. I did a very small flat arm relief on the top of the body:

(that hairline of cherry that's visible will disappear in finish sanding.)
And a few matching small reliefs in the waist on the back:

And I flattened out the transition to the neck to have the same look, angle-wise, where the back panel meets the neck carving:

I think that's all I will do, and leave the rest of the edges as sharp cormers. I like the way the sharp corners evoke the sharp corners of an acoustic guitar/bass, while the small carved sections evoke an electric solid body.
I also got the bottom of the fingerboard cut away to match the soundhole and glued it on. Before I glued it on, I clamped it in place and tested out the access to the truss rod, which is a good thing, because the little carved relief in the top wasn't quite long enough. But after some careful chisel work, the wrench fits in, and you can't see any evidence of the truss rod access at all:

I cut the fingerboard narrow enough to account for the wide binding I'm planning on using, hence that exposed ledge along the neck.
Then I set the bass aside and I finished fitting the heel of the guitar neck into the guitar body. The neck pocket in the body was a bit sloppy. Looks like that's partially due to poor machining and partially due to the body being kicked around in storage for 58 years or so. So it was impossible to get a 100% perfect fit due to little dings and dents along the edge of the pocket, but this will be hidden under the pickguard anyways.

Then I marked the guitar neck for position marker dots. I have 2mm abalone dots for the side and 1/4 abalone for the face. I drilled the holes on the side and glued those dots in. Working with 2mm dots is hilariously frustrating. I can only imagine the plastic rod approach is much easier, but I wanted abalone since I love the look of abalone against maple. In the end, I got the dot on top of the hole with tweezers, then gently tapped it with a soft hammer to pop it down into the hole, then wicked thin CA onto it to hold it in. They're a really tight fit in the hole, I couldn't get them in without the hammer taps. They're definitely not going anywhere. I can't find my 1/4" forstner bit to do the face holes so I guess that will have to wait until I buy another one.

The body needs the pickup route widened, and the guitar neck needs to be fretted and position markers installed, then the guitar will be ready for a finish. I'm thinking about a cream white for the body, and leave the neck natural.
Next up on the bass is fingerboard line inlays and binding...
I had a few minutes to do some shaping on the headstock and body over the weekend. While I was working on the headstock, I noticed something curious (and promising) - I could hear the usual raspy sounds from the file against the wood, but the sound was loudest coming from the soundhole, not directly from where the file was touching the headstock - I guess the vibrations were traveling down the neck and taking advantage of the (albeit small) natural amplification of a hollow body.
I'm pretty sure I figured the contouring out. I did a very small flat arm relief on the top of the body:
(that hairline of cherry that's visible will disappear in finish sanding.)
And a few matching small reliefs in the waist on the back:
And I flattened out the transition to the neck to have the same look, angle-wise, where the back panel meets the neck carving:
I think that's all I will do, and leave the rest of the edges as sharp cormers. I like the way the sharp corners evoke the sharp corners of an acoustic guitar/bass, while the small carved sections evoke an electric solid body.
I also got the bottom of the fingerboard cut away to match the soundhole and glued it on. Before I glued it on, I clamped it in place and tested out the access to the truss rod, which is a good thing, because the little carved relief in the top wasn't quite long enough. But after some careful chisel work, the wrench fits in, and you can't see any evidence of the truss rod access at all:
I cut the fingerboard narrow enough to account for the wide binding I'm planning on using, hence that exposed ledge along the neck.
Then I set the bass aside and I finished fitting the heel of the guitar neck into the guitar body. The neck pocket in the body was a bit sloppy. Looks like that's partially due to poor machining and partially due to the body being kicked around in storage for 58 years or so. So it was impossible to get a 100% perfect fit due to little dings and dents along the edge of the pocket, but this will be hidden under the pickguard anyways.
Then I marked the guitar neck for position marker dots. I have 2mm abalone dots for the side and 1/4 abalone for the face. I drilled the holes on the side and glued those dots in. Working with 2mm dots is hilariously frustrating. I can only imagine the plastic rod approach is much easier, but I wanted abalone since I love the look of abalone against maple. In the end, I got the dot on top of the hole with tweezers, then gently tapped it with a soft hammer to pop it down into the hole, then wicked thin CA onto it to hold it in. They're a really tight fit in the hole, I couldn't get them in without the hammer taps. They're definitely not going anywhere. I can't find my 1/4" forstner bit to do the face holes so I guess that will have to wait until I buy another one.
The body needs the pickup route widened, and the guitar neck needs to be fretted and position markers installed, then the guitar will be ready for a finish. I'm thinking about a cream white for the body, and leave the neck natural.
Next up on the bass is fingerboard line inlays and binding...
 The builds are looking good.
Plenty of progress in the few hours I managed to spend in the shop yesterday.
First I glued cherry veneer in the fret lines on the bass. I used thin CA for this (don't worry, that piece of veneer right up near the camera that's too short for it's slot got replaced before gluing!).

While the CA was setting up, I drilled the guitar neck for position markers, glued them in, and pounded in the frets.

I went ahead and leveled the frets, crowned them, and shaped the ends. I'll polish them later. I really love abalone against maple.
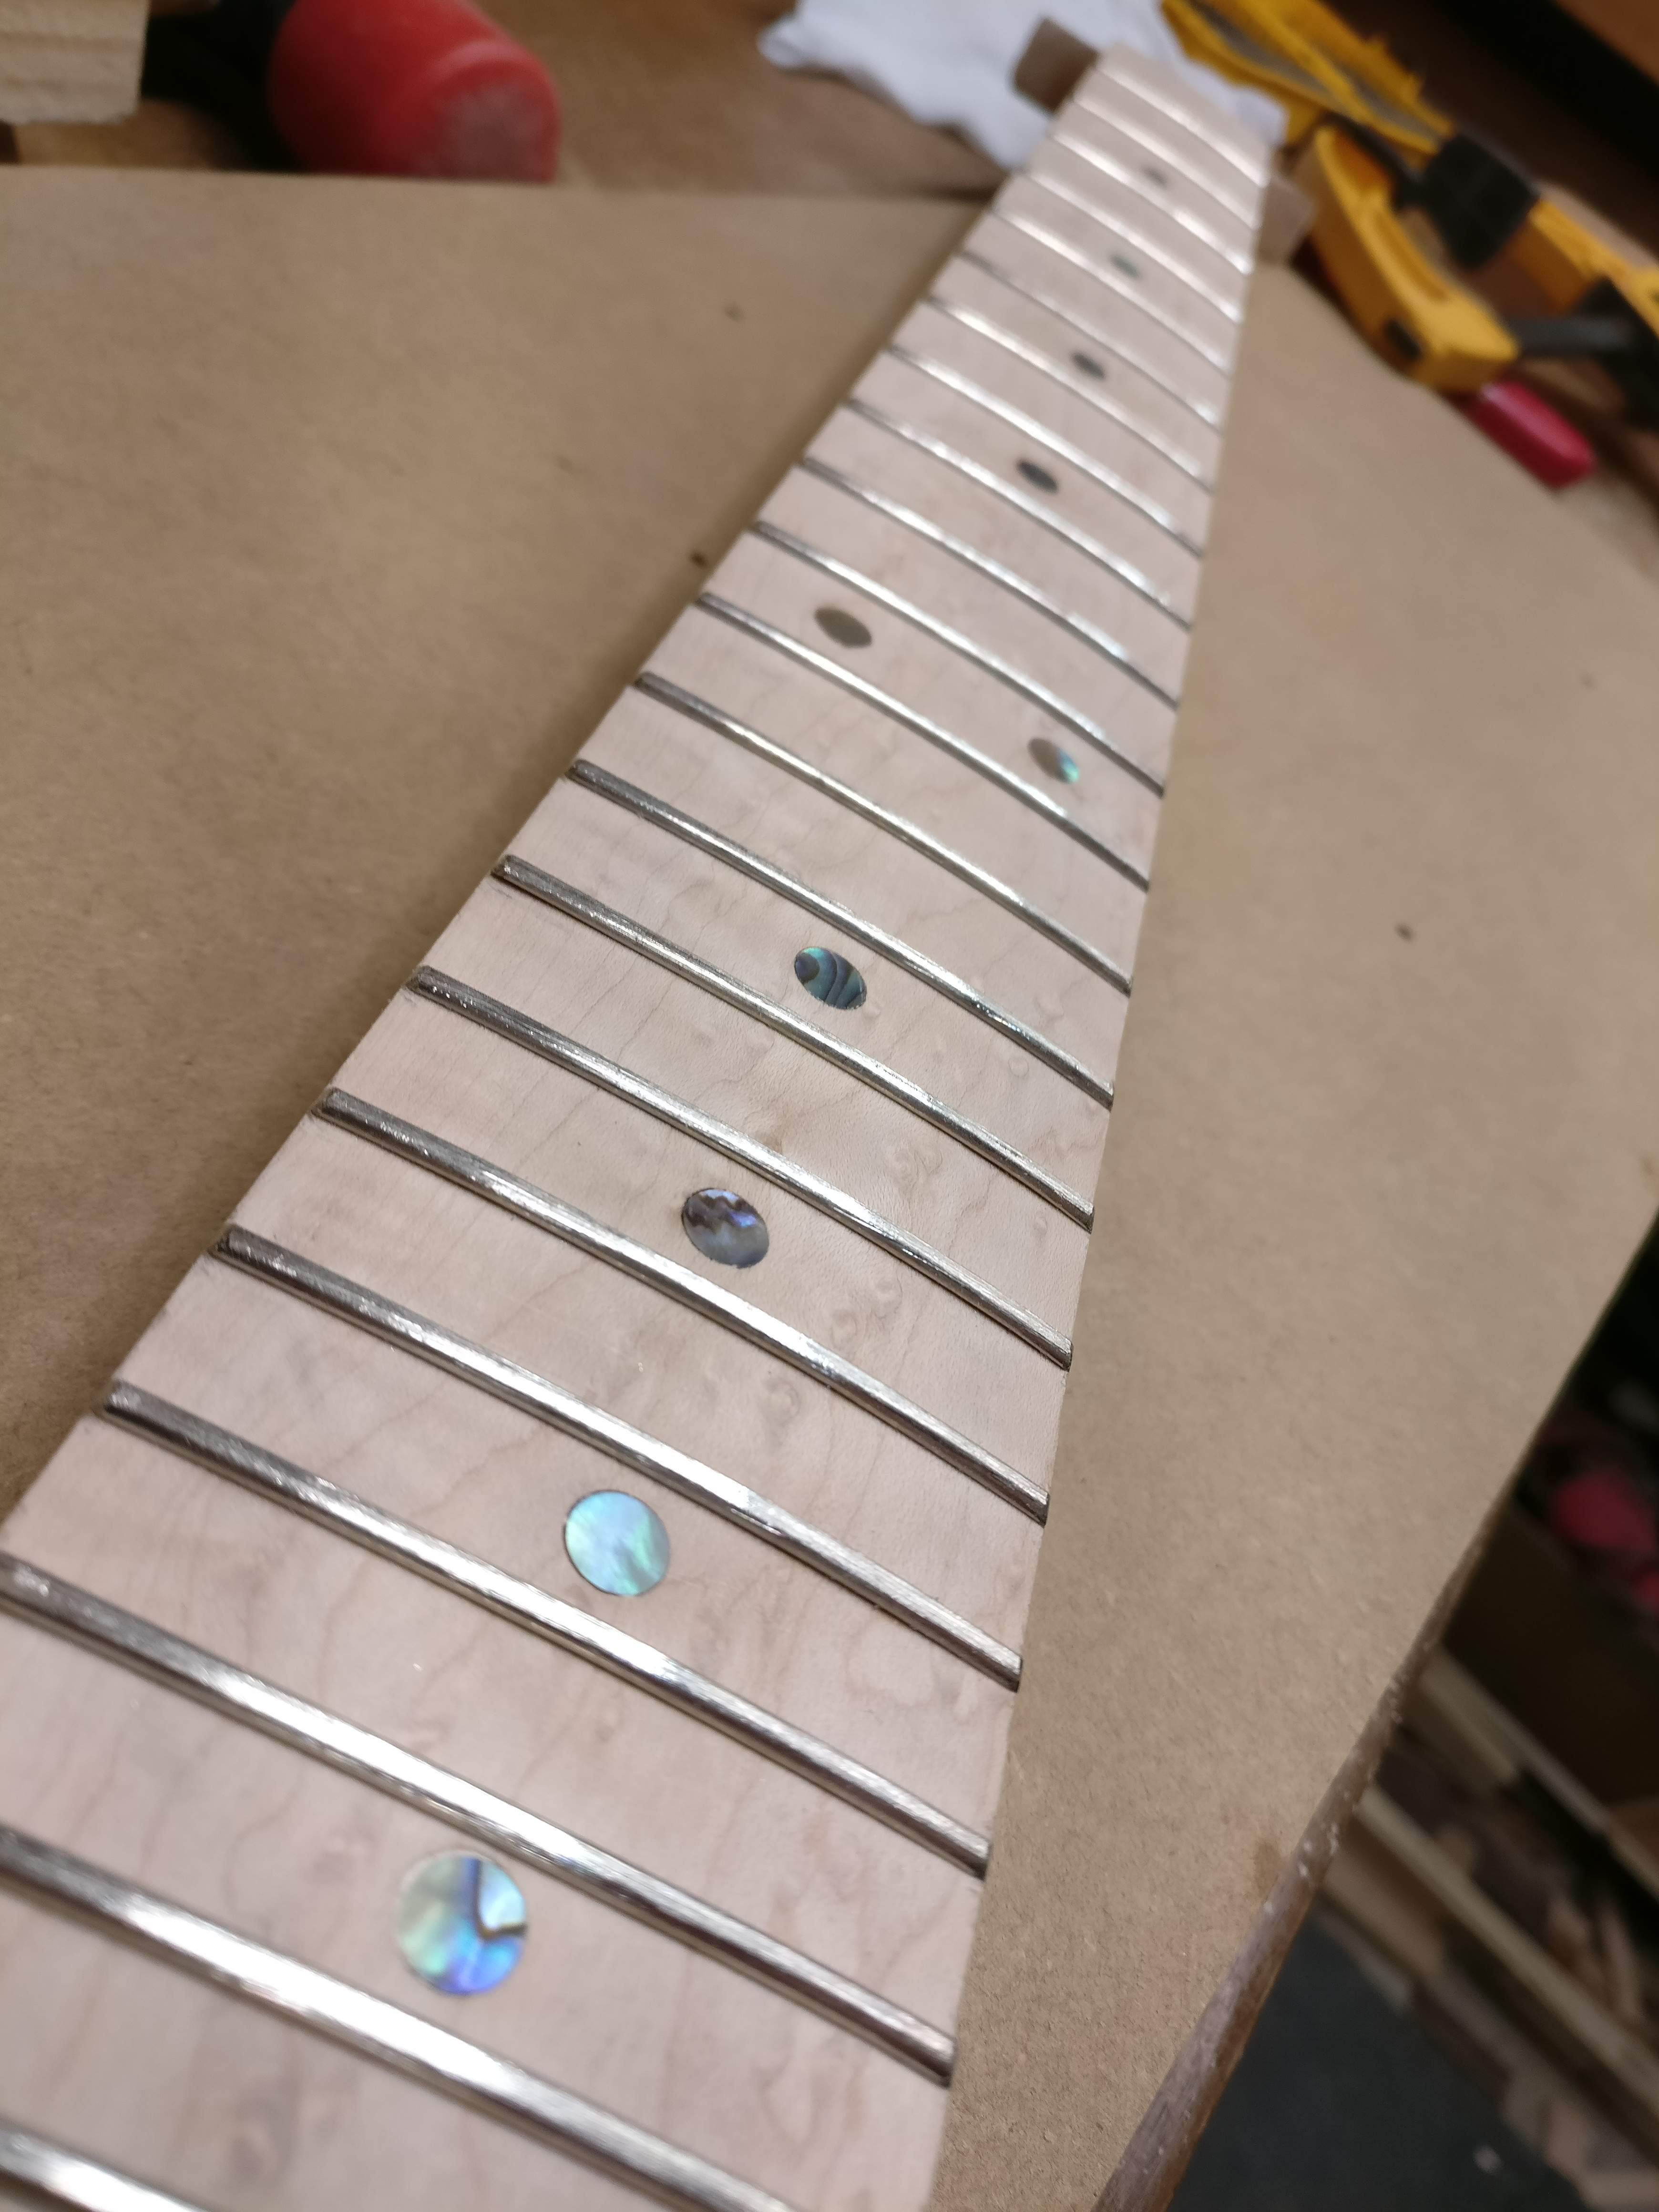
I also got the tuner holes in the guitar headstock. I had to take the thickness down by about an eighth due to the extra thick birdseye headplate I'd put on the front. Then I located all the hardware on the body, drilled all the mounting holes, filled the grain, and cut a pickguard from some three ply plastic.

The pickguard is loosely based on what a real Corvette pickguard looks like, but a little simpler. I don't like the "flares" in real Corvette pickguards up by the neck. I had a lot of fun making the pickguard - drawing a paper template, cutting it out on the bandsaw, truing it up with a file, then sanding the bevel on the drill press drum sander. I feel like people who buy pickguards are missing out!

After all that, I switched back to the bass and cut the flamed maple binding to go along the edge of the fingerboard, and I drilled it for 2mm abalone side dots like I'd used on the guitar. I glued those in, then I glued the binding onto the neck with a strip of the cherry veneer on the inside surface. I wrapped it in saran wrap then used an old bicycle inner tube as a "clamp:"

This morning, I unwrapped it and planed the binding down level to the fingerboard, then hit it with a radius sanding block.

I'm super happy with how it came out, except one major flaw. The side marker dots were centered on the binding before I glued it on, which meant they're definitely not centered now. A few of them are showing through the top of the binding now:

I don't know what the heck to do about that. I really wanted abalone dots, but clearly this can't stay like that. I may take a diagonal chunk out of the binding at each marker and replace it with a piece of cherry or something.
I also need to decide what to do with the binding at the end of the board near the soundhole. Originally, I was going to bend a piece to follow the curve there, but now that I'm looking at it, I'm not sure. Partly because adding even a small amount of length to the fingerboard may make it hard or impossible to get the allen wrench into the truss rod. I may just cut the binding off flush with the end of the curve and leave it as-is.
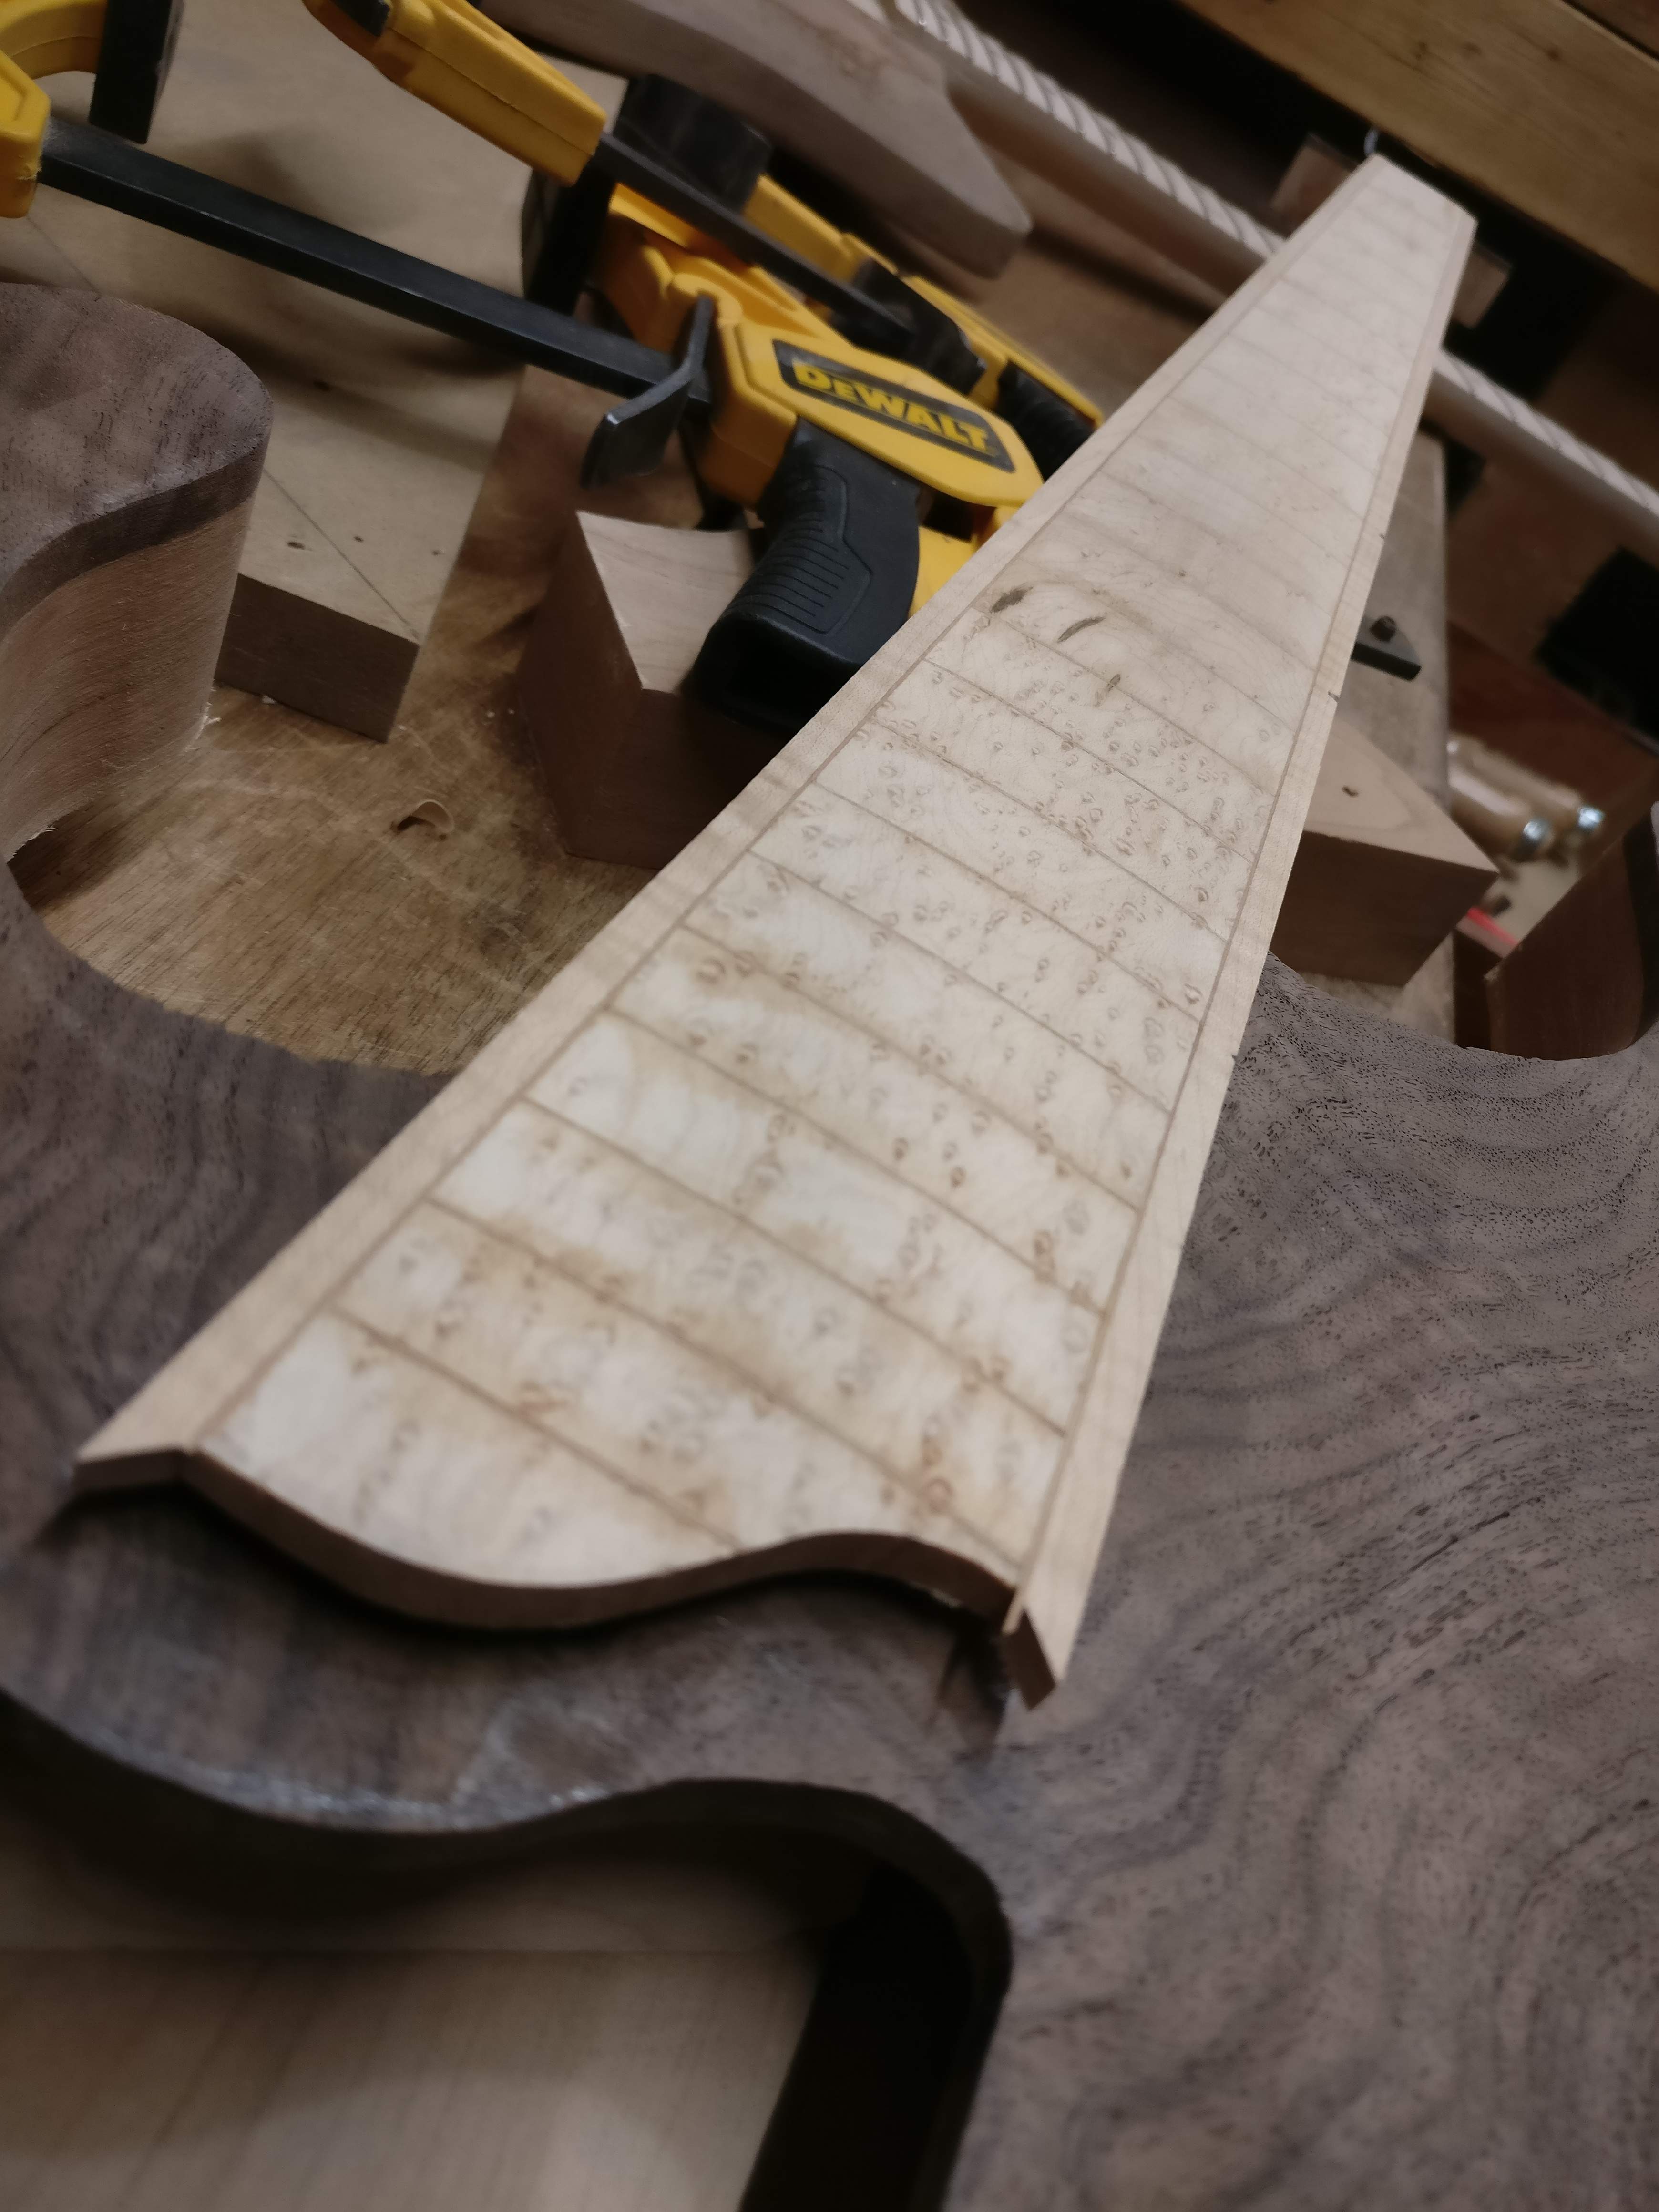
If anyone has thoughts on the side markers or the binding at the end of the fingerboard, I'd be happy to hear them. Otherwise that's probably about all the progress I'll make for this week!
First I glued cherry veneer in the fret lines on the bass. I used thin CA for this (don't worry, that piece of veneer right up near the camera that's too short for it's slot got replaced before gluing!).
While the CA was setting up, I drilled the guitar neck for position markers, glued them in, and pounded in the frets.
I went ahead and leveled the frets, crowned them, and shaped the ends. I'll polish them later. I really love abalone against maple.
I also got the tuner holes in the guitar headstock. I had to take the thickness down by about an eighth due to the extra thick birdseye headplate I'd put on the front. Then I located all the hardware on the body, drilled all the mounting holes, filled the grain, and cut a pickguard from some three ply plastic.
The pickguard is loosely based on what a real Corvette pickguard looks like, but a little simpler. I don't like the "flares" in real Corvette pickguards up by the neck. I had a lot of fun making the pickguard - drawing a paper template, cutting it out on the bandsaw, truing it up with a file, then sanding the bevel on the drill press drum sander. I feel like people who buy pickguards are missing out!
After all that, I switched back to the bass and cut the flamed maple binding to go along the edge of the fingerboard, and I drilled it for 2mm abalone side dots like I'd used on the guitar. I glued those in, then I glued the binding onto the neck with a strip of the cherry veneer on the inside surface. I wrapped it in saran wrap then used an old bicycle inner tube as a "clamp:"
This morning, I unwrapped it and planed the binding down level to the fingerboard, then hit it with a radius sanding block.
I'm super happy with how it came out, except one major flaw. The side marker dots were centered on the binding before I glued it on, which meant they're definitely not centered now. A few of them are showing through the top of the binding now:
I don't know what the heck to do about that. I really wanted abalone dots, but clearly this can't stay like that. I may take a diagonal chunk out of the binding at each marker and replace it with a piece of cherry or something.
I also need to decide what to do with the binding at the end of the board near the soundhole. Originally, I was going to bend a piece to follow the curve there, but now that I'm looking at it, I'm not sure. Partly because adding even a small amount of length to the fingerboard may make it hard or impossible to get the allen wrench into the truss rod. I may just cut the binding off flush with the end of the curve and leave it as-is.
If anyone has thoughts on the side markers or the binding at the end of the fingerboard, I'd be happy to hear them. Otherwise that's probably about all the progress I'll make for this week!

Part of the problem with the dots is that they're really small, and they weren't all evenly centered, so some of them were totally exposed on the edge of the fretboard and the lowest was only barely exposed. I don't think a camfer or other solution leaving them in place would have worked, just because of the unevenness.
So I found a supplier that had 2mm x 6mm abalone strips in stock and ordered some. Then I popped the existing dots out, and chiseled little vertical channels where they'd been and glued in the strips, then went back over and cut off the excess above the top surface of the fretboard and rough-filed them flush. I think it looks good. It's subtle like the dots but it solves the problem of the dots not being perfectly spaced top to bottom, and it purposefully exposes the ends of the strips so you can see the markers from the top and the side.
Slot chiseled out where the dot had been:
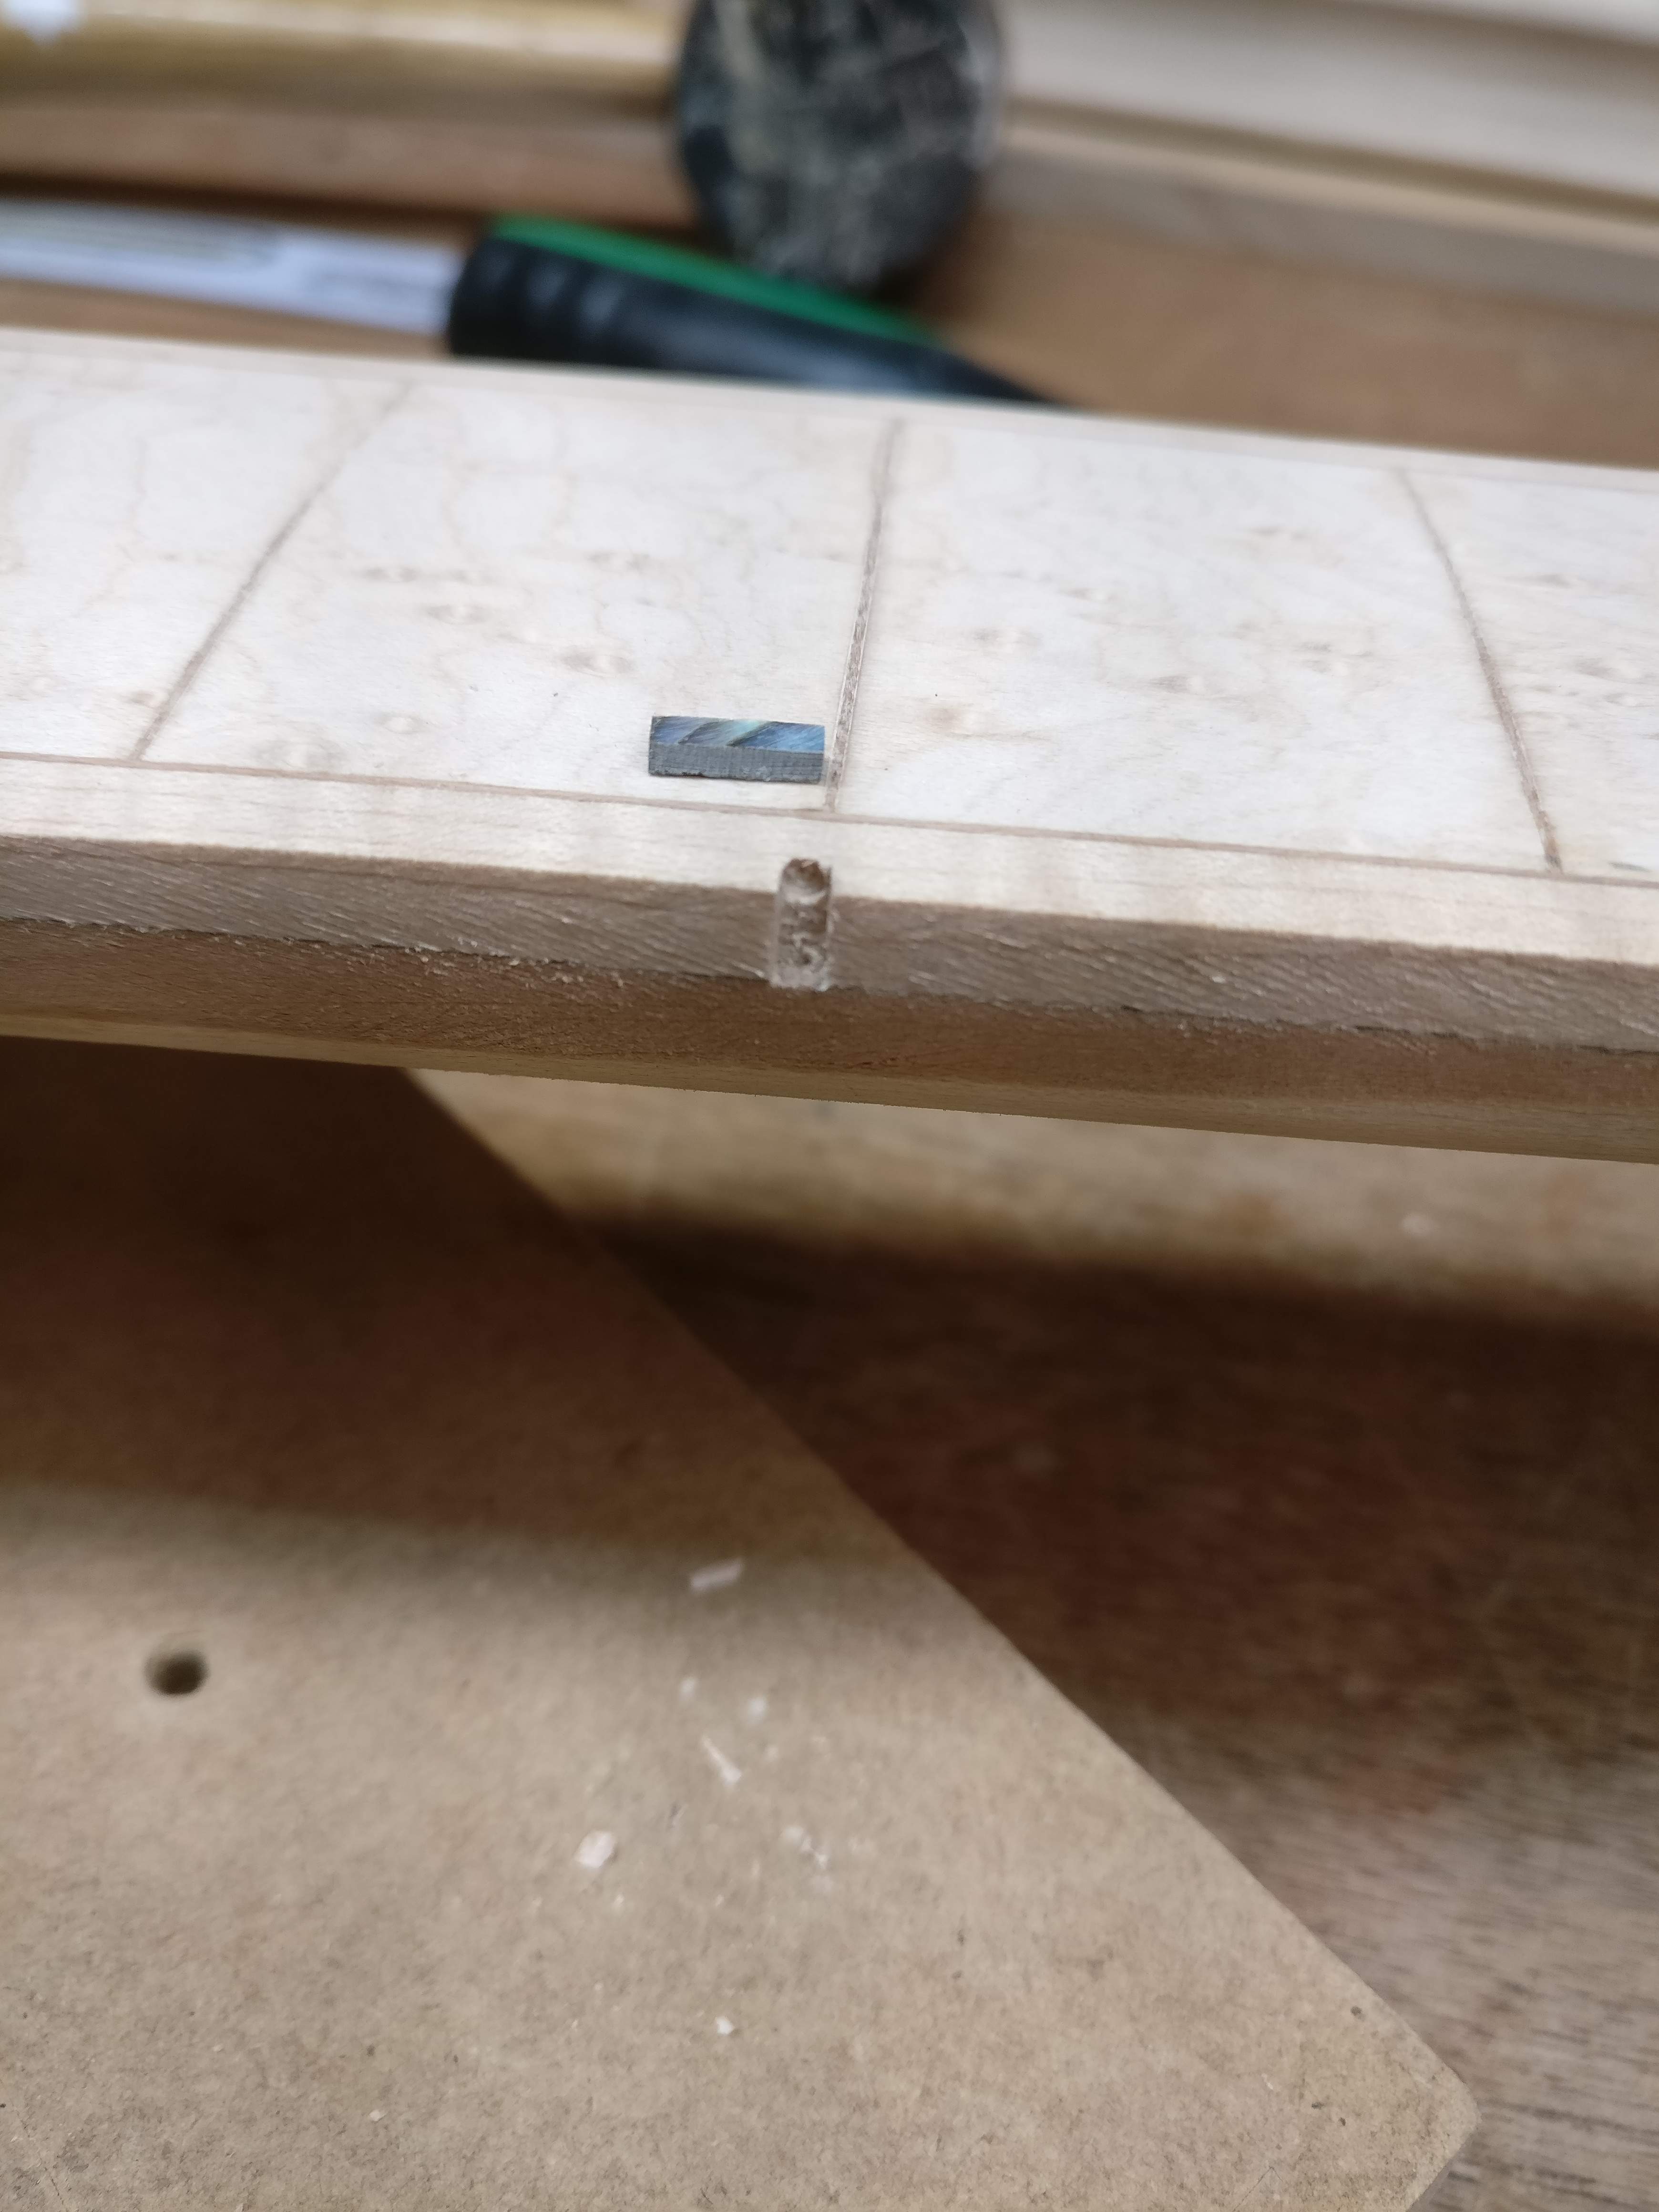
Strip glued in with thick CA:
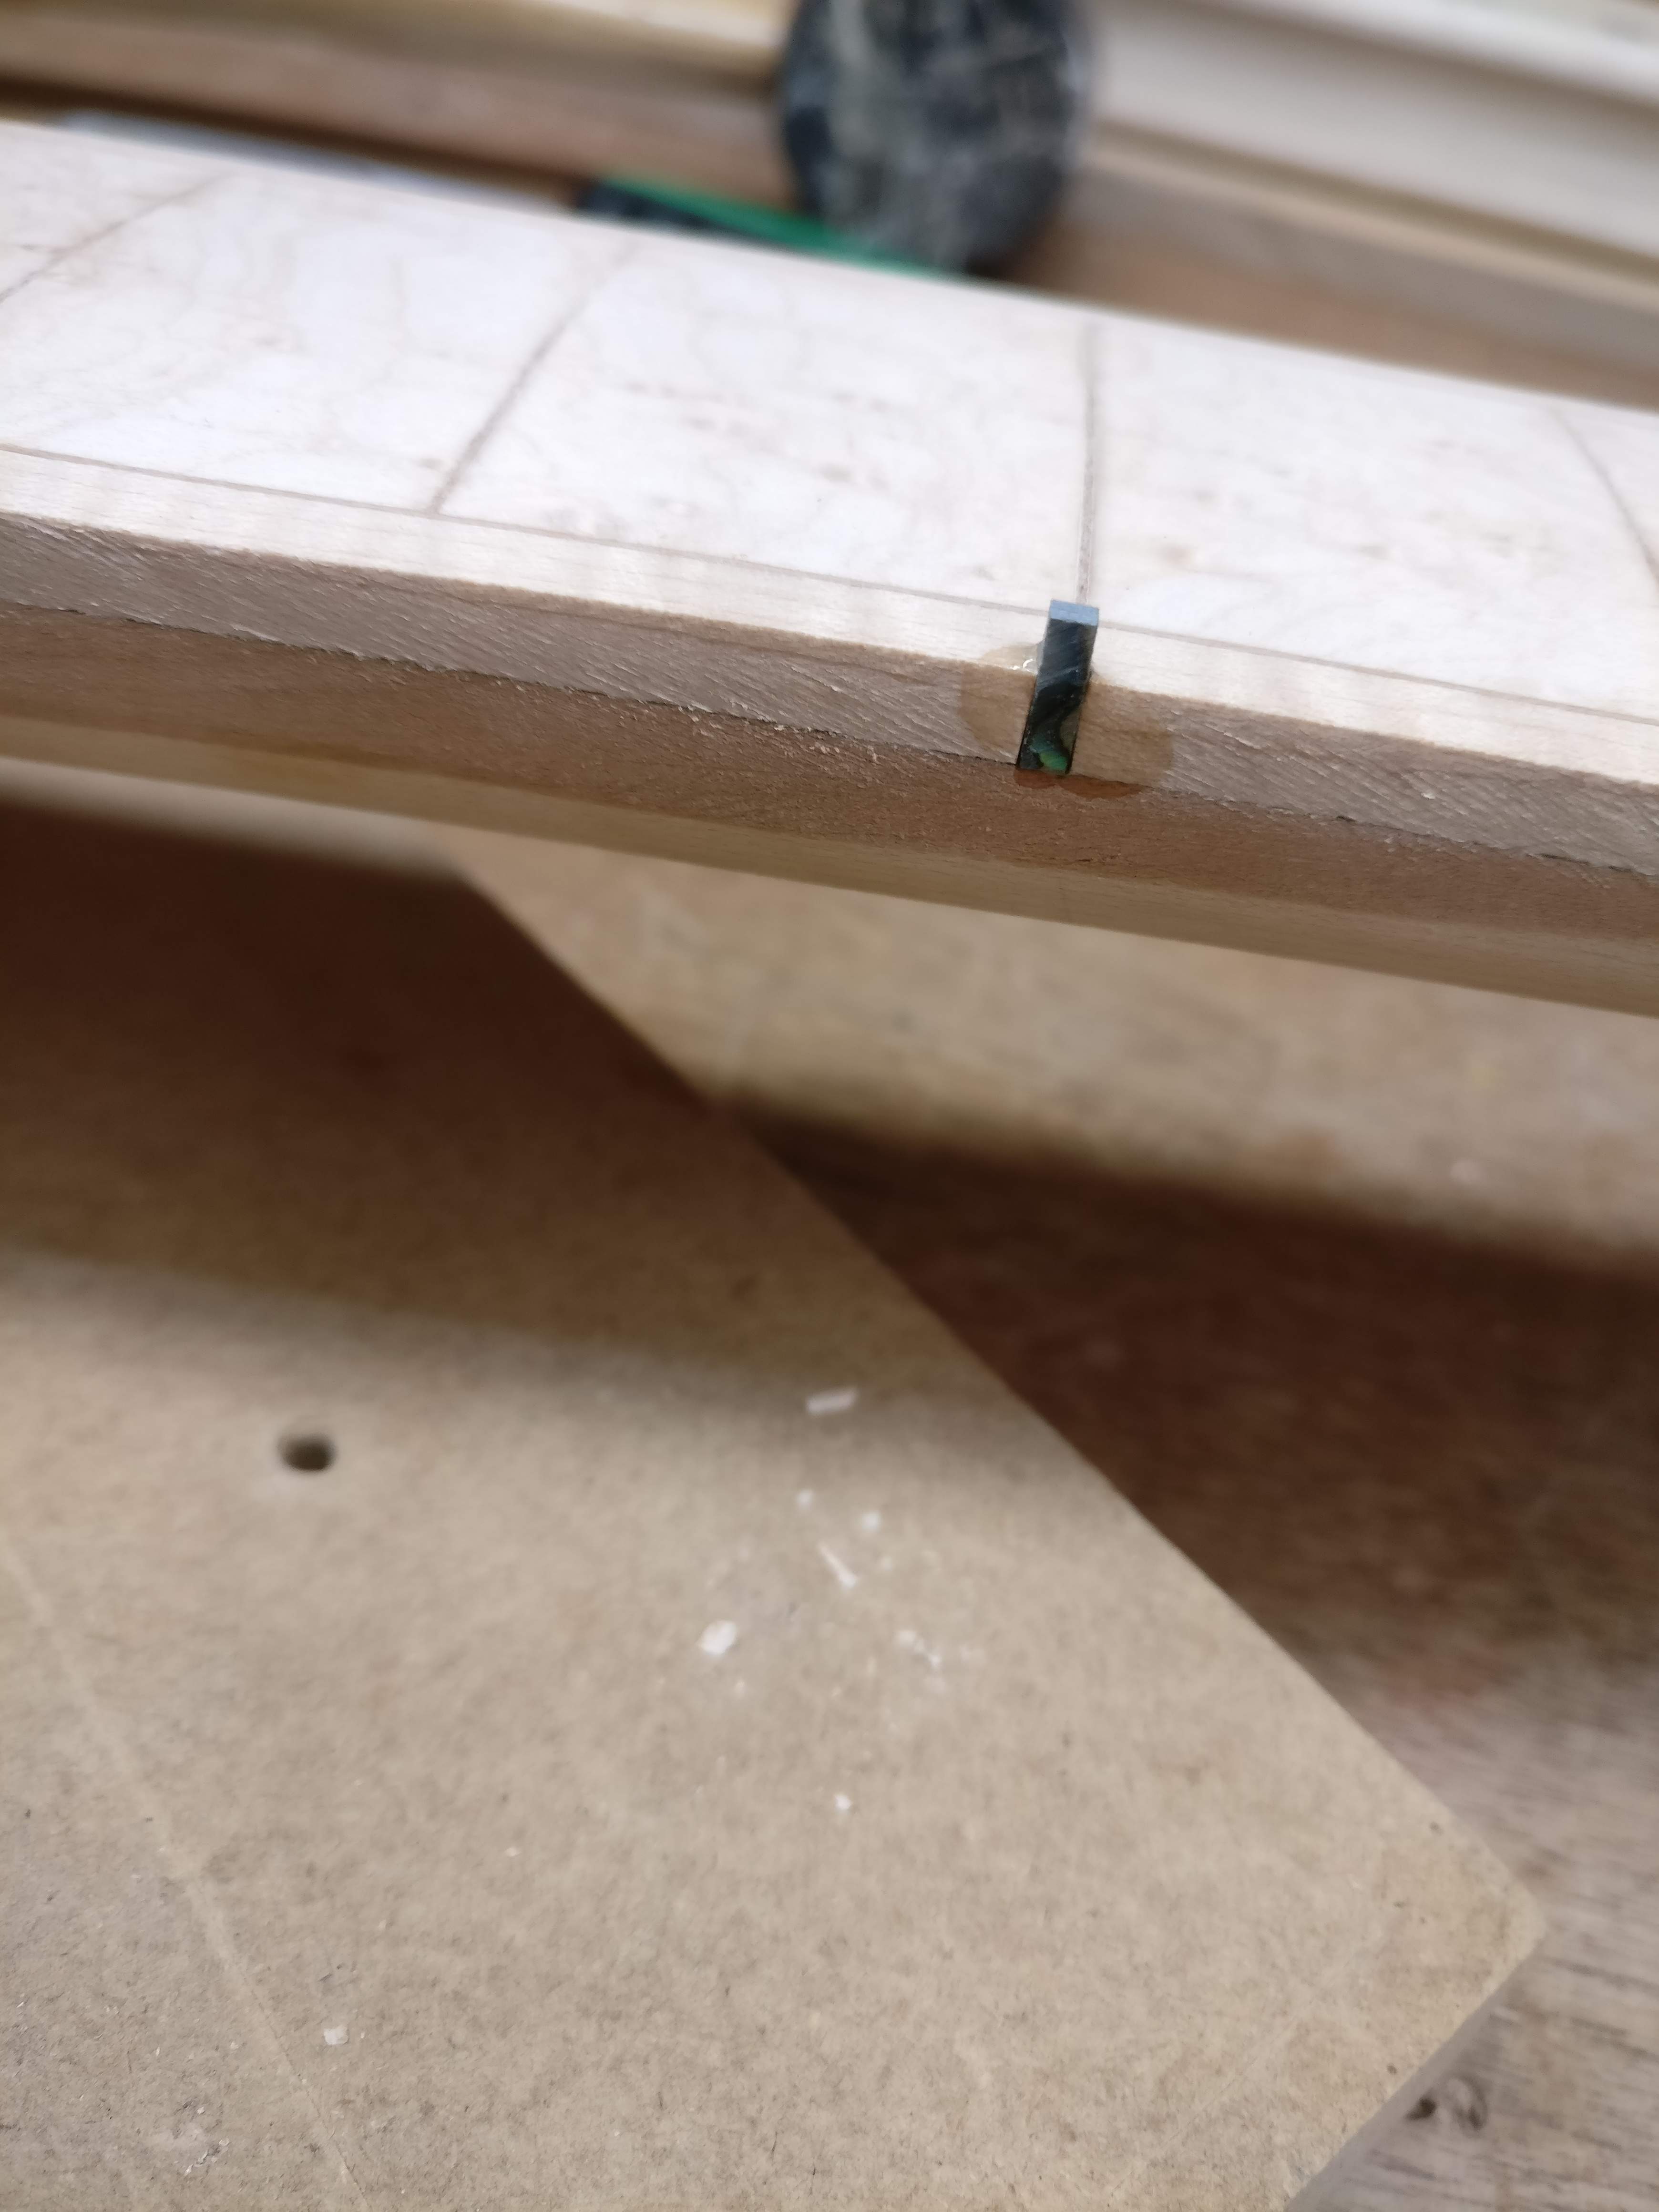
Rough filed flush:

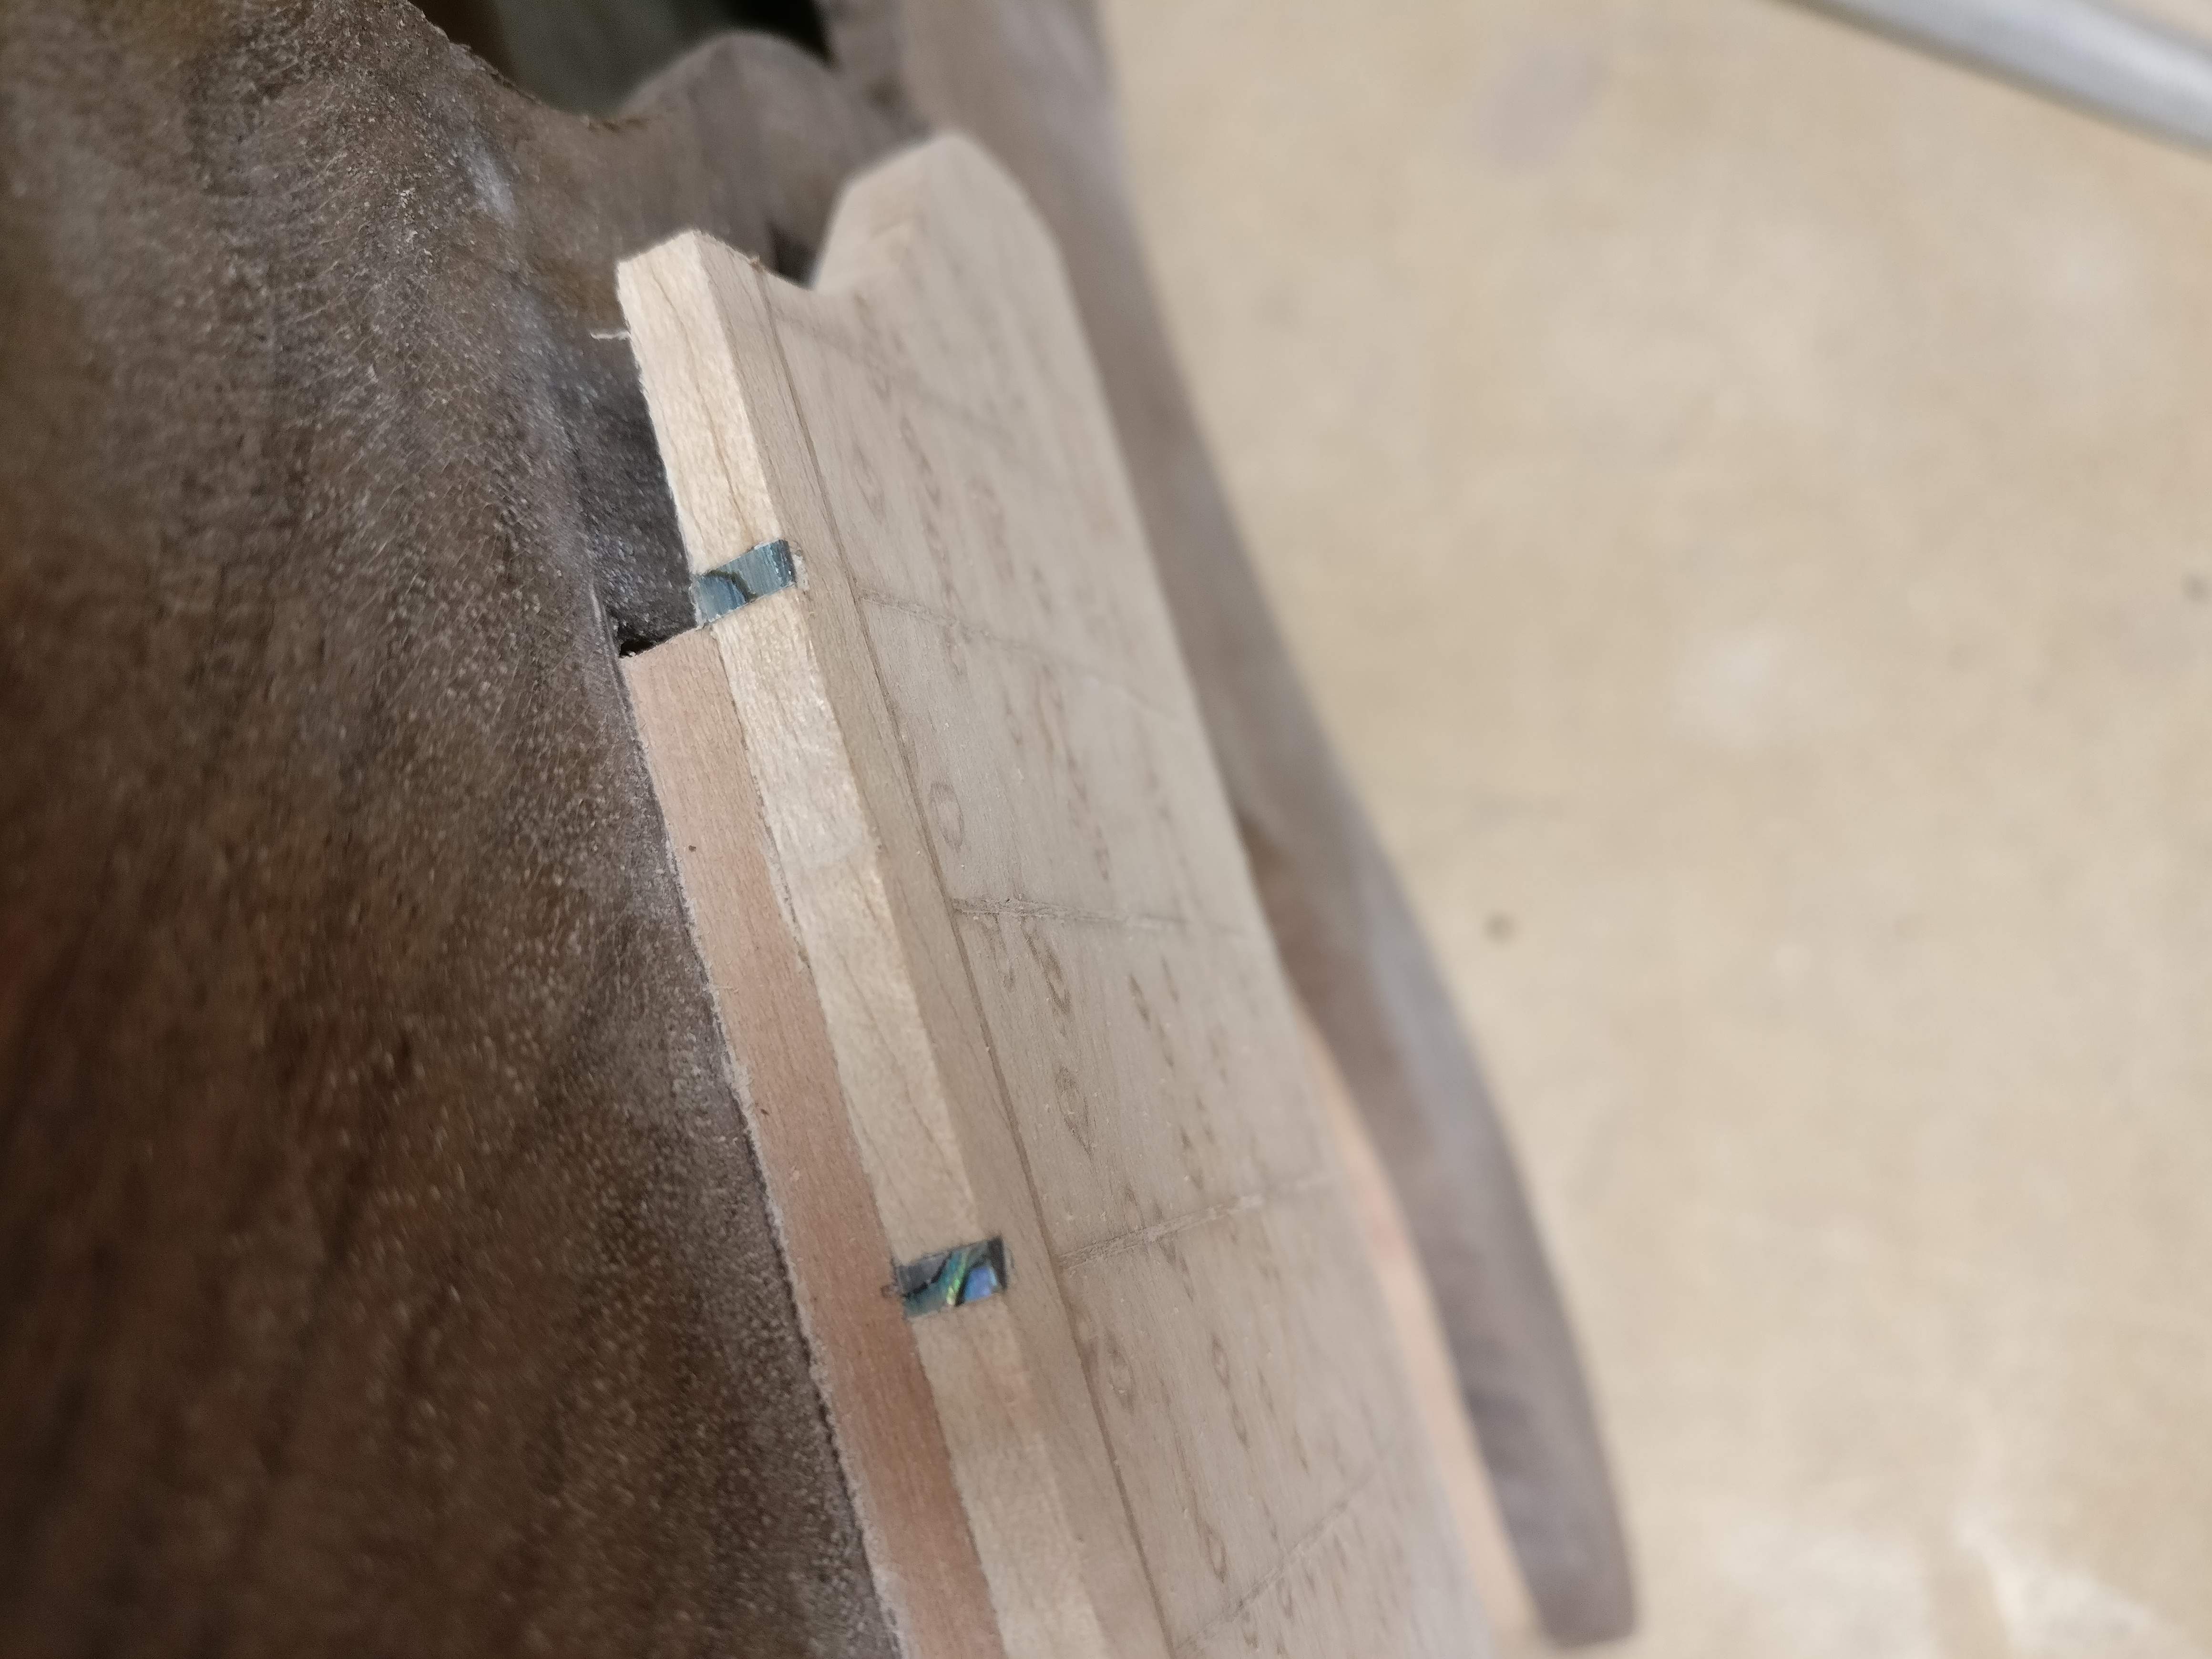
It turned out really nice but I hope I never have to do chisel work this intricate again. If I want to do strips like this in the future I'll just slot the binding with a saw before gluing it on.
So I found a supplier that had 2mm x 6mm abalone strips in stock and ordered some. Then I popped the existing dots out, and chiseled little vertical channels where they'd been and glued in the strips, then went back over and cut off the excess above the top surface of the fretboard and rough-filed them flush. I think it looks good. It's subtle like the dots but it solves the problem of the dots not being perfectly spaced top to bottom, and it purposefully exposes the ends of the strips so you can see the markers from the top and the side.
Slot chiseled out where the dot had been:
Strip glued in with thick CA:
Rough filed flush:
It turned out really nice but I hope I never have to do chisel work this intricate again. If I want to do strips like this in the future I'll just slot the binding with a saw before gluing it on.
I fell behind on this build, but what you did is exactly what I was thinking when I saw what happened. Nice recovery.
It's been a slow few weeks. Besides thinking about this fix I've been stuck on tuners. I ordered cosmo black gb7's but they're really glossy, which I think clashes with the organic look of this bass. I'd like to get some of the aged copper tuners Schaller makes but I can't find any in the US.


