• TalkBass has been independent since 1998. Add your voice.
    Create a free account to reply to discussions, view embedded media, and browse with fewer display ads.
    Join freeLog in
    Want zero display ads or expanded classifieds tools? Compare plans.

Special Edition Build-off - 4003w new build

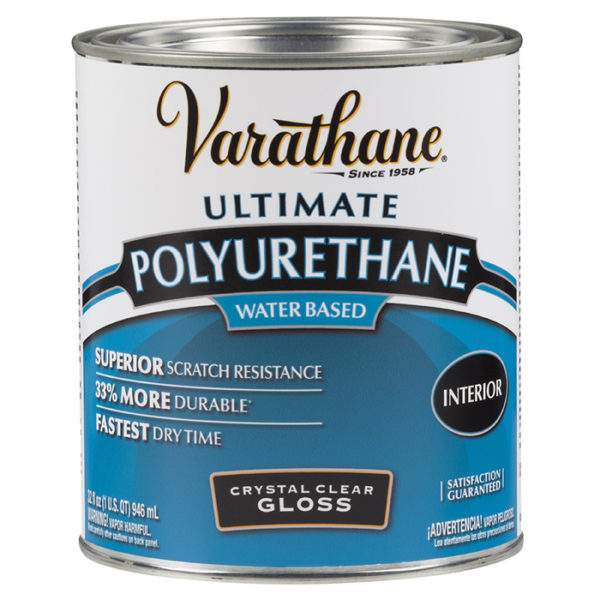
Can't say on Helmsman but the Varathane Ultimate that several people have been using from the water based finishes thread is no problem over SolarEZ. At least the one time I've used it.
4F799EF6-EEC4-416B-8A6C-444F5CDAE26C.jpeg
 
  • Like
Reactions: Gilmourisgod
I used Varathane clear coat on the Hossenfeffer 1, worked pretty well, even though my spray setup is less than ideal. I was never able to get better than a a medium orange peel out of it, but I was using a cheap Harbor Freight all-in-one HVLP gun, I'm sure my results would have been better with a higher quality gun. The finish still looks great, I'd say it's harder than nitro, but nowhere near as hard as poly. I was going to try the Solarez but chickened out. From what I've read, it dries so hard that you really have to work to level sand it. If they can come up with something that really self levels and then UV cures, I'd love to try it.
 
Great information. I'll try the Solerez on a scrap and see how it sands. I have some epoxy (30 minute) that does self level pretty good and sands, so I'll also try that tomorrow. I'll post results.

The Helmsman is spray can, so that's easy. I've used it on ukulele's before with good results. Just worried about adhesion.
 
  • Like
Reactions: Gilmourisgod
I was able to do a test of Solarez and Z-poxy. The Solarez went on very thin and cured in 1 minute as stated. I did a second thin coat and was ready to sand in 5 minutes. This was put on very thin with a squeegee. I also put on the Z-poxy and waited about an hour. The Solarez sanded easily, about the same as the Z-poxy. The results on the Solarez were really good, if not great! The Z-poxy worked well too, but was thicker and took more time to sand. I was able to sand the Solarez back to wood leaving a 'fill' in the pores. At 200 grit is starts to take on a sheen. Here's a couple pictures.

I think the Solarez is the way to go. Especially sanding it back to exposed wood. No adhesion issues!

Solerez and Z-poxy.jpg
Comparison.jpg
Solerez sanded.jpg
 
I've been moving along slowly. I put the 2 coats of Solarez on the bass a waited about 10 minutes before sanding. It flatened out nicely. The front of the body was sanded by hand with a 4" x 6" block with 320 grit. It took about 20 minutes. For the back I decided to try the random orbital sander with 220. Same result as the front in about 4 minutes. I now know how to do this in the future.

I was able to spray three coats of the urethane in 3 hours, no drips or errors. I've been waiting until tomorrow to wet sand and see if I need any addition coats. Its already looking flat and asking for the next steps. Patience, Grasshopper. Patience!

I did spray the test block with three coats of the urethane and wet sanded with 1000. I then buffed it with rubbing compound and polish. Its pretty much a glass finish on that, without too much effort.

That the window reflection on the test. Clouds actually!

I kinda' like the blue frets, too!

Sealed first coat finish.jpg
Test finish.jpg
 
The finishing is continuing. I wet sanded the finish flat on Wednesday night and decided a couple more coats of finish would be in order. It just felt like the film was getting thin. The finish does have a little amber tone to it, so you can kind of tell if its getting thin. It should be ready to buff tomorrow.

While waiting, I've been looking at the Ric O Sound schematics. I don't like the pickup selector switch they use because it requires a deep cavity for the controls. I don't like the standard and switching jacks because they require removing a lot of material from the edge and it just a bit scary to hog that much material out. The solution I'm looking at is using mini DPDT on/on/on switch for the pickup selector and second DPDT on/on and a Stereo barrel jack so I can still keep the stereo/mono option. The switch would go where the circuit goes to the switching jack in the schematic. All I have to do is find a place on the pickguard to place the second switch.

I'm also planning to wind the pickups using ALNICO 5 rods and 43AWG wire I already have. Still working the specs out for this.

The wood is done, but lots to do still!

dpdt schematic.png
4 Control, 2 Pickups, Stereo, bass.gif
 
Yup! I've got one of those switches. It requires about an inch of space under the pickguard. The body is only 1 1/4" and I'm trying to keep the cavity to about .65" depth. The mini DPDT needs about 1/2" which would leave more material in the body. I did use the switch you posted on my last build and the regular jack. A lot of material was removed to get them in. I kept thinking that if I was not making a 100% accurate copy, I'd do it different. So, I'm sort of following my prior train of thought. DPDT switches are also cheaper, about $2.50 each. I have a black cover for the switch end, which will make it look a little bigger, for asthetics.

I noticed the schematic has 500K tone pots and 250K volume pots. I always thought they used 330K, so was surprised.
 
  • Like
Reactions: ctmullins
Gotcha. The mini-switch will obviously work fine. I don't like how they feel, so I use the big Switchcraft ones.

There are other switches that have the larger knob but are still low-profile underneath. Some cheap ones from Asia, for instance. And the 4PDT Pickup Selector Switch - 3 Position (On/On/On) | DiMarzio, which has four times as many poles as you need, but is no doubt very well made.
 
I liked the 4PDT until I saw the price! $33! Maybe I'm just getting cheap in my old age. My wife says I've always been that way though!

I do like the idea of a switch for the stereo/mono circuit. When I had my 4001, I never actually used it, but now I'm doing home recording with ProTools and probably will.

All of these mods would be pretty easy to remove later, so I'm thinking its pretty safe.
 
  • Like
Reactions: ctmullins
Might have to back up a step and use your fine polish again, by hand this time, with the grain. Then try the swirl remover again, by hand. You are so close, I wouldn't risk burning through it with a machine buffer. Get a cold beer, bright light, good tunes, and caress it like it was your wife. Bass looks effing fantastic, BTW.

Came to the same conclusion this morning. Two beers, micro-fiber, Mark Knopfler and elbow grease. The test piece of wood didn't have swirls and the only difference was that I didn't use the machine. Could be the pads I used.
 
So, I wet sanded and the more I spent close time, the more little flaws I noticed. Finally, I just admitted that I really needed to flatten the finish and respray. Does anyone else obsess over the finish like this? Anyway, after the respray its flat and after 72 hours to make sure its cured, it'll get a light sanding, buff and polish.

Flat finish.jpg


I started working out the pickguard layout. Its pretty standard, but will have two mini DPDT switches where the one pickup selector would be. One of the mini's will handle the PUP selector and the other will switch from mono to stereo. It will have one stereo jack. Here's the layout:
Pickgurard layout.jpg


The pots and hardware have been ordered and hopefully get here in the next week. The other main item is pickups. Biggest issue is the magnet configuration. "Toasters" are actually 6 string pickups, with 6 poles, ALNICO 5 and .25" X .75" long. I like this in the neck position, but want something stronger in the bridge. So, here's the concept: 8 pole .25" X .62". 3000 feet of AWG 44 will get me the right resistance and keep the inductance low enough to retain the highs. Will use Reverse Wind and Reverse Polarity to get humbucking when both pickups are on. Another design element will put the negative/ground side on the outside of the winding to act somewhat as shielding. Will use the CNC laser to cut the flatwork.

pickupflatware3.jpg
 
Yeah, I find the finish work the most difficult part of the build,so much so that I may stick to oil finishes from now on. All the flaws you can't see while building come to the surface to mock and taunt you. You wind your own pups too? Now that's just showing off. :D

Actually, I'm just cheap and want to learn to create specific tonal qualities. It costs $6-8 to make a PUP and with the homemade winder, about 8 minutes to wind. The winder is CNC so coils can be duplicated exactly and mirror image (reserve direction) created. Gotta' admit, sometimes I feel like a complete nerd, doing this. :D

So, on the finish, I think I should have used more Solarez to fill the pores. Very little was used, just drops spread thin to avoid sanding. There were a few not quite filled pores that showed up when wet sanding. Dimples actually! That could have been avoided. :rollno: Its a learning process.
 
I started working out the pickguard layout. Its pretty standard, but will have two mini DPDT switches where the one pickup selector would be. One of the mini's will handle the PUP selector and the other will switch from mono to stereo. It will have one stereo jack. Here's the layout:
View attachment 3843717

Nothing wrong with your attention to detail in the finish. I find prepwork needs to be flawless to get a good finish. :thumbsup:


So, is it me, or my ocd....do we have a right handed guitar with a left handed pickgaurd?
 

Latest posts