• TalkBass has been independent since 1998. Add your voice.
    Create a free account to reply to discussions, view embedded media, and browse with fewer display ads.
    Join freeLog in
    Want zero display ads or expanded classifieds tools? Compare plans.

Stingray Natural Ash refinish and coil selector Mod

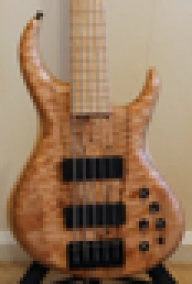
To anyone interested - I've decided to post my stingray project process. I acquired a beautiful honey burst 2008 EB MM Stingray fretless a few months ago. While i was really happy with the bass, I grew increasingly curious about 2 things: Could i get one with an natural ash finish without the thick Poly coating that all stingrays seem to come with and what about a 3 way selector switch for the 2 coil humbucker.. similar to the switch that comes stock on the 5 string single pickup stingray.

So after much research I found that Ernie Ball (to their credit ) doesn't really do "parts" or mods like the fender camp has developed over the years. They keep the integrity of their instruments as close to original as possible (which holds the value steady) There are no replacement bodies or parts available for these basses - outside of aftermarket preamps and pickups - tuners etc.. Which IMHO are not necessary because the MM Stingray and Sterling come from the factory with the best sounding, highest quality components you can get.. in short these are fantastic instruments and an amazing American made value for the price paid..

But i still wanted a little more tonal variety by way of having a selector switch to switch between bridge single coil/Parallel humbucker/ neck single coil and a natural ash body... So began the recent process of stripping the polyurethane and refinishing the ash body with Tung Oil and adding a coil selector switch... more to come shortly...
 
First thing was to research how to remove poly coating - short of sanding until my arm fell off.. the way i chose was using heat - via heat gun from home depot. The gun i got went to 1000 degrees. and i had to have it cranked to the top to get any results. When you apply heat to poly coating it bubbles and separates from the body. I had to apply the heat for about 60 seconds in one general area before the first "bubble" popped up. I quickly learned that once the poly coating starts bubbling you have to keep the heat gun slowly moving and the bubble will follow. I also learned that at least with this bass, under the exterior poly coating there is another layer of clear finish that DOES NOT respond to heat! I found this out the hard way and actually slightly burnt the ash below the clear coat trying to force a second layer of bubbling. Once i started to smell burnt wood i backed off, decided to just remove the outer layer of poly with heat and deal with the under layer next.

You can see both layers in this picture. I stopped at this point and tried chipping the outer poly with a scraper by nothing was budging so i went back to heat. I found that it was best to do an entire side with heat all at once.. letting the "bubble" follow the slow moving heat gun until the entire side was completely peeled and crackled off.

l_085cd6f92709459bbcc90e458a1757c4.png
\


Here's my first test area before i had disassembled the bass you can see the two areas i tried to force the inner clear coat off with heat with poor results.

l_612ff26d763e4e1bb946d70f0ea8762e.png


And yes.. at this point i was thinking "oh crap, what have i gotten myself into now.."
 
Yeah you're absolutely right. The project is actually Done and I was able to sand out the surface burn marks. One thing i regret is i didn't document the process with very many photos. However, i will explain in great detail what occurred and how.. especially converting the 2 wire double coil humbucker to 4 wire for the selector switch...
 
Basically slowly moving the heat gun i was able to get 95% of the outer poly to bubble up. I did it in 3 sessions: Back, Front and Sides. you have to be really careful around the horns and keep the gun moving - also i noticed the sides and neck joint area was a bit stubborn to get the outer poly to release. I just ended up taking the stubborn sections off with phase 2: Sanding.

Total time for outer poly removal w/ heat gun 45 minutes tops.

once i finished as much as i could with the heat gun, i researched removing the undercoating with chemical stripper as i really didn't want to spend hours sanding. After much research i was able to discover that there is really no known chemical substance that is 100% effective in removing polyurethane from guitars. The one that seems to be most effective is something called Aircraft Remover -available at auto zone. It is some seriously nasty stuff. Simply cracking the can open you're inundated with what smells like concentrated ammonia. Moving ahead, I applied a generous portion of this toxic green goo to my test area and let it sit 4x longer than the recommended 30 minutes. Guess what..... NOTHING HAPPENED!!!

So, i wiped the aircraft remover off the body and resigned myself to the laborious task of removal by sander. I purchases a 39.00 orbital black and decker sander from HD called the "mouse". it's footprint looked like a small iron. I found the pointy tip especially good for sanding inside the horn areas.

To my astonishment, this little sander rocked and i saw almost instantaneous results. To get the bulk of the undercoat off i used 80grit sheets, then went to 120 for more delicate areas and finished off with 220 grit.

Total sanding time: 8 hours!! Yes it took 8 hours of sanding with this little orbital sander to get the whole body down to the natural raw ash!! But the results were worth it!!!

Phase 3 Tung oil finish. Again i just went to HD and purchased their standard tung oil finish.

Be forewarned Tung oil has a slightly yellowing or vintage effect when applied to raw wood. It looks fantastic on ash though.

I applied the tung oil with a lint free sponge and wiped it down 5 minutes later with the same style dry sponge as directed - let the first coat dry for about 10 hours, then applied another coat in the same fashion... apply then wipe down in 5 minutes. After the second coat dried, i hit the whole body with 220 grit sand paper and made it very smooth. Then i applied the 3rd and final coat of tung oil and wiped down after 5 minutes. When that was dry i buffed with a cotton cloth and it was perfect and ready for re assembly....


l_daaecd6b6e104981ac2f11994f8ccef6.png

l_fbff3d4377a44ae4a79ed5c9b1b5c5aa.png

l_4186677f63bd4861a53aecbca372ae97.png
 
Next came the addition of the 3 way coil selector switch.. There are a few ways you can mod this for different series/parallel/single coil oprions. Check out this thread to see them all with schematics: http://www.talkbass.com/forum/showthread.php?t=717929

I decided to go with Bridge Coil/ Parallel /Neck coil variation... but first i had to convert the stock double coil 2 wire MM humbucker to a 4 wire pickup.. or effectively into 2 single coil 2 wire pickups under the same pickup cover...
 
The pictures in this post are courtesy of Link Removed - a great source for detailed info about MM electronics throughout the years.

This is a current style MM humbucker for stingray.

C%5FEB%5FPUP%5F4%2Ejpg.jpg


As you can see it's just 2 coils soldered together. This is a view of the + side. The white lead is the + lead off of the right single coil. The green wire is the + lead off the left coil. To separate, i didn't bust out the soldering gun, i just snipped off the green lead where it is soldered to the white lead, thus separating this end.

EB%20PUP%20Side%20View%201%2Ejpg.jpg


Here is the ground or - end of the pickup.

EB%20PUP%20Side%20View%202%2Ejpg.jpg


again i just snipped the orange wire where it solders to the black wire on the opposite pickup. Now the two single coils are seperated, both having their own positive and negative leads.

The black/white coil is black ground white +
The Green/Orange coil is orange ground and green +

I had to get some extra wire to lengthen the wire's on the green orange pickup so they could reach the preamp.


Basically all i needed to do the mod was a Double Pole Double Throw (DPDT) micro toggle switch that is for On/On/On functioning.

I carefully drilled a hole between the Input jack and Bass control on the mounting plate.

l_ef4e70d1614d4c37890fd0fd9a6ab381.png
 
Basically the rest was pretty simple. There are only two wires going to the MM preamp that are effected by this mod - the black and white that originally came from the pickup. I chose to cut them about 1" from the preamp as Ernie ball solders them directly to a very clean, precise circuit board and i didn't want to jack that up! So depending upon the configuration of parallel/ series/ single coil etc.. that your looking for just refer to the soldering schematics in the above post.

in a nutshell the two positive wires from the two coils (white and green) solder to their own specific point on the switch, then a single positive or "output" wire comes off of another point on the switch. That + wire coming off the switch is then reconnected to the cut white wire going into the preamp.

The two ground wires coming form the single coils (black and orange) simply twist together and solder to the black cut wire going into the preamp.

Done!

Sounds:

Single coil bridge: slightly brighter and punchier than the stock humbucking sound - it even has the perception that it's a little louder than the regular humbucking position.

Parallel: Classic stingray sound of course.

Neck single coil: Close to that P bass sound.. a little brighter than a P IMHO. Sounds really good for that clanky 70s slap.

Really fun project that turned out even better than I hoped it would.

l_511c9697665941adaeec0306015dd958.png
 
Larry...I would have been in "Panic-Mode" after that first picture of the start of the peeling/finish process.

I must say, it turned out great, and the body now matches the headstock a bit as well.

So does your switch have the same settings as the one on a Sterling?
 
Larry...I would have been in "Panic-Mode" after that first picture of the start of the peeling/finish process.

I must say, it turned out great, and the body now matches the headstock a bit as well.

So does your switch have the same settings as the one on a Sterling?

No.. i don't believe so. The sterling has a series mode, this doesn't although i'm thinking of going back in and rewiring it to have Series/Neck coil/ Parallel switching.. does someone know what the positions are designated for on a sterling?
 
Good job... be glad it was poly and no nitrogloss, like mine.
A possible refinement of a tung oil coating (if you want some more gloss) is putting on a top coat of Danish oil and polish with car polish. Carnauba wax on top will give the body a very sweet feel.

Cool. I may give that a try. I like the tung oil as it is, however a slight bit more gloss and that "slick" feel might be a nice touch.