• TalkBass has been independent since 1998. Add your voice.
    Create a free account to reply to discussions, view embedded media, and browse with fewer display ads.
    Join freeLog in
    Want zero display ads or expanded classifieds tools? Compare plans.

Stratocaster Project

I hope you are not planning to freehand with that cove bit.

You'd be better off (IMHO) wrapping some sandpaper around a baseball bat or whatever diameter you want and going at it by hand than trying to route with that thing. And it has a whopping 1/4" shaft. Yikes. I'm assuming you don't have a belt sander, where the end-roller will do the job nice and fast, since you don't really need a spindle sander for that shape.

Reaching back several posts, rather than "get CF bars in ASAP" the way to deal with "a little warp" would have been to check for that before reducing the thickness from 7/8 to 0.8" and straighten it up there. IMHO. Or in general machine it a bit oversize, wait, and deal with whatever it does movement-wise in the next reduction of size step.
 
Last edited:
  • Like
Reactions: NKBassman
I hope you are not planning to freehand with that cove bit.

You'd be better off (IMHO) wrapping some sandpaper around a baseball bat or whatever diameter you want and going at it by hand than trying to route with that thing. And it has a whopping 1/4" shaft. Yikes.

Reaching back several posts, rather than "get CF bars in ASAP" the way to deal with "a little warp" would have been to check for that before reducing the thickness from 7/8 to 0.8" and straighten it up there. IMHO. or in general machine it a bit oversize, wait, and deal with whatever it does movement-wise in the next reduction of size step.

No, not free handing it. I will set up a fence square to the center line and work in slow passes until I am just kissing the end of the fretboard.

Re. the warping, yeah, that would have been ideal. I didn't notice until after the final pass through the planer. But, here we are and we're pressing onward anyway. If it's a failure in the end, at least I learned something and I can do it all better next time. And there will be a next time.
 
Last edited:
  • Like
Reactions: 13ghosts
I have now successfully done the scoop with the cove bit, too. :p

Other than a bit of burning that I had to sand out, it turned out about as well as I could have hoped for and looks appropriately Fendery to me. I didn't have my phone on me, but I'll grab some pics tomorrow.

I also flush cut the fretboard to the neck, and confirmed that the truss rod works in both directions.
 
Last edited:
  • Like
Reactions: Matt Liebenau
The scoop transition turned out okay, I think. The line on the little maple transition piece isn't perfectly square, but I can probably get that looking a little better with some more filing/sanding. That'll wait till later.

I am also noticing that the glue line between the fretboard and the neck isn't particularly tight in a few spots. I can live with it or maybe try to fill it with some CA glue or something. However, in my previous experience the extra thin CA glue tends to just wick into the wood fibers, which doesn't help for filling small gaps, or do you any favours when it comes to staining.

More lessons learned for next time.

IMG_7745.jpeg


IMG_7741.jpeg


IMG_7742.jpeg


IMG_7744.jpeg
 
Last edited:
I used an old bike inner tube last time as my fret board was already radiused, so more difficult to clamp . Very effective and nice even clamping pressure.
I was actually looking at some innertubes when I was at the hardware store on the weekend for exactly that purpose, but I decided they were too expensive to buy new ones just to cut them up for this :p
 
Last edited:
  • Haha
Reactions: Flying B
I was actually looking at some innertubes when I was at the hardware store on the weekend for exactly that purpose, but I decided they were too expensive to buy new ones just to cut them up for this :p
If you don't know someone who rides, find one. I bet most bike shops would happily give you a blown tube considered beyond being worth the bother of patching (again...) for free, and I'm quite sure that most bicyclists will offer you several from their personal stash of same for free. One or two might actually throw them away and you'd have to wait for them to destroy another before they'd have a dead one for you to use for clamping, but usually they get put away "just in case" and accumulate.
 
  • Like
Reactions: NKBassman
I've been plugging away at this project, stealing an hour or two here and there and making some slow progress. This will not win any luthier awards for craftsmanship, but I've learned a lot and it's been a fun project so far.

Lets see... where did we end off on the diary here....

I marked out the fret lines using the Solo Music template, and ordered myself their fret saw as well. They also sell an optional depth stop for the fret saw, which I neglected to buy in the interest of not over-spending on all the tools up front. But I'm going to buy one for my next build, because I definitely cut these too deep :p.

Then I radiused the fretboard using an aluminum radius sanding block that I got off Amazon, sanding from 120 through 400. This ended up being way easier and less labour intensive than I thought it would be. By the time I got to 400 it only took a couple of passes to knock down the surface.

I installed the face dots, rounded over the fretboard edges with a flat sanding block, and slopped on a couple coats of Watco Teak Oil, rubbing it in with some Scotchbrite synthetic steel wool letting it sit per the directions on the can, then reapply, let it sit some more, and finally wipe off anything that's left. Then I let it sit over night and gave it a brisk rub down with some finer scotchbrite and some brown paper bag the next day. I've read here in the LC that brown paper bag is about equivalent to 1000 grit sandpaper.... The pics below were taken when the oil was still wet, so you will see some texture. But it's super smooth now, and less sticky than the thick gloss poly on the factory neck (80s/90s'ish Squier), which is what I wanted. I'm quite happy with the feel of the fretboard, and can only hope that the back of the neck feels as comfortable...

2.jpg


That birdseye maple really pops! It's hard to see, and even harder to capture in a picture, but the dot markers are actually a dark red mottled tort. It's a blink-and-you'll-miss-it detail, but I really like it.
7.jpg


4.jpg


3.jpg


Hammered in the frets yesterday and started trimming them back.
8.jpg


I also stained the relief carve on the headstock. This is Minwax Walnut stain over top of the darkened douglas fir. There is Teak Oil applied to the main headstock area, but I'm going to wait and finish the rest of it after I carve the back.
10.jpg
 

Attachments

  • 6.jpg
    6.jpg
    185.1 KB · Views: 14
  • 9.jpg
    9.jpg
    190.7 KB · Views: 11
Last edited:
Well after an exceptionally busy summer and fall, some travelling, some gigging, some downtime recovering from some physical injuries, some therapy to get a handle on some mental injuries, some burnout, and a LOT of work at my day job (not necessarily all in that order), I'm finally picking up where I left off on this. Just bumping with a journal entry for now, I'll add some more pics later.

I cut the nut slot, poorly.... and after hemming and hawing about how to fix it for 6 months (and breaking my 1/8" router bit in the process), I decided to just clean it up as best I could with a 1/8" wide chisel (thank you Amazon) which in the end took like 10 minutes... something about over-complicating things and fixating on power tools...

I probably overcut the slot a little too deep in the process, but I have a pre-slotted nut that might be just tall enough to make it work. I'm moving on with the rest of the build for now, and I'll circle back to the nut slot later when it's time to string it up. I may have to shim the nut slightly, glue some wood back in the slot and cut it again, or cut my own nut (listed in order of decreasing enthusiasm).

I also inadvertently took a good little chunk out of the fretboard behind the nut while cleaning up the slot (and immediately lost the piece that broke off), but that won't make my guitar playing any worse than it already is :p.

IMG_9822.jpeg


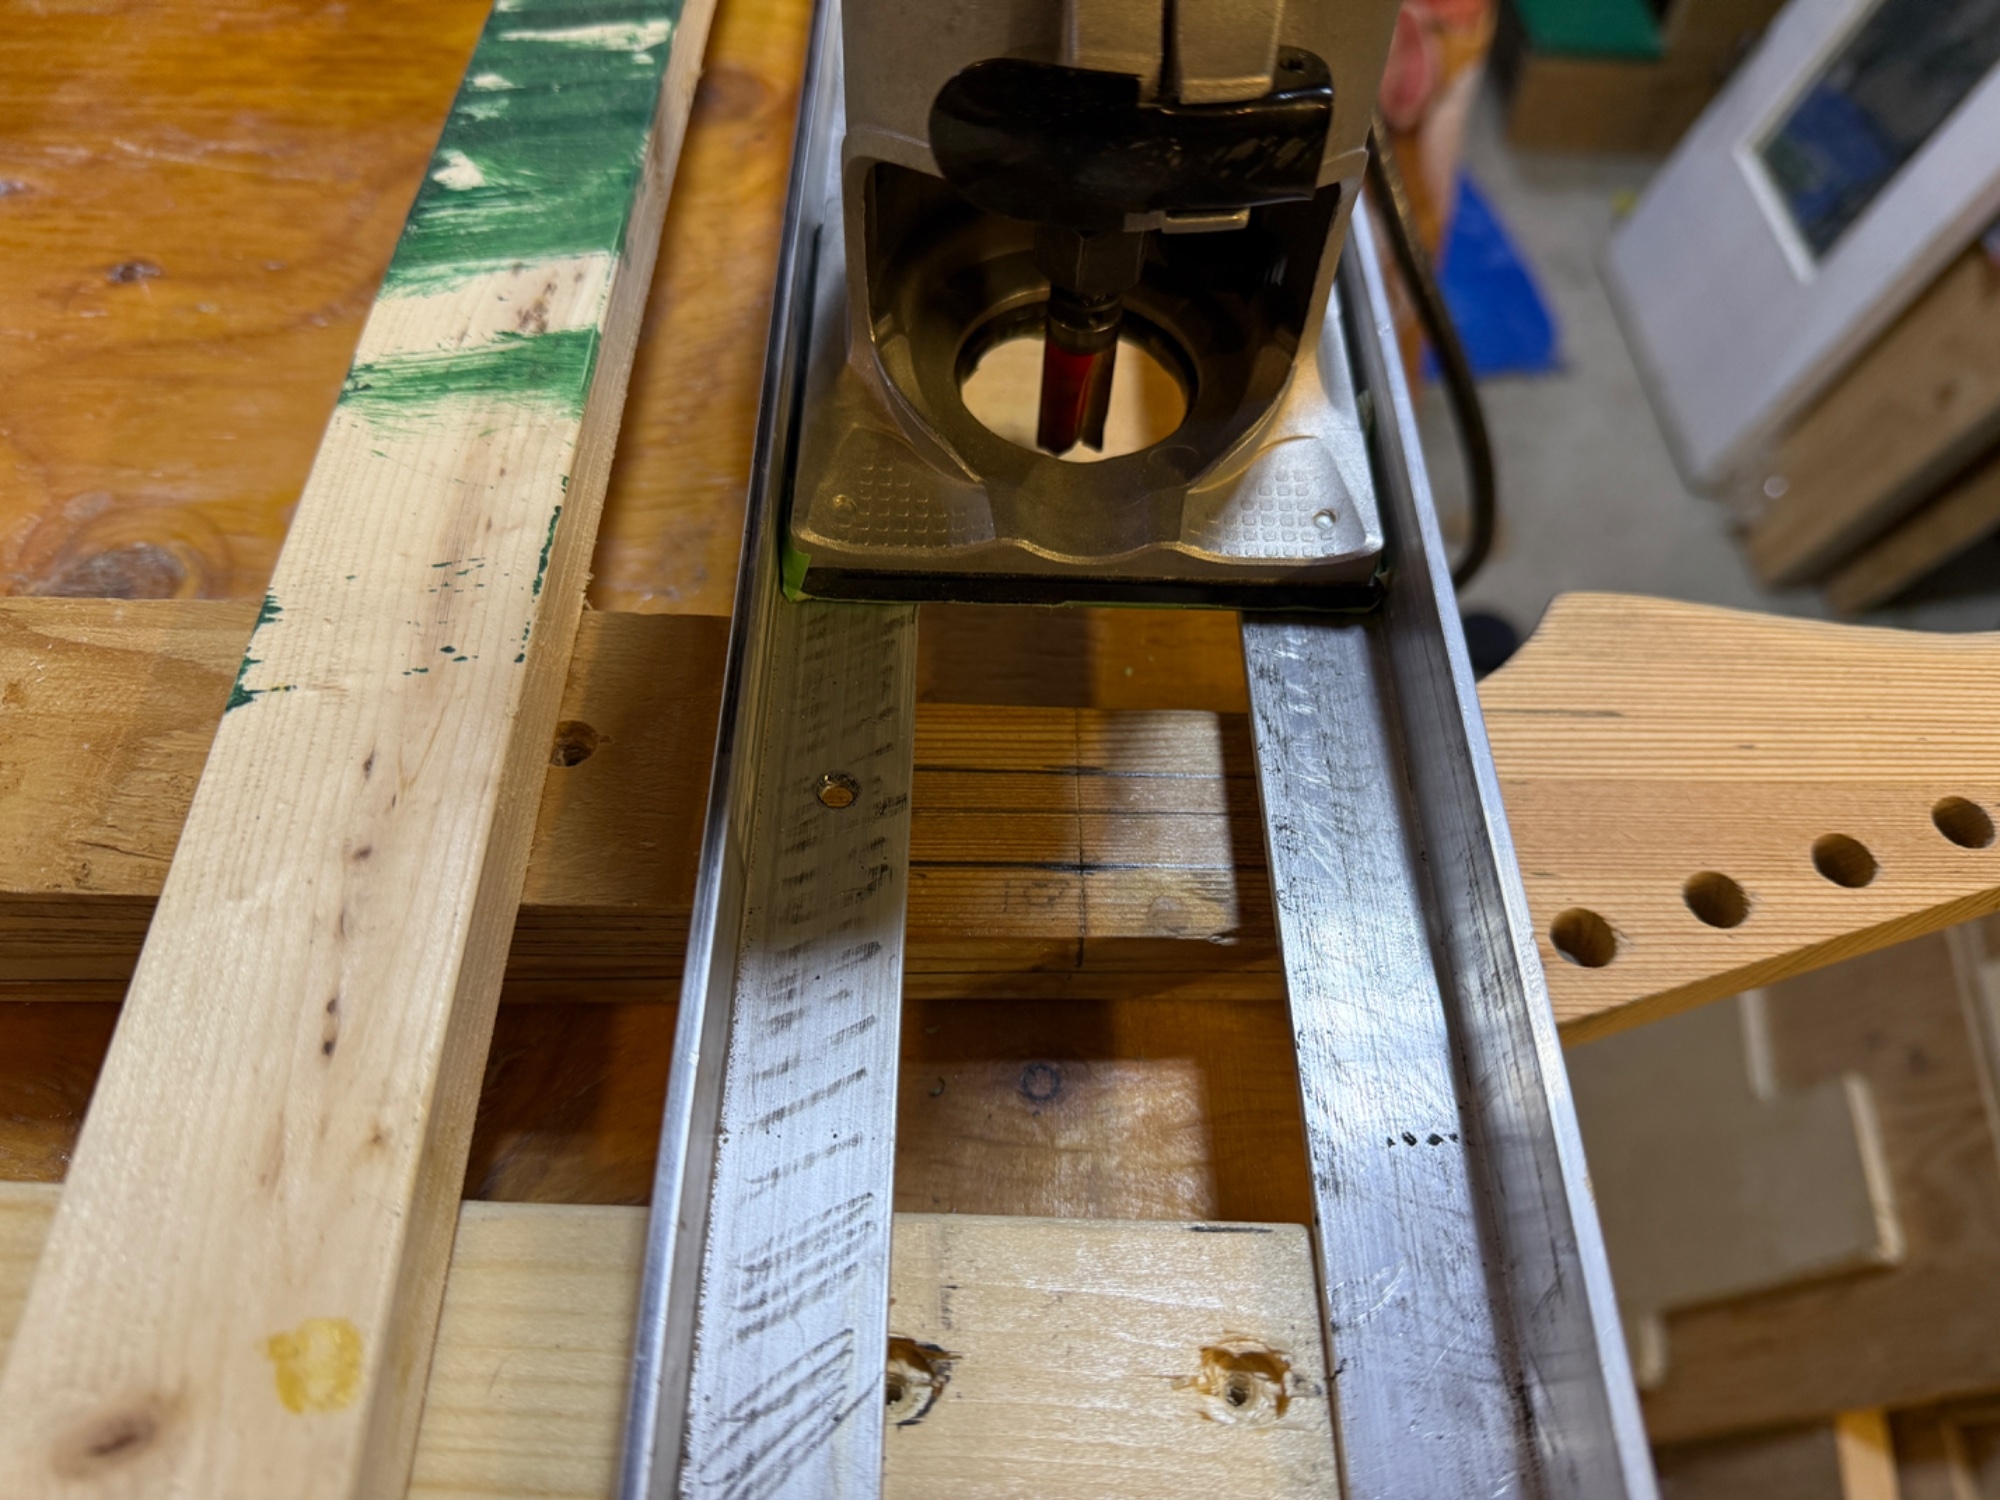
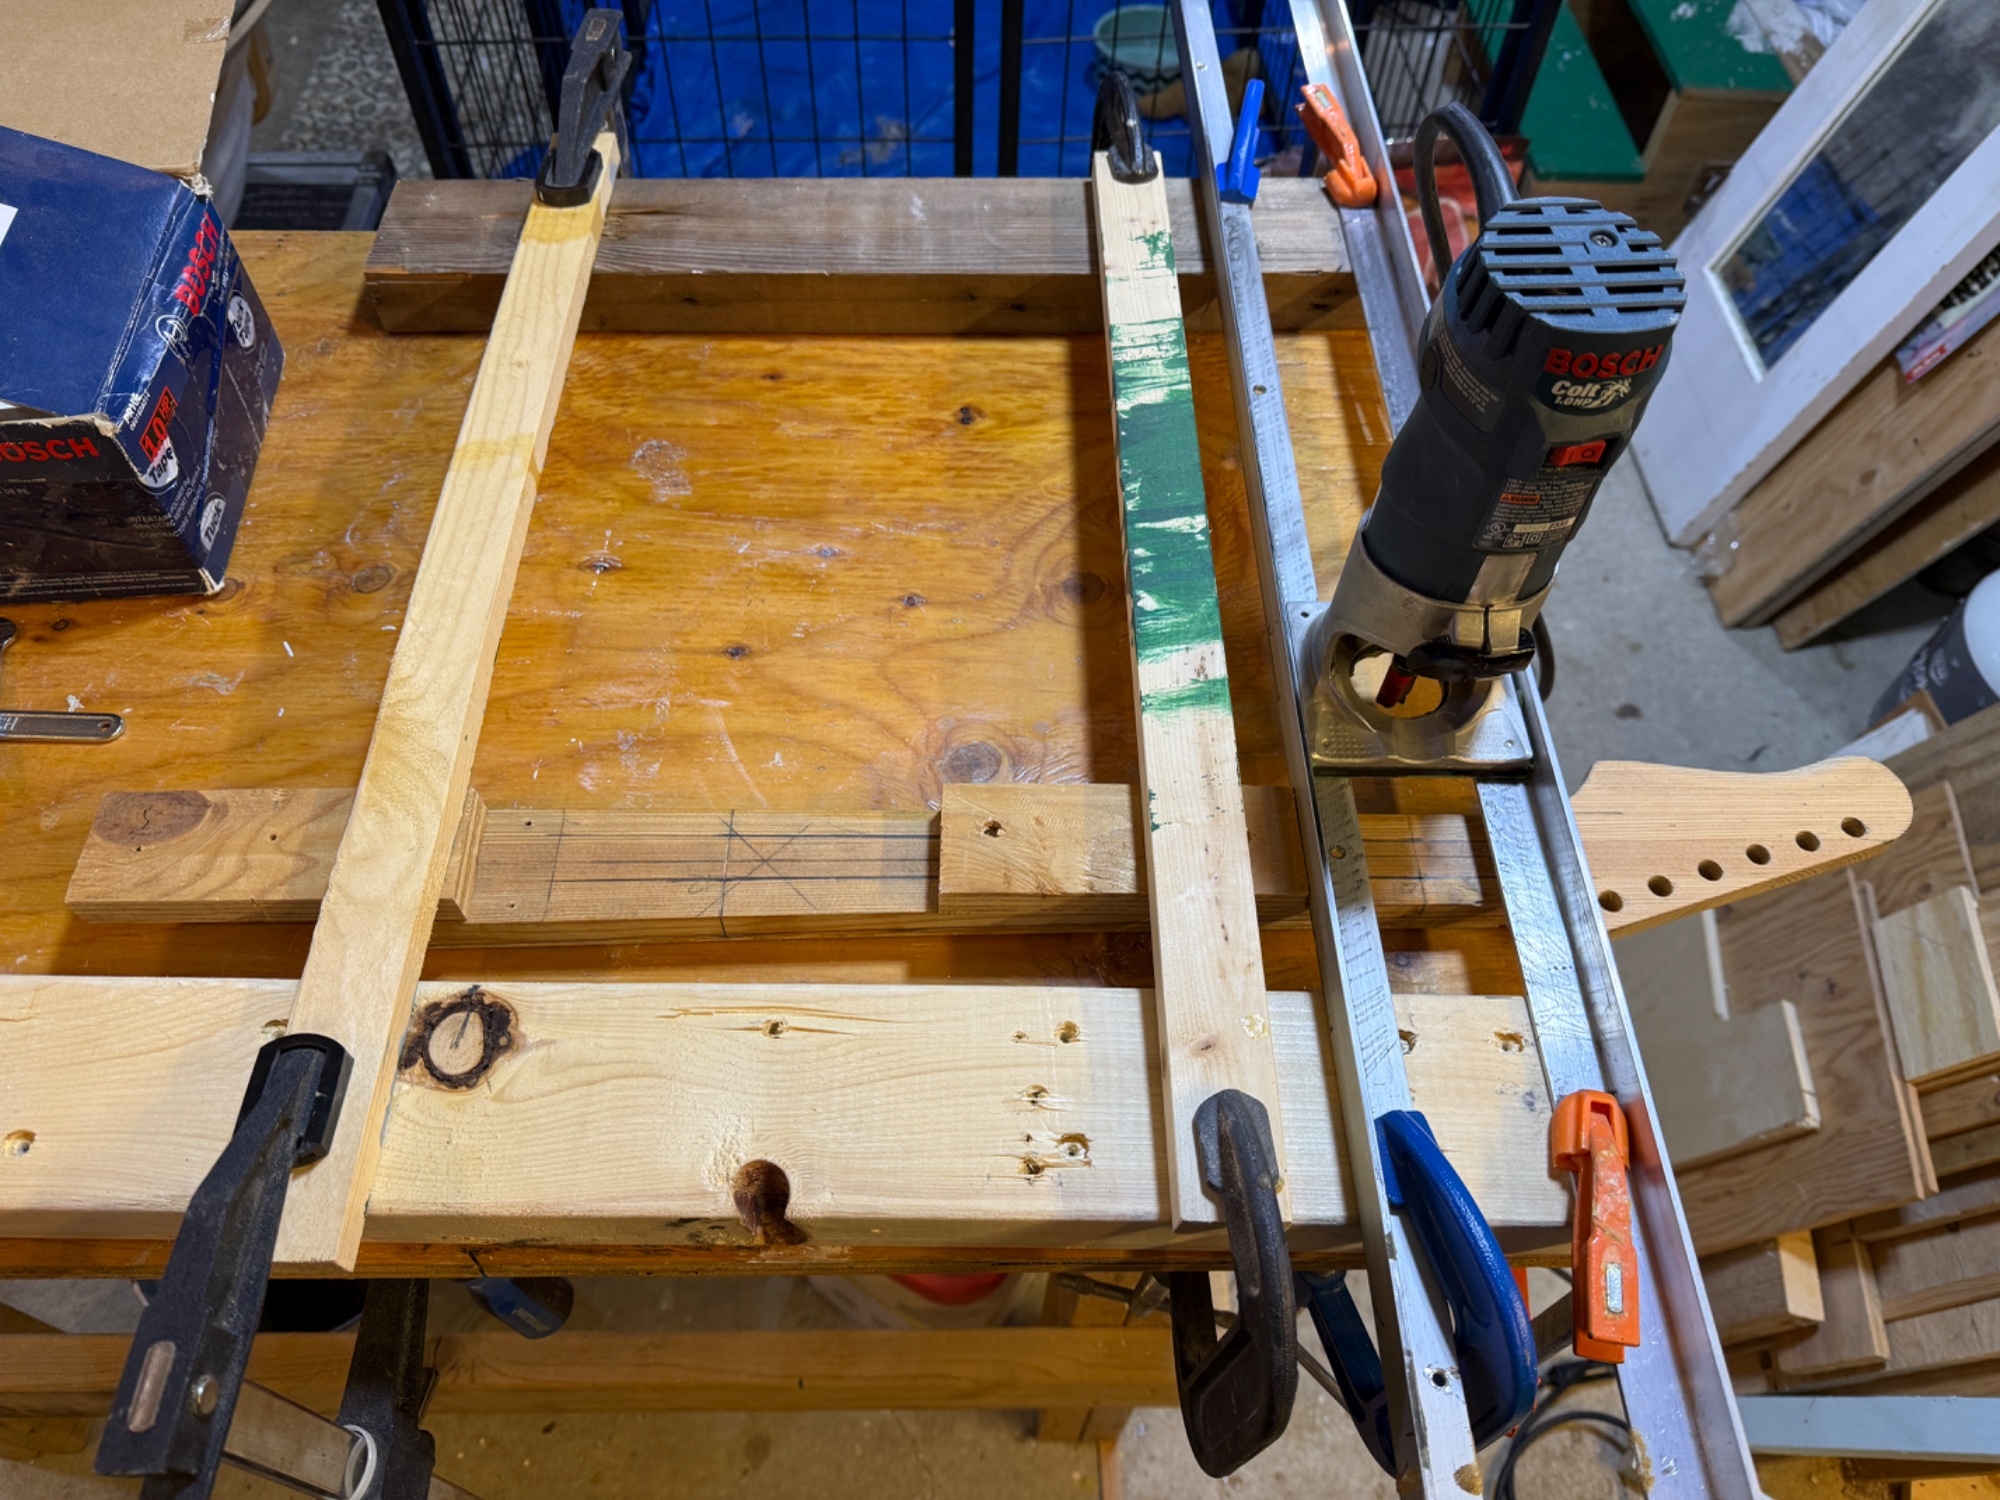
I cobbled together a super janky home-made router sled with some aluminum angle, and used that to cut the overall depth of the neck at the 1st and 12th frets. I then reset the sled on an angle to connect the two points for a smooth taper along the length of the neck. I have since bought some actual slide rails to build a proper sled fixture, but that'll be for the next one...
IMG_9806.jpeg


IMG_9807.jpeg


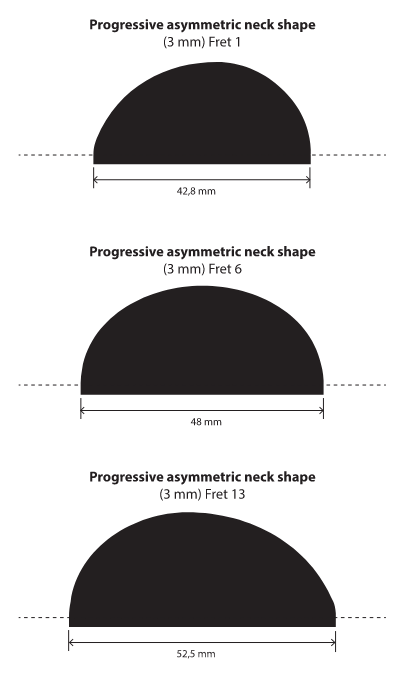
From there, I carved the back using an asymmetric profile I found online somewhere when I started this project. It seemed like the same amount of work to me to either do a symmetric carve or go wildly asymmetric, so I figured I might as well go off the beaten path and try something that looks comfortable on paper, at least. The profile varies along the length of the neck, from heavier on the low side of the neck at the 1st fret to heavier on the high side of the neck at the 12th. I used the template silhouettes below and figured out my facet dimensions in CAD. Ultimately I ended up just fudging things in a little bit, but I like the way it turned out.
1766517957985.png


Same as above for setting the overall depth of the neck, I marked my facet lines at the 1st fret and 12th fret and then just connected the dots. Once the primary and secondary facets were cut, I smoothed everything over with a sanding block until I couldn't feel any more ridges, et voila. This is my second neck carve now, and I'm 2/2 surprised that it can turn out so nicely from just cutting a few straight lines and smoothing it over.

IMG_9810.jpeg


IMG_9811.jpeg


IMG_9819.jpeg


After sanding I ended up with a tiny bit of CF poking through in the thinnest area:
IMG_9820.jpeg

1766520712914.jpeg

Oh well... We'll call it a learning opportunity for next time: buy the smaller square CF bars instead of the deeper rectangular ones. The finish is smooth and you can't feel it, it just looks like a little black streak against the bare wood. Everything will darken up with finishing anyway, and in general I'm not overly concerned with aesthetics on this build.

Headstock transition at the back of the neck turned out nice though. Done by hand with a chisel, just tying it in from the flat back of the headstock to the finished profile at the 1st fret.
IMG_9818.jpeg


I had some grain chip out along the edges of headstock, one of the downsides of working with 100 year old Douglas Fir... I got a little carried away trying to sand it out, and ended up cutting it back and turning it into a kind of "tummy carve" cutaway detail on the back of the headstock by the time I was done. It was hard to photograph last night, but I'm actually happy with how it turned out (especially considering that it wasn't planned in the first place).

IMG_9823.jpeg


Now I'm working on sanding out some grain texture at edges of the headstock, and debating my next steps. It's probably time to put the tuners on and re-mount it to the body to double check string alignments and all that, but I also have a NYE gig coming up and I kinda don't want that guitar in pieces while I'm supposed to be practicing... I'll be pretty busy over the holidays anyway, so it can just sit and "acclimatize" to having the back carved out for now while I figure out where to go from here.
 
Last edited:
Thanks Matt!

I know this thread is starting to read like a long running list of mistakes, but it's been a fun and rewarding project so far and I'm really looking forward to being able to string it up and see just how bad it really is. This is kinda my first "real" neck build, so it's more of a practice/learning build than anything else. If it turns out to be firewood at the end of the day, then at least I learned something along the way.

I'm trying to present it all honestly, warts and all, with the hopes that someone else might be able to benefit from reading it all some day.

Happy new year, folks. See you on the other side!
 
Last edited:
  • Like
Reactions: Matt Liebenau
How mistakes get fixed is often the best part of a build thread. Doing that as you go is a great way to make use of the brain trust here if you want some other options for solving a particular problem.

Nice "design on the fly" solution to the chipout on the headstock.

As for the carbon, using TOW (yarn/ribbon) set into epoxy in the slot beats any shape of bar; and you can make the slot any shape that helps, such as a rounded bottom. Not seeing it after shaping is almost entirely working out the planned neck shape so you know where to put it and miss seeing it, and then no changing that on the fly without reference to as built detail drawings for "Where did I put it and how much room do I have before I hit it?" Typically 1/8" (3mm) of clearance is good to shoot for.
 
I was tired of monkeying around with the botched nut slot, so I decided to just fill it in and start over.

I set my router guide back up and cleaned up the slot properly, then glued in a strip of maple leftover from the fretboard. Let that sit overnight, then cut/filed and sanded smooth. Then it's back to the router to recut the slot.

After sanding the nut blank just enough to darken the sand paper, it slid right into place.

Much happier with this now. However the nut will need some more work since it's obviously slotted for a tighter radius. I guess I'll have to bite the bullet and get myself a basic set of nut files to finish this off.
 
  • Like
Reactions: Matt Liebenau