
Didn't say you had to, just pointing out what has been done (options...) while following that line. It's yours, make it yours. Dare to change the shape of the routed away bit. Heck, dare to change the angle of it as well. Or carve the thing rather than routing, if that works for you.

Enjoy the benefits of a premium membership!
Upgrade Account
-
TalkBass has been independent since 1998. Add your voice.
Create a free account to reply to discussions, view embedded media, and browse with fewer display ads.
Join free Log in
Want zero display ads or expanded classifieds tools? Compare plans.
You are using an out of date browser. It may not display this or other websites correctly.
You should upgrade or use an alternative browser.
You should upgrade or use an alternative browser.
Stratocaster Project
- Thread starter NKBassman
- Start date
More options
Who Replied?

Of course, I know. Thanks for the inspiration!Didn't say you had to, just pointing out what has been done (options...) while following that line.
Checked the template VS the actual neck and everything looks about right. The template is a nice fit in the neck pocket, as nice as the stock neck is anyway, which is ... not the tightest. But it's fine.
I also pulled the entire pickguard apart and redid all the wiring over from scratch.
It sounds good, too. But I'm still tempted to eff around with it a little bit more, as the bridge pickup is so bright and the neck pickup is actually a bit darker than I'd like. They each sound great on their own, but the disparity between them is quite significant. For the neck pickup I'm liking the sound with the tone all the way up, but on the bridge pickup I find myself riding the tone down at least 50%... a fixed treble bleed of some sort on the bridge pickup might be in order.
The issue of the pickups being ever so slightly misaligned off from the low E string does still bother me when strumming, but I'm not considering chasing that down for now. I'll wait until I'm working with the new neck before I make any final adjustments there.
I also pulled the entire pickguard apart and redid all the wiring over from scratch.
- I ditched the 5-way switching and went for a standard 3-way blade switch instead.
- I took out the the linear-taper tone pot and went with A500k pots for both volume and tone.
- Replaced the 0.022uF tone cap with 0.047uF
It sounds good, too. But I'm still tempted to eff around with it a little bit more, as the bridge pickup is so bright and the neck pickup is actually a bit darker than I'd like. They each sound great on their own, but the disparity between them is quite significant. For the neck pickup I'm liking the sound with the tone all the way up, but on the bridge pickup I find myself riding the tone down at least 50%... a fixed treble bleed of some sort on the bridge pickup might be in order.
The issue of the pickups being ever so slightly misaligned off from the low E string does still bother me when strumming, but I'm not considering chasing that down for now. I'll wait until I'm working with the new neck before I make any final adjustments there.
Last edited:
Decided to do a practice/mockup on some scrap before committing to any cutting on my prepared neck blank. Layout is all looking good and making sense!
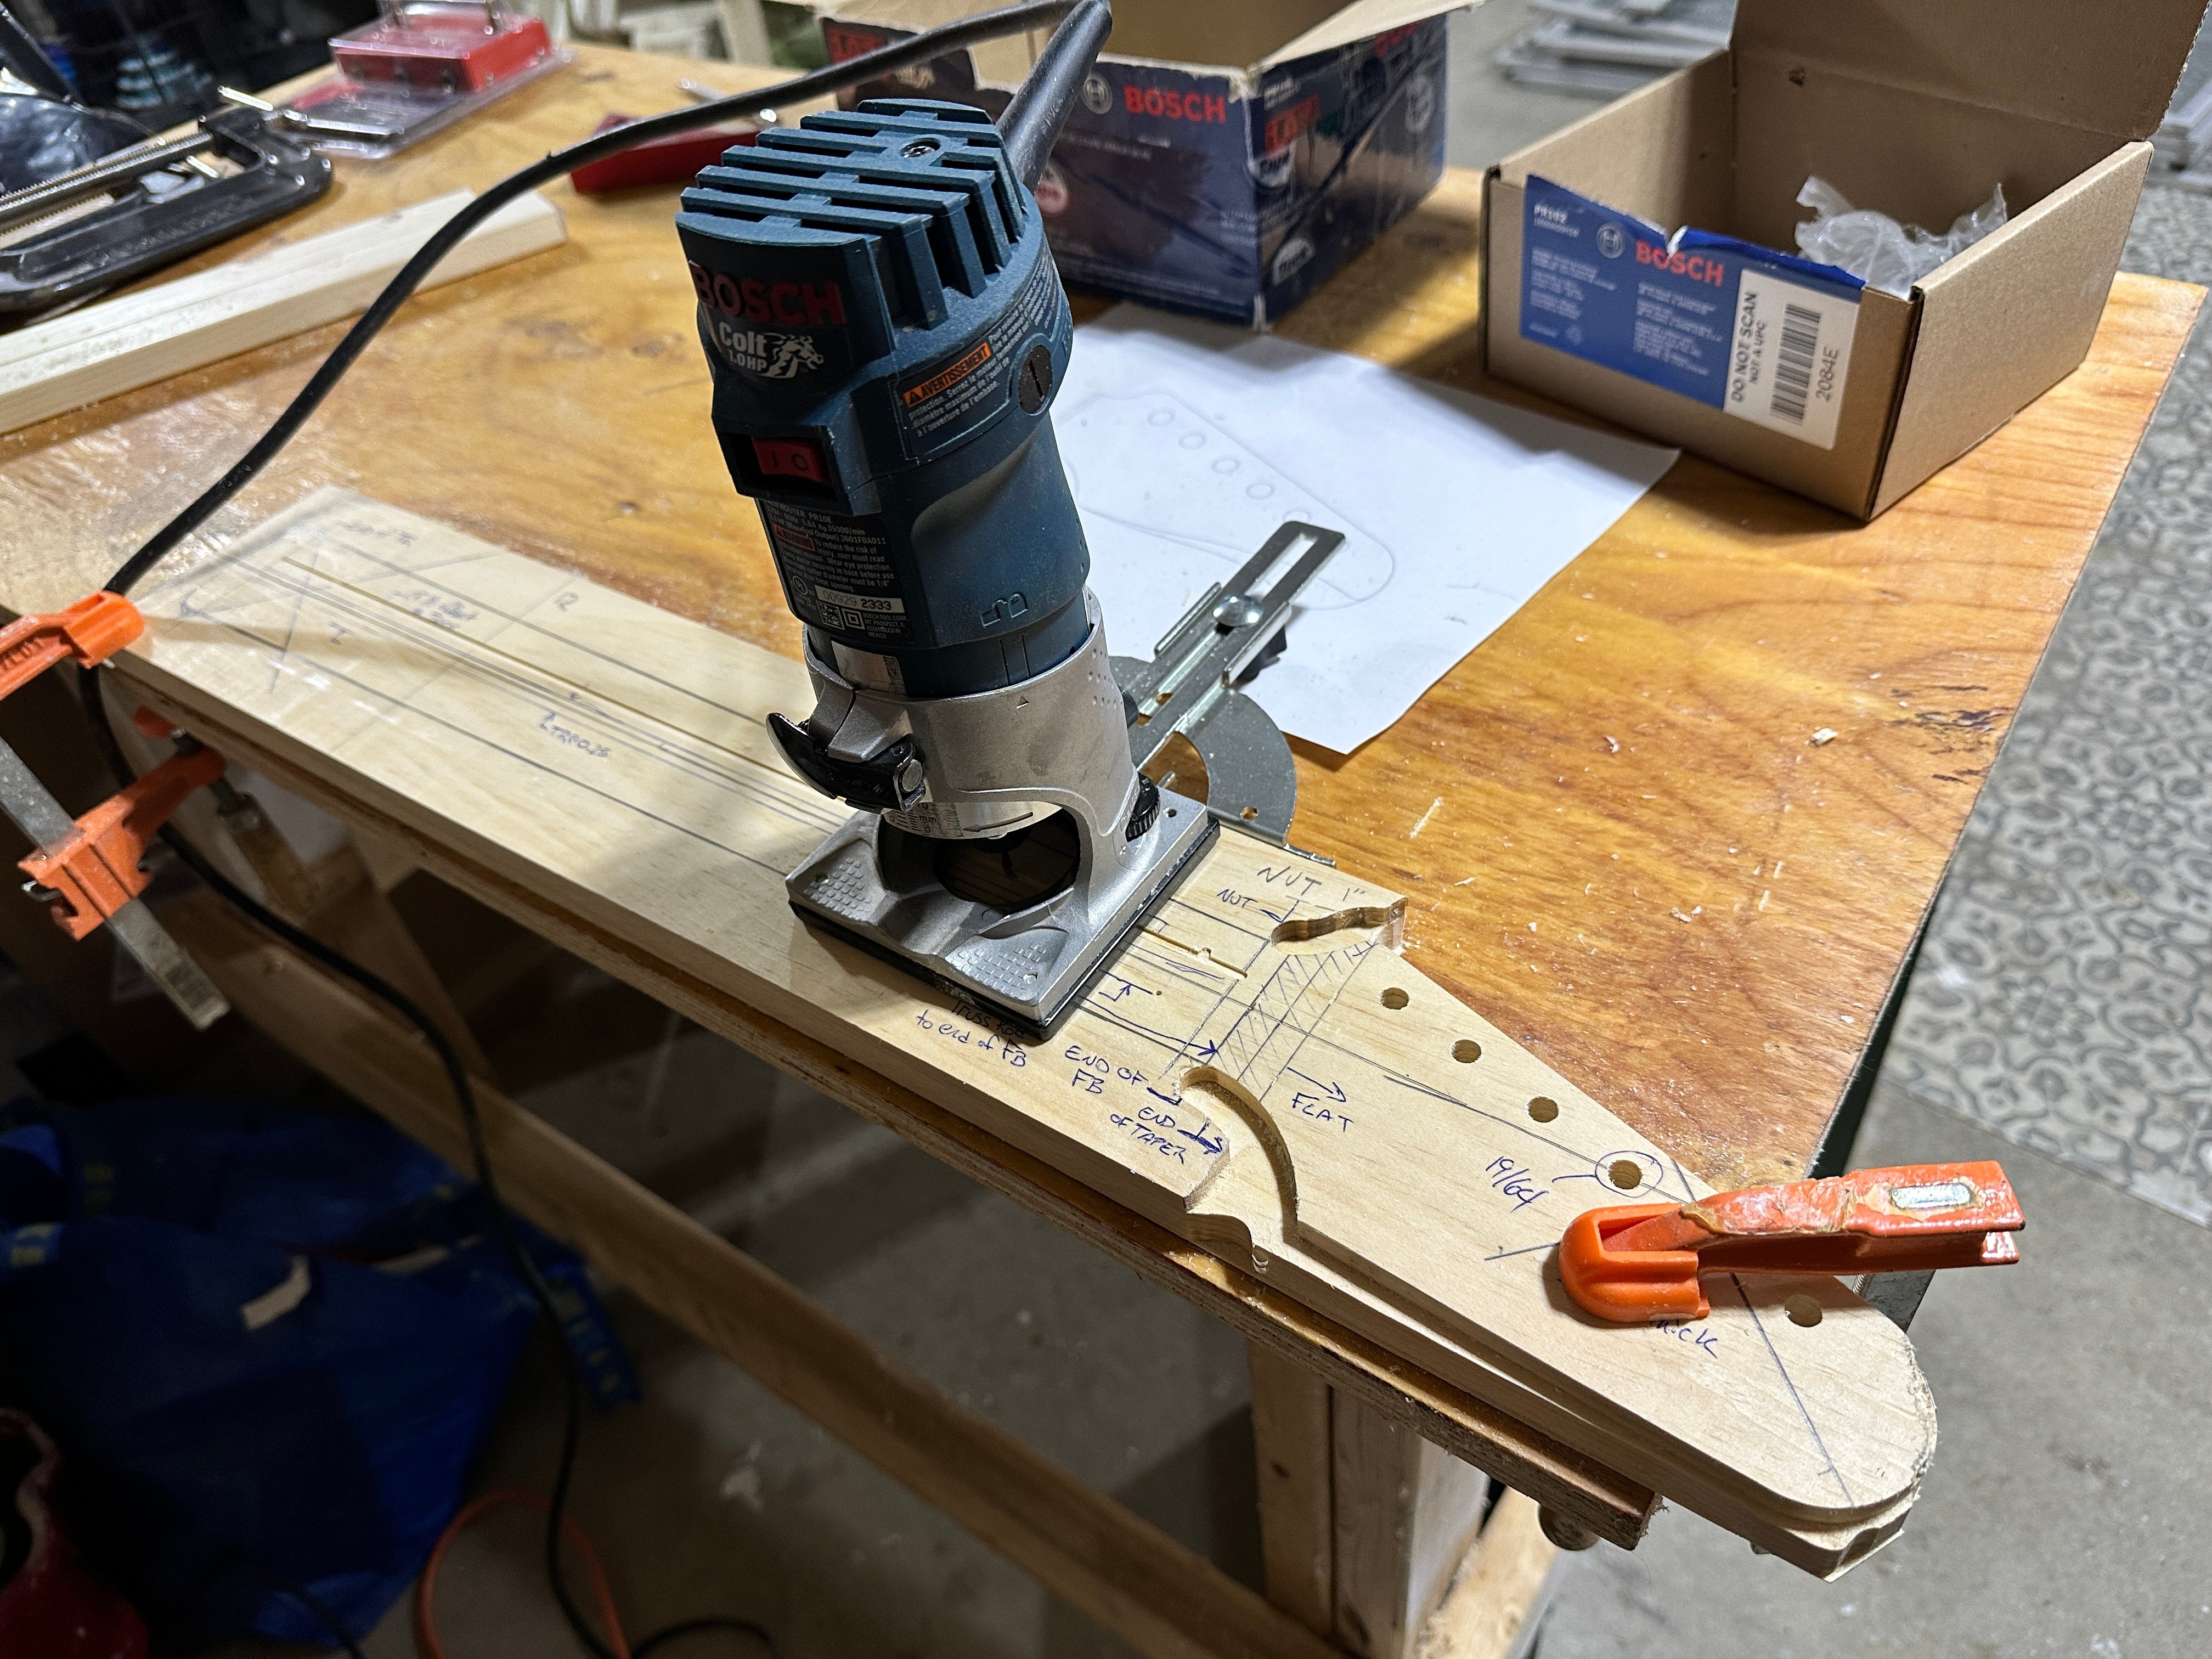
I ordered a couple of new bits and an edge guide for my Bosch palm router and wow! that is a game changer. No more fiddling around with make-shift fences and dubious offset measurements... just put the bit where you want it, set the guide, and awaaaaay we go!
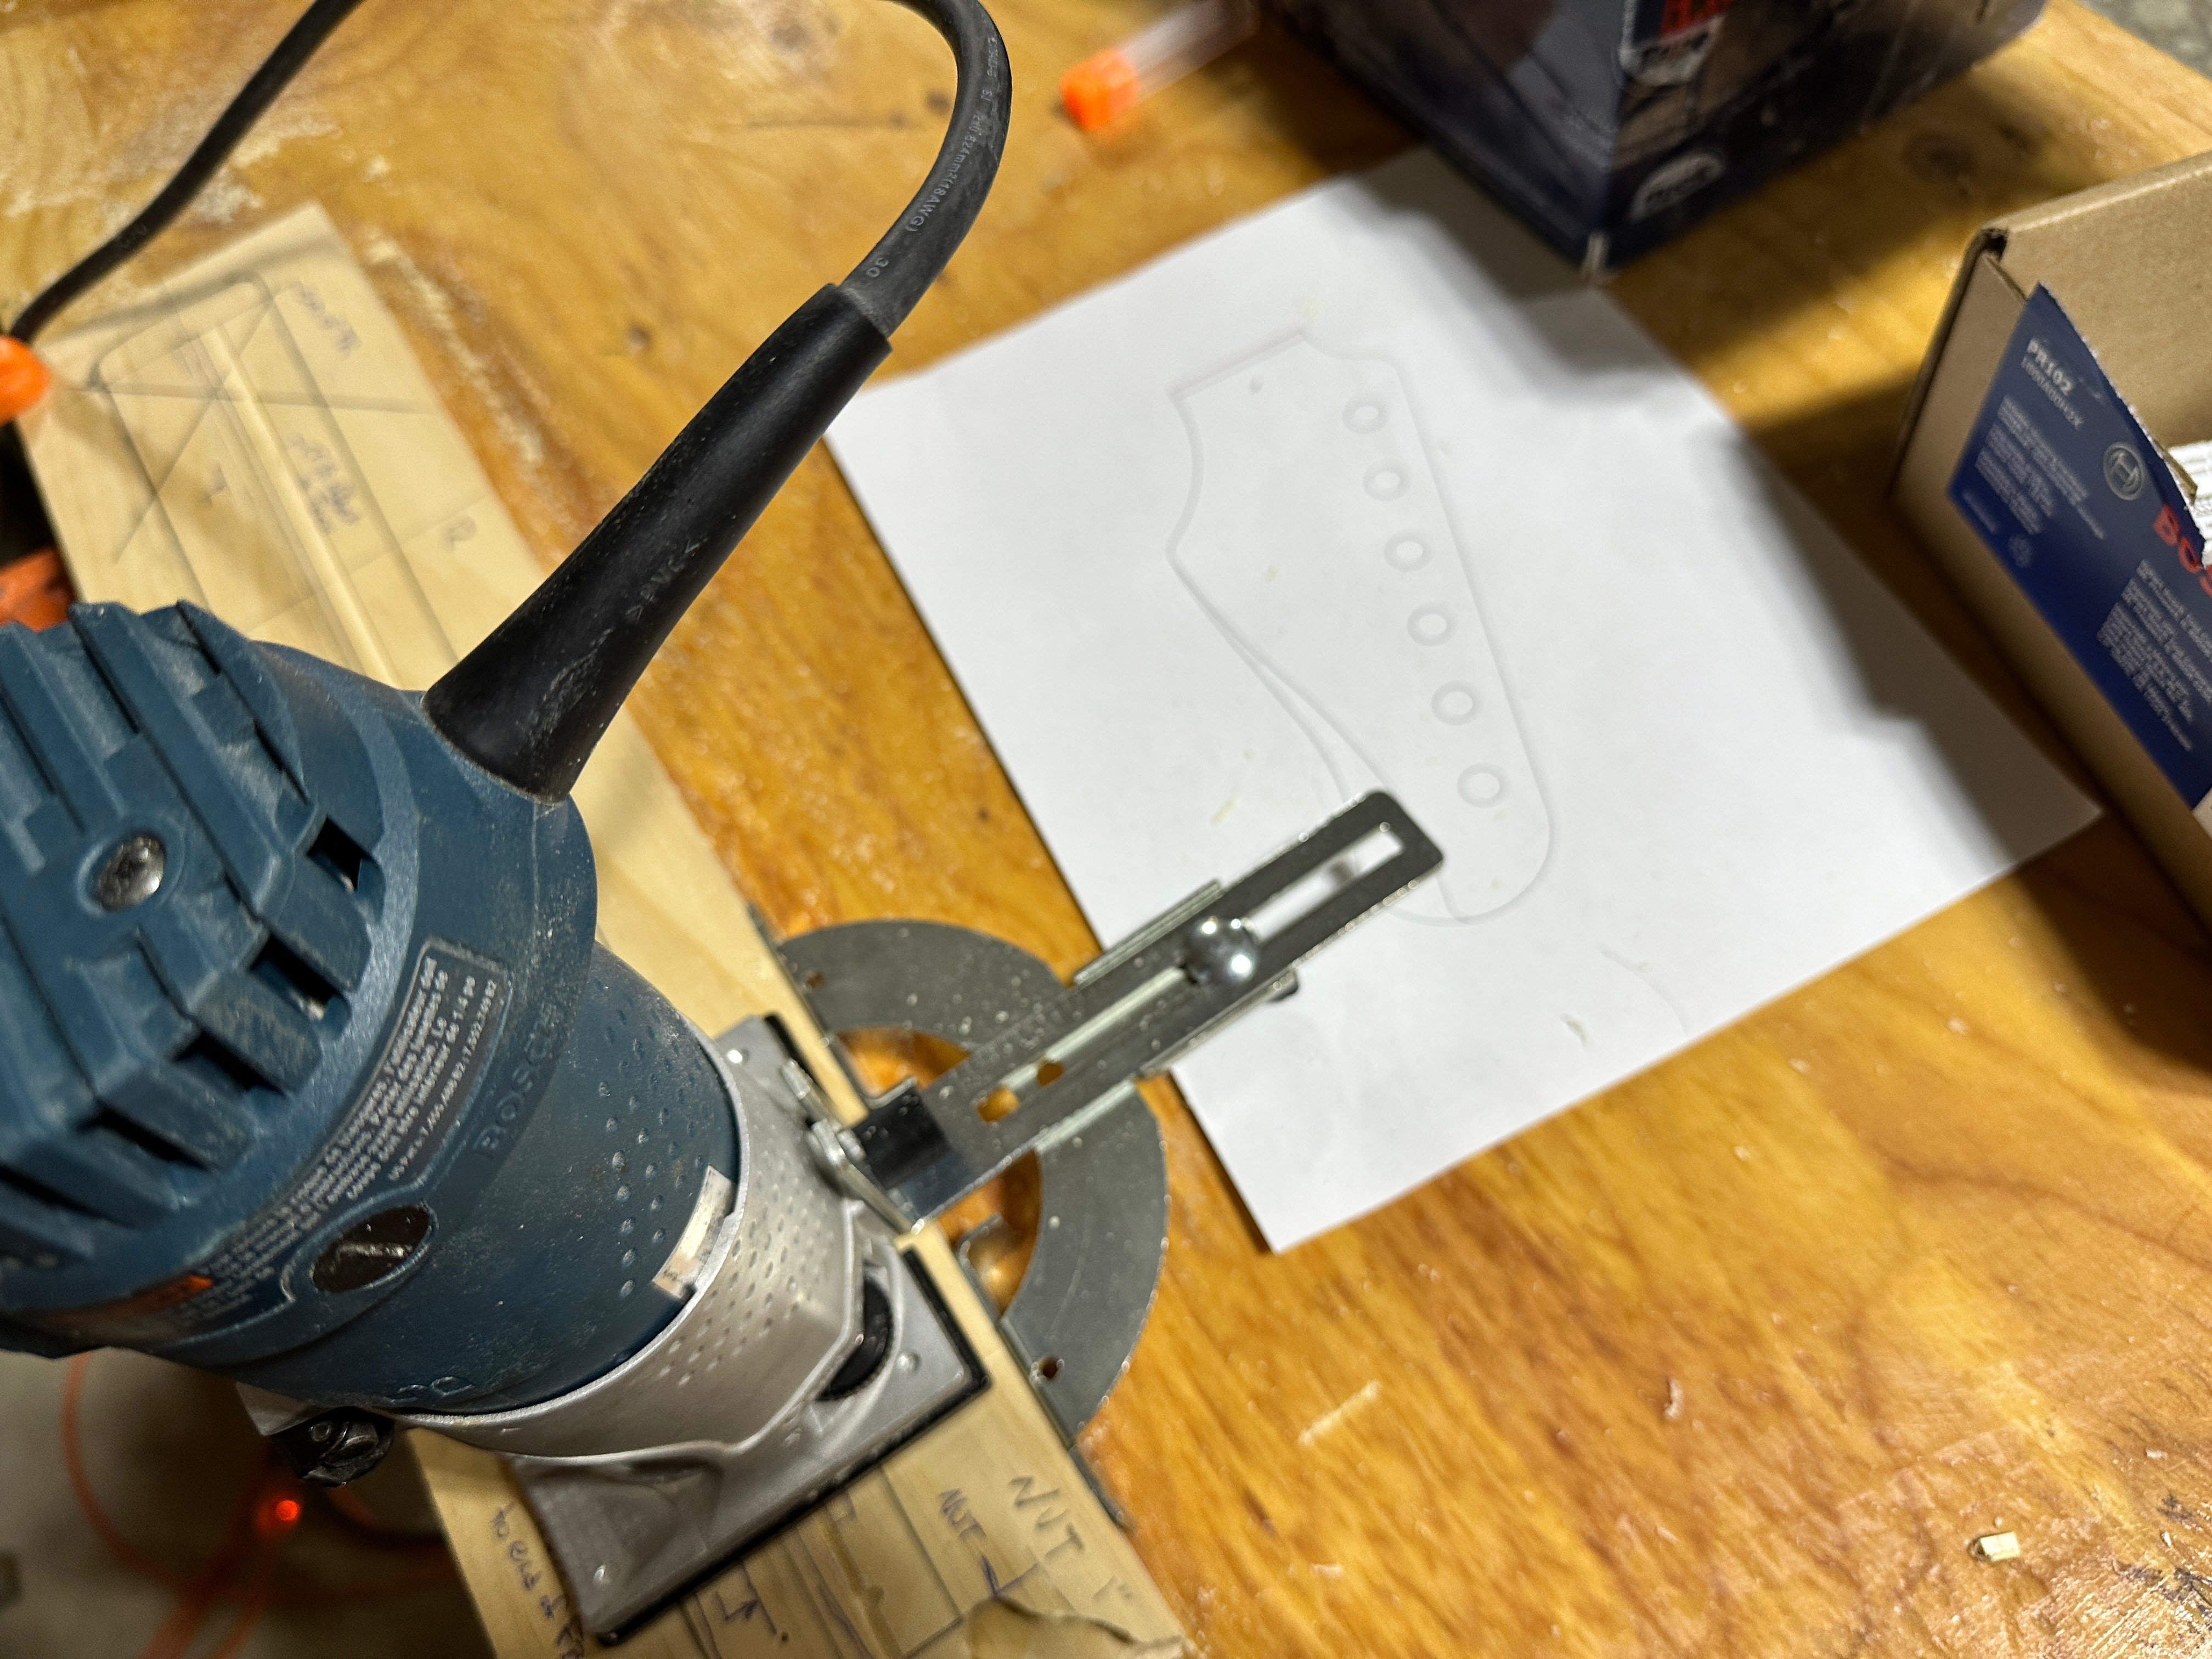
CF bars are a nice snug fit with the new 1/8" bit. I want to practice cut the truss rod next, but I used this style of truss rod on my first neck build and it was a very nice fit with a proper 6mm bit.
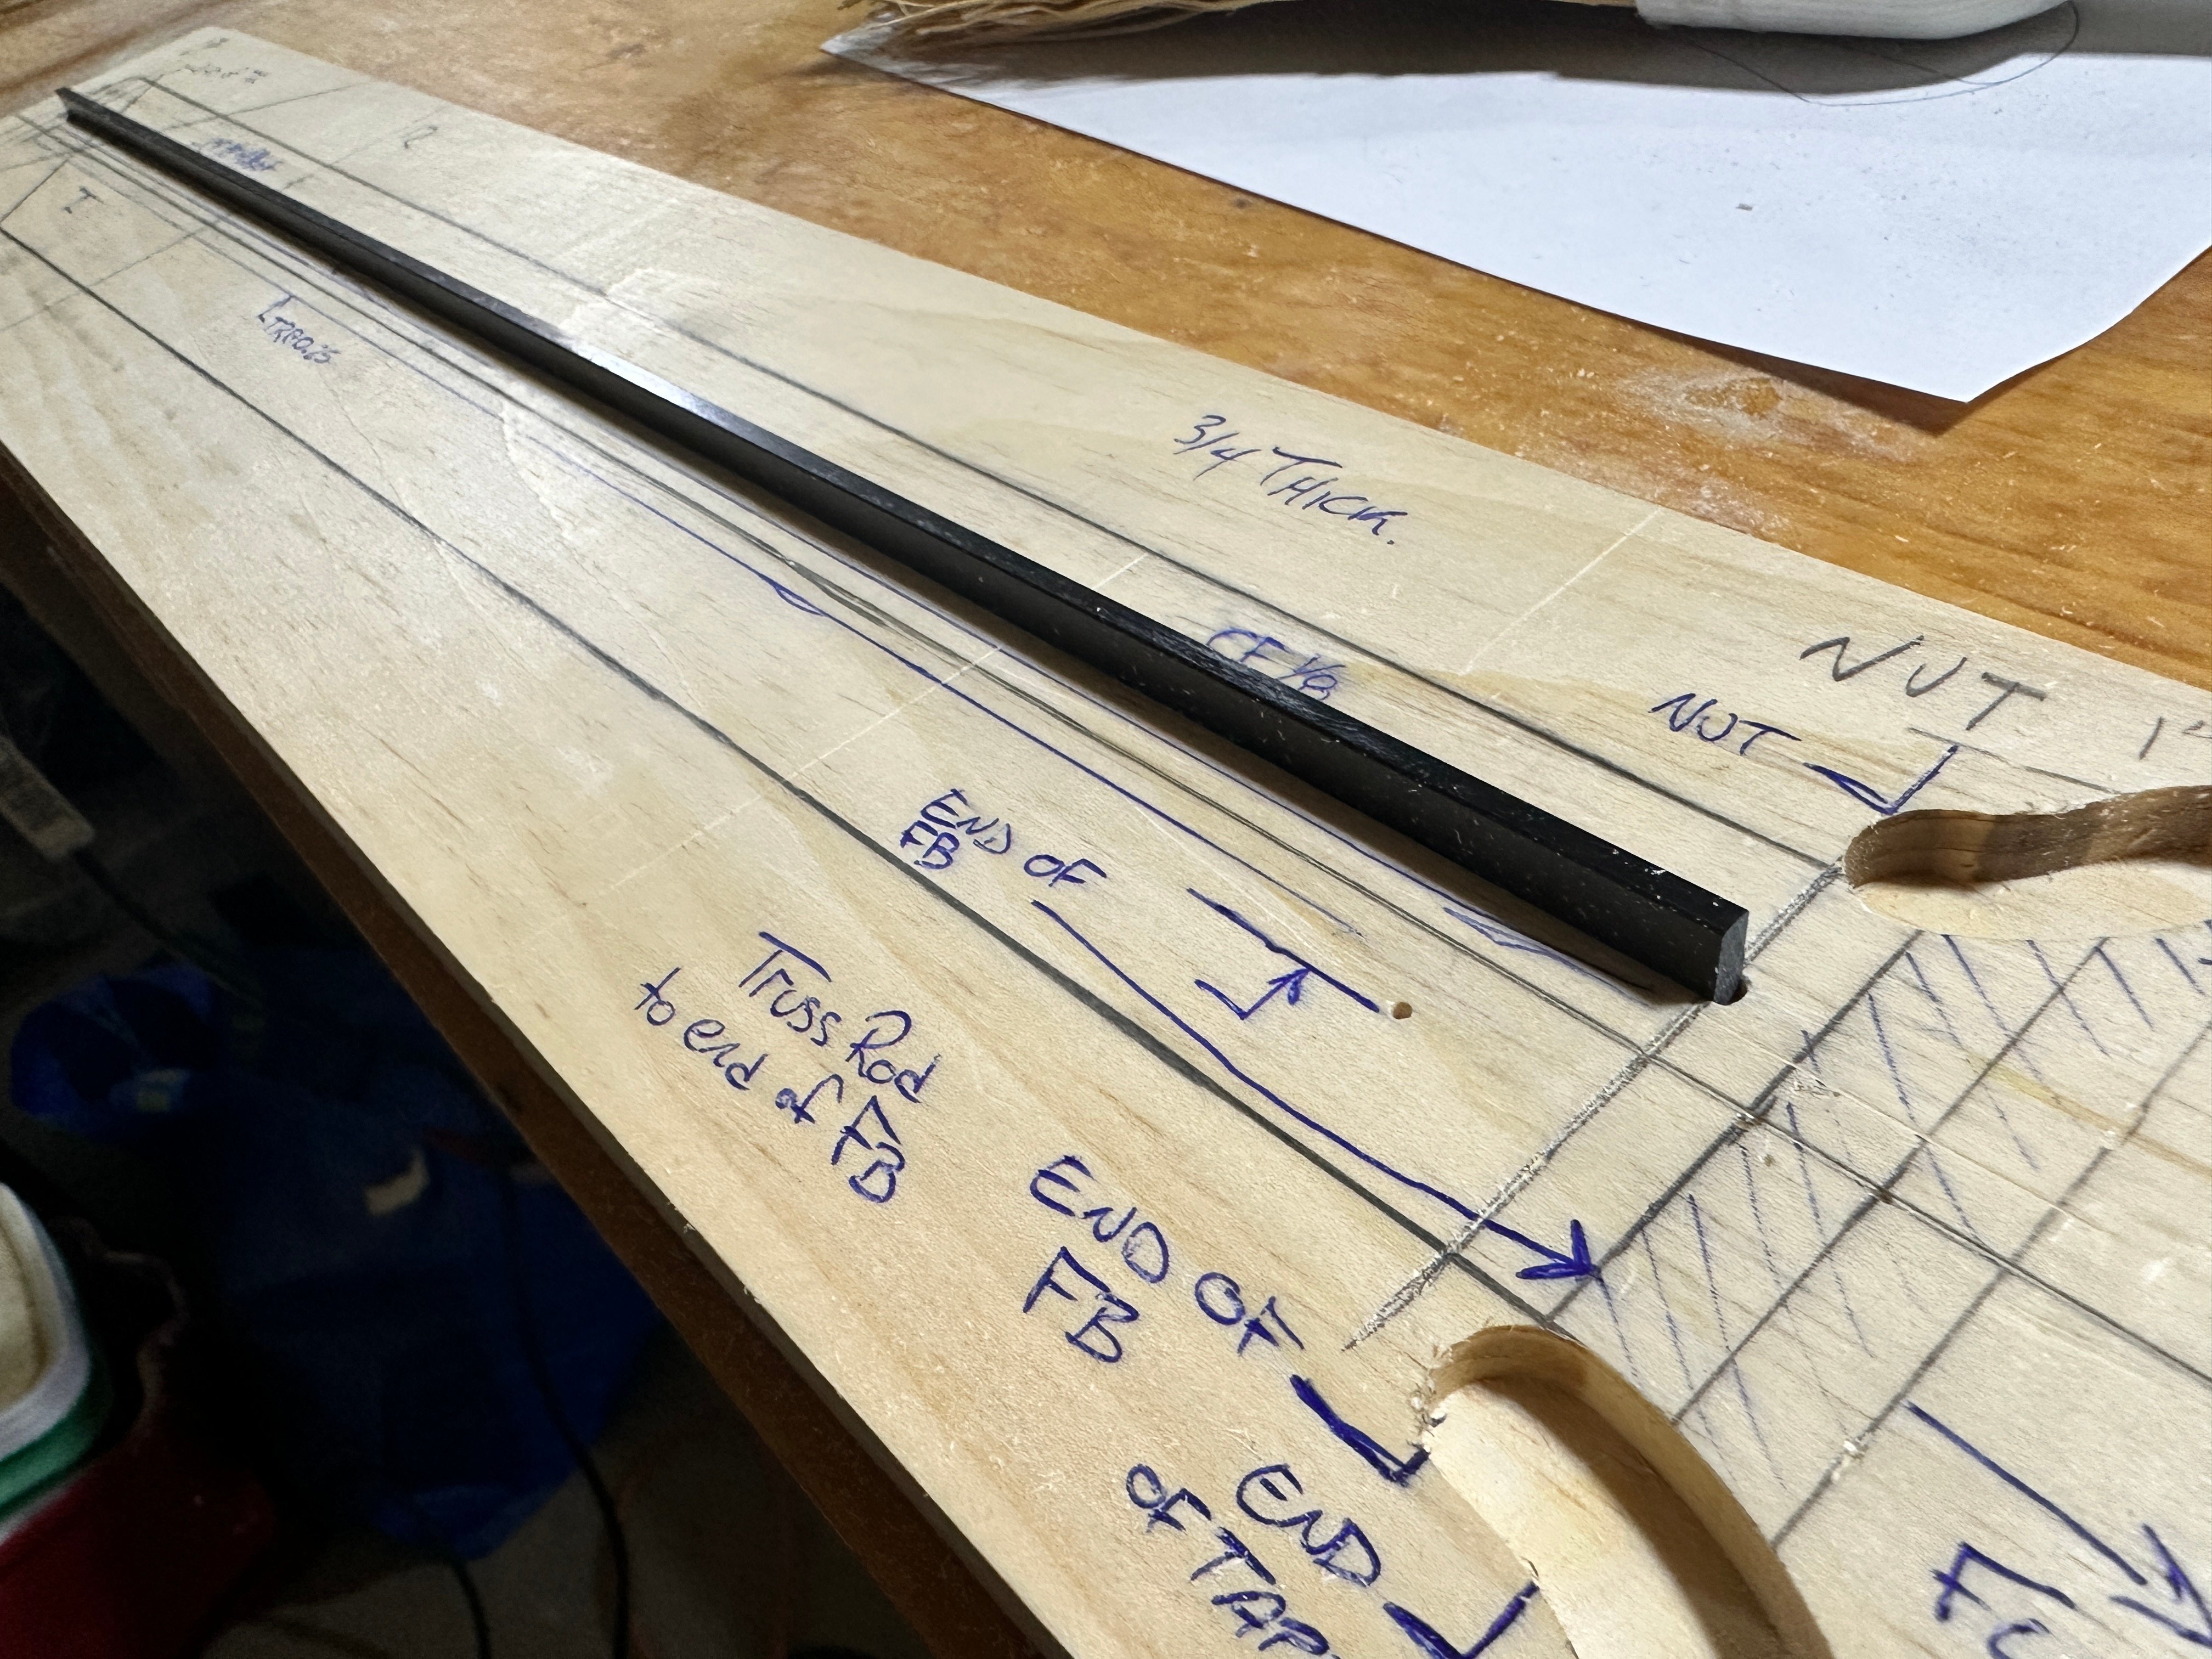
I also picked up a 1" dia. spoil board cutting bit for thicknessing the headstock. It left a very nice and smooth flat final surface, I'm actually really impressed! I'll just have to use my other larger router with a bigger base to give more surface area for riding the rail supports when doing the actual cut. The small square base of the palm router is not ideal as there can be very little surface contact at times, and it will dip and gouge the finished surface if you're not careful (and of course the obvious safety concerns as well). I suppose I should leave a little bit of extra thickness for sanding after... that's what this practice run is for!
Seems I neglected to take a picture of the finished headstock thicknessing cut.
I ordered a couple of new bits and an edge guide for my Bosch palm router and wow! that is a game changer. No more fiddling around with make-shift fences and dubious offset measurements... just put the bit where you want it, set the guide, and awaaaaay we go!
CF bars are a nice snug fit with the new 1/8" bit. I want to practice cut the truss rod next, but I used this style of truss rod on my first neck build and it was a very nice fit with a proper 6mm bit.
I also picked up a 1" dia. spoil board cutting bit for thicknessing the headstock. It left a very nice and smooth flat final surface, I'm actually really impressed! I'll just have to use my other larger router with a bigger base to give more surface area for riding the rail supports when doing the actual cut. The small square base of the palm router is not ideal as there can be very little surface contact at times, and it will dip and gouge the finished surface if you're not careful (and of course the obvious safety concerns as well). I suppose I should leave a little bit of extra thickness for sanding after... that's what this practice run is for!
Seems I neglected to take a picture of the finished headstock thicknessing cut.
Last edited:

Decided to do a practice/mockup on some scrap before committing to any cutting on my prepared neck blank. Layout is all looking good and making sense!
View attachment 7174470
I ordered a couple of new bits and an edge guide for my Bosch palm router and wow! that is a game changer. No more fiddling around with make-shift fences and dubious offset measurements... just put the bit where you want it, set the guide, and awaaaaay we go!
View attachment 7174471
CF bars are a nice snug fit with the new 1/8" bit. I want to practice cut the truss rod next, but I used this style of truss rod on my first neck build and it was a very nice fit with a proper 6mm bit.
View attachment 7174472
I also picked up a 1" dia. spoil board cutting bit for thicknessing the headstock. It left a very nice and smooth flat final surface, I'm actually really impressed! I'll just have to use my other larger router with a bigger base to give more surface area for riding the rail supports when doing the actual cut. The small square base of the palm router is not ideal as there can be very little surface contact at times, and it will dip and gouge the finished surface if you're not careful (and of course the obvious safety concerns as well). I suppose I should leave a little bit of extra thickness for sanding after... that's what this practice run is for!
Seems I neglected to take a picture of the finished headstock thicknessing cut.
I wouldn’t use the small router for thicknessing regardless but you can definitely make a larger base for the router so it has more surface area. I’ve got at least one that has an MDF base on it most of the time mostly for more surface area.
Being a test run there was a fair amount of IDGAF happening last night, but yeah I did not particularly enjoy that experience lol.I wouldn’t use the small router for thicknessing regardless but you can definitely make a larger base for the router so it has more surface area. I’ve got at least one that has an MDF base on it most of the time mostly for more surface area.
I have a larger router, just misplaced the wrench for the chuck... and after this test cut last night I will not be using the smaller router for that purpose again.
Being a test run there was a fair amount of IDGAF happening last night, but yeah I did not particularly enjoy that experience lol.
I have a larger router, just misplaced the wrench for the chuck... and after this test cut last night I will not be using the smaller router for that purpose again.
Right, I wasn’t suggesting using the little one, you can make a larger base for the larger router also.
I'm glad I did the mockup test neck before committing to the real thing, as it's helped me think out my order of operations in advance of the work... something I'm traditionally not very adept at doing. I'm more of the "figure it out as you go" type, which has got me into a few tight spots on projects around the house over the years  .
.
.- As I am getting a pre-radiused fretboard made for me, I'm finding that it kinda complicates or limits the order of operations a little, as you lose the flat surface to work off of once the FB is glued into place.
- Some of the headstock shaping and preliminary thicknessing will be easier before the FB is glued up. But the thickness transition between the headstock face and the finished fretboard needs to be done or at least brought to final line after the fretboard is in place.
- Right now I'm thinking it would be easier to shape the fretboard with the template first before gluing it to the neck blank, and then trim the neck blank taper to the finished fretboard... Instead of vice-versa templating the neck first before gluing down the fretboard. That way, even if the fretboard shifts a little during glueup (or whatever other "oopsie" you can think of), at the end of the day the neck and fretboard will be true to one another, and any slop in the alignment would be limited to the headstock beyond the nut. Cutting the neck taper to shape first before gluing on an oversized fretboard seems like it opens up more room for error.
Last edited:
Due to some unfortunate circumstances, production of the fretboard that I've been waiting on has been delayed. I'm still expecting it to show up eventually, but in the meantime I decided to order myself some fretboard wood and tools and press forward trying to make a fretboard on my own. I found myself a nice birdseye maple fretboard blank from EdCo Fine Woods in BC for only $15! Not bad even if I totally bone it. What's the worst that could happen? 

With fretboard material now en route, and as I'm currently recovering from surgery and limited from taking on any strenuous physical activity for the next month, it's time to get moving on this neck project again.
I took my mockup build about as far as I could carry it, including a quick practice carving of the neck itself. I glued on some 3/8ish plywood scrap to simulate a fretboard, and then fudged out an asymmetric neck profile using the "facet method" that actually feels pretty comfortable. I'll probably use/refine this profile when I get to carving the actual neck. Other than a couple small mishaps with the router, it turned out as good or better than I expected.
I'm really glad I decided to do this test mockup first, before cutting into my actual neck blank.
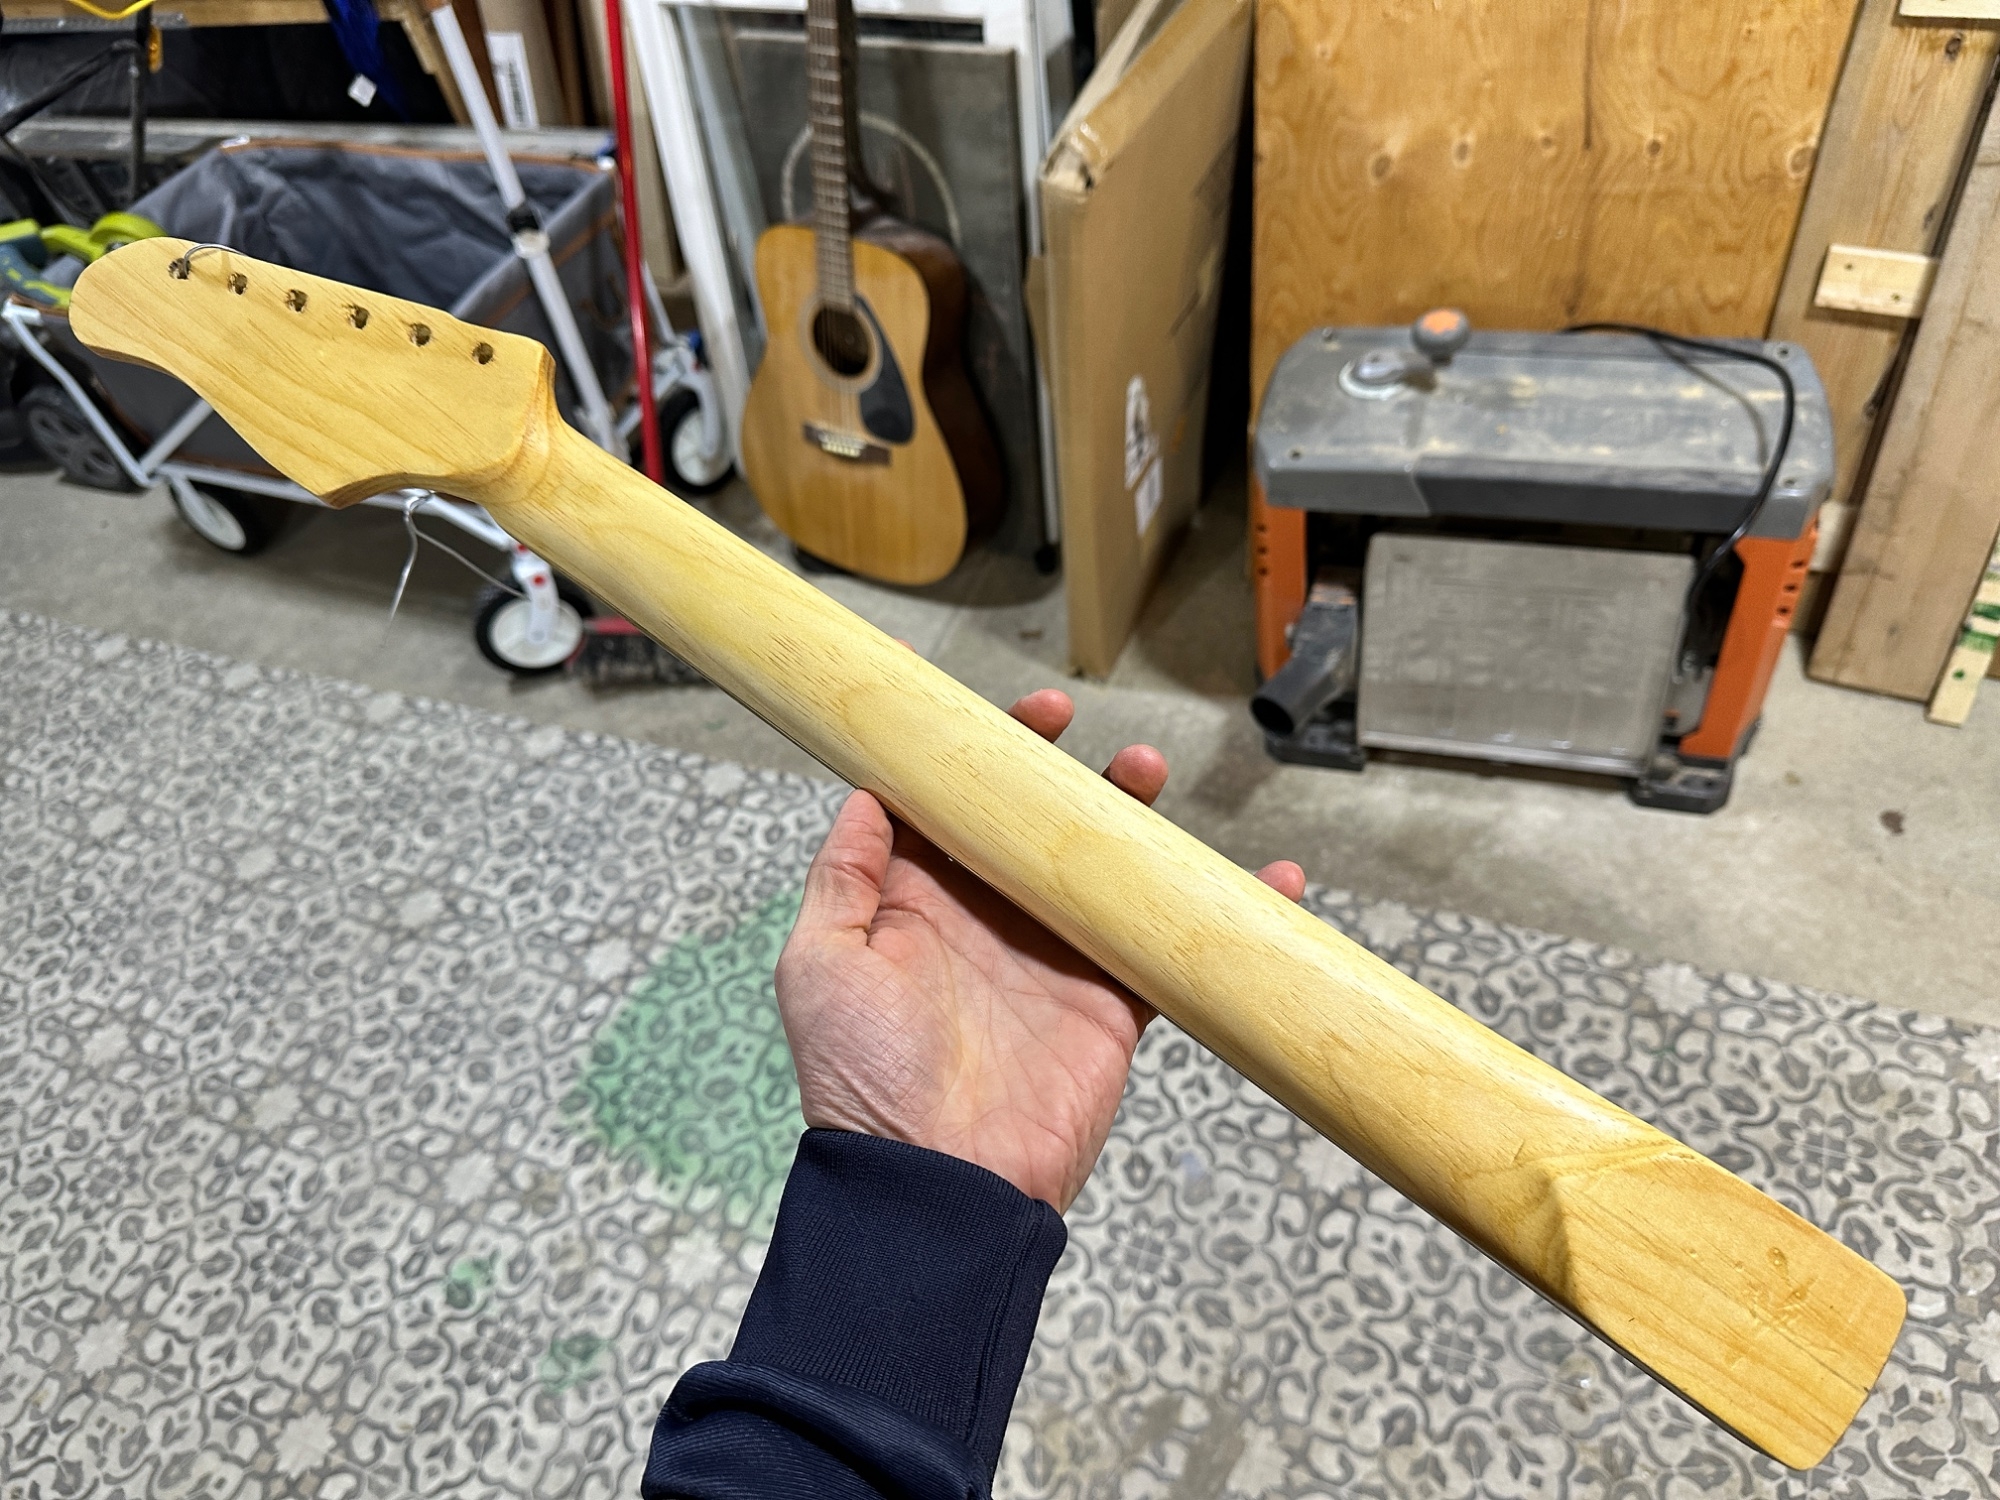
I made myself a few templates for the Suhr headstock I liked, complete with the relief cut for a two-stepped profile. I really like how it turned out. To make the templates, I printed an image of the headstock at 1:1 scale, then poked the outline through the paper into a scrap of 3/4" plywood with a sharp center-punch. Connect the dots, cut/file/sand to the line, et voila. A spindle sander would have been nice here... maybe I'll put that on my xmas list for this year
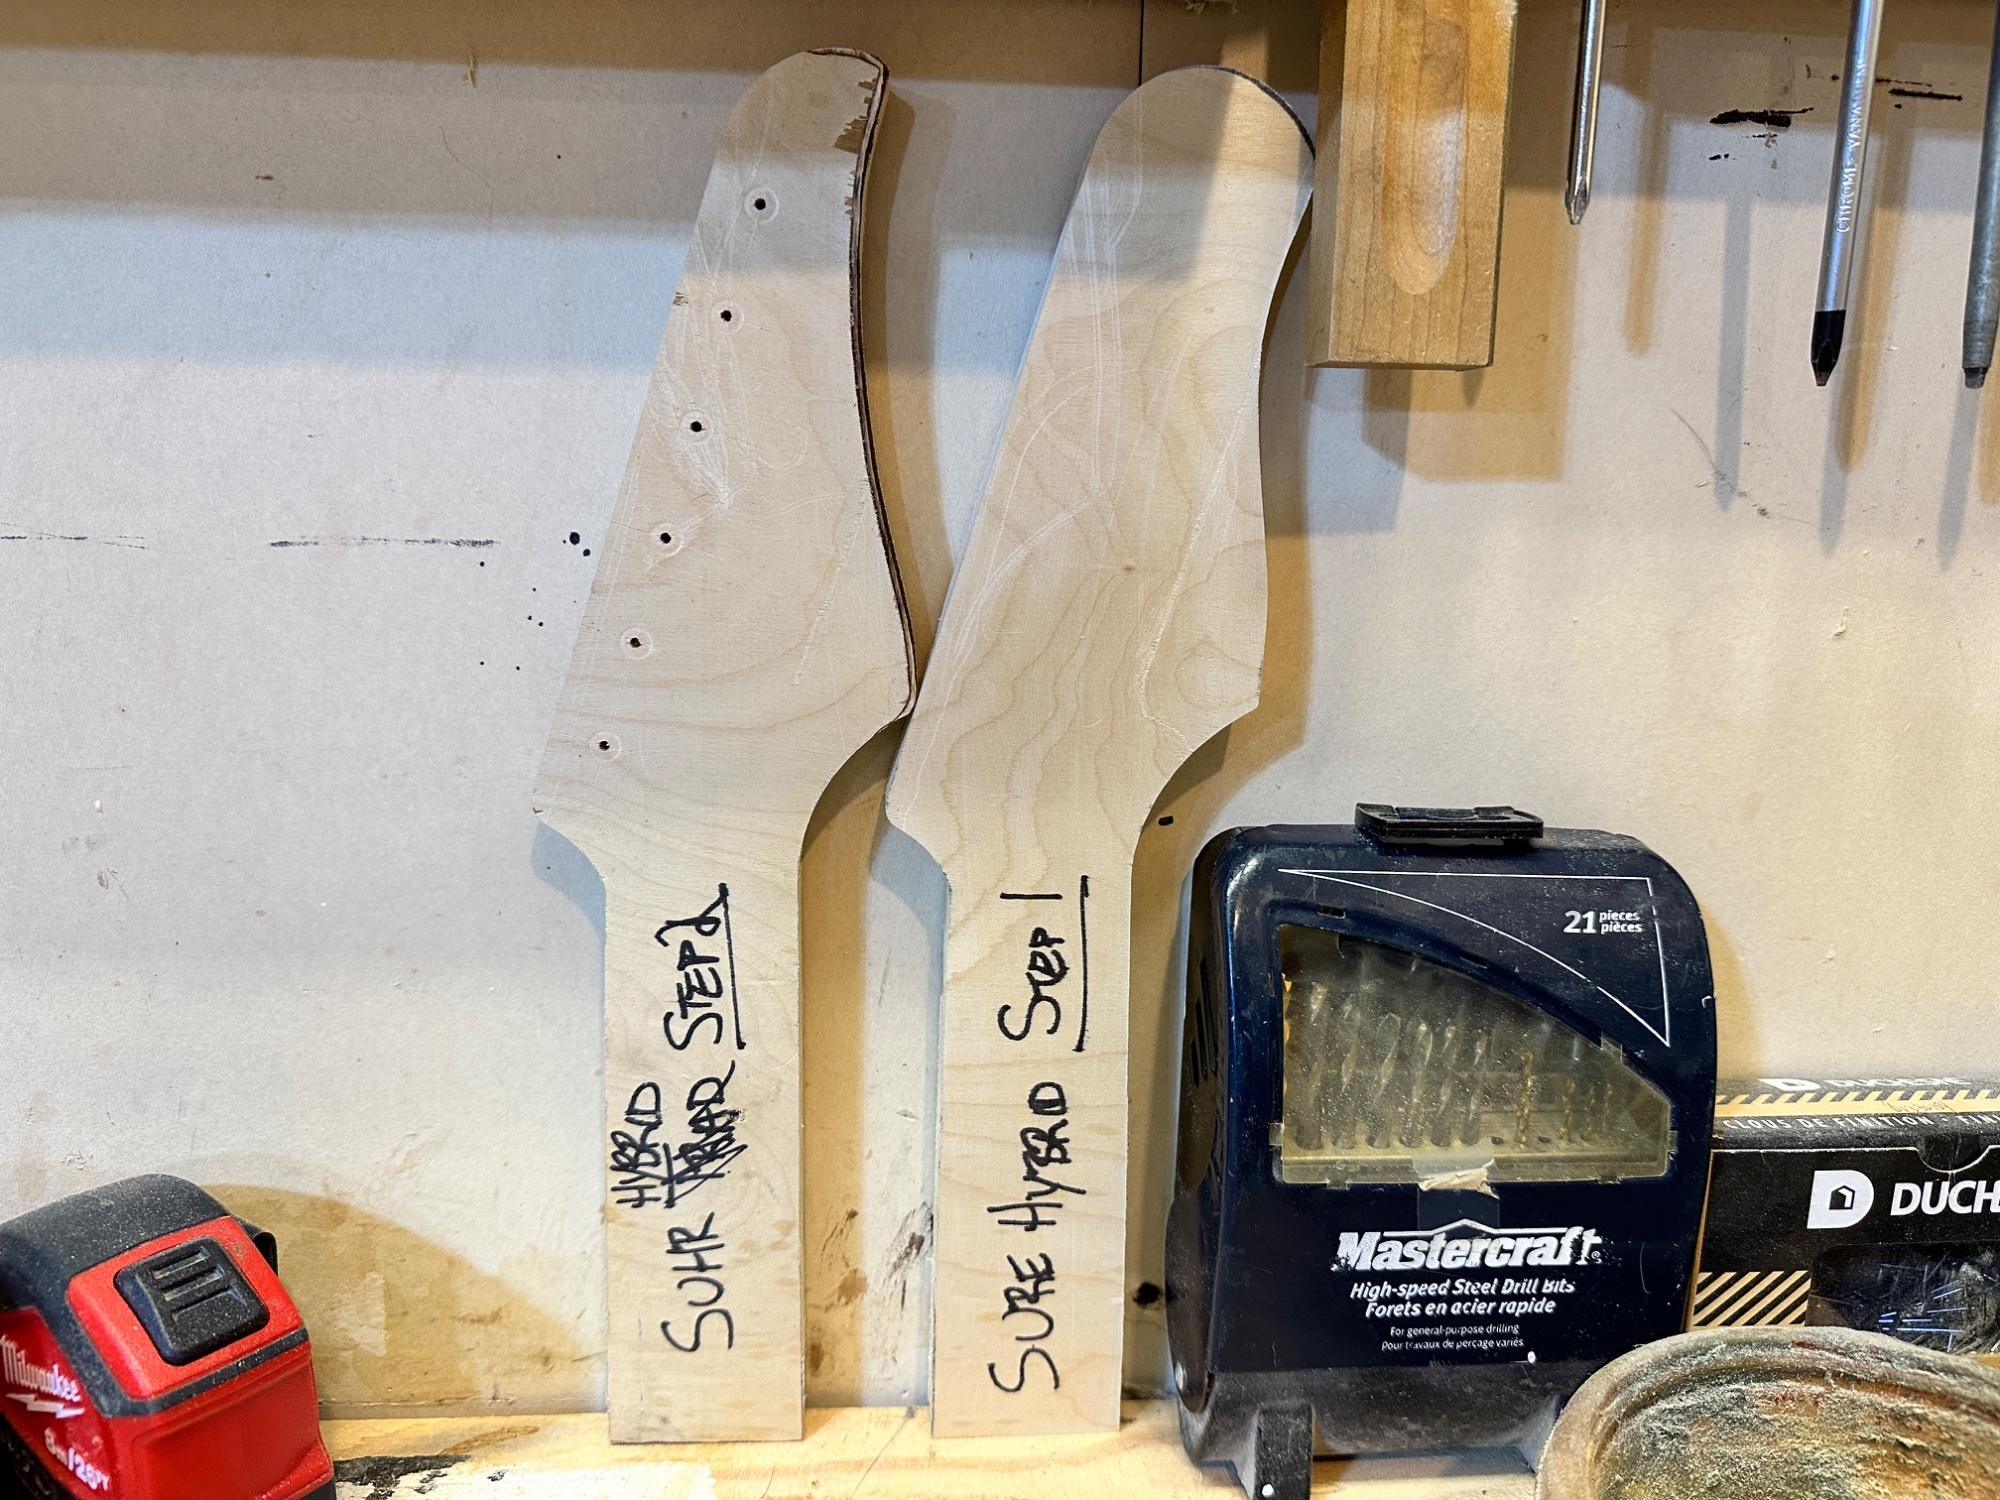
I played around with darkening the relief with some stain for a bit of contrast, too. Doesn't look super hot on the pine, but should be better on the actual neck (see more pics in the next post).
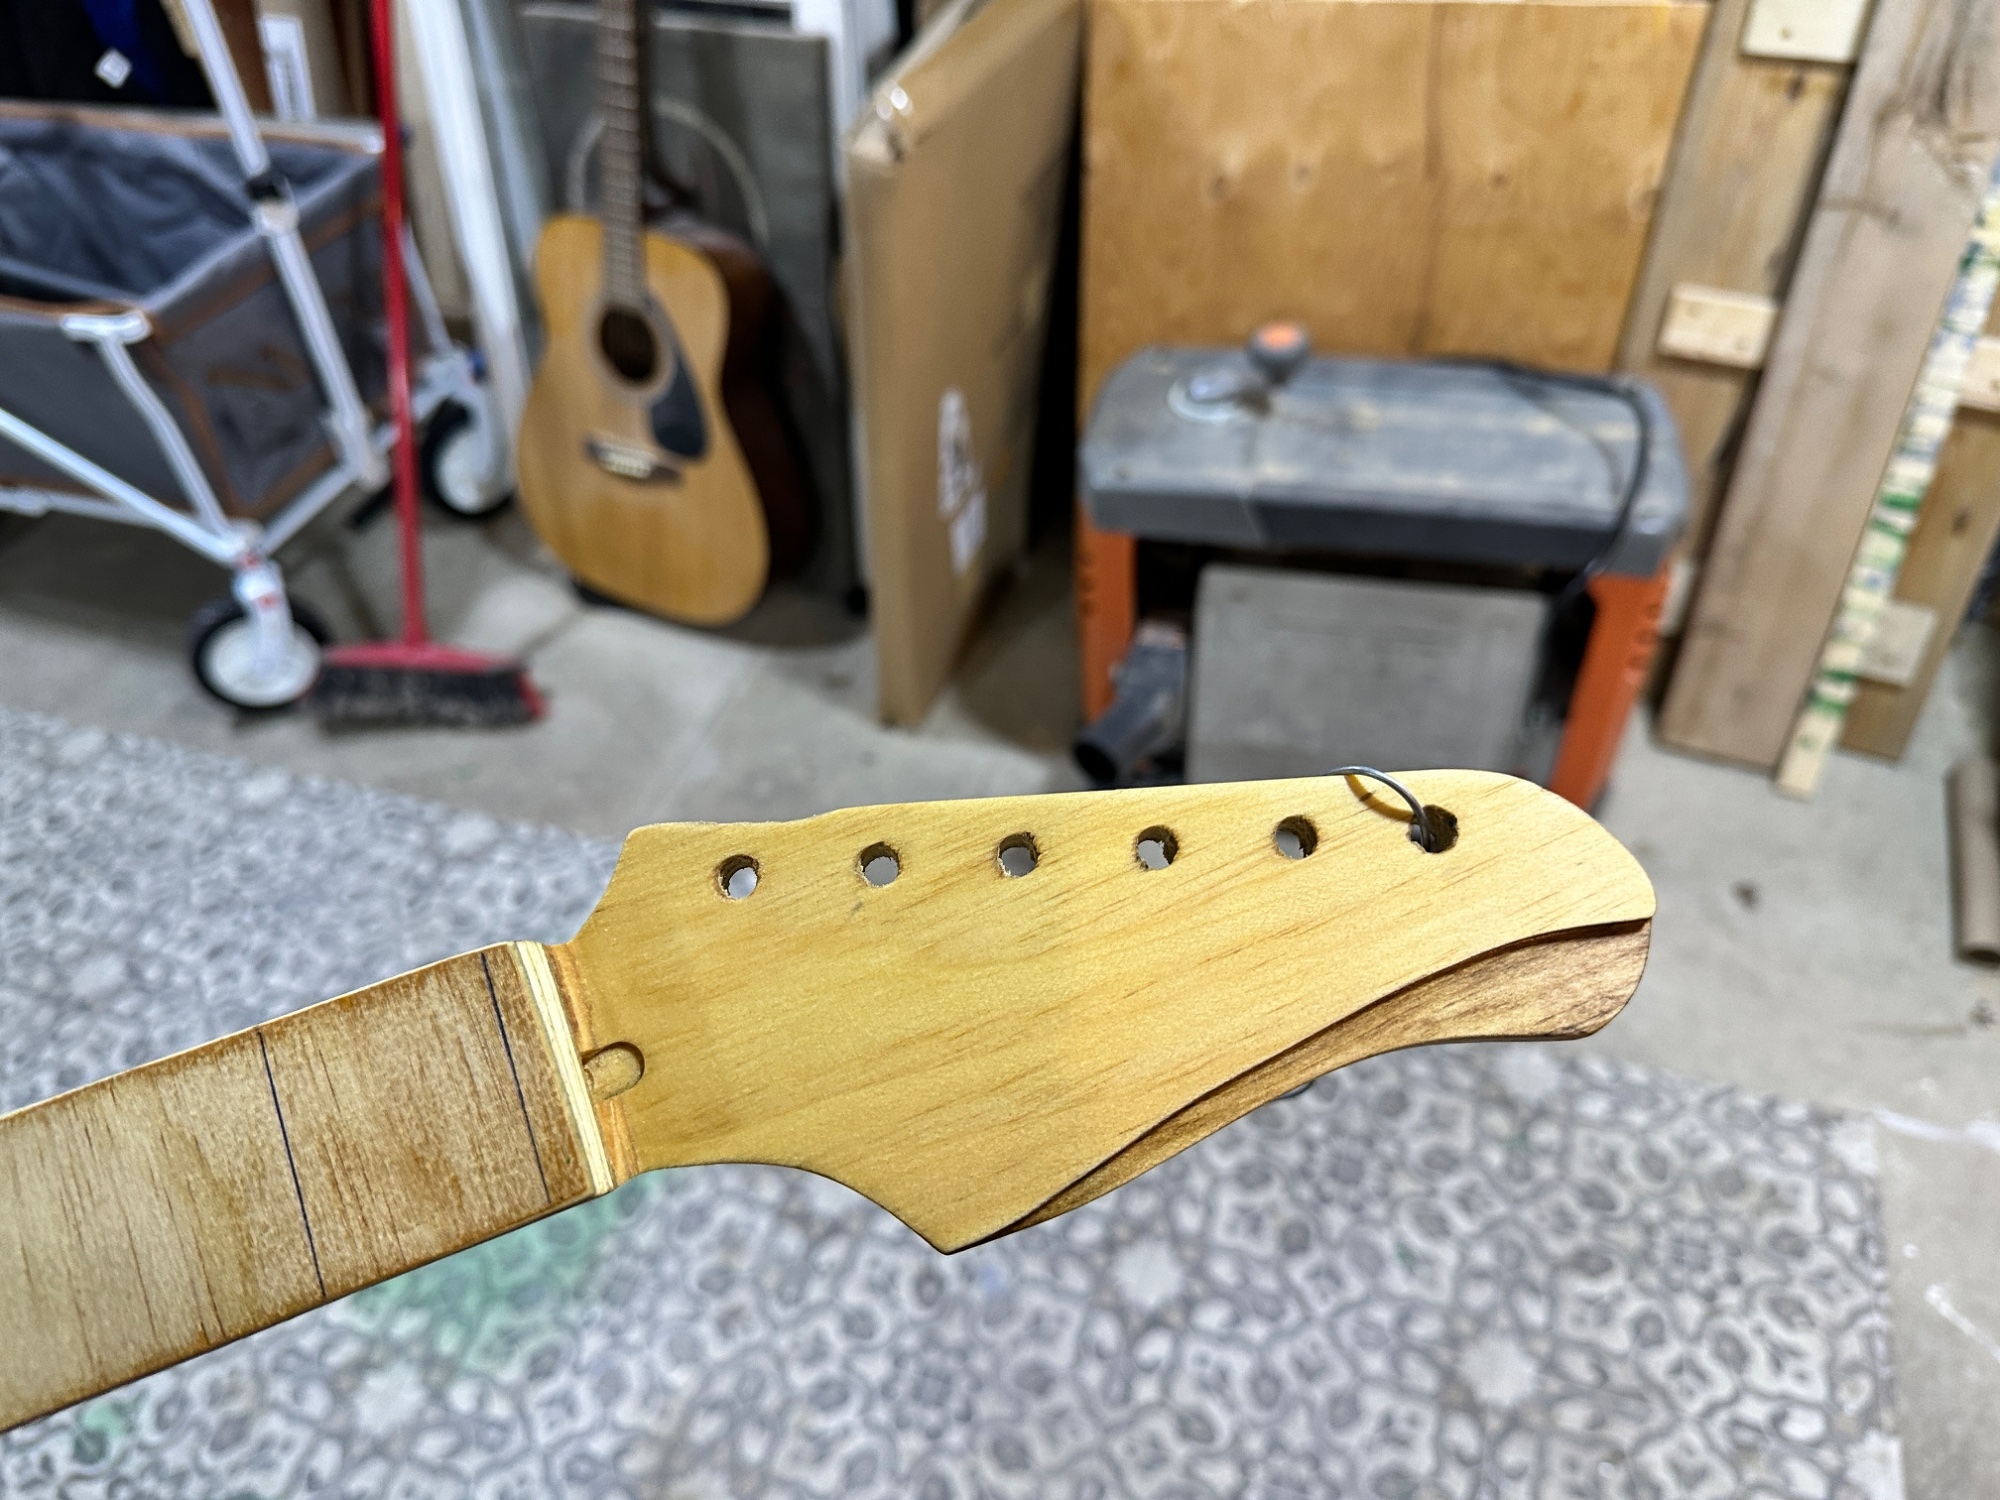
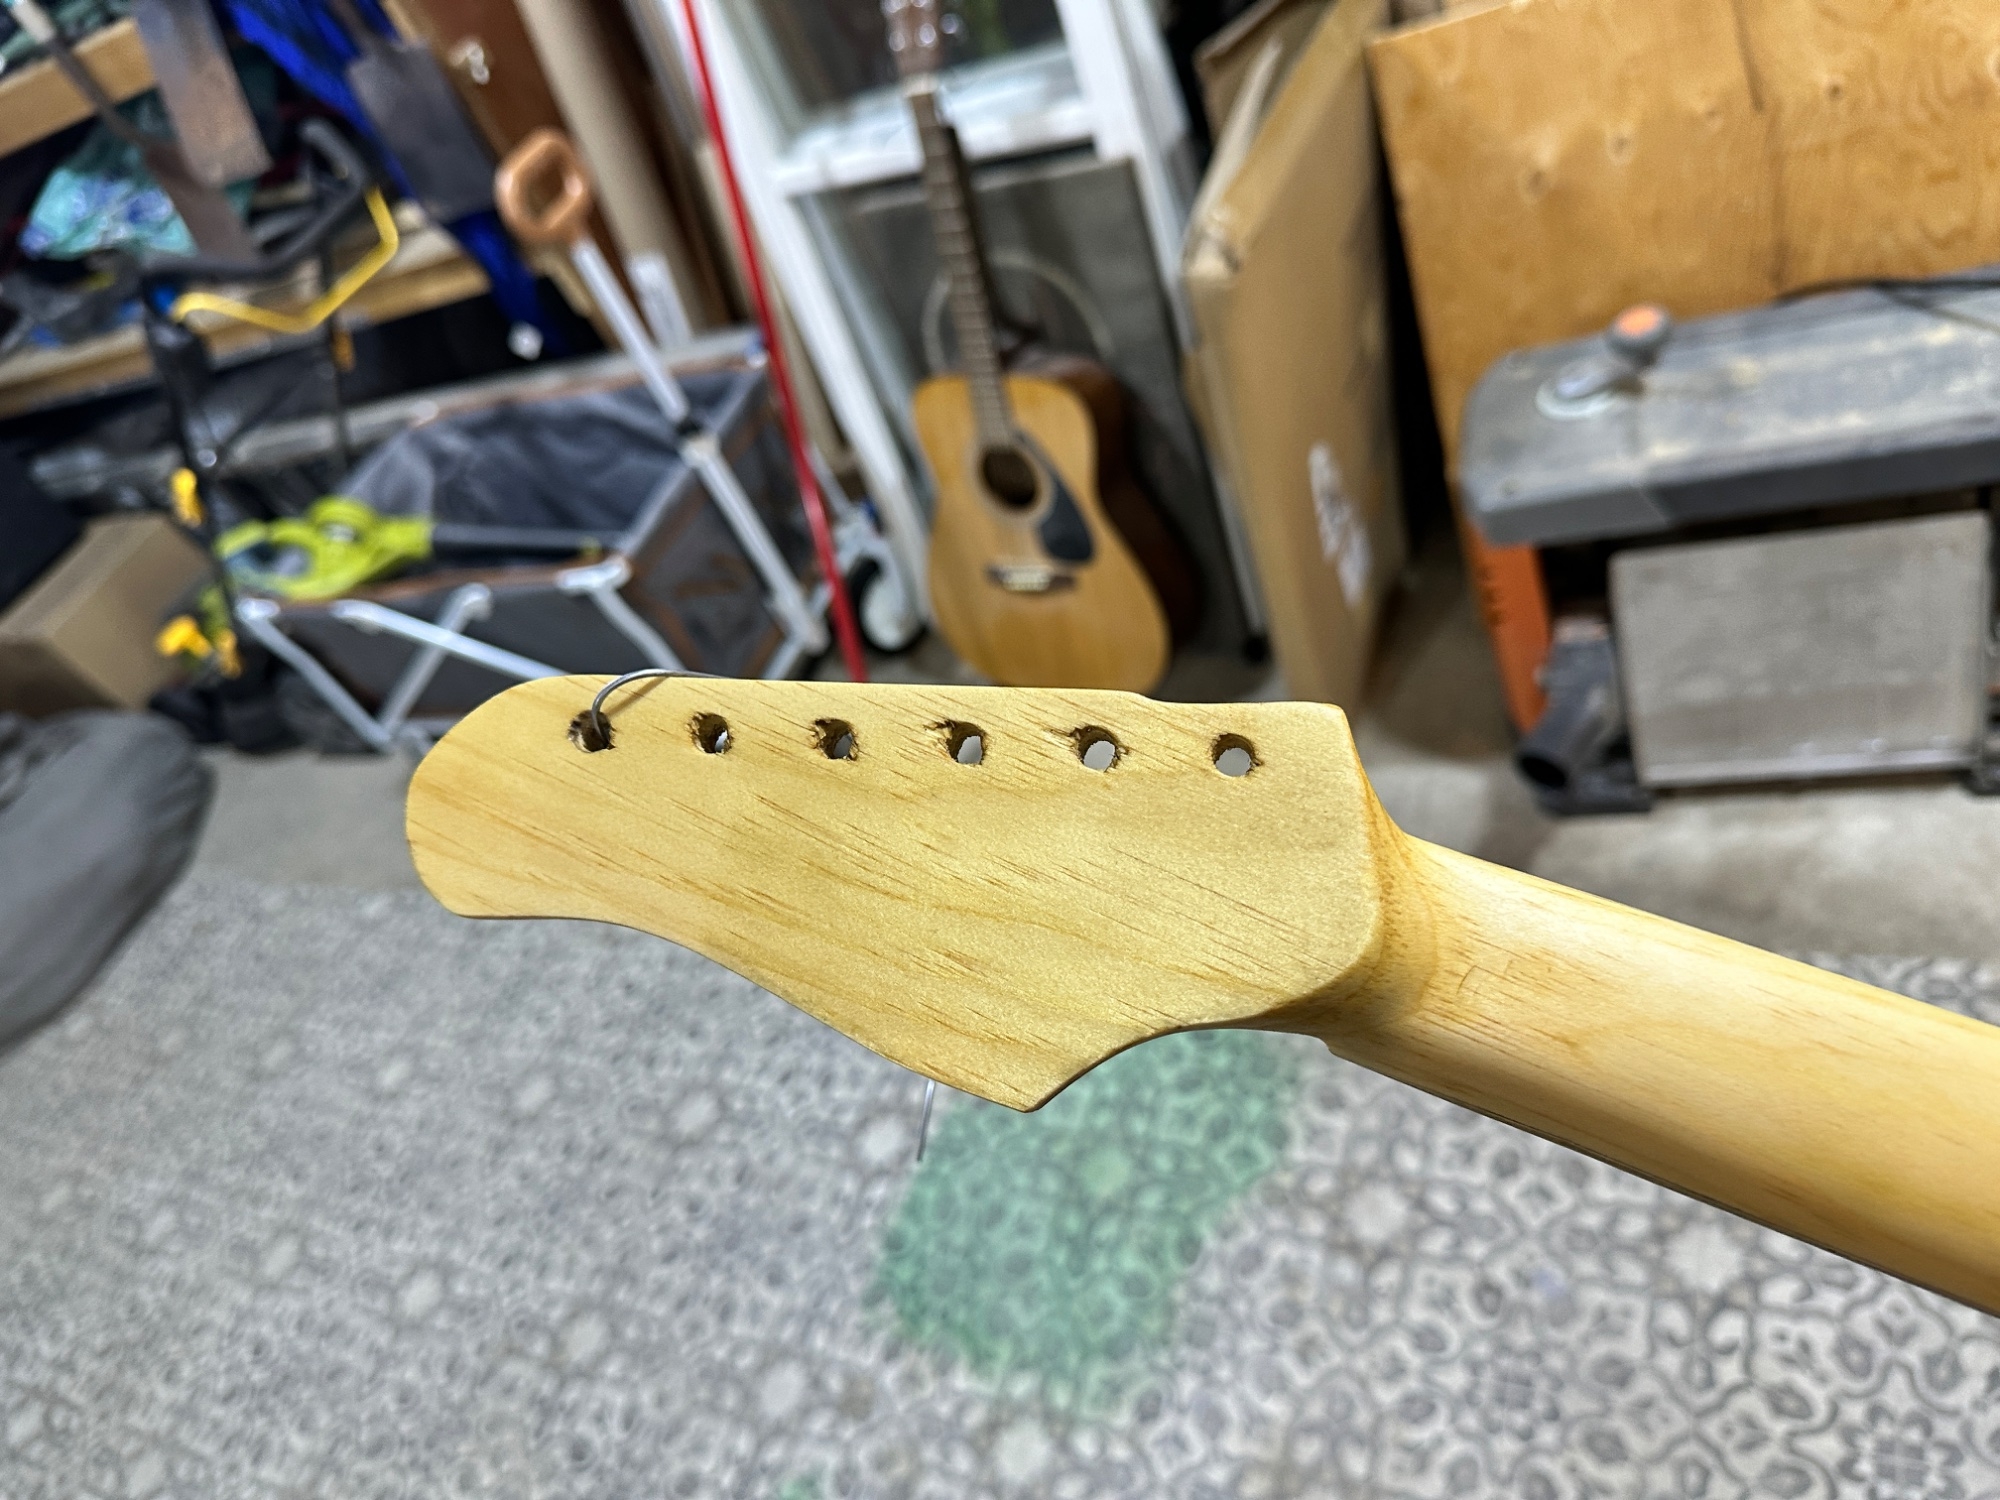
Finally, I wiped on 2-3 coats of Watco Teak Oil, let it cure for a few days, and then rubbed it down with some 3m synthetic "steel wool" scrubbing pads for a nice smooth satin feel. It won't be as hard or protective of a finish as poly (I can still indent the pine of the test neck with my fingernail), but I really like the smooth almost-bare-wood feel and the nice golden colour that it gives. The old growth Douglas Fir that I'm using for the actual neck is considerably harder than this hardware store pine all on its own, so I'm not too worried about it.
With fretboard material now en route, and as I'm currently recovering from surgery and limited from taking on any strenuous physical activity for the next month, it's time to get moving on this neck project again.
I took my mockup build about as far as I could carry it, including a quick practice carving of the neck itself. I glued on some 3/8ish plywood scrap to simulate a fretboard, and then fudged out an asymmetric neck profile using the "facet method" that actually feels pretty comfortable. I'll probably use/refine this profile when I get to carving the actual neck. Other than a couple small mishaps with the router, it turned out as good or better than I expected.
I'm really glad I decided to do this test mockup first, before cutting into my actual neck blank.
I made myself a few templates for the Suhr headstock I liked, complete with the relief cut for a two-stepped profile. I really like how it turned out. To make the templates, I printed an image of the headstock at 1:1 scale, then poked the outline through the paper into a scrap of 3/4" plywood with a sharp center-punch. Connect the dots, cut/file/sand to the line, et voila. A spindle sander would have been nice here... maybe I'll put that on my xmas list for this year
I played around with darkening the relief with some stain for a bit of contrast, too. Doesn't look super hot on the pine, but should be better on the actual neck (see more pics in the next post).
Finally, I wiped on 2-3 coats of Watco Teak Oil, let it cure for a few days, and then rubbed it down with some 3m synthetic "steel wool" scrubbing pads for a nice smooth satin feel. It won't be as hard or protective of a finish as poly (I can still indent the pine of the test neck with my fingernail), but I really like the smooth almost-bare-wood feel and the nice golden colour that it gives. The old growth Douglas Fir that I'm using for the actual neck is considerably harder than this hardware store pine all on its own, so I'm not too worried about it.
Last edited:
After finishing off the mockup, the only thing left to do was start cutting wood on the project neck.
I had previously thinned the blank down to about 7/8" a few months ago. I thinned it out a little more to about 0.8" as the final thickness, and got to work laying things out.
As I was laying out the lines for the CF bars and truss rod, I noticed that the blank had warped just a few mm, with the headstock end lifting up off the work surface. DOH! I'm not sure what to do with this, or if it will have a significant impact on the final product, but I decided to push forward anyway. I clamped the neck flat to my work table and hoped for the best that the CF bars would help straighten it out enough to continue working with it. I'm just gonna go for it and see what happens... Next time I will install the CF stiffening bars as early in the process as possible.
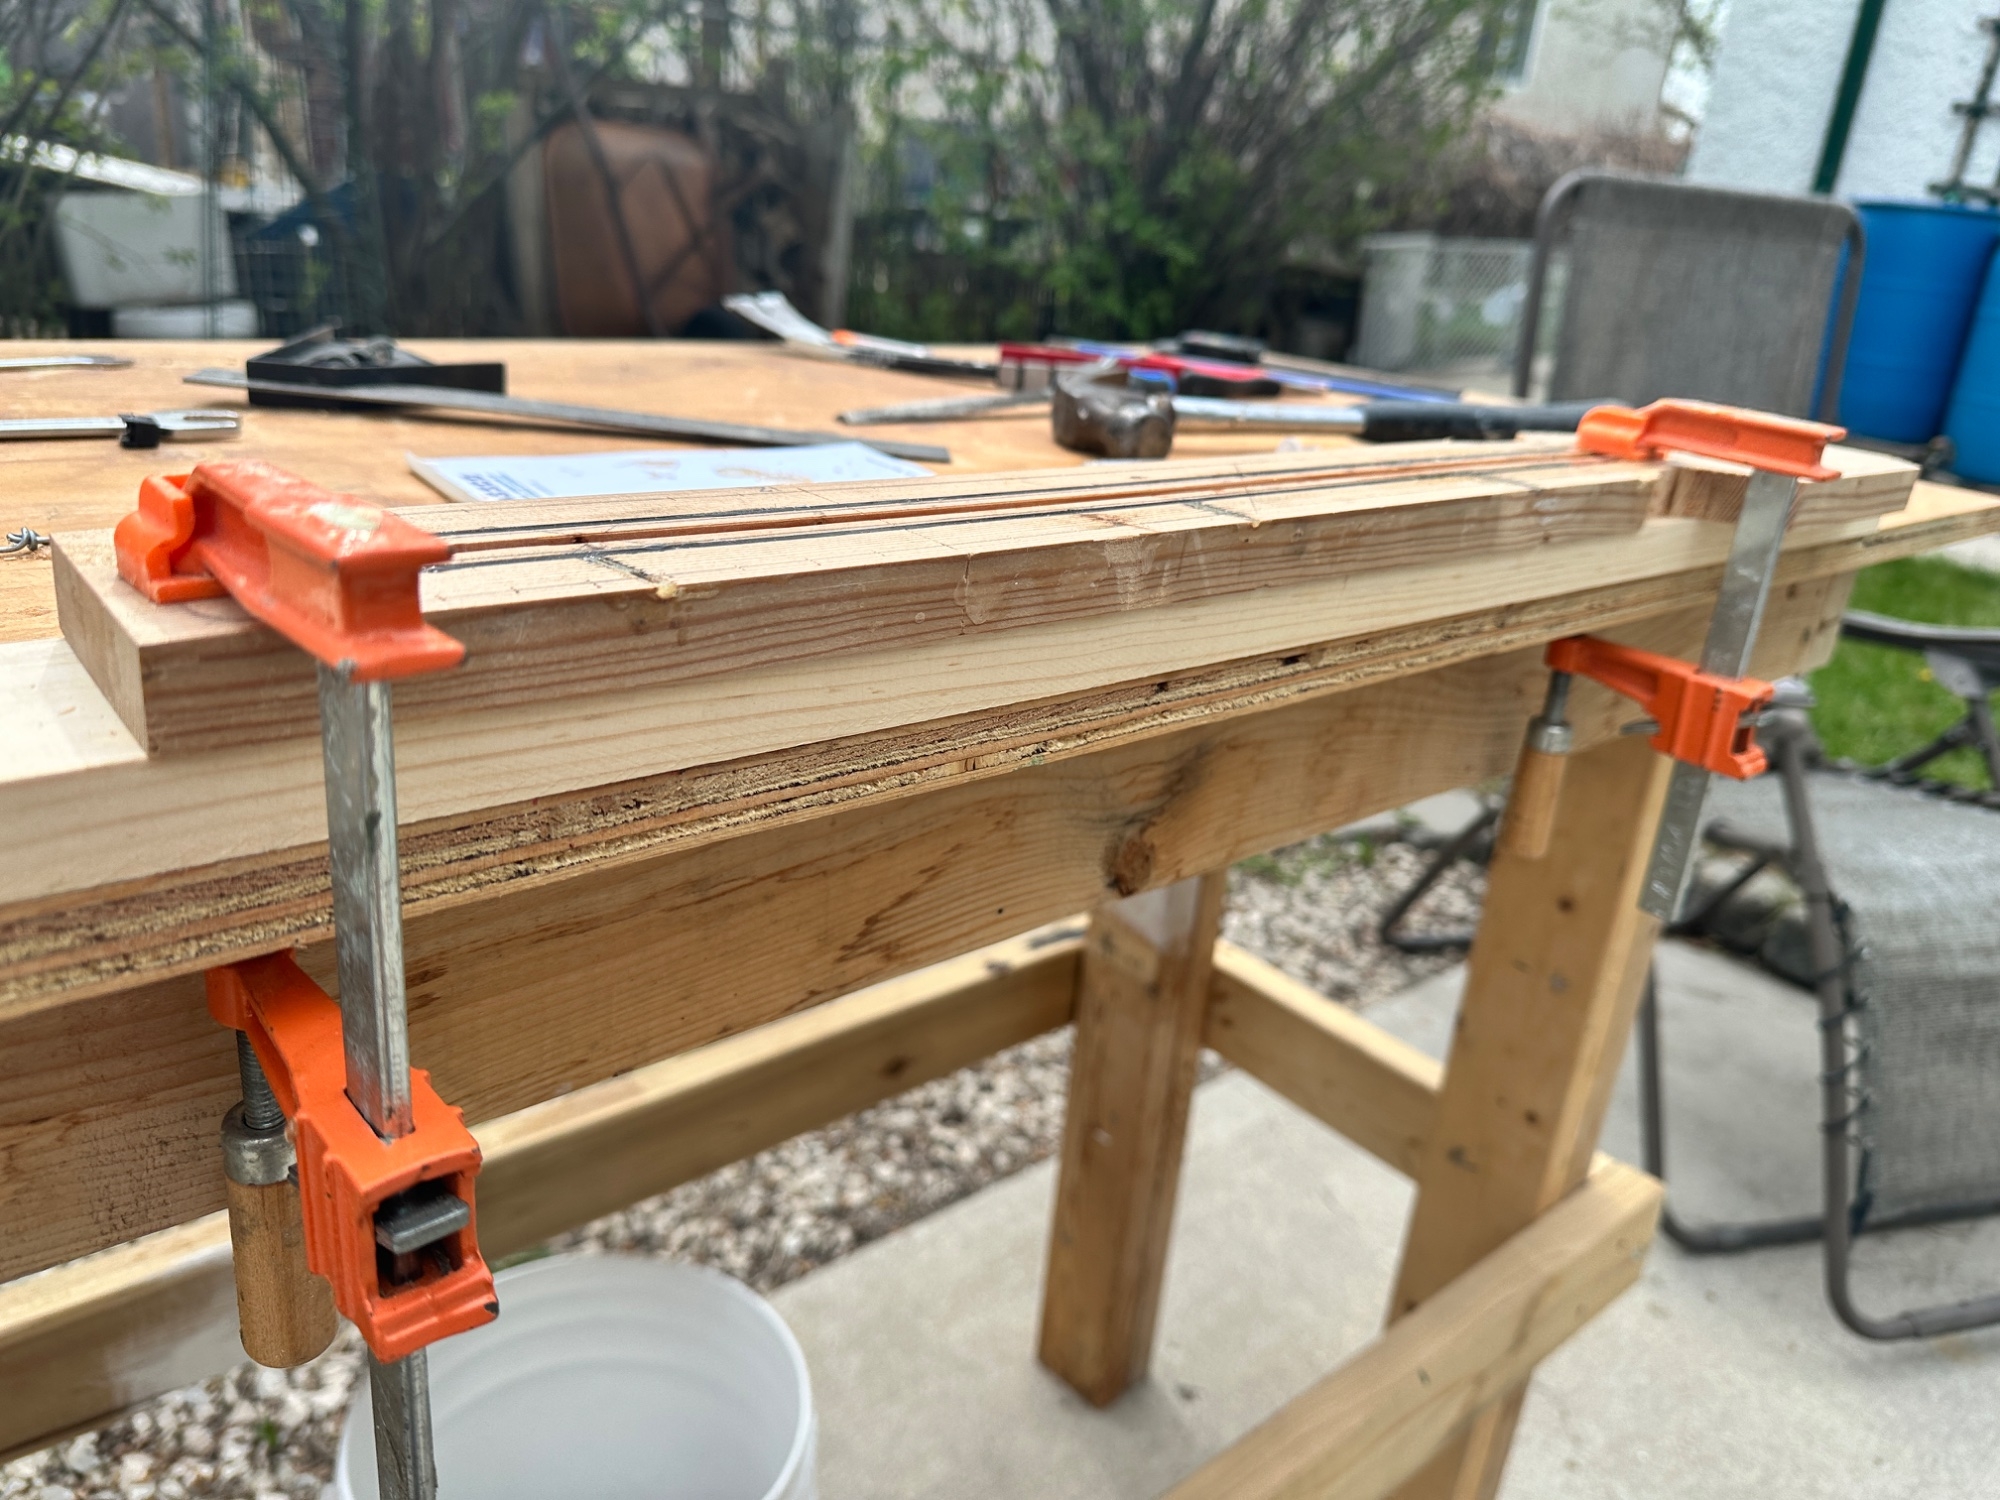
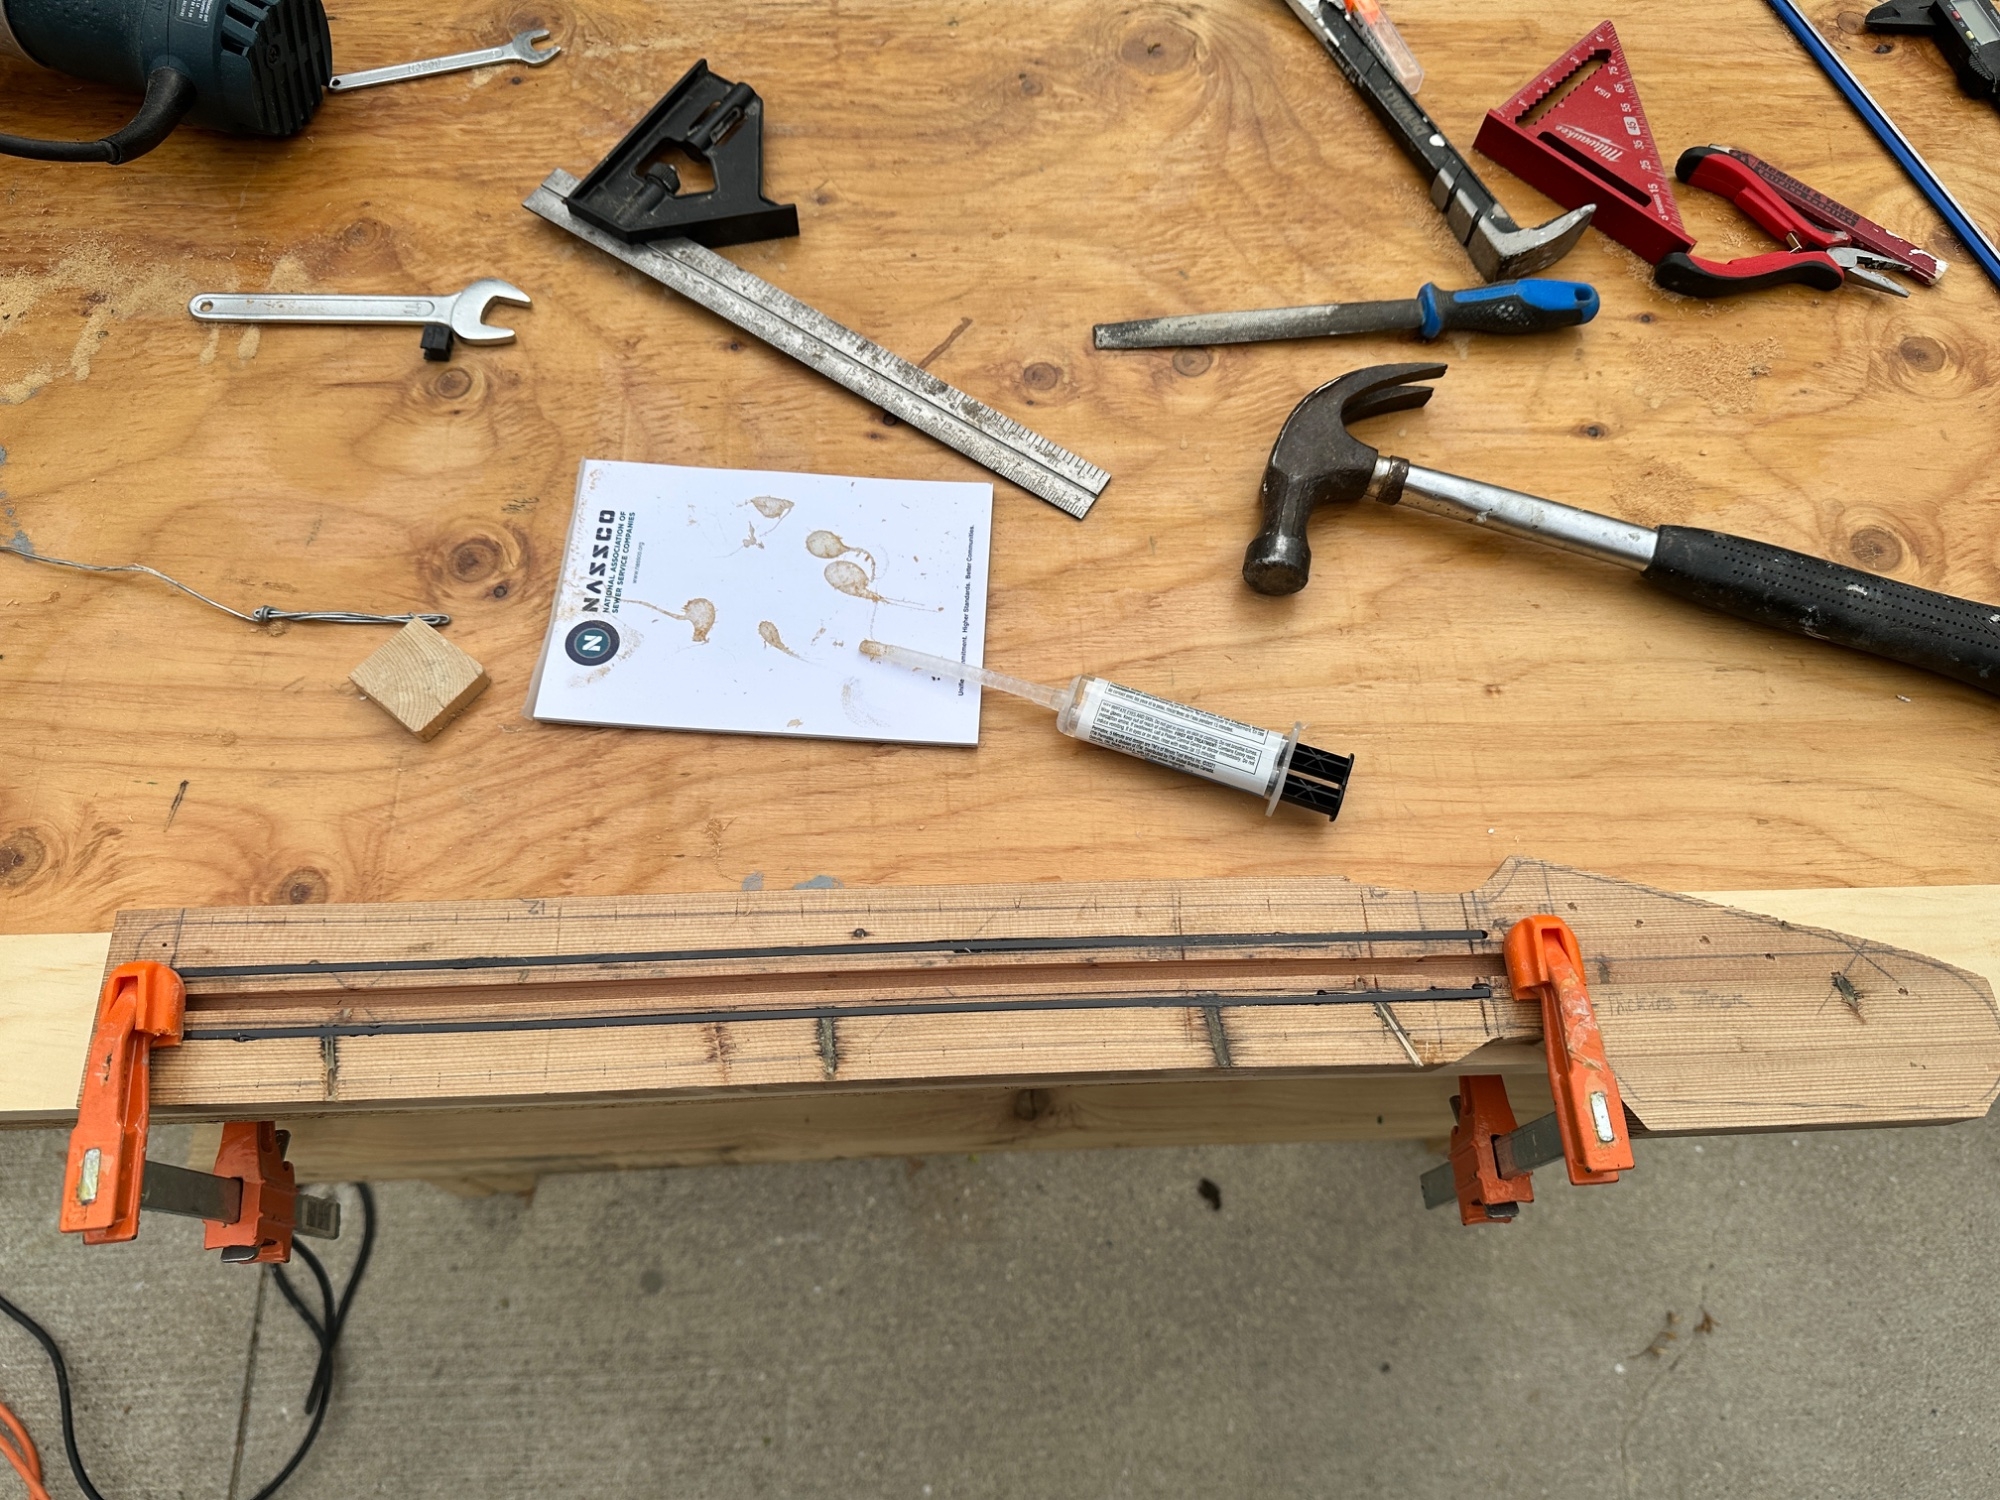
CF and truss rod slots routed, and CF bars epoxied into place. I left it clamped to the table overnight to allow the epoxy to cure, hoping the added stiffness of the bars will take out the warpage in the blank.
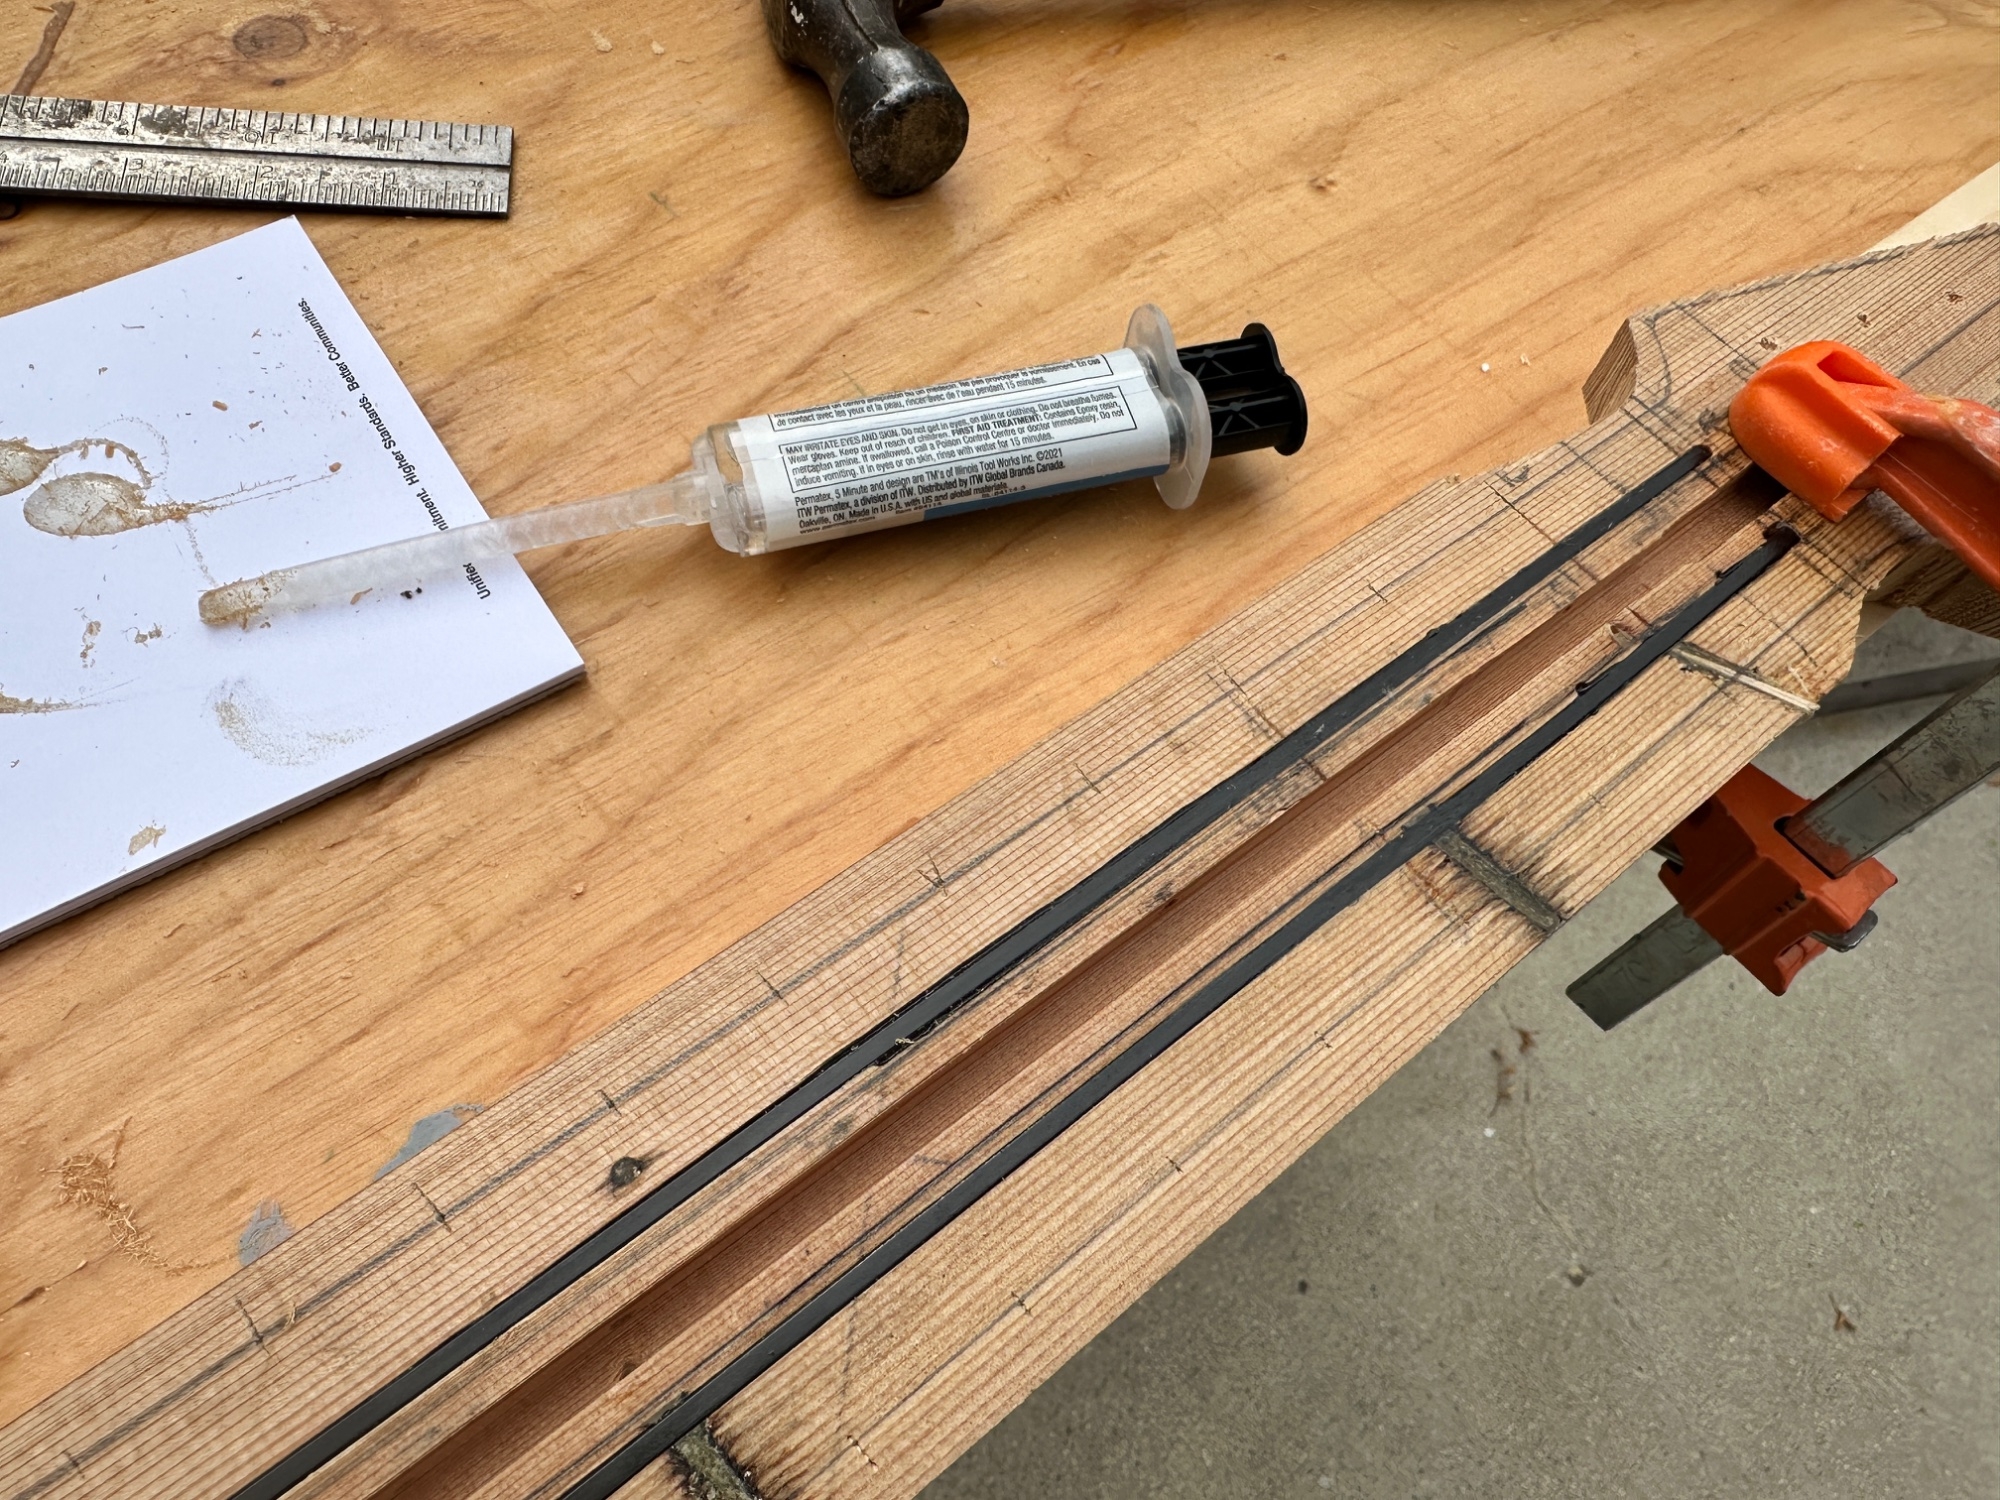
You can see a few of the old lathe-and-plaster nail holes exposed from the 100 y/o 2x4 that I'm using for this build. I filled these wherever I could with epoxy, and one toothpick for good measure. After the epoxy was cured, I ran the whole thing through a very light pass on the planer one more time to clean up the surface.
Next I got to work on the headstock outline. I used the neck template to give me a starting point at the nut and to cut the main outline of the headstock, then lined up my homemade headstock templates and cut the final shape and stepped relief cuts. After the outline and relief were cut, I took the headstock down to the approx. final thickness with a spoilboard bit. I set up two 1" aluminum L-angles on either side of the neck for a parallel surface for the router to ride on, which worked pretty well.
Unfortunately, it looks like I didn't consider the depth of the TR slot relative to the finished thickness of the headstock, and cut it through all the way to the end of the tapered headstock transition. This might look a bit unsightly at the end of the day. Oh well.
Also, the CF bars seem to have straightened out the playing area of the neck from the previous warpage, but the tip of the headstock is still lifting off the work surface about 2 mm. It's minor enough that I think I can work with it, however... since the neck was clamped flat while routing the TR slot, I didn't account for the warp in the depth of the slot. The TR sits perfectly at the heel end, but is about 1 mm proud of the surface at the nut end. I'll need to deepen the slot to compensate, which might be tricky now that I don't have any straight lines to work off of at the nut.
And of course the tuners I ordered needed a 10 mm drill bit.... 3/8" wouldn't do it. Amazon to the rescue....
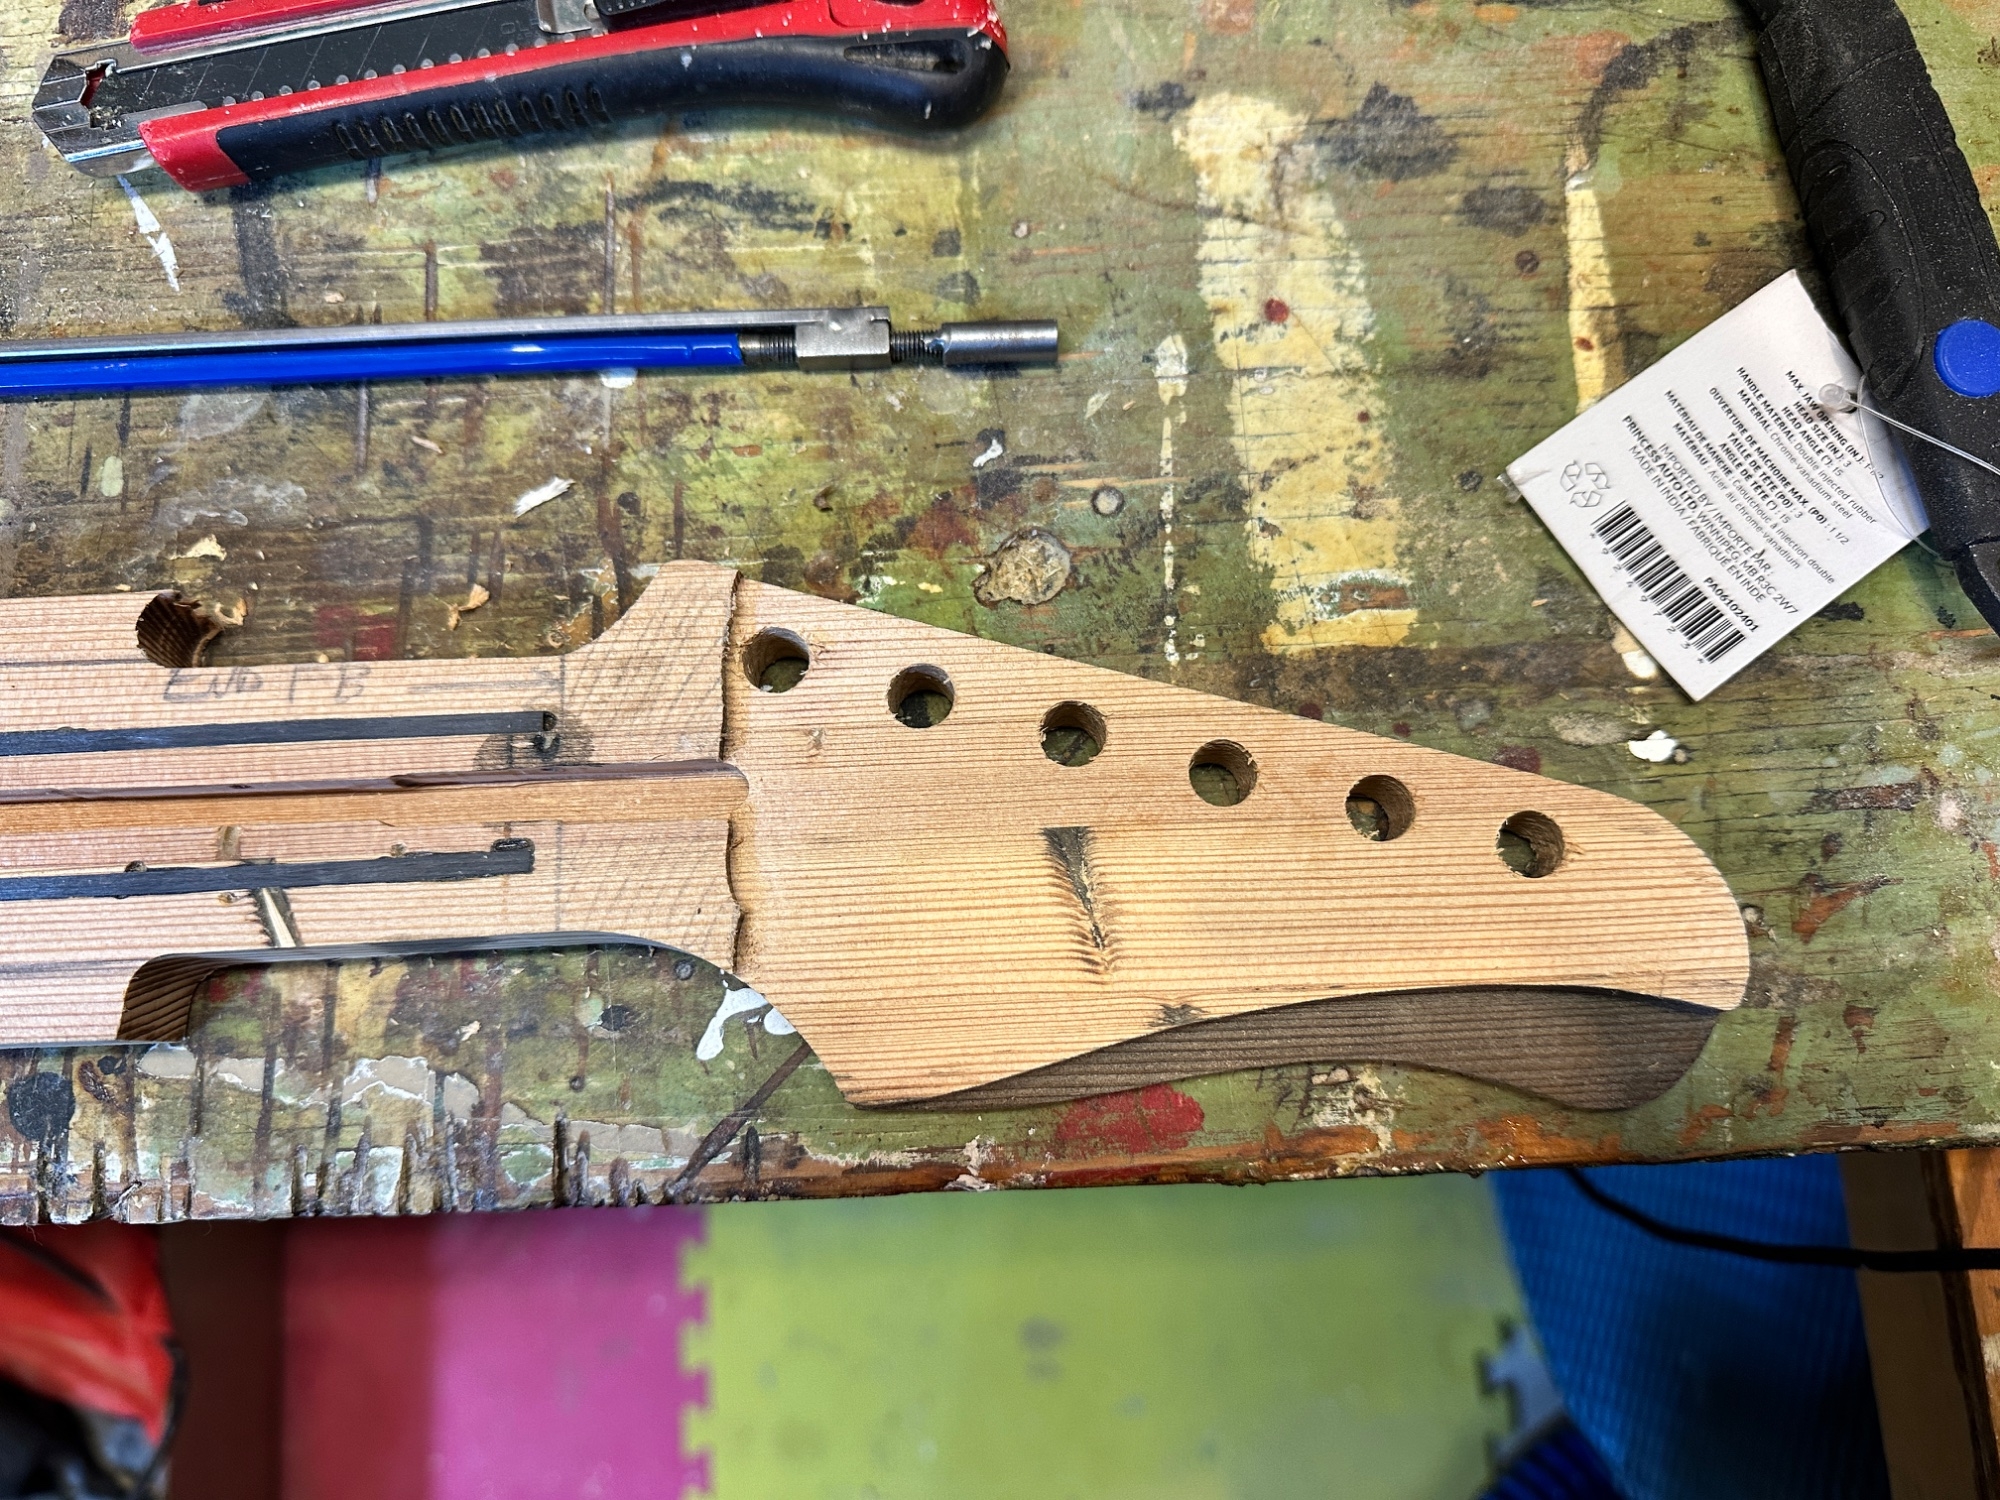
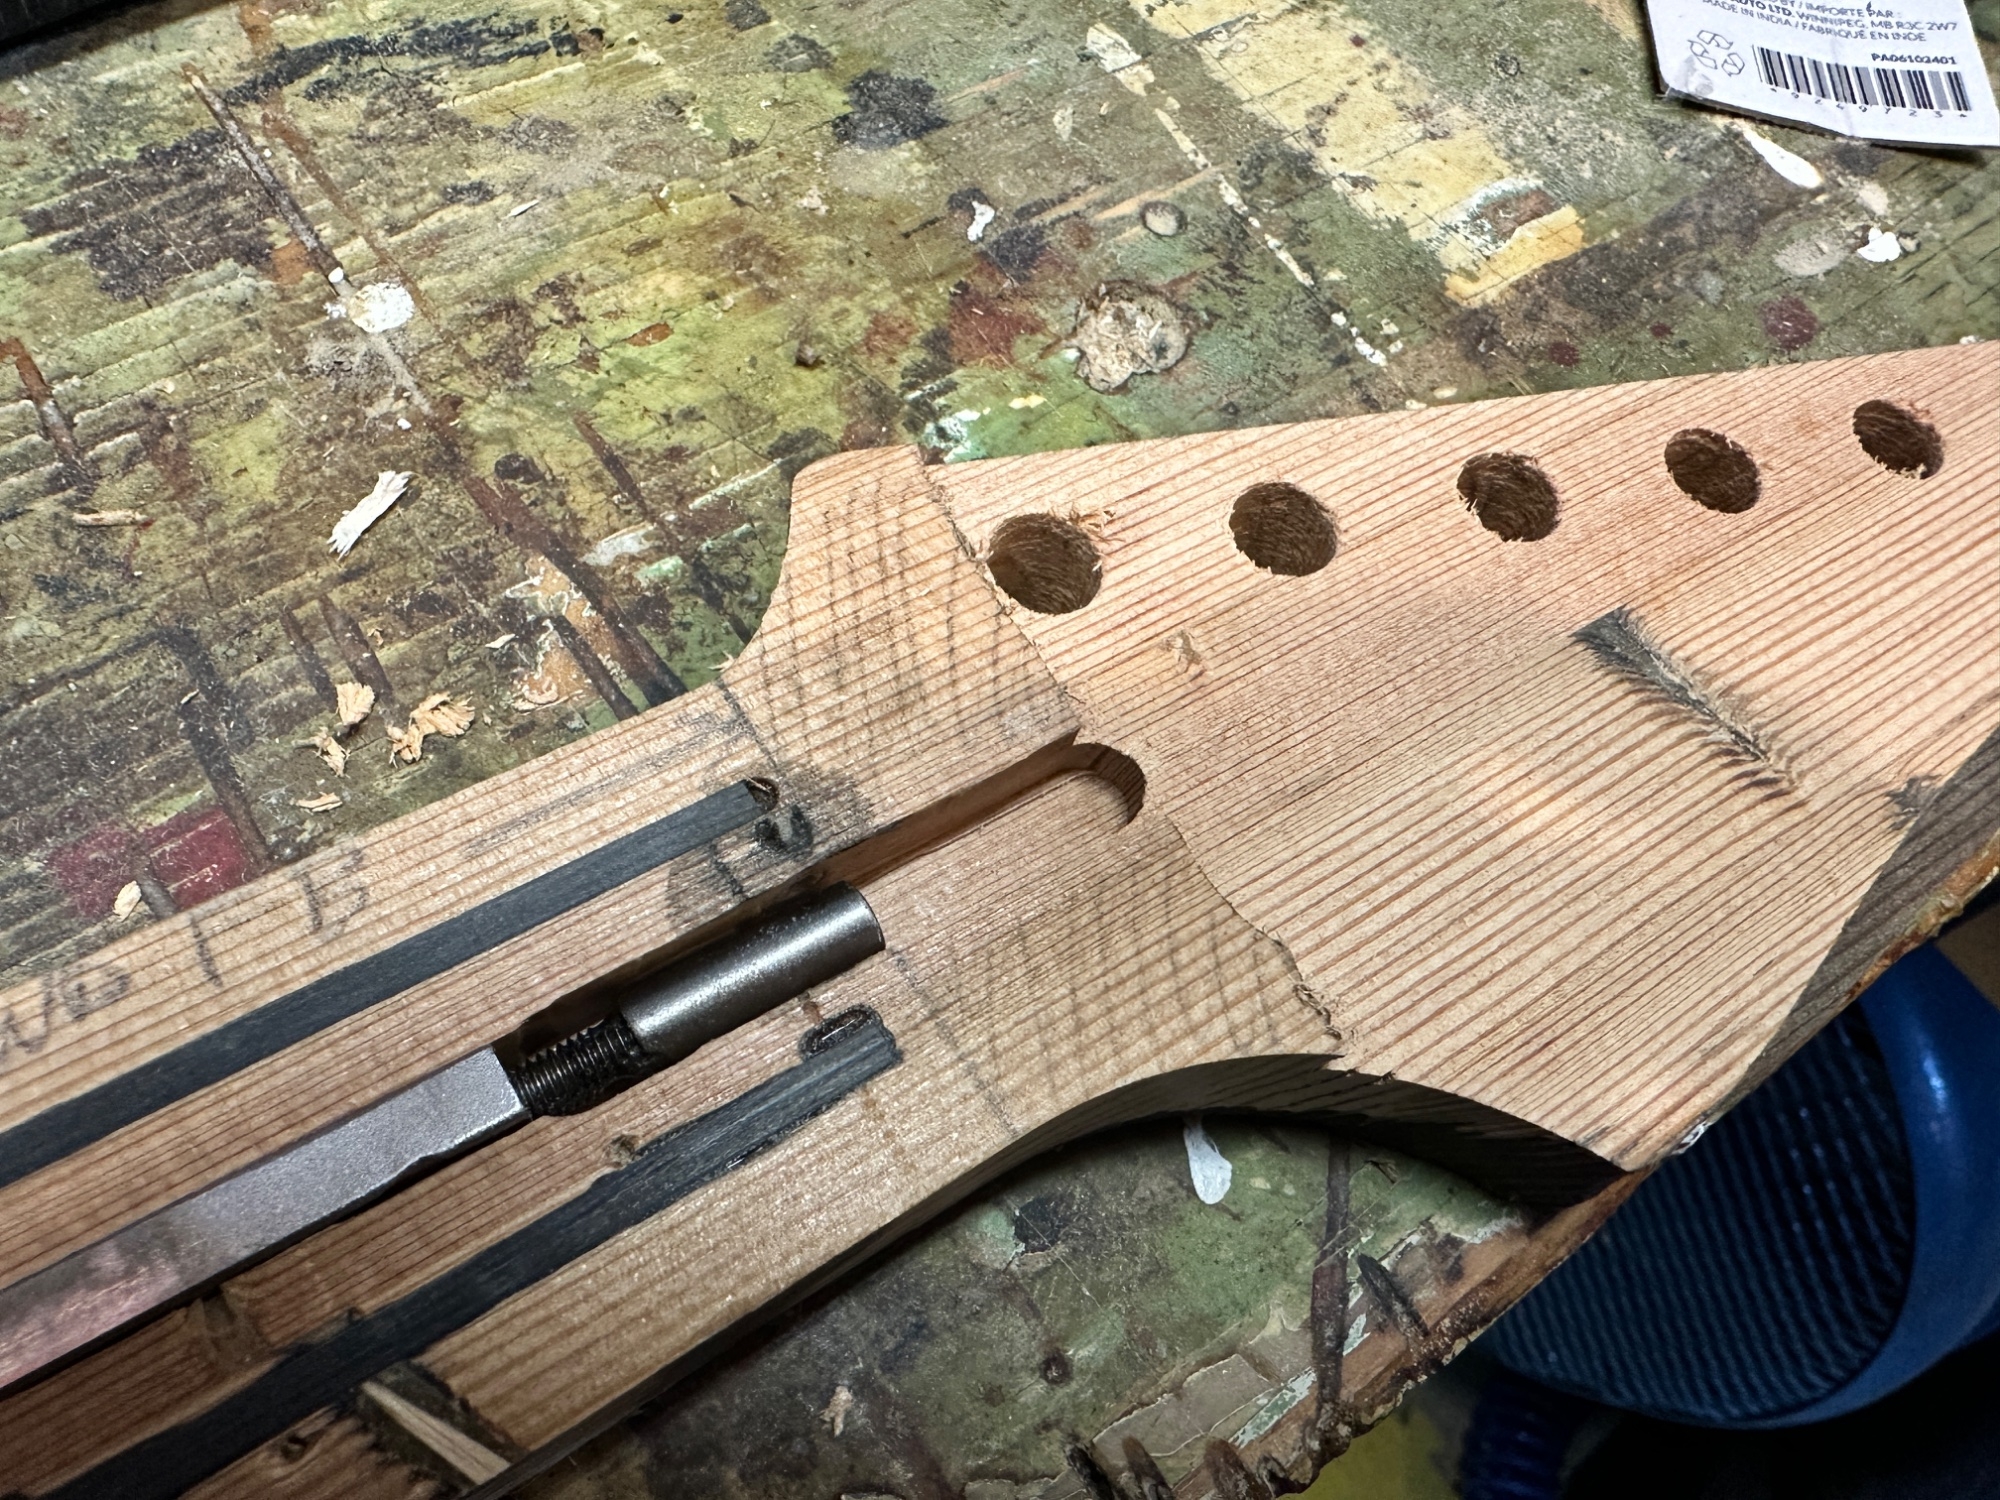
I am also playing around with darkening the wood using a solution of steel wool soaked in vinegar (creating iron acetate IIRC). This reacts with the tanins in the wood, darkening it quite a bit. It didn't do much on pine test piece, but makes a pretty significant reaction on the Douglas Fir, as you can see below on the back of the headstock, and above on the headstock relief cut area. I haven't applied any stain here, just the steel wool and vinegar solution. You don't really have any control over what the final colour is going to be, but the colour change doesn't penetrate very deeply into the wood so it's fairly easy to sand out if it doesn't turn out as expected. Here you can see that it is reacting more strongly with the center strip of the neck blank VS the outer sides. Another application might even that out a little bit, but I'll worry about that later.
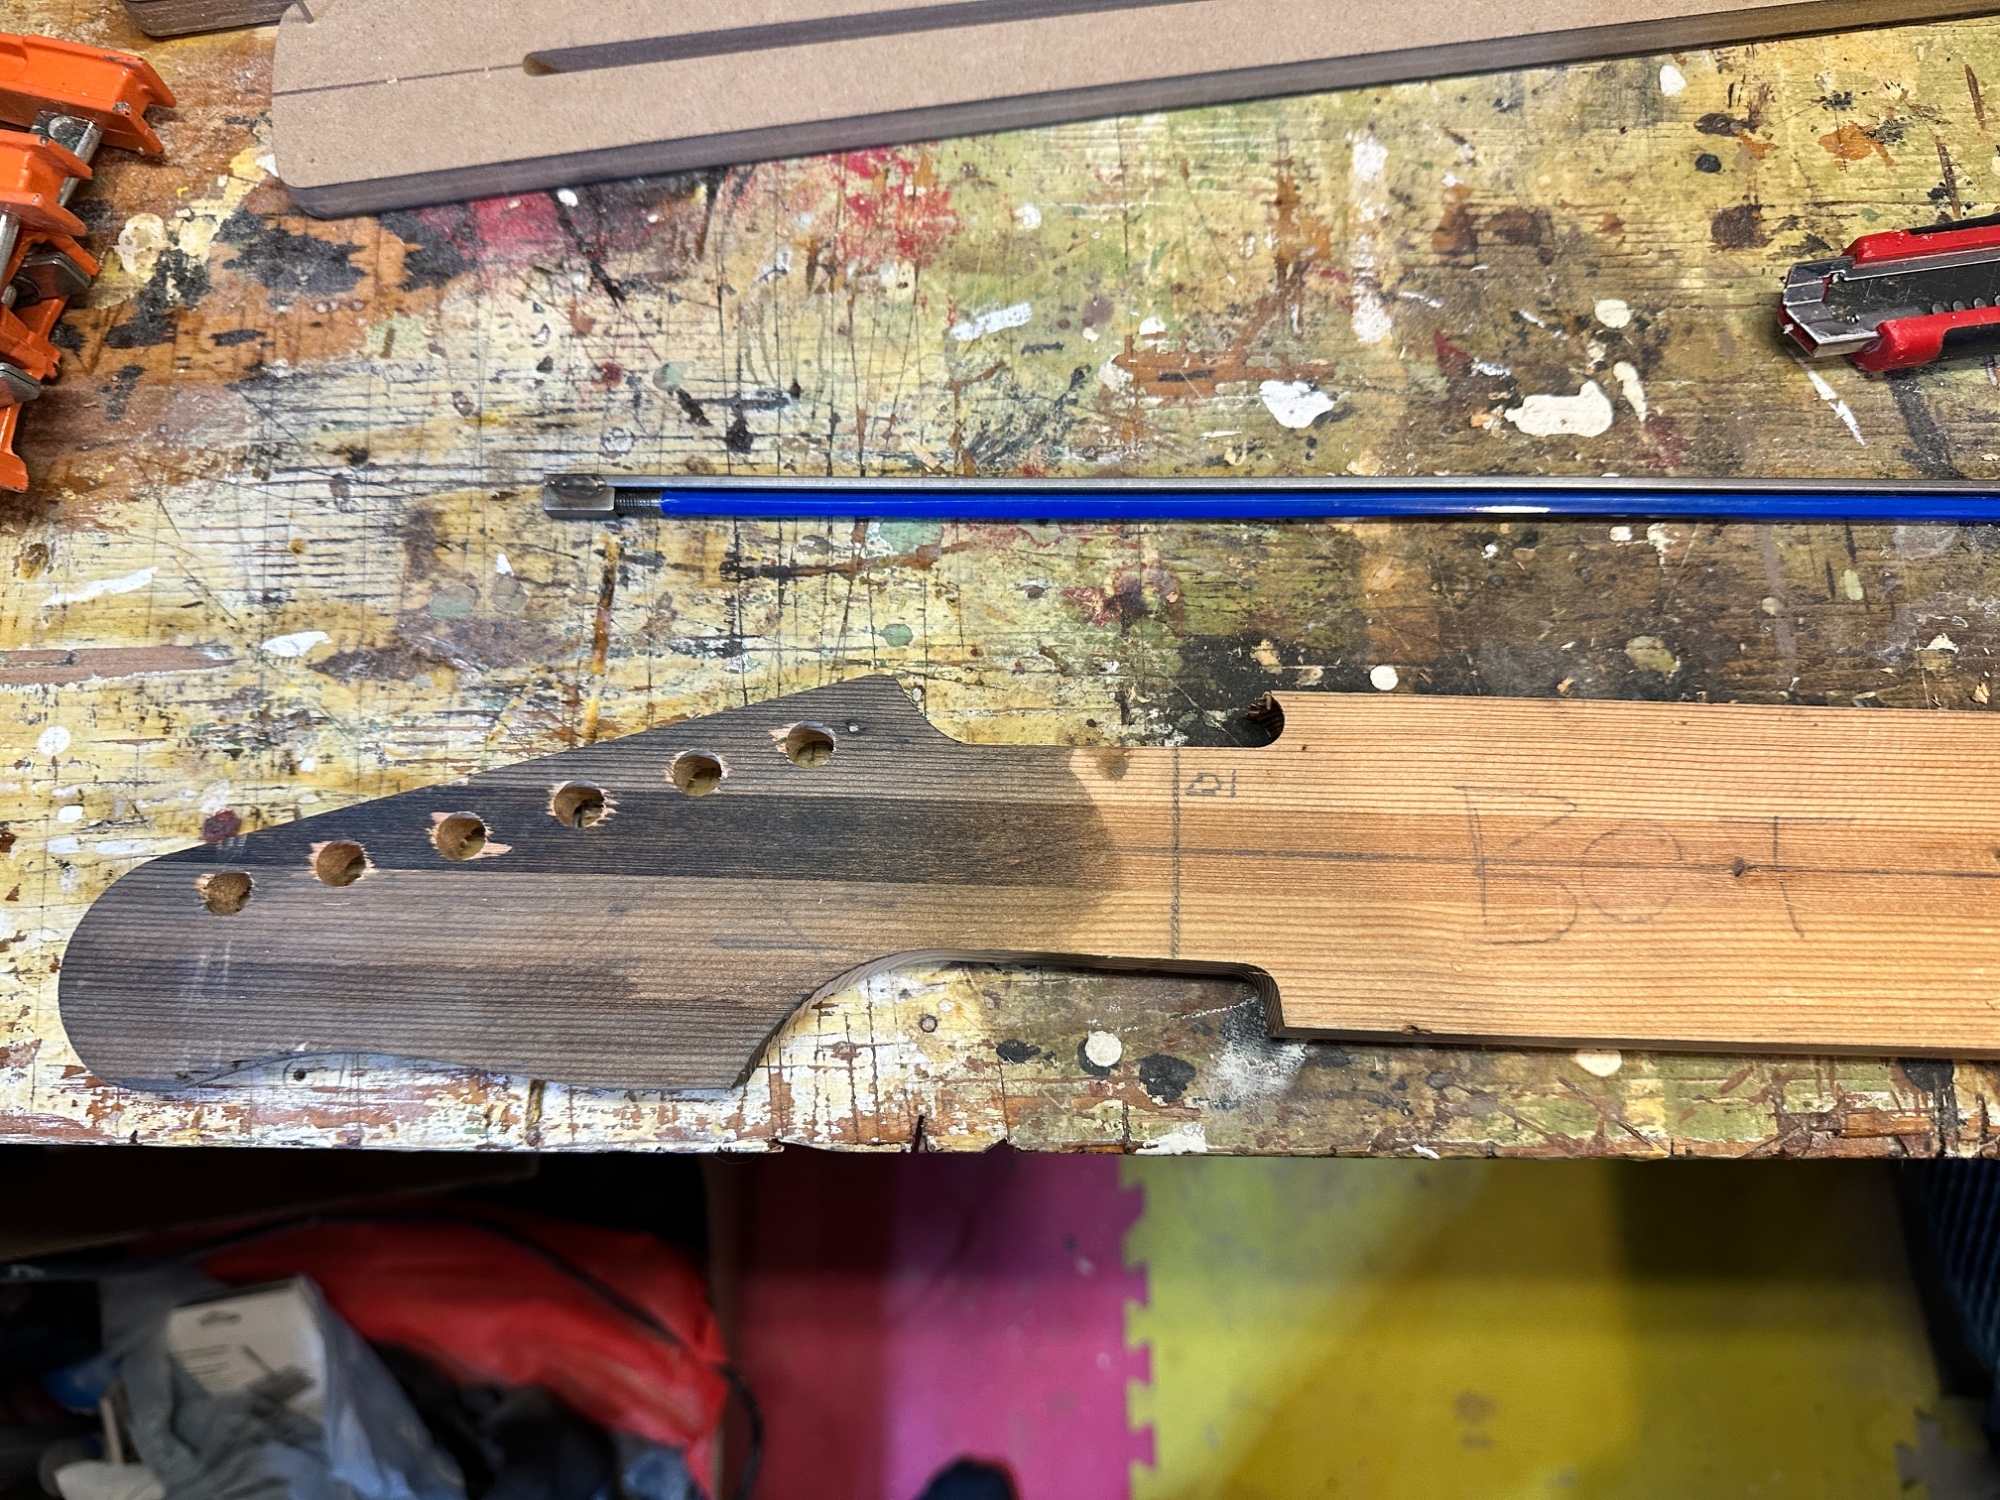
I had previously thinned the blank down to about 7/8" a few months ago. I thinned it out a little more to about 0.8" as the final thickness, and got to work laying things out.
As I was laying out the lines for the CF bars and truss rod, I noticed that the blank had warped just a few mm, with the headstock end lifting up off the work surface. DOH! I'm not sure what to do with this, or if it will have a significant impact on the final product, but I decided to push forward anyway. I clamped the neck flat to my work table and hoped for the best that the CF bars would help straighten it out enough to continue working with it. I'm just gonna go for it and see what happens... Next time I will install the CF stiffening bars as early in the process as possible.
CF and truss rod slots routed, and CF bars epoxied into place. I left it clamped to the table overnight to allow the epoxy to cure, hoping the added stiffness of the bars will take out the warpage in the blank.
You can see a few of the old lathe-and-plaster nail holes exposed from the 100 y/o 2x4 that I'm using for this build. I filled these wherever I could with epoxy, and one toothpick for good measure
. After the epoxy was cured, I ran the whole thing through a very light pass on the planer one more time to clean up the surface.Next I got to work on the headstock outline. I used the neck template to give me a starting point at the nut and to cut the main outline of the headstock, then lined up my homemade headstock templates and cut the final shape and stepped relief cuts. After the outline and relief were cut, I took the headstock down to the approx. final thickness with a spoilboard bit. I set up two 1" aluminum L-angles on either side of the neck for a parallel surface for the router to ride on, which worked pretty well.
Unfortunately, it looks like I didn't consider the depth of the TR slot relative to the finished thickness of the headstock, and cut it through all the way to the end of the tapered headstock transition. This might look a bit unsightly at the end of the day. Oh well.
Also, the CF bars seem to have straightened out the playing area of the neck from the previous warpage, but the tip of the headstock is still lifting off the work surface about 2 mm. It's minor enough that I think I can work with it, however... since the neck was clamped flat while routing the TR slot, I didn't account for the warp in the depth of the slot. The TR sits perfectly at the heel end, but is about 1 mm proud of the surface at the nut end. I'll need to deepen the slot to compensate, which might be tricky now that I don't have any straight lines to work off of at the nut.
And of course the tuners I ordered needed a 10 mm drill bit.... 3/8" wouldn't do it. Amazon to the rescue...
.I am also playing around with darkening the wood using a solution of steel wool soaked in vinegar (creating iron acetate IIRC). This reacts with the tanins in the wood, darkening it quite a bit. It didn't do much on pine test piece, but makes a pretty significant reaction on the Douglas Fir, as you can see below on the back of the headstock, and above on the headstock relief cut area. I haven't applied any stain here, just the steel wool and vinegar solution. You don't really have any control over what the final colour is going to be, but the colour change doesn't penetrate very deeply into the wood so it's fairly easy to sand out if it doesn't turn out as expected. Here you can see that it is reacting more strongly with the center strip of the neck blank VS the outer sides. Another application might even that out a little bit, but I'll worry about that later.
Last edited:
Well, crisis averted on the truss rod issue. Turns out the socket/nut end of the TR projects ever so slightly below the plane of the base, so all I had to do was carve out a small notch in the bottom of the TR slot with a chisel to accommodate the socket, and everything sits pretty now.
Last edited:
@Matt Liebenau , @Gilmourisgod
Since you guys seem to be following along here, I could use some advice on order of operations for the next few steps.
Right now I have a neck beam that is largely unshaped (only headstock cut out as shown above), and a raw board coming in for the fretboard. I'm a little confused about the best way forward between the following to-do's. I've put the list in the approx order I'm thinking, but would welcome any advice.
Since you guys seem to be following along here, I could use some advice on order of operations for the next few steps.
Right now I have a neck beam that is largely unshaped (only headstock cut out as shown above), and a raw board coming in for the fretboard. I'm a little confused about the best way forward between the following to-do's. I've put the list in the approx order I'm thinking, but would welcome any advice.
- taper neck beam w/ template
- radius fretboard (sanding block incoming)
- slot fretboard (hand fret saw) (not sure if this should be done before or after radius sanding, or before/after glue-up)
- rough cut fretboard taper
- glue fretboard to neck beam
- taper fretboard w/ pattern bit off the neck beam
- install frets
@Freekmagnet , maybe I should page you in here as a resident neck construction expert, too. Would appreciate your input on order of operations here, when you have a chance.@Matt Liebenau , @Gilmourisgod
Since you guys seem to be following along here, I could use some advice on order of operations for the next few steps.
Right now I have a neck beam that is largely unshaped (only headstock cut out as shown above), and a raw board coming in for the fretboard. I'm a little confused about the best way forward between the following to-do's. I've put the list in the approx order I'm thinking, but would welcome any advice.
- taper neck beam w/ template
- radius fretboard (sanding block incoming)
- slot fretboard (hand fret saw) (not sure if this should be done before or after radius sanding, or before/after glue-up)
- rough cut fretboard taper
- glue fretboard to neck beam
- taper fretboard w/ pattern bit off the neck beam
- install frets
Now I am thinking maybe it would be best to leave the sides of the neck beam square before gluing on the fretboard, which would help with making sure my fret cuts are nice and square... I don't know, I'm just thinking myself in circles here.
Now I'm thinking to leave the neck beam with square sides for as long as possible in the process would be best. That way if anything shifts during glue-up it's not really a problem.
- Rough cut FB and glue FB to neck beam.
- Fret slotting while everything is still square.
- Cut taper.
- FB radius sanding.
- Install frets.
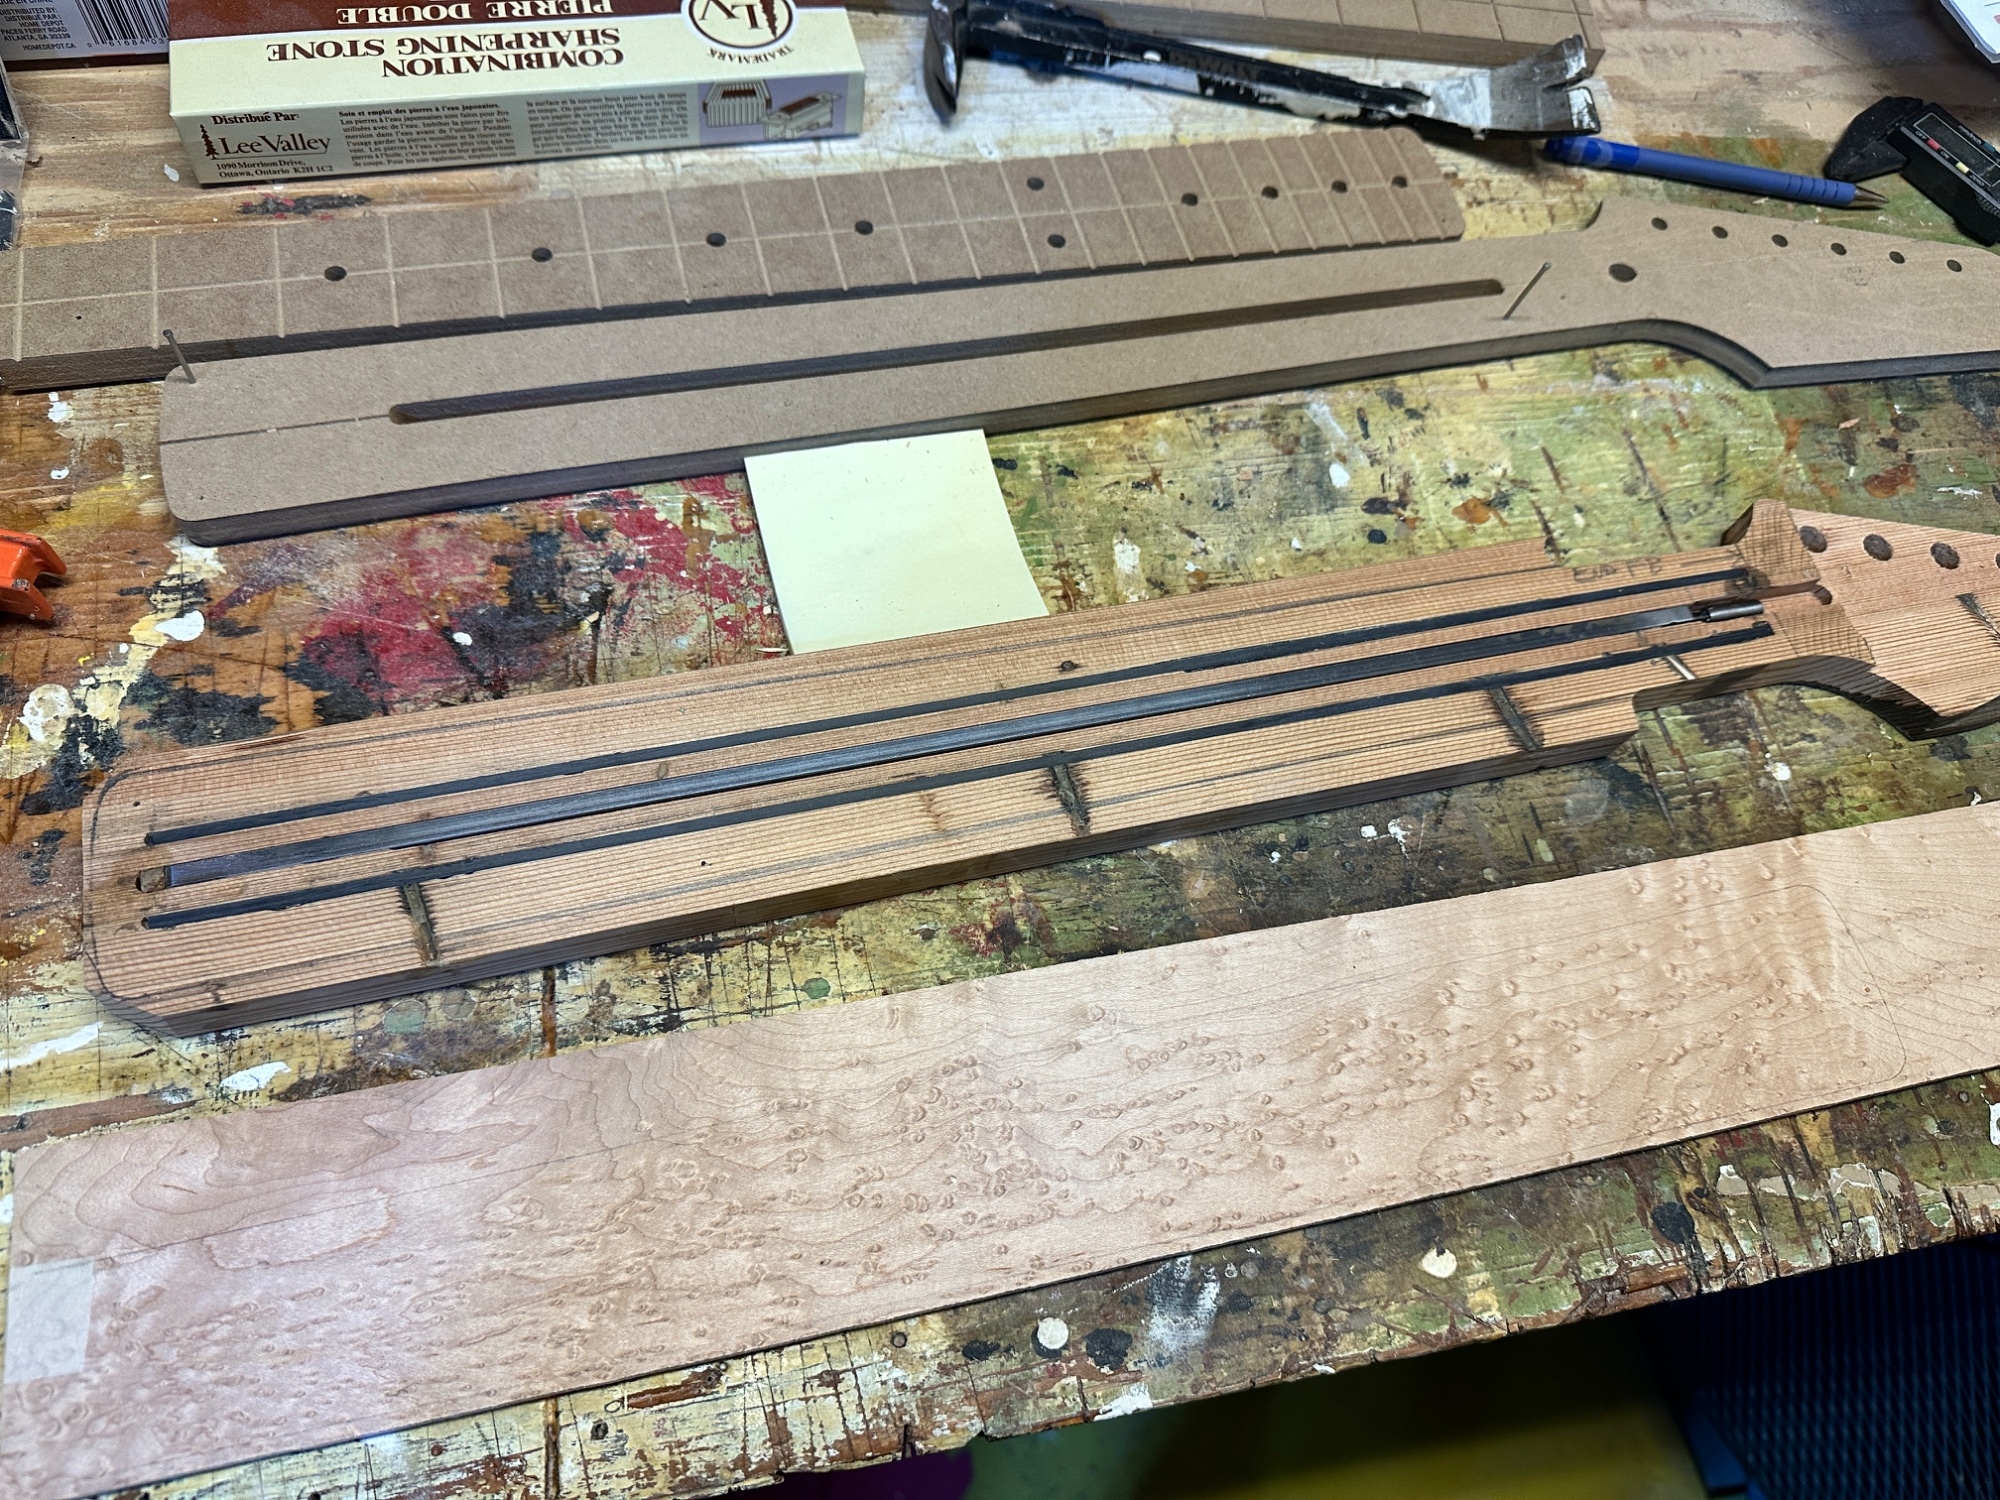
and speak of the devil... UPS just knocked on the door and dropped off a very pretty piece of Birdseye maple.

Fwiw my current order of operations for a neck is:
Truss rod channel
Rout perimeter of neck to template
Cut fret slots in fb while still square
Radius fretboard (but I'm leaning towards doing this later on my next build)
Taper fretboard but leave a couple mm oversized
Lineup fretboard to center line on neck and install locating pins, then glue it on and flush rout it to the neck.
Truss rod channel
Rout perimeter of neck to template
Cut fret slots in fb while still square
Radius fretboard (but I'm leaning towards doing this later on my next build)
Taper fretboard but leave a couple mm oversized
Lineup fretboard to center line on neck and install locating pins, then glue it on and flush rout it to the neck.
That makes sense! Thank you!Fwiw my current order of operations for a neck is:
Truss rod channel
Rout perimeter of neck to template
Cut fret slots in fb while still square
Radius fretboard (but I'm leaning towards doing this later on my next build)
Taper fretboard but leave a couple mm oversized
Lineup fretboard to center line on neck and install locating pins, then glue it on and flush rout it to the neck.
I'm thinking I might rough cut and glue the FB to my square neck blank first, then slot, then taper. That'll let me capture the most dramatic Birdseye figure on the board regardless of the FB orientation. You can see in the pic above, the figuring is a little inconsistent across the width of the board.
But I'll keep thinking about it. Thanks!
Last edited:

Freekmagnet
Commercial User
Here's my order of operations:@Freekmagnet , maybe I should page you in here as a resident neck construction expert, too. Would appreciate your input on order of operations here, when you have a chance.
Now I am thinking maybe it would be best to leave the sides of the neck beam square before gluing on the fretboard, which would help with making sure my fret cuts are nice and square... I don't know, I'm just thinking myself in circles here.
- Cut / plane and thickness the blank
- Cut the truss rod channel and install the truss rod and heel bars
- Cut the shape
- Install the FB
- Radius/slot the FB
- Trim the FB
- Surface the FB
- Install / level /crown the frets
- Carve the neck
- Polish the frets
- Sand / finish
So, I keep the sides square for as long as possible. That way, the neck is easier to clamp, measure, etc. I hope that answers your question!
Well, I went for it yesterday.
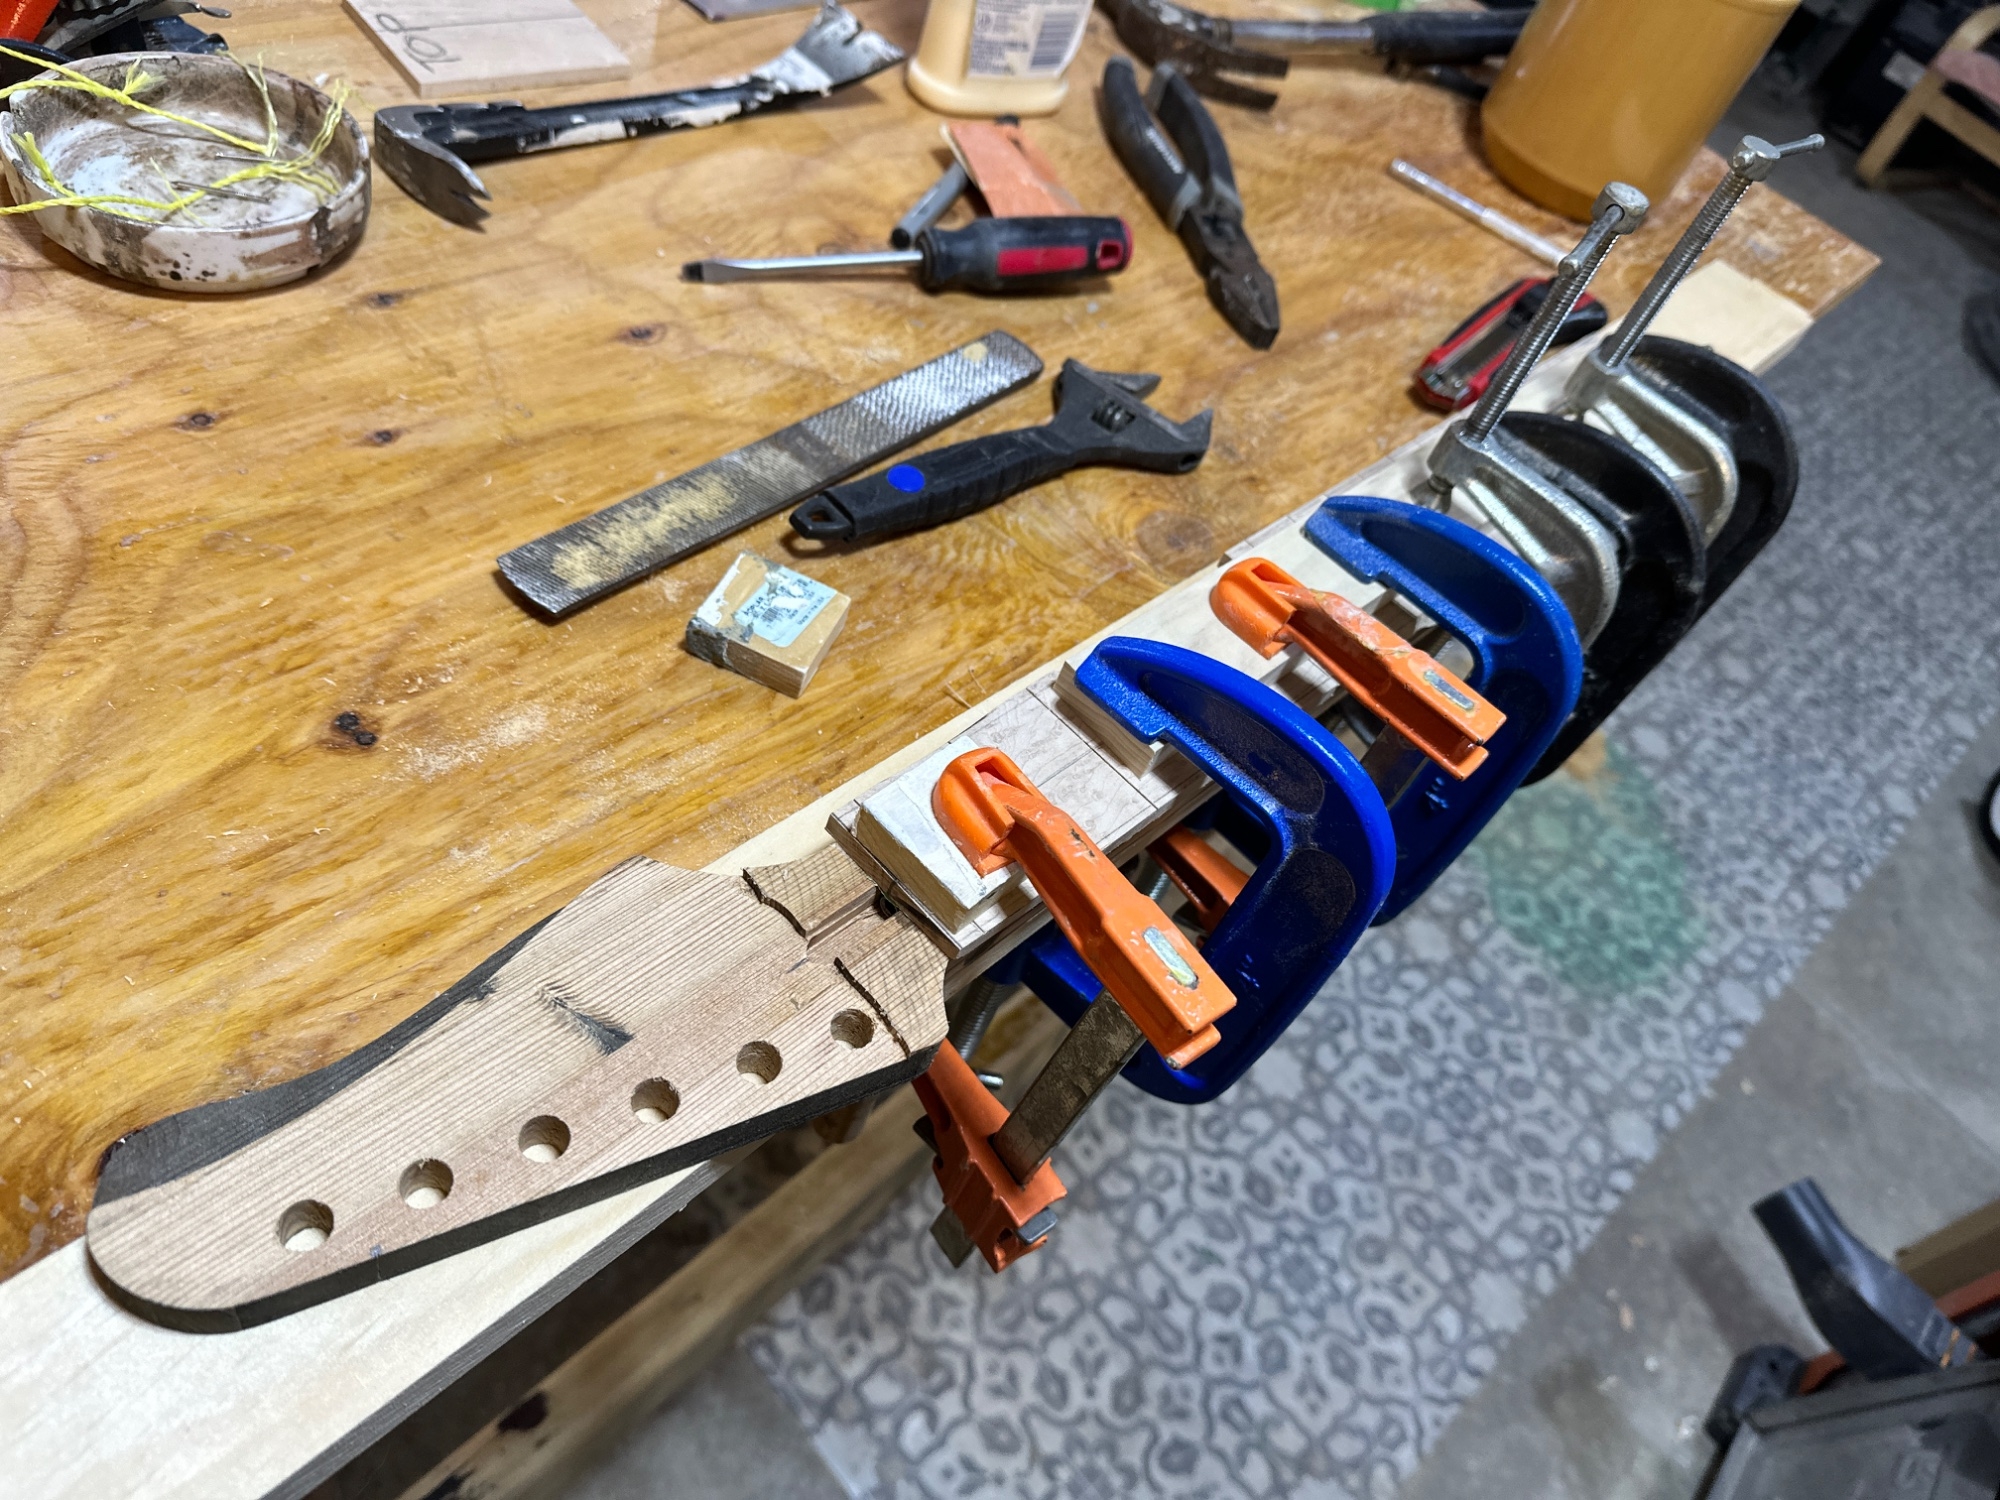
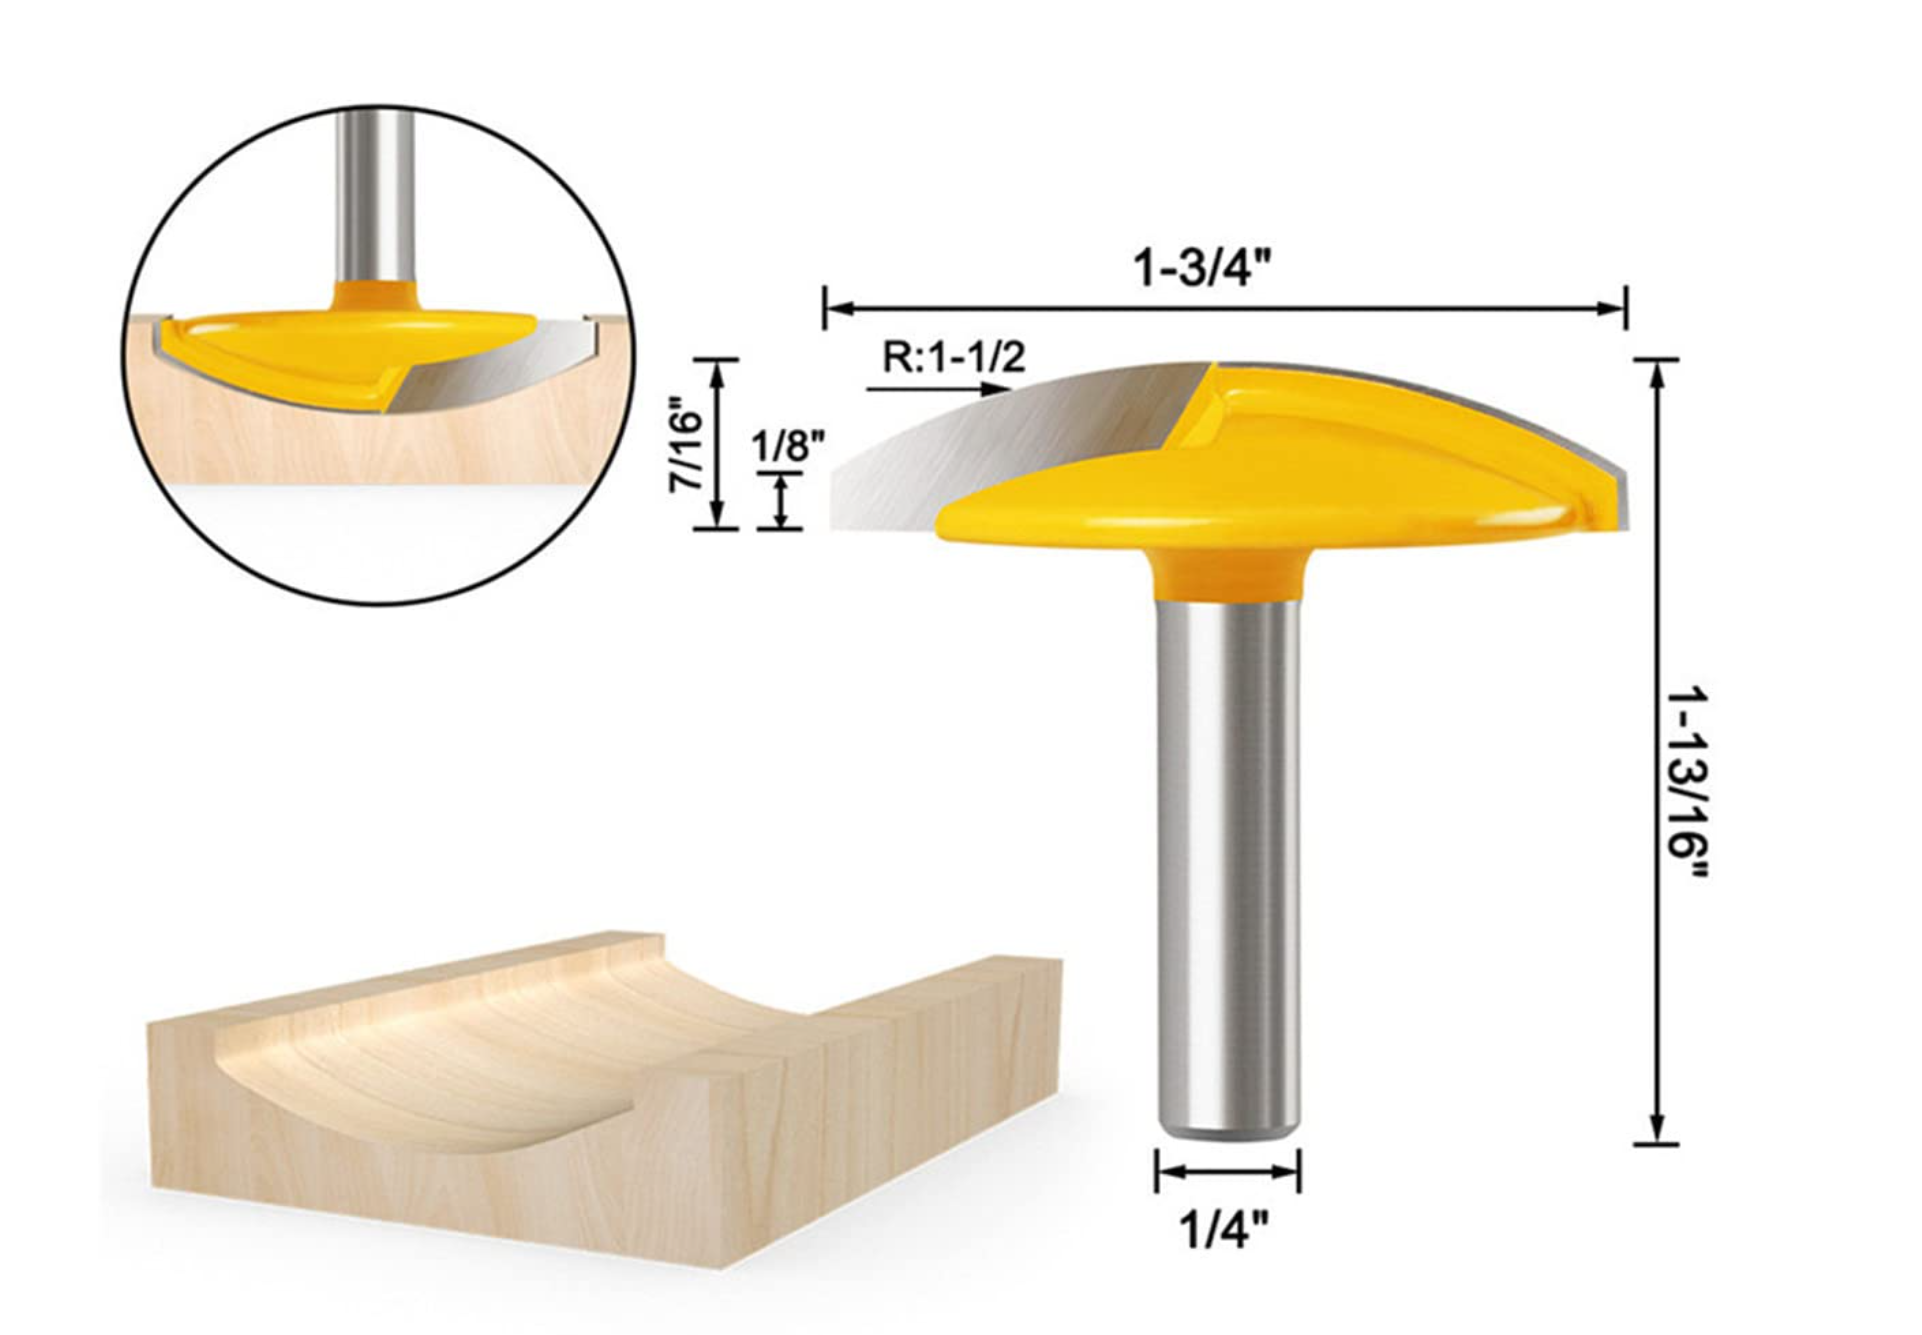
One oopsie.... I didn't account for having the fretboard run out over the "end of fretboard" line to account for the curved taper. I cut the FB off right at the line and glued it down before I realized this, of course. So I went and glued a little scrap of maple FB cutoff over the TR access slot, which will mostly be routed away when I go back in to do the thickness transition. Lacking a spindle sander for doing the typical fender headstock curved transition, I got myself a large radius cove routing bit to do it with the router instead.
- Trimmed the neck beam to the template.
- Slotted and trimmed the fretboard.
- Glued fretboard to neck
 .
.
One oopsie.... I didn't account for having the fretboard run out over the "end of fretboard" line to account for the curved taper. I cut the FB off right at the line and glued it down before I realized this, of course. So I went and glued a little scrap of maple FB cutoff over the TR access slot, which will mostly be routed away when I go back in to do the thickness transition. Lacking a spindle sander for doing the typical fender headstock curved transition, I got myself a large radius cove routing bit to do it with the router instead.
Last edited:


