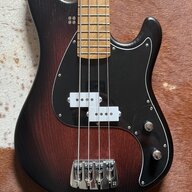
I'm going to look at the myriad of parts I have and see if I can do some sort of assembly build. I wish I could do a scratch, but assembly is probably my limit right now. Maybe do some mods and such……

TalkBass has been independent since 1998. Add your voice.
Create a free account to reply to discussions, view embedded media, and browse with fewer display ads.
Join free Log in
Want zero display ads or expanded classifieds tools? Compare plans.
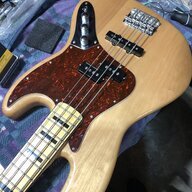




I love the meteora shape! That's what I'll be doing for a partial build. Now I gotta clean my garage and tune up my bandsaw...Deciding on body style I was between a symmetrical body or an asymmetrical body, thinking since the head stock will not be symmetrical I will go with the left.
View attachment 5474230
blue stain with red tortoise shell
I love the meteora shape! That's what I'll be doing for a partial build. Now I gotta clean my garage and tune up my bandsaw...
Yes, yes, yes and yes! You can prepare everything in billets, boards or strips right to the point of being glue-up ready. Just no gluing up and no cutting/shaping. So feel free to get everything ready so that on the starting day you can slather boards with glue and toss them in the clamps. If you have your templates all ready, you may even be able to get most of the body parts created the next day.Seeking some clarification on "dimensioning."
I'm not a seasoned, trained woodworker -- Mostly learn by doing, and until last year was pretty much working with 1980s 6th grade woodshop knowledge. I'll be doing some scratch builds, so want to be sure I know where to stop with my prep so I don't violate the scratch build rules. I see that lumber may be "dimensioned" in advance, and it's clear that no glue ups or shaping is allowed. Just wondering where "dimensioning" stops. Here are the specific operations I'm wondering about.
Think that covers it. Got my fingerboards ordered today. The end of LMII has really make that part complicated. I'll be trying the royal blackwood for fretless boards from stewmac, and resawing a maple one from a board from my local Woodcraft (who, by the way, stock lots of great options sized for guitar fingerboards, but none for bass. Grrr.
- With a really long and wide maple board that will be cut into strips for the laminates in a few necks, seems like crosscutting to length would be allowed. Can I also rip to final thickness, to basically get the "sticks" that will be assembled into the neck? (jointing/planing is out of the question, since I'd do that after glue-up)
- Similarly, can I cut my walnut stringers to length and width? Can I thickness-sand them in advance too?
- Bookmatched tops and bottoms from 3/4 boards: Since they're mentioned in the rules, sounds like I'd be OK resawing my 1/4" tops from the 3/4" board. Can I plane/thickness sand these in advance? I know I can't edge-glue them yet.
- Body core blanks: Another 8-foot board, this time ash. Sounds like I can crosscut each half of the eventual body to length. Can I plane down to final thickness? Joint common edges? Basically everything up to glue up?

Your highest pitch string will be the one that is closest to the measured scale length, and all other saddles will sit back further by a small amount referred to as 'saddle compensation'. @rmmottola goes into it in elucidating detail here: Liutaio Mottola Lutherie Information Websiteworking on my layout- when you are doing the nut to bridge length, do you just average the saddle position and call it the length or is there a specific spot on the bridge to measure from?
to add context- measurements from my "parts" bass of 34" was 2xs nut to 12th fret which put it average/close to the edge of saddle range. Im thinking the answer is "average" but hoping for confirmation before checking it off.
I'm not sure if this has already been covered, but do I have to have all the wood for the initial entry photo? I've got neck wood but not (hollow) body wood. I won't have that till July.....

Your highest pitch string will be the one that is closest to the measured scale length, and all other saddles will sit back further by a small amount referred to as 'saddle compensation'. @rmmottola goes into it in elucidating detail here: Liutaio Mottola Lutherie Information Website
Saddles will generally always need to move away from the nut when compensating, so I tend to set the G saddle right on the scale length line (in your case 34" from nut). I push the saddle as far forward (towards nut) in it's travel, or back 1/8" or so and then mount the bridge at that location. It's nice to have a tiny bit of forward movement in saddles, but generally I try to maximize the travel available for the lowest strings, which means moving the bridge as far back as I can, while keeping the G string saddle at the end of it's travel and aligned with the scale length line.
Hope that makes sense!
I'm not sure if this has already been covered, but do I have to have all the wood for the initial entry photo? I've got neck wood but not (hollow) body wood. I won't have that till July.....
@Quills nailed it - the main thing is to prevent people from doing a bunch of work in advance and then entering under the 'wrong' category.I don't make the rules but I would guess that, provided you take another photo of the new wood also with the Build-off secret message in it when you get the new wood, it should be fine.
I think the rule is the way it is to stop people pre-fabbing stuff and/or uploading old photo sequences and pretending they're fresh.
But I'd wait for Beej to get the main ruling ...
 If you include new lumber later and then just show your work at that point, you're good.
 This should be a sticky! Lots of people have the same question. Generally, you will never need to shorten the string when intonating, so allow for most/all of the saddle travel rearward.
Nice one @Beej !

I got them from Guitar Madness on eBay.This is a question I had for myself too! super helpful! I've been considering using a hipshot D-style bridge without the tailpiece instead of the A-style, and I've been anxious about how to properly position it since there's less available adjustment.
On that note... does anyone know where I might find front string ferrules suitable for bass strings? I've seen these on plenty of guitars but haven't been able to turn up anything for basses.
View attachment 5476170
EDIT: might be moot - I was just looking at one of my other bridges, and it appears that I have about 6mm of compensation between my G and E strings, and the D-style bridge only offers about 4.5mm of adjustment...

Set it off-square by 2-4mm (further back on the E side) and it could work. Narrows the string spacing slightly...EDIT: might be moot - I was just looking at one of my other bridges, and it appears that I have about 6mm of compensation between my G and E strings, and the D-style bridge only offers about 4.5mm of adjustment...