
If you do decide to replace it, I've had really good luck at both curlymaple.com and curlymaplewood.com in terms of buying a specific board with specific figure to match something I've already got.

Enjoy the benefits of a premium membership!
Upgrade Account
-
TalkBass has been independent since 1998. Add your voice.
Create a free account to reply to discussions, view embedded media, and browse with fewer display ads.
Join free Log in
Want zero display ads or expanded classifieds tools? Compare plans.
You are using an out of date browser. It may not display this or other websites correctly.
You should upgrade or use an alternative browser.
You should upgrade or use an alternative browser.
The Hossenfeffer III Build
- Thread starter Gilmourisgod
- Start date
More options
Who Replied?

Yeah, I stumbled.on them online too. The price and delay, plus the "Mystery Surprise" aspect of mail ordering lumber kind of sucks, but in the midst of a pandemic, i cant complain. I'm officially out of maple neck material, gonna have to suck it up and drive someplace or take a chance on mailorder again. There's a place in New Hampshire I'd like to check out, we could roll it into a hiking trip. I'm REALLY hoping this neck works out, its beautiful stock.
Heh. Checked it last night, epoxy cured like a Champ. Relief! Next up got to plane both neck faces perfectly flat to final 1-1/2” body thickness. I’ve learned the hard way this can’t be done on either my planer or jointer, the figured maple and purple heart will just tear out randomly. Gonna have to break out my low budget router sled.

oh please post pics of the router sled! I'm going to build one....Heh. Checked it last night, epoxy cured like a Champ. Relief! Next up got to plane both neck faces perfectly flat to final 1-1/2” body thickness. I’ve learned the hard way this can’t be done on either my planer or jointer, the figured maple and purple heart will just tear out randomly. Gonna have to break out my low budget router sled.
I will, but be prepared to be severely underwhelmed, it's just an MDF trough I put necks in to shave them down to size, and embarassingly cheesy. I keep meaning to build something more multi-purpose but somehow don't get around to it. Looking at Bruce's incredibly nice and well thought out jigs makes me feel Worthless and Weak.oh please post pics of the router sled! I'm going to build one....

I will, but be prepared to be severely underwhelmed, it's just an MDF trough I put necks in to shave them down to size, and embarassingly cheesy. I keep meaning to build something more multi-purpose but somehow don't get around to it. Looking at Bruce's incredibly nice and well thought out jigs makes me feel Worthless and Weak.
Not sure that yours is as cheesy as the one I made. A sheet of MDF, a couple of lengths of PVC pipe held on by squeeze clamps and a "sled".
It's hard to see in this photo but there is a slot in the sled, so the router can be "slid" from side to side, add the fact that I held the router handles while routing the results were not very accurate.
After seeing the jigs made by Bruce, my jig needs to be retired and new ones built.
That Router Planing Thread has been saved and a few photos of jigs have been dowloaded to my computer, As soon as it gets warm enough to go into the garage, A few of the Bruce Johnson jigs need to be built!
I will, but be prepared to be severely underwhelmed, it's just an MDF trough I put necks in to shave them down to size, and embarassingly cheesy. I keep meaning to build something more multi-purpose but somehow don't get around to it. Looking at Bruce's incredibly nice and well thought out jigs makes me feel Worthless and Weak.
Here Hear!Not sure that yours is as cheesy as the one I made. A sheet of MDF, a couple of lengths of PVC pipe held on by squeeze clamps and a "sled".
It's hard to see in this photo but there is a slot in the sled, so the router can be "slid" from side to side, add the fact that I held the router handles while routing the results were not very accurate.
View attachment 4134673
After seeing the jigs made by Bruce, my jig needs to be retired and new ones built.
That Router Planing Thread has been saved and a few photos of jigs have been dowloaded to my computer, As soon as it gets warm enough to go into the garage, A few of the Bruce Johnson jigs need to be built!
Nope . Mine is WAY cheesier. If you saw it in the scrap bin you wouldnt blink. Sigh. I have been shamed into building a proper sled at last.

I need to build one myself, I don't have anything at the moment. But I know exactly what I plan to build. 
Got any plans or drawings? I must have looked at 20 different version on YT, I'm leaning towards a steel angle-iron version.I need to build one myself, I don't have anything at the moment. But I know exactly what I plan to build.
The neck beam came out of the clamps dead straight and flat. Win! The purpleheart is about 1/64" proud of the maple, so I'll have to router plane it anyway. I'm really short on free time, I'll see if I can jury-rig a few improvements to my crappy neck planing jig for this one, and try to build something better later.
I'm just gonna keep it simple for my first one and use MDF on the "base" and the "sides". So basically it'll just be an MDF "pan" with another MDF sled on top of it that the router will ride in. It's also the cheapest option I can do currently. Once I get one built out of MDF and fully understand how to properly use it, then I'll start thinking of what I want to try to improve on.Got any plans or drawings? I must have looked at 20 different version on YT, I'm leaning towards a steel angle-iron version....

@Gilmourisgod when I first started using epoxy, I overclamped it a few times and accidentally starved the joints a bit. I've found that epoxy needs less clamping than PVA or aliphatic resin glues for this reason. One body laminate popped off when I dropped it on the floor.  I was "disappointed", in a word. Anyway, because of the clamp photo above on your laminates, I'd recommend giving the beam a good whack with a rubber mallet just to ensure integrity of your glue-up. If it all falls to pieces (unlikely) at least it was in the early stages.
I was "disappointed", in a word. Anyway, because of the clamp photo above on your laminates, I'd recommend giving the beam a good whack with a rubber mallet just to ensure integrity of your glue-up. If it all falls to pieces (unlikely) at least it was in the early stages.
I’ll do that, but I put a decent amount of epoxy on both sides of each piece, and only got minimal squeezout, so I don’t think I starved it. The number of clamps was more about canceling the slight outward bow of the two outer maple plies, which seem to have worked. I’m going to epoxy everything but the fingerboard on this one in the Interest of Science.
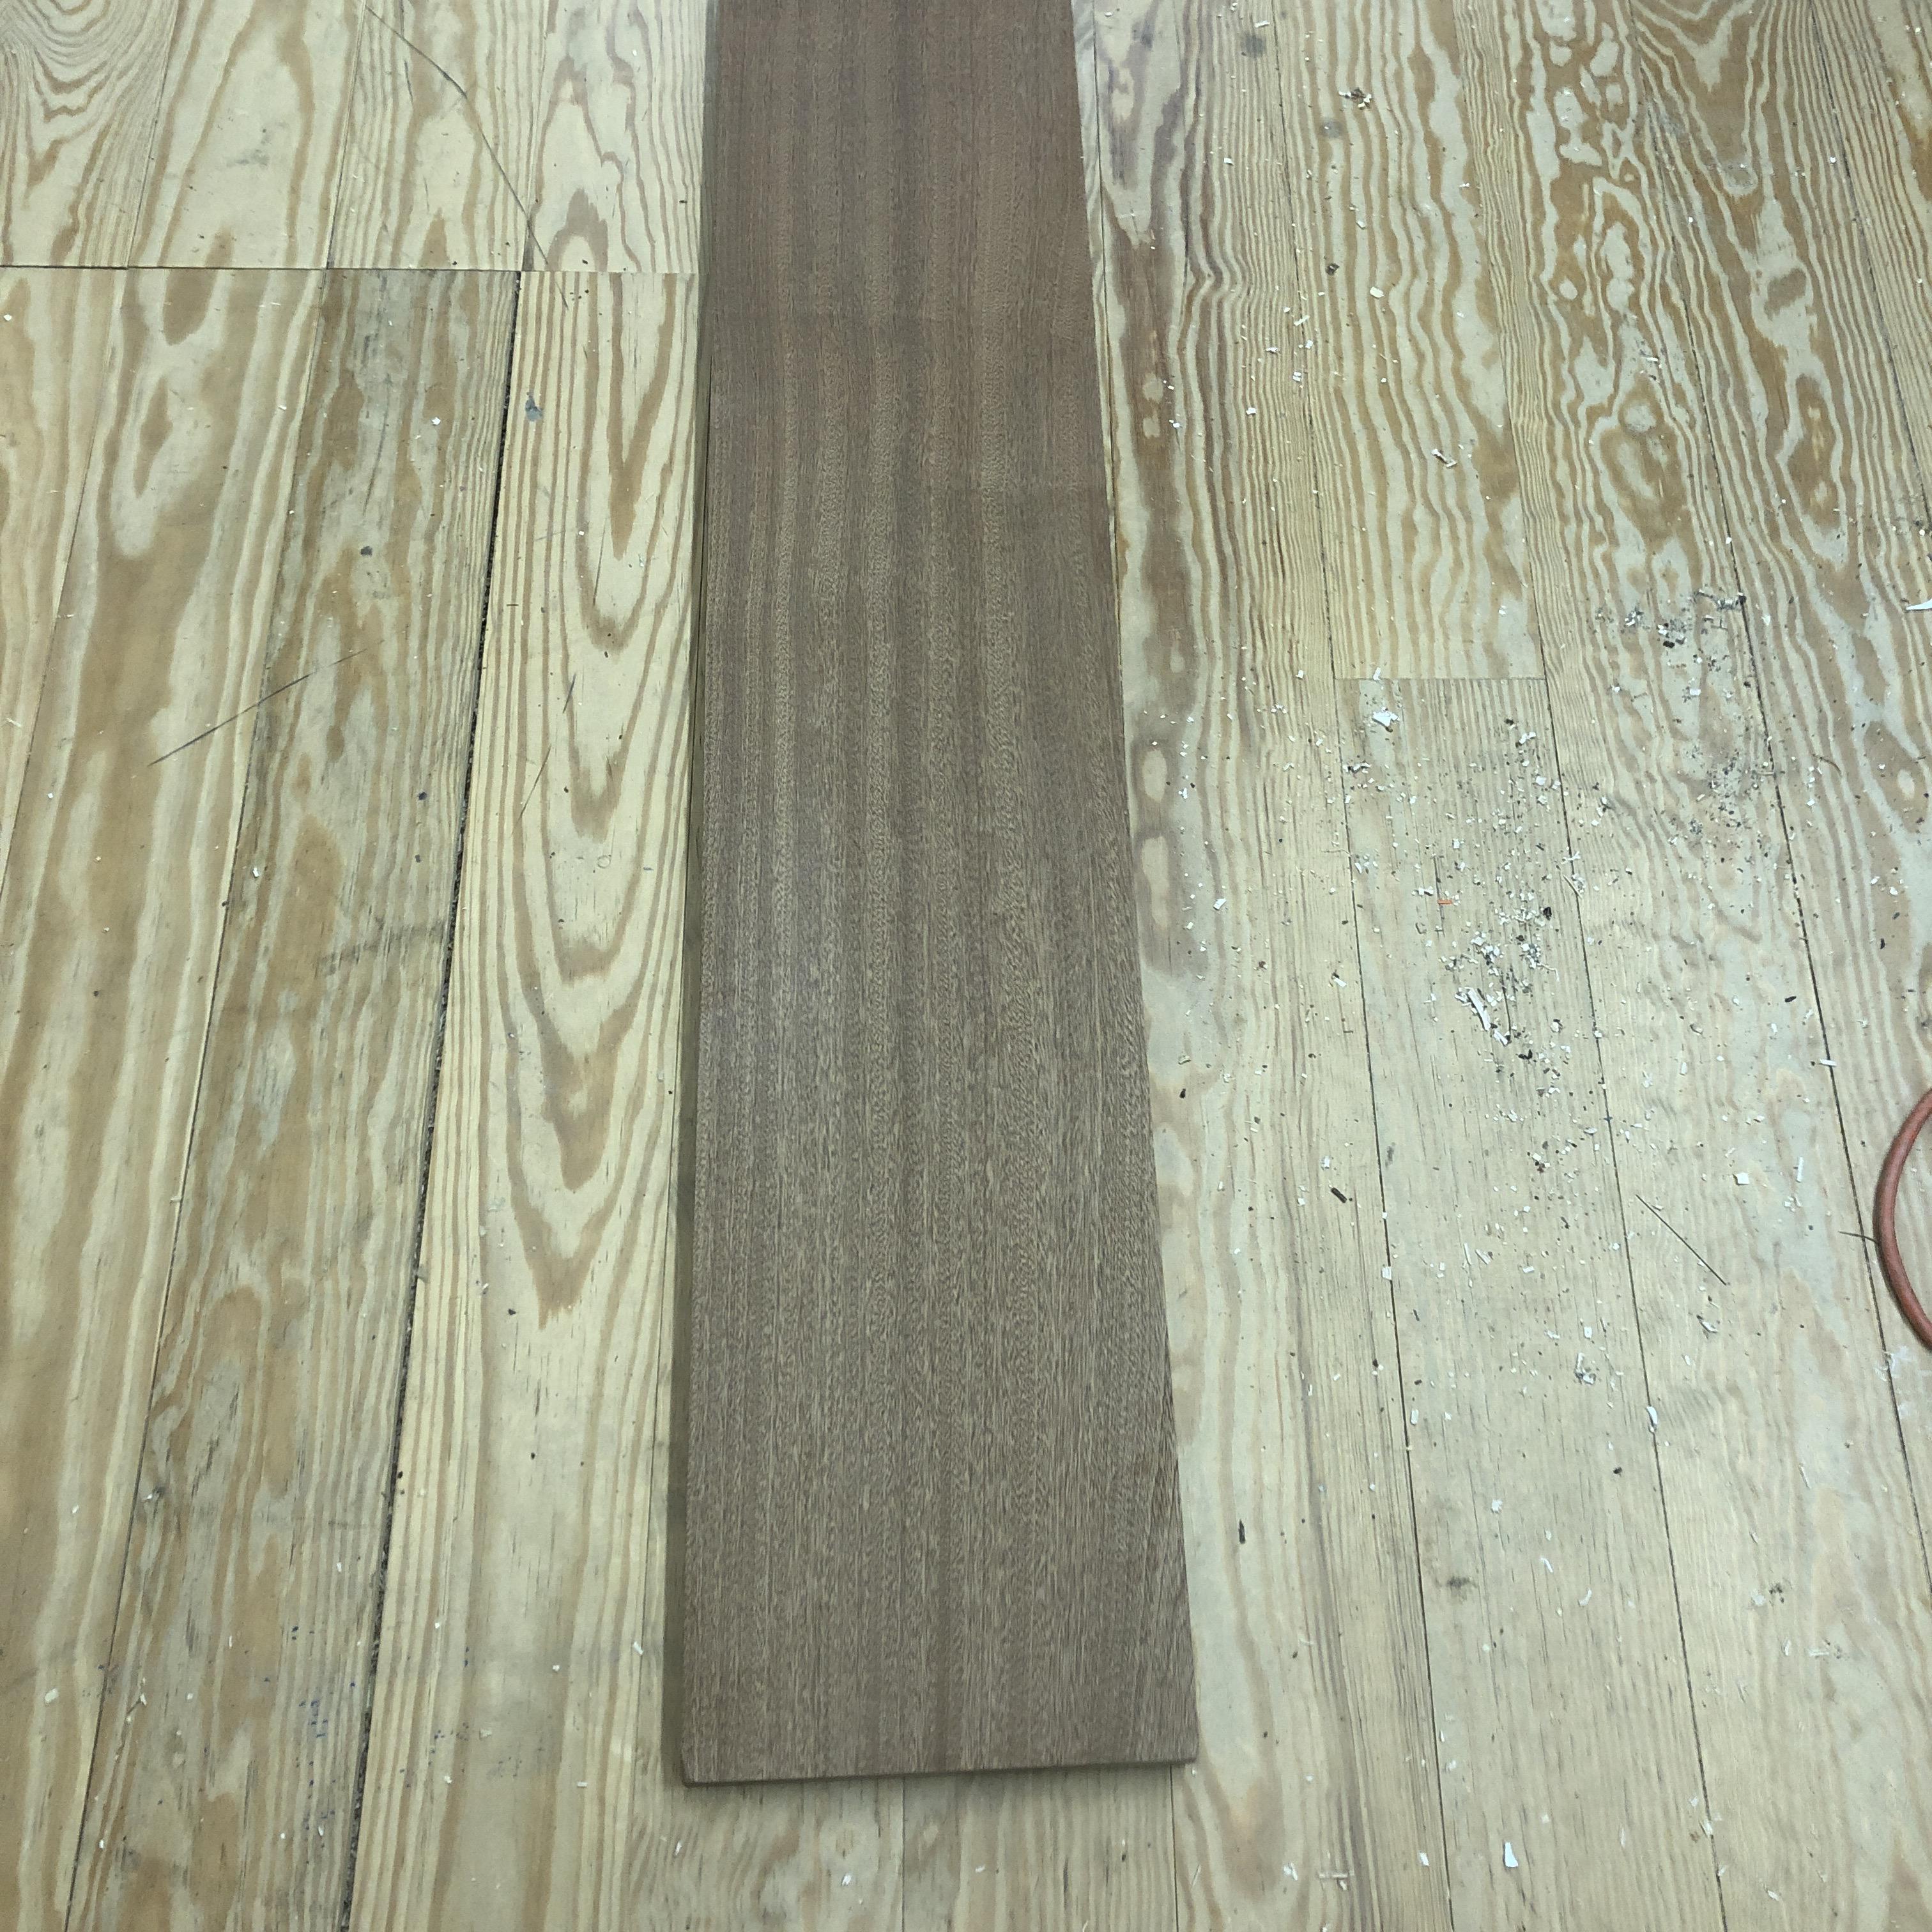
Last of my wood and parts trickling, Sapele back plank, this crap photo doesn't do it justice, nice chattoyance in person.
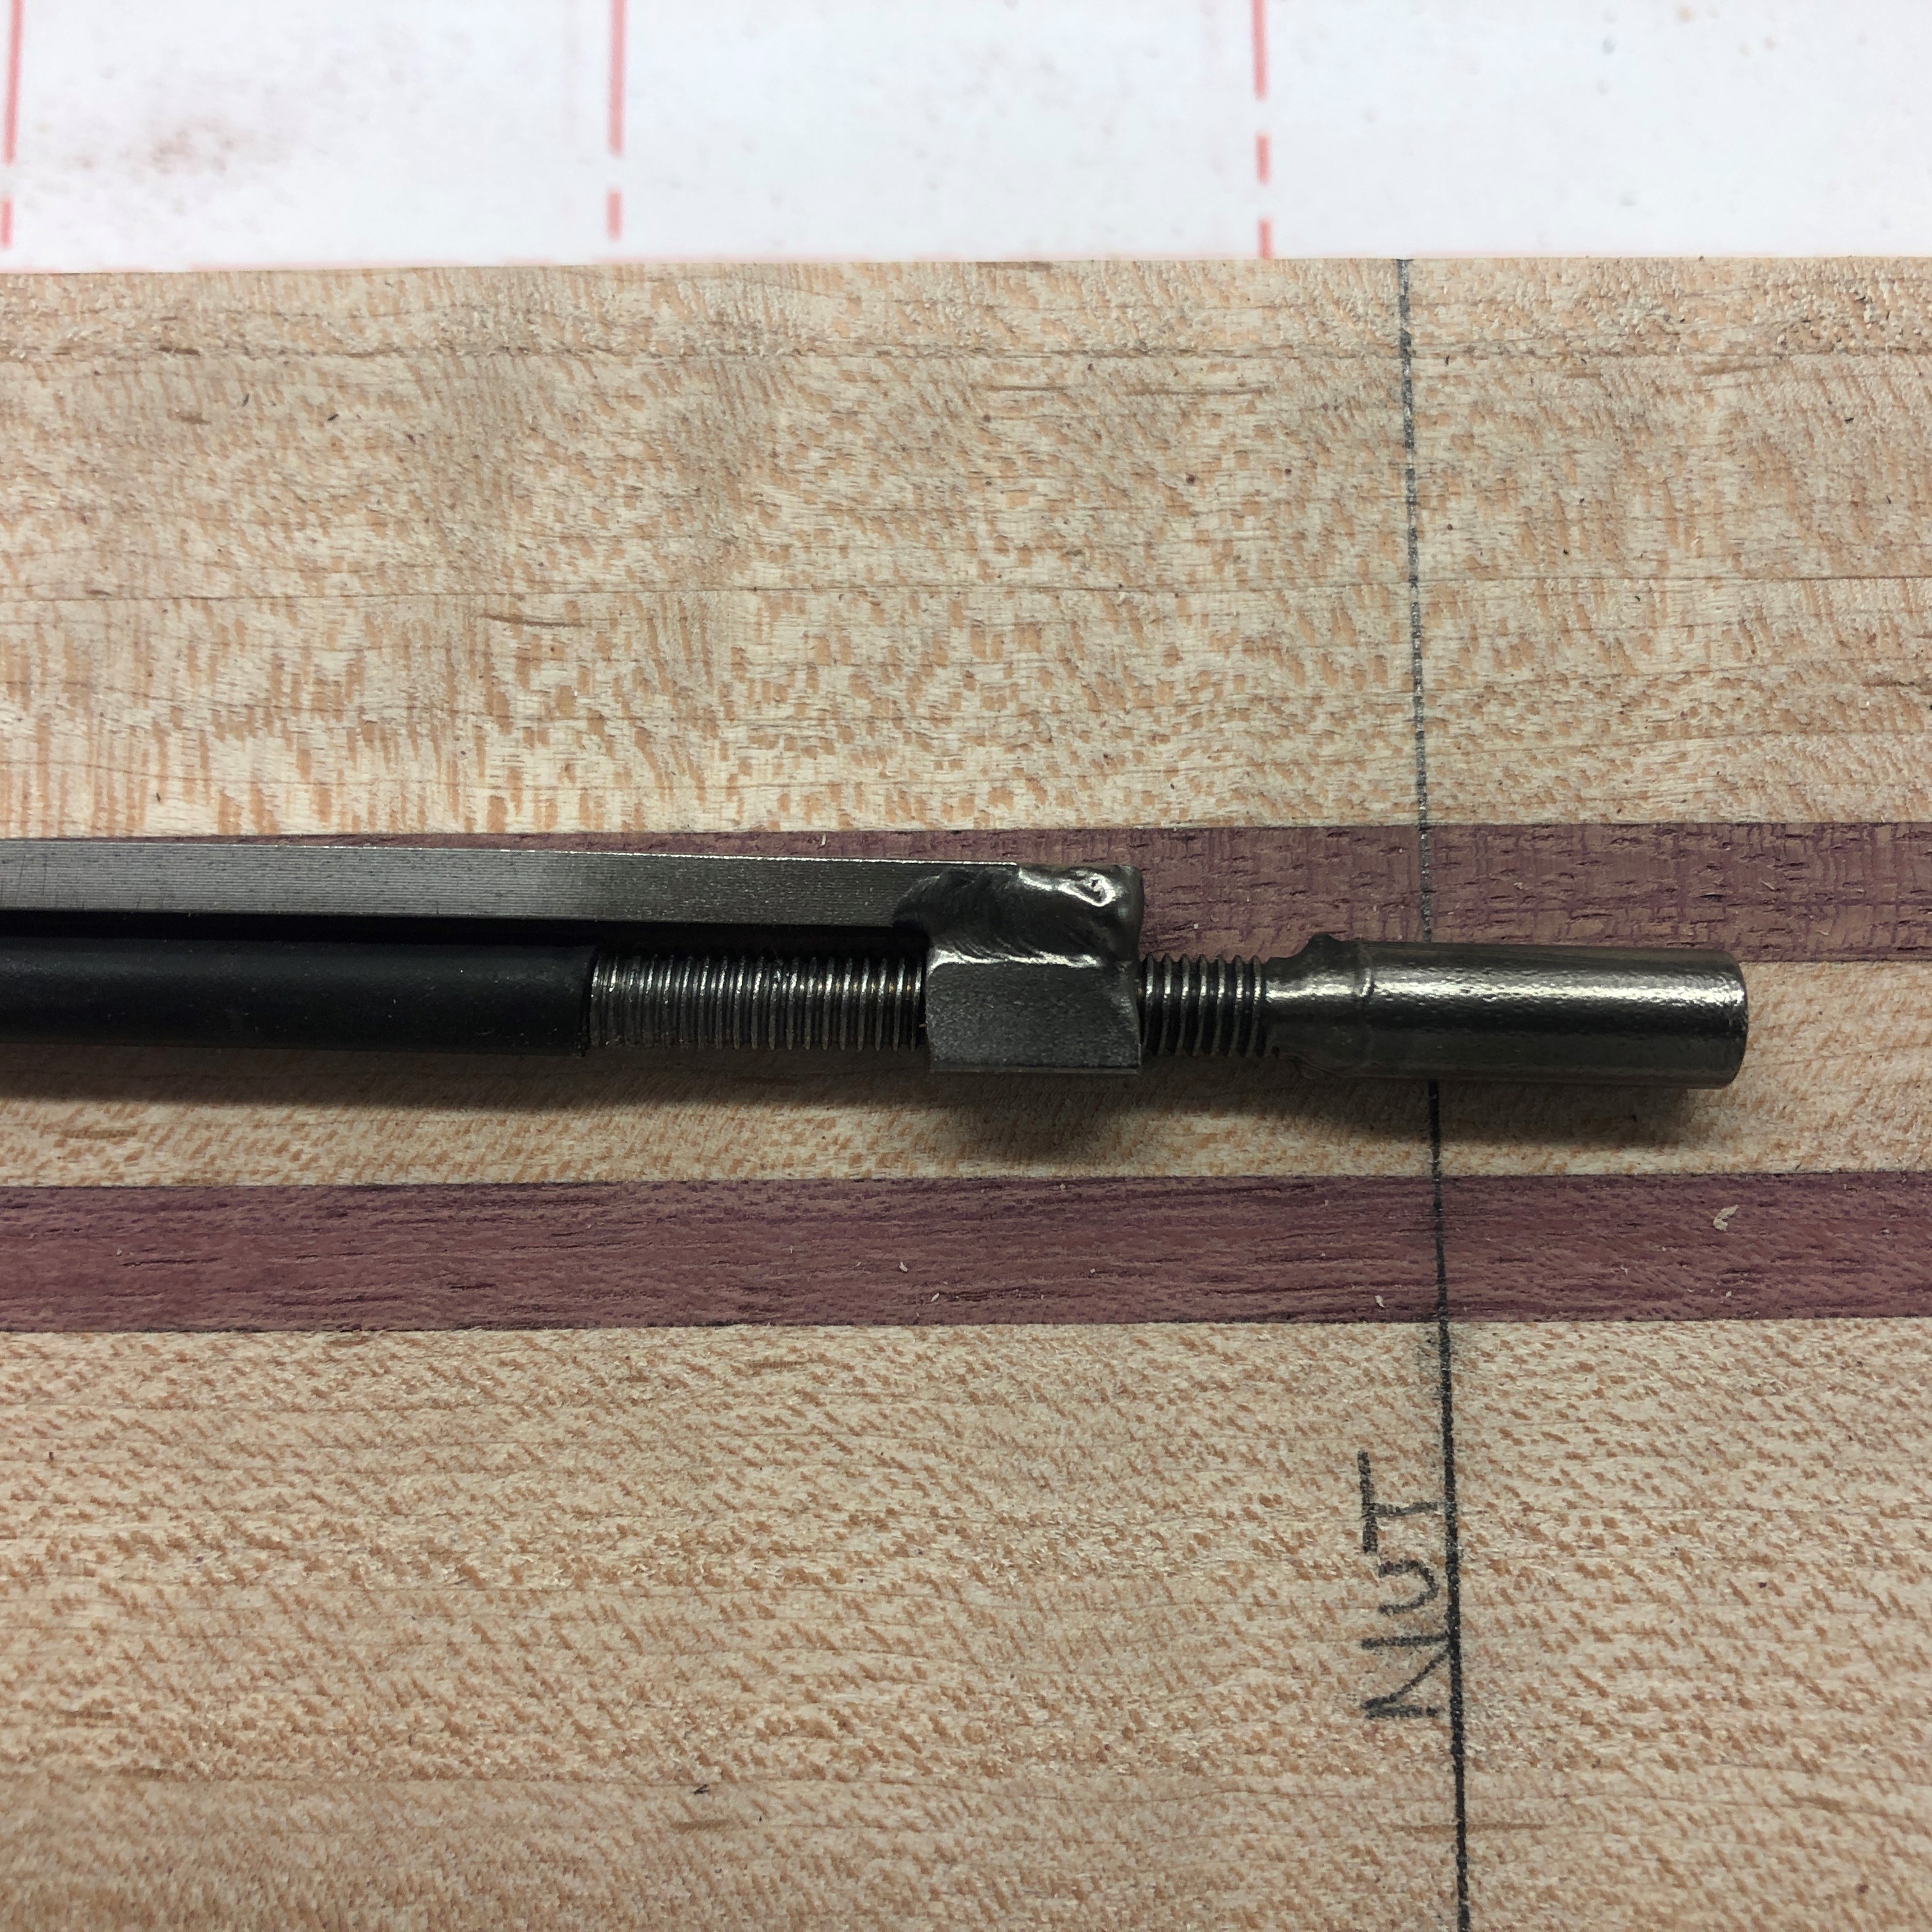
LMI Trussrod, and yes, it works.

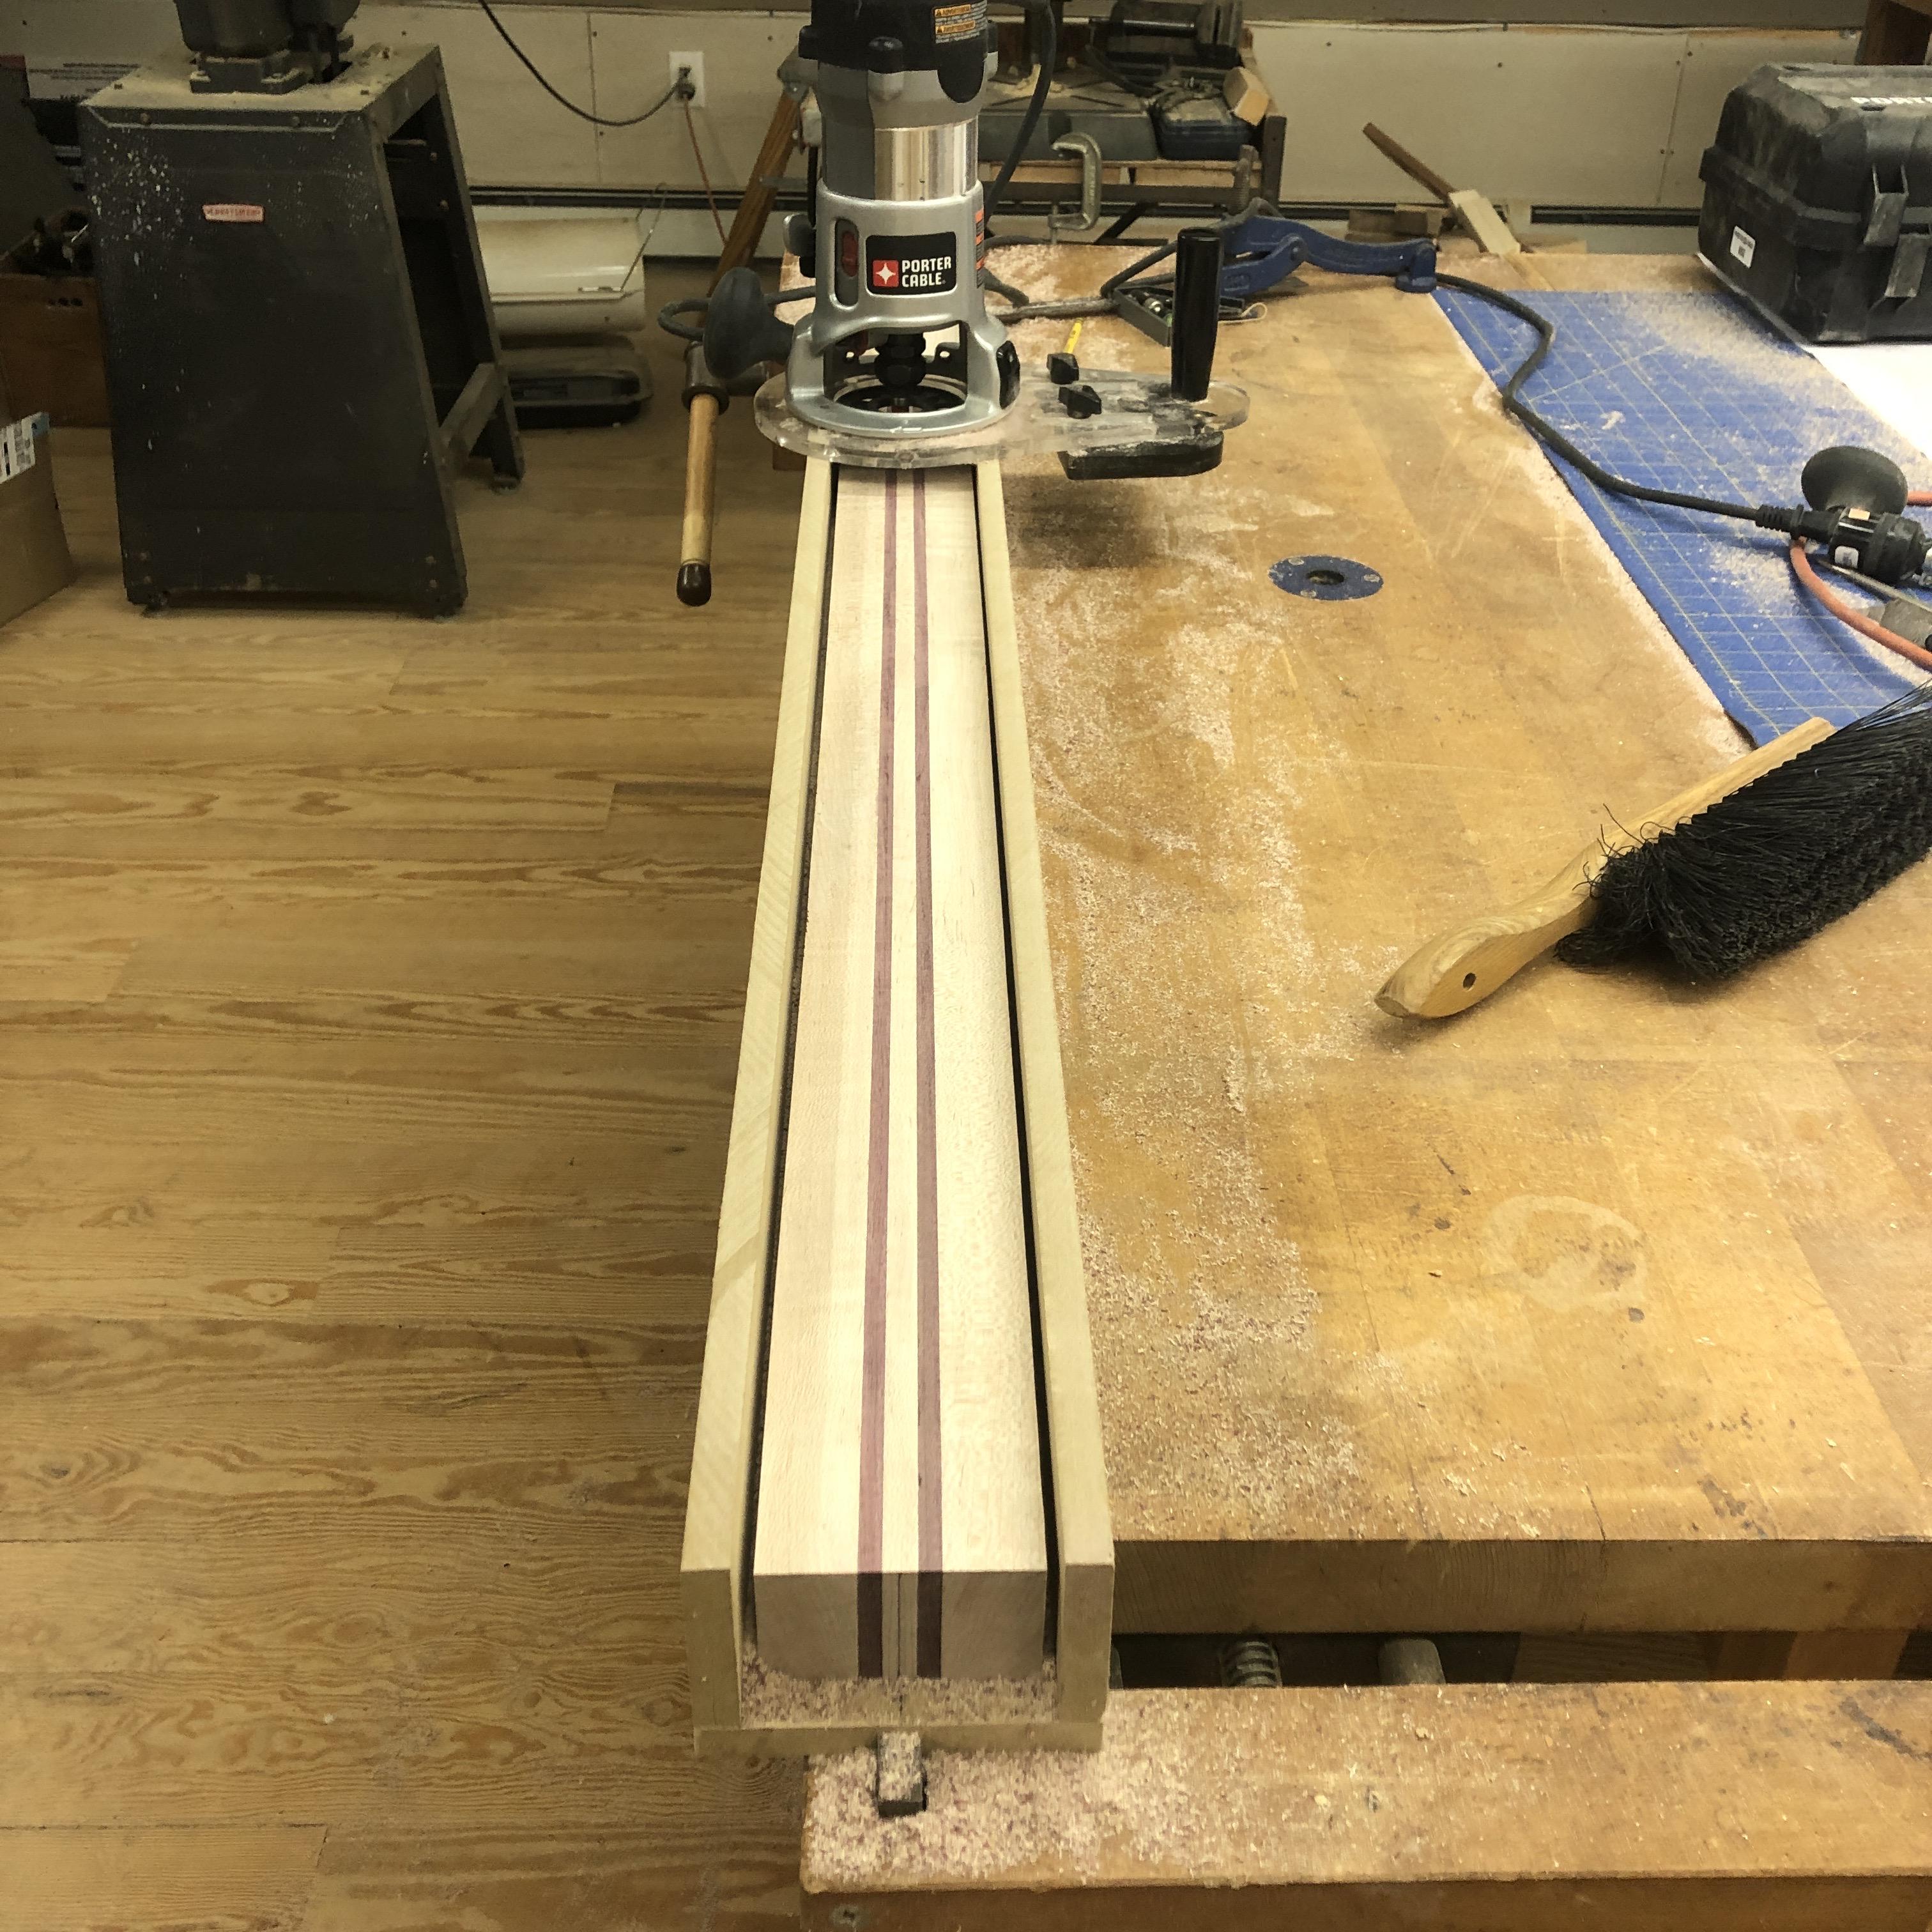
Low budget router sled. Actually, this works fine for neck planing, just using the guide on my extended router base. Got both sides dead flat with no tearout, but if I'm going to keep using this, I have to get a wider flattening bit, took a while with a 1/2" diameter bit! I'm going to have to build a sled to flatten the body, any attempt to use a jointer or thickness planer just tears out hunks of wood on the neck beam maple and purpleheart.
Got my LMI Rocklite Ebano board, very happy with it. As advertised, it's a very convincing analog for true ebony. If I didn't know it was synthetic I'd assume it was ebony. This is actually a five string board, which is all I could find from any US supplier, the Rocklite factory in UK has closed down indefinitely due to Covid. Seems a bit wasteful, but I'll use the offcuts to practice inlay on.

Got the trussrod and CF stiffener channels cut, and the CF bars epoxied in.
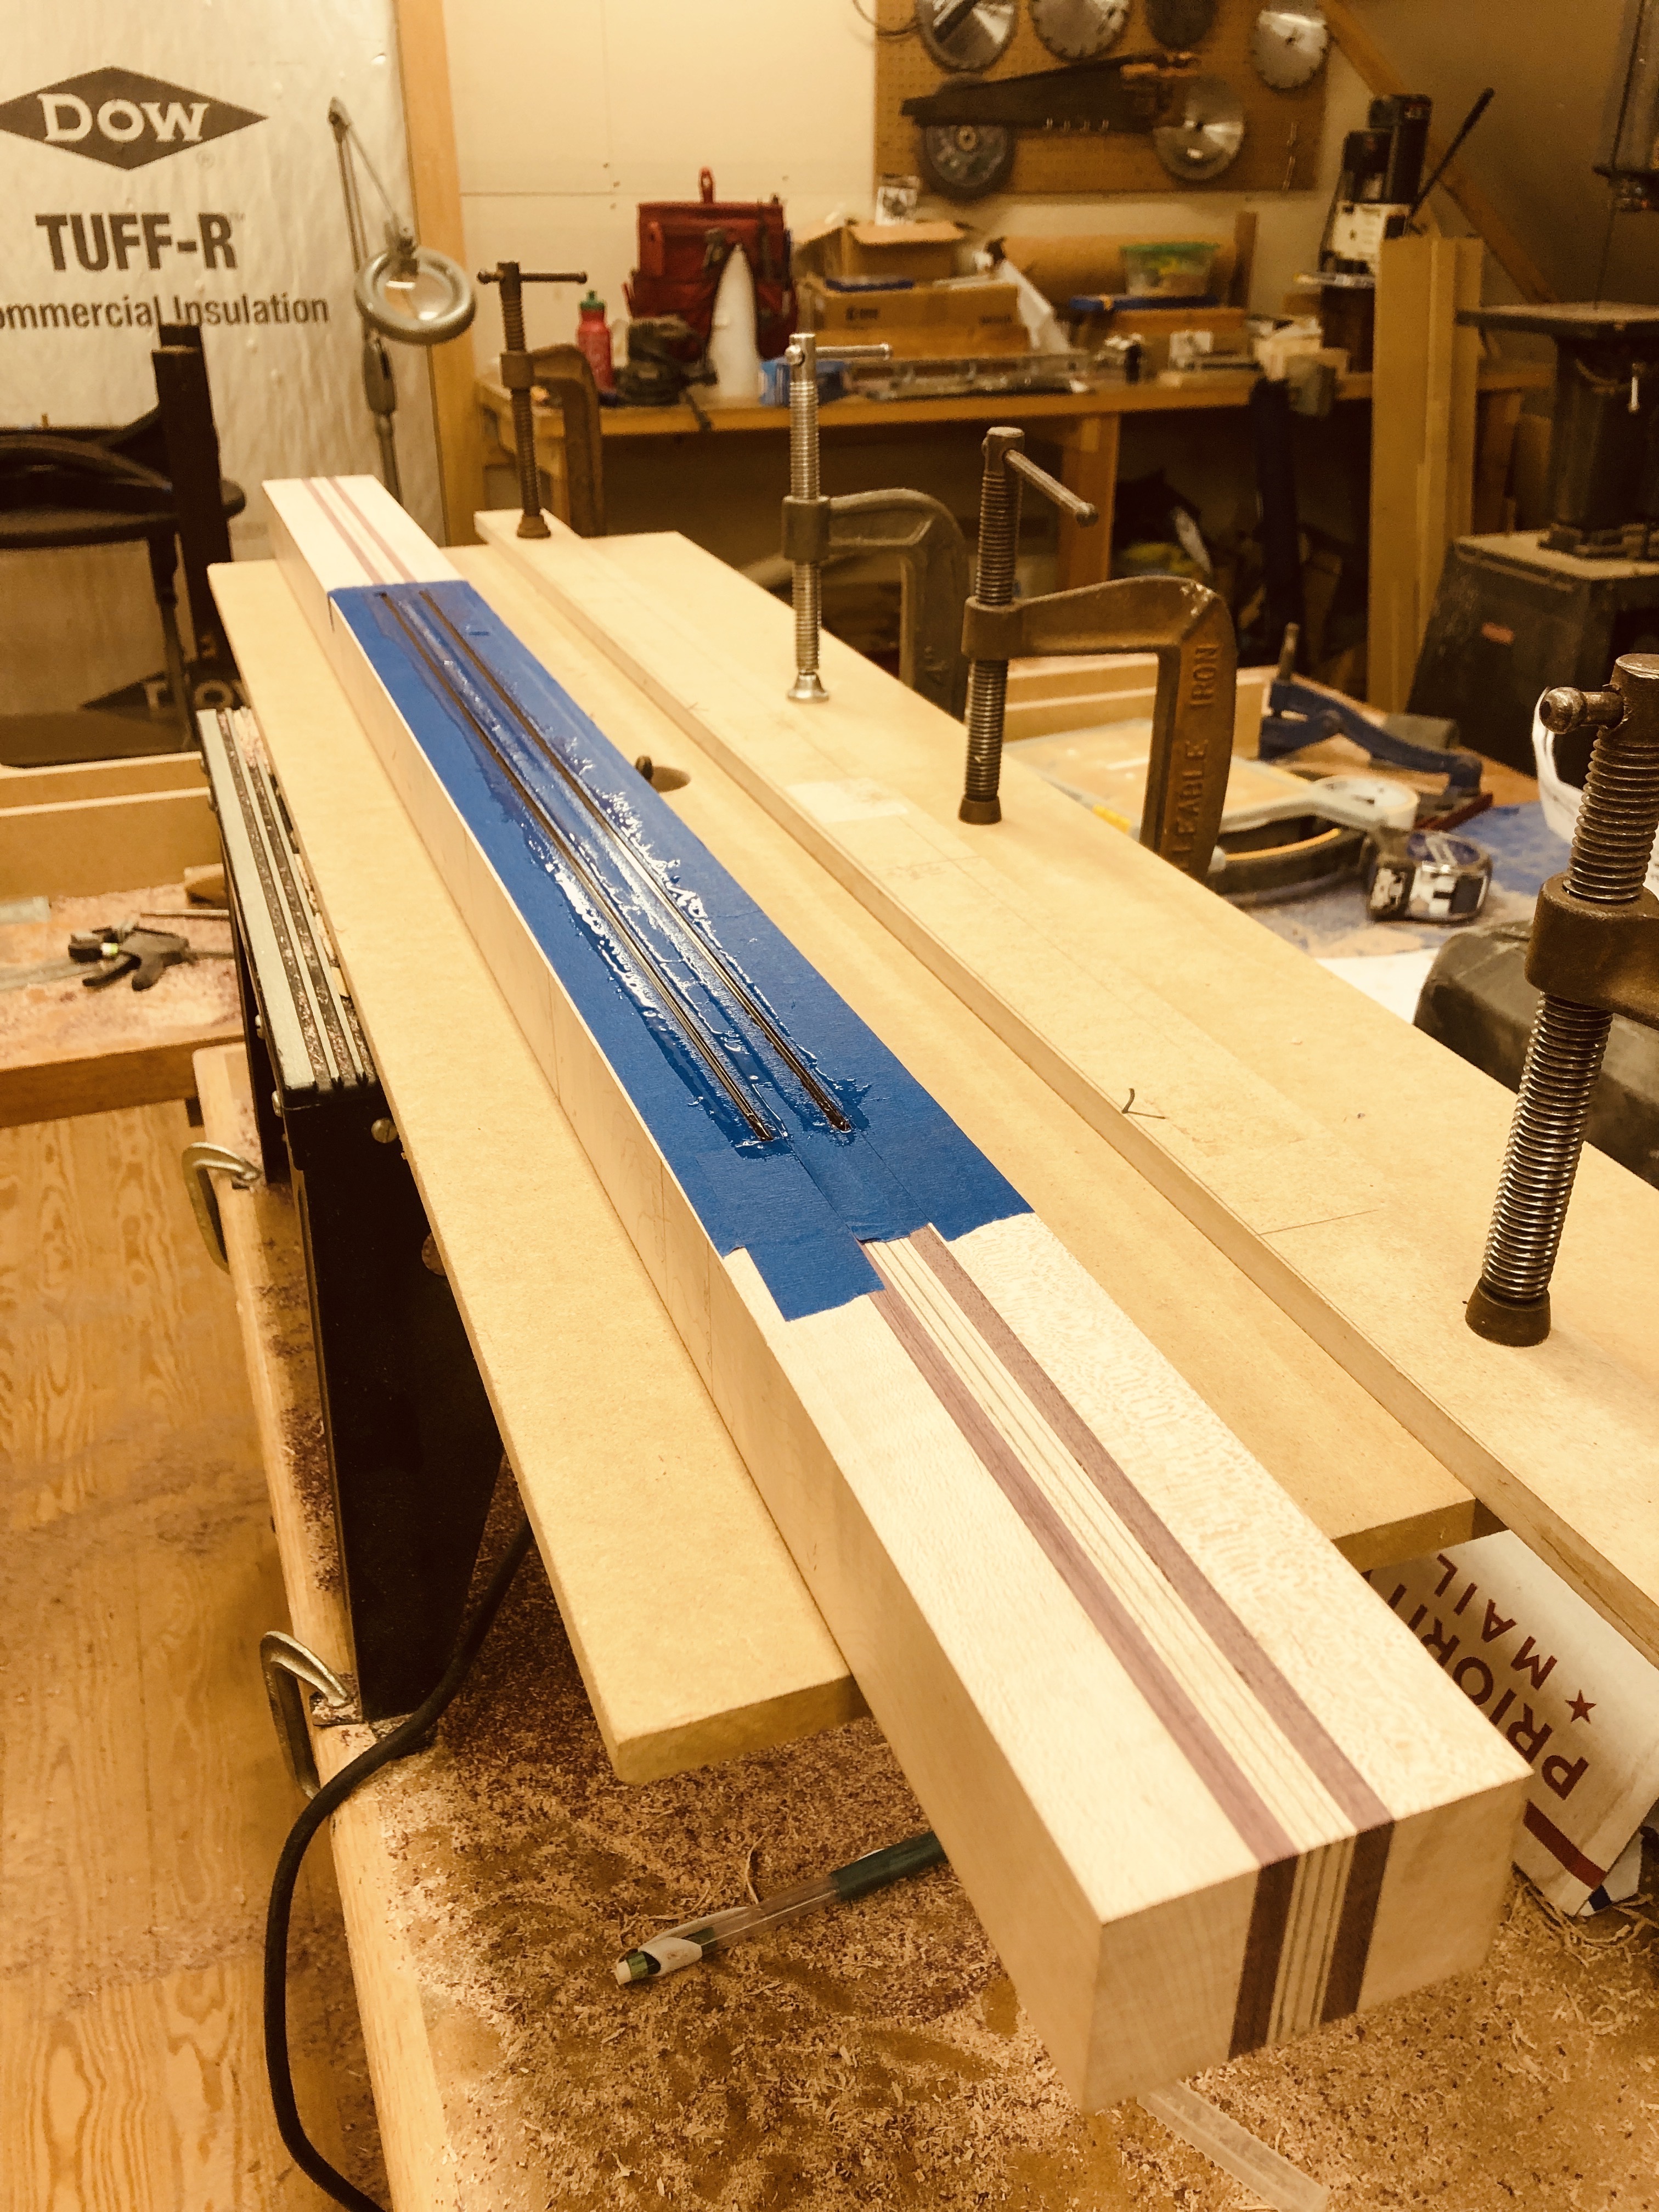
Next up I'll start laminating the body wings, which will be a bit tricky making sure I have all the routes for wiring channels, control cavity, etc. worked out, never done a triple laminate body like this before.
LMI Trussrod, and yes, it works.
Low budget router sled. Actually, this works fine for neck planing, just using the guide on my extended router base. Got both sides dead flat with no tearout, but if I'm going to keep using this, I have to get a wider flattening bit, took a while with a 1/2" diameter bit! I'm going to have to build a sled to flatten the body, any attempt to use a jointer or thickness planer just tears out hunks of wood on the neck beam maple and purpleheart.
Got my LMI Rocklite Ebano board, very happy with it. As advertised, it's a very convincing analog for true ebony. If I didn't know it was synthetic I'd assume it was ebony. This is actually a five string board, which is all I could find from any US supplier, the Rocklite factory in UK has closed down indefinitely due to Covid. Seems a bit wasteful, but I'll use the offcuts to practice inlay on.
Got the trussrod and CF stiffener channels cut, and the CF bars epoxied in.
Next up I'll start laminating the body wings, which will be a bit tricky making sure I have all the routes for wiring channels, control cavity, etc. worked out, never done a triple laminate body like this before.
Attachments

Last edited:
For thicknessing, I'm looking at drum sanders.
Although I did just receive a monster 16" King planer (in need of restoration)!
I'm assembling a table (true sided box) and sled. Actually a truncheon where one of the crappy routers i've accumulated from garage sales, will be mounted on a rigid plate , with nylon cutting board on the bottom for easier sliding.
I bought a 2" wide bit for this purpose. (Yes I'll post pics)
Although I did just receive a monster 16" King planer (in need of restoration)!
I'm assembling a table (true sided box) and sled. Actually a truncheon where one of the crappy routers i've accumulated from garage sales, will be mounted on a rigid plate , with nylon cutting board on the bottom for easier sliding.
I bought a 2" wide bit for this purpose. (Yes I'll post pics)
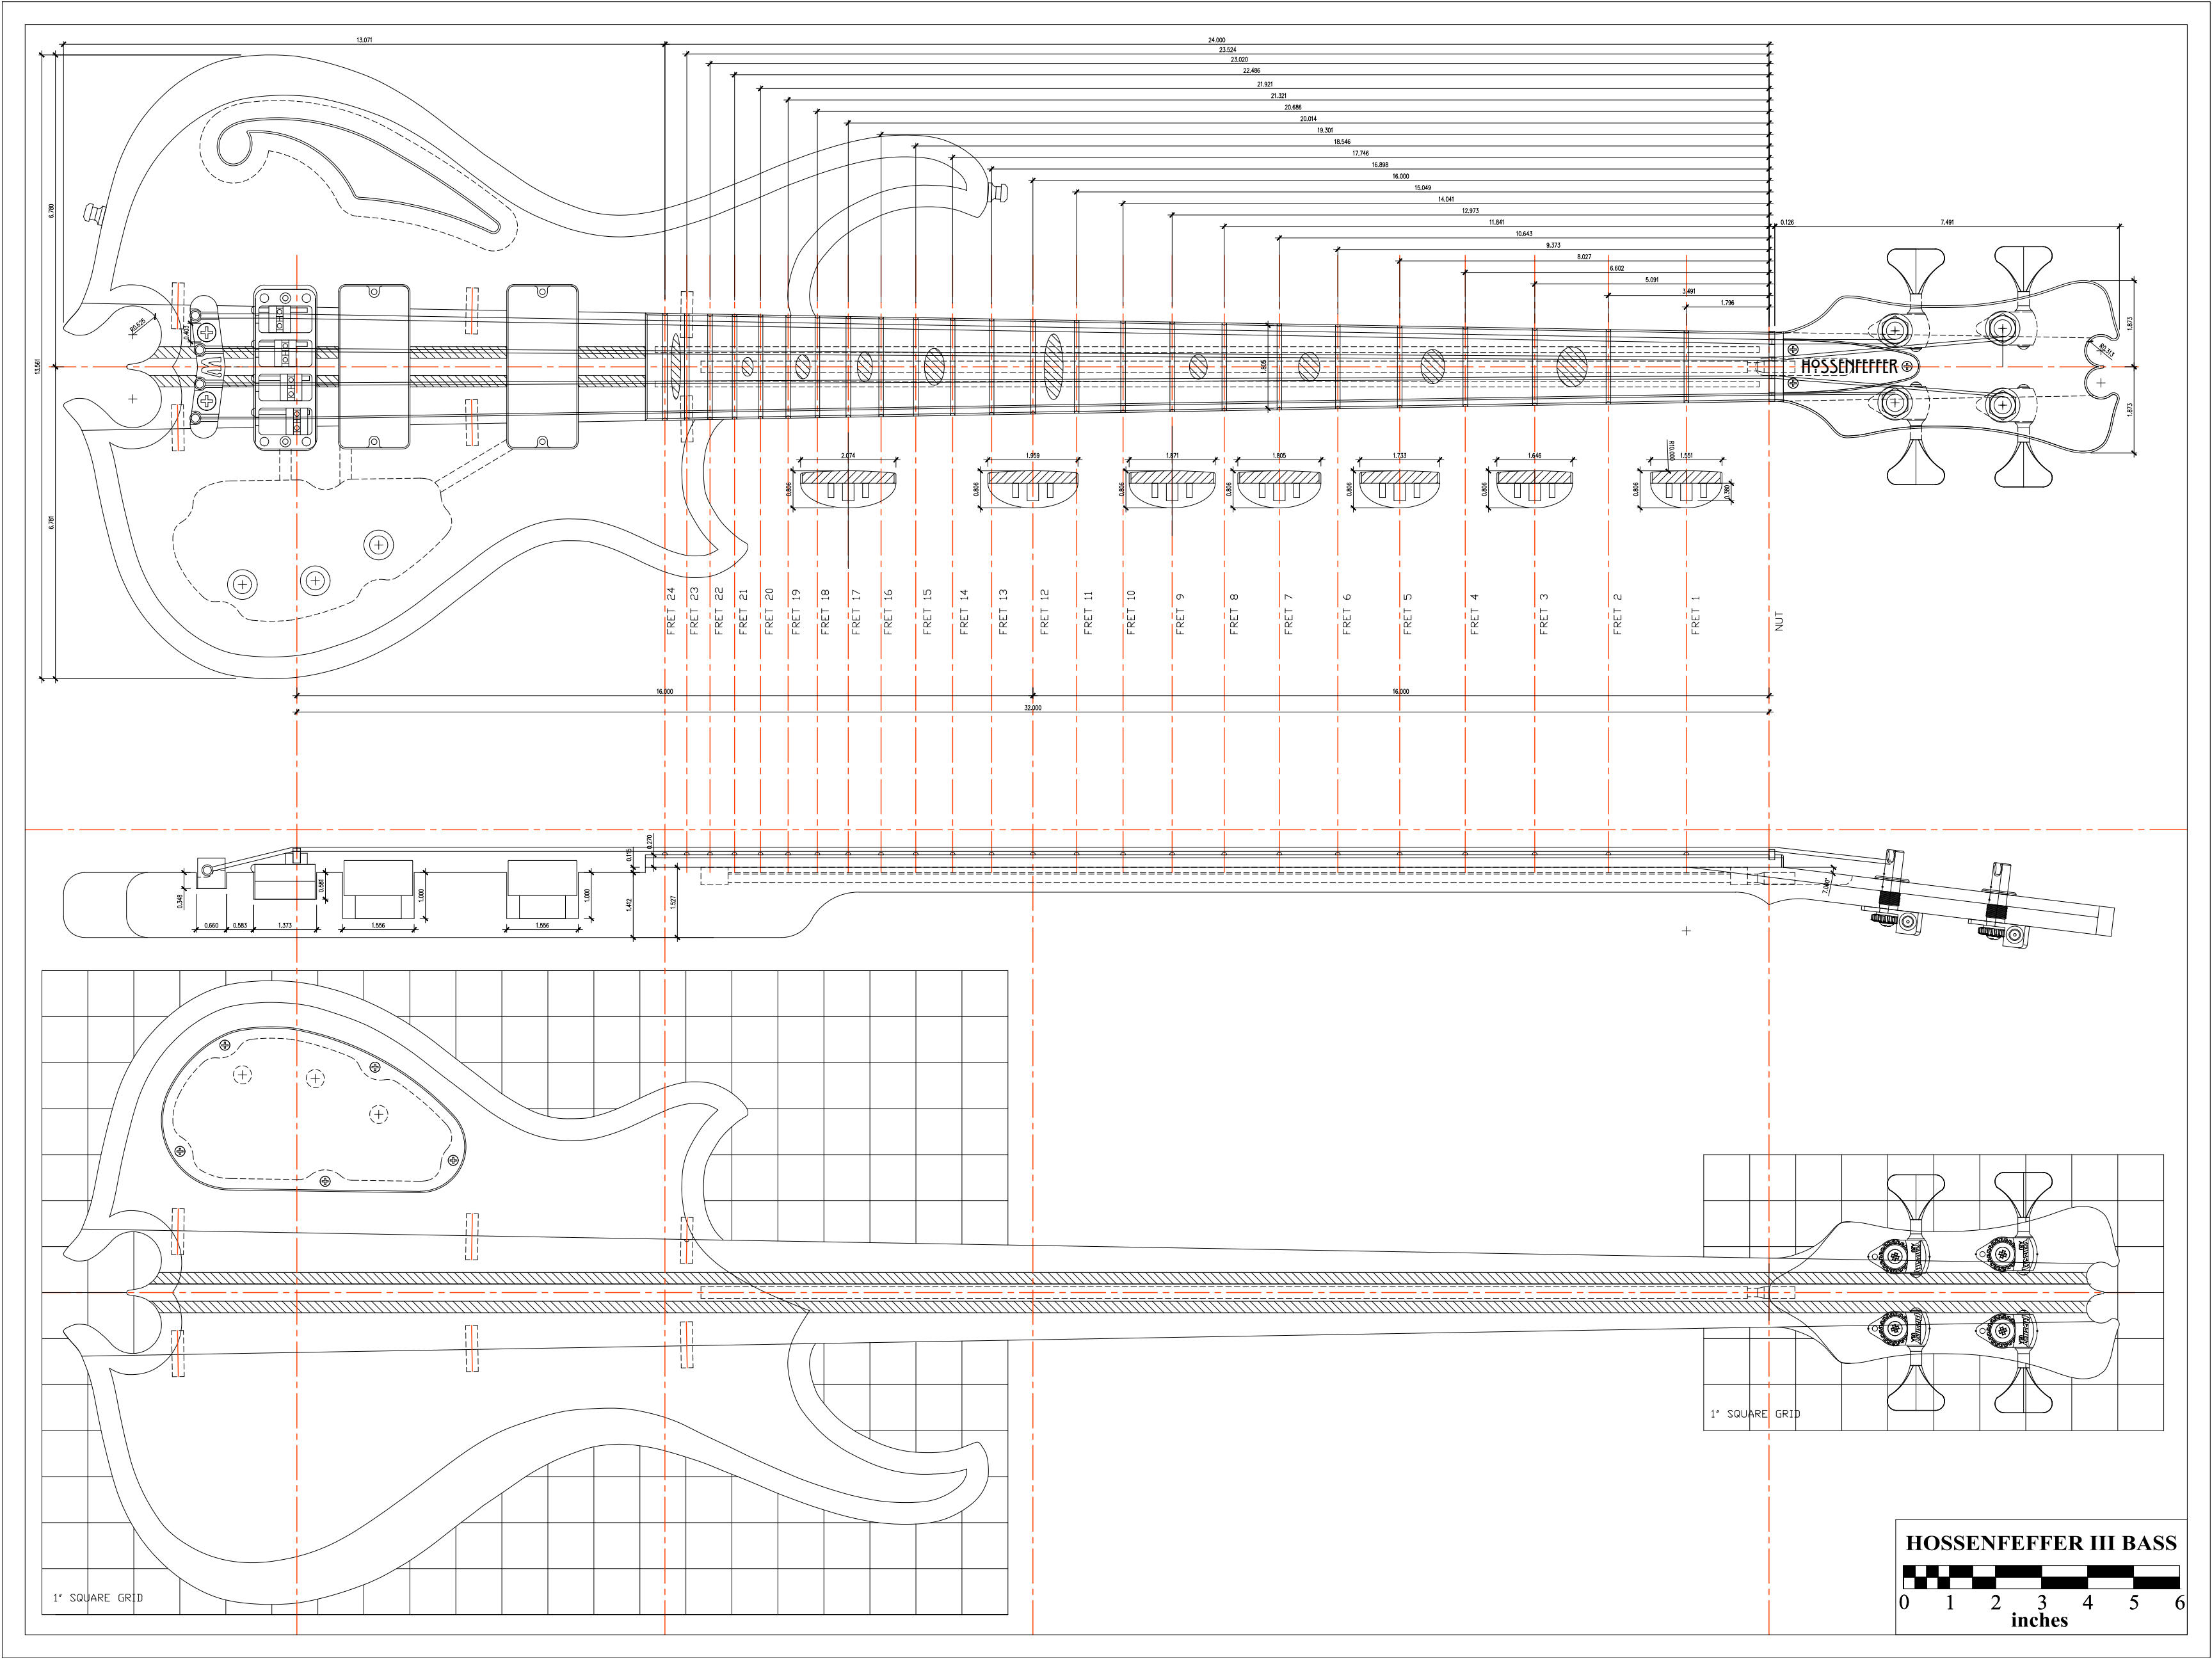
After a lot of editing, the final version of my drawing. I had intended to do a 1-1/2" thick body, but I had a little router "mishap" on the back of the neck beam that necessitated shaving off another 1/16" to fix, so I'm just under 1.5" total. Classic brain fart with a router, less said the better. Sigh....Hopefully this won't be a neck diver, but I never really know until they are built. I wanted to keep the bass light, but the bridge is pretty heavy. I'm hoping that with that bridge, tailpiece, pickups, etc., and ultralite tuners, that it will balance. Assuming a 1/4" thick top with a 1/16" aluminum sheet stiffener, and a 3/16" control cavity cover, I'll have about 7/8" of height inside the control cavity, which is more than enough for the volume, tone, and Bourns blend pot. If anybody else wants to try their hand at a Balance K body style, PM me for the drawing.
Last edited:
Been slow progress the last couple weeks, I only get a few hours each weekend, been booked the last two. The first steps are complete on the neck anyway, now I can set this aside to do it's thing while I work on the body wings. I tend to leave necks clamped to something flat to acclimate, which may or may not make any difference, but it makes me FEEL better.
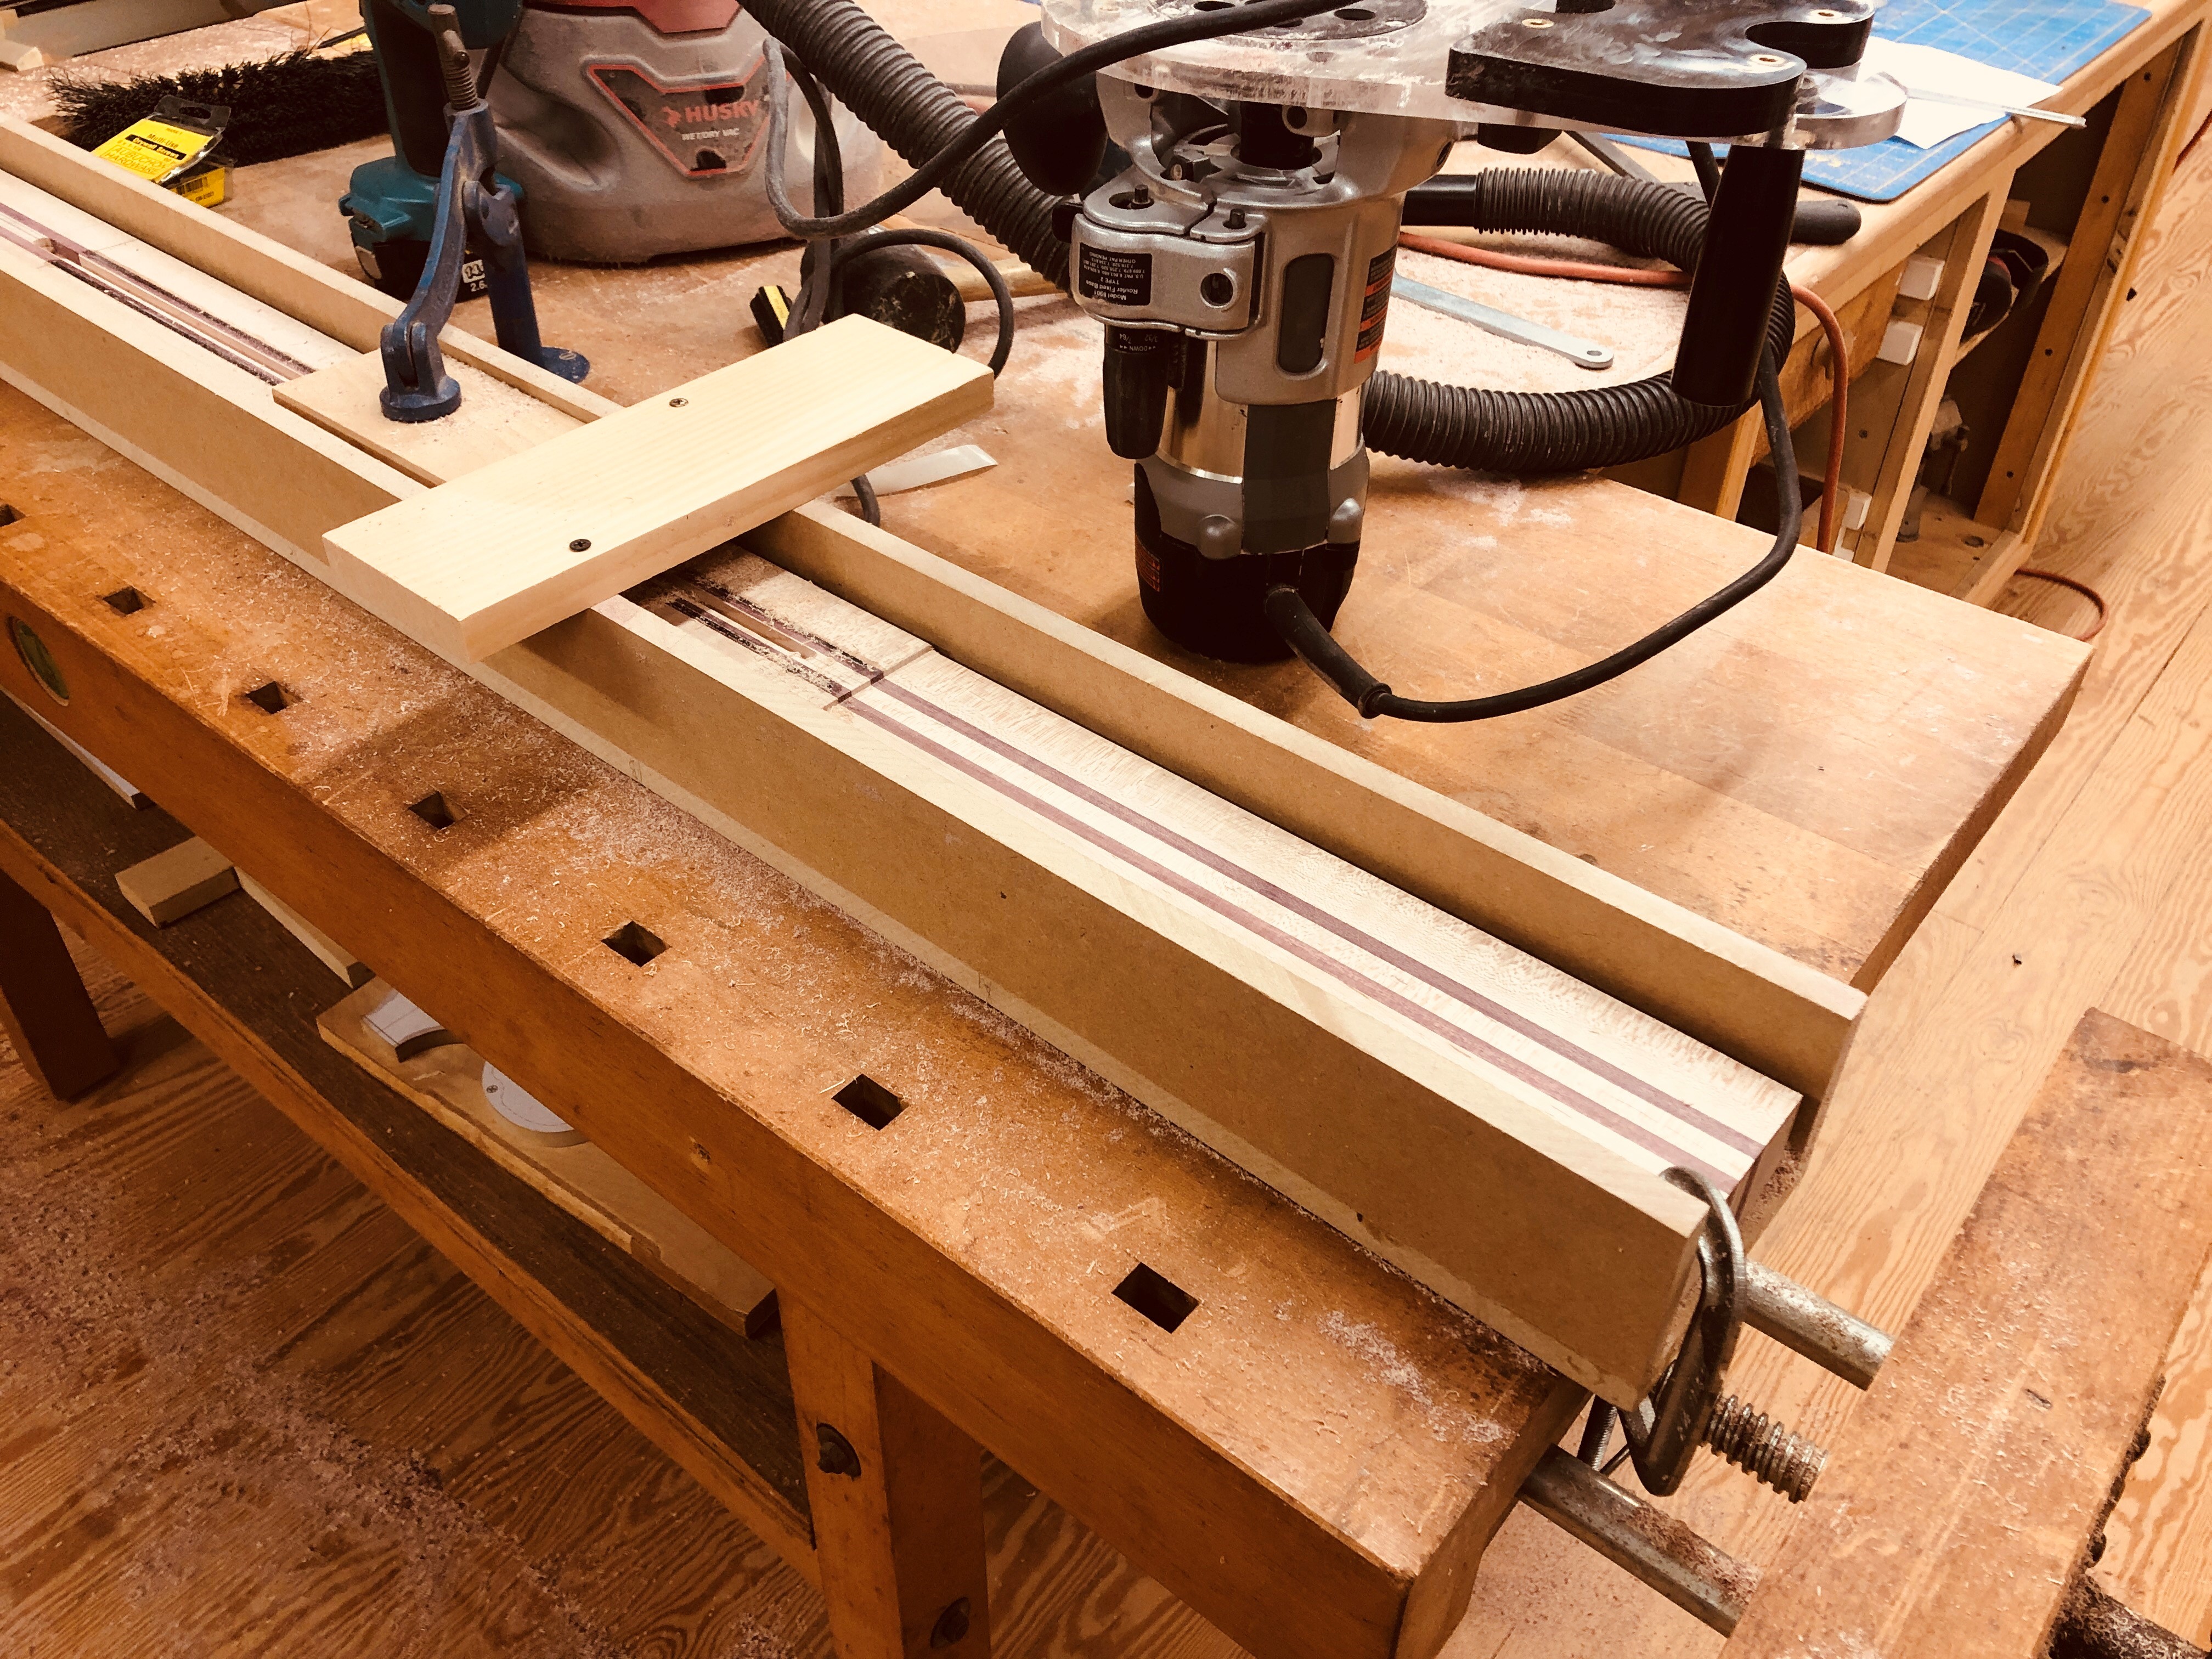
1/8" offset cut at body section of neck beam. That's all the offset I needed to work with he bridge, and no neck angle required.
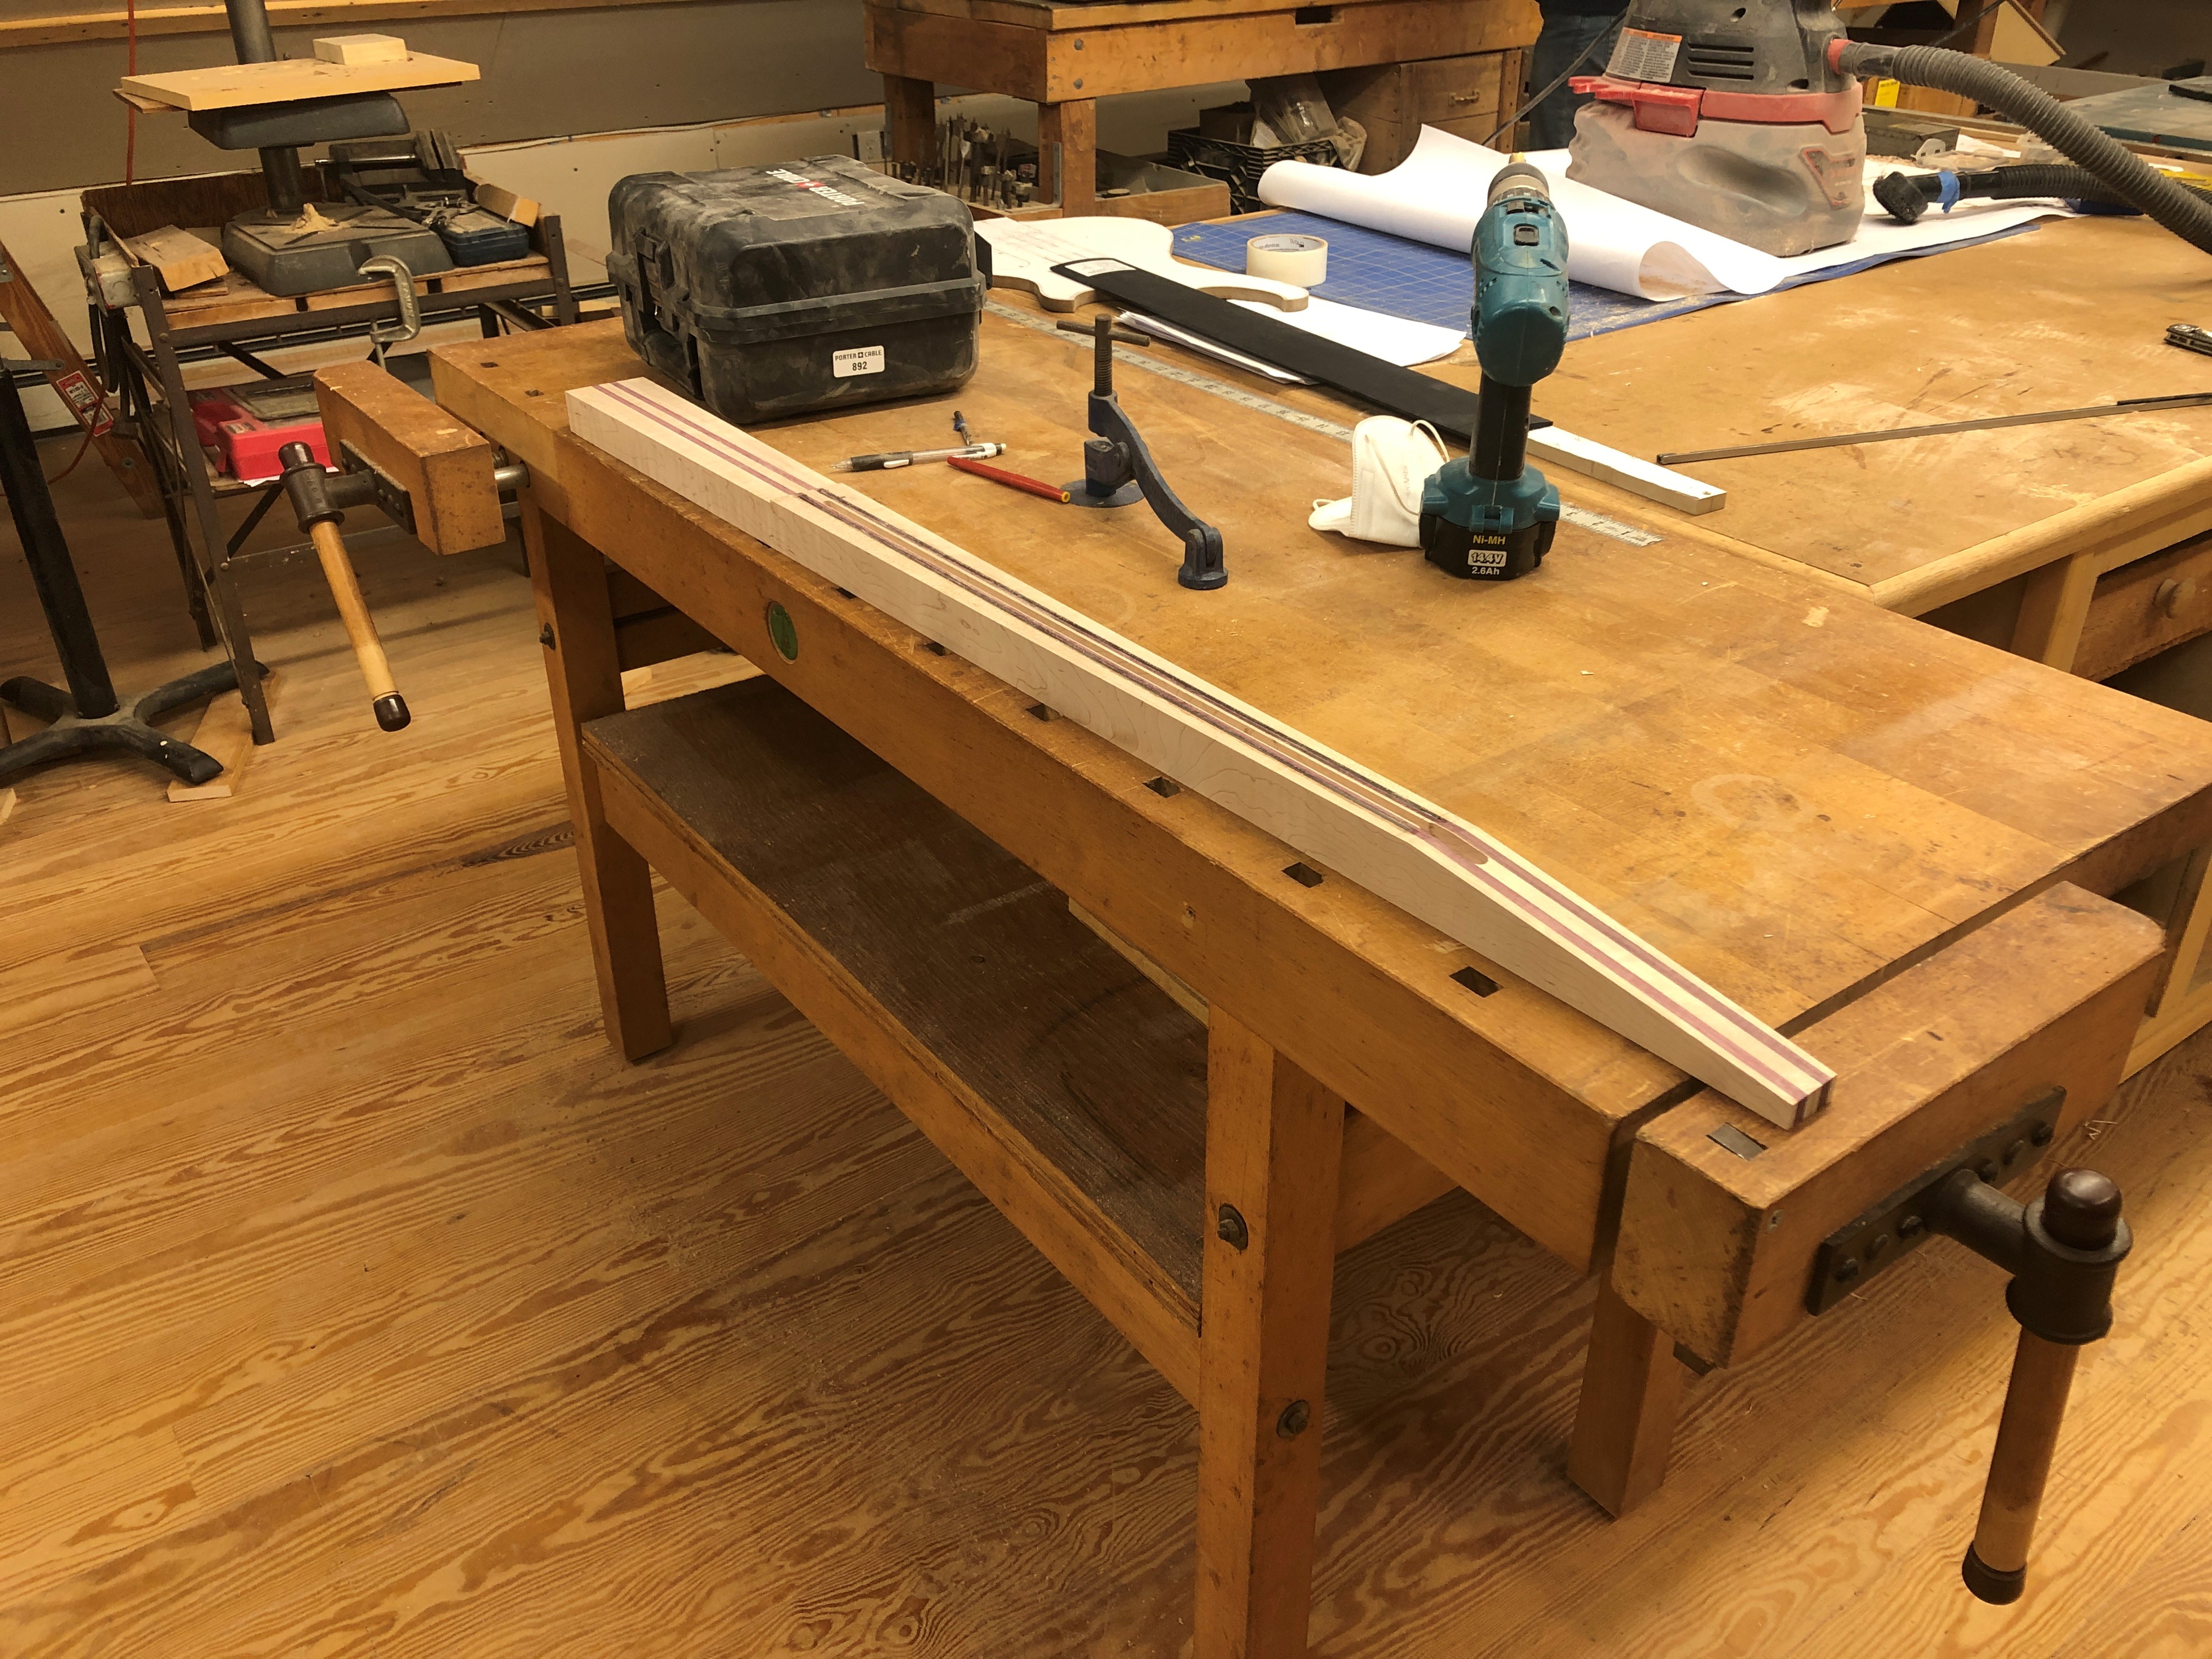
Neck beam machined to taper and 7 degree headstock angle cut
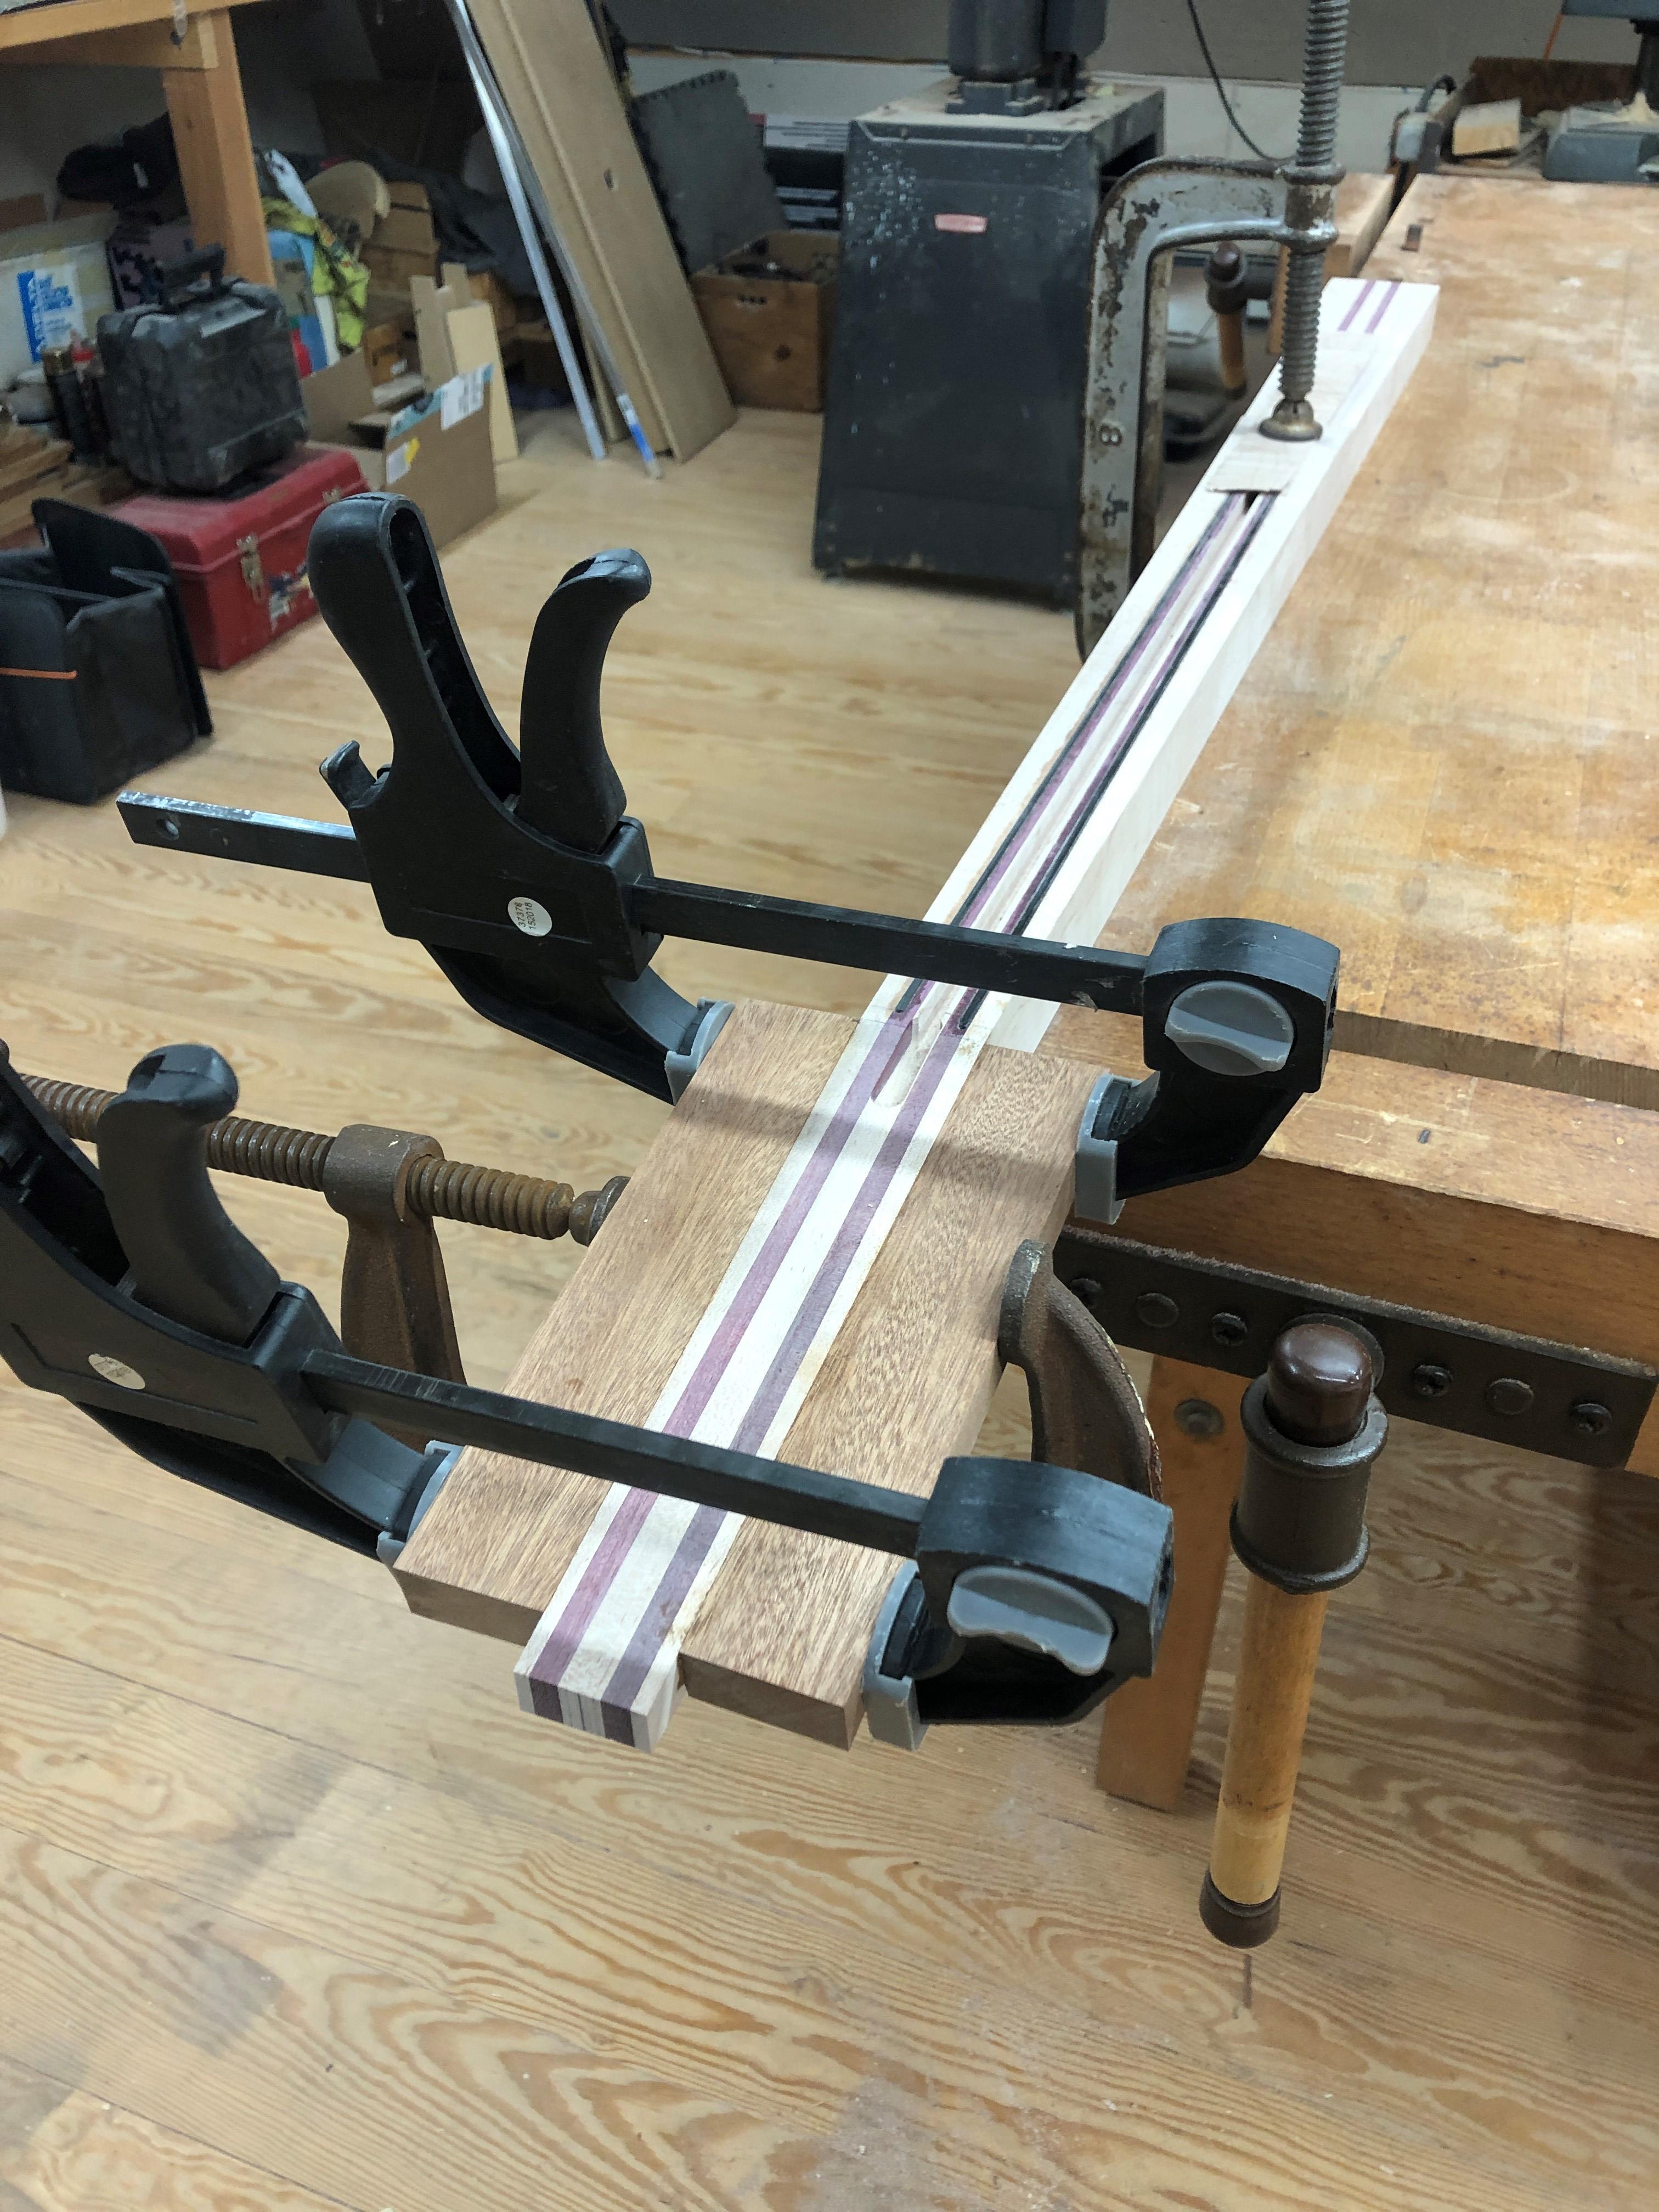
Sapele Mahogany wings glued on. This will all get overlaid with a piece of bookmatch Cocobolo for the headstock cap, with the sapele visible from behind.
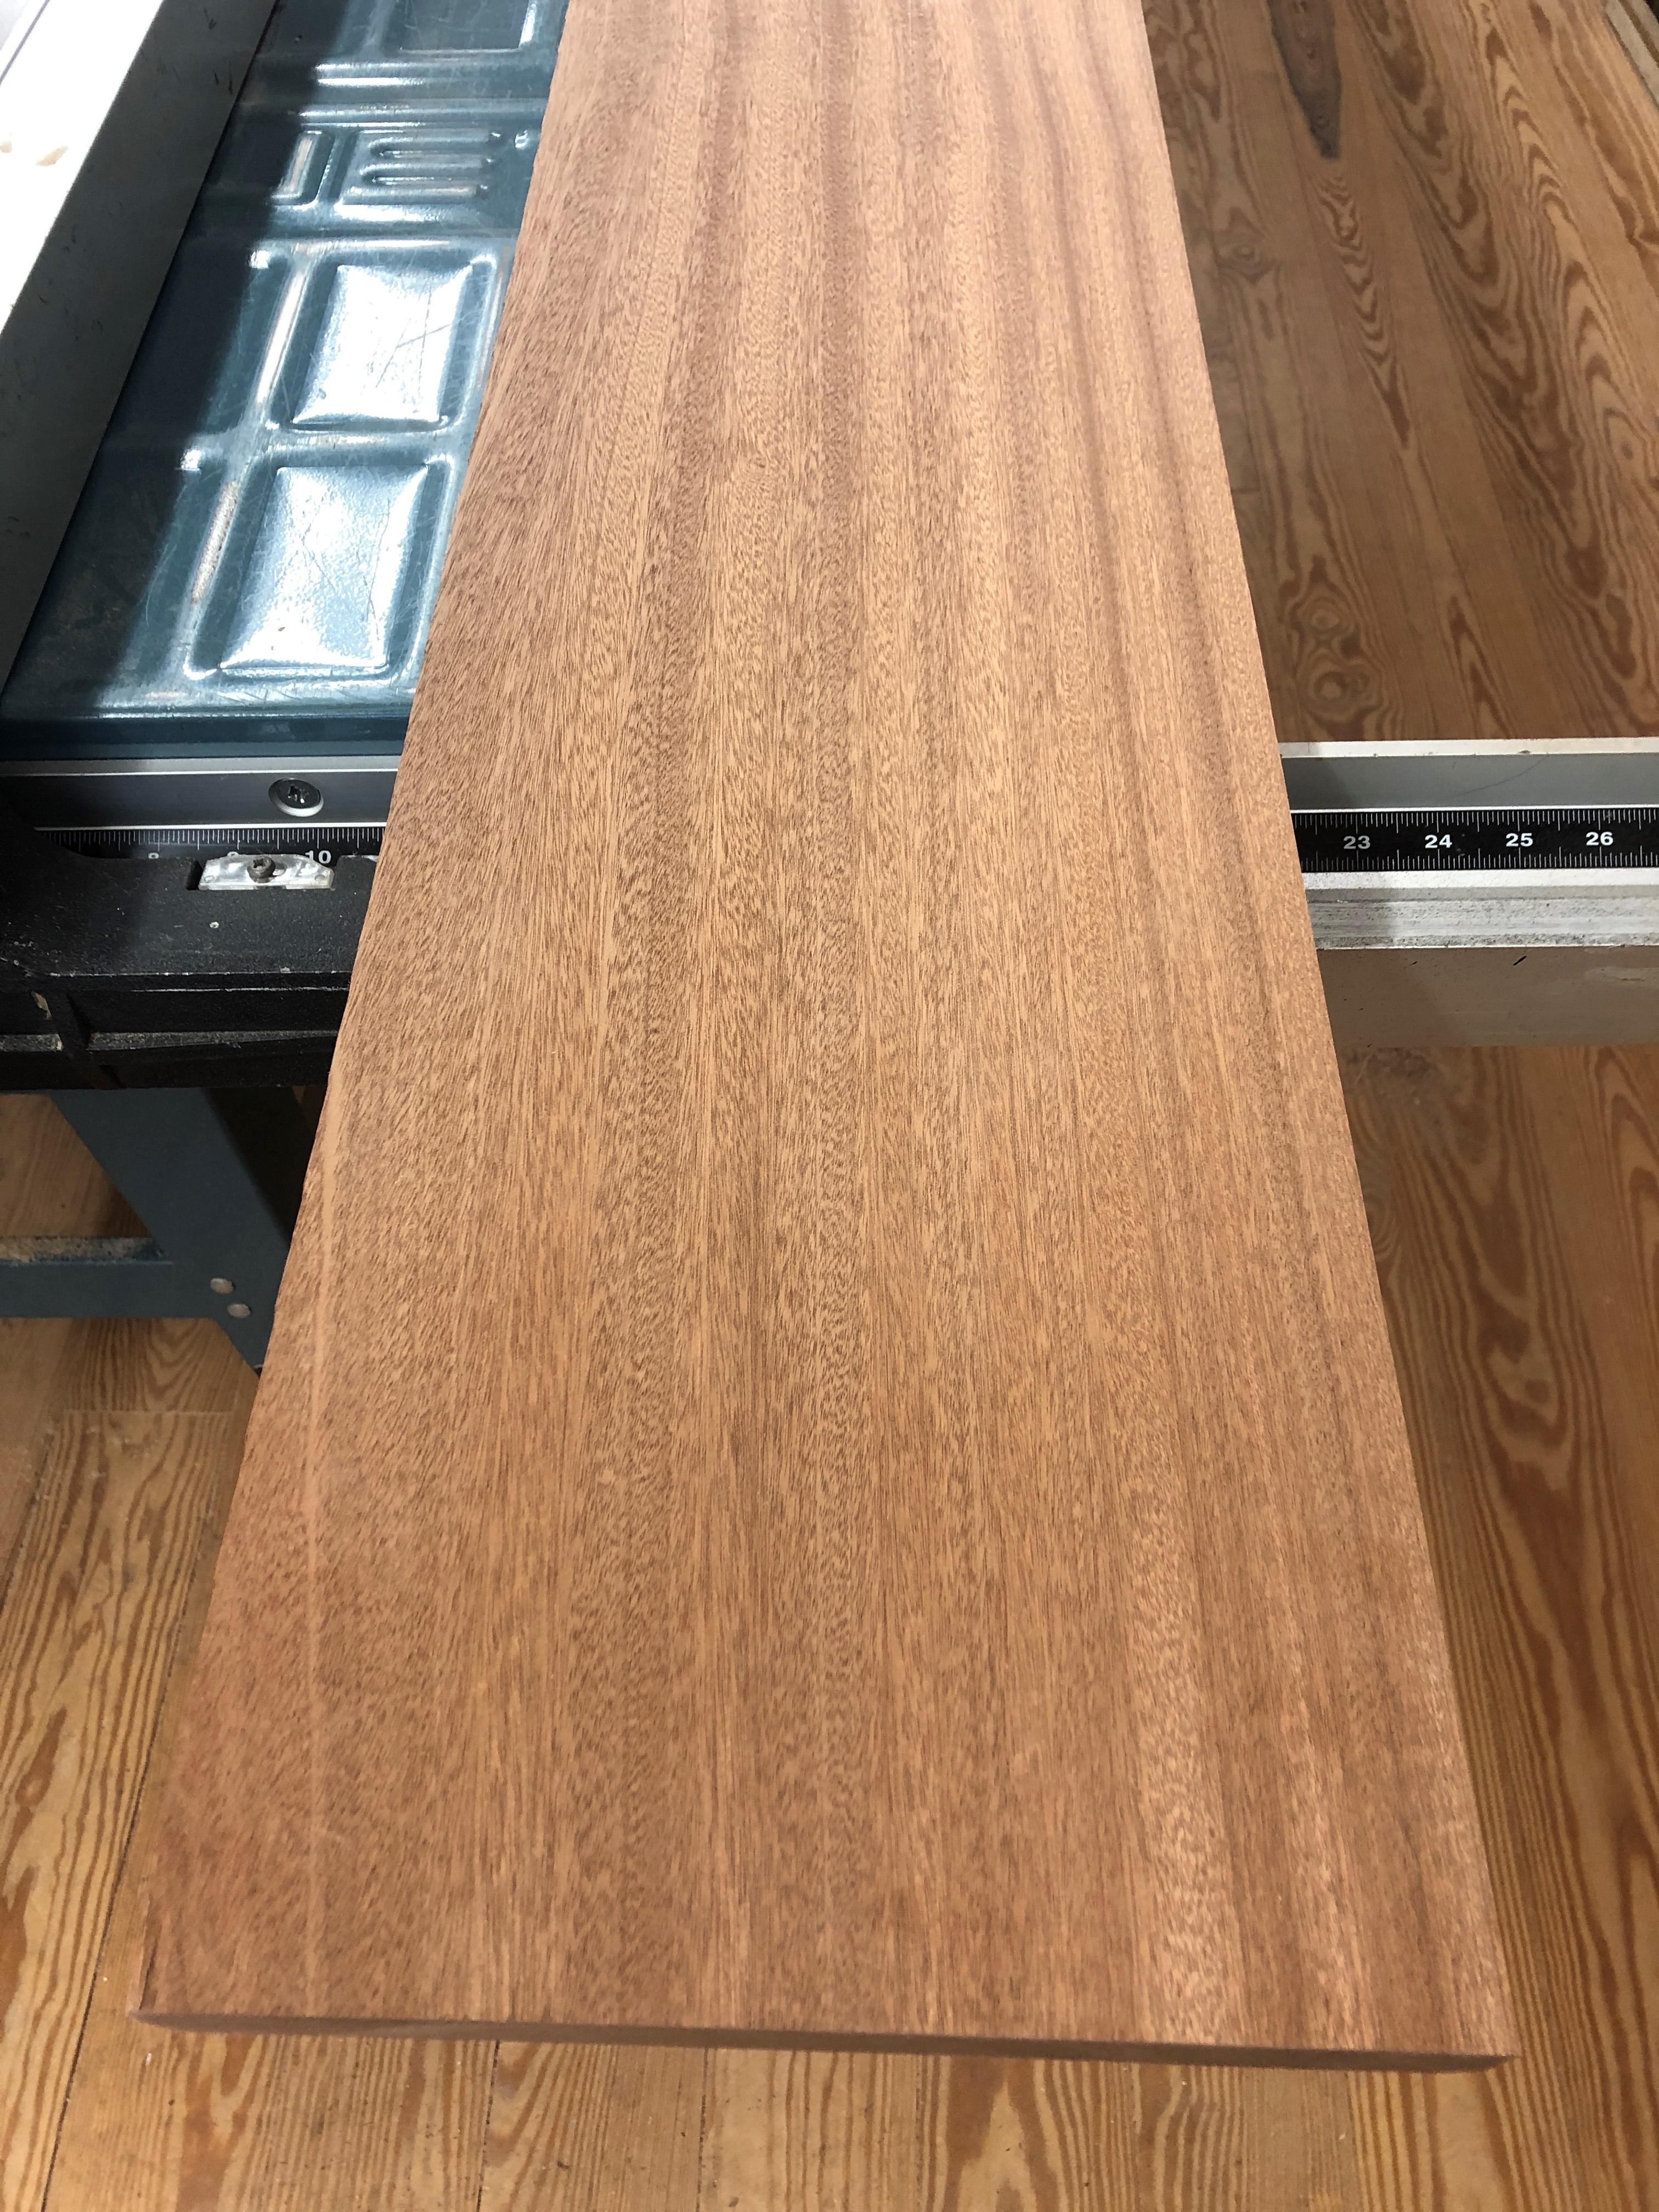
Better shot of the sapele plank that will form the back, not real splashy, but it will pop nicely with some Tru-Oil.
1/8" offset cut at body section of neck beam. That's all the offset I needed to work with he bridge, and no neck angle required.
Neck beam machined to taper and 7 degree headstock angle cut
Sapele Mahogany wings glued on. This will all get overlaid with a piece of bookmatch Cocobolo for the headstock cap, with the sapele visible from behind.
Better shot of the sapele plank that will form the back, not real splashy, but it will pop nicely with some Tru-Oil.
Last edited:
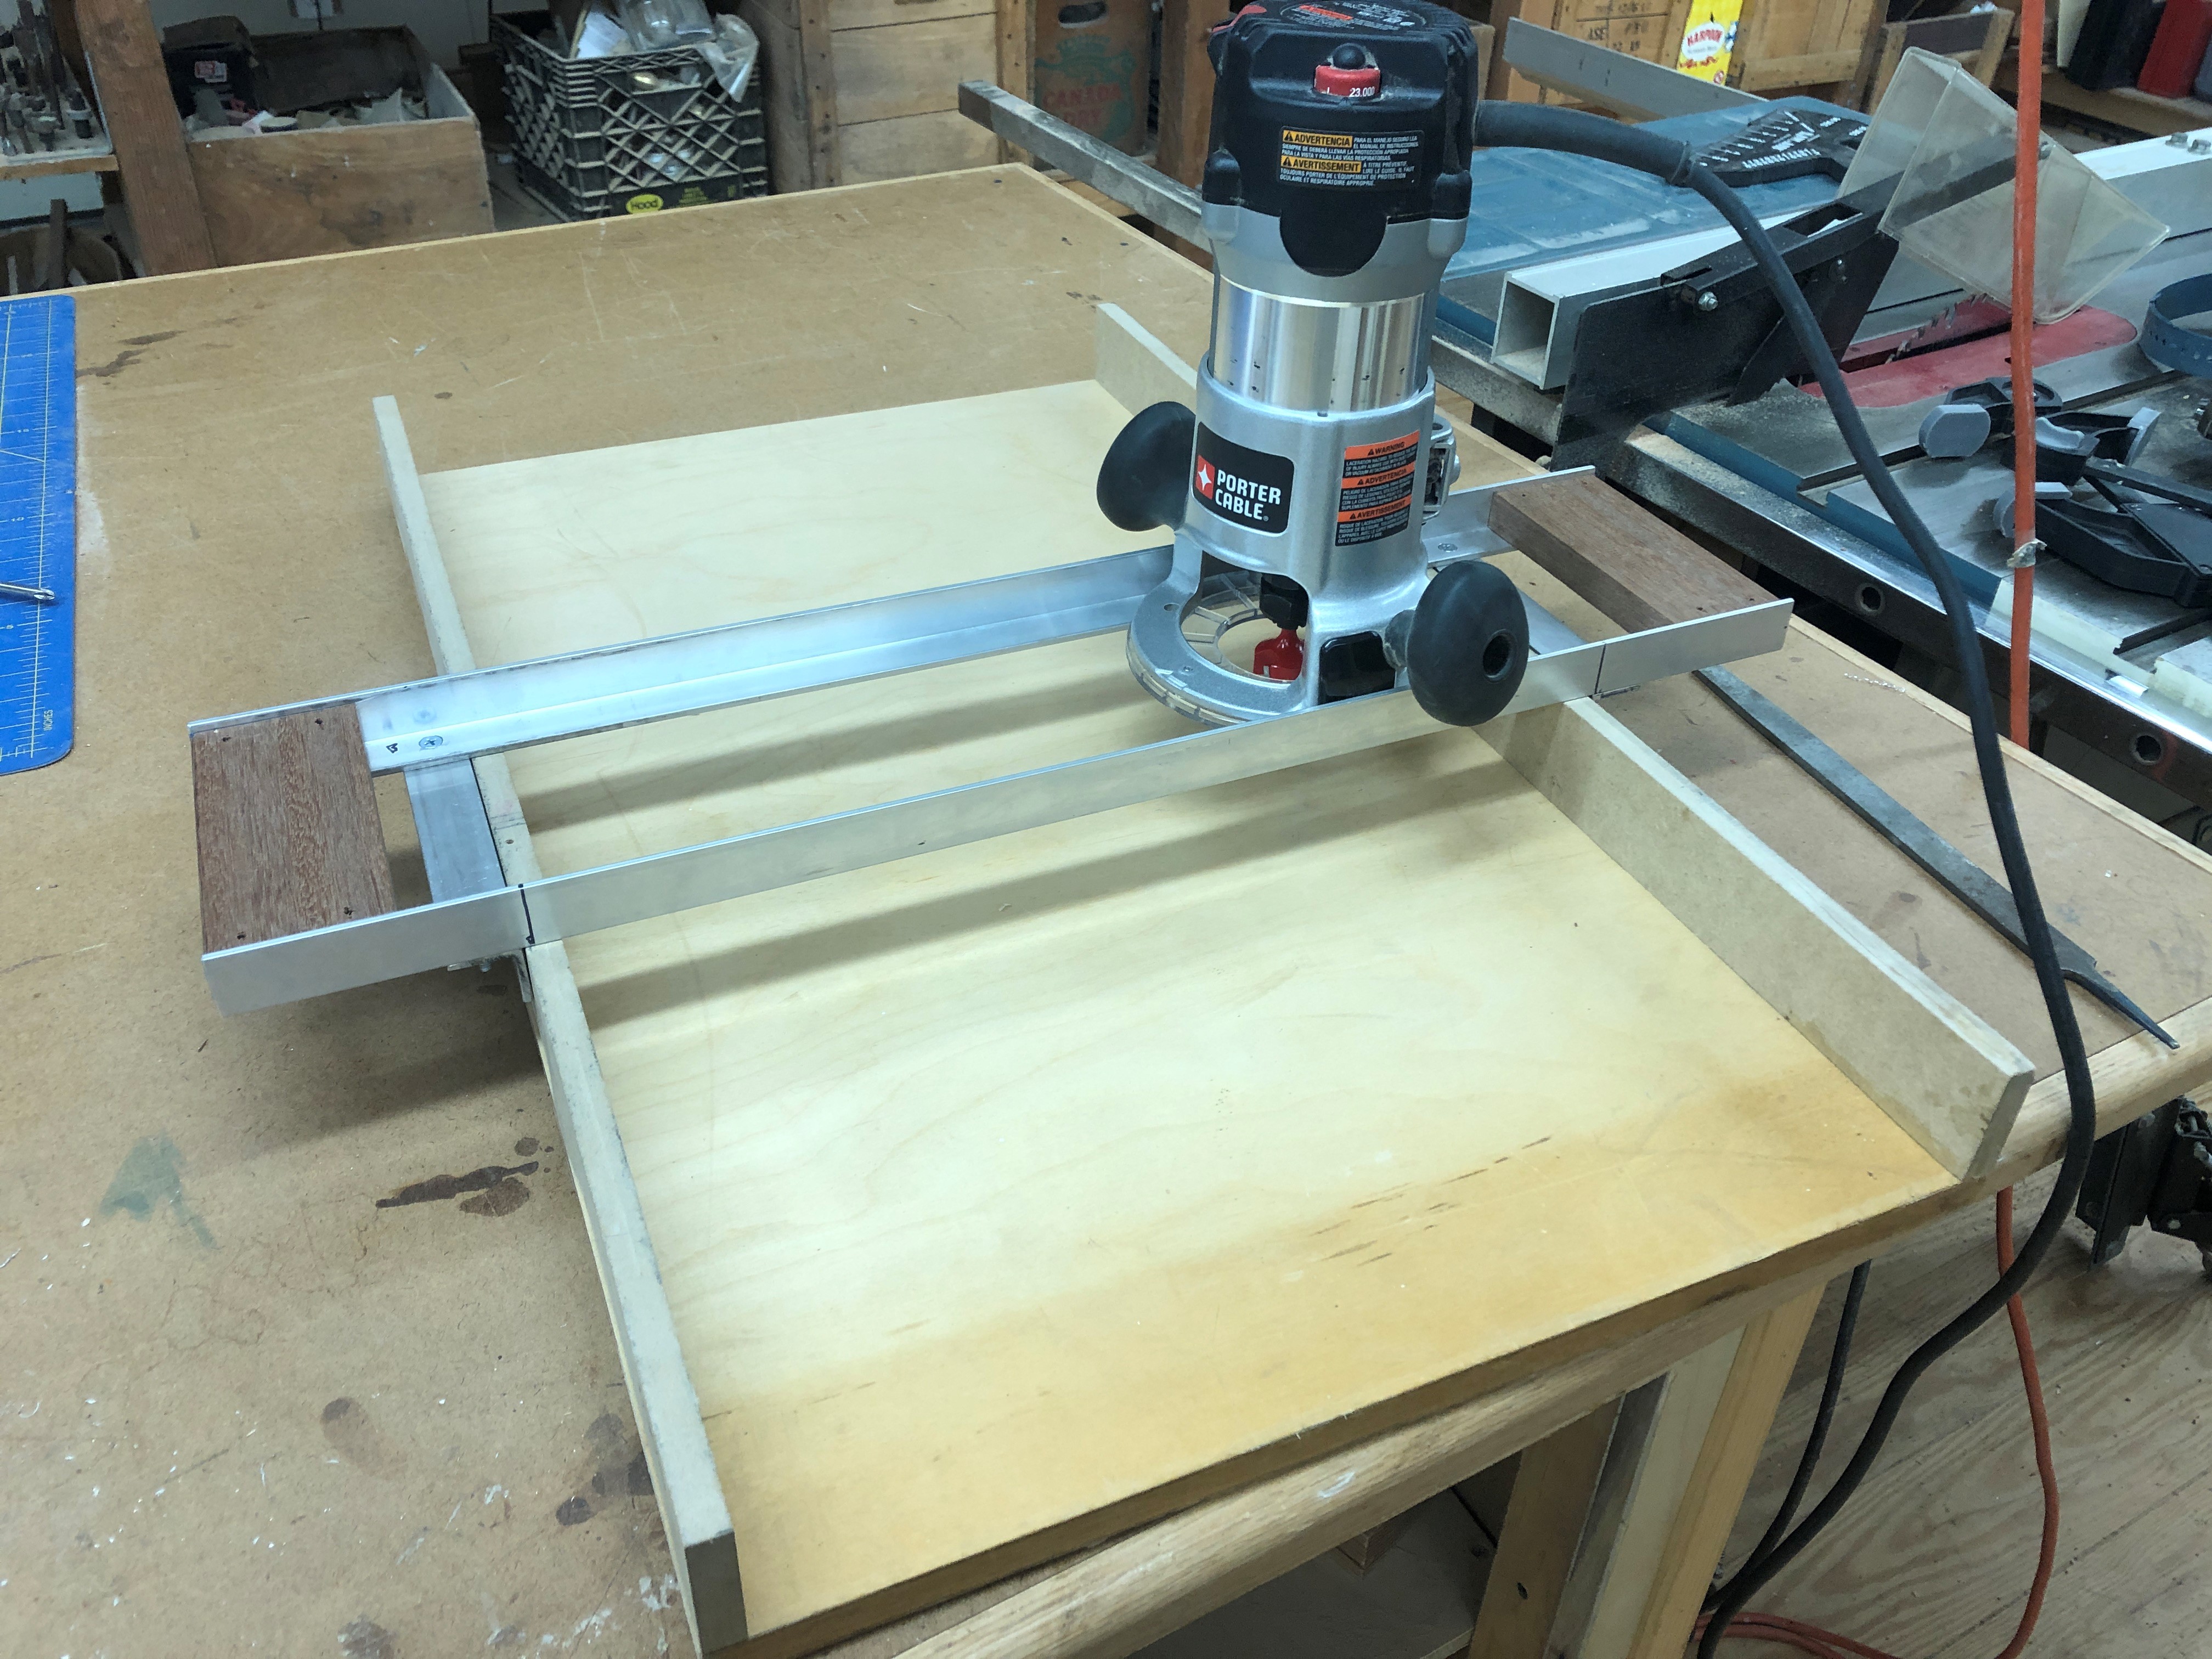
Well, I'ts about time I built a router sled....
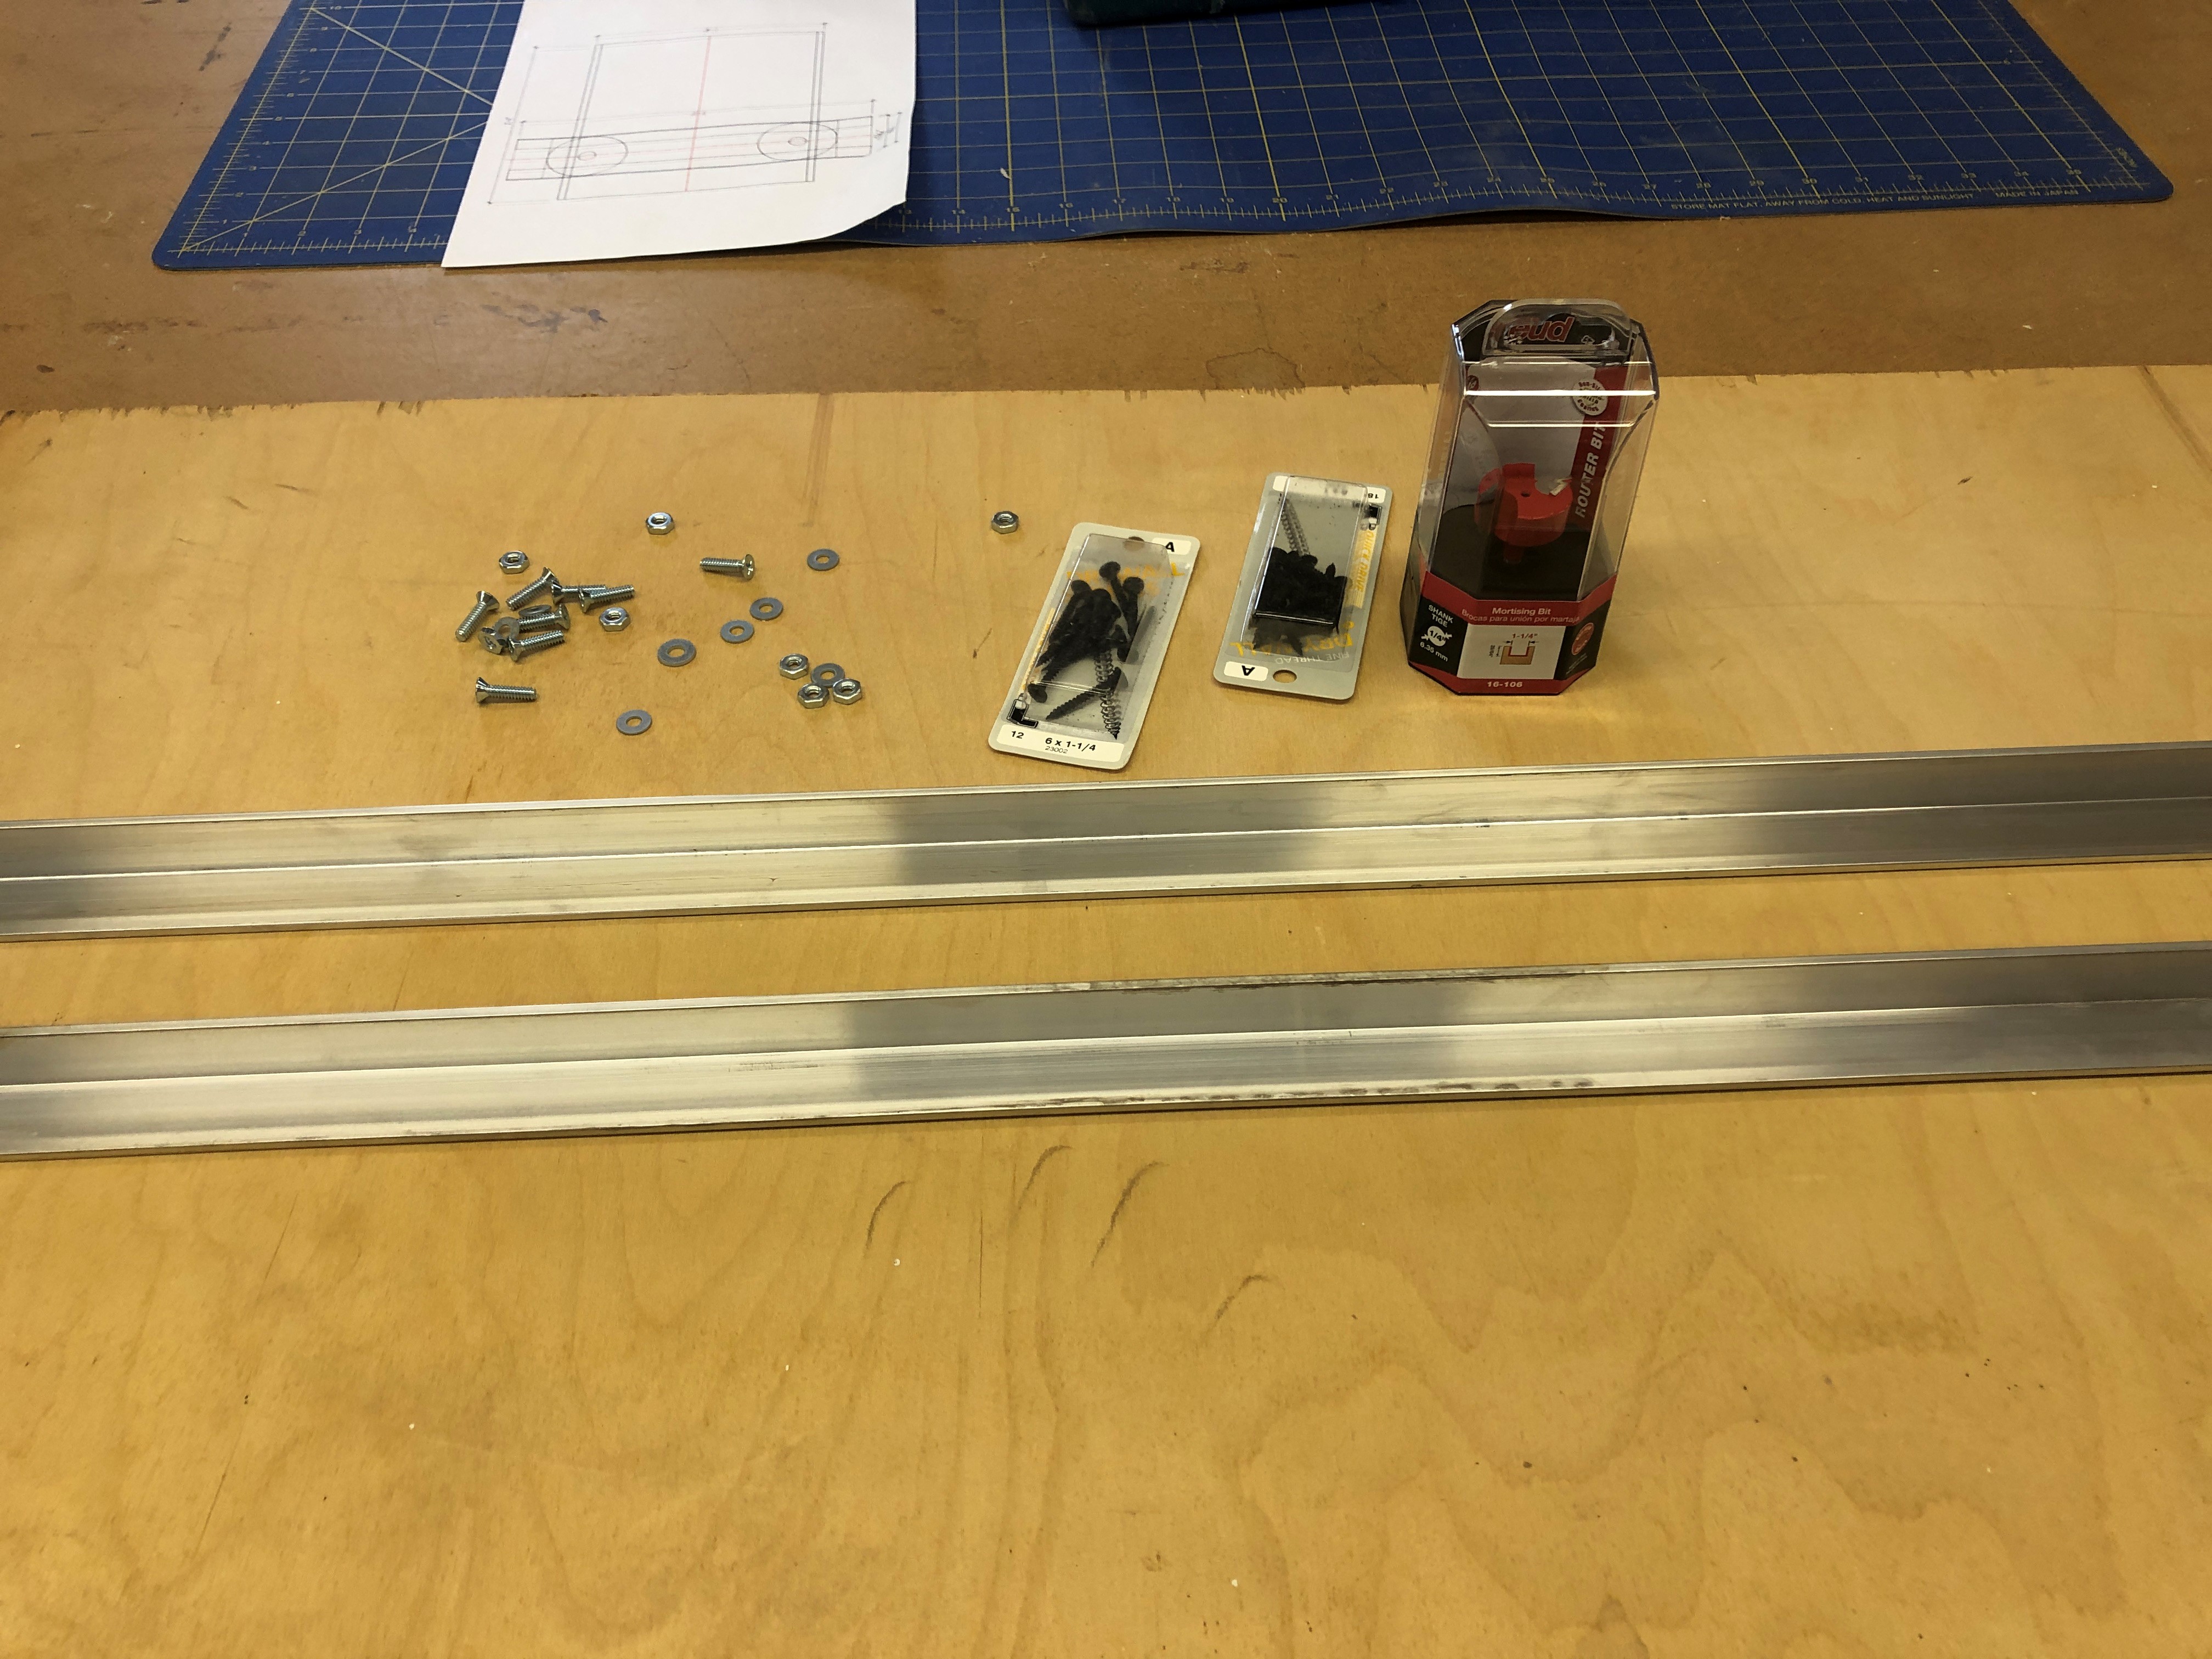
I waxed it all up, runs slick, but the wax seems to wear away quick. Maybe I should get some of that UHMW tape and put it on the rails?
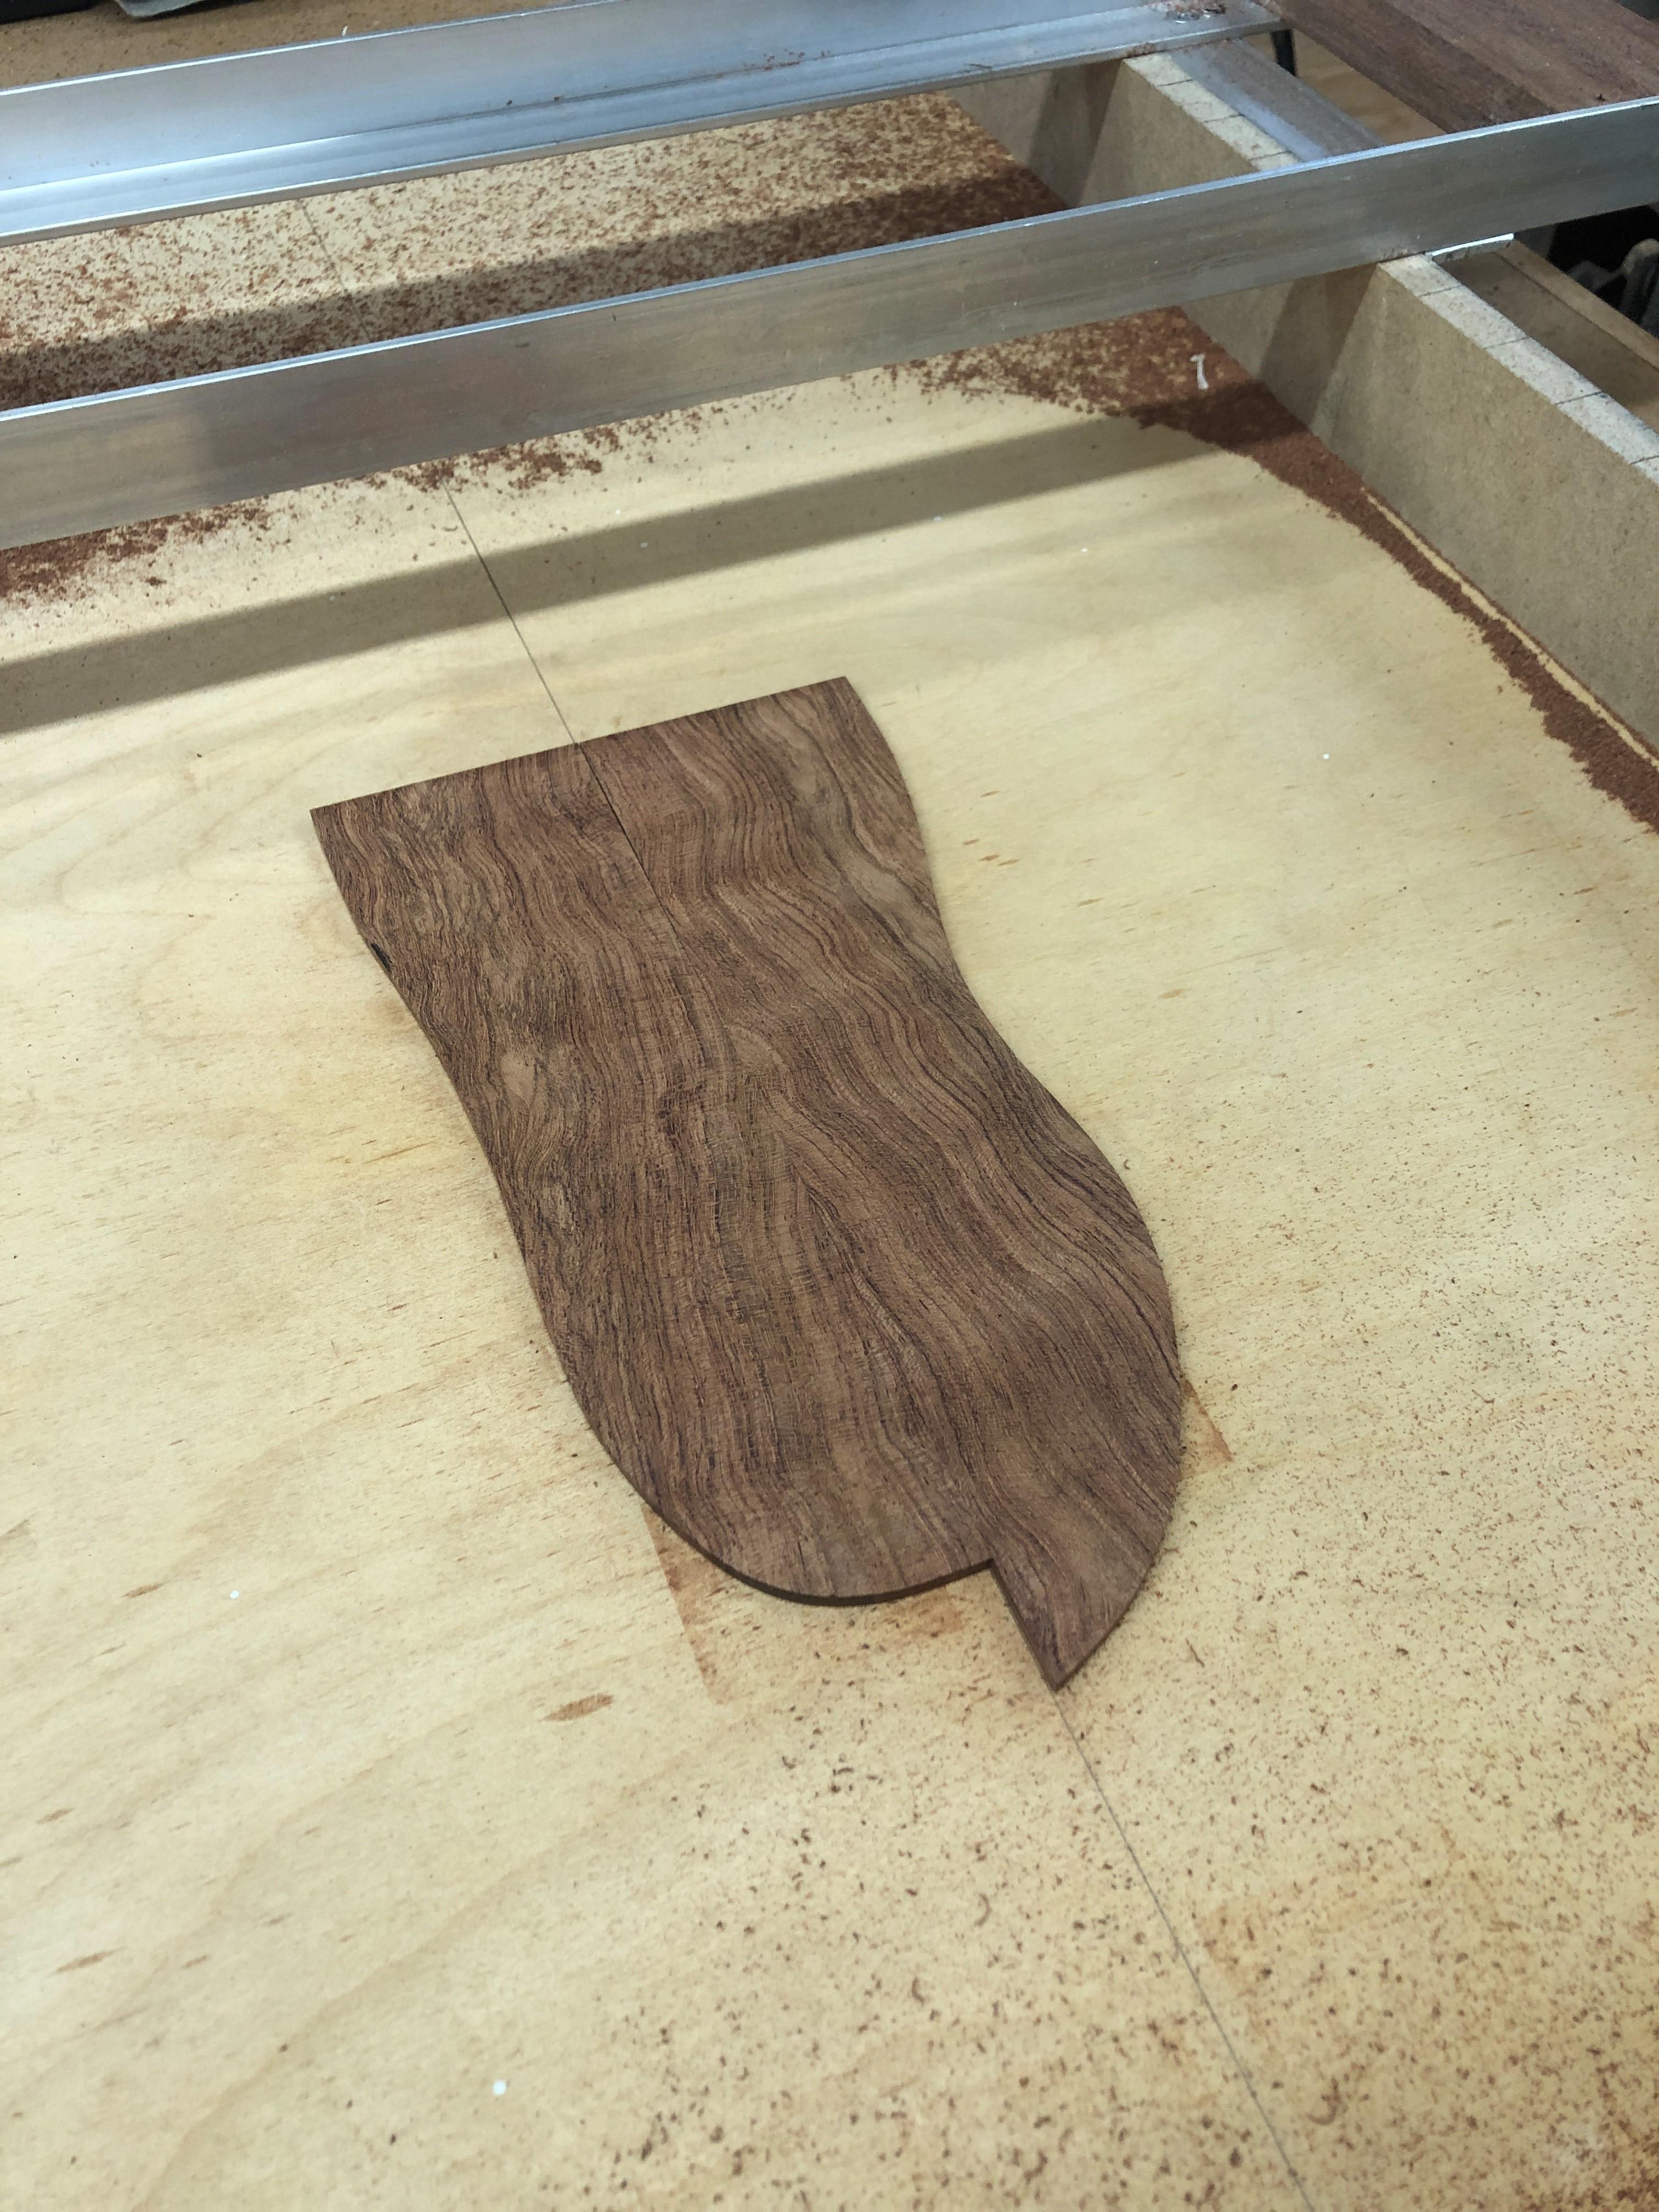
No way I could have planed this figured cocobolo headstock cap in my planer, it would have shredded it.

Planed down to 1/8" thickness with no tearout, and smooth as a Baby's Bee-Hind. Huzzah!
I probably could have planed this down in my 12.5" Delta, but you know, new toy and all....
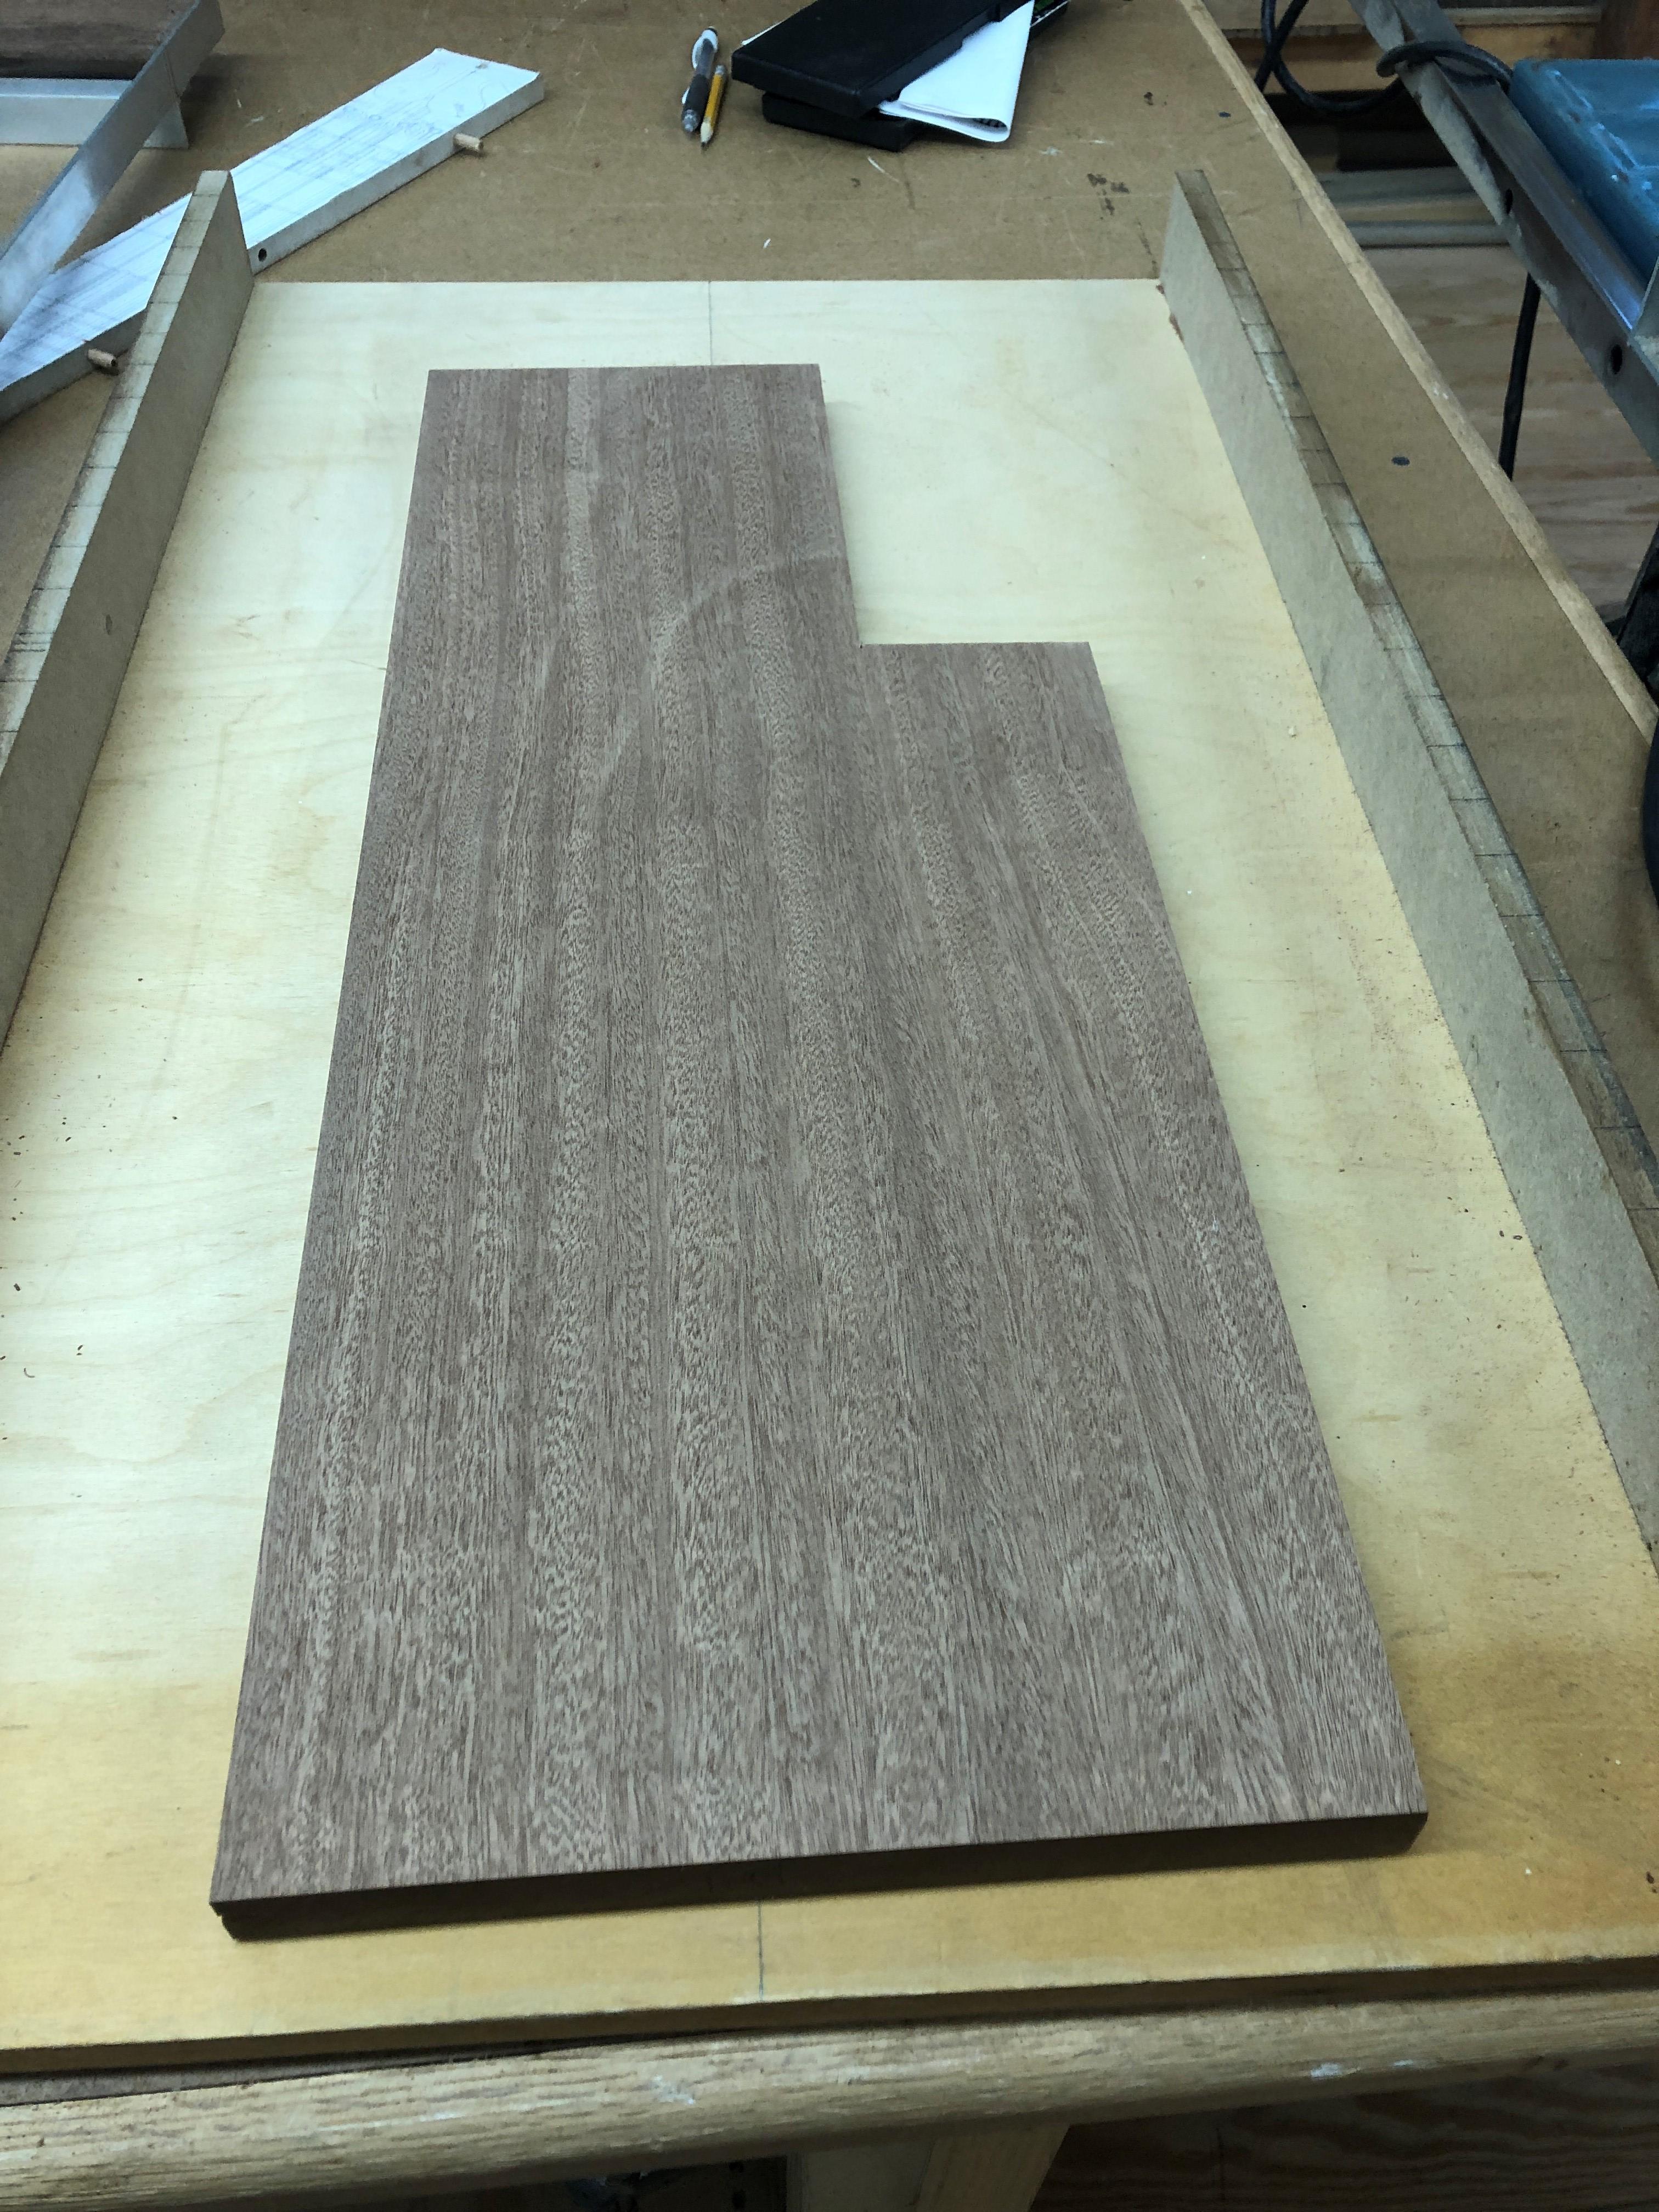
Sapele back laminate planed down to around 7/8" thick, this will get laminated with 1/4" maple and 1/4" cocobolo. Unlike all the YT videos I saw where people run the router perpendicular to grain, I got a much better quality of cut going long dimension, with the grain. Easily as smooth as the planer, one downside though... It makes a hell of a mess! My planer has a dust shroud on it for a shop vac collector, this one just throws shavings all around to about a 3' radius. As expected, I'm mildly allergic to Cocobolo, sneezing and wheezing tonight, my nose feels like a baloon.
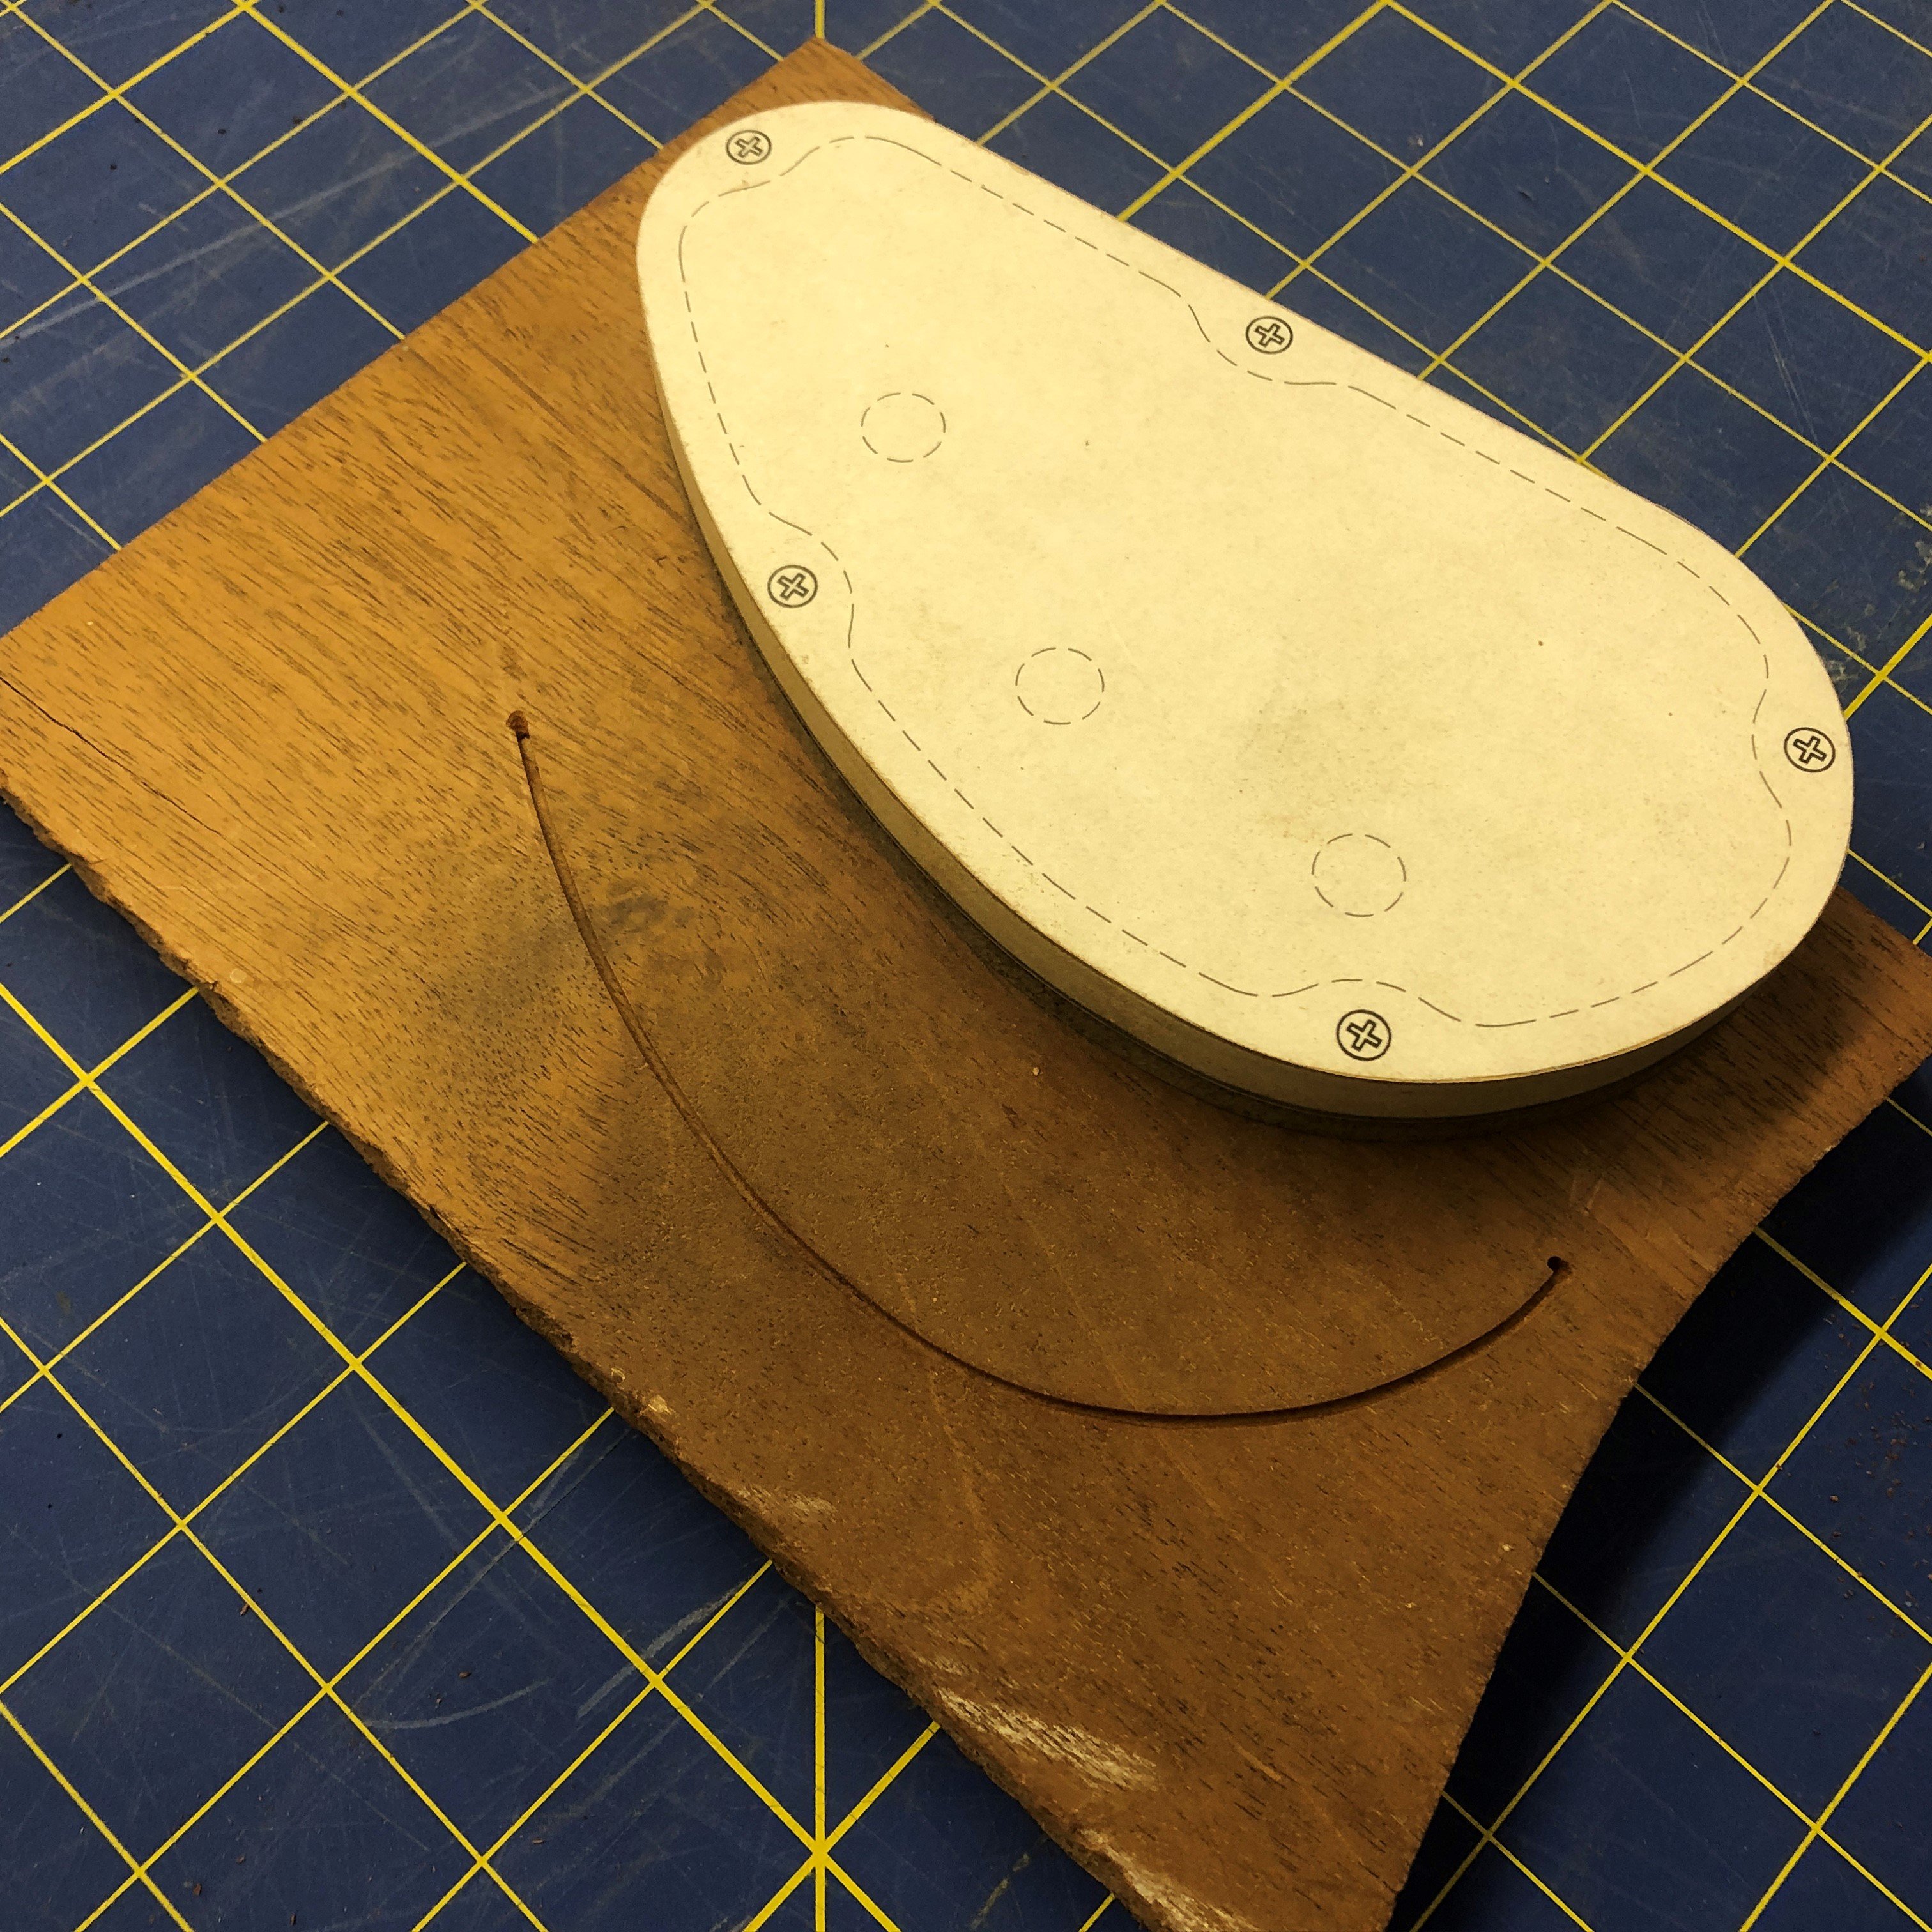
Just for yucks, I tried running a 1/16" dremel bit around my control cavity cover template on some scrap to see if it might work to make a continuous grain cover. The hard part is starting and stopping the cut, it's nearly impossible not to have it leave a wider entry and exit hole. I'm a bit stumped as to how to pull this off cleanly. My sapele back lamination was only 1" thick to start with, so I didn't have any extra thickness to spare, at least not enough to rout an "island" of extra sapele that could be cut away from the plank to use as a cover. If anybody has a trick up their sleeve for this, by all means, weigh in! I'm thinking I may just route all but 3/16" or so from the back and then hand cut the cover out with a coping saw. Not ideal, I never had much luck keeping a straight line with a coping saw, let alone a curved one.
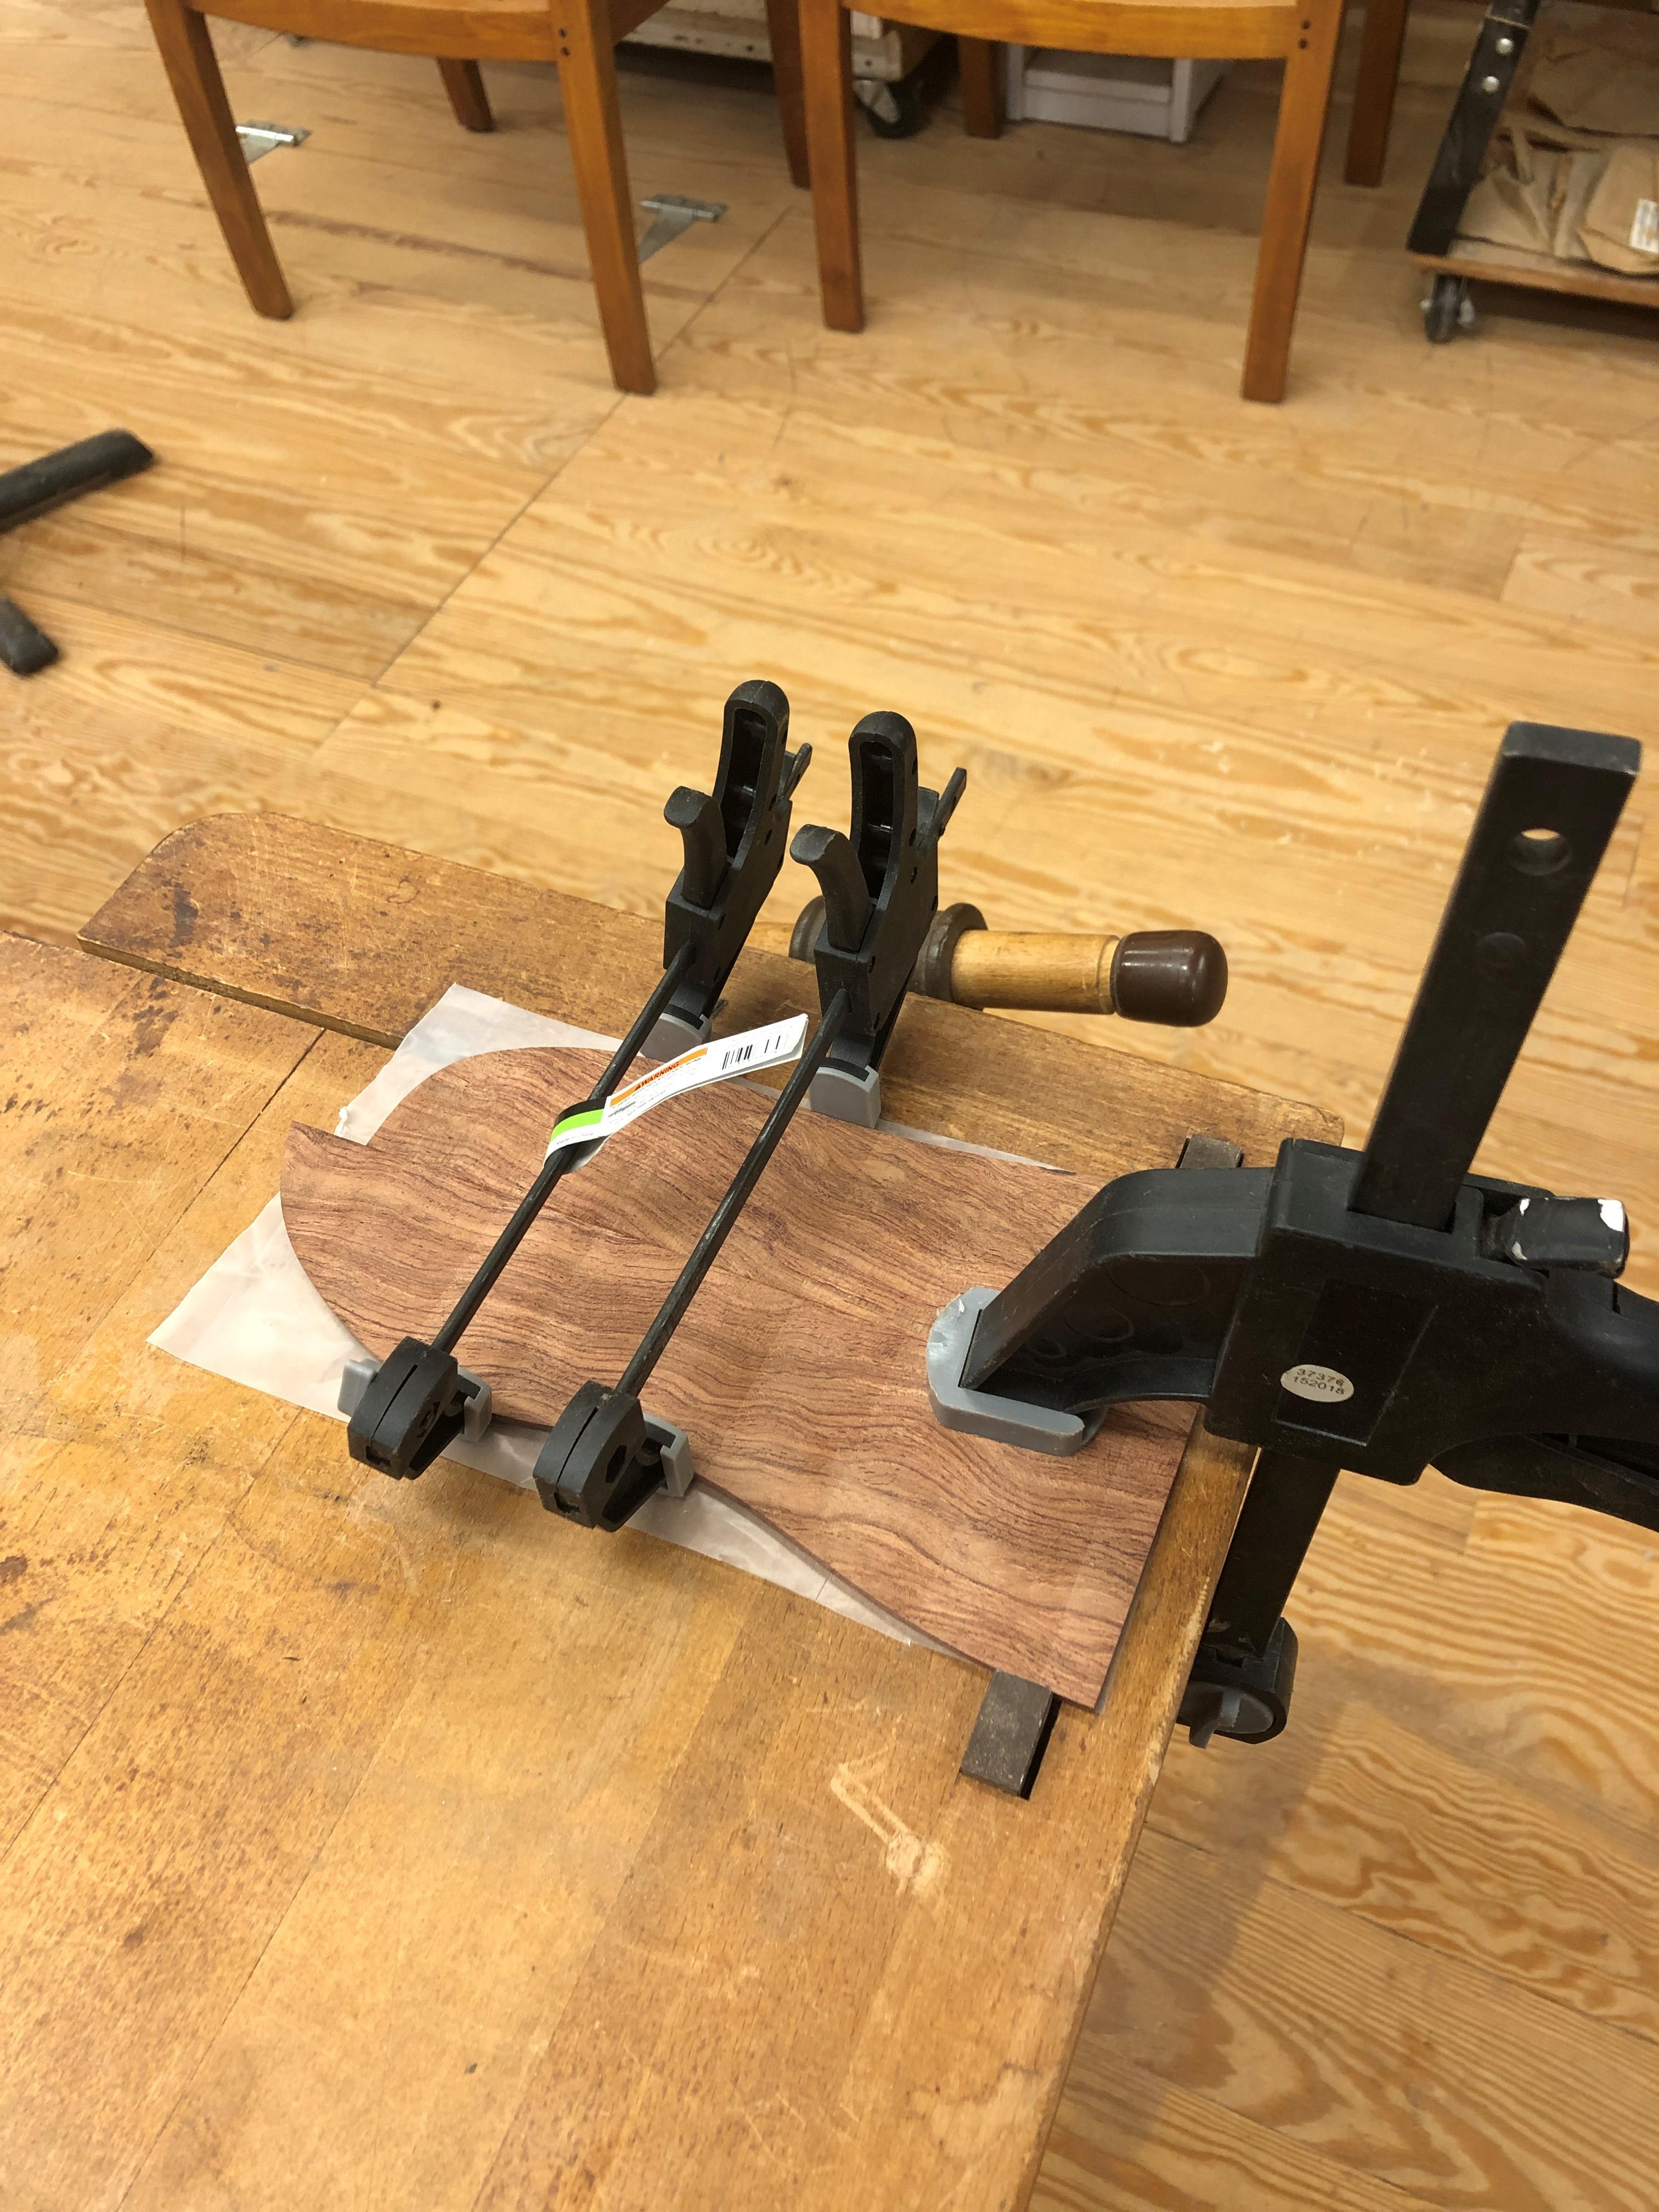
Headstock cap bookmatch. I think (hope) some Tru-Oil will really pop this stuff.
I waxed it all up, runs slick, but the wax seems to wear away quick. Maybe I should get some of that UHMW tape and put it on the rails?
No way I could have planed this figured cocobolo headstock cap in my planer, it would have shredded it.
Planed down to 1/8" thickness with no tearout, and smooth as a Baby's Bee-Hind. Huzzah!
I probably could have planed this down in my 12.5" Delta, but you know, new toy and all....
Sapele back laminate planed down to around 7/8" thick, this will get laminated with 1/4" maple and 1/4" cocobolo. Unlike all the YT videos I saw where people run the router perpendicular to grain, I got a much better quality of cut going long dimension, with the grain. Easily as smooth as the planer, one downside though... It makes a hell of a mess! My planer has a dust shroud on it for a shop vac collector, this one just throws shavings all around to about a 3' radius. As expected, I'm mildly allergic to Cocobolo, sneezing and wheezing tonight, my nose feels like a baloon.
Just for yucks, I tried running a 1/16" dremel bit around my control cavity cover template on some scrap to see if it might work to make a continuous grain cover. The hard part is starting and stopping the cut, it's nearly impossible not to have it leave a wider entry and exit hole. I'm a bit stumped as to how to pull this off cleanly. My sapele back lamination was only 1" thick to start with, so I didn't have any extra thickness to spare, at least not enough to rout an "island" of extra sapele that could be cut away from the plank to use as a cover. If anybody has a trick up their sleeve for this, by all means, weigh in! I'm thinking I may just route all but 3/16" or so from the back and then hand cut the cover out with a coping saw. Not ideal, I never had much luck keeping a straight line with a coping saw, let alone a curved one.
Headstock cap bookmatch. I think (hope) some Tru-Oil will really pop this stuff.
Last edited:
Well, I'ts about time I built a router sled....
View attachment 4169105
I waxed it all up, runs slick, but the wax seems to wear away quick. Maybe I should get some of that UHMW tape and put it on the rails?
View attachment 4169106
No way I could have planed this figured cocobolo headstock cap in my planer, it would have shredded it.
View attachment 4169107
Planed down to 1/8" thickness with no tearout, and smooth as a Baby's Bee-Hind. Huzzah!
View attachment 4169108
I probably could have planed this down in my 12.5" Delta, but you know, new toy and all....
Sapele back laminate planed down to around 7/8" thick, this will get laminated with 1/4" maple and 1/4" cocobolo. Unlike all the YT videos I saw where people run the router perpendicular to grain, I got a much better quality of cut going long dimension, with the grain. Easily as smooth as the planer, one downside though... It makes a hell of a mess! My planer has a dust shroud on it for a shop vac collector, this one just throws shavings all around to about a 3' radius. As expected, I'm mildly allergic to Cocobolo, sneezing and wheezing tonight, my nose feels like a baloon.
View attachment 4169110
Just for yucks, I tried running a 1/16" dremel bit around my control cavity cover template on some scrap to see if it might work to make a continuous grain cover. The hard part is starting and stopping the cut, it's nearly impossible not to have it leave a wider entry and exit hole. I'm a bit stumped as to how to pull this off cleanly. My sapele back lamination was only 1" thick to start with, so I didn't have any extra thickness to spare, at least not enough to rout an "island" of extra sapele that could be cut away from the plank to use as a cover. If anybody has a trick up their sleeve for this, by all means, weigh in! I'm thinking I may just route all but 3/16" or so from the back and then hand cut the cover out with a coping saw. Not ideal, I never had much luck keeping a straight line with a coping saw, let alone a curved one.
View attachment 4169111
Headstock cap bookmatch. I think (hope) some Tru-Oil will really pop this stuff.
View attachment 4169138
Very nice Router sled!
How did you hold down the cocobolo in order to route it? And I agree, routing with the grain seems to work better for me.
With my sled, I just set the hose from my dust collector at the outer reach of the sled, it doesn't pick up everything, but it keeps the dust down and grabs a bunch of the excess dust.

Rôckhewer
Commercial User
- Feb 28, 2015
- 2,922
- 9,028
- Disclosures
- Owner/Builder- RockHewer Custom Guitars LLC
Try lighly cutting around the template with a scalpel first. It may help the saw blade follow the path of least resistance.hand cut the cover out with a coping saw. Not ideal, I never had much luck keeping a straight line with a coping saw, let alone a curved one
Or... at least give you a nice sharp line to follow.


