

Enjoy the benefits of a premium membership!
Upgrade Account
-
TalkBass has been independent since 1998. Add your voice.
Create a free account to reply to discussions, view embedded media, and browse with fewer display ads.
Join free Log in
Want zero display ads or expanded classifieds tools? Compare plans.
You are using an out of date browser. It may not display this or other websites correctly.
You should upgrade or use an alternative browser.
You should upgrade or use an alternative browser.
The Hossenfeffer III Build
- Thread starter Gilmourisgod
- Start date
More options
Who Replied?

I didn't get involved in the headstock design discussion, but seeing it as a whole, it works great with the body. The perfect mix between Alembic and BC Rich . Happy sanding!
. Happy sanding!
- Apr 18, 2008
- 16,011
- 1
- 31,719
- Disclosures
- I'm highly opinionated and extremely self-assured



just be glad I didn't attempt to postulate that my Jiggedy-Jig was Wigeddy-Wack.^^^ Literally made me

I almost forgot, I have to drill control knob and output jack holes before sanding. I'm using a barrel-jack on this one because it's too deep for a little switchcraft. I figure on using a large Forstner bit to recess the jack head a bit, then a smaller one to drill through. I've done this free-hand before and gotten away with it, but short of owning a Shop-Smith which can be set up to side-bore it, is there a better way to do that? Some kind of Jigeddy?

I didn't have the body wing attached yet but I'm sure there is a way to set up a completed neck through.I almost forgot, I have to drill control knob and output jack holes before sanding. I'm using a barrel-jack on this one because it's too deep for a little switchcraft. I figure on using a large Forstner bit to recess the jack head a bit, then a smaller one to drill through. I've done this free-hand before and gotten away with it, but short of owning a Shop-Smith which can be set up to side-bore it, is there a better way to do that? Some kind of Jigeddy?
just be glad I didn't attempt to postulate that my Jiggedy-Jig was Wigeddy-Wack.
Word, the ShopSmith horizontal boring function is dope, yo.I didn't have the body wing attached yet but I'm sure there is a way to set up a completed neck through.View attachment 4584325


See, that's what I SHOULD have done, would have been easy before the wings were glued on! I've made a bunch of small, non-fatal PITA sequencing errors on this one, symptomatic of my extremely low bass output. I learn stuff the hard way and then forget it in the two-year gap between builds. After I spent hours polishing up the frets, I discovered that the last few weeks of dry weather have shrunk the neck a hair, so now I have to re-file the fret ends, polish, etc, all of which should have been noticed and dealt with BEFORE leveling and polishing the frets. Sigh. Learn and Re-Learn, apparently.I didn't have the body wing attached yet but I'm sure there is a way to set up a completed neck through.View attachment 4584325
Attachments

- Apr 18, 2008
- 16,011
- 1
- 31,719
- Disclosures
- I'm highly opinionated and extremely self-assured
Live and Learn.
Then Forget.
Then Live some more, and Learn again.
Rinse & Repeat!
Then Forget.
Then Live some more, and Learn again.
Rinse & Repeat!

Yeah, I don't learn good.
I have a drill press (that's not fully set up yet) but I elected to drill my barrel jack hole by hand. I did the same thing: Forstner bit to recess, then regular bit.
The problems I encountered were: cheap HF Forstner bits that required me pushing too hard to get them to cut. Which is asking for a disaster. The sides were clean, but the inner ledge that the flange of the jack sits on was tore up. And I used a brand new, sharp, general purpose half inch bit to drill the rest of the hole, which either wanted to grab the work and throw it across the room, or rip all the material out, rather than cut it cleanly. I ended up using a smaller bit, then going as deep as I could with the step bit and finishing it with the big round file. I spent too much time on it. Luckily I had enough depth that I could go deeper with the forstner and get a better ledge and then use an O ring.
What I should've done was wait until I had a quality Forstner bit and done it all while clamped in the drill press. Or at least clamped it to the bench and made a guide for the bit.
So, my pro tip is, don't do it like I did. Use good Forstner bits and if you can't get it in the press, clamp it down and make a guide.
I have a drill press (that's not fully set up yet) but I elected to drill my barrel jack hole by hand. I did the same thing: Forstner bit to recess, then regular bit.
The problems I encountered were: cheap HF Forstner bits that required me pushing too hard to get them to cut. Which is asking for a disaster. The sides were clean, but the inner ledge that the flange of the jack sits on was tore up. And I used a brand new, sharp, general purpose half inch bit to drill the rest of the hole, which either wanted to grab the work and throw it across the room, or rip all the material out, rather than cut it cleanly. I ended up using a smaller bit, then going as deep as I could with the step bit and finishing it with the big round file. I spent too much time on it. Luckily I had enough depth that I could go deeper with the forstner and get a better ledge and then use an O ring.
What I should've done was wait until I had a quality Forstner bit and done it all while clamped in the drill press. Or at least clamped it to the bench and made a guide for the bit.
So, my pro tip is, don't do it like I did. Use good Forstner bits and if you can't get it in the press, clamp it down and make a guide.
Last edited:
Ok, sanded, sanded, and then…. Sanded some more. Been away last two weekends, so no new photos, but lots of groveling for advice. After the requisite Gilmour agonizing for weeks, I have decided on a (partial) finish, starting with Zpoxy as s grain filler. I’ve read about everything I can find on how to finish cocobolo, the common thread being the need to remove the natural oils with either Naptha, denatured alcohol, or acetone (which one?) immediately prior to applying at least 2-3 coats of dewaxed shellac to seal in that oil. The question being, does the shellac go on before or after the Zpoxy? I can see rationale for both, but I’m guessing shellac first?
As to top coat, opinions online vary as to interaction or lack of adhesion for any oil based finish like Tru Oil, tung oil, or poly over cocobolo, with or without shellac sealer. Some builders recommend a water based wipe on poly like Minwax Oil Modified Wipe On Poly, because it won’t (??) react negatively with any cocobolo juice that seeps through the shellac, no idea if this is true. Suggestions please!
A lot of wood turners do CA finish on cocobolo, though I’m a bit wary of the fumes.
The goal is a grain filled high-gloss Alembic style finish without resort to some poisonous 2k polyester nightmare, but if that’s what it takes…..
As to top coat, opinions online vary as to interaction or lack of adhesion for any oil based finish like Tru Oil, tung oil, or poly over cocobolo, with or without shellac sealer. Some builders recommend a water based wipe on poly like Minwax Oil Modified Wipe On Poly, because it won’t (??) react negatively with any cocobolo juice that seeps through the shellac, no idea if this is true. Suggestions please!
A lot of wood turners do CA finish on cocobolo, though I’m a bit wary of the fumes.
The goal is a grain filled high-gloss Alembic style finish without resort to some poisonous 2k polyester nightmare, but if that’s what it takes…..
I had a couple offcuts from the cocobolo top, mostly heartwood with flaws, so no great loss. I tried the Zpoxy pore fill, one side straight onto wood, the other a coat of Zpoxy over a shellac sealer coat. I was worried about the cocobolo orangey oils contaminating the maple, but didn't see any evidence of it, and no obvious adhesion problems over shellac. I decided to go straight onto the bass with Zpoxy wih no sealer coat, might have been a mistake as you will soon see.
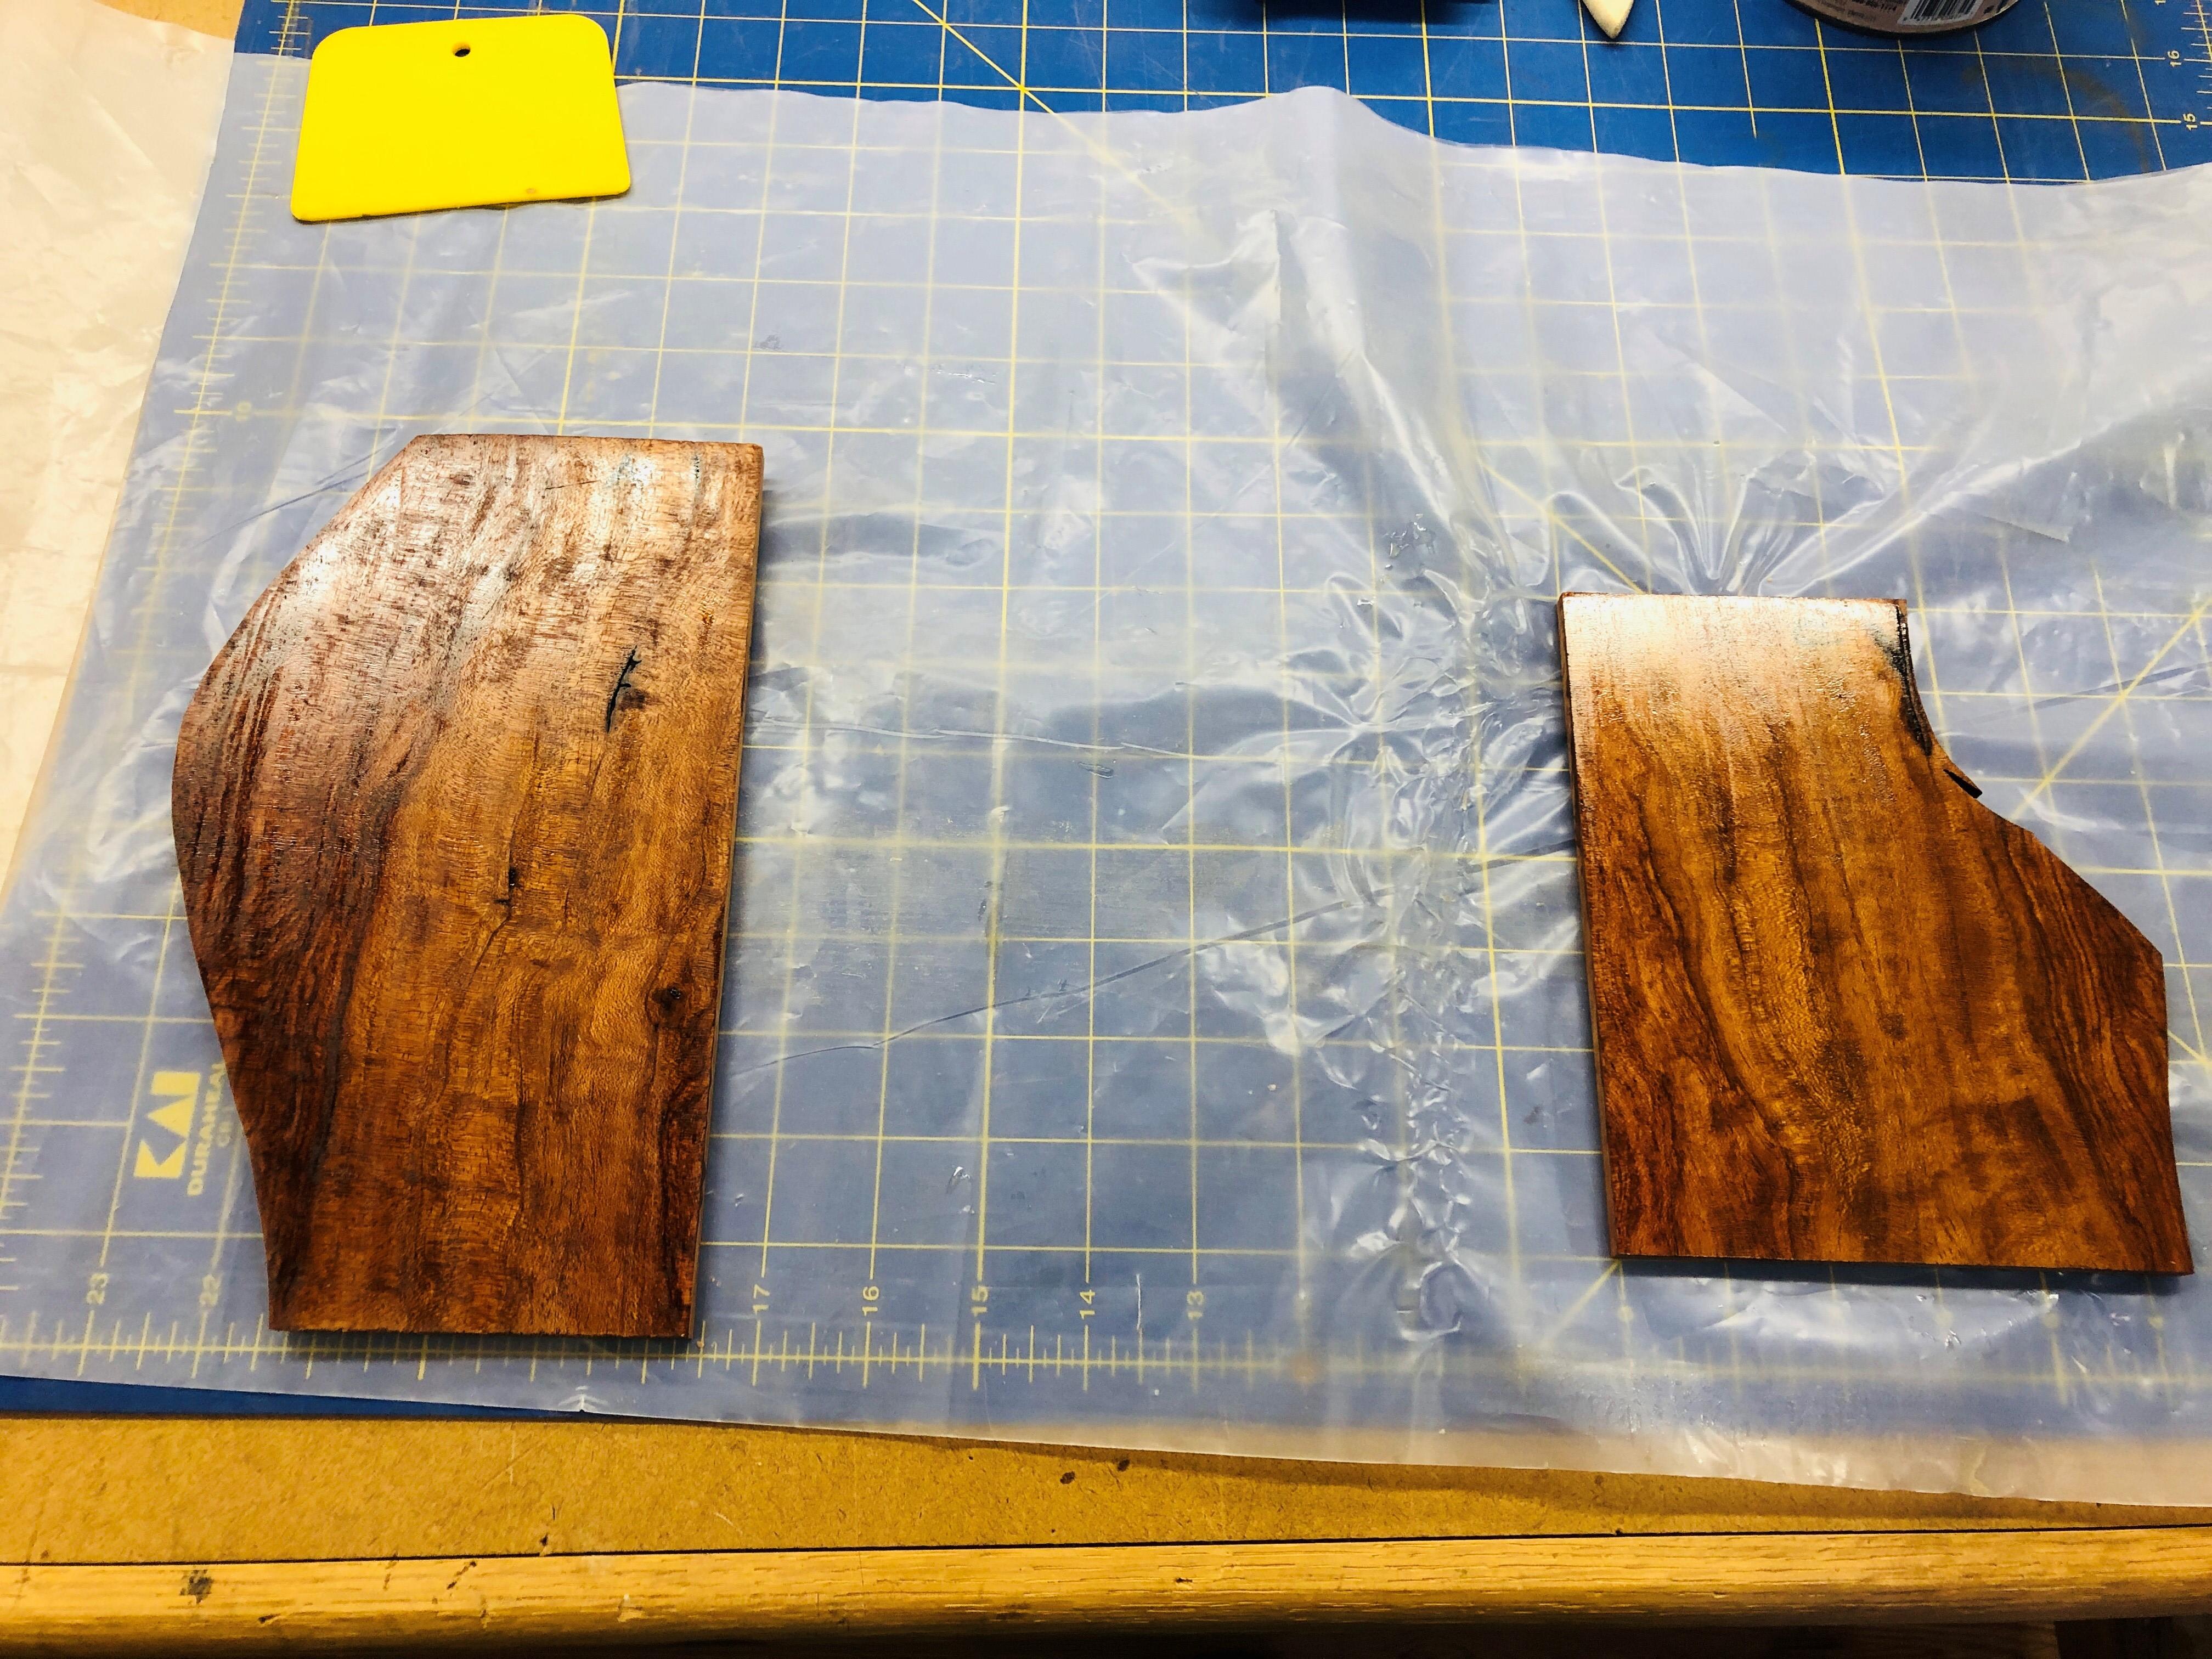
Never done this before, so a little nerve wracking, but the Zpoxy has a decent open time. I did the whole bass in one go, which was a race against time. If I do second coat, I'll do one side at a time. I masked the board with packing tape, only thing know that won't stick to epoxy.


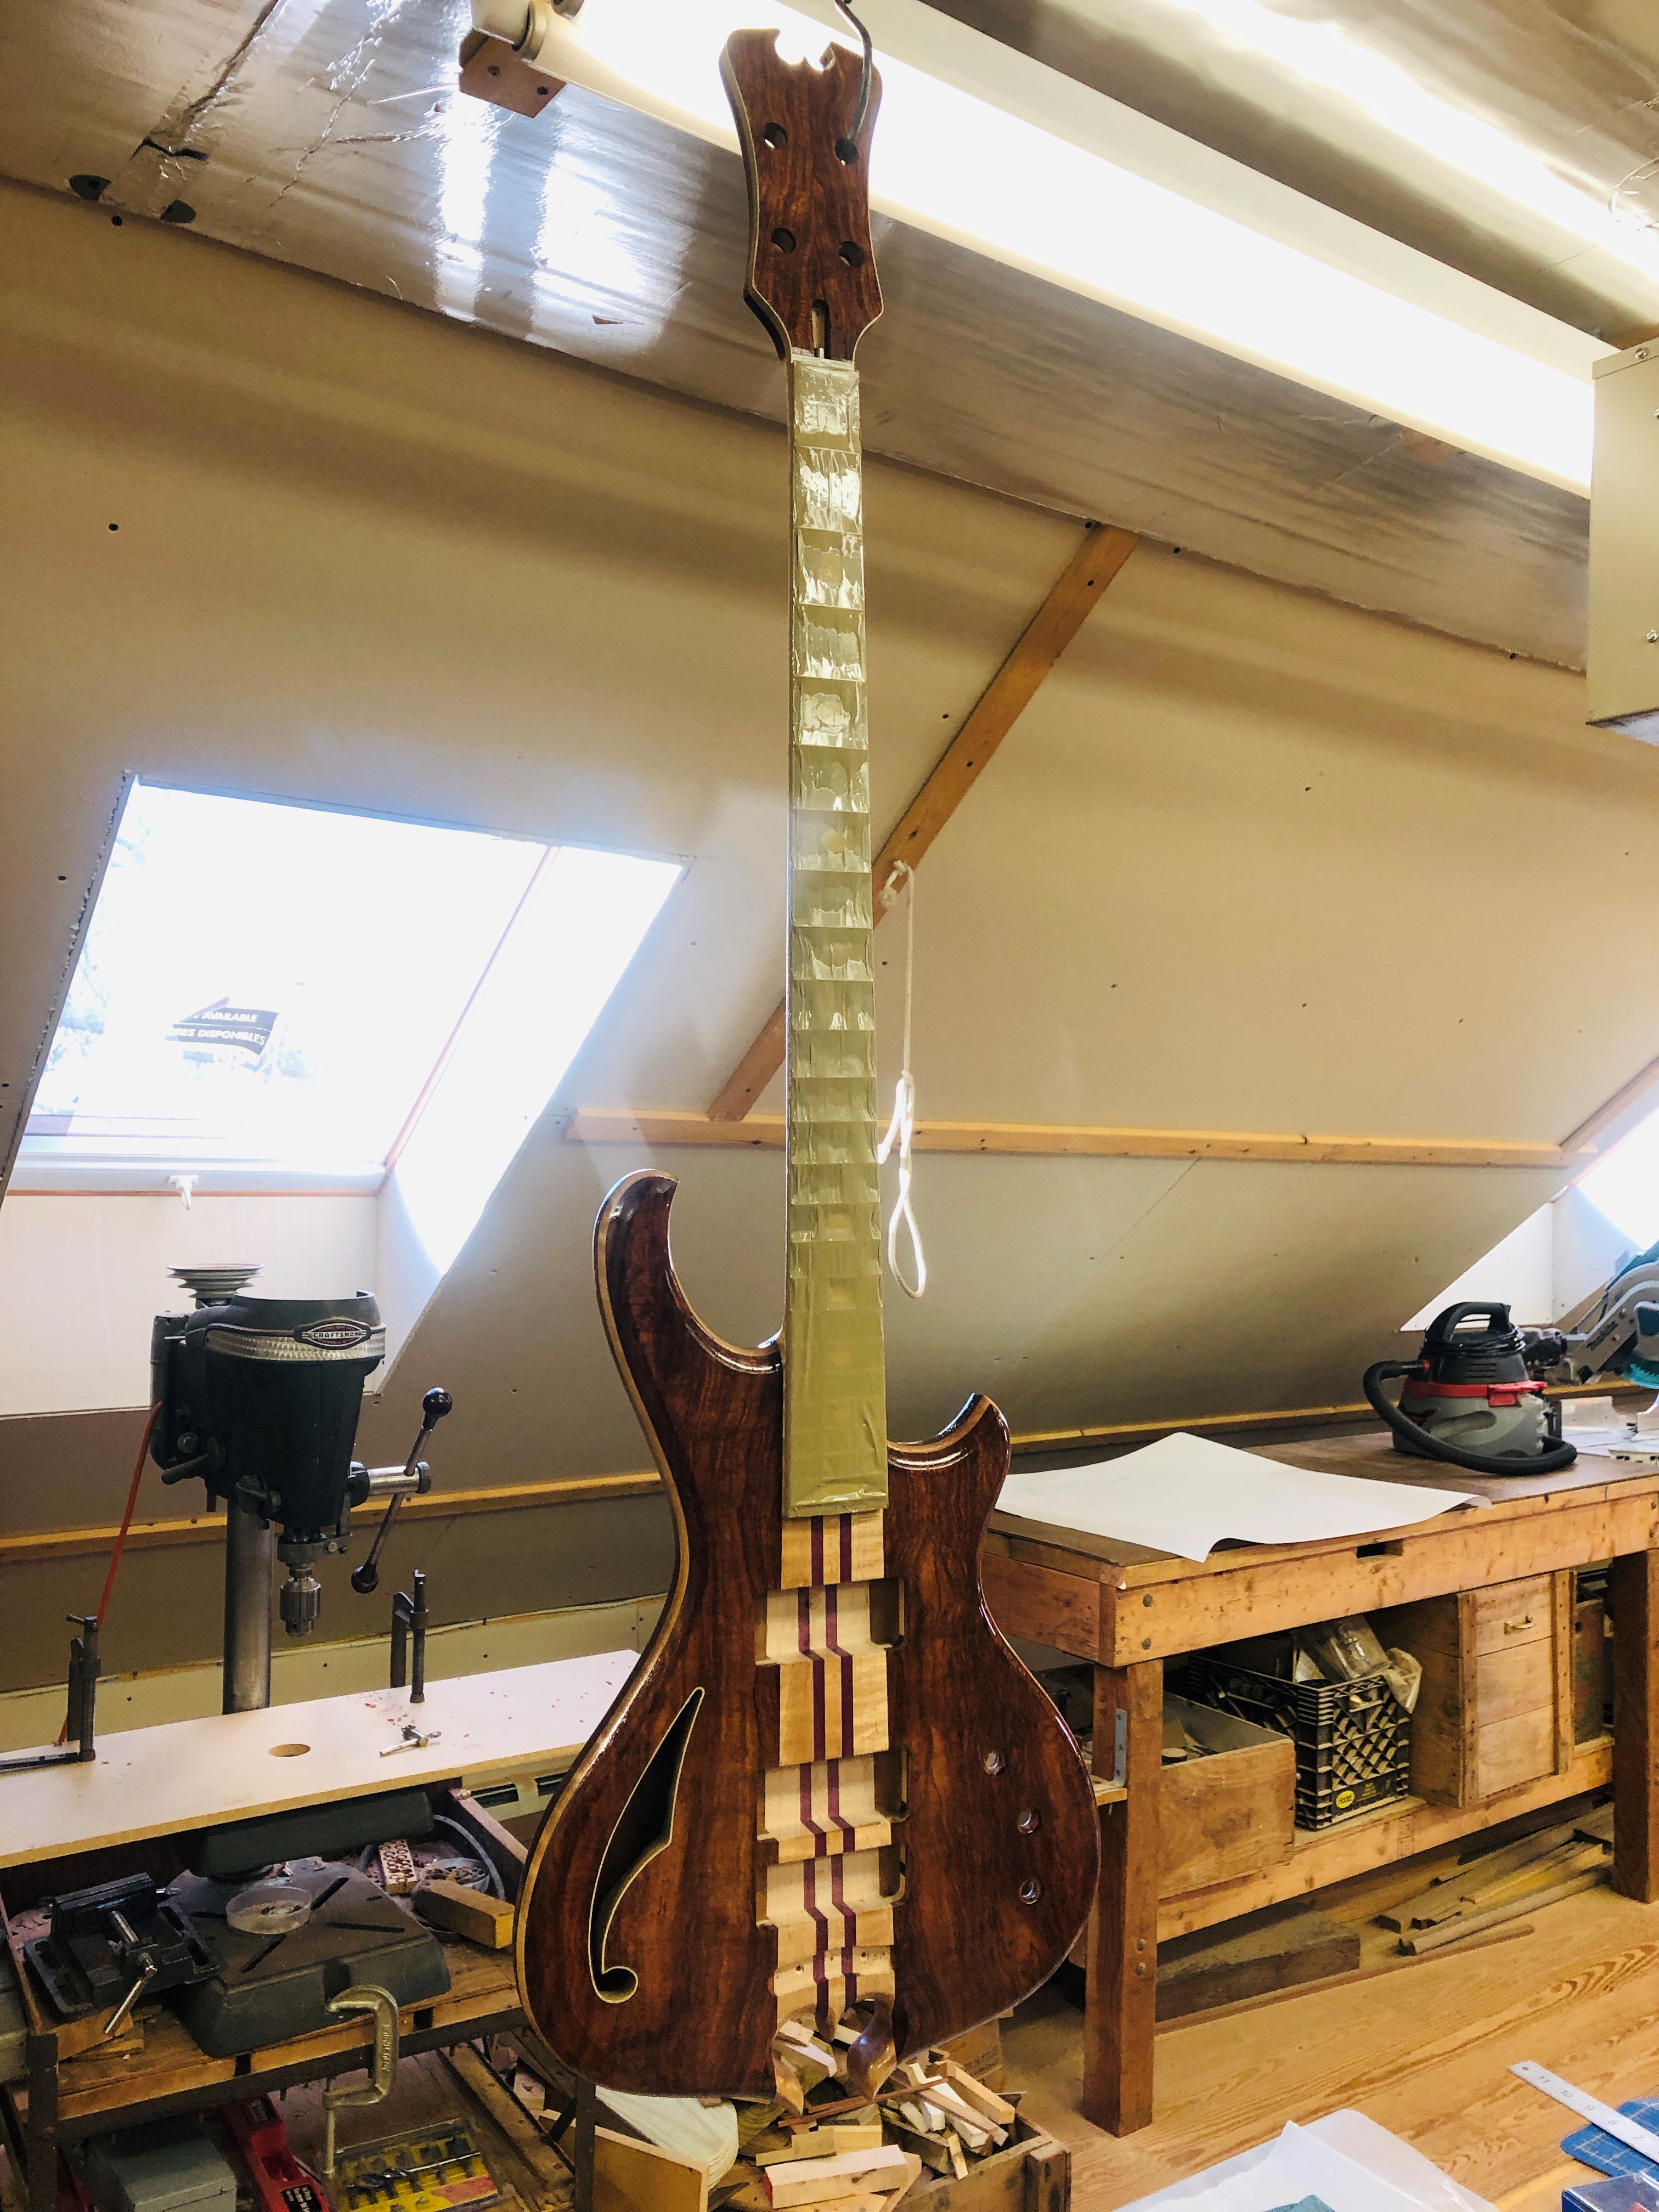
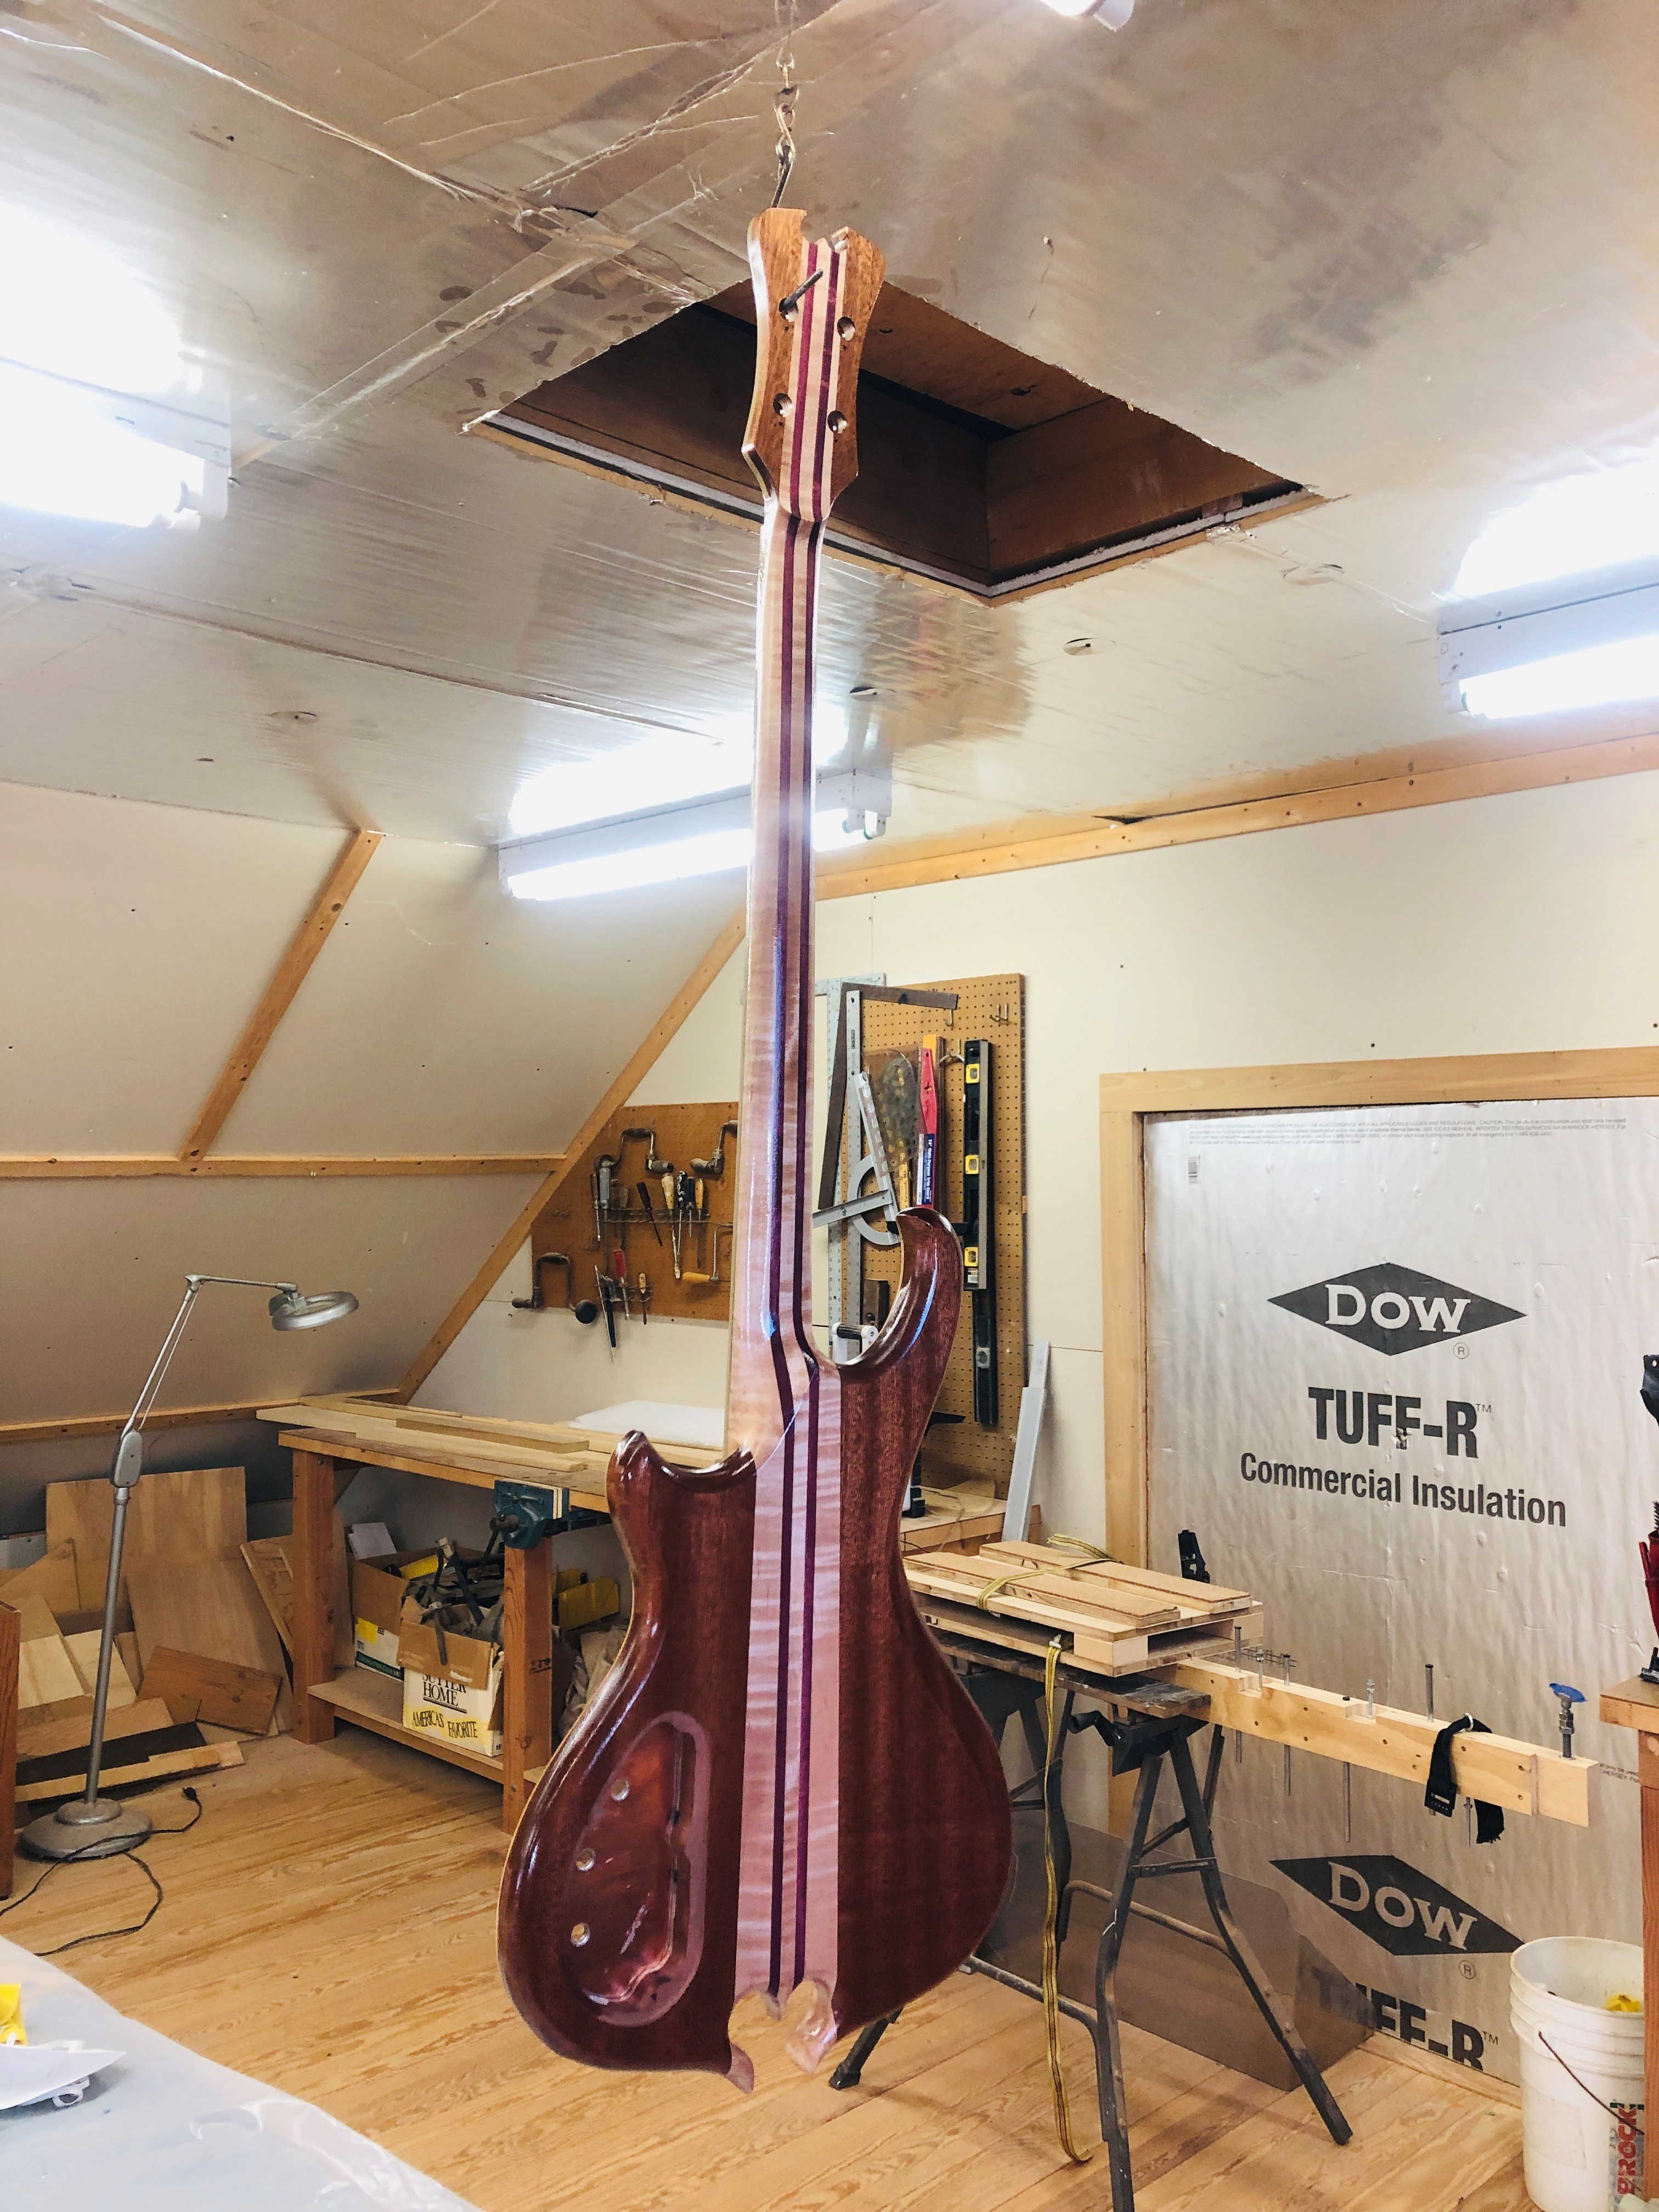
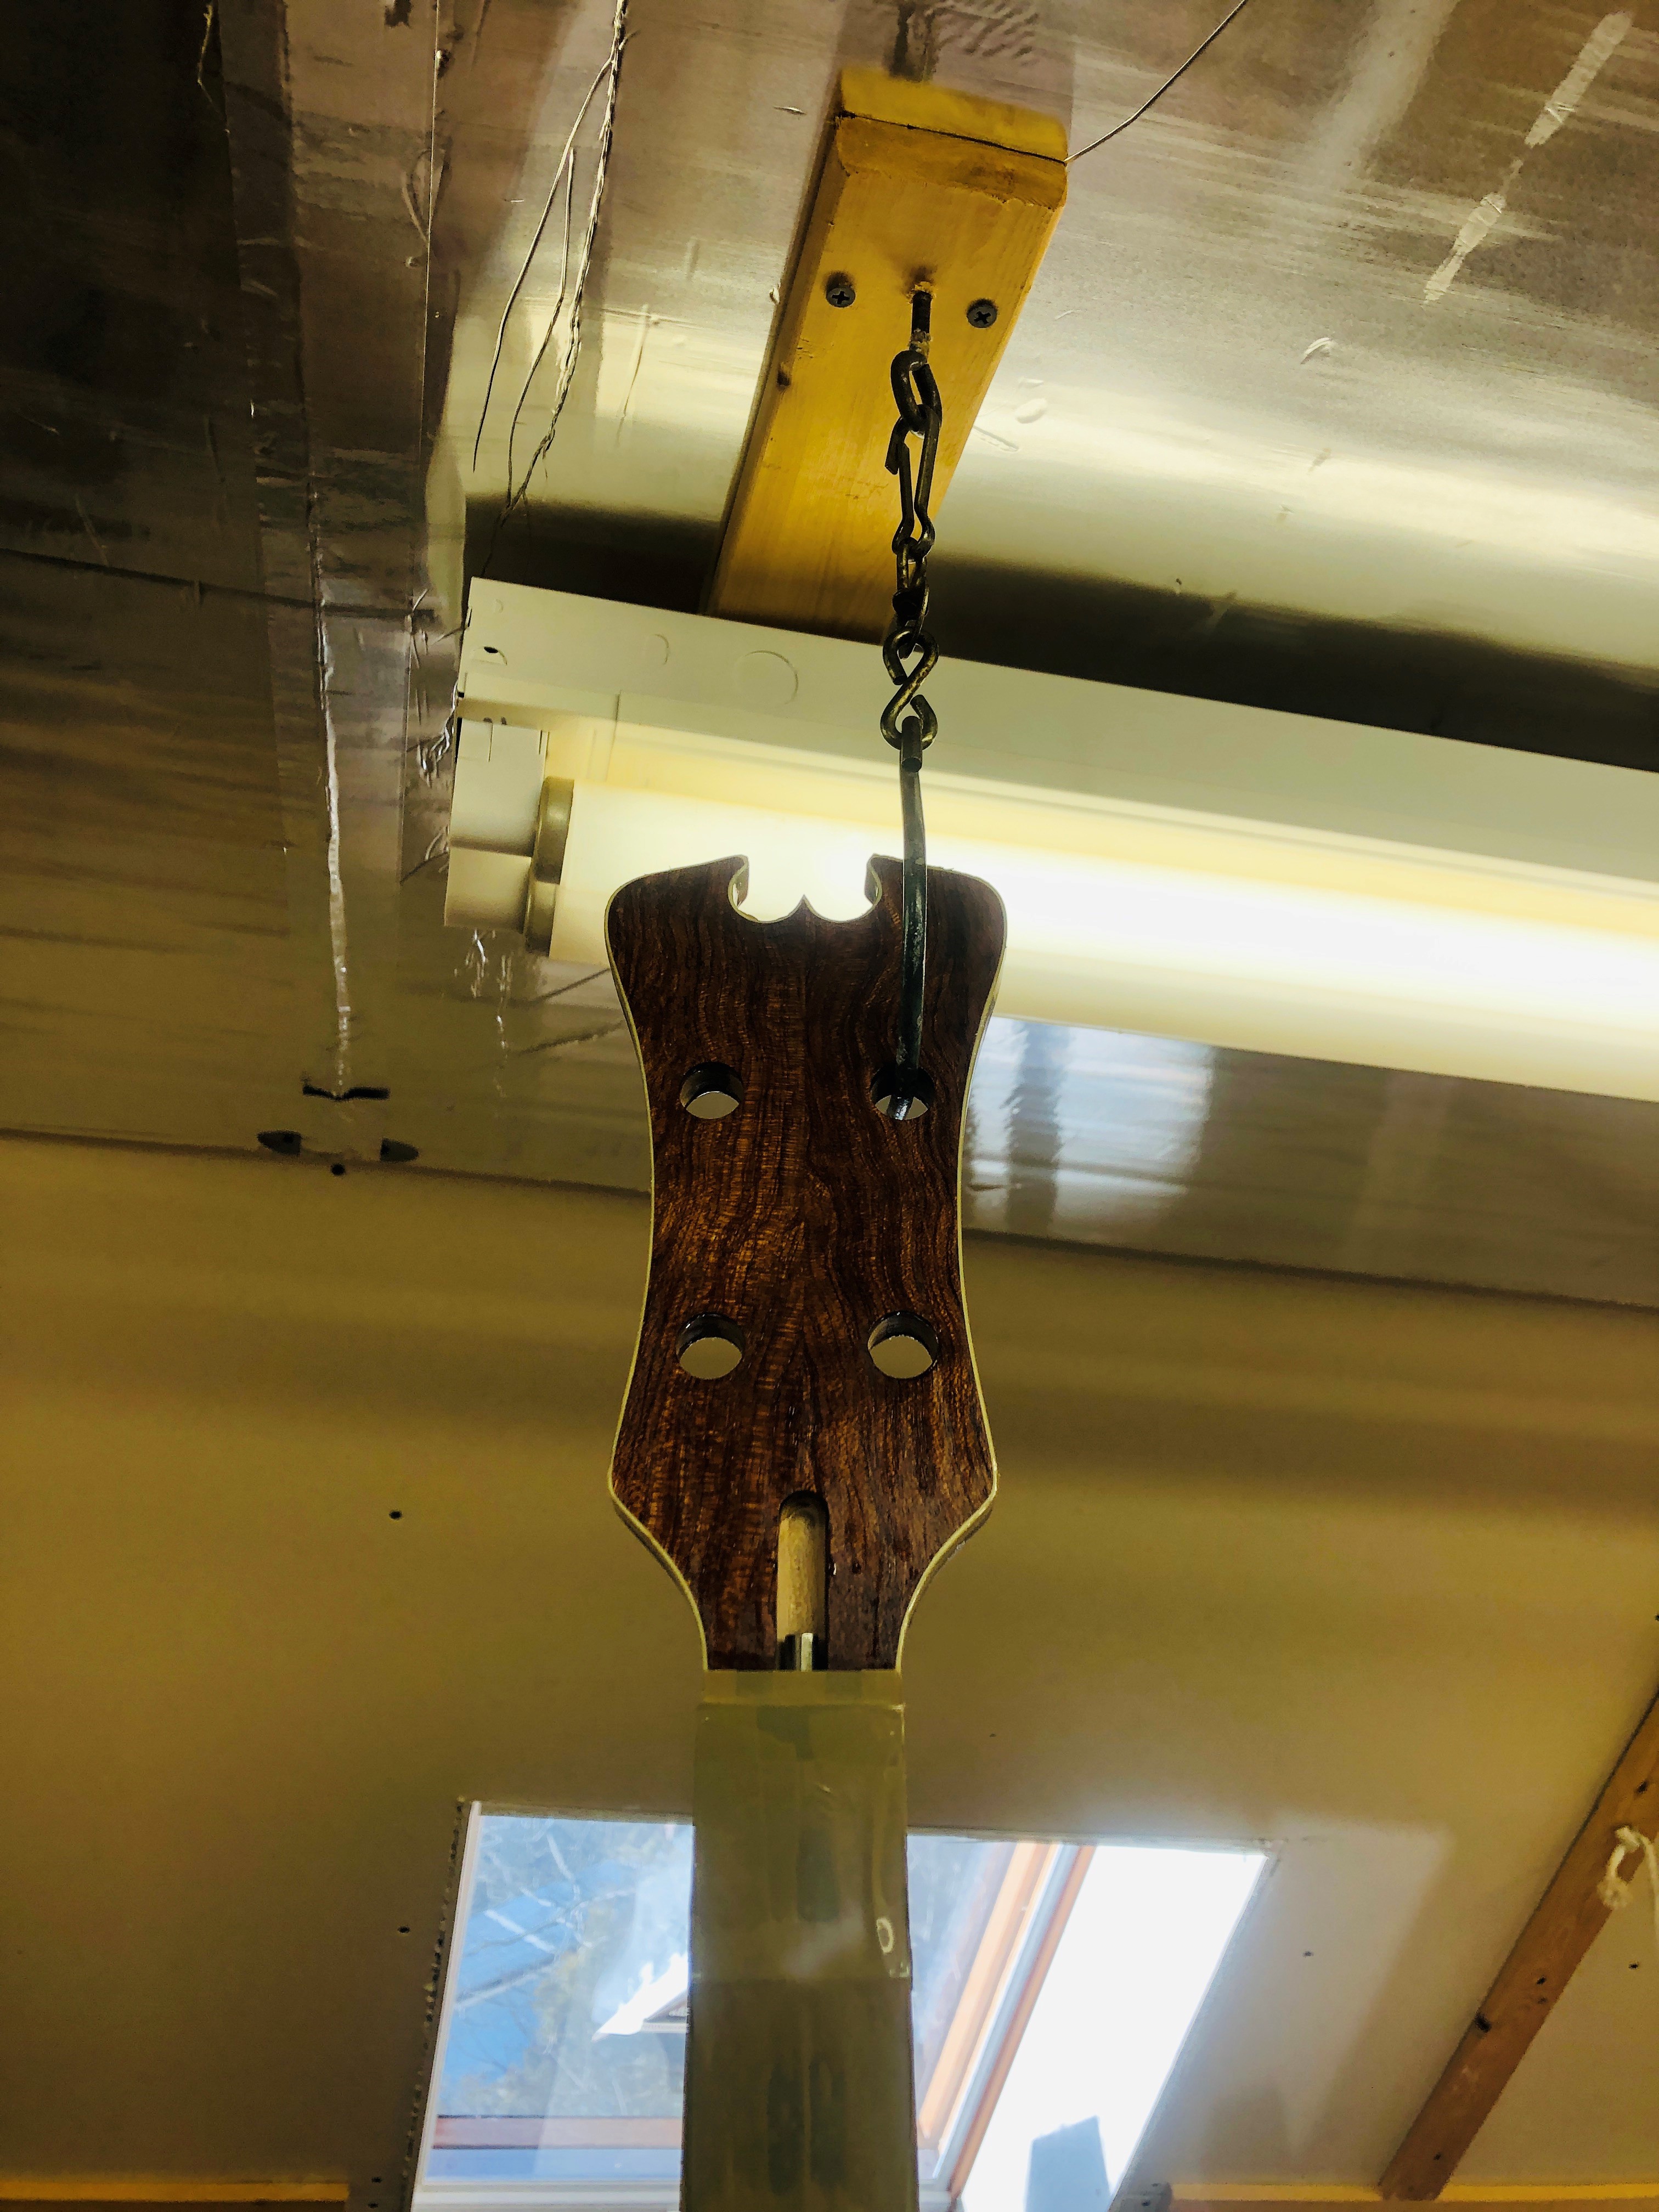
I was all worried about Cocobolo Juice bleeding into the epoxy, which didn't happen at all, but I got some weird dark staining on the maple. This was entirely invisible until I put the Zpoxy on, any idea what would cause this? Some router burn in the maple end-grain that only shows up under finish?? Mineral staining in the maple? I'm wondering if a coat of shellac BEFORE Zpoxy would have prevented this? It looks worse in person.

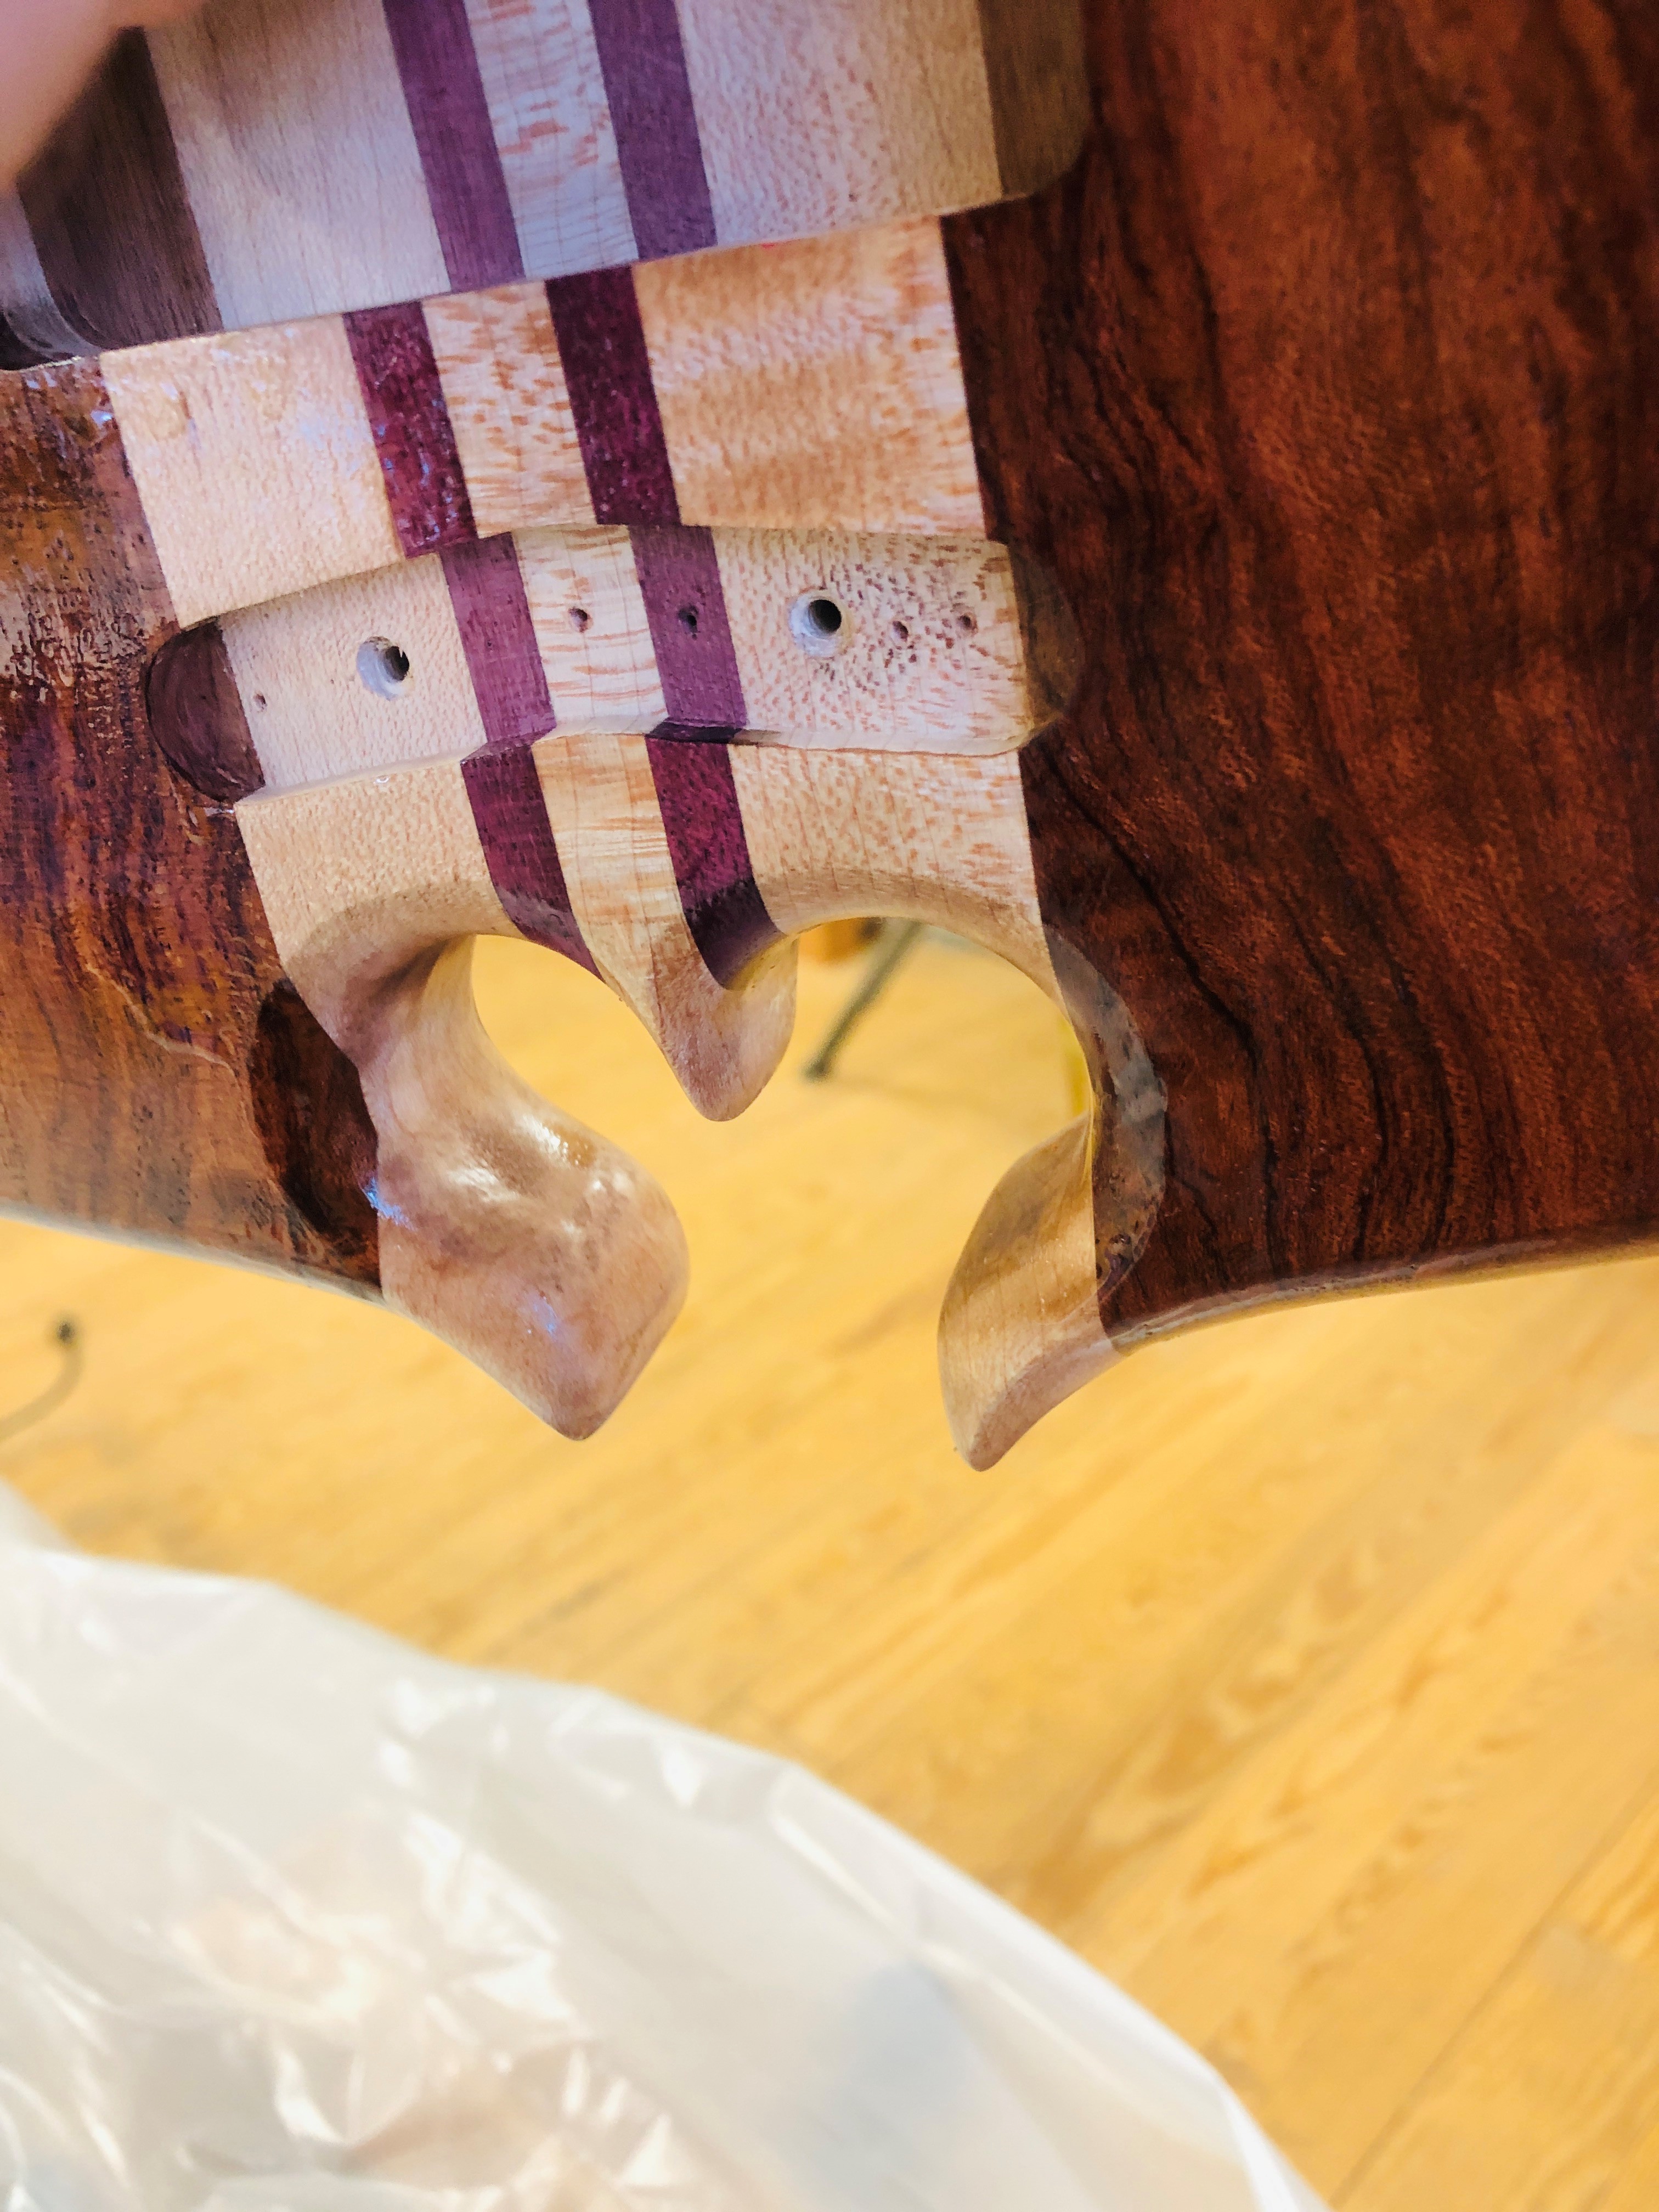
Thinking I might have to sand this back to bare wood, which is one of the several techniques I see online for Zpox. Some people sand ALL of it off, leaving only the pore fill. Some sand MOST of it of, some sand ALMOST all of it off and apply a wash-coat of diluted Zpoxy as a final coat. What's the best practice with this stuff?
Never done this before, so a little nerve wracking, but the Zpoxy has a decent open time. I did the whole bass in one go, which was a race against time. If I do second coat, I'll do one side at a time. I masked the board with packing tape, only thing know that won't stick to epoxy.
I was all worried about Cocobolo Juice bleeding into the epoxy, which didn't happen at all, but I got some weird dark staining on the maple. This was entirely invisible until I put the Zpoxy on, any idea what would cause this? Some router burn in the maple end-grain that only shows up under finish?? Mineral staining in the maple? I'm wondering if a coat of shellac BEFORE Zpoxy would have prevented this? It looks worse in person.
Thinking I might have to sand this back to bare wood, which is one of the several techniques I see online for Zpox. Some people sand ALL of it off, leaving only the pore fill. Some sand MOST of it of, some sand ALMOST all of it off and apply a wash-coat of diluted Zpoxy as a final coat. What's the best practice with this stuff?

First, that looks ridiculously amazing.
2nd, are you sure that's not just what the grain wants to do? Would be an endless amount of frustration if you keep sanding it back and it just wants to do that no matter what.
2nd, are you sure that's not just what the grain wants to do? Would be an endless amount of frustration if you keep sanding it back and it just wants to do that no matter what.

Since this is really just a first coat and the film thickness is likely to be uneven, I would expect that the chatoyance is going to do some weird things. Once the lens (coating) is uniform or normalized the wood is gonna do what the wood does. I don't see anything that looks like contamination. Do you have a better picture of what you think is contamination?
If you zoom in on the second photo of the Heart Omega cutout, you can see something, maybe cocobolo dust, has gotten into the grain. The epoxy popped it, it was completely invisible until the Zpoxy went on. I don’t think I can live with it, I’ll try sanding the maple back to bare wood anyway. I’ve done laminations of maple and walnut on neck beams and never seen this before.
When you sand it down, maybe naptha and a toothbrush to clear the dust from the open end grain. I do see it now.If you zoom in on the second photo of the Heart Omega cutout, you can see something, maybe cocobolo dust, has gotten into the grain. The epoxy popped it, it was completely invisible until the Zpoxy went on. I don’t think I can live with it, I’ll try sanding the maple back to bare wood anyway. I’ve done laminations of maple and walnut on neck beams and never seen this before.
Well, it's been a frustrating and unproductive month. The Zpoxy pore filler was a bit of a fiasco, leaving dark stains on the maple. Having sanded it, wiped it, and blown it with compressed air and leaving no visible darker wood dust in the end grain, it still blotched badly for reasons I dont understand. At any rate, I had to sand the whole thing back down to bare wood to get rid of most of the blotch on the maple. After a good 8 hours of sanding, scraping, swearing, etc., I got back to where I started. Most of the Zpoxy is still in the grain, but the rest was bare wood again, so I sealed it all up with de-waxed shellac, which seems to be compatible with virtually any finish. All that work got me back to about where I was visually, a month ago, minus the maple blotching. i have since given this a light sanding with 320 grit, so it's back to dull again.


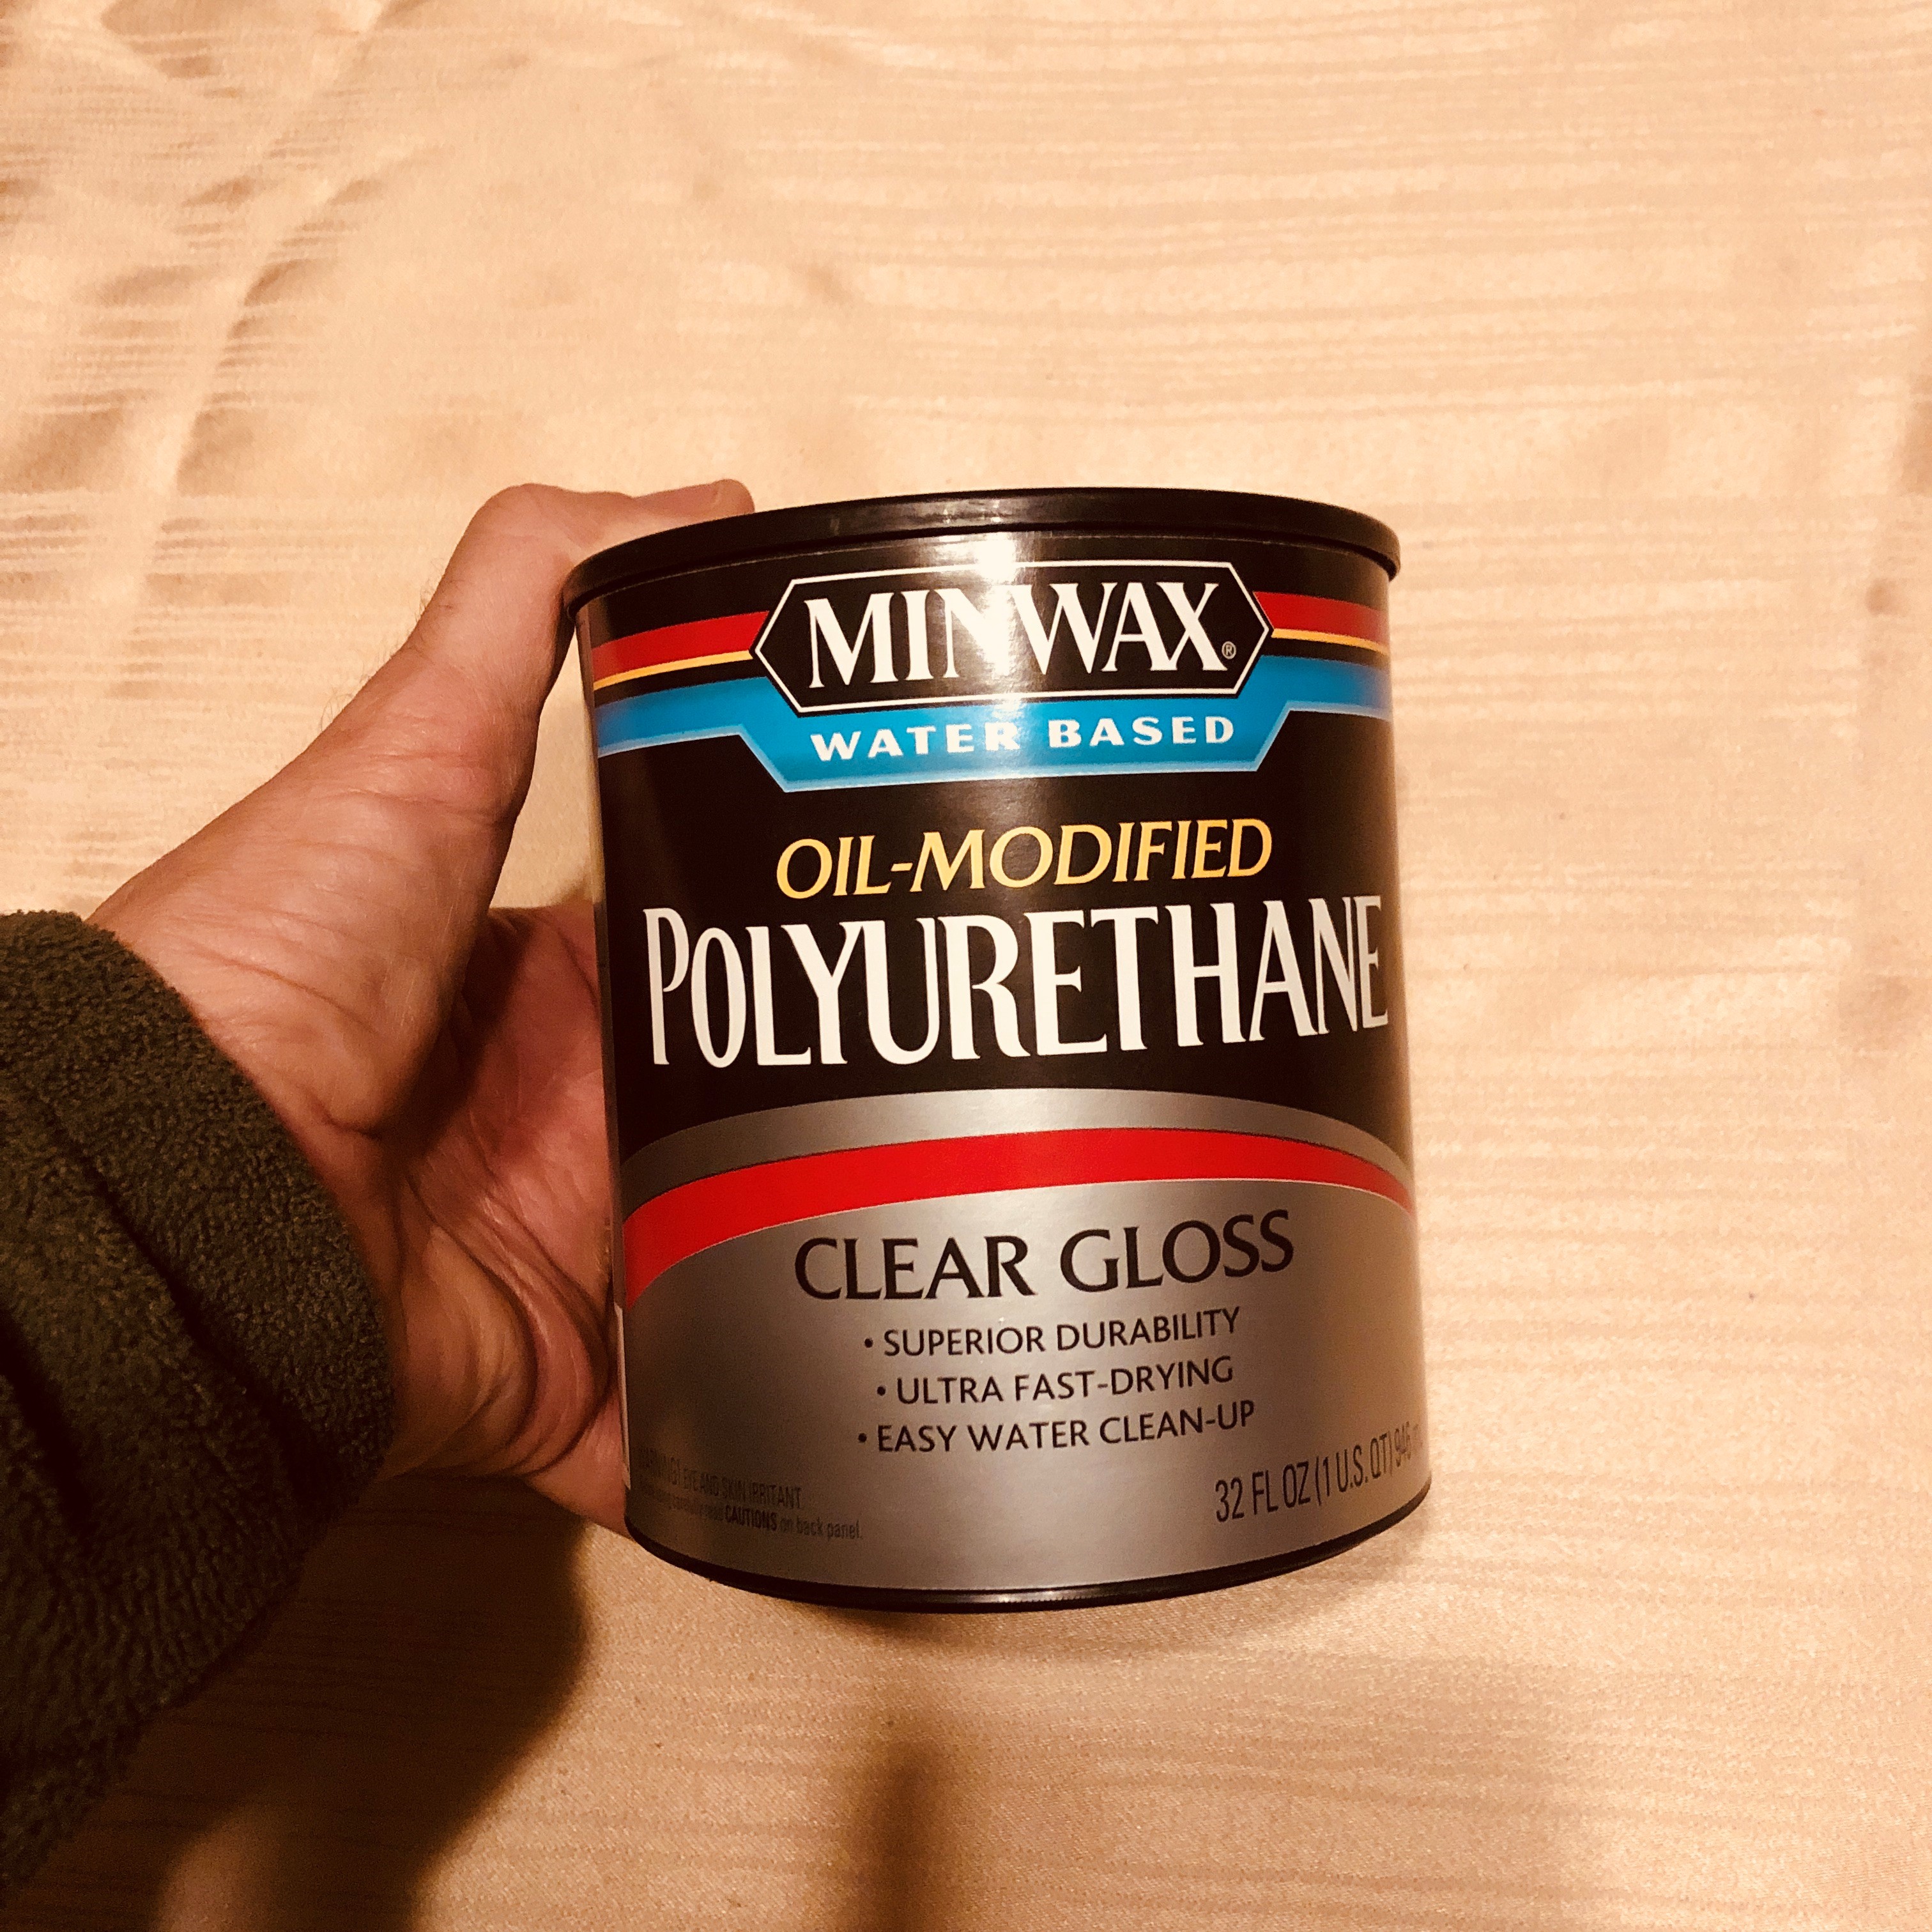
So...back to square one. I was under the impression Minwax still made an aerosol water-based, oil modified poly. Although there may still be a few cans of old stock kicking around, Minwax informs they have discontinued it. I was leaning towards water based poly for the reduced toxicity and stench, but the oil modified version is the only one with a little amber tint, which i want. Most WB poly is nearly water-clear. I bought a quart of this stuff, intending to spray it on.... maybe.
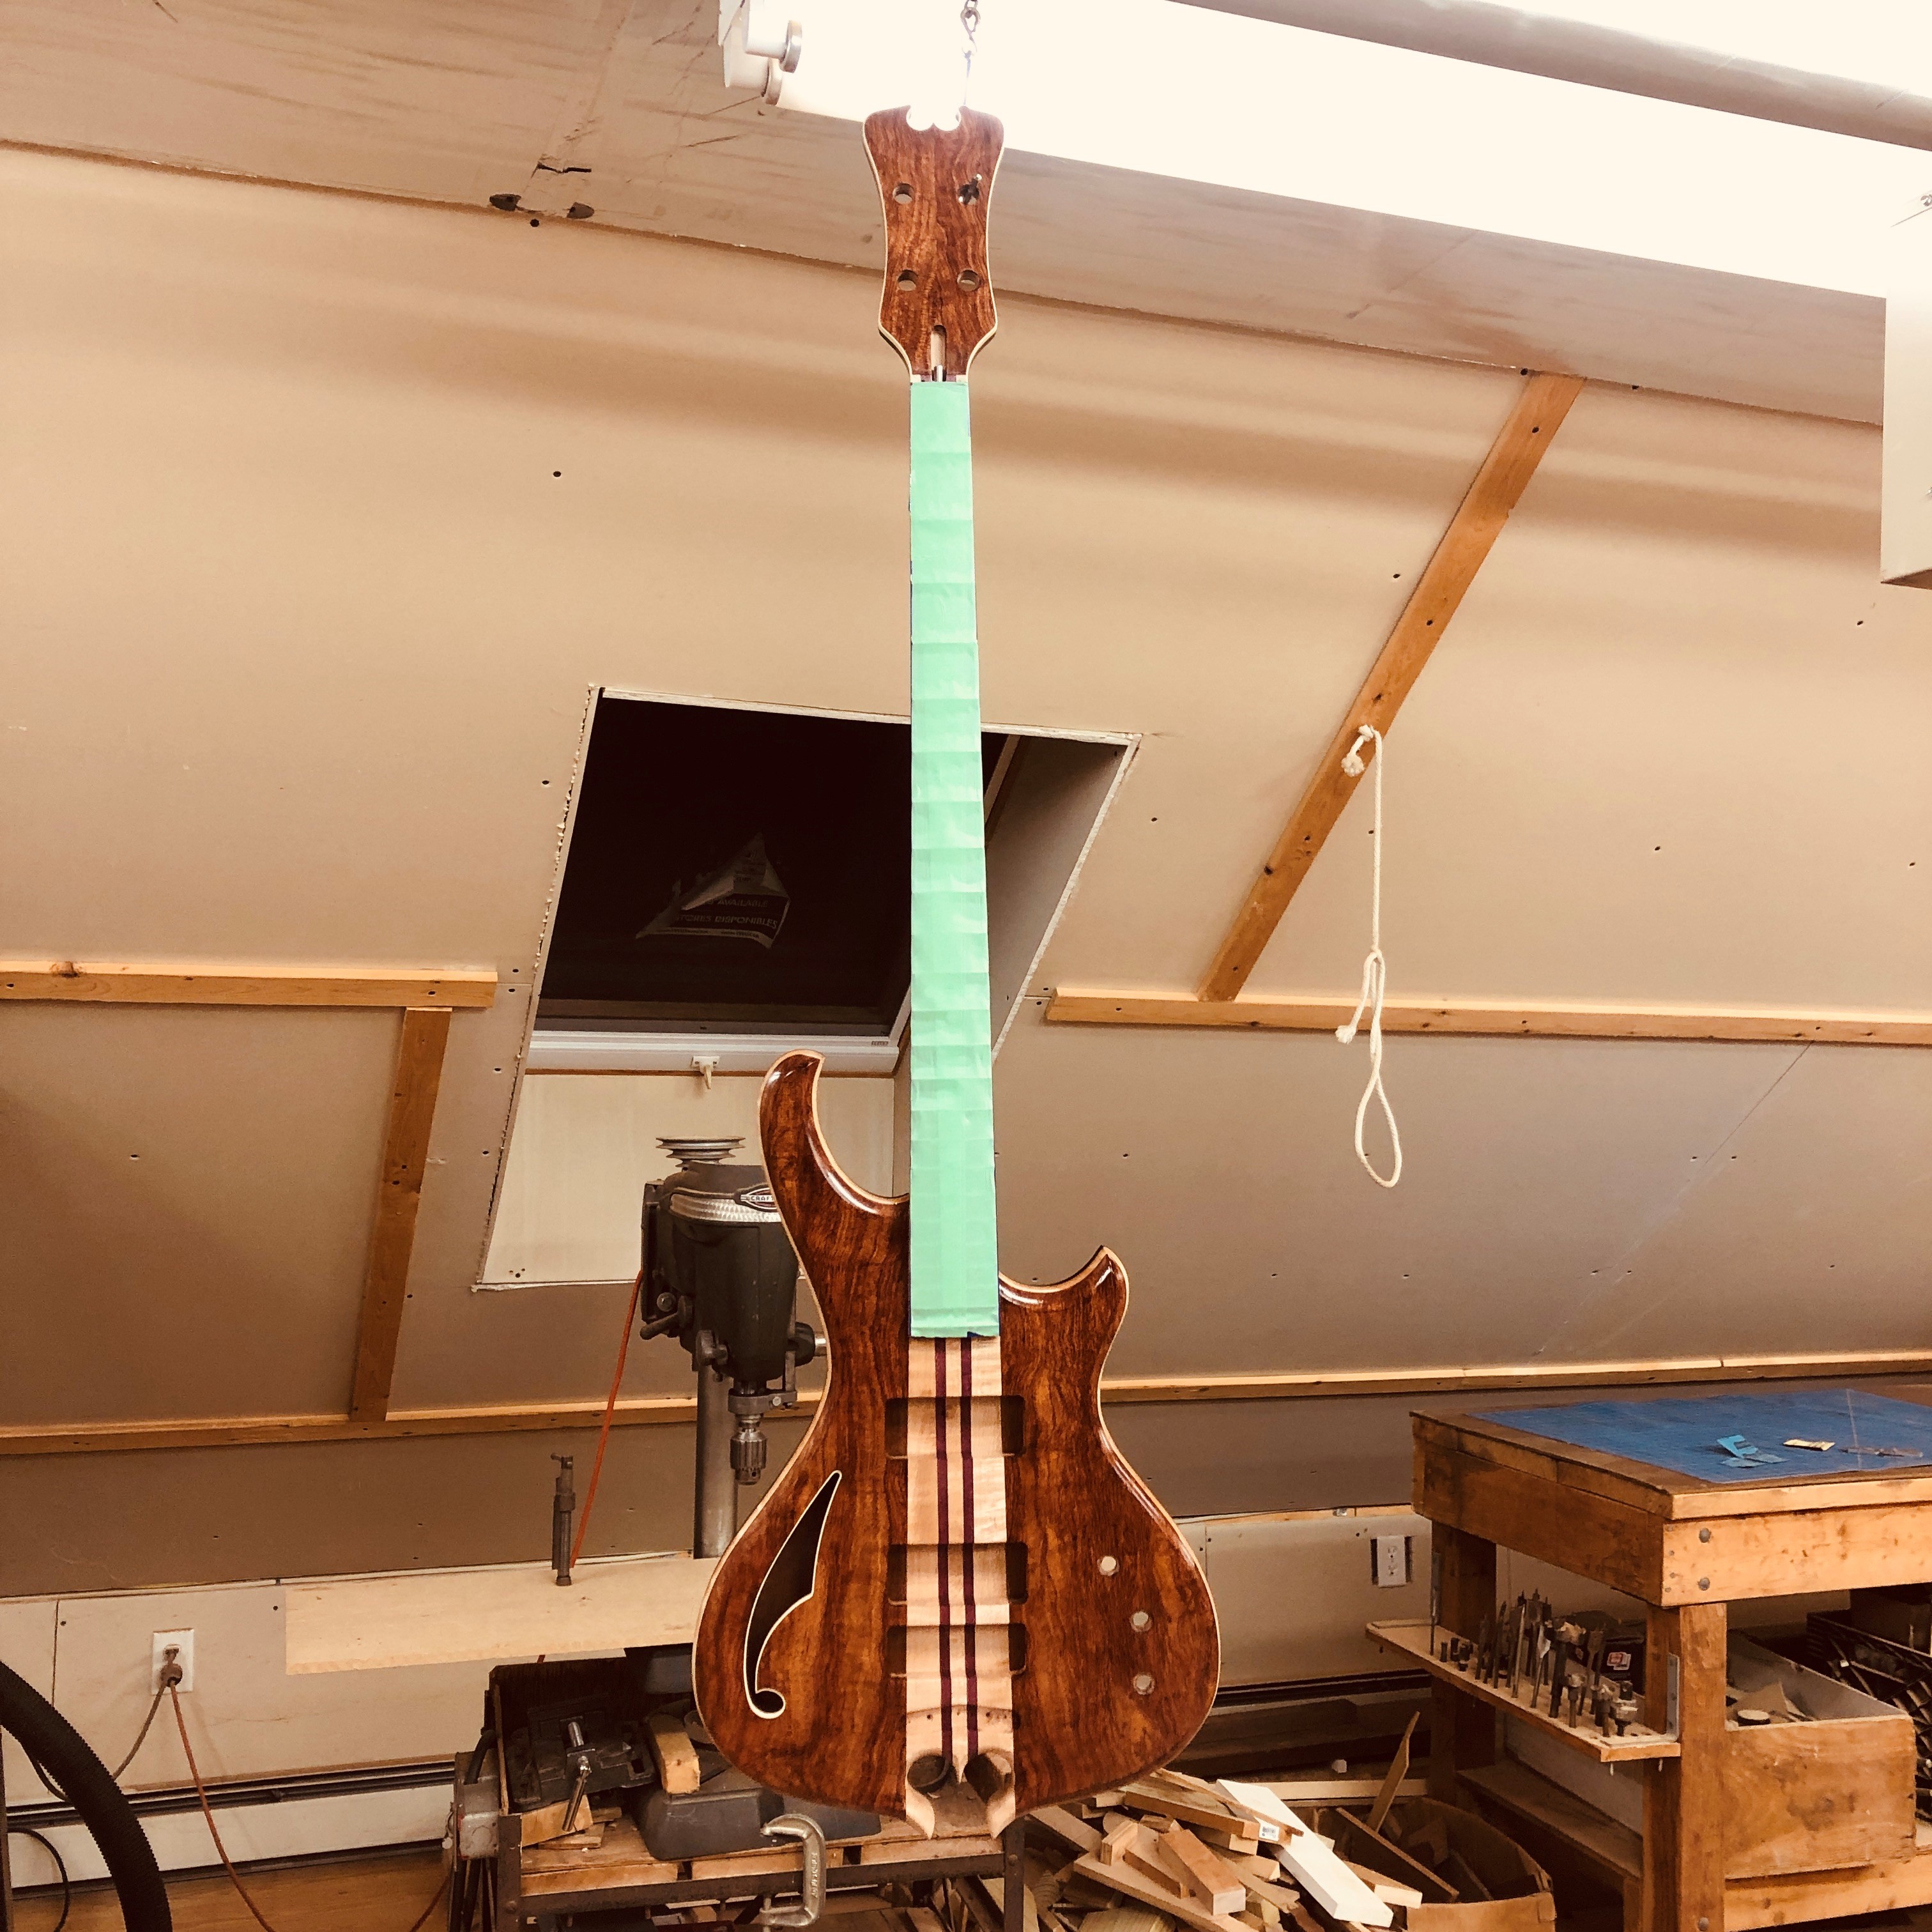
Really torn now. My previous experience with Varathane Ultimate is that it just isn't very scratch resistant, and that seems a common complaint on water base. I love how Tru-Oil looks, but again, not too durable. I'm on the verge of saying Eff-it and buying some good old fashioned amber tint wipe-on poly, stench and VOC be damned. Any suggestions as to best fimish for this beast greatly appreciated.
So...back to square one. I was under the impression Minwax still made an aerosol water-based, oil modified poly. Although there may still be a few cans of old stock kicking around, Minwax informs they have discontinued it. I was leaning towards water based poly for the reduced toxicity and stench, but the oil modified version is the only one with a little amber tint, which i want. Most WB poly is nearly water-clear. I bought a quart of this stuff, intending to spray it on.... maybe.
Really torn now. My previous experience with Varathane Ultimate is that it just isn't very scratch resistant, and that seems a common complaint on water base. I love how Tru-Oil looks, but again, not too durable. I'm on the verge of saying Eff-it and buying some good old fashioned amber tint wipe-on poly, stench and VOC be damned. Any suggestions as to best fimish for this beast greatly appreciated.

