I would've used 2 or 3 more clamps but that's just me... 


TalkBass has been independent since 1998. Add your voice.
Create a free account to reply to discussions, view embedded media, and browse with fewer display ads.
Join free Log in
Want zero display ads or expanded classifieds tools? Compare plans.
No need, I'm sat on them as we speak, more than enough pressure thereI would've used 2 or 3 more clamps but that's just me...


Not in the most enthusiastic mood today but got a bit done. Flattened the board for the top with the try plane and cut the shape out a fair bit oversize. Marked the position of the back on it and then pinned in some panel pins outside of the perimeter to prevent major slippage when clamping the glued surfaces together. I marked the position of the cable rout and applied some shielding tape to that, the rout on the back has a shallow recess to allow for the thickness of this tape if you noticed the other day when i taped that up.. Spread some glue and clamped them both up. Ho Hum, wait until tomorrow now
View attachment 3035271
View attachment 3035272
This afternoon I'm going to work out the jig for the neck joint and the pickup routs or at least I hope to; I'm expecting a delivery from StewMac with some springs and some pickup foam, I'll decide which to use when they get here. I'm going to rout the neck pocket and the pickup sockets at the same angle as the neck angle.
Then there's the bridge, I'm not sure what to do there, either rout them flat or to rout at the approximate angle of the body carve, I'm thinking flat as it allows a little bit of extra clearance to access the adjusting screws and to put strings in. What would you do?
Yes, looking at the picture you sent me it appears to be flat so that's the way I'll go. In hindsight setting them in following the body carve will aggravate any intonation issues caused by raising the saddles. I suppose it should be set at the same angle as the strings but that would just look daftSee if you can study some detailed pics. At least that might give you an idea of which way to go.
Today I took the glued bodies out of clamps and trimmed the excess with the bandsaw. Then I flushed the tops on the router table, when I looked at them I had a *** moment as there was what appeared to be an open glue line all around the join but when I sanded a bit of the top op the disc sander it turned out to be just a little glue that had discoloured the back at the very corner and comes out with the slightest sanding, PHEW LOL; that had me going for a few seconds. You can see the line in the photographs, it looks just like an open glue line, in hindsight there was no way that I could have ended up with an open glue line but I still fell for it.
Next I scribed a line at 49mm all around which will be the line to carve the top to but also the line at which the bottom of the fretboard will sit at the neck body interface. I marked the position of the neck joint and pickup pocket routs and drilled out the waste to cut back on the amount of noise from the router. I fixed the routing jig to the body with a couple of screws, one through the point of the bridge and one near the edge where the wood will be carved away so no holes will be left after the body's done. I routed the neck joint on one body but then realised I had made the jig too shallow for the pickup pockets so I made a perspex spacer, I'll fit that and finish the routing tomorrow. The weather picked up so we went for a walk on the beach, it seemed a lot more fun than woodwork
View attachment 3036920
View attachment 3036923
View attachment 3036924
View attachment 3036925
View attachment 3036926
Now now, I'm not falling for flattery, you've jilted me once, once bitten twice shyExcellent work! You really are creating something very special there.

May I request a pic of that tailpiece? I'm curious about it after seeing that it required such a deep rout...Had a difficult day today, will explain in a bit. Started off where I left off yesterday and finished routing the pickup pockets. Then I moved on to making a jig to rout the bridge pieces which is where I had bother, no idea why but could I get the shape of the tailpiece right?? Three goes it took me before I got there, after that it was just a simple rout and that was done. I drilled through from the bridge, bridge pickup and tail piece for wiring; the neck pickup I got very lucky in that the front of the rout (which was angled remember) just nicked the rout underneath for the switch wiring so I can feed the pickup wire straight through there. I'd had a belly full after all that so I went and sat in the garden and had a nice cup of tea
View attachment 3038182
Some shiny bits just for fun
View attachment 3038183
The body gets carved away heavily there so it will be nearly fully exposed when it's done, it will look like this when it's doneMay I request a pic of that tailpiece? I'm curious about it after seeing that it required such a deep rout...
*durf*The body gets carved away heavily there so it will be nearly fully exposed when it's done, it will look like this when it's done
View attachment 3038201
 Forgot to turn on that part of my thinker

Been following this thread with rapt attention. Just saying thank you for bringing us along on this process. Not sure if you mentioned - are you raising the twins yourself or are you putting them up for adoption?Had a difficult day today, will explain in a bit. Started off where I left off yesterday and finished routing the pickup pockets. Then I moved on to making a jig to rout the bridge pieces which is where I had bother, no idea why but could I get the shape of the tailpiece right?? Three goes it took me before I got there, after that it was just a simple rout and that was done. I drilled through from the bridge, bridge pickup and tail piece for wiring; the neck pickup I got very lucky in that the front of the rout (which was angled remember) just nicked the rout underneath for the switch wiring so I can feed the pickup wire straight through there. I'd had a belly full after all that so I went and sat in the garden and had a nice cup of tea
View attachment 3038182
Some shiny bits just for fun
View attachment 3038183

I'm keeping one and will try and sell the other, they won't be identical twins though one with a Rosewood fretboard the other Ebony (or the Rocklite equivalentsBeen following this thread with rapt attention. Just saying thank you for bringing us along on this process. Not sure if you mentioned - are you raising the twins yourself or are you putting them up for adoption?
)
Sororal twins will sound just as sweet!I'm keeping one and will try and sell the other, they won't be identical twins though one with a Rosewood fretboard the other Ebony (or the Rocklite equivalents
 ) to just get it somewhere like a shape at the back, the front couldn't be done until the angle for the neck/fretboard had been cut. For that I just made a jig, basically a sloping bit of MDF at 4.5 degrees with a hole in it to access the top of the body. There was some spare wood the jig didn't reach so I whipped those off with a drawknife, a bit like a massive spokeshave then took a bench plane to flatten it. Finally I took the thumb planes and some tiny spokeshaves and tuned the shape to something that looked right, it's sort of an intuitive process, try it you'll see. After that I was tired so I still need to tune the shape on the second body but I'm happy with the first, that just needs the neck fitting and sorting any snags before sanding etc.
I'm saving up the $ to adopt one of these twins...
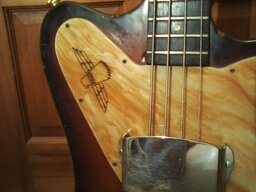
Phew it's been a hot one today! Not happy I have a blister on my thumb! How you ask? I'll tell you how
Started off routing a shoulder at the level of the top of the binding to give myself a clean edge to work to while shaping the tops, yes shaping at last WOOHOO!! After that I drew a rough contour map of the general curves I expected to get, after that well it was shaping time. I used a thing called an Arbourtech, a rather nasty carving attachment that fits onto a grinder, this is a method I do not recommend, it can reduce your guitar body to firewood in less time than it takes to blink. So why am I using one, I've had a lot of practice with it but even then it's a worrying procedure.
After rough carving I used some small thumb planes (blister!!
Oh and I also checked the neck blanks for any movement, admittedly they are still blanks and any movement would be unlikely but if there is any movement at this stage then the blank is firewood. There was none but some of you may be interested to know how I checked. To see if there is any twist on a narrow board you used a gadget called a pair of winding sticks, these are basically two parallel wooden straight edges with two inlays on each one with a pair of black (Ebony) and one with a pair of white (in my case Ivory veneers from a piano), as luck would have it I couldn't find them so I used a pair of 12" rules one balanced at either end from which you can sight down to see any twist (wind) exaggerated by the length of the winding sticks. Handy thing to know
View attachment 3039268
View attachment 3039230
Some of your tools look like little torture devices-Yikes! The twins are looking good. Keep it up!
View attachment 3039231
View attachment 3039232
View attachment 3039244
View attachment 3039248
View attachment 3039250
View attachment 3039251
View attachment 3039252
View attachment 3039253