• TalkBass has been independent since 1998. Add your voice.
    Create a free account to reply to discussions, view embedded media, and browse with fewer display ads.
    Join freeLog in
    Want zero display ads or expanded classifieds tools? Compare plans.

The Mediocre Builders Club

These were my mayor builds. I have others, specifically one that has taken a fair number of years to terminate which I will be posting later on. I also have posts on modifications I made to some of my basses, including a fretless conversion, which will be repeated shortly to have a clone Rickenbacker 4003 NF fretless.
And yesterday I received the fakenbacker for the fretless conversion:


img_20210504_172142_s-jpg.jpg


This is reviewed here Club RickenFaker / FakenBacker - Show Your Fake Rics!

So I won't go into the details other than that this bass was supposed to have the Ric scale of 33.25" and it has not, it's a normal 34"
There's also a bit of overhang at the edge of the body on one side of bridge.
The fretless conversion will be combined with a scale conversion to get everything right at once.
Normally a scale conversion is impossible without changing the neck as the frets have their position according to the scale. This would be impossible as the neck is neck-thru so no way to do anything about that without mayor luthier work.

However, since we're going fretless, meaning no frets, no need for fretlines (although this was the original idea, by filling the fret spaces, leaving them just barely visible) and since the shark-fin inlays are very cheap, not anywhere near as nice as the originals, I'm opting for gluing a thin veneer over the entire fretboard. With veneer of less than 1 mm thickness this is no problem as that will make the neck barely thicker than with frets.
After that the only thing left to do will be moving the bridge further up the body to get the 33.25" scale. Depending on where it will finally be located I might opt for using a OEM ric compatible bridge or stay with the fakenbridge. I even have an original Hipshot for Ric bridge that I could use, but would rather not in case my original Ric should develop the infamous bridge-lift problem.

Other than that, there's some more work to be done on this bass, namely:
- pickup replacements with possible routing work
- electronics rewiring and replacement
- mounting a new OEM ric pickguard
- change the knobs and strings

So I'll be gathering material needed for this bass in the coming time and will be posting progress under the "Nofretbacker project" denominator.

Hope you'll enjoy this.
 
And yesterday I received the fakenbacker for the fretless conversion:


View attachment 4258425

This is reviewed here Club RickenFaker / FakenBacker - Show Your Fake Rics!

So I won't go into the details other than that this bass was supposed to have the Ric scale of 33.25" and it has not, it's a normal 34"
There's also a bit of overhang at the edge of the body on one side of bridge.
The fretless conversion will be combined with a scale conversion to get everything right at once.
Normally a scale conversion is impossible without changing the neck as the frets have their position according to the scale. This would be impossible as the neck is neck-thru so no way to do anything about that without mayor luthier work.

However, since we're going fretless, meaning no frets, no need for fretlines (although this was the original idea, by filling the fret spaces, leaving them just barely visible) and since the shark-fin inlays are very cheap, not anywhere near as nice as the originals, I'm opting for gluing a thin veneer over the entire fretboard. With veneer of less than 1 mm thickness this is no problem as that will make the neck barely thicker than with frets.
After that the only thing left to do will be moving the bridge further up the body to get the 33.25" scale. Depending on where it will finally be located I might opt for using a OEM ric compatible bridge or stay with the fakenbridge. I even have an original Hipshot for Ric bridge that I could use, but would rather not in case my original Ric should develop the infamous bridge-lift problem.

Other than that, there's some more work to be done on this bass, namely:
- pickup replacements with possible routing work
- electronics rewiring and replacement
- mounting a new OEM ric pickguard
- change the knobs and strings

So I'll be gathering material needed for this bass in the coming time and will be posting progress under the "Nofretbacker project" denominator.

Hope you'll enjoy this.
And it just occurred to me I can use a somewhat lighter color of the veneer so it will resemble the Ric fretboard much better! :)
And just found it for only $10. 0.25 - 0.50 mm thick just perfect.
 
And it just occurred to me I can use a somewhat lighter color of the veneer so it will resemble the Ric fretboard much better! :)
And just found it for only $10. 0.25 - 0.50 mm thick just perfect.
And bought another one that resembles the Ric fretboard perfectly at only $18 with a thickness of 0.45mm which is perfect.

Another thing: I just did the previous mentioned trick of turning the saddles 180º. Here's the result:
IMG_20210505_203035_s.jpg

As you can see no overhang anymore. As easy as that, only needed to loosen the 2 screws of the bridge.

Seeing this, I'll probably go with the original setup when I change the scale to 33.25". It will be enough to move the bridge a little further up the body without being too "obvious". Using the oem Ric bridge would leave a rather clear gap between the end of bridge and the edge of the body due to the saddles being closer to the string mounting and thus even farther away which would imply moving the bridge even more closer to the bridge pickup. Not a good idea, I think.
 
Last edited:
Nofretbacker project:

Just had a confirmation for a partial refund from the seller. As I said in the review, this is a decent seller even though he made a mistake (we're all human) he recognized his error and we came to an agreement. That is good and no reason to give bad critics, which I won't.

What is important with buying from any Chinese seller is to state clearly what you want/need. If you clearly state in a message you want your bass to have 26 frets, it should have 26 frets, if it doesn't you'll have proof and can open a dispute in which Aliexpress will revise all your message and give you either a full or partial refund if nothing else can be done. Also make screenshots of the original order data and the item.

Well, so much for that. Yesterday when I was fiddling with the bridge I also did a mock-up of the position at 33.25" scale. It's a little bit further up the body but nothing too much. What is obvious is that I can't use the Ric compatible bridge as it is shorter then the fakenbridge. I can live with that.

The veneer I found has what looks like the exact same color and structure as the original Ric fretboard. This may very well be a great idea for the conversion. It only adds 0.45 mm to the fretboard which is about half of the normal fret height. In my previous fret conversion project I needed to lower my bridge saddles quite I bit to avoid having a too high action. Fretting a string on the fretted bass means it is about 1 mm above the fretboard. So removing the frets means having one mm added to the action which thus should be compensated by lowering the bridge. In this case it'll only be 0.5 mm (0.45 + glue thickness = about 0.5 mm) so that's even better.

The great thing is the veneer covers everything, inlays and fret slots, and leaves a complete blank fretboard. I love this. Come to think of it, I might even buy a 10" radius sanding block and run it over the fretboard before gluing the veneer, that would make it even more Ric like.

I will need to remove the side marker dots but that's no big deal, a little dremel work will take care of that.
 
Today I am going to tell a little story. This may not be the direct inspiration for this club, but it certainly captures the essence of why it is important. It was sometime between 7 and 9 months ago that I decided to build my first Bass from scratch. I wanted to experiment with different tone-woods, specifically cherry. so the idea was to build a semi hollow body. the problem was that i didn't have the tools i really needed, so i was going to try a radical idea. i decided to build it "sandwich style" that being to cut the body with the cavities being cut all the way through with a jig saw rather cut them most of the way through with a router. To cover the back i cut a seperate piece of 1/4" cherry plywood, and the same for the top.
I had no idea what size or shape to make it, so i just drew what seemed reasonable to me and started to build it. It was slightly less than a steller build. here are the pics....
20201221_160107.jpg 20201222_160741.jpg 20201228_114110.jpg 20201228_114226.jpg 20201228_114235.jpg 20210102_110256.jpg 20210102_112715.jpg 20210102_131938.jpg 20210102_134937.jpg

Even though it was ugly, I considered it a success because of all that i learned in the process, and the fact that i sounded much better than it looked. I posted it on one of the threads, probably bass hoarding personality disorder. I got some really bad comments, including one person saying how nice it was for me to buy some high school kids shop project.

But there were also people who supported me and encouraged me to keep at it. MirandM was one of the ones who was most supportive. It would have been easy to give up and even quit the site as a result of the negative comments, and judgmental attitudes expressed by some members of the site.

Here is the point.

Without building that "shop project", and getting offered ideas from others like MirandM I would not have improved to the point where i have now built projects like this one...
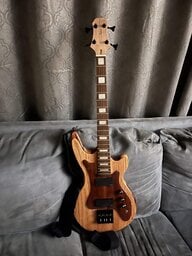
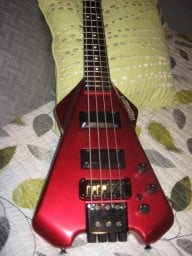
active.jpgor even this one...guitar 2.jpg

The reason for this club is to have a place where any work will be encouraged, and nobody will ridicule or judge any work no matter the results. And it is important that you not be intimidated by someone else's great success. I can say for certain that I will only offer support and possible tips if asked for. And if i ever sound like I am not being accepting enough, you can always remind me of the shop project.

Please bookmark this, so that if any new members seem to be intimidated, you can point this out to them, and make the point that this is a place where they are safe to share everything and anything, because without the "less than perfect" builds, none of us would ever become good.

remember the following quote and live by it.....

"The difference between a master and a novice is that the master has failed more times than the novice has even tried."
 
Today I am going to tell a little story. This may not be the direct inspiration for this club, but it certainly captures the essence of why it is important. It was sometime between 7 and 9 months ago that I decided to build my first Bass from scratch. I wanted to experiment with different tone-woods, specifically cherry. so the idea was to build a semi hollow body. the problem was that i didn't have the tools i really needed, so i was going to try a radical idea. i decided to build it "sandwich style" that being to cut the body with the cavities being cut all the way through with a jig saw rather cut them most of the way through with a router. To cover the back i cut a seperate piece of 1/4" cherry plywood, and the same for the top.
I had no idea what size or shape to make it, so i just drew what seemed reasonable to me and started to build it. It was slightly less than a steller build. here are the pics....
View attachment 4261302 View attachment 4261303 View attachment 4261304 View attachment 4261305 View attachment 4261306 View attachment 4261308 View attachment 4261309 View attachment 4261310 View attachment 4261311

Even though it was ugly, I considered it a success because of all that i learned in the process, and the fact that i sounded much better than it looked. I posted it on one of the threads, probably bass hoarding personality disorder. I got some really bad comments, including one person saying how nice it was for me to buy some high school kids shop project.

But there were also people who supported me and encouraged me to keep at it. MirandM was one of the ones who was most supportive. It would have been easy to give up and even quit the site as a result of the negative comments, and judgmental attitudes expressed by some members of the site.

Here is the point.

Without building that "shop project", and getting offered ideas from others like MirandM I would not have improved to the point where i have now built projects like this one...
View attachment 4261338or even this one...View attachment 4261339

The reason for this club is to have a place where any work will be encouraged, and nobody will ridicule or judge any work no matter the results. And it is important that you not be intimidated by someone else's great success. I can say for certain that I will only offer support and possible tips if asked for. And if i ever sound like I am not being accepting enough, you can always remind me of the shop project.

Please bookmark this, so that if any new members seem to be intimidated, you can point this out to them, and make the point that this is a place where they are safe to share everything and anything, because without the "less than perfect" builds, none of us would ever become good.

remember the following quote and live by it.....

"The difference between a master and a novice is that the master has failed more times than the novice has even tried."
Thank you for posting this, you explained the essence of my intentions with this club more than I ever could.
One of the main reasons for starting this club was exactly what happened to you with this build and how I was unable to find a real place here on TB where anyone could post it like this without being judged right off the bat.

One popular phrase for this comes to my mind: "The importance is not reaching the top of the mountain, it's the road you took to get there!"

THANK YOU.
 
Last edited:
spent a little time working on my "floating bass" project today. So, I thought I might post a few pics. still needs many hours of sanding and finishing work but it is starting to take shape. I was able to fit up the neck and measure for the bridge location. That in turn allowed me to route the pickup cutouts.

The top-wood will only be anchored at two points, just below the neck and right under the bridge.

BTW this is my first time using a hipshot bridge. I always thought they looked just like the cheap ones and so never thought to spend the extra money on them. I bought it because of the string spacing adjustment. andso cool that they supply spare parts. Now, I don't think I'll ever go back.


IMG_0028.JPG

IMG_0029.JPG

IMG_0030.JPG

IMG_0031.JPG
 
Last edited:
I had a chance to re shape a fender style headstock today.
Sorry, no before shot but im sure y’all have seen your share of fender style headstocks:)
78DCE7BB-F974-4F45-884E-27F2065FF66E.jpeg

this neck will be going on a mahogany body kit that i built a couple years ago. The original neck ended up having some issues so out with the old, in with the new! I’ll sand off the rest of the original finish, stain the top of the headstock with something dark then fish that and the neck with tru- oil.
 
I had a chance to re shape a fender style headstock today.
Sorry, no before shot but im sure y’all have seen your share of fender style headstocks:)
View attachment 4262859
this neck will be going on a mahogany body kit that i built a couple years ago. The original neck ended up having some issues so out with the old, in with the new! I’ll sand off the rest of the original finish, stain the top of the headstock with something dark then fish that and the neck with tru- oil.
Cute, different, lol looks like a mouse has eaten in on your headstock :laugh:
Cheese Bass ?
 
Last edited:
@bass theory
I admire your determination, starting right in with an original design. Ive taken the easier route copying iconic designs and adding in some "improvements" (debatable) where it made sense as a route to learning some craft. I hope to come up with my own body shape eventually. In my mind, the only thing that matters is knowing that you did your absolute bleeding-edge best on each build. Any failures are bought and paid for, and you OWN the successes.
 
Today I am going to tell a little story. This may not be the direct inspiration for this club, but it certainly captures the essence of why it is important. It was sometime between 7 and 9 months ago that I decided to build my first Bass from scratch. I wanted to experiment with different tone-woods, specifically cherry. so the idea was to build a semi hollow body. the problem was that i didn't have the tools i really needed, so i was going to try a radical idea. i decided to build it "sandwich style" that being to cut the body with the cavities being cut all the way through with a jig saw rather cut them most of the way through with a router. To cover the back i cut a seperate piece of 1/4" cherry plywood, and the same for the top.
I had no idea what size or shape to make it, so i just drew what seemed reasonable to me and started to build it. It was slightly less than a steller build. here are the pics....
View attachment 4261302 View attachment 4261303 View attachment 4261304 View attachment 4261305 View attachment 4261306 View attachment 4261308 View attachment 4261309 View attachment 4261310 View attachment 4261311

Even though it was ugly, I considered it a success because of all that i learned in the process, and the fact that i sounded much better than it looked. I posted it on one of the threads, probably bass hoarding personality disorder. I got some really bad comments, including one person saying how nice it was for me to buy some high school kids shop project.

But there were also people who supported me and encouraged me to keep at it. MirandM was one of the ones who was most supportive. It would have been easy to give up and even quit the site as a result of the negative comments, and judgmental attitudes expressed by some members of the site.

Here is the point.

Without building that "shop project", and getting offered ideas from others like MirandM I would not have improved to the point where i have now built projects like this one...
View attachment 4261338or even this one...View attachment 4261339

The reason for this club is to have a place where any work will be encouraged, and nobody will ridicule or judge any work no matter the results. And it is important that you not be intimidated by someone else's great success. I can say for certain that I will only offer support and possible tips if asked for. And if i ever sound like I am not being accepting enough, you can always remind me of the shop project.

Please bookmark this, so that if any new members seem to be intimidated, you can point this out to them, and make the point that this is a place where they are safe to share everything and anything, because without the "less than perfect" builds, none of us would ever become good.

remember the following quote and live by it.....

"The difference between a master and a novice is that the master has failed more times than the novice has even tried."
Too bad you didn’t post it in the Luthier’s Corner, you would have had all the support you’d ever need! :thumbsup:
 
nofretbacker project.

I finally got my bridge pickup cover and just ordered the pickup with surround set.
This set also has a pup cover but that one's made of metal and just a little too close to the strings on this bass. I know this from experience with my tealbacker where I did the exact same thing and needed to buy the rick oem pup cover which is a fair bit higher, that worked perfectly.

The bridge pickup in this set is for 17 mm standard string spacing. Having the chinabridge that won't do as it has 19 mm and I cannot use the Ric compatible bridges because they would have to be mounted much closer to the bridge pickup. I have no problem with the Chinabridge, it's fairly decent, even though many people have problems with it, I don't, it just works. So I will replace the bridge pickup in the set with the original bridge chinapickup which isn't bad either. The toaster neck pickup is better replaced by a high gain all parts version, which does give a noticeable difference. This one I don't mind since I mostly play neck or both pickups

If I remember correctly last time I bought two ric 3-way switches so I should have one in my parts box and I have a complete set of ric alike knobs so not much left to acquire to start the project. Ah of course I forgot, still waiting for the veneer to be delivered, otherwise this whole project make no sense at all.
:)
 
I might have to join this club at some point. I have attached some pic's of my $69 Jazz kit build. I sweated bullets over the head stock shaping but do know what? Every time i walk past it i smile a little bit. BTW it now has tapes on it.:cool:
 

Attachments

  • 20180328_220438.jpg
    20180328_220438.jpg
    172 KB · Views: 79
  • 20180409_214841.jpg
    20180409_214841.jpg
    346.1 KB · Views: 69
  • 20180409_214903.jpg
    20180409_214903.jpg
    424.4 KB · Views: 69