
My bad, thugh in my defense, he is a walking derailment...
So? Sorry not sorry?


TalkBass has been independent since 1998. Add your voice.
Create a free account to reply to discussions, view embedded media, and browse with fewer display ads.
Join free Log in
Want zero display ads or expanded classifieds tools? Compare plans.
My bad, thugh in my defense, he is a walking derailment...

Go MarkBass!!Finished my P/J ‘assembly’ today... joined the crew!!

Let’s bring this back to basses.... my new Barlow Falcon bass! View attachment 3339509View attachment 3339510View attachment 3339511View attachment 3339512View attachment 3339513
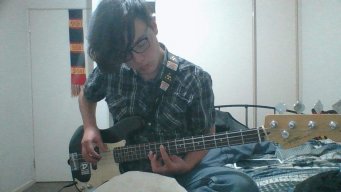

Looks like the knobs are really tight together?sorry photo was taken with a potato.
yeah, I had a limited space as I was chiseling the hole out for all the electronics, as when I used the router it dislocated my hand and nearly took off my fingers . and it was honestly a lot easier to chisel than to router, but all the nobs were too big on the internet so I 3d printed the nobs to fit it.Looks like the knobs are really tight together?
yeah, I had a limited space as I was chiseling the hole out for all the electronics, as when I used the router it dislocated my hand and nearly took off my fingers . and it was honestly a lot easier to chisel than to router, but all the nobs were too big on the internet so I 3d printed the nobs to fit it.

Really nice selection!





Really nice selection!
Just needs a jazz...
(And one of each in 5 string too)



yeah, I had a limited space as I was chiseling the hole out for all the electronics, as when I used the router it dislocated my hand and nearly took off my fingers . and it was honestly a lot easier to chisel than to router, but all the nobs were too big on the internet so I 3d printed the nobs to fit it.




