
Enjoy the benefits of a premium membership!
Upgrade Account
-
TalkBass has been independent since 1998. Add your voice.
Create a free account to reply to discussions, view embedded media, and browse with fewer display ads.
Join free Log in
Want zero display ads or expanded classifieds tools? Compare plans.
You are using an out of date browser. It may not display this or other websites correctly.
You should upgrade or use an alternative browser.
You should upgrade or use an alternative browser.
- Status
- Not open for further replies.
More options
Who Replied?

Well the bridge is a little odd, but that's part of the charm isn't it? 
I didn't have too much trouble intonating mine, I may or may not have loosened up the string I was working on, the pulled it to the side enought that I could get a tiny phillips screwdriver in there and just stuck the screwdriver in at an angle. The screw turned very easy as long as the string was not pushing down on the saddle. I tried to adjust by large amounts to minimize the amount of times I had to go through the process. I may have only adjusted each saddle twice and the job was done. For the string height, I thought it seemed like the bridge was decently matched to the fretboard radius, so I didn't worry about heights too much. Maybe I just play with a higher action and didn't notice a small height variation between strings. All seemed well within reason for my purposes. I don't slap or tap though, so maybe my setup wouldn't work for a lot of guys. Couldn't tell ya.
The mute though is lovely! You can adjust the mute to work on all strings at once. I mean just barely touch them all so you have the same amount of decay for all the strings but you have to really want it. The foam mute pad is glued to a thin steel plate, and that plate is bent to hold the pad in the right shape. If you want it just right you'll need to either bend that plate to just the right arc or you'll need to grind or sand the foam to shape. If I cared enough to keep the mute, I'd take it to the belt sander and carefully grind an angle on that foam so the pad would be thickest on the side nearest the tailpiece and thinner as it gets closer to the pickups. Having just a small point of contact will add a lot of forgiveness to the way the foam works on the string, and you should be able to get them all muting close to the same without too much trouble.
And a note of caution to you guys removing bridges for the first time!!!
The ground wire is soldered to the middle of the mute plate. When you remove the screws and go to pick up the loose bridge, that ground wire will pull the bridge out of your hand if you're not paying very close attention! (I did it twice so I know, duh) The bridge is heavy enough and will fall far enough to put a couple small dings in your paint job, so watch for this please. Have your soldering iron or wire cutter ready before you remove the bridge screws.
I didn't have too much trouble intonating mine, I may or may not have loosened up the string I was working on, the pulled it to the side enought that I could get a tiny phillips screwdriver in there and just stuck the screwdriver in at an angle. The screw turned very easy as long as the string was not pushing down on the saddle. I tried to adjust by large amounts to minimize the amount of times I had to go through the process. I may have only adjusted each saddle twice and the job was done. For the string height, I thought it seemed like the bridge was decently matched to the fretboard radius, so I didn't worry about heights too much. Maybe I just play with a higher action and didn't notice a small height variation between strings. All seemed well within reason for my purposes. I don't slap or tap though, so maybe my setup wouldn't work for a lot of guys. Couldn't tell ya.
The mute though is lovely! You can adjust the mute to work on all strings at once. I mean just barely touch them all so you have the same amount of decay for all the strings but you have to really want it. The foam mute pad is glued to a thin steel plate, and that plate is bent to hold the pad in the right shape. If you want it just right you'll need to either bend that plate to just the right arc or you'll need to grind or sand the foam to shape. If I cared enough to keep the mute, I'd take it to the belt sander and carefully grind an angle on that foam so the pad would be thickest on the side nearest the tailpiece and thinner as it gets closer to the pickups. Having just a small point of contact will add a lot of forgiveness to the way the foam works on the string, and you should be able to get them all muting close to the same without too much trouble.
And a note of caution to you guys removing bridges for the first time!!!
The ground wire is soldered to the middle of the mute plate. When you remove the screws and go to pick up the loose bridge, that ground wire will pull the bridge out of your hand if you're not paying very close attention! (I did it twice so I know, duh) The bridge is heavy enough and will fall far enough to put a couple small dings in your paint job, so watch for this please. Have your soldering iron or wire cutter ready before you remove the bridge screws.
I can live with a minor tail lift, don't wanna do any non-reversable mods.
This bridge is..wierd. No way to intonate without taking strings off (!), no way to raise/lower strings individually (!). And that mute pad is a joke, unless I missed something. I can only mute one or two strings at the time..
And the tail lift thing.
I like this bass, but those bridge issues are MAJOR, IMO.
I can see why some of you guys go Hipshot.
Strange RIC didn't redesigned this thing way back, when they altered the pups and truss rod system introducing the 4003.
Well the bridge is a little odd, but that's part of the charm isn't it?
I didn't have too much trouble intonating mine, I may or may not have loosened up the string I was working on, the pulled it to the side enought that I could get a tiny phillips screwdriver in there and just stuck the screwdriver in at an angle. The screw turned very easy as long as the string was not pushing down on the saddle. I tried to adjust by large amounts to minimize the amount of times I had to go through the process. I may have only adjusted each saddle twice and the job was done. For the string height, I thought it seemed like the bridge was decently matched to the fretboard radius, so I didn't worry about heights too much. Maybe I just play with a higher action and didn't notice a small height variation between strings. All seemed well within reason for my purposes. I don't slap or tap though, so maybe my setup wouldn't work for a lot of guys. Couldn't tell ya.
The mute though is lovely! You can adjust the mute to work on all strings at once. I mean just barely touch them all so you have the same amount of decay for all the strings but you have to really want it. The foam mute pad is glued to a thin steel plate, and that plate is bent to hold the pad in the right shape. If you want it just right you'll need to either bend that plate to just the right arc or you'll need to grind or sand the foam to shape. If I cared enough to keep the mute, I'd take it to the belt sander and carefully grind an angle on that foam so the pad would be thickest on the side nearest the tailpiece and thinner as it gets closer to the pickups. Having just a small point of contact will add a lot of forgiveness to the way the foam works on the string, and you should be able to get them all muting close to the same without too much trouble.
And a note of caution to you guys removing bridges for the first time!!!
The ground wire is soldered to the middle of the mute plate. When you remove the screws and go to pick up the loose bridge, that ground wire will pull the bridge out of your hand if you're not paying very close attention! (I did it twice so I know, duh) The bridge is heavy enough and will fall far enough to put a couple small dings in your paint job, so watch for this please. Have your soldering iron or wire cutter ready before you remove the bridge screws.
haha yeah, i remember that. Funny though cause i always thought ground wires went under the bridge pickup. Then i took the bridge off and found out otherwise :x

Well the bridge is a little odd, but that's part of the charm isn't it?
Agree.
Thanks for all your advice. BTW, love your Black on AFG, Wademeister63.
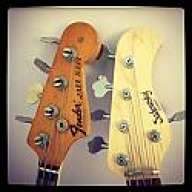
ok, i just traded for a Jetglo RIC 4001c64. i'll post pics when i can, but its pretty awesome! can anyone tell me how the knobs are arranged?


Anybody wanna see my '73 4001 that I ordered when I was 17 years old? If so, I'll take some pics tomorrow. 
Did I just give away my age?
Did I just give away my age?


Just played an amazing, 4000.
I think it was an early 70's.
I was blown away, by tone, and playability.
I feel GAS !!!!!!!!



has anyone had issues with "tail lift" ? it seems like my newly acquired 4001c64 has a bit of it and i was wondering if thats common.

ah yes, i must have missed that. i think mine's a little worse. i can fit a credit card in there easily. if i switch to strings with less tension (TI flats), will it go away or is that something that once it appears, it stays?

FWIW... in the year-and-a-half or so that I've owned my C64S, the amount of tail lift I've experienced hasn't increased. With the new tail pieces, it would seem to be something that happens to a certain degree and then "stabilizes".
I've seen examples of some vintage tail pieces that really got "bent out of shape"... to the point of lifting up almost perpendicular to the body!
One thing to note... some folks have mentioned the possibility of "leveraging" the tail piece into increased lift via the over-tightening of the attachment screws that reside under the bridge piece... so just to be on the safe side, don't over-tighten those screws!
I've seen examples of some vintage tail pieces that really got "bent out of shape"... to the point of lifting up almost perpendicular to the body!
One thing to note... some folks have mentioned the possibility of "leveraging" the tail piece into increased lift via the over-tightening of the attachment screws that reside under the bridge piece... so just to be on the safe side, don't over-tighten those screws!
I've got some lift and mine is only a little over a year old, nothing I am worried about though. The ric plays great and sounds even better.
I have pondered the hipshot bridge replacement but I think I am going to wait for the new official Rickenbacker bridge to come out before I decide on any mods.
I for one really enjoy the "upright sound" you can get by engaging the mechanical mute & would miss that feature if I went hipshot.
I have pondered the hipshot bridge replacement but I think I am going to wait for the new official Rickenbacker bridge to come out before I decide on any mods.
I for one really enjoy the "upright sound" you can get by engaging the mechanical mute & would miss that feature if I went hipshot.
- Status
- Not open for further replies.


