• TalkBass has been independent since 1998. Add your voice.
    Create a free account to reply to discussions, view embedded media, and browse with fewer display ads.
    Join freeLog in
    Want zero display ads or expanded classifieds tools? Compare plans.

Tuxedo Bass #3 Coming Up

THIS IS No. 3, not No. 2!

Can some kind mod fix that for me?

I decided to get a jump on the next bass. I cut the wood and blew my last bandsaw blade and hadda finish some cuts by jig saw.

If I need tools or parts on a Sunday early evening, there's nothing open where I live - not that it matters to me much as the nearest Lowes is 70 miles away.

As you can see - it's more of the same built-up wood laminations with construction grade spruce (2x6s) and some hemlock for - well, I just have some that's all.
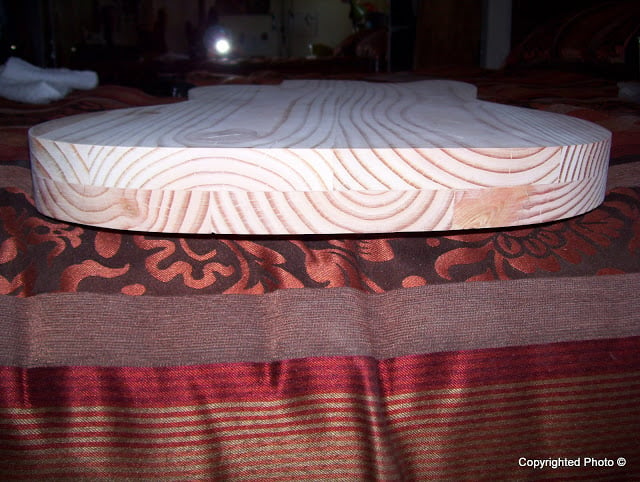
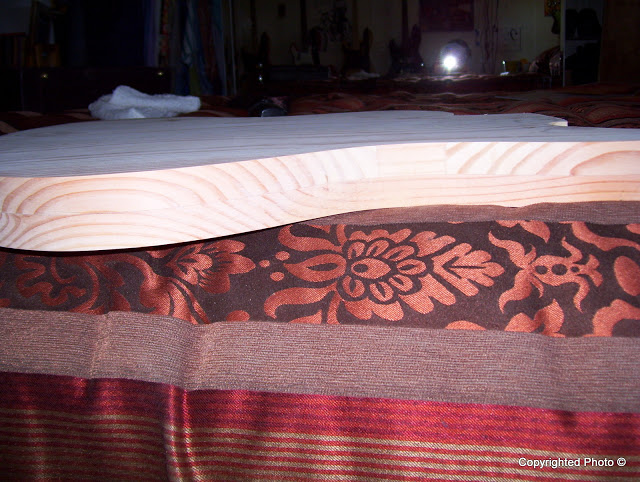
100_8139.jpg


100_8140.jpg


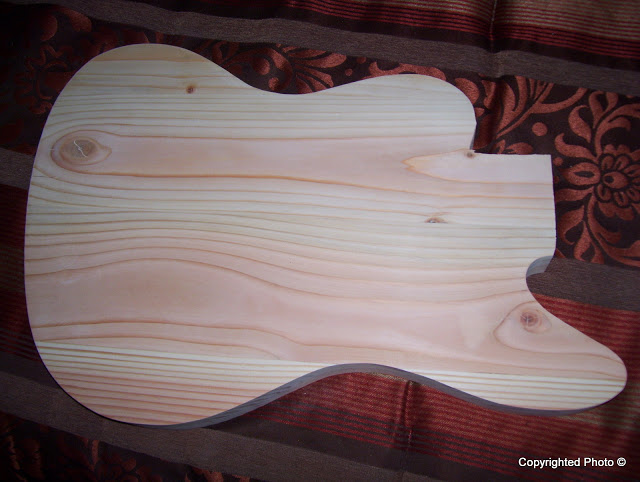
This time I'm leaving a small area uncut around the neck pocket to make it a lot easier to rout-out the pocket with a full supporting boundary around the router plate! I learned THAT the hard way.
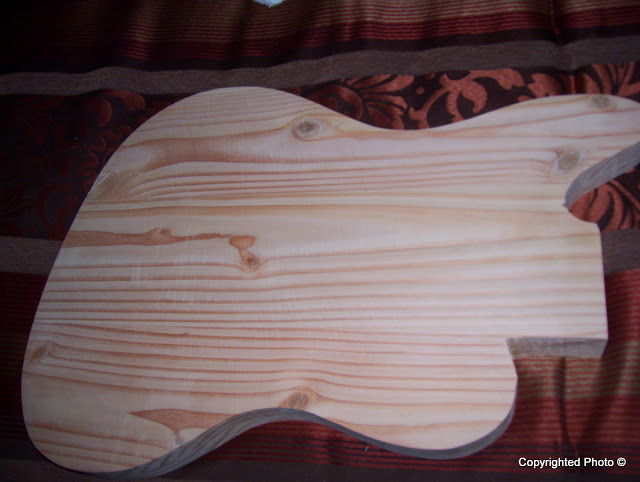
100_8137.jpg


100_8138.jpg


So far - and with no further work on the body, it weighs in at: 6lbs/4ozs - kinda heavy - but there's more wood to remove yet.

Can anyone guess what it's gonna be?

HINT: It will be Fender shaped - but gonna have some Ibanez DNA in it. :hyper:

Let's see where this one goes. No plans but the ones in my head. Scary! :hmm:
 
I'm gathering parts and at the same time ruminating about the pickups.

This is going to be a new design for me - like I said some Fender Jag and some Ibanez - so it'll have the Fender Jag profile and the Ibanez SR 500 thinness and tapers.

Here's the thoughts so far::

Thin Ibby body but the Fender Jag-shape (hard to imagine?)
MAYBE dual sets of P-P'ups, mirror imaged
No pickguard
Squier football type output jack on the face of the body
A sunken flat control panel for the knobs 1/4" below face level.
All black hardware
Blocked neck
Mentally working on the headstock detail so far - nothing's jumped into my big brain yet.

I spent a rather ill weekend - 102.5ºF fever and it looks like I washed out my eyes with vanilla pudding this morning. I've got something internal going on and I'll go to the VA tomorrow to find out what it is.

Prolly need a shot --- or to be shot --- or sumpthin'.
 
Today was a good day and I actually got outta my deathbed and did some work on the body.

I had cut the basic shape with a small bandsaw and got to this point before I took ill.

NOTE: any pictures you see with me holding the router with one hand are staged, and the other hand is holding the camera while the router is actually NOT running:::

100_8137.jpg


And today I did some of the routing for the neck and the control panel. Notice that I had left surplus material around the neck pocket for the router to work better and my not having to hold up one side of it to make a flat cut.

I built a jig for the pocket when I finally got the neck I'm gonna use here at the house so I could be sure of the correct size and tapered shape::

100_8176.jpg


The nice part was that I could drive a couple of small finishing nails through the template into that bonus wood that was gonna get cut off anyway. I don't have much faith in double-sided tape, so this just felt more secure to me.

100_8179.jpg


Here you can see that I was using my Dremel Advantage™ smaller unit and I think it gives great control and a good visibility to the actual cutter as it's working.

100_8177.jpg


It works for me anyway. This is the cutter I used, and since I have made the template a little smaller, I could just run the shank of the cutter as a guide. It's not the best - but again, it worked for me. Next job, I'll have the template bit with the bearing up on the shaft, near the chuck.

100_8180.jpg


100_8181.jpg


Here I am checking the depth of the pocket as I have it so far. I'm checking it in an area that will be cut off later and any mistakes here aren't fatal to the body - I hope!

Yes - I use machinist's calipers for this as I've used them all my working life and they just feel better to me.

100_8182.jpg


The arrows on the template are for me to know where the neck pocket actually ends when the blank is all routed out - so I can have a little fudge room.

After the first cuts to depth, I took a flush-cut bit and finished off the corners of the pocket to get it square and remove any extra material that I didn't want to work with the bigger bit:::

100_8185.jpg


As you can see, I went to the minimalist router adapter for this part, and it works well if you don't push too hard with the cutter:::

100_8187.jpg


Here's where it gets interesting. I decided I'm going to make a really 'different' control panel - but here's the first cut to depth for that area. Now bear with me here, as this isn't totally clear in these pixs - but you'll understand my thinking when I get a little further down the line:::

100_8188.jpg


The arc was free-handed with the router, and I set a temporary fence on the body with a piece of plywood and a pair of clamps for the upper cut:::

100_8189.jpg


100_8190.jpg


Here is where I took the template off and the temporary fence that I had clamped to the body::

100_8192.jpg


Now back to the belt sander to finish those radius cuts and I have to remove the end of the neck pocket yet at this point to keep support for those neck pocket fillets strong until the last moment.

100_8193.jpg


I'm going to break this post right here since I don't know what the TB limit on hotlinks is for any one post. BRB.
 
  • Like
Reactions: PawleeP
......and continuing:::

I have some really small router bits for my standard Dremel tool, and I chucked up a round-over for this part - again, bear with this as it makes little sense at this time, but it will become clear later on:::

100_8200.jpg


100_8197.jpg


This is a small detail I want in the finished product - but ya gotta see what I have in mind before you can understand what my idea is for the control panel pocket.

100_8196.jpg


100_8198.jpg


Now - to shoot the end of the neck pocket straight to the center line of the body:::

100_8201.jpg


100_8203.jpg


Here's a mock-up with the neck of choice:::

100_8205.jpg


100_8206.jpg


100_8207.jpg


100_8208.jpg


Have you figured out the final plan of the control panel?

Hint: No PG.

More next time - I'm tired and still am not 100% feeling good yet.
 
Yeah - but in a very different way if I can find or make the right type of knobs. Think: Japanese transistor radio.

I'm breaking for lunch right now and then back to sanding/carving the body down to shape and I'll take more pixs tonight with a little less info on the tools this time.

I figger everybody knows what a router and sanding bench looks like.

I keep tossing around in my head what the actual finish will be on this one. It changes as I see different aspects in the wood and the details of the grain.

When one is standing cutting/sanding/grinding wood - a lot of interesting thoughts can happen. Hah!

Perhaps a trans-black. I dunnow yet.

Trans black and chrome sounds nice.
 
Saturday Report​

OK - I spent the day working on the body for a bit and now you can see where my mind is on the control panel:::

100_8220.jpg


I'm leaving enough fatness on the bottom of the body to compensate for the neck/head weight.

100_8219.jpg


You can see the SR500 influence here:::

100_8217.jpg


This is the lower bout:::

100_8216.jpg


A little better view of the back of the body:::

100_8214.jpg


100_8212.jpg


Listen to me here!

You did NOT SEE the pickup marks!
You DID NOT see the pickup marks!
YOU DID NOT SEE the pickup marks!
YOU DID NOT SEE THE PICKUP MARKS!

100_8211.jpg


NEXT: rout the secret p'up slots and get the pots figured out and where the knobs are finally gonna go - and HOW they are gonna mount.
 
I just got back in for the evening after a long day on the sanding bench. The body now feels like a Jaguar that was designed by the M&M/Mars candy company. That makes me feel that a bright candy-color would be nice.

Maybe bright lemon yellow and matching headstock?

[Invalid or Expired Link Removed]

Hmmmmmmmmmmmm.

Weight right now = 4lbs/2ozs and I've still gotta take more weight out for the p'ups and electrical control cavity in the back.


I'm having thoughts about the design of the next Tux Bass now too.