

Enjoy the benefits of a premium membership!
Upgrade Account
-
TalkBass has been independent since 1998. Add your voice.
Create a free account to reply to discussions, view embedded media, and browse with fewer display ads.
Join free Log in
Want zero display ads or expanded classifieds tools? Compare plans.
You are using an out of date browser. It may not display this or other websites correctly.
You should upgrade or use an alternative browser.
You should upgrade or use an alternative browser.
WBO 2024: Bari-metric Pressure
- Thread starter Quills
- Start date
More options
Who Replied?

Looks pretty good all things considered
Thanks, Beej.
As a friend of mine said: with the first baby, you worry about every little hiccup and pause in breathing, but by the time you get to the fourth one you mop the diarrhea off the countertop and start chopping the onions for the bolognese.
I've definitely got a case of first baby syndrome, but I'm reasonably happy with how it's going so far.
One op. Six pics.
I'm having a period where I'm only getting an hour or so in the shop each day, so I'm trying to do at least one semi-major task, to ensure things don't have a chance to stagnate. I figure I can stay roughly on-schedule for the deadline if I get the body mostly-finished by next weekend (obviously, there are certain things you can't do without the neck and attendant bridge position).
I managed to get into the shop and do the edge-contour routing on the front. This needs to be done at this phase as the arm-rest and belly-carve are going to cut across it. I'm still in two minds as to whether to go 'stark' and just have the carves cut across the edge-contour, or use rasps and files to feather the contours into the recesses. I'll decide when I've done them.
My original plan was to put a 45-degree chamfer on the edge but, as the design developed, I thought it would encroach and thin-out the face shape too much; with 45-degrees, you're intruding into the face as much as you are the sides. I have a 15-degree chamfer bit, so I thought I would give that a go as, at 15-degrees, the face incursion is only 26% of the side incursion (pretty much a quarter).
So that's what I did.
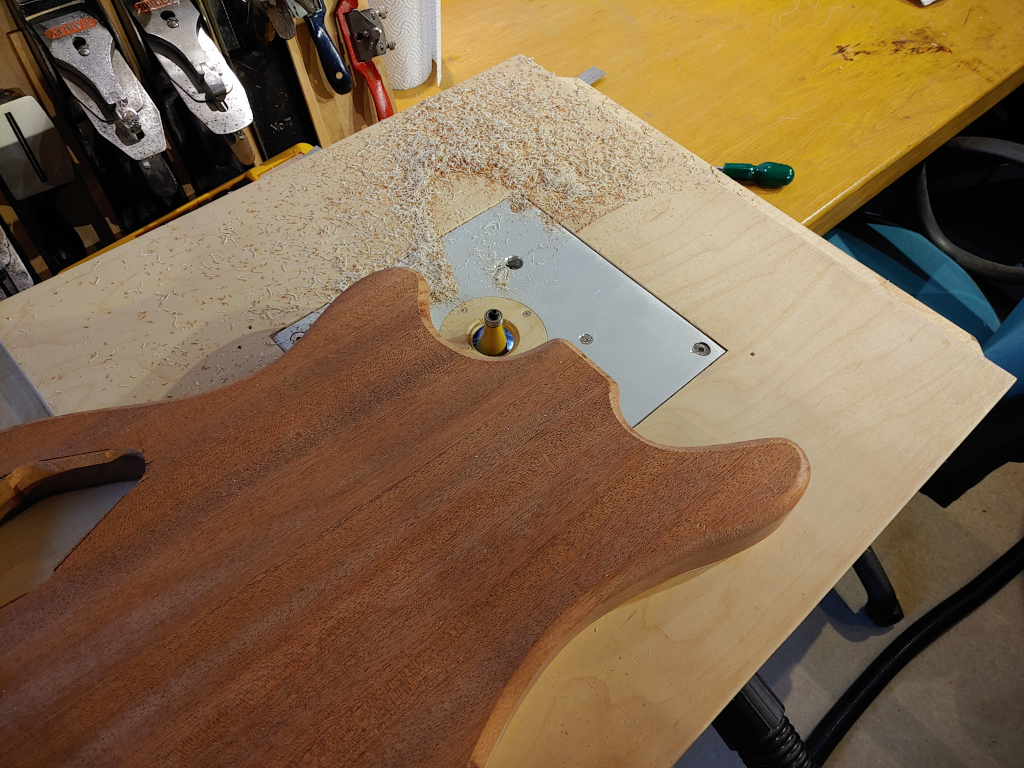
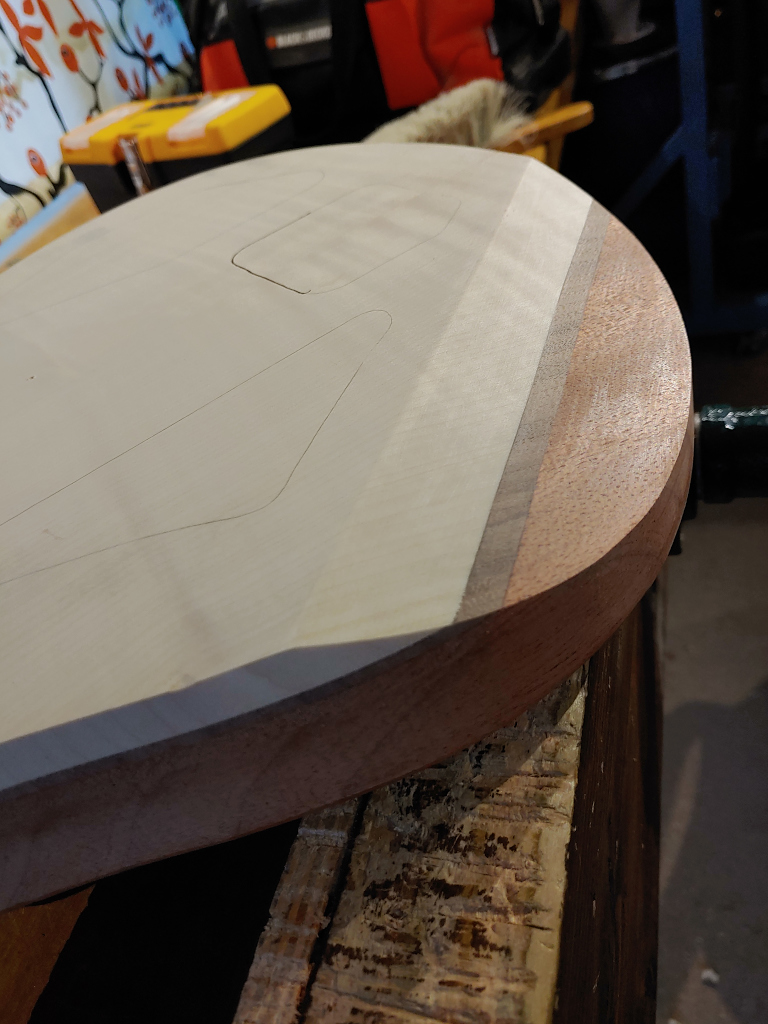
I went slowly to prevent tear out, increasing the blade 2mm at a time for the first 4 passes, then 1mm, then 0.5mm for the last few. It looked pretty good but a bit 'standard' when the chamfer hit the top of the walnut, and it looked decent when it hit the bottom but, every cut I made, I liked the effect more, so I kept going until the balance between the face shape and sides looked 'about right' (as the chamfer 'borders' the sides when the top is viewed directly).
The end result is that the chamfer goes about 4mm (5/32") into the Utile. In combination with the 7/16" (11.1mm) round-over on the back, it made the body look 'plump' in quite a nice way while thinning out the top. It also gives a really sweet basis for attempting faux binding.
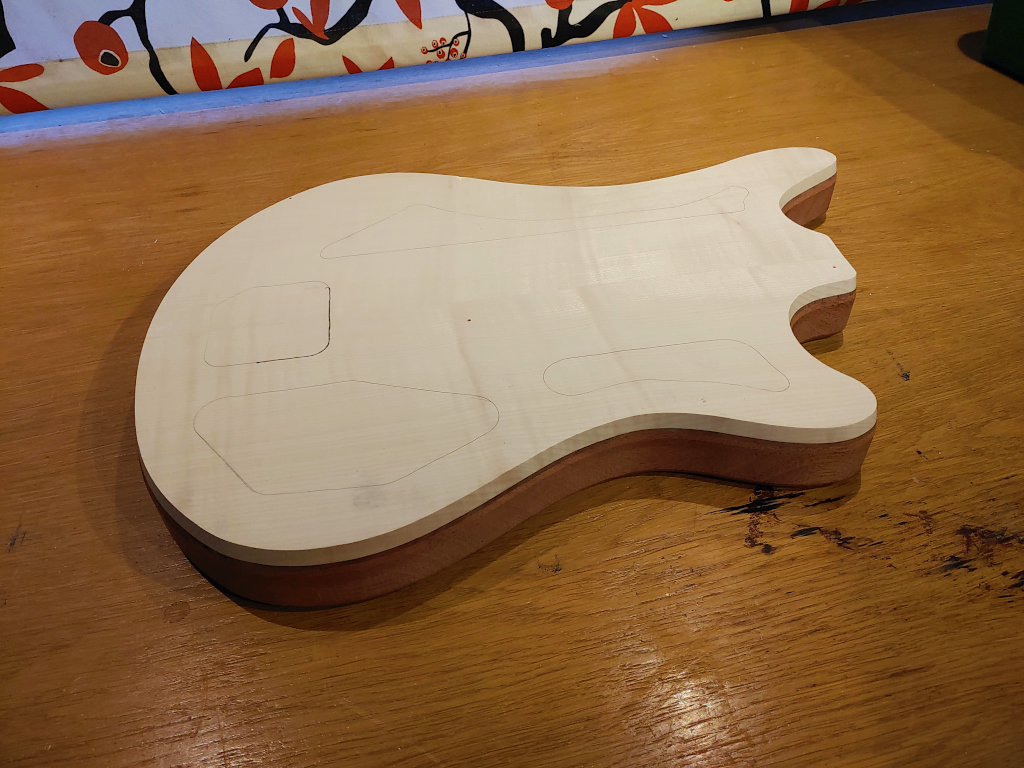
The gap between the laminations on the top of the guitar cleaned up a treat, giving credence to the ROS hypothesis, and would have cleaned up more if I'd kept going, but I liked it where it was. This is literally the only gap remaining, and it's a fraction the size of the original and will fill invisibly:
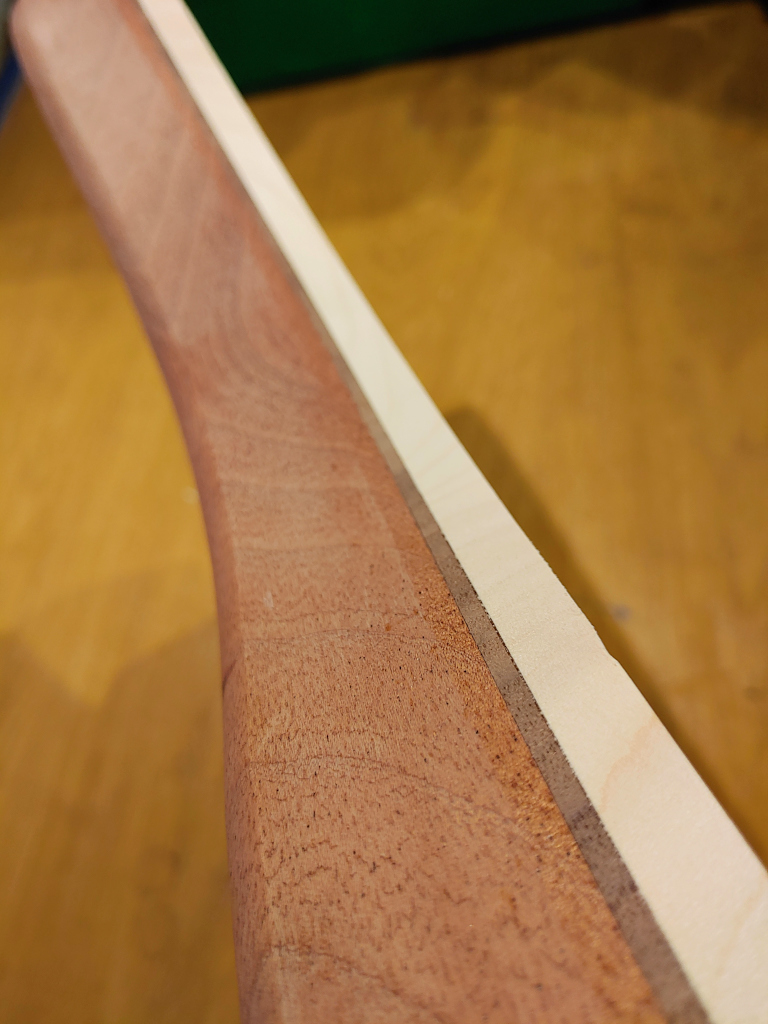
Side contour:
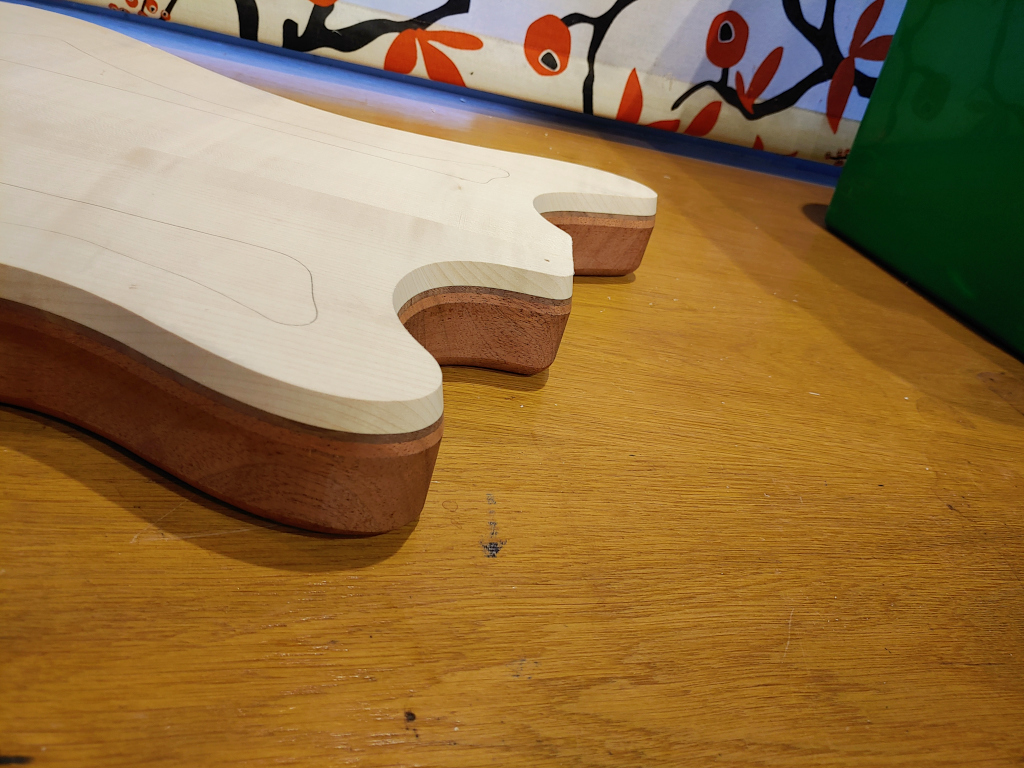
Kind-of starting to look like something ...
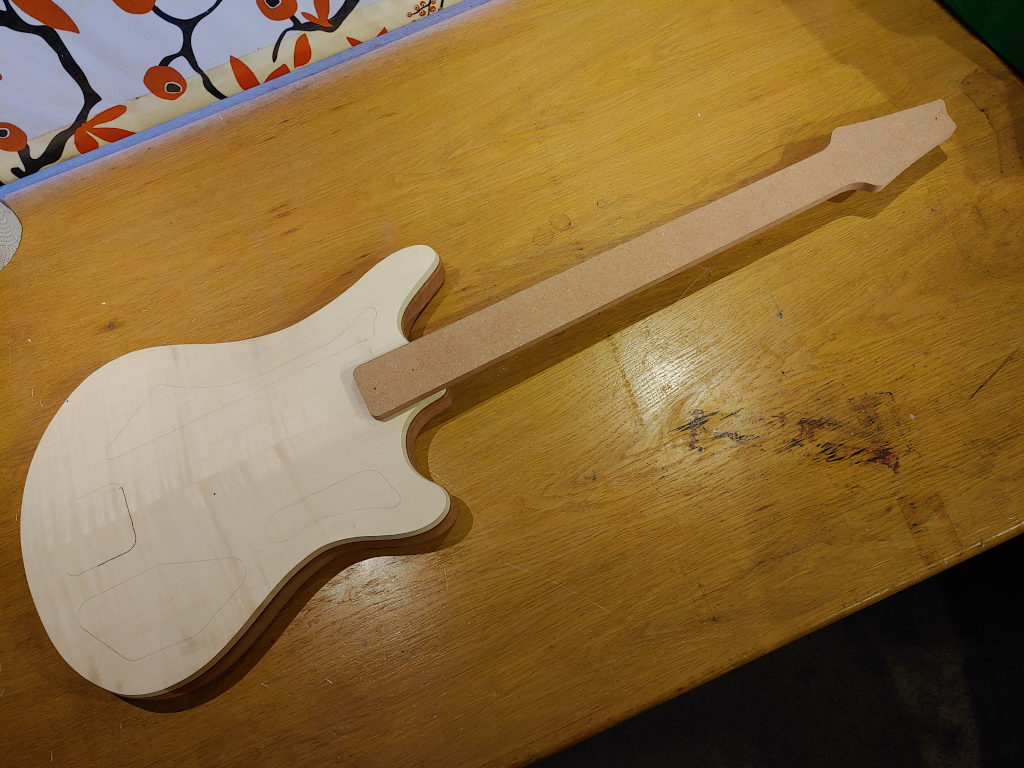
Just for curiosity, I weighed it again:
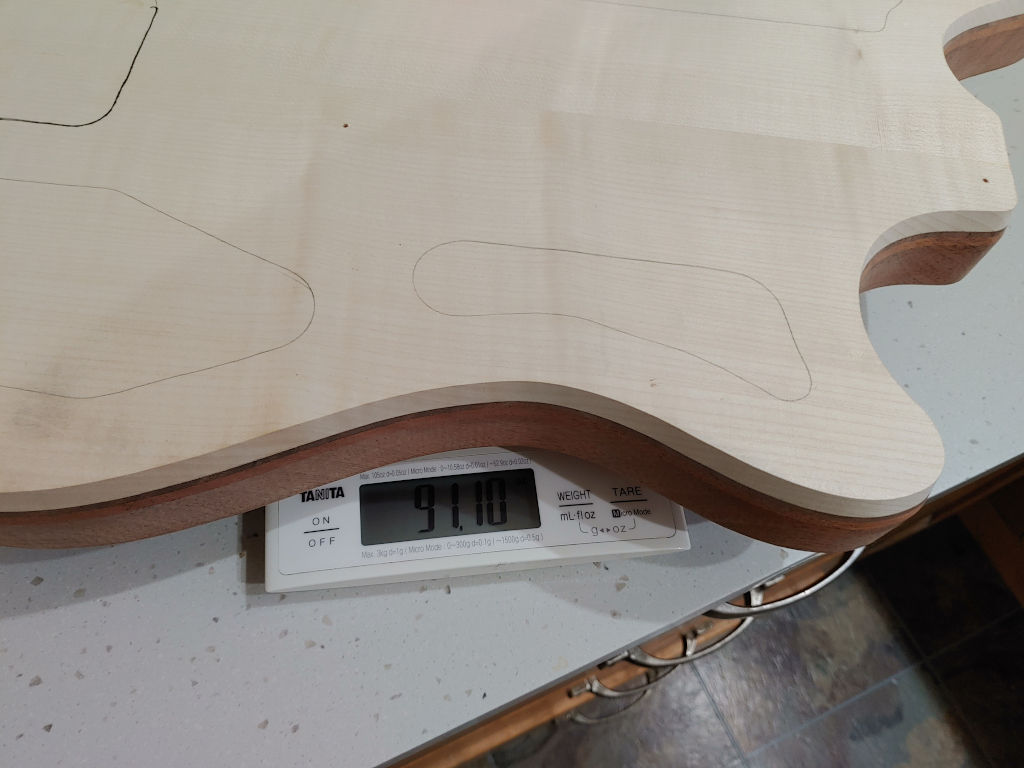
The chamfer op had taken off 25 grams, or 0.9 ounces, so it's now 5lbs 11.1oz.
Makes all the difference ...
I'm having a period where I'm only getting an hour or so in the shop each day, so I'm trying to do at least one semi-major task, to ensure things don't have a chance to stagnate. I figure I can stay roughly on-schedule for the deadline if I get the body mostly-finished by next weekend (obviously, there are certain things you can't do without the neck and attendant bridge position).
I managed to get into the shop and do the edge-contour routing on the front. This needs to be done at this phase as the arm-rest and belly-carve are going to cut across it. I'm still in two minds as to whether to go 'stark' and just have the carves cut across the edge-contour, or use rasps and files to feather the contours into the recesses. I'll decide when I've done them.
My original plan was to put a 45-degree chamfer on the edge but, as the design developed, I thought it would encroach and thin-out the face shape too much; with 45-degrees, you're intruding into the face as much as you are the sides. I have a 15-degree chamfer bit, so I thought I would give that a go as, at 15-degrees, the face incursion is only 26% of the side incursion (pretty much a quarter).
So that's what I did.
I went slowly to prevent tear out, increasing the blade 2mm at a time for the first 4 passes, then 1mm, then 0.5mm for the last few. It looked pretty good but a bit 'standard' when the chamfer hit the top of the walnut, and it looked decent when it hit the bottom but, every cut I made, I liked the effect more, so I kept going until the balance between the face shape and sides looked 'about right' (as the chamfer 'borders' the sides when the top is viewed directly).
The end result is that the chamfer goes about 4mm (5/32") into the Utile. In combination with the 7/16" (11.1mm) round-over on the back, it made the body look 'plump' in quite a nice way while thinning out the top. It also gives a really sweet basis for attempting faux binding.
The gap between the laminations on the top of the guitar cleaned up a treat, giving credence to the ROS hypothesis, and would have cleaned up more if I'd kept going, but I liked it where it was. This is literally the only gap remaining, and it's a fraction the size of the original and will fill invisibly:
Side contour:
Kind-of starting to look like something ...
Just for curiosity, I weighed it again:
The chamfer op had taken off 25 grams, or 0.9 ounces, so it's now 5lbs 11.1oz.
Makes all the difference ...
Last edited:

I always feel like after cutting the body shape out adding the round over or chamfer or whatever you’re doing makes the body look the most like an instrument, so to speak.
I always feel like after cutting the body shape out adding the round over or chamfer or whatever you’re doing makes the body look the most like an instrument, so to speak.
Agreed. What you've been working-on suddenly 'clicks in'.

Looks really cool! I like the 15°!
Same here...I'm having a period where I'm only getting an hour or so in the shop each day
The Carvery.
(Warning: pic heavy)
The moment I'd been kind-of dreading had arrived. It was time to do the body contours -- arm rest and belly carve. I'd been researching and dreaming-up all sorts of automated ways and jigs to do this, but in the end I sort of 'ran home to momma' and decided to do it with hand tools.
I started off by using the master template to get the position for the arm-rest line. Once I had that line I drew equally-spaced lines 20mm (25/32") apart at right angles to the main line.
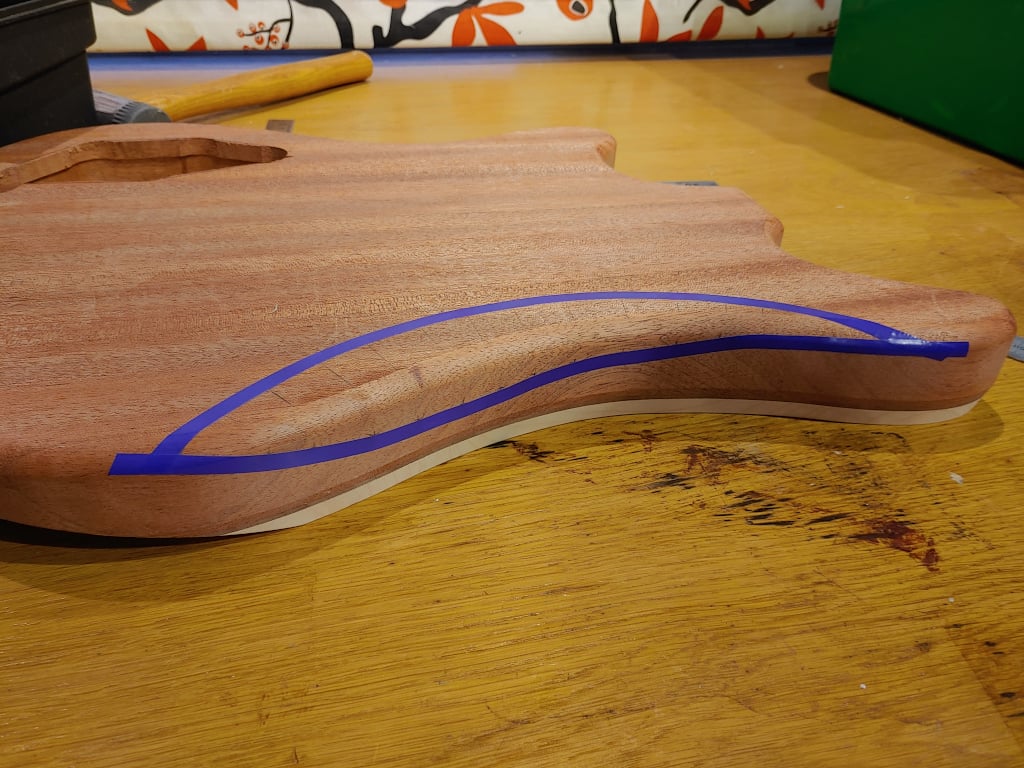
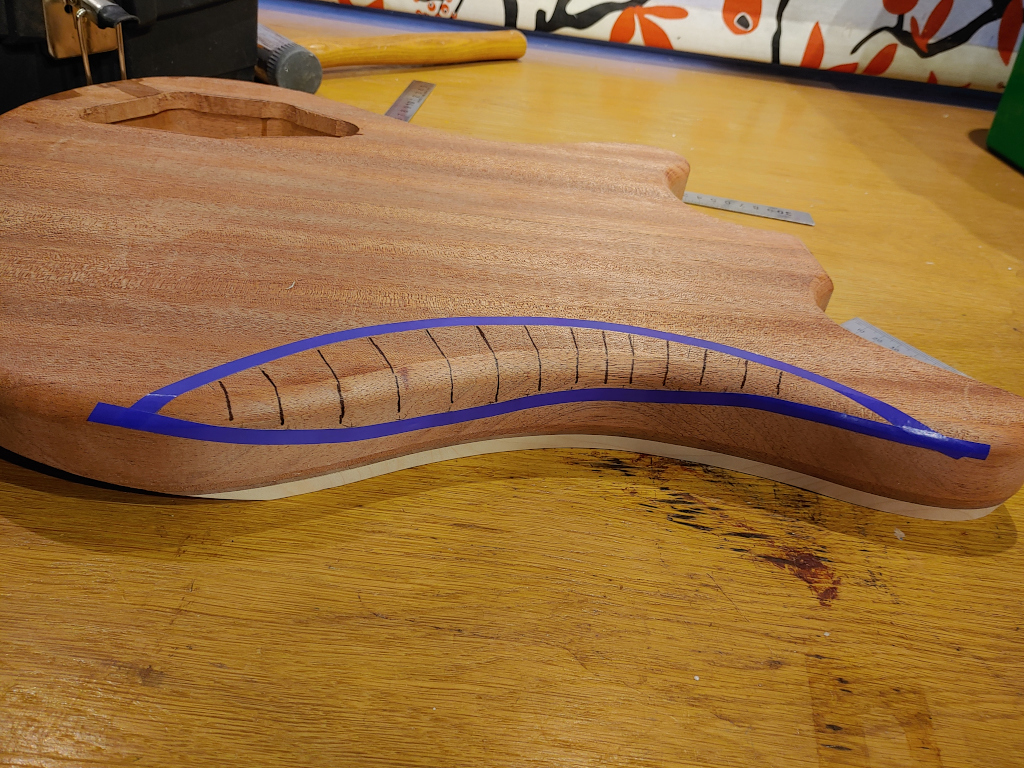
If the longest distance from the main line to the edge of the body is X, and the maximum drop distance is Y, and we assume that the line at X is where we want Y, then Y/X gives a ratio that you can compute all the other drop distances from, simply by doing drop = line_length * (Y/X). Using this I marked all the drop distances on the body:
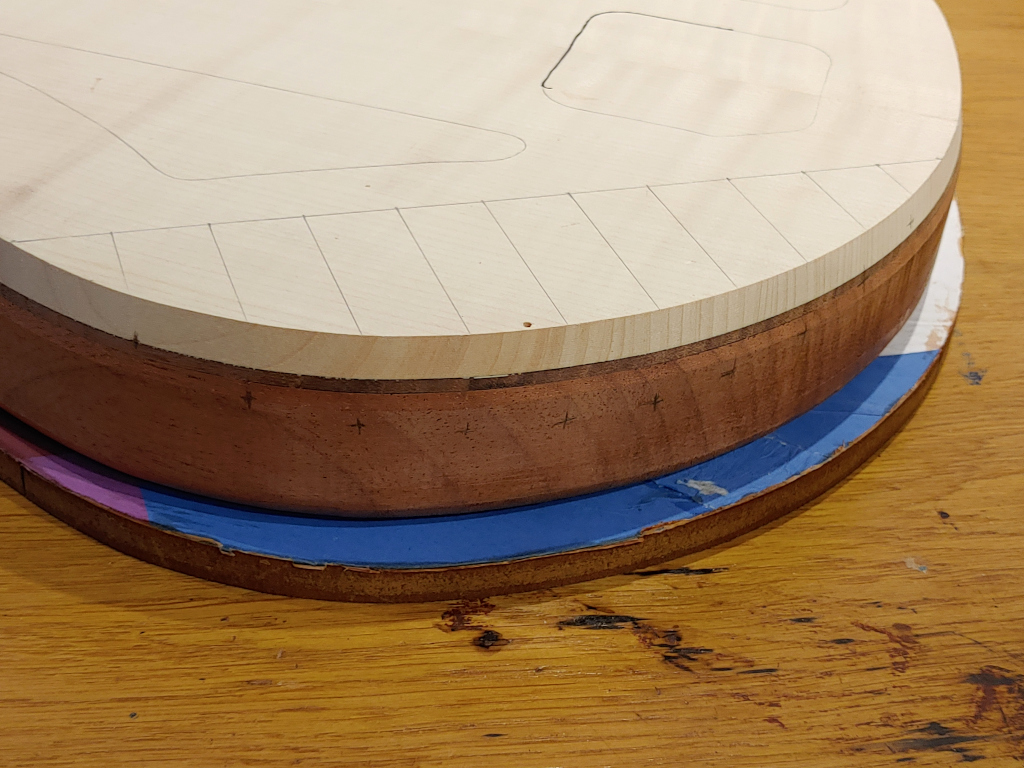
I then joined the dots with vinyl edging-tape and the straight line with standard blue tape. This gave me the approximate maximum extents of the bevel / carve. I also put a knife cut just inside the tape. This was to give a weakened break-line at which any potential tear-out could preferentially rip.
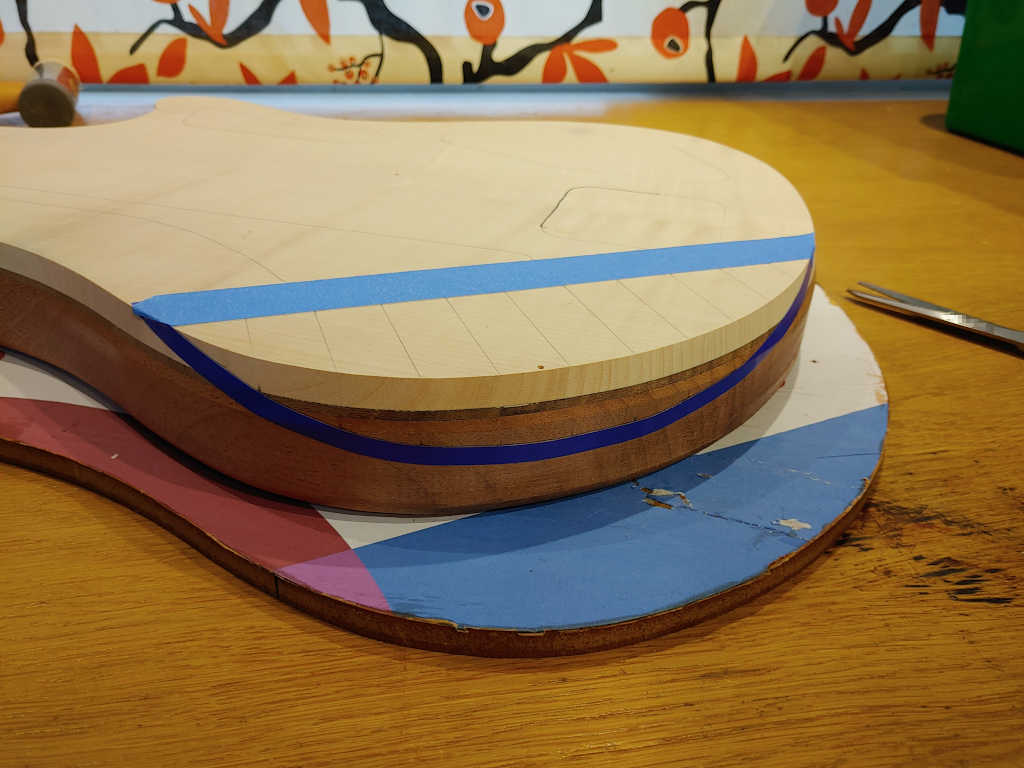
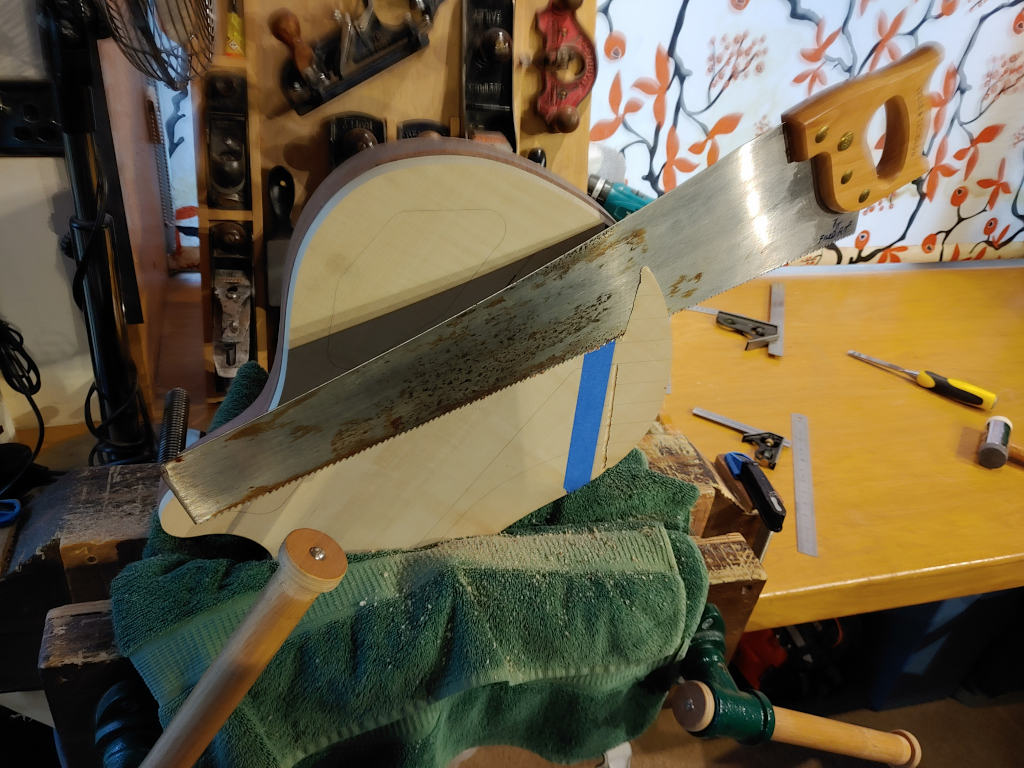
I then lined-up the body in the vice so that the straight line was approximately vertical, broke out a rusty panel saw (which really needs a service) and made the cut from both sides.
Doing something so crudely brutal to an object you've spent quite a few hours working-on is both terrifying and very enjoyable. The cuts weren't as straight as I'd like -- it's difficult to get the angle on that type of cut -- but it came out close enough for government work, and I'd baked some leeway into the structure by-design:
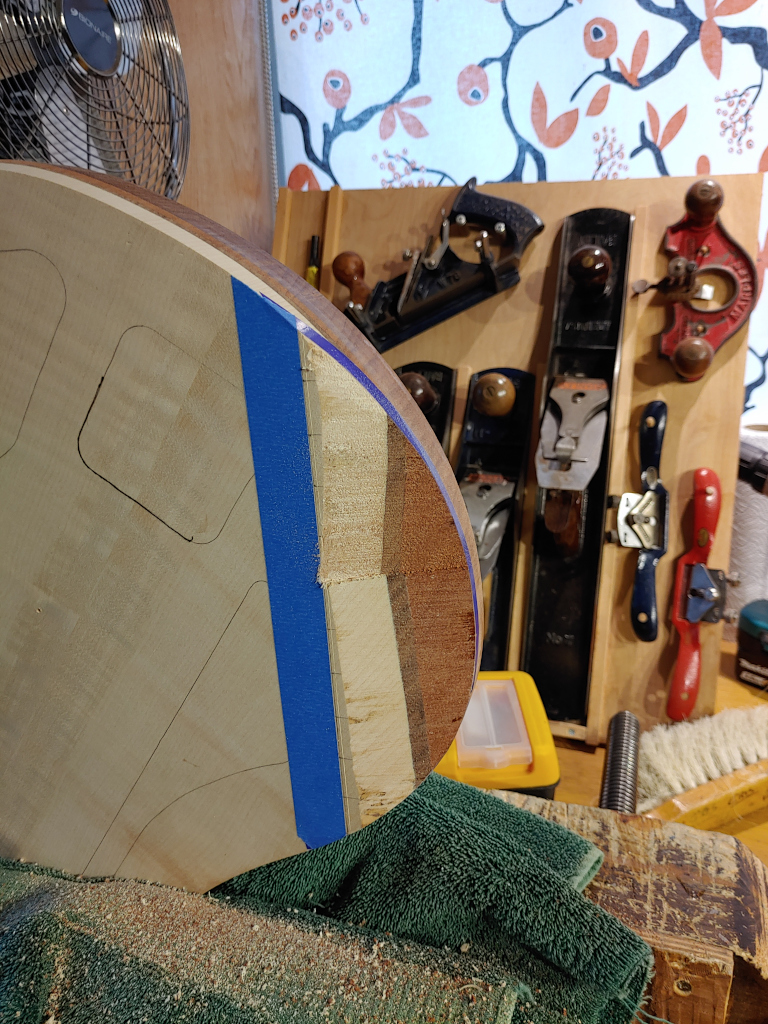
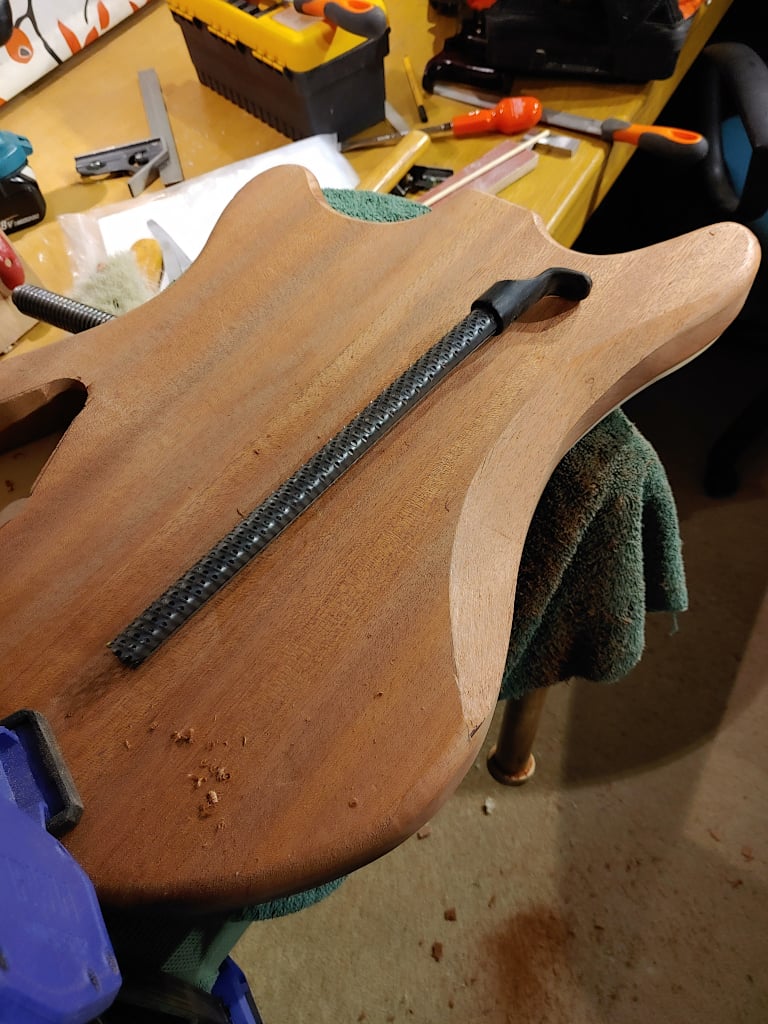
I used various different tools to bring the cuts into coplanarity, in pretty much the right place.
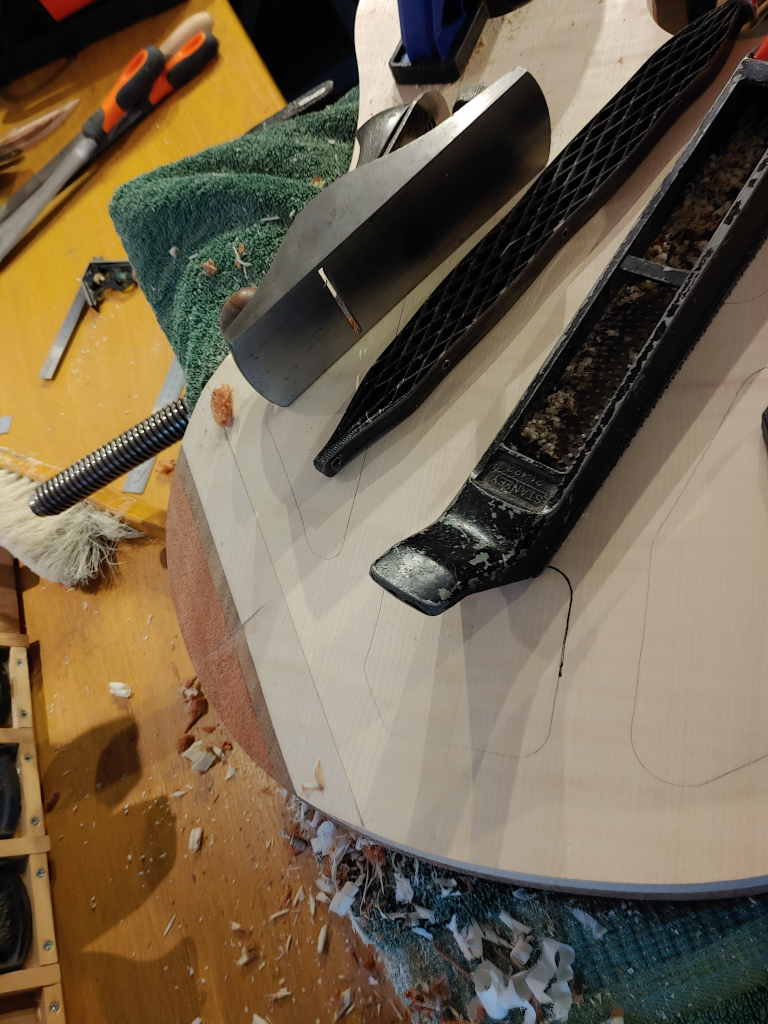
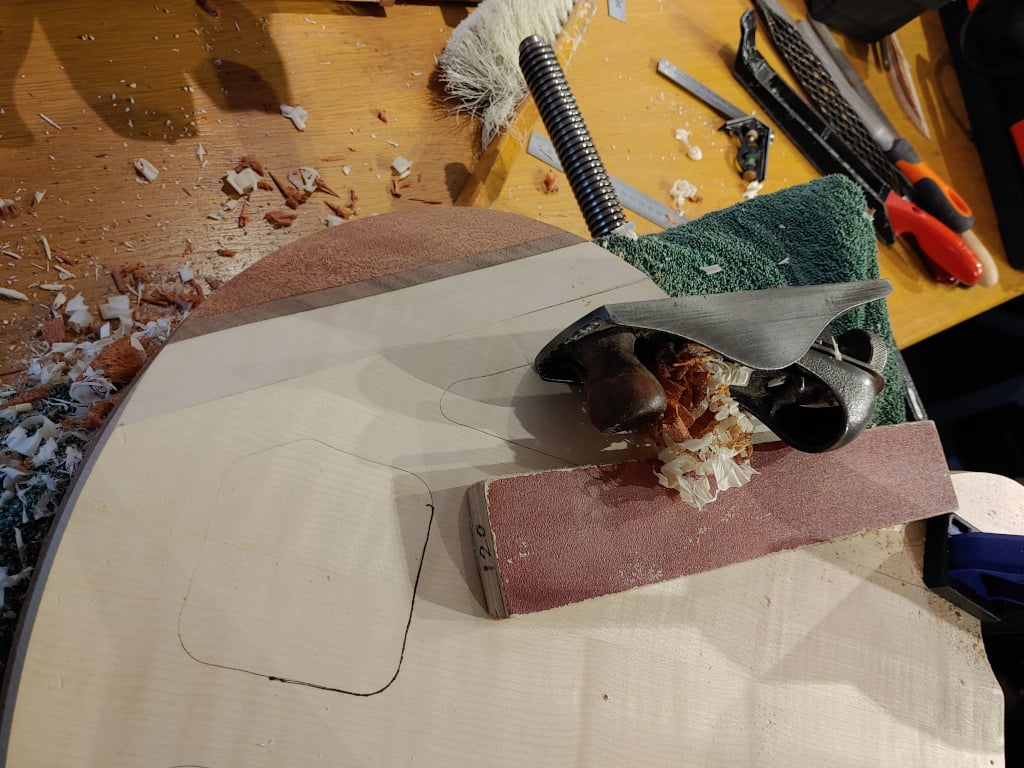
The stars of the show were (in reverse order): the ubiquitous shinto saw rasp; a 45-year-old surform (with a new blade), which was my old man's before he gave up workshopping; and a Record 220 block plane (which was perfect for this job). The dreadnought file was OK; the hand rasps were OK, the files were OK but, to be honest: surform, block plane, sandpaper. Done. The surform even out-performed the Shinto, which surprised me, but was cool to see.
It's not finished by any means and I'm still thinking about the best way of 'dressing' it. Part of me wants to carve the edges so the whole thing facet-wraps around the corner. Part of me thinks that's way too ambitious. Breaking the edge is the simplest thing to do but is a bit boring. In addition, there's a ding in the top just outside the arm-rest (you can see it in the second pic below); I thought it was just a dent that would steam out, but it's not; there's actually some material missing. I'm not sure when it happened. Some form of carve-feathering could get rid of it. Whichever; this is all stuff that can be finalized after I've done the neck.
It came out pretty well, though:

I used a similar methodology as above to mark out the extents of the belly carve, except I used approximated tangents to the circle rather than parallel lines.
This was followed by marking-in very approximate cut lines.
I eschewed using a rusty old panel saw and used a better-maintained crosscut saw instead.

Chop-chop -- making sure to go downhill from each end, you don't want to be chopping uphill or the grain will split in the wrong place.

I didn't get many pics of the process as I kind-of got into the zone of just doing it. This pic was taken after most of the cut marks had been removed (you can see one or two faintly remaining in the middle):
This shot was when it was getting near done-enough-for-now from the front end:
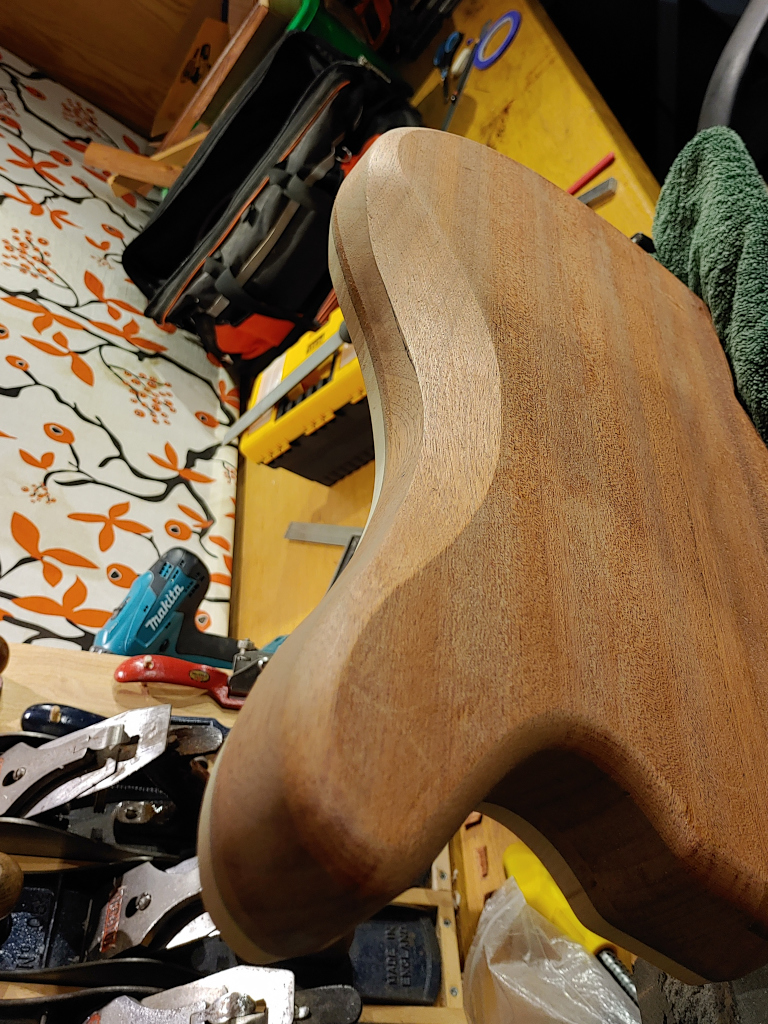
... and at the same time from the back ...
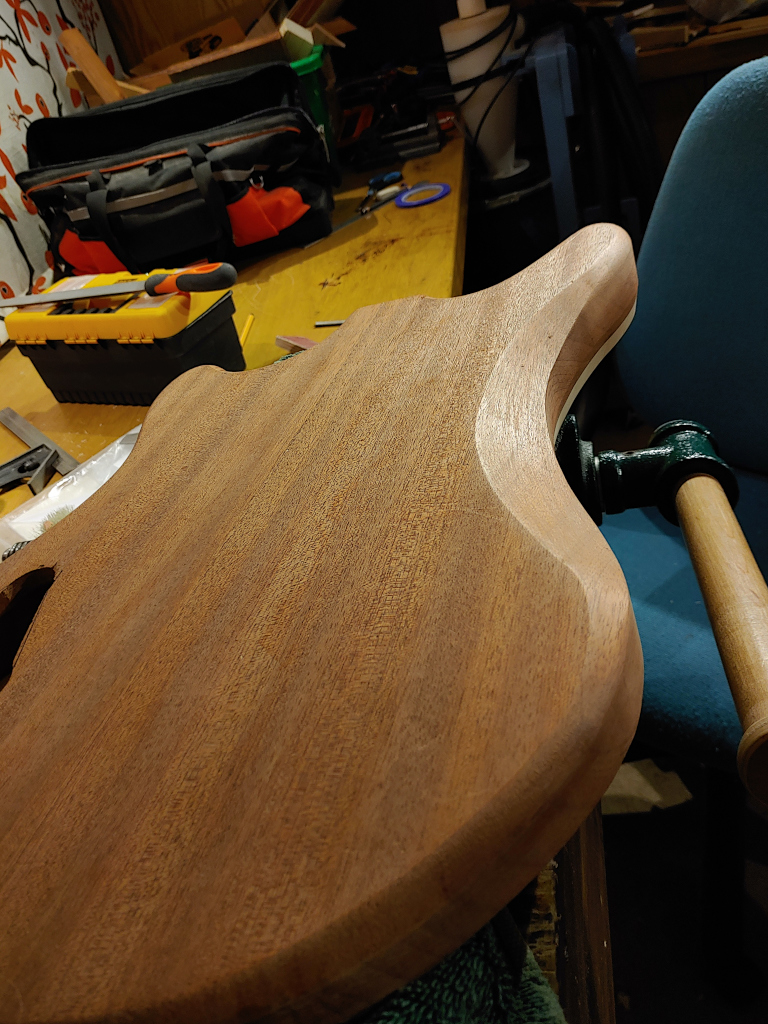
Again, it's not quite complete; again, there's more feathering and sanding work to do but, again, that's all pre-finishing work; the broad-phase of getting the body together is very nearly done.
The hero tools for this operation were ...

... a round surform I only bought a few weeks ago; a 12" (305mm) #1 half-round file; a 6" (150mm) #1 half-round file, and a 6" #3 half-round file.
The small half-round iwasaki that I had kind-of fell between two stools; it wasn't aggressive enough for the grunt work and it was too aggressive -- particularly with respect to the edge-grain -- for the smoothing work. I feel sure that a big iwasaki half-round would have been excellent, but I don't have one. My half-round rasps were too aggressive as well; their main roughing advantage pretty much got cancelled-out by the saw and chisel, and they're far too toothy to be trusted within 3mm (1/8") of the final surface.
Again, the surform was the (semi-)surprise package. I say 'semi' because, while researching belly carve methods a couple of months back, I saw Bob Gjika extolling the virtues of one as he was having really good luck with it. He can be an opinionated so-and-so from what I've seen, but he seems to do very good work. The trick is not to use it with a stabbing, along-the-axis method, but to semi-draw-file with it, moving it sideways and slightly diagonally (see Bob's video). Again, I'm sure a big Iwasaki would work just as well.
Anyway. That's that on that. There's more to do on the carves (a bit more filing, plus scraping and sanding), but it'll do for now. Just need to get that control cavity out of the way and it's on to the neck.
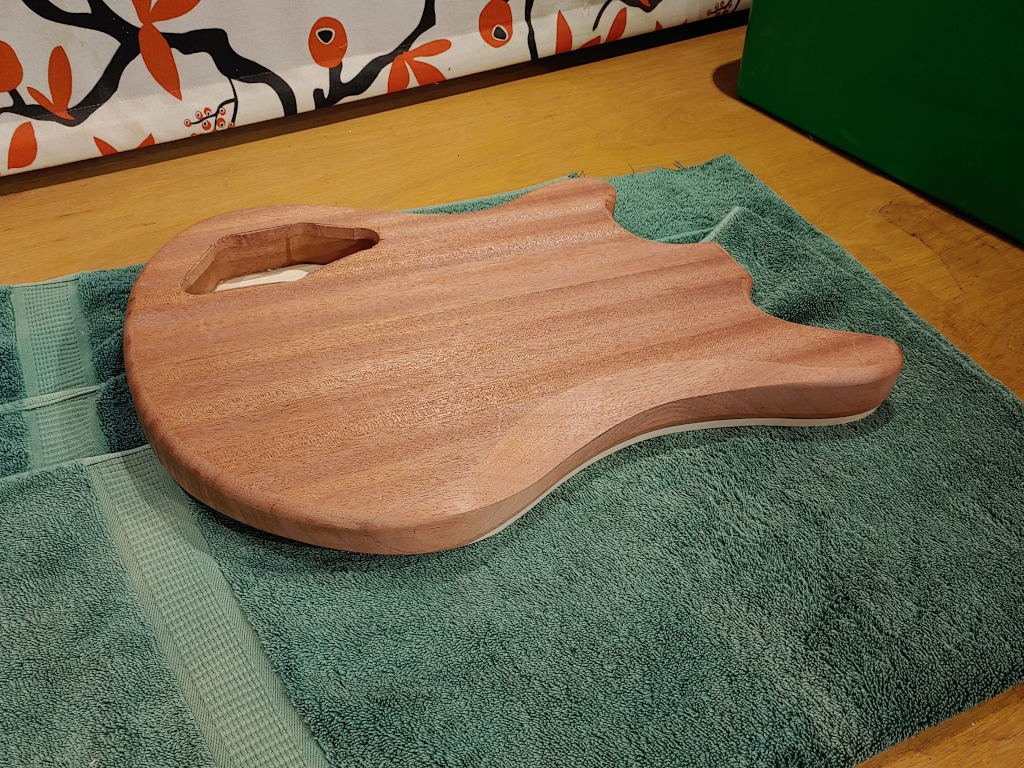
(Warning: pic heavy)
The moment I'd been kind-of dreading had arrived. It was time to do the body contours -- arm rest and belly carve. I'd been researching and dreaming-up all sorts of automated ways and jigs to do this, but in the end I sort of 'ran home to momma' and decided to do it with hand tools.
I started off by using the master template to get the position for the arm-rest line. Once I had that line I drew equally-spaced lines 20mm (25/32") apart at right angles to the main line.
If the longest distance from the main line to the edge of the body is X, and the maximum drop distance is Y, and we assume that the line at X is where we want Y, then Y/X gives a ratio that you can compute all the other drop distances from, simply by doing drop = line_length * (Y/X). Using this I marked all the drop distances on the body:
I then joined the dots with vinyl edging-tape and the straight line with standard blue tape. This gave me the approximate maximum extents of the bevel / carve. I also put a knife cut just inside the tape. This was to give a weakened break-line at which any potential tear-out could preferentially rip.
I then lined-up the body in the vice so that the straight line was approximately vertical, broke out a rusty panel saw (which really needs a service) and made the cut from both sides.
Doing something so crudely brutal to an object you've spent quite a few hours working-on is both terrifying and very enjoyable. The cuts weren't as straight as I'd like -- it's difficult to get the angle on that type of cut -- but it came out close enough for government work, and I'd baked some leeway into the structure by-design:
I used various different tools to bring the cuts into coplanarity, in pretty much the right place.
The stars of the show were (in reverse order): the ubiquitous shinto saw rasp; a 45-year-old surform (with a new blade), which was my old man's before he gave up workshopping; and a Record 220 block plane (which was perfect for this job). The dreadnought file was OK; the hand rasps were OK, the files were OK but, to be honest: surform, block plane, sandpaper. Done. The surform even out-performed the Shinto, which surprised me, but was cool to see.
It's not finished by any means and I'm still thinking about the best way of 'dressing' it. Part of me wants to carve the edges so the whole thing facet-wraps around the corner. Part of me thinks that's way too ambitious. Breaking the edge is the simplest thing to do but is a bit boring. In addition, there's a ding in the top just outside the arm-rest (you can see it in the second pic below); I thought it was just a dent that would steam out, but it's not; there's actually some material missing. I'm not sure when it happened. Some form of carve-feathering could get rid of it. Whichever; this is all stuff that can be finalized after I've done the neck.
It came out pretty well, though:
I used a similar methodology as above to mark out the extents of the belly carve, except I used approximated tangents to the circle rather than parallel lines.
This was followed by marking-in very approximate cut lines.
I eschewed using a rusty old panel saw and used a better-maintained crosscut saw instead.
Chop-chop -- making sure to go downhill from each end, you don't want to be chopping uphill or the grain will split in the wrong place.
I didn't get many pics of the process as I kind-of got into the zone of just doing it. This pic was taken after most of the cut marks had been removed (you can see one or two faintly remaining in the middle):
This shot was when it was getting near done-enough-for-now from the front end:
... and at the same time from the back ...
Again, it's not quite complete; again, there's more feathering and sanding work to do but, again, that's all pre-finishing work; the broad-phase of getting the body together is very nearly done.
The hero tools for this operation were ...
... a round surform I only bought a few weeks ago; a 12" (305mm) #1 half-round file; a 6" (150mm) #1 half-round file, and a 6" #3 half-round file.
The small half-round iwasaki that I had kind-of fell between two stools; it wasn't aggressive enough for the grunt work and it was too aggressive -- particularly with respect to the edge-grain -- for the smoothing work. I feel sure that a big iwasaki half-round would have been excellent, but I don't have one. My half-round rasps were too aggressive as well; their main roughing advantage pretty much got cancelled-out by the saw and chisel, and they're far too toothy to be trusted within 3mm (1/8") of the final surface.
Again, the surform was the (semi-)surprise package. I say 'semi' because, while researching belly carve methods a couple of months back, I saw Bob Gjika extolling the virtues of one as he was having really good luck with it. He can be an opinionated so-and-so from what I've seen, but he seems to do very good work. The trick is not to use it with a stabbing, along-the-axis method, but to semi-draw-file with it, moving it sideways and slightly diagonally (see Bob's video). Again, I'm sure a big Iwasaki would work just as well.
Anyway. That's that on that. There's more to do on the carves (a bit more filing, plus scraping and sanding), but it'll do for now. Just need to get that control cavity out of the way and it's on to the neck.
Last edited:
I’ve got probably the same round Surform that I like for that same operation. I’ve got the big flat Surform too but I often feel like it’s too big and defer to the Shinto. I also have a Microplane wit half round and flat blades that worked well for smoothing. I need to get some new blades for it one of these days.
I’ve got probably the same round Surform that I like for that same operation. I’ve got the big flat Surform too but I often feel like it’s too big and defer to the Shinto. I also have a Microplane wit half round and flat blades that worked well for smoothing. I need to get some new blades for it one of these days.
I think the shinto's a superior rasp. I think I'll probably prefer it on the neck carve for that reason. The surform is more like an aggregation of small scrub planes and sometimes that might be what you want. In doing the arm rest, they daisy-chained in the way I was using them; the shinto got the asymmetry down quickly and pretty flat; the surform also did that but made it smooth enough for the block plane to be used easily, and the block plane made it smooth and true.
I've looked at the microplane but not yet used it. Truth be told: I only tried the flat surform because I had one available; I don't think it's a necessary tool by any means but it's a decent one.

The "rusty panel saw" appears from this side of the screen to be a ripsaw. Ripsaws are kinda finicky about being asked to do anything other than rip (cut parallel to the grain) due to their tooth shape.
So, not too shocking that it didn't want to cooperate on that cut, IMHO.
Sort-of, but not really. If they're sharpened and set correctly, rip-cut teeth will go cross-grain just fine (just a bit rougher -- it does get more finicky as the teeth get bigger, though) and, in many ways, that cut is just as much rip as cross.
The bigger problem is: until ten months ago, that saw was filed rip and set pretty much perfectly, but we had a roof leak in the out-building (it's one of the reasons you can see rust spots on some of the planes; I've got 90% of it, but not all of it) and that saw took a lot of the splash. I've sanded it back and oiled it since then, but what I haven't done yet is take it back to ground zero and re-cut and re-set the teeth (which is really what it needs).
This means that there's asymmetric corrosion on some of the teeth in the middle, which makes 'steering' a lot harder, probably means it's not tracking completely true, and puts even more emphasis on getting the initial cut direction correct; because you don't have much leeway for correction during a relatively short cut (the wider the panel relative to the kerf, the bigger the turning circle, and the turning circle was already compromised). I was slightly off both times because it's a cut I'm not really used to and, from the pics, the body wasn't as vertical as I thought it was at the time. It came out OK, though.
Last edited:
Also: I forgot to mention it, but I weighed it again afterwards, just for data, and it had dropped to ...
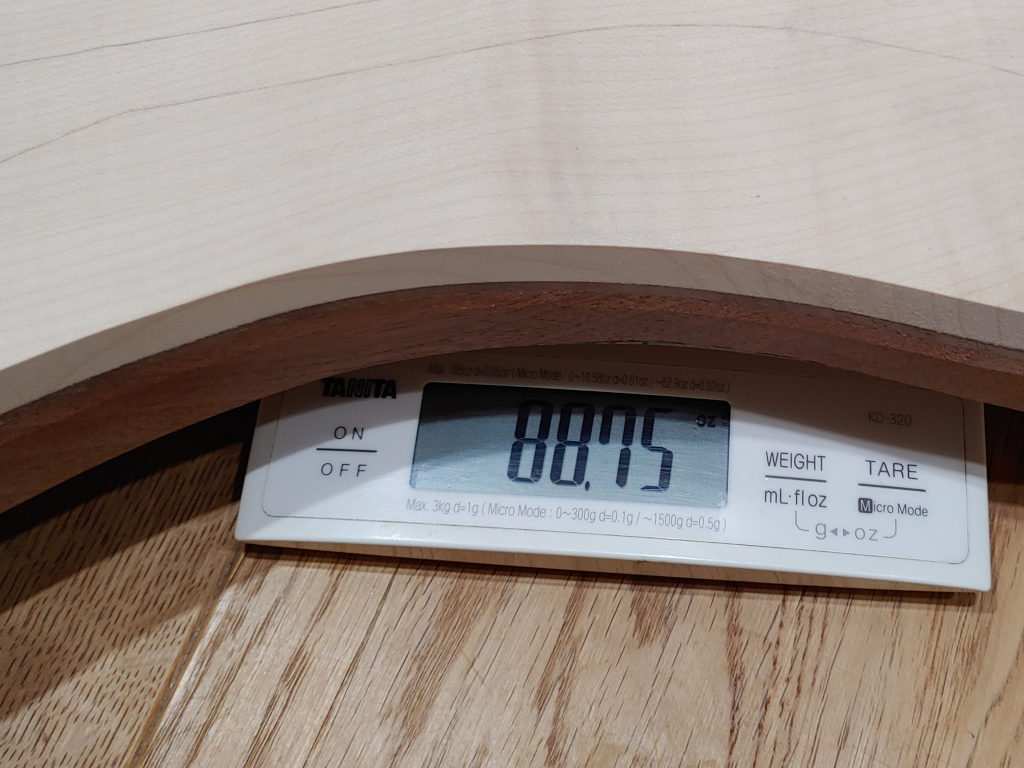
So it's now 5lbs 8-and-3/4 ounces (2.52Kg). Which means the carve operations took off 2.35 ounces (67 grams) . Neither of the carves is that extreme -- the belly carve in particular is quite small as these things go -- but it's interesting. Its looking like my guess-timate of 5lbs 6oz for the minimum unadorned body weight is looking optimistically possible after the pup-and-neck mortices happen, but my guess is that it'll be slightly higher.
So it's now 5lbs 8-and-3/4 ounces (2.52Kg). Which means the carve operations took off 2.35 ounces (67 grams) . Neither of the carves is that extreme -- the belly carve in particular is quite small as these things go -- but it's interesting. Its looking like my guess-timate of 5lbs 6oz for the minimum unadorned body weight is looking optimistically possible after the pup-and-neck mortices happen, but my guess is that it'll be slightly higher.

The Carvery.
(Warning: pic heavy)
The moment I'd been kind-of dreading had arrived. It was time to do the body contours -- arm rest and belly carve. I'd been researching and dreaming-up all sorts of automated ways and jigs to do this, but in the end I sort of 'ran home to momma' and decided to do it with hand tools.
I started off by using the master template to get the position for the arm-rest line. Once I had that line I drew equally-spaced lines 20mm (25/32") apart at right angles to the main line.
If the longest distance from the main line to the edge of the body is X, and the maximum drop distance is Y, and we assume that the line at X is where we want Y, then Y/X gives a ratio that you can compute all the other drop distances from, simply by doing drop = line_length * (Y/X). Using this I marked all the drop distances on the body:
View attachment 5342133
I then joined the dots with vinyl edging-tape and the straight line with standard blue tape. This gave me the approximate maximum extents of the bevel / carve. I also put a knife cut just inside the tape. This was to give a weakened break-line at which any potential tear-out could preferentially rip.
I then lined-up the body in the vice so that the straight line was approximately vertical, broke out a rusty panel saw (which really needs a service) and made the cut from both sides.
Doing something so crudely brutal to an object you've spent quite a few hours working-on is both terrifying and very enjoyable. The cuts weren't as straight as I'd like -- it's difficult to get the angle on that type of cut -- but it came out close enough for government work, and I'd baked some leeway into the structure by-design:
View attachment 5342138
View attachment 5342139
I used various different tools to bring the cuts into coplanarity, in pretty much the right place.
View attachment 5342142
View attachment 5342143
The stars of the show were (in reverse order): the ubiquitous shinto saw rasp; a 45-year-old surform (with a new blade), which was my old man's before he gave up workshopping; and a Record 220 block plane (which was perfect for this job). The dreadnought file was OK; the hand rasps were OK, the files were OK but, to be honest: surform, block plane, sandpaper. Done. The surform even out-performed the Shinto, which surprised me, but was cool to see.
It's not finished by any means and I'm still thinking about the best way of 'dressing' it. Part of me wants to carve the edges so the whole thing facet-wraps around the corner. Part of me thinks that's way too ambitious. Breaking the edge is the simplest thing to do but is a bit boring. In addition, there's a ding in the top just outside the arm-rest (you can see it in the second pic below); I thought it was just a dent that would steam out, but it's not; there's actually some material missing. I'm not sure when it happened. Some form of carve-feathering could get rid of it. Whichever; this is all stuff that can be finalized after I've done the neck.
It came out pretty well, though:
View attachment 5342166
View attachment 5342169
I used a similar methodology as above to mark out the extents of the belly carve, except I used approximated tangents to the circle rather than parallel lines.
View attachment 5342172
This was followed by marking-in very approximate cut lines.
View attachment 5342173
I eschewed using a rusty old panel saw and used a better-maintained crosscut saw instead.
View attachment 5342176
Chop-chop -- making sure to go downhill from each end, you don't want to be chopping uphill or the grain will split in the wrong place.
View attachment 5342179
I didn't get many pics of the process as I kind-of got into the zone of just doing it. This pic was taken after most of the cut marks had been removed (you can see one or two faintly remaining in the middle):
View attachment 5342183
This shot was when it was getting near done-enough-for-now from the front end:
View attachment 5342186
... and at the same time from the back ...
View attachment 5342187
Again, it's not quite complete; again, there's more feathering and sanding work to do but, again, that's all pre-finishing work; the broad-phase of getting the body together is very nearly done.
The hero tools for this operation were ...
View attachment 5342190
... a round surform I only bought a few weeks ago; a 12" (305mm) #1 half-round file; a 6" (150mm) #1 half-round file, and a 6" #3 half-round file.
The small half-round iwasaki that I had kind-of fell between two stools; it wasn't aggressive enough for the grunt work and it was too aggressive -- particularly with respect to the edge-grain -- for the smoothing work. I feel sure that a big iwasaki half-round would have been excellent, but I don't have one. My half-round rasps were too aggressive as well; their main roughing advantage pretty much got cancelled-out by the saw and chisel, and they're far too toothy to be trusted within 3mm (1/8") of the final surface.
Again, the surform was the (semi-)surprise package. I say 'semi' because, while researching belly carve methods a couple of months back, I saw Bob Gjika extolling the virtues of one as he was having really good luck with it. He can be an opinionated so-and-so from what I've seen, but he seems to do very good work. The trick is not to use it with a stabbing, along-the-axis method, but to semi-draw-file with it, moving it sideways and slightly diagonally (see Bob's video). Again, I'm sure a big Iwasaki would work just as well.
Anyway. That's that on that. There's more to do on the carves (a bit more filing, plus scraping and sanding), but it'll do for now. Just need to get that control cavity out of the way and it's on to the neck.
View attachment 5342208
That's a nice documentation of different techniques for shaping a body. You covered most of the common tools and methods, with your observations of the pros and cons. Thanks for taking the time to photograph and write this up! This is the kind of content we want here on Luthier's Corner.
I agree with your overall review that there isn't any single "best" one of these tools. They are individually better and worse at different parts of the shaping job. I have all of these tools that you've covered, plus a few others, and I use them all at different times. Some are my favorites that I go to first, but other times the others work best.
Three shaping tools that you didn't try (and would probably really like) are: Microplanes, an Angle Grinder with a coarse sanding disk, and a heavy die grinder. Those three are at the top of my list of most commonly used for complex shaping. They are big time savers. In most cases, I use them for the rough shaping, then files to smooth everything out.
Three shaping tools that you didn't try (and would probably really like) are: Microplanes, an Angle Grinder with a coarse sanding disk, and a heavy die grinder. Those three are at the top of my list of most commonly used for complex shaping. They are big time savers. In most cases, I use them for the rough shaping, then files to smooth everything out.
Thanks, Bruce. I definitely need to have a look at the microplane at some point. The reason I steered clear of the 'power carving' techniques is that I'm not used to them and I'm super-used to hand-tools so, this being my first full build, I'm being a chicken and playing it somewhat safe.
I'm very used to angle grinders (and flap discs, and grinding wheels) on metal, though, so perhaps I should put my big boy boots on and do some experimenting. Like you say, I have a feeling I'd love it, but I need to take some time to develop the experience / knowledge base first. This build has given me the type of hardwood cut-offs I can experiment on. Do you have any suggestions with grits, or just play and find what works? I nearly bought a saburr-tooth (kutzall etc.) 4" disc a while ago for this type of purpose, but wasn't sure of the coarseness to go with.

Loved watching the shaping there. And that is my personal favorite thing to do in some builds, for sure.
An angle grinder with a wheel of your choice is gonna be a GAME CHANGER for you. It definitely blew my mind when I first started using one.
This is looking great, keep up the good work!
An angle grinder with a wheel of your choice is gonna be a GAME CHANGER for you. It definitely blew my mind when I first started using one.
This is looking great, keep up the good work!
Loved watching the shaping there. And that is my personal favorite thing to do in some builds, for sure.
An angle grinder with a wheel of your choice is gonna be a GAME CHANGER for you. It definitely blew my mind when I first started using one.
This is looking great, keep up the good work!
Thank you. I was very surprised how much I enjoyed it given how cagey I was beforehand. I'm considering doing fully-hand-carved body contouring on a future build because watching it all emerge was very cool in a contemplative sort of way and, while it took a while, it doesn't take as long as you think it might and, even when you get into the weeds, the time passes quickly because you're in the groove of what you're doing. Never really been a free-hand/sculptural woodworker, more mortices-and-tenons, but it's good stuff.
Yup -- am definitely going to have to experiment with the power tools. It's on the todo list.
There is a certain... I don't even know what to call it - "rhythm" maybe? - when it comes to working with shaping tools.
It's definitely scary at first because things look HORRID when you first start. Wood is roughed up and just looks bad. But once the rough shape has been cut and you start to smooth it, you see it take shape as coming together. I think that's what you basically just described.
But going further, there is a rhythm that I feel, at least, when it comes to working with things. You start to really know what the tool is gonna do. You look at where you're working and you see lines moving into the shape you want to end up with. It's kinda magical in a way.
It's definitely scary at first because things look HORRID when you first start. Wood is roughed up and just looks bad. But once the rough shape has been cut and you start to smooth it, you see it take shape as coming together. I think that's what you basically just described.
But going further, there is a rhythm that I feel, at least, when it comes to working with things. You start to really know what the tool is gonna do. You look at where you're working and you see lines moving into the shape you want to end up with. It's kinda magical in a way.

If the longest distance from the main line to the edge of the body is X, and the maximum drop distance is Y, and we assume that the line at X is where we want Y, then Y/X gives a ratio that you can compute all the other drop distances from, simply by doing drop = line_length * (Y/X)
Huh?

Looks great though, coming along nicely.
Huh?
Looks great though, coming along nicely.

For those who might not be joking: It's just saying that, as far as the parallel lines are concerned, the length of each parallel line relative to how deep on the body the carve goes at the end of that line is the same proportion for every parallel line. So if the longest line is 100mm, and the depth of the cut is 20mm at the end of that line, then the depth of the cut for every line will be 20%, or 0.2 (or 20/100) of the length of that parallel line. That's how you get the dots/crosses on the side of the body in the first picture. That guarantees that the arm rest is a flat plane and makes it much easier to carve.
Unless, of course, you want your arm carve to be a section of a hyperbolic paraboloid rather than planar.
That's "shwoopily curvaceous" if math bothers the reader You'd have many options of shwoop depending where on the surface you picked your section...
That's "shwoopily curvaceous" if math bothers the reader
You'd have many options of shwoop depending where on the surface you picked your section...


