• TalkBass has been independent since 1998. Add your voice.
    Create a free account to reply to discussions, view embedded media, and browse with fewer display ads.
    Join freeLog in
    Want zero display ads or expanded classifieds tools? Compare plans.

What to use as a neck Shim?

i definitely would not want to use coins or business cards.

a piece of maple, brass, whatever you like- as long as its cut to size, should be fine. i had a very high end bass that needed a shim, and the luthier who made the instrument made one out of maple. worked beautifully.
 
I just switched to an high mass bridge on my Fender P-bass and since the bridge it both thicker then the original and with larger saddles i need a shim at the body end of the neck pocket to get decent action.

Never shimmed a neck before, is it anything i need to think off? and what would work well as one? I have heard about using sandpaper, playing cards and such. I only need a pretty thin shim i belive.

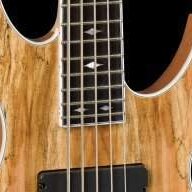
A pick can work, I also like 1/16" or 1/8" hard wood veneer. I don't like paper or cardboard. I have also used steel washers, and a friend of mine used a steel plate.
 
I have installed several shims for high mass bridge conversions.

I actually buy 1/8 th inch bridge plate stock maple board from stew mac. It's very stable, dense and doesn't splinter.
You will not require a tilt shim because of what you are doing with the bridge.

Invalid Link Removed

Buy a couple of these boards. Measure your pocket dimensions, cut the board in a peice slighly larger than the dimensions and sand the sides until you have a fit all th way around.

THIS WILL WORK...

Jeff
 
  • Like
Reactions: PazzoBasso
A small shim on the bridge side of the pocket has more effect than a full pocket flat shim. A wedge is best if you are worried about full contact but it really isn't necessary. Building a wedge from sand paper is a good idea. Sanding veneer in to wedge is a good idea.

Flat shims leave a really noticeable gap; angled shims look better and can be very thin compare to flat because they angle the neck. A .010 lift on a angle and you'll probably exceed 1/8" lift at the saddle. With a flat shim to get 1/8" lift at the saddle you need a 1/8 shim because it's flat; now you have a 1/8" gap at the heel joint. Yuck.
 
Last edited:
I've had good results with both a 1/2" strip of business card or of veneer (free, scrap from a local cabinet shop), placed at the bridge end of the neck pocket. Gave me just enough tilt to get the saddle adjustments to the middle of their range, and the only way you could see the neck had been shimmed was if you looked _very_ closely at the top edge of the neck/body joint; the plane of the body and the plane of the fingerboard weren't _absolutely_ parallel. As OCD as I am, it was hardly anything.
 
I just switched to an high mass bridge on my Fender P-bass and since the bridge it both thicker then the original and with larger saddles i need a shim at the body end of the neck pocket to get decent action.

Never shimmed a neck before, is it anything i need to think off? and what would work well as one? I have heard about using sandpaper, playing cards and such. I only need a pretty thin shim i belive.

+1 to using wood. Once compressed with the pressure it will "link" better with the neighboring wood in the pocket/neck, and better follow the natural move of the other parts (temperature/humidity changes). Hard plastic does not have the same elastic properties and after a period of expansion (high humidity, heat) will get "crushed" and will not go back to fill the space where it was before. After multiple iterations of this, your neck will become loose.

About what to think of before doing it? Some items you may want to consider:
  • Loosen the strings just to the point you can take the neck out, but keep them in the bass. It will make adjustments easier.
  • There are lots of theories, but I would go with a full pocket shim. A partial shim will give you an angle, but I found the solution to create problems across the fretboard, making some buzzing appear where previously there was none. Take the time, the right tools and the right measures and bring the neck up to the level you want with the right spacing, all across the pocket.
  • Once installed, I personally don't like to see/to have a gap where dust gets in, does not look good. I would also take some elastic tape (black, the kind is used to tape electric wired, that you can stretch) and install it in the external, visible border. Once you close it will look nicer and the cavity will be sealed.
  • Before you start, bring your saddles up (they are probably at their lowest as you have been trying to avoid installing a shim) to just above their mid range. Give yourself some added adjustment capabilities and size your shim's thickness from there.
I hope this helps. Regards