• TalkBass has been independent since 1998. Add your voice.
    Create a free account to reply to discussions, view embedded media, and browse with fewer display ads.
    Join freeLog in
    Want zero display ads or expanded classifieds tools? Compare plans.

What's On Your Workbench?

Revisiting the ‘51 reissue neck:

I picked up some water-thin super glue and added one drop at a time in front of the truss rod anchor until it didn’t want to run in anymore.
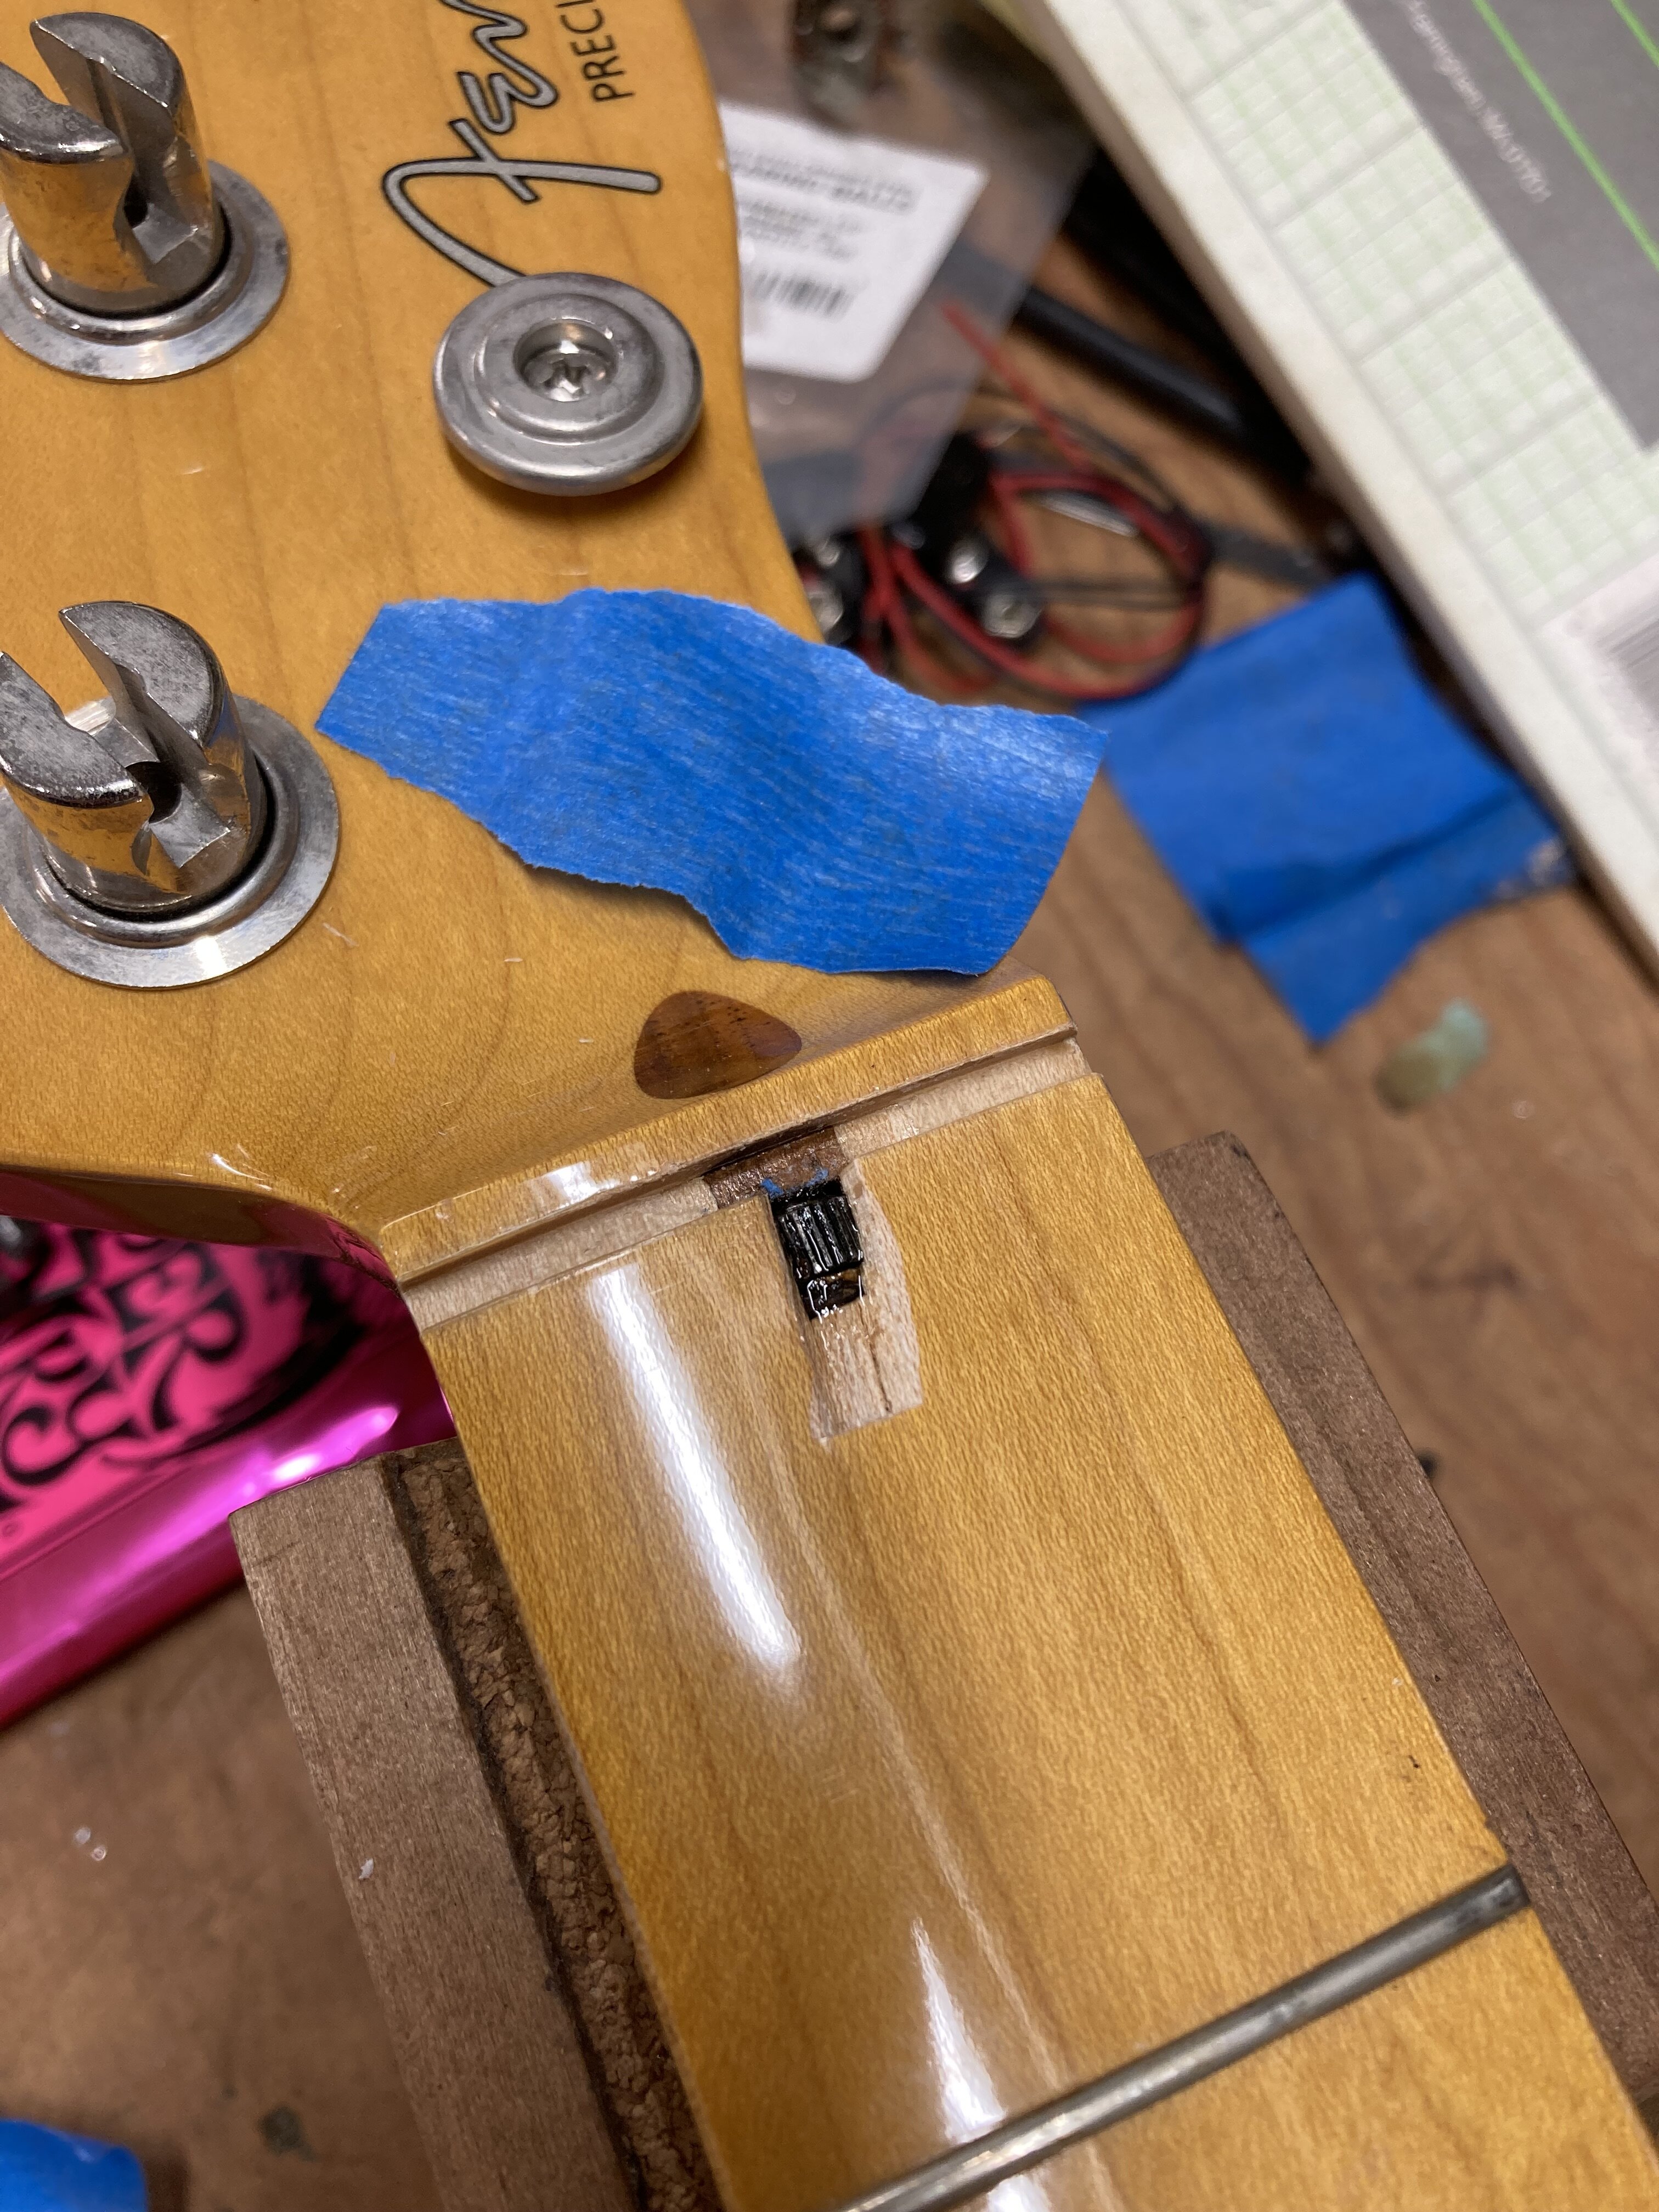
IMG_6537.jpeg

I first pushed the rod as far towards the headstock as I could so that the glue would run in front of the anchor to fill the gap and shore up the wood fibers. Theoretically it should work. Practically? Who knows?

Tomorrow I’ll glue the missing chip back in. It fits in very tightly so it should be… not invisible, exactly, but pretty hard to see when it’s done.

Once that’s cured for a while I’ll need to apply some heat to the neck. The failed anchor allowed a pretty nasty forward bow to form and I wouldn’t even try to use the truss rod alone to correct it. There’s just no way. Heat is the answer (hopefully).
 
Edit: I should mention that some enterprising individual could make up and sell those pre-cast luminescent side dots as a hobby business. They are very easy to make.

Hey Bruce. I recently bought some luminlay from Amazon (USA), it seemed easier than ordering directly from Japan. It took forever to arrive and only cost me my firstborn (I'm in Europe)... So I must admit that the idea of making my own custom luminescent dots greatly appeals to me, especially since I'd love to put them on all my instruments.

Would you, by any chance, have some pictures of the silicone mold? The last time I made a mold it was out of plaster and I probably was 7yo so I'd love to see how you did it.

We'd pour the powder into each pocket, about halfway full. Drip in some West Systems epoxy and let it cure. Pulled out of the mold, they were nice uniform dimensions and an even mix of the powder in the resin.
Did you have to stir it after pouring it to get it evenly mixed? I'm a bit apprehensive about air bubbles because of how small the diameter of the rods is.

Last question, can you recommend a good quality consistent luminescent powder for top results?
 
  • Like
Reactions: Beej
Hey Bruce. I recently bought some luminlay from Amazon (USA), it seemed easier than ordering directly from Japan. It took forever to arrive and only cost me my firstborn (I'm in Europe)... So I must admit that the idea of making my own custom luminescent dots greatly appeals to me, especially since I'd love to put them on all my instruments.

Would you, by any chance, have some pictures of the silicone mold? The last time I made a mold it was out of plaster and I probably was 7yo so I'd love to see how you did it.


Did you have to stir it after pouring it to get it evenly mixed? I'm a bit apprehensive about air bubbles because of how small the diameter of the rods is.

Last question, can you recommend a good quality consistent luminescent powder for top results?

I couldn't find any pictures of the side dot molds that we used. That was 8 or so years ago. Mike passed away in 2018, and I had the sad job of cleaning out his two shops for his estate. But I don't know what happened to those molds. I didn't find them in his stuff.

They are easy enough to make, using standard silicone rubber mold technique. I use silicone molds to cast many of my pickup parts, like bobbins and outer housings.

IMG_9835B.jpg


The mold on the left is for larger surface dots, of a different type. But that's the idea of the mold that you need to make up. A block of silicone rubber with an array of small cylindrical holes. Silicone Rubber Mold-Making compound is available in art supply stores and online.

IMG_0146B.jpg


The Master is on the right. It's a rectangular block of MDF (or whatever) with an array of holes drilled and pins tapped in. For side marker dots, find some little dowel pins that are the diameter you want the dots to be, but a little longer.

If I remember right, the molds I made for Mike used 1/8" x 3/4" steel dowel pins. The master was made with the pins sticking up out of the base 1/4". So the cast cylinders ended up 1/8" diameter x 1/4" long. That was a nice size to work with. I think I made that mold to do 26 dots, enough for two 24 fret necks per pour.

IMG_0147B.jpg


Four blocks of MDF are cut so they are a nice fit around the base of the Master.

IMG_8413B.jpg


Here's a pickup bobbin mold, being cast. This is the technique. Wax the blocks and clamp them around the outside of the Master. Mix up the silicone rubber, pour it in, up level to the top. Let it cure, pull it apart.

Casting the dots was nothing more than pouring the powder in the holes, about half-deep, pouring in the West Systems epoxy until it was slightly overflowing, a crown on top. Let them cure. It seemed to mix the powder evenly by itself, and there was no real problem with bubbles. Any bubbles would come up to the top by themselves as it was curing.

Out of the mold, the dots were like little rivets, with a rounded lump on top. We'd glue them into the holes in the neck with CA glue, and file the heads off flush. Very neat and clean looking, and nice even illumination.

Mike bought the luminescent power at Michael's, which is a large chain Arts & Crafts store around here. I don't remember the brand, but it was available in many colors. There must be something like that over in your world. I remember making them in White, Red, Blue and Green for different customers. They were at least as bright as the Lumilay dots.
 
Last edited:
I couldn't find any pictures of the side dot molds that we used. That was 8 or so years ago. Mike passed away in 2018, and I had the sad job of cleaning out his two shops for his estate. But I don't know what happened to those molds. I didn't find them in his stuff.

They are easy enough to make, using standard silicone rubber mold technique. I use silicone molds to cast many of my pickup parts, like bobbins and outer housings.

View attachment 5355165

The mold on the left is for larger surface dots, of a different type. But that's the idea of the mold that you need to make up. A block of silicone rubber with an array of small cylindrical holes. Silicone Rubber Mold-Making compound is available in art supply stores and online.

View attachment 5355306

The Master is on the right. It's a rectangular block of MDF (or whatever) with an array of holes drilled and pins tapped in. For side marker dots, find some little dowel pins that are the diameter you want the dots to be, but a little longer.

If I remember right, the molds I made for Mike used 1/8" x 3/4" steel dowel pins. The master was made with the pins sticking up out of the base 1/4". So the cast cylinders ended up 1/8" diameter x 1/4" long. That was a nice size to work with. I think I made that mold to do 26 dots, enough for two 24 fret necks per pour.

View attachment 5355307

Four blocks of MDF are cut so they are a nice fit around the base of the Master.

View attachment 5355305

Here's a pickup bobbin mold, being cast. This is the technique. Wax the blocks and clamp them around the outside of the Master. Mix up the silicone rubber, pour it in, up level to the top. Let it cure, pull it apart.

Casting the dots was nothing more than pouring the powder in the holes, about half-deep, pouring in the West Systems epoxy until it was slightly overflowing, a crown on top. Let them cure. It seemed to mix the powder evenly by itself, and there was no real problem with bubbles. Any bubbles would come up to the top by themselves as it was curing.

Out of the mold, the dots were like little rivets, with a rounded lump on top. We'd glue them into the holes in the neck with CA glue, and file the heads off flush. Very neat and clean looking, and nice even illumination.

Mike bought the luminescent power at Michael's, which is a large chain Arts & Crafts store around here. I don't remember the brand, but it was available in many colors. There must be something like that over in your world. I remember making them in White, Red, Blue and Green for different customers. They were at least as bright as the Lumilay dots.

Because the Luminlay I received came as a tiny rod (60mm/3mm) I was all set on that format but making them much shorter makes a lot of sense, I can see how this helps avoid air bubbles and makes for better consistency.

This all seems pretty straightforward. I have most of what I need, on to looking for luminescent powder and steel dowel pins. Thanks a lot for the superbly detailed tutorial!
 
Because the Luminlay I received came as a tiny rod (60mm/3mm) I was all set on that format but making them much shorter makes a lot of sense, I can see how this helps avoid air bubbles and makes for better consistency.

This all seems pretty straightforward. I have most of what I need, on to looking for luminescent powder and steel dowel pins. Thanks a lot for the superbly detailed tutorial!

Yes, If you want 3mm dia dots, then get some 3mm x 12mm dowel pins.

For the luminescent powder, search for Glow In Dark Resin Powder. Here's some examples on Amazon:

https://www.amazon.com/Pigment-Powd...refix=glow+in+dark+powder,aps,240&sr=8-6&th=1

https://www.amazon.com/Portman-Lumi...refix=glow+in+dark+powder,aps,240&sr=8-7&th=1
 
As an Amazon Associate, TalkBass may receive commissions from qualifying purchases made via links on this site.
  • Like
Reactions: llmk
I couldn't find any pictures of the side dot molds that we used. That was 8 or so years ago. Mike passed away in 2018, and I had the sad job of cleaning out his two shops for his estate. But I don't know what happened to those molds. I didn't find them in his stuff.

They are easy enough to make, using standard silicone rubber mold technique. I use silicone molds to cast many of my pickup parts, like bobbins and outer housings.

View attachment 5355165

The mold on the left is for larger surface dots, of a different type. But that's the idea of the mold that you need to make up. A block of silicone rubber with an array of small cylindrical holes. Silicone Rubber Mold-Making compound is available in art supply stores and online.

View attachment 5355306

The Master is on the right. It's a rectangular block of MDF (or whatever) with an array of holes drilled and pins tapped in. For side marker dots, find some little dowel pins that are the diameter you want the dots to be, but a little longer.

If I remember right, the molds I made for Mike used 1/8" x 3/4" steel dowel pins. The master was made with the pins sticking up out of the base 1/4". So the cast cylinders ended up 1/8" diameter x 1/4" long. That was a nice size to work with. I think I made that mold to do 26 dots, enough for two 24 fret necks per pour.

View attachment 5355307

Four blocks of MDF are cut so they are a nice fit around the base of the Master.

View attachment 5355305

Here's a pickup bobbin mold, being cast. This is the technique. Wax the blocks and clamp them around the outside of the Master. Mix up the silicone rubber, pour it in, up level to the top. Let it cure, pull it apart.

Casting the dots was nothing more than pouring the powder in the holes, about half-deep, pouring in the West Systems epoxy until it was slightly overflowing, a crown on top. Let them cure. It seemed to mix the powder evenly by itself, and there was no real problem with bubbles. Any bubbles would come up to the top by themselves as it was curing.

Out of the mold, the dots were like little rivets, with a rounded lump on top. We'd glue them into the holes in the neck with CA glue, and file the heads off flush. Very neat and clean looking, and nice even illumination.

Mike bought the luminescent power at Michael's, which is a large chain Arts & Crafts store around here. I don't remember the brand, but it was available in many colors. There must be something like that over in your world. I remember making them in White, Red, Blue and Green for different customers. They were at least as bright as the Lumilay dots.

Great and detailed explanation as always! Thanks! I'll definitely try that.

Last question, can you recommend a good quality consistent luminescent powder for top results?

I looked it up and it should be made of strontium aluminate.
 
Last edited:
  • Like
Reactions: llmk
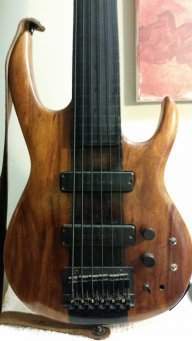
Not so much what's on my workbench but what I found and what will happen later. I've had one of these for years looking for a second and now I found it (albeit used) so I can plan another narrow six for myself. Now I have a pair of DiMarzio Alchemy bass pickups. I got some special stuff in the wings that I may put with this so keep tuned for a new build (once I complete some of my outstanding ones).
IMG_9340.JPG
 
Last edited:
Not so much what's on my workbench but what I found and what will happen later. I've had one of these for years looking for a second and now I found it (albeit used) so I can plan another narrow six for myself. Now I have a pair of DiMarzio Alchemy bass pickups. I got some special stuff in the wings that I may put with this so keep tuned for a new build (once I complete some of my outstanding ones).
How do you find these things? :jawdrop: I've never seen one in person.
 
  • Like
Reactions: Slidlow
Not on my bench, but on it's way there...

I acquired a truck load of walnut from a buddy of mine; he bought a bunch planning to get into turning when he retired in a couple years. He made a few things, then decided it was too much like work! He offered me half of his hoard if I would come and get it.

20240222_104800.jpg

20240222_104747.jpg
Not all of it is in great shape; some rot, knots and warped bits, but it's somewhere in the neighborhood of 120 bdft, mostly 4/4 and 5/4 by 8ft boards! Now I have figure out where I'm going to put it...

Couple questions about wood storage...

A lot of the boards are rough sawn; is it better to store it as is or run it through the planer to clean it up a bit?

Also, this wood has been stored in an attic for several years after my buddy got it so it should be pretty well dried at this point; if I cut some of the boards into shorter lengths, for storage, is it still a good idea to paint the ends? It will likely be years before I can into most of this stuff.
 
Most of the woods "move" within 3 weeks according to my luthier so I would put them all in your wood shop and leave them there for a while without doing anything as a first step.
When you will remove some material out of them or cut in shorter lengths, they will move again so between each cut or planning, I would give them a rest.
 
  • Like
Reactions: BishopJP