• TalkBass has been independent since 1998. Add your voice.
    Create a free account to reply to discussions, view embedded media, and browse with fewer display ads.
    Join freeLog in
    Want zero display ads or expanded classifieds tools? Compare plans.

What's On Your Workbench?

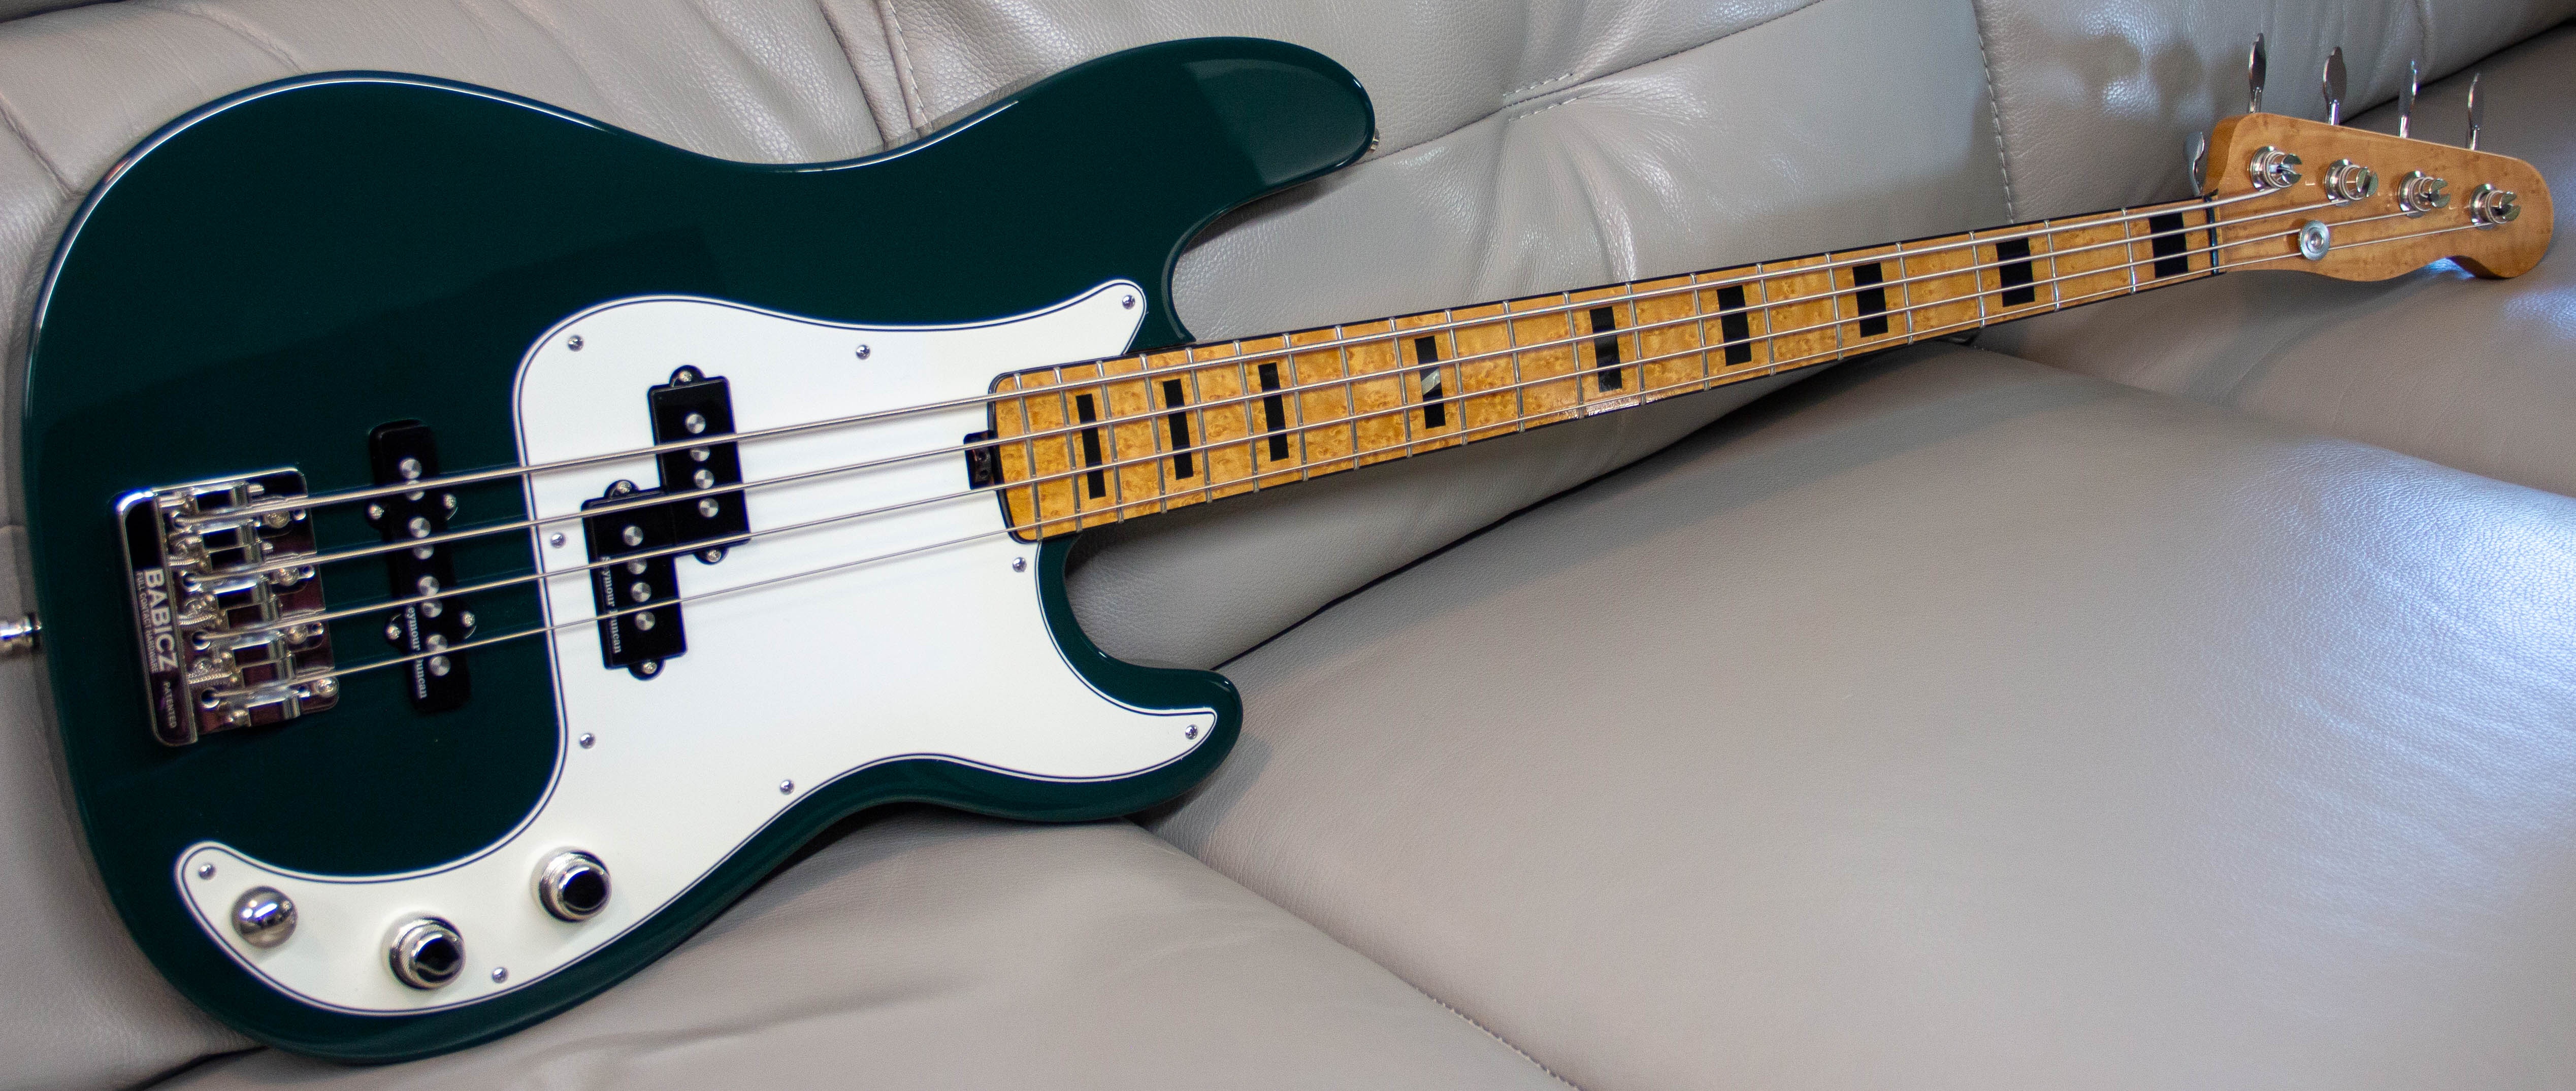
This one just came off the workbench. Finally completed my summer 2024 build off entry. Better late than never!

Full build thread is here if you're interested.

XXCg6TP.jpg
 
I finally have one of those “got a cool tool at a great price” stories!

Picked this up for $300… a 16” Jet bandsaw. As soon as I saw it on marketplace I hopped in the truck before I even hit send on the message fingers crossed that I could get it in my bed. Good call, because the lady was fussing over closing the ad because so many people after me were messaging her trying to come get it ASAP

Luckily they’re on a farm and had a tractor with forks

Unfortunately, when I got home my wife DID NOT have a forklift :mad:

So I got it out with a series of contraptions, platforms, and injuries.

Had a brand new set of tires yet to be installed, and two blades that look brand new.. doesn’t seem to be missing anything, though I haven’t gotten a chance to go to deep on the inspection quite yet; hopefully there aren’t any big issues that pop up, but considering the most threads I found about used prices for these seem to be $600-900 for decent condition, I think it’d be hard for this to be a bust for me
IMG_6639.jpeg


At 36, I don’t know how many more times I can load a 400lb tool by myself, but I’d say it’s at least one

 
I am
I finally have one of those “got a cool tool at a great price” stories!

Picked this up for $300… a 16” Jet bandsaw. As soon as I saw it on marketplace I hopped in the truck before I even hit send on the message fingers crossed that I could get it in my bed. Good call, because the lady was fussing over closing the ad because so many people after me were messaging her trying to come get it ASAP

Luckily they’re on a farm and had a tractor with forks

Unfortunately, when I got home my wife DID NOT have a forklift :mad:

So I got it out with a series of contraptions, platforms, and injuries.

Had a brand new set of tires yet to be installed, and two blades that look brand new.. doesn’t seem to be missing anything, though I haven’t gotten a chance to go to deep on the inspection quite yet; hopefully there aren’t any big issues that pop up, but considering the most threads I found about used prices for these seem to be $600-900 for decent condition, I think it’d be hard for this to be a bust for me View attachment 7354076

At 36, I don’t know how many more times I can load a 400lb tool by myself, but I’d say it’s at least one
I am a big believer in owning engine hoists, pickup ramps, and wheeled lift tables.
 
  • Like
Reactions: T_Bone_TL
After successfully building and then selling 3 basses made from a similar kit setup, I now have four of these sitting at home that I'm about to get started on. If I don't include labor put into each of the three kits, I made a small profit on them, so I figured what the heck and ordered these. These four are actually FAR nicer than the first three I did and I'm excited to get them built. I figure my enjoyment in building them is my compensation for the time and labor I put into them, and that is my payment for that portion...not to mention that I find doing the kits reduces my stress. Should come out further ahead with these than I did with the other three as I got these kits cheaper than the others.

81ig0Nw3IzL._AC_SL1500_.jpg
 
After some consideration, I made a decision about the path forward with my neck rescue.

When faced with the gap I showed last week:
IMG_9032.jpeg

I wasn’t sure how I wanted to fill it. I considered sawdust and super glue, sawdust and epoxy, metal dust and super glue or epoxy, epoxy putty and, lastly, maple end grain.

I liked the idea of a slice of end grain because it replaces the compressed wood with…. wood, but it seemed like it would be the most complicated solution. I decided to try it anyway and it wound up being pretty easy.


IMG_9072.jpeg


IMG_9071.jpeg

I should have taken some pictures but I was on a roll. Basically, I made a half-donut by drilling into the end of a strip of hard maple and then slicing off the end to the correct thickness. Then I used a chisel to round one side and, lastly, I made two parallel cuts to remove the bottom of the donut. Something like this:
IMG_9073.jpeg

I then worried the donut bottom to the bottom of the slot with dental tools, saturated everything with super glue (after a dry fit, of course) and then slid the top half of the donut piece down over both the truss rod and the bottom piece. Afterwards I wicked in more super glue. I need to fill in a little bit around it with some glue and sawdust and then it can sit and cure for at least a week.

Once it’s cured I can chisel the filler piece to match the surrounding broken maple and I can glue the “cover” back on. At that point, it should be a fully working truss rod.
 
At 36, I don’t know how many more times I can load a 400lb tool by myself, but I’d say it’s at least one
Quite a few if you use your noggin more than your back.
I am a big believer in owning engine hoists, pickup ramps, and wheeled lift tables.
This is the way. Though the combo of ramps and wheels can be hairy unless a winch is also involved.

Once in a while, calling a rigging company is the way. It's good to know when it's smarter to do that rather than lose something more valuable than their fee.
 
At first I thought "pickup ramps? Seems a bit much," but then I thought "What if I have to switch out some super ferrites on a Peavey T-40?" Totally makes sense to have some good lifting hardware.
:)
I just bought some pickup ramps from Harbor Freight. I am specifically thinking of how to put my ~150 lb. generator into the back of the truck, and then get it out again.

I agree, a come-along is probably also indicated for maximum safety - maybe not for the 150 lb. generator, I can restrain that from running away down the ramp myself, but I'm sure that it won't be that long till I find myself running something up those ramps that's a lot heavier than 150 pounds.

Years ago I changed jobs from a big high production facility to a much smaller much lower production rate company. Right off the bat I noticed that the assembly workers were having to pick up and carry heavy units from place to place, which of course in a real mass production asembly area is a big no-no. So I told the manufacturing engineer "you really ought to get some wheeled lift carts for these folks before you end up with a bunch of back injuries." He scoffed; "Nah, not needed; they wouldn't use them anyway; waste of money." So I went on about my business. A little while later, I bought a nice battery operated wheeled lift cart for our R&D test area, because I wasn't going to heave that heavy stuff around any more. All was well until the day the lift cart came up missing. Looked all over for it, finally found it in the assembly area. I said "Hey guys, that's ours, I gotta take it back" and the assembly line guys all said "oh no, please don't! we love this thing, it saves our backs, it's the best thing since sliced bread..." So much for "they wouldn't use it if they had it."
 
I finally have one of those “got a cool tool at a great price” stories!

Picked this up for $300… a 16” Jet bandsaw. As soon as I saw it on marketplace I hopped in the truck before I even hit send on the message fingers crossed that I could get it in my bed. Good call, because the lady was fussing over closing the ad because so many people after me were messaging her trying to come get it ASAP

Luckily they’re on a farm and had a tractor with forks

Unfortunately, when I got home my wife DID NOT have a forklift :mad:

So I got it out with a series of contraptions, platforms, and injuries.

Had a brand new set of tires yet to be installed, and two blades that look brand new.. doesn’t seem to be missing anything, though I haven’t gotten a chance to go to deep on the inspection quite yet; hopefully there aren’t any big issues that pop up, but considering the most threads I found about used prices for these seem to be $600-900 for decent condition, I think it’d be hard for this to be a bust for me View attachment 7354076

At 36, I don’t know how many more times I can load a 400lb tool by myself, but I’d say it’s at least one

That's a good find! Jet makes good quality machines, and parts are easily available. And you got it for a good price. Around my area, it would be listed for around $800-$1000.

As you know, I've done a lot of machinery moving in my years, including several big bandsaws. In my experience, the safest way to move a machine onto or off of a trailer or pickup bed is with a crane. Pick it straight up, drive the trailer out from under it. Those folding engine hoists work great. I have one of the cheap import ones that I bought on CraigsList for $100, and it's served me well many times moving machines.

When I went to pick up my Davis & Wells 20" bandsaw (800 lbs). I rented a small flat trailer, and put the folding hoist in the back of my pickup. It's light enough that I can load it into a truck by myself. At the seller's place, I used the hoist to set the bandsaw onto the trailer, working by myself, then put it back in the pickup bed for the ride home. Back at my shop, I used my overhead gantry crane to lift the bandsaw and drive the trailer out from under it. I could have used the hoist again, but the gantry crane was easier.

So, yes, I recommend that you get one of those cheap folding engine hoists. You'll find many uses for it around the shop. For example, lifting up the Jet to set it on a nice stable wooden base.
 
Last edited:
Some little, wedge-shaped bits to fill in where I got a little too rambunctious with either a chisel or the Exacto knife:
IMG_9096.jpeg

Three tiny wedges were glued in, each with a slightly different angle to match each part of the cut.

I needed to cut away some extra wood to be able to access the gap and install the endgrain donut (band name?) but future Lo-E will be careful to remove as little as absolutely necessary to avoid this sort of thing if he ever has to do this again. All-in-all, though, cutting the teeny wedges wasn’t much trouble. A little model-makers’ miter box and a small backsaw made short work of it.

On the other side of the bench, coat #6 is drying on the body.
 
Some little, wedge-shaped bits to fill in where I got a little too rambunctious with either a chisel or the Exacto knife:
View attachment 7358602
Three tiny wedges were glued in, each with a slightly different angle to match each part of the cut.

I needed to cut away some extra wood to be able to access the gap and install the endgrain donut (band name?) but future Lo-E will be careful to remove as little as absolutely necessary to avoid this sort of thing if he ever has to do this again. All-in-all, though, cutting the teeny wedges wasn’t much trouble. A little model-makers’ miter box and a small backsaw made short work of it.

On the other side of the bench, coat #6 is drying on the body.


Good deal. I did that but the other direction on a Kay guitar a couple of years ago. The anchor end of the truss rod was a plate and the rod end was kind of like a carriage bolt head that went through a square hole in the anchor plate. The head had managed to push out of the plate and the whole rod was turning. I figured I was replacing the truss rod but I managed to figure out where the end of the rod was in the neck heel and carefully drilled in with a big Forstner. Once I saw what was going on I glued in a wood shim to keep the end of the rod pressed into the plate and the neck adjusted just fine. There’s pictures somewhere in my thread.
 
The little wedges have been trimmed and the “cover” fits like a glove:
IMG_9097.jpeg

IMG_9098.jpeg

I’ll wait a few more days to be sure that the glue has fully cured before I replace that chunk of fingerboard.

Then it’s on to heat-setting the banana curve out of the neck (if possible.

Meanwhile, coat #7 has been sanded back at 400 and coat #8 has been applied.

I have a boat-load of rehearsals and recording sessions in the next couple of weeks so I may not get back to this for a while.

IMG_9099.jpeg
 
The little wedges have been trimmed and the “cover” fits like a glove:
View attachment 7359407
View attachment 7359408
I’ll wait a few more days to be sure that the glue has fully cured before I replace that chunk of fingerboard.

Then it’s on to heat-setting the banana curve out of the neck (if possible.

Meanwhile, coat #7 has been sanded back at 400 and coat #8 has been applied.

I have a boat-load of rehearsals and recording sessions in the next couple of weeks so I may not get back to this for a while.

View attachment 7359418

All looks good! But before you glue down the "cover", you should fill around the anchor with epoxy. West Systems or similar. That's an important addition to the strength of locking the anchor to the wood. Wood glue, spanning a gap, has very little strength. Epoxy, filling a gap, is almost as strong as when it's joining wood with no gap. That's a big advantage of using epoxy for structural things.

Pour a little bit of epoxy in around the anchor, letting it sink down in, adding more as needed. Let it cure, recheck the fit of the cover piece, trim a bit if necessary, then glue the cover down with wood glue.
 
  • Like
Reactions: JIO and AK4570
Nothing on the bench. Don’t even have a bench. But as of the last few days I’ve had a bit of a windfall, without losing my cabin.
Two maples and a red oak down so far.
Had to drop a white oak when I first got here. I bought a shed to have somewhere dry to work.
I Should have enough wood to build work benches, shaving horse, chicken coop and enough cordwood to heat the house for a few years. Plus a sweet bonus to help the work along
IMG_0211.jpeg
IMG_0190.jpeg
IMG_0211.jpeg
IMG_0190.jpeg
IMG_0177.jpeg
IMG_0181.jpeg
IMG_0186.jpeg
 
All looks good! But before you glue down the "cover", you should fill around the anchor with epoxy. West Systems or similar. That's an important addition to the strength of locking the anchor to the wood. Wood glue, spanning a gap, has very little strength. Epoxy, filling a gap, is almost as strong as when it's joining wood with no gap. That's a big advantage of using epoxy for structural things.

Pour a little bit of epoxy in around the anchor, letting it sink down in, adding more as needed. Let it cure, recheck the fit of the cover piece, trim a bit if necessary, then glue the cover down with wood glue.

I second Bruce's suggestion. This is the perfect spot to use a thin, laminating (West Systems or Total Boat) epoxy.

Best regards,
John

Well, this becomes a good news/bad news kind of situation.

The bad news is that the gap was filled when I saturated the filler pieces with cyanoacrylate. By capillary action, the super glue wicked right in and filled that gap so any epoxy would have nowhere to go; the gaps are already full.

The good news is that, while cyanoacrylate isn’t really as strong in this application as epoxy would have been, it’s still going to be better than nothing. The gap ahead of the anchor is completely filled with saturated wood and the anchor can’t really move anywhere so I feel fairly confident this will all hold fast.
 
  • Like
Reactions: Bruce Johnson
Well, this becomes a good news/bad news kind of situation.

The bad news is that the gap was filled when I saturated the filler pieces with cyanoacrylate. By capillary action, the super glue wicked right in and filled that gap so any epoxy would have nowhere to go; the gaps are already full.

The good news is that, while cyanoacrylate isn’t really as strong in this application as epoxy would have been, it’s still going to be better than nothing. The gap ahead of the anchor is completely filled with saturated wood and the anchor can’t really move anywhere so I feel fairly confident this will all hold fast.

Hey Ethan;

I was more concerned about the space around the outside of the anchor, around the serrations. You really don't want the truss rod to break loose and start turning. The wedges up in front of the anchor look fine and plenty strong.
 
  • Like
Reactions: Beej
Hey Ethan;

I was more concerned about the space around the outside of the anchor, around the serrations. You really don't want the truss rod to break loose and start turning. The wedges up in front of the anchor look fine and plenty strong.
The splines of the anchor are still well engaged in the surrounding wood but that’s the space I was talking about, too. The cyanoacrylate wicked in there and filled that space up - what little there was.
 
  • Like
Reactions: Bruce Johnson