
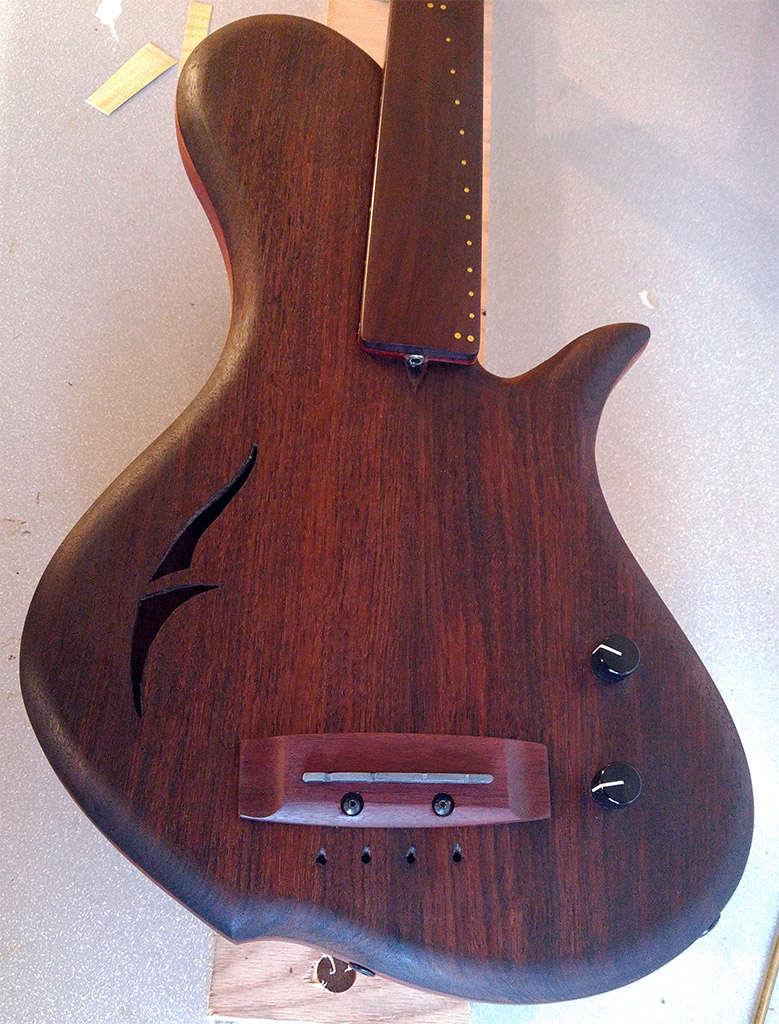
Finally got around to building a new bridge for this thing.

Enjoy the benefits of a premium membership!
Upgrade Account
-
TalkBass has been independent since 1998. Add your voice.
Create a free account to reply to discussions, view embedded media, and browse with fewer display ads.
Join free Log in
Want zero display ads or expanded classifieds tools? Compare plans.
You are using an out of date browser. It may not display this or other websites correctly.
You should upgrade or use an alternative browser.
You should upgrade or use an alternative browser.
What's On Your Workbench?
- Thread starter HaMMerHeD
- Start date
More options
Who Replied?

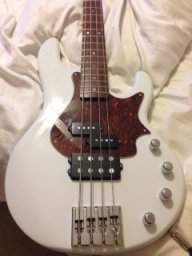
Squier VM 70's Jazz bass I purchased as new, but with a headstock break longitudinally down the center. Looked ugly, but the repair came out great (if I do say so myself). Anyway, I applied a new headstock decal and was going to sell it....until I brought it to band practice and loved it! (Especially since it cost me $120 w/free shipping!).
I've decided it's going to be my go to bass (along with my Musicmaster), so on to the work bench it goes to make it "mine".
This is going to include body refinish which includes stripping the Poly off and a light stain and nitro clear coat (any advice?).
Also new pick ups and I had a custom harness made.....oh and a tort guard of course! If all are interested I'll keep the photos coming as the project continues.


I've decided it's going to be my go to bass (along with my Musicmaster), so on to the work bench it goes to make it "mine".
This is going to include body refinish which includes stripping the Poly off and a light stain and nitro clear coat (any advice?).
Also new pick ups and I had a custom harness made.....oh and a tort guard of course! If all are interested I'll keep the photos coming as the project continues.

Hopkins
Commercial User
Squier VM 70's Jazz bass I purchased as new, but with a headstock break longitudinally down the center. Looked ugly, but the repair came out great (if I do say so myself). Anyway, I applied a new headstock decal and was going to sell it....until I brought it to band practice and loved it! (Especially since it cost me $120 w/free shipping!).
I've decided it's going to be my go to bass (along with my Musicmaster), so on to the work bench it goes to make it "mine".
This is going to include body refinish which includes stripping the Poly off and a light stain and nitro clear coat (any advice?).
Also new pick ups and I had a custom harness made.....oh and a tort guard of course! If all are interested I'll keep the photos coming as the project continues.
View attachment 729984 View attachment 729985 View attachment 729986 View attachment 729987
Before you stain it, make sure you have every bit of sealer sanded off the body or you will have spots that did not take stain
And take the Fender logo off, either put a Squier logo back on it, or even a custom logo, but don't represent it as something its not. As it stands its a counterfeit bass.

- Aug 25, 2004
- 939
- 1,337
- Disclosures
- Builder: Martin Keith Guitars
My handplane project didn't turn out.
It looks nice...
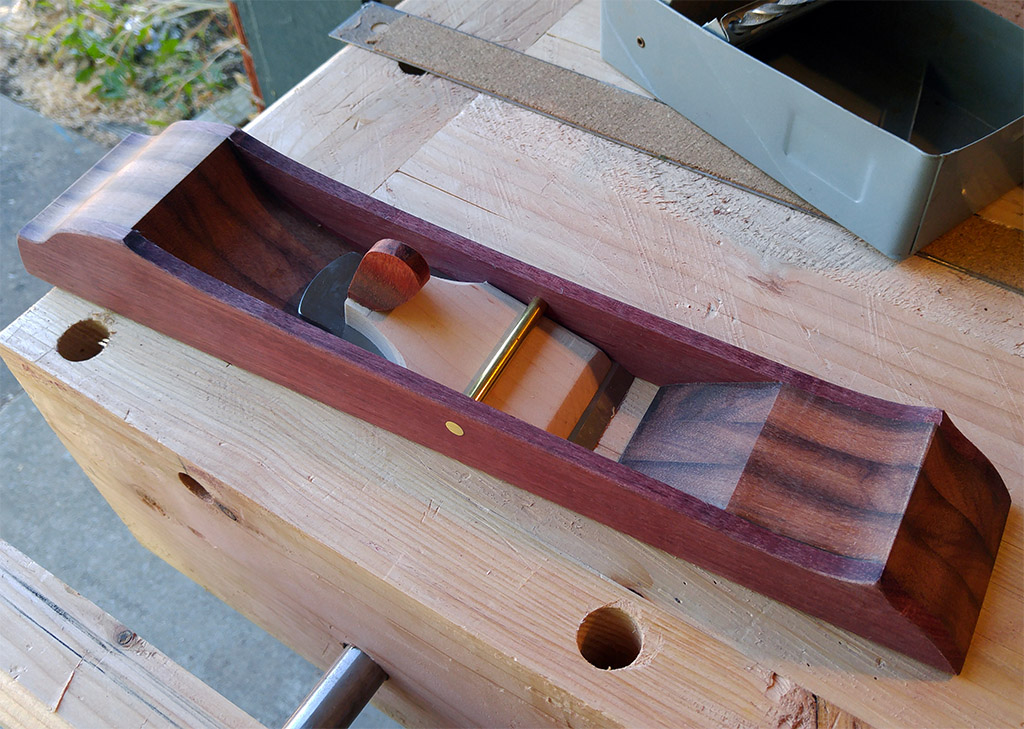
But here wasn't enough surface area for the glue to keep the blade bed fill block attached to the cheek where it gets super thin as a result of the 12 degree blade bed angle.
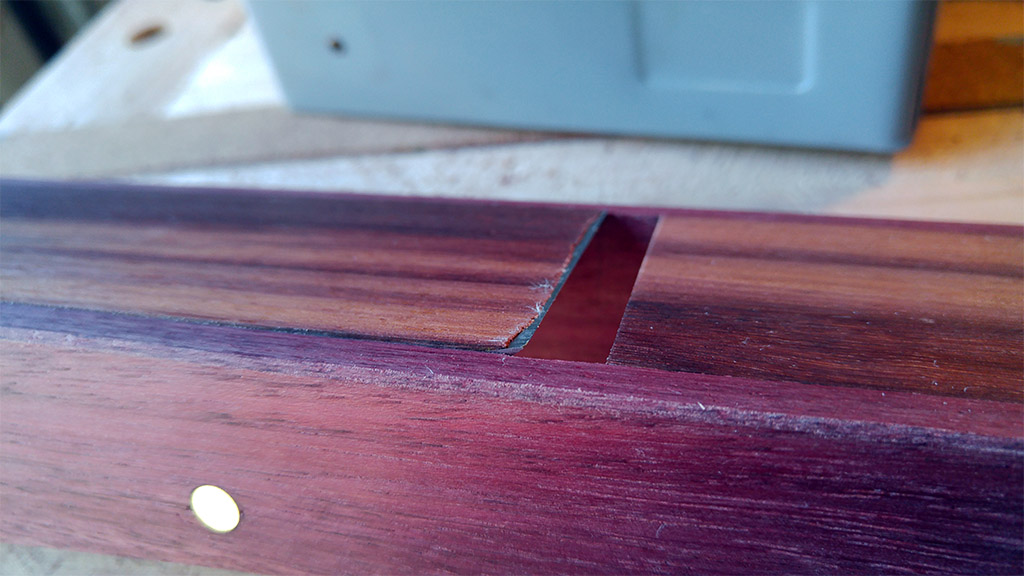
So it's a no go.
Laminate a baseplate onto the bottom, bridging over the side.
That mouth opening looks quite large for the kind of fine work you'd usually be doing with a low-angle plane,
so you could tighten up the opening in the baseplate as well.
It wouldn't even have to be that thick, and you could just project the blade a bit further down to reach through.
Make a longer wedge if you need to, or just thin up the one you have a little to get the end closer to the bevel. Should work OK after that.
If you really wanted to get nuts, you could mount the baseplate in two pieces, with the front piece adjustable (attach w/a counter sunk screw or two)
to make a variable-sized mouth. Probably overkill, but it would be doable.
Cheers,
Martin
Laminate a baseplate onto the bottom, bridging over the side.
That mouth opening looks quite large for the kind of fine work you'd usually be doing with a low-angle plane,
so you could tighten up the opening in the baseplate as well.
It wouldn't even have to be that thick, and you could just project the blade a bit further down to reach through.
Make a longer wedge if you need to, or just thin up the one you have a little to get the end closer to the bevel. Should work OK after that.
If you really wanted to get nuts, you could mount the baseplate in two pieces, with the front piece adjustable (attach w/a counter sunk screw or two)
to make a variable-sized mouth. Probably overkill, but it would be doable.
Cheers,
Martin
I'm just going to build a new body for the blade.
Also, finally got a proper precision straight edge.

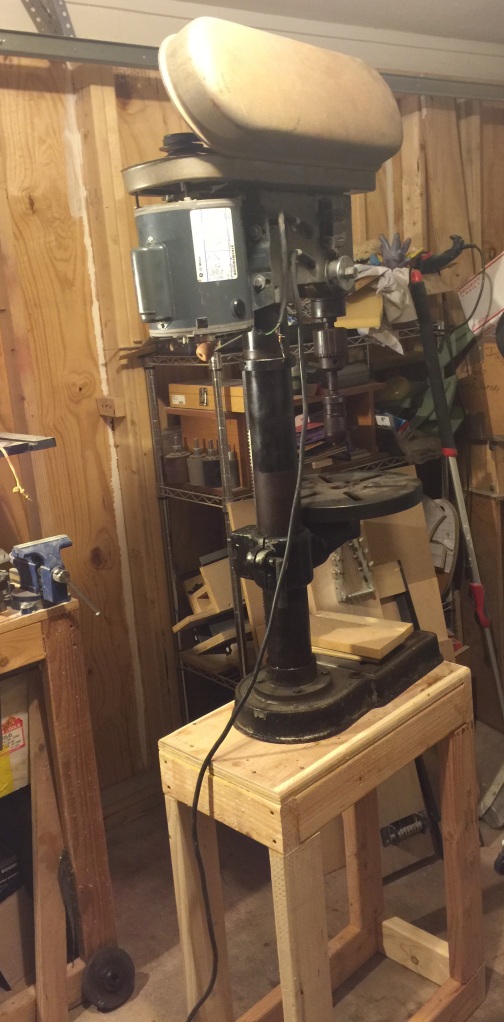
So I found a motor on CL for the drill press for $70
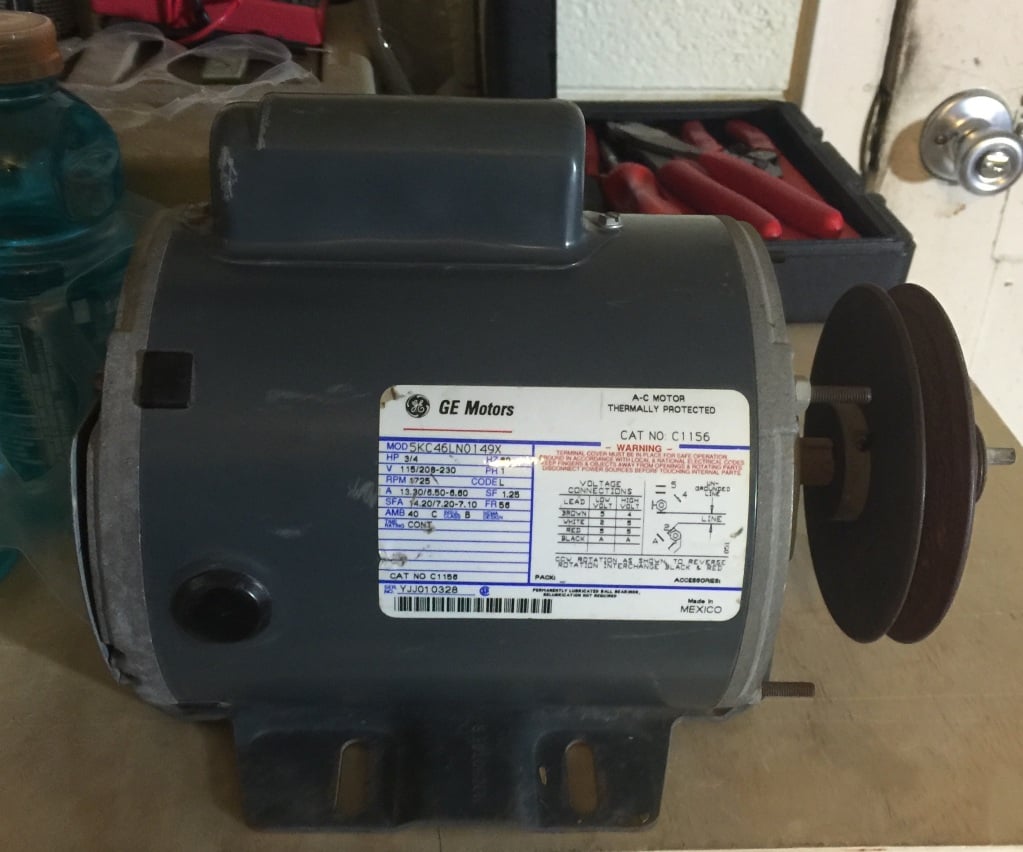
It's from a compressor but the specs are right.
I swapped out the pulleys, which was a feat in itself, and test fitted it, and placed it on the stand I made from 2x4's.
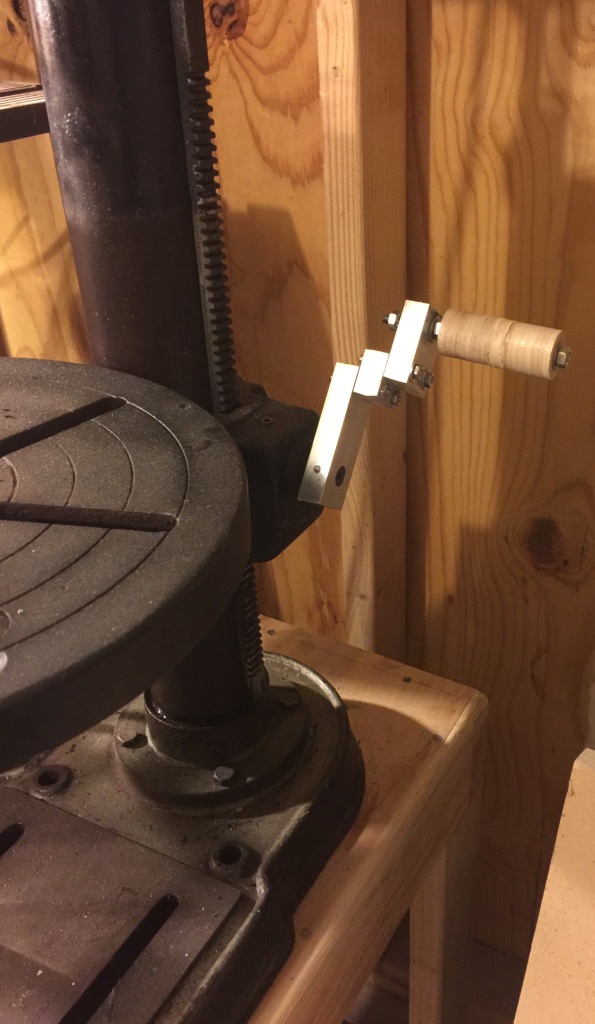
Fabricated a table height adjustment arm
And spaced out the motor with a 1/2" piece of plywood, and everything seems to work.
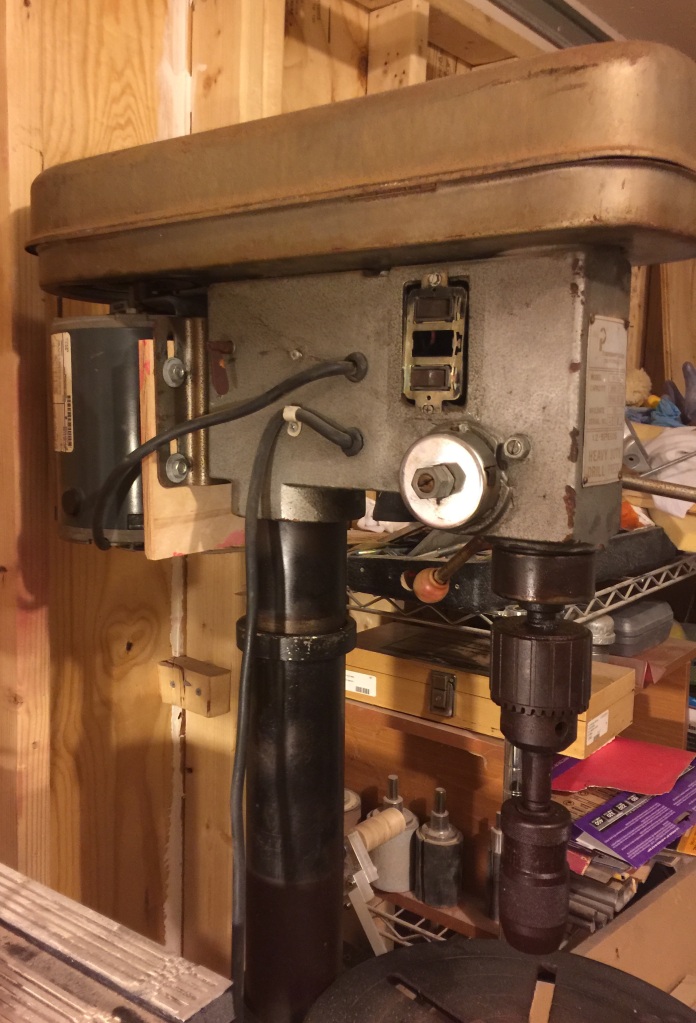
Just waiting for the chuck key I ordered for the massive 3/4" chuck. I still want to tidy up the electrical panel, and a few other odds and ends.
It's from a compressor but the specs are right.
I swapped out the pulleys, which was a feat in itself, and test fitted it, and placed it on the stand I made from 2x4's.
Fabricated a table height adjustment arm
And spaced out the motor with a 1/2" piece of plywood, and everything seems to work.
Just waiting for the chuck key I ordered for the massive 3/4" chuck. I still want to tidy up the electrical panel, and a few other odds and ends.

- Apr 18, 2008
- 16,004
- 1
- 31,698
- Disclosures
- I'm highly opinionated and extremely self-assured
Getting tung oil now. Once it's done I'll be starting some BFM Titan subs.


Manton Customs
UK Luthier
1960s made in Italy Eko Barracuda bass in for restoration!
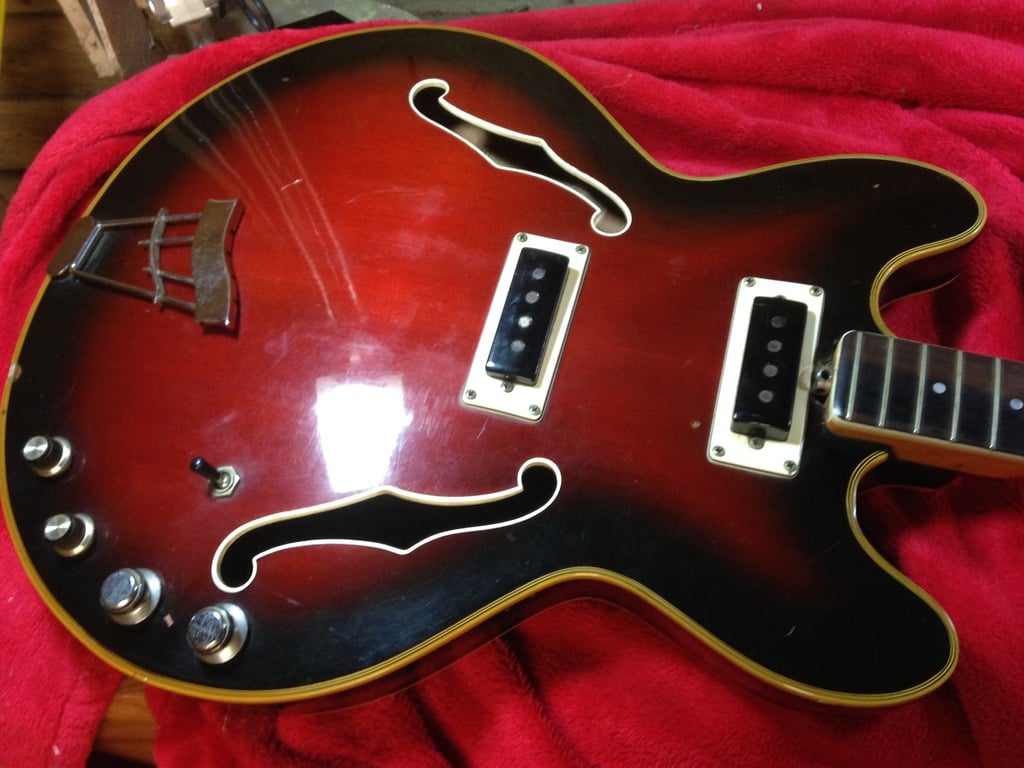
Quite a few 1960s guitars in for restoration (well three!) at the moment too, so I can post pics of these too if they are of any interest?
Quite a few 1960s guitars in for restoration (well three!) at the moment too, so I can post pics of these too if they are of any interest?
Last edited:

Manton Customs
UK Luthier
Yes!
Ok then! Here's another Italian 60's EKO, a guitar this time but they made a bass version also, it's called an EKO Florentine. This is obviously a before restoration pic, it's about done now so I'll have to get a finished picture up at some point.
A shot of the fretwire....it needed a refret! That's done now
I'll have to get a pic of the other two, they are both MIJ guitars.
View attachment 731613 Wall-mount headboard made from 5/8" thick sections of walnut and cherry, trimmed in maple. Birthday present for my lovely wife. Never mind that her birthday was back in January....
Getting tung oil now. Once it's done I'll be starting some BFM Titan subs.
Great job and I like your shop location! You are like me and will work where ever you can.
I consider this job done. I'm happy with the result.


I consider this job done. I'm happy with the result.


I really like the headstock design on this, points notwithstanding

I really like the headstock design on this, points notwithstanding
It was my own creation
 You can get it from this link (file format is AutoCAD 2014).
Here is my contribution to the board. This is my first build. A fretless 4-string neck-through. Maple and cherry with a persimmon fretboard.
Last edited:
Technically no longer on my workbench, but has been for the last fews days, in between working on the pedal steel.

The Stratocaster is officially done. Made the ash body and pickguard - I don't like that 5-way selector, so I am using a Volume, 3 position selector which chooses the neck pickup, middle, or both, into a blend between the selector and bridge pickup. Real happy with the way this came out.
The Stratocaster is officially done. Made the ash body and pickguard - I don't like that 5-way selector, so I am using a Volume, 3 position selector which chooses the neck pickup, middle, or both, into a blend between the selector and bridge pickup. Real happy with the way this came out.

Means2nEnd
Supporting Member
I have 5 necks to shape that are glued up but I was able to get some shaping done on my partner's bass (FYI red zebra wood smells like vomit when working it!) and also a PJ I am working on I did some dye work and a first coat of poly/oil finish I love blue and black in maple..
Attachments
-
 0bd9a08c-cf92-4fda-9429-749cd0a075e4.jpg111.4 KB · Views: 178
 -
 5c2e99ae-0ac9-4c75-a5d1-f65101e6e216.jpg123 KB · Views: 182
 -
 8a3da412-4517-42fe-800c-eec0525ca15b.jpg104.3 KB · Views: 171
 -
 985cfa17-10f6-4d75-9efc-44d4a2876c81.jpg56.1 KB · Views: 171
 -
 b274d952-713d-4aa3-8057-657c516bea9a.jpg68.1 KB · Views: 174
 -
 de4f7219-7d30-49df-9ac8-6f5867c1cf80.jpg125.3 KB · Views: 175

I'm taking a step back from the CBBG after a double sided tape failure so on my bench now is a replacement pickgaurd for my main bass, I'm excited to try this new materiel, it's a recycled plastic core sandwiched between to sheets of metal so I don't have to worry about shielding, I'm going to do a vinyl wrap over it when I'm done.
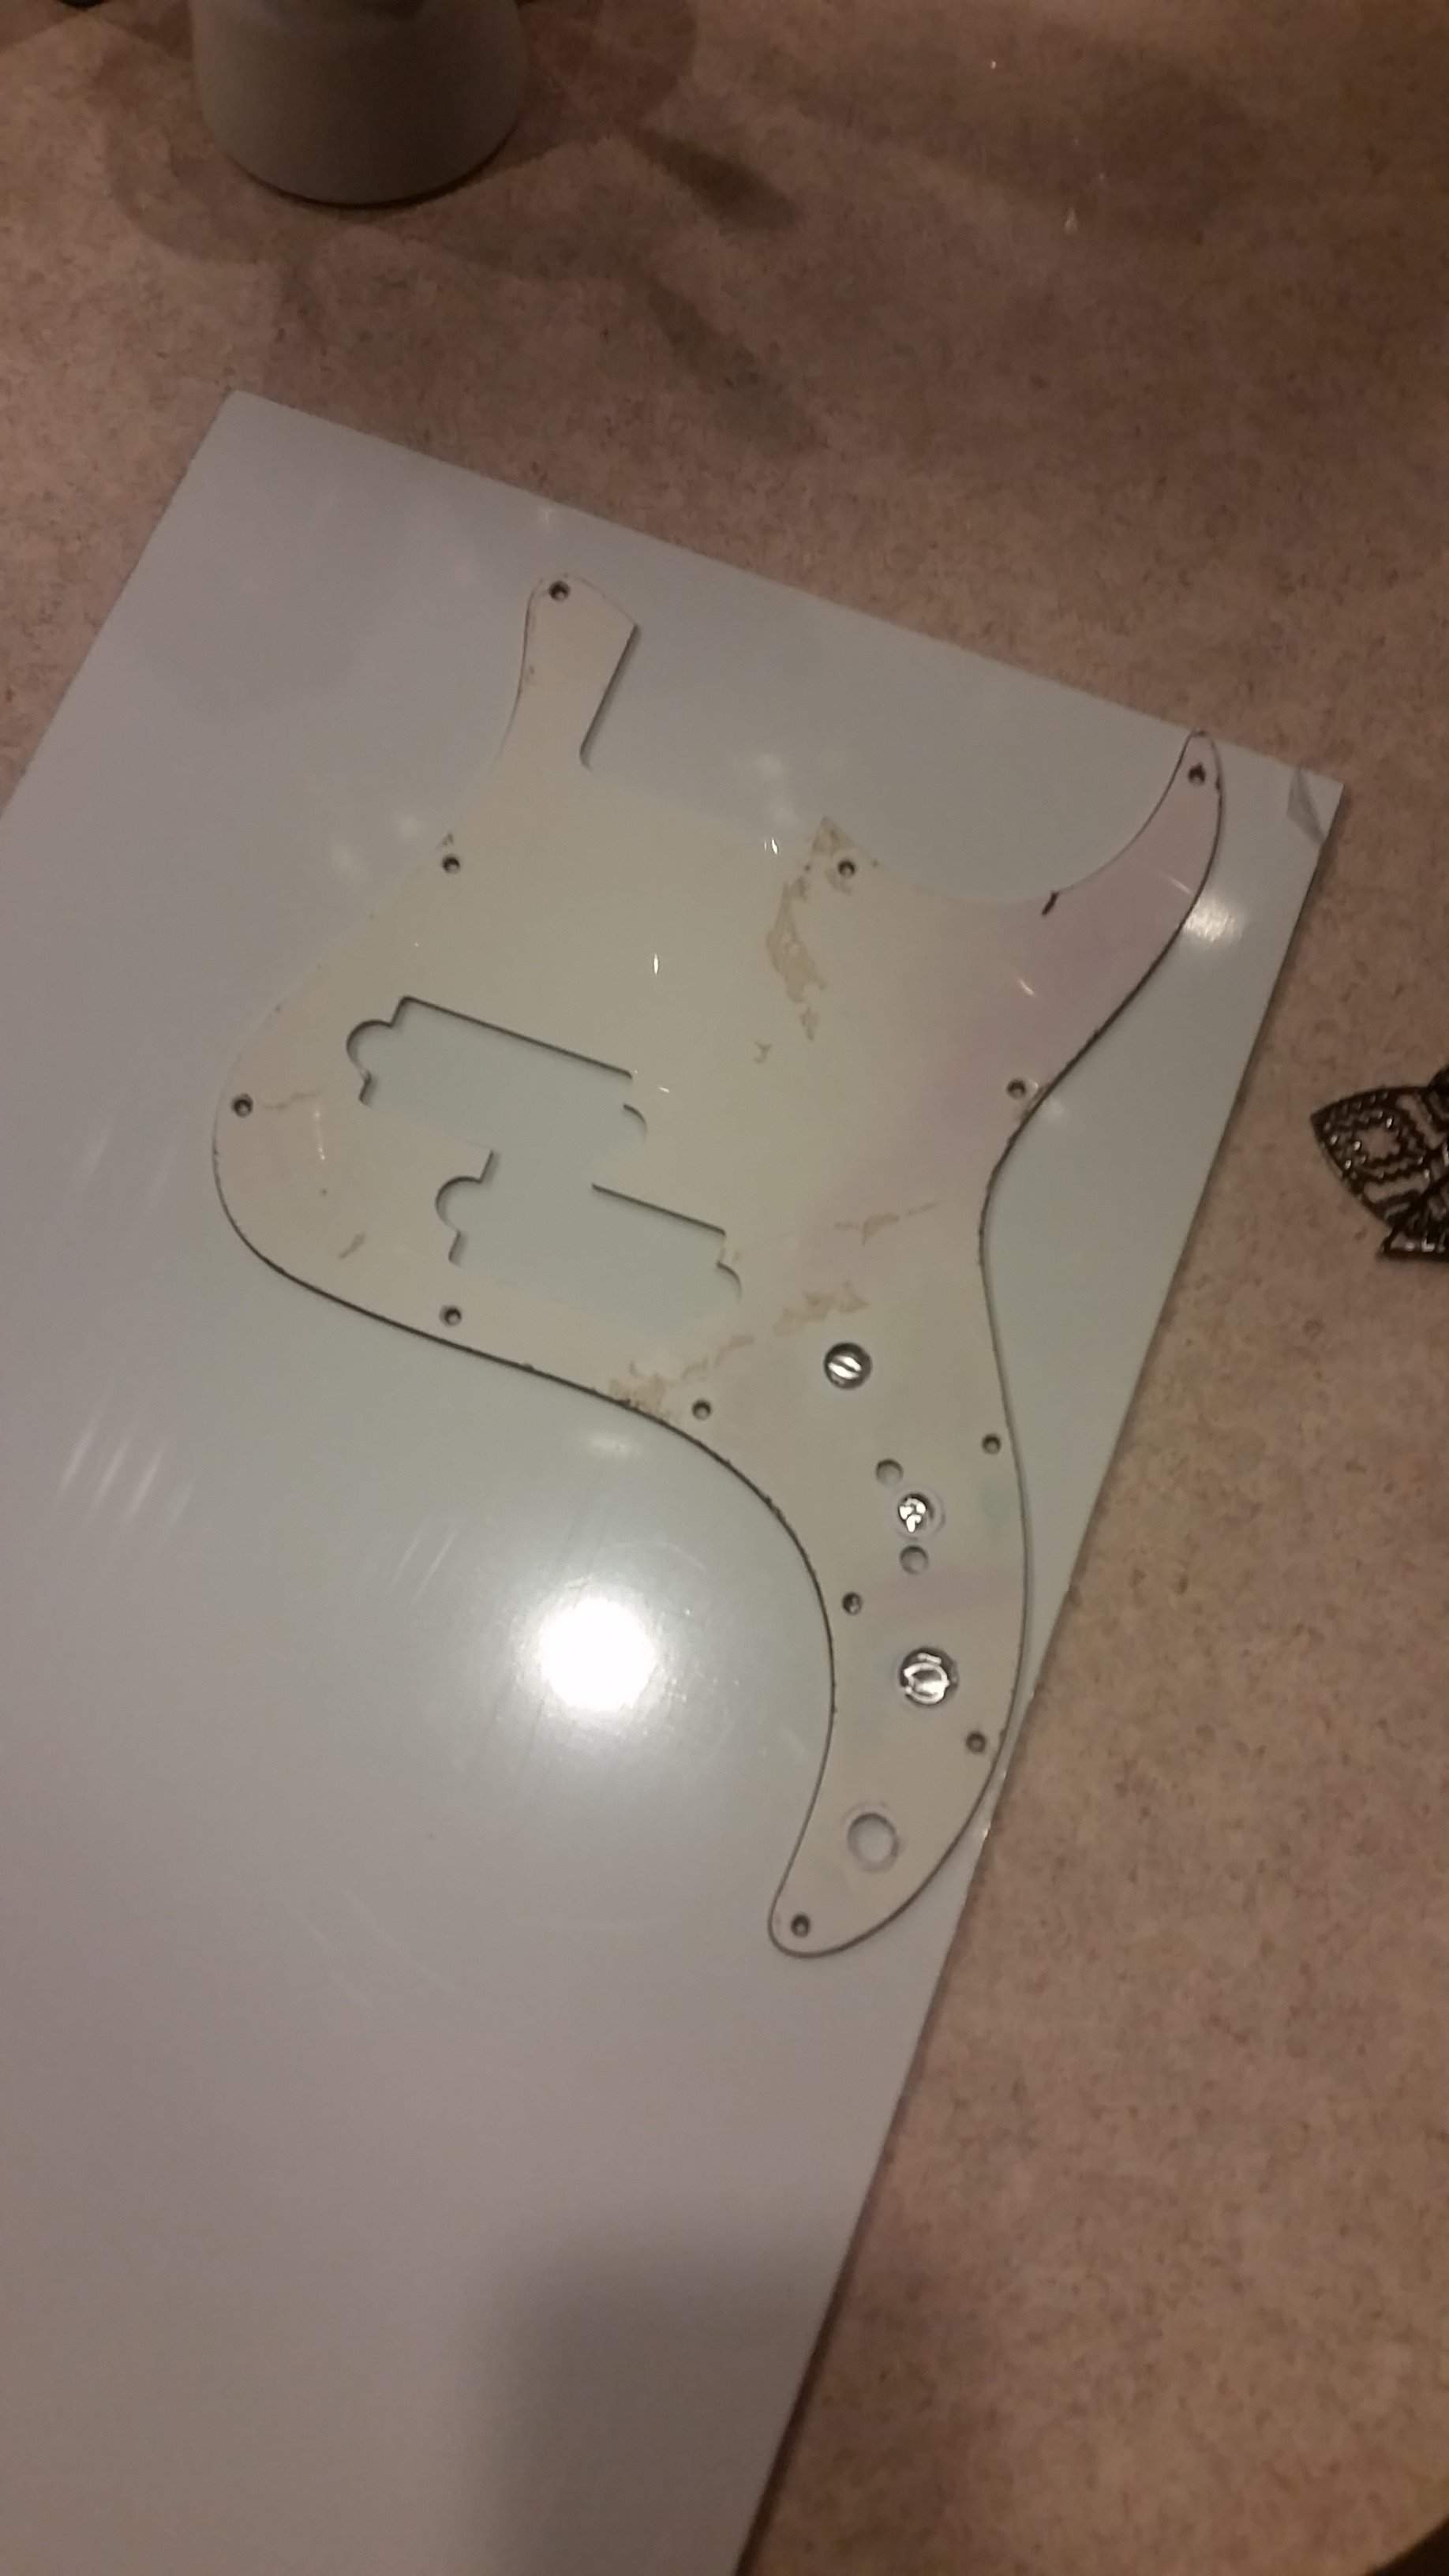
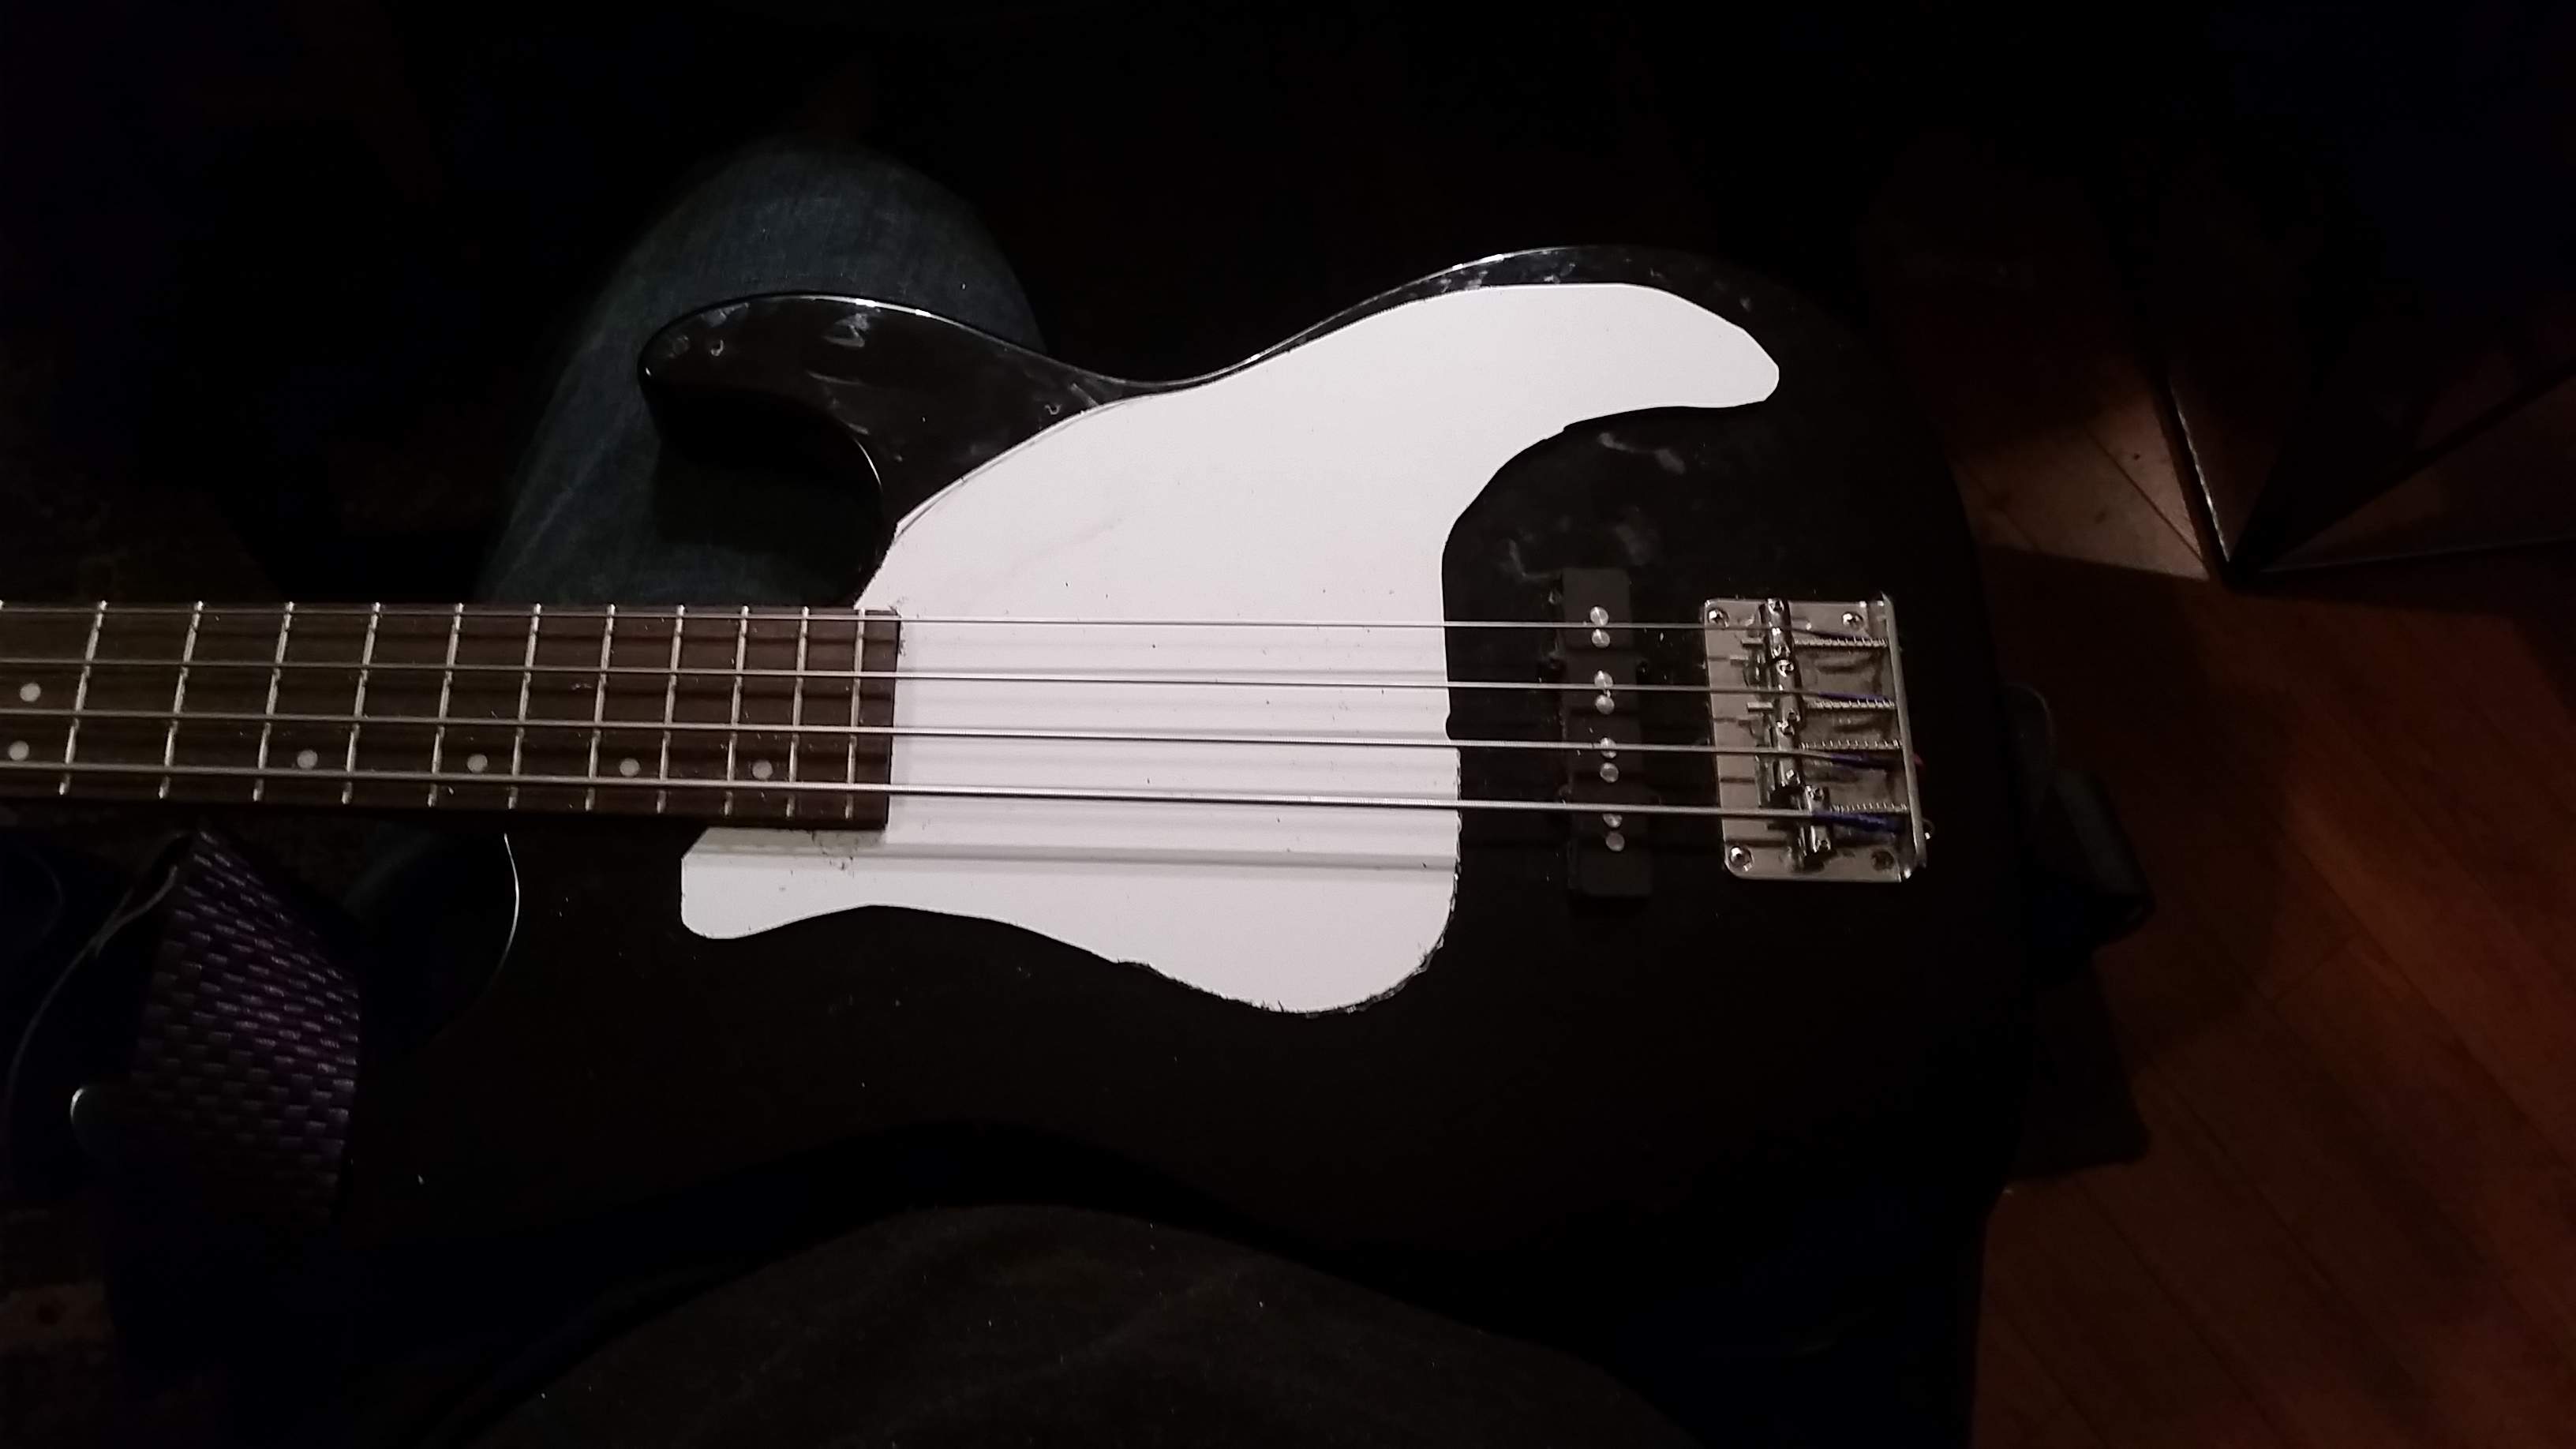
EDIT: Trying to create a template from the original with the router completely failed and I'm not sure why, I was using a top bearing template bit and 3/8" mdf taped it upside down, trimmed of the excess with a jig saw, set the router depth so the bearing was riding only on the pickgaurd and when I went to route it made it a couple inches just fine then it would go into the pickgaurd, checked to see if it moved nothing, repeat a couple times and now the original has a bunch of little nicks in it. So I took it inside, traced it onto the sheet, used a jig saw to get close to the line and now I'm finishing it with files, and a drum sander. Here's where I'm at now.
EDIT: Trying to create a template from the original with the router completely failed and I'm not sure why, I was using a top bearing template bit and 3/8" mdf taped it upside down, trimmed of the excess with a jig saw, set the router depth so the bearing was riding only on the pickgaurd and when I went to route it made it a couple inches just fine then it would go into the pickgaurd, checked to see if it moved nothing, repeat a couple times and now the original has a bunch of little nicks in it. So I took it inside, traced it onto the sheet, used a jig saw to get close to the line and now I'm finishing it with files, and a drum sander. Here's where I'm at now.
Last edited:
Latest posts
-
 I didn't need it but I bought it anyway new (to me) cab day...
- Latest: Redbrangus
-

-

-

