• TalkBass has been independent since 1998. Add your voice.
    Create a free account to reply to discussions, view embedded media, and browse with fewer display ads.
    Join freeLog in
    Want zero display ads or expanded classifieds tools? Compare plans.

Winter 2018 Build Off - 4004CTM

Too true. Switched to the trim router - same bit, a brand new Bosch bottom-bearing - and things are so much better. Nearly cleaned it up, and what’s left should be relatively easily sanded out.
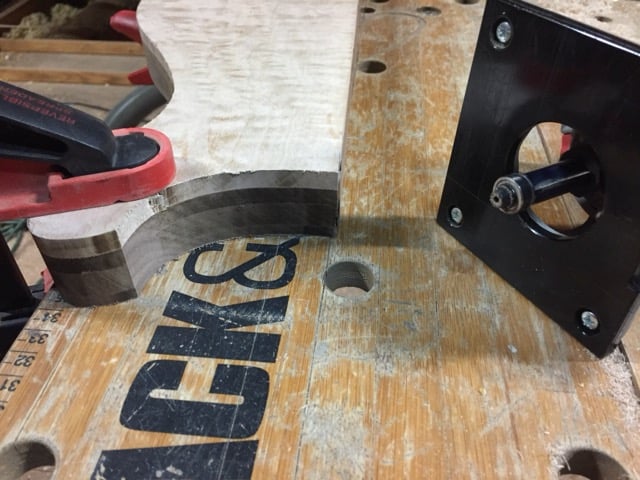
4004_0154.jpg


This was, of course, made much easier with my new favorite Christmas present. :)

4004_0155.jpg


While I was standing there, trim router in hand, I decided to go ahead and do the 4003s-style partial roundovers. Once again @Gilmourisgod ’s template made it super-easy to place them. Thanks bro!
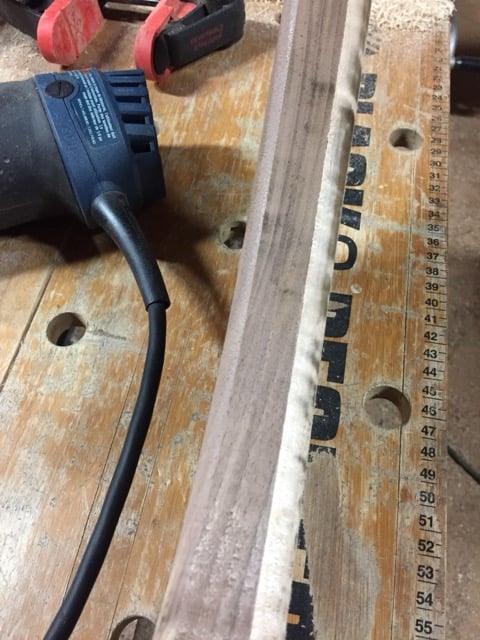
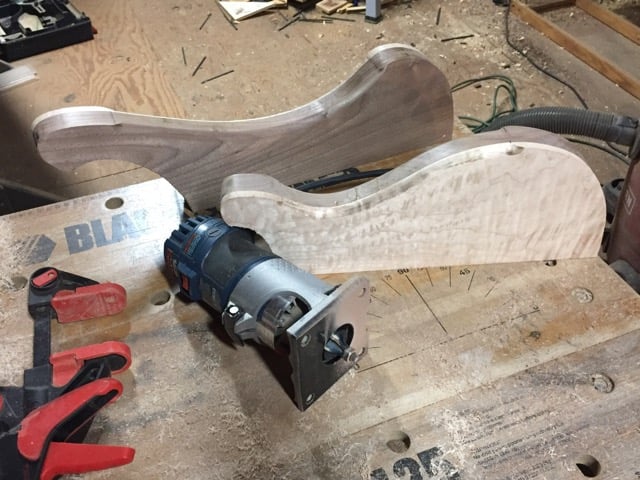
4004_0156.jpg


4004_0158.jpg


And here’s a glimpse into the future.
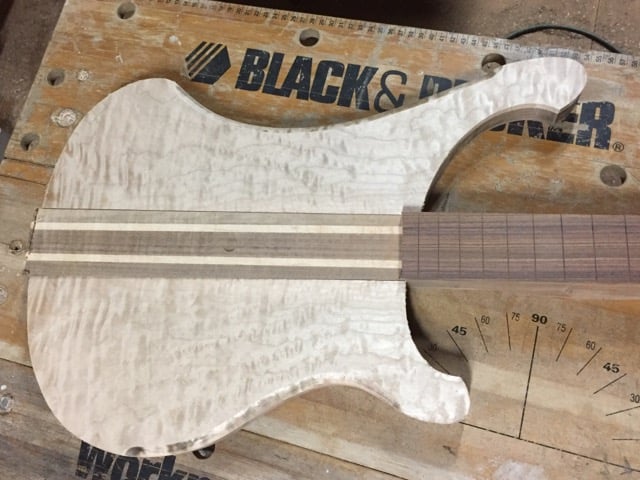
4004_0157.jpg


I’ve been looking at a lot of 4004 photos online, and this is turning out to be kind of a photo-negative of the Cheyenne I; dark spine through the center flanked by light wings. Wasn’t sure if I would like it, but so far I do!
 
Too true. Switched to the trim router - same bit, a brand new Bosch bottom-bearing - and things are so much better. Nearly cleaned it up, and what’s left should be relatively easily sanded out.

View attachment 2877198

This was, of course, made much easier with my new favorite Christmas present. :)

View attachment 2877199

While I was standing there, trim router in hand, I decided to go ahead and do the 4003s-style partial roundovers. Once again @Gilmourisgod ’s template made it super-easy to place them. Thanks bro!

View attachment 2877200

View attachment 2877201

And here’s a glimpse into the future.

View attachment 2877202

I’ve been looking at a lot of 4004 photos online, and this is turning out to be kind of a photo-negative of the Cheyenne I; dark spine through the center flanked by light wings. Wasn’t sure if I would like it, but so far I do!
Next year....The Workmate build off....:D
 
  • Like
Reactions: wraub and ctmullins
Ouch! That’s a nasty chipout. I’ve more or less given up on template bits for final body shaping, just too many grain changes around body horns like that. I bandsaw to within 1/8” and use the robosander, which is slow as hell, but no chipout. Supposedly the shear-cut router bits will cut clean, but if it ain’t broke..... I’ll probably try bits again eventually, but not in crotch walnut.
 
Stole a few hours this evening. Got the fingerboard fretted, then trimmed the excess off the back of the neck. I don’t have a bandsaw, so I did this with my jigsaw. Yecch...

4004_0162.jpg


Then I rough-shaped the neck with a combination of roundover bit, belt sander, combination rasp, and Shinto. That was gratifying. :)

4004_0161.jpg


Also started sanding the wings. So much more to do though!
 
Thanks for the comments!

Yes they do, I'm excited to see the finished on the top. I bet it will make the stringers really pop!

Yes, I am a huge sucker for a nice quilted maple top, and I love flame maple nearly as much (ribbon sapele too, but hey, that’s another build-off :roflmao: ). I bought a set of scrapers a while back, but haven’t really used them; I’m going to give them a try on this top and see if I can get a good smooth surface. Maple and walnut are two of my favorite woods! :hyper:
 
Hey CT, how deep is the slot for the LMI DA rod? I used a BBG DA rod for the Hossenfeffer, and wasn't too happy with the quality. The 4mm hex key it came with is a sloppy fit at best, makes me think I might have gotten a slightly janked return item. At any rate, not using a BBG rod again. I think the BBG slot was 1/4" wide x 3/8" deep.
 
A tiny bit of progress: did some sanding on the wings and drilled for controls. I don’t like the tiny micro-switch that Ric uses on its 4004s, so I’m using a full-sized toggle instead, which is why that hole is larger. Drilling for controls before doing the control cavity ensures I get nice clean holes.

And then, just for pure instant gratification, I hit them with a coat of oil. :cool:

4004_0165.jpg


Actually this does have the benefit of helping me see how much more sanding/scraping I have to do.
 
CT, must be sharing brainwaves, your process on this is a perfect mental preview for my HF-2 Build, had the same thought about drilling pot holes and the bigger switch. One solid whack and the microswitches are toast. What brand are you using for the switch? The big Ric leaf switches seem like they’d require too much wood hogged out. Top looks fantastic!
 
  • Like
Reactions: ctmullins
CT, must be sharing brainwaves, your process on this is a perfect mental preview for my HF-2 Build, had the same thought about drilling pot holes and the bigger switch. One solid whack and the microswitches are toast. What brand are you using for the switch? The big Ric leaf switches seem like they’d require too much wood hogged out. Top looks fantastic!

Thanks! Slow but steady, I’ll get there eventually.

I’m partial to the short Switchcraft toggle switches. They’re very sturdy, but only need 7/8” of cavity depth for mounting.

EP-4066-000.jpg


But this build will have a bit of a surprise in that department. Not quite ready to let the cat out of the bag just yet! :cool:
 
No progress to report, but an aesthetic observation regarding body symmetry.

Most “normal” bass/guitar bodies tend to be mostly symmetrical about the centerline. A standard Fender P, for instance, is completely symmetrical in the lower bout, and essentially symmetrical in the upper bout, excepting the extended upper horn. The upper horn is the same distance from the centerline as the lower horn. Mostly the same for J basses, except the entire shape is slanted. The Les Paul, the Starfire, the Soundgear, etc. Lots of examples of general symmetry about the centerline.

The Rickenbacker 400x series (and the related 400 series) is different. It’s a beautifully elegant and curvaceous shape, but to the eye accustomed to symmetry, there’s something strange going on here. The upper horn is both longer and further from the centerline than the lower horn, while the upper side of the lower bout looks vestigial.

Since I had the wings in hand, I took these two pics to illustrate the extent of the variation:

4004_0171.jpg


4004_0166.jpg


I find it remarkable how this design eschews traditional rules about body shape and proportions, yet still retains grace and beauty. Doubly so when you consider that it was designed in the late 1950s.

I never knew who was responsible for the design, but I just looked it up; it was German designer Roger Rossmeisl, who also designed the 300 series for Rickenbacker, then went on to design semi-hollow bodies for Fender.