• TalkBass has been independent since 1998. Add your voice.
    Create a free account to reply to discussions, view embedded media, and browse with fewer display ads.
    Join freeLog in
    Want zero display ads or expanded classifieds tools? Compare plans.

Winter Build-off 2018: It had to be walnut...

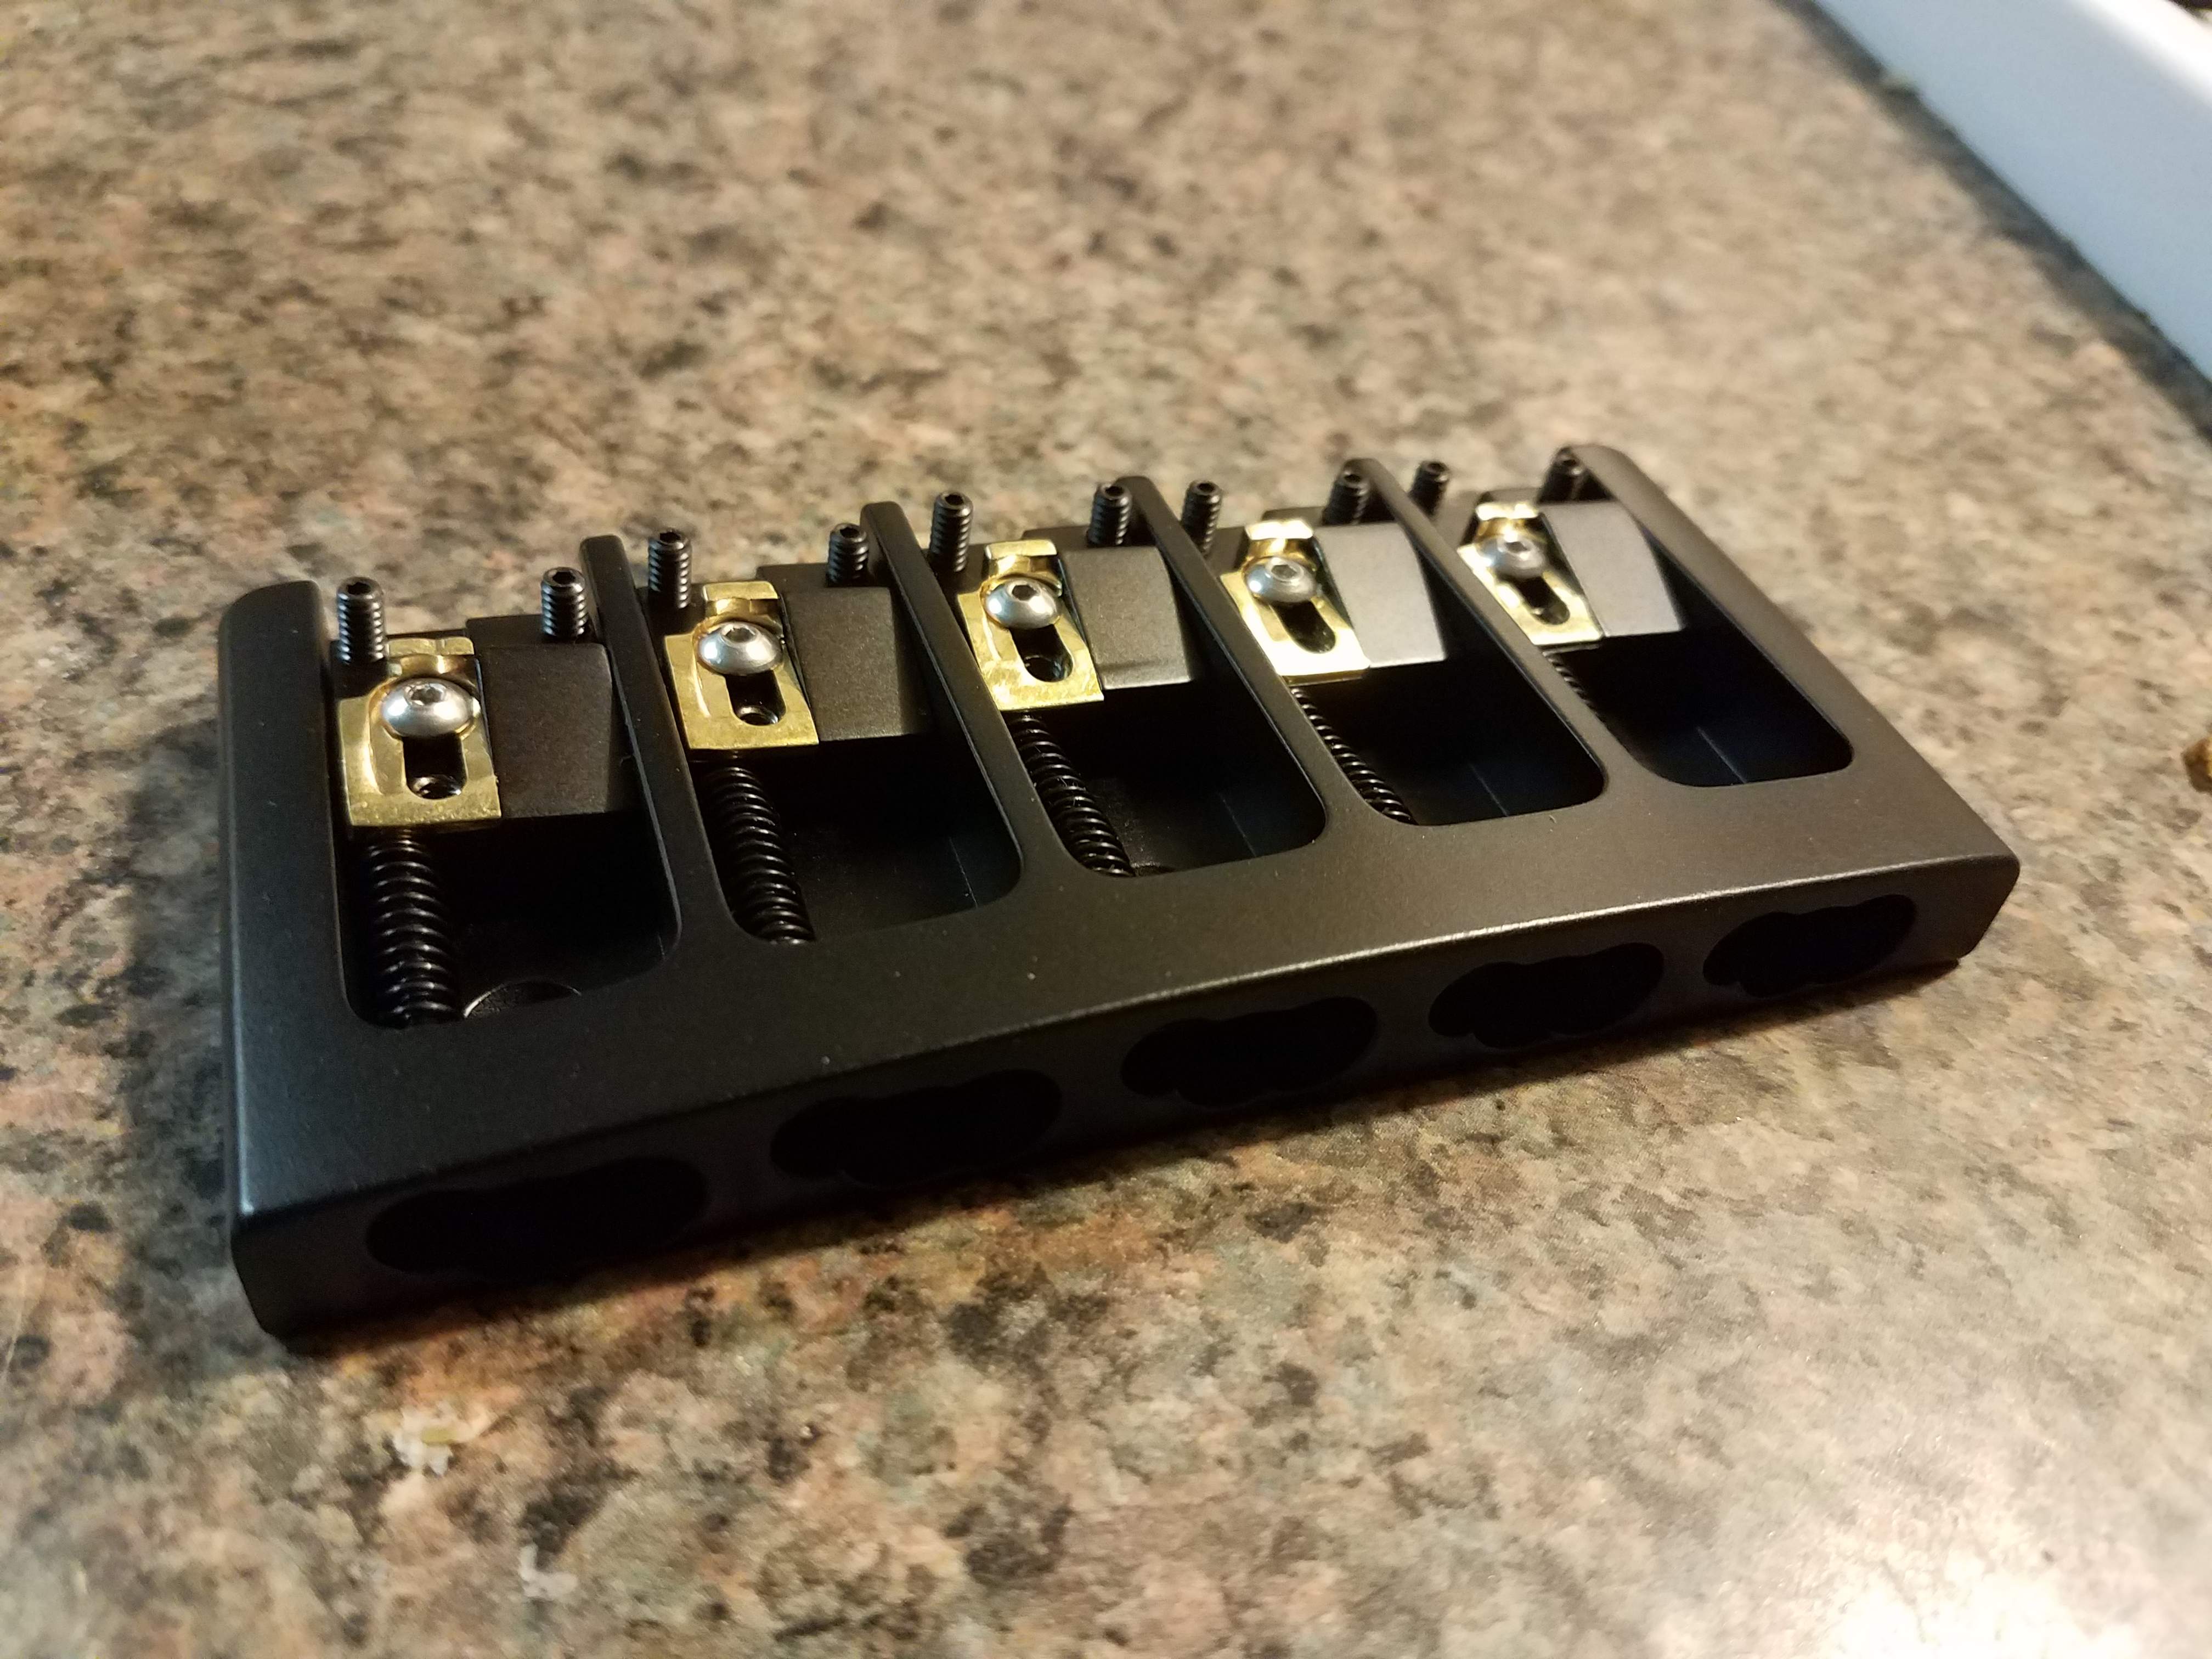
Howdy folks. That deadline is creeping up on us but I finally got my 10 string bridge and I'm ready to make some progress. Before we move on I'd like to thank Bill and Oscar and all the other great folks at hipshot who managed to work this bridge in during the busy NAMM season.

First, a picture of the goods.
20180301_172240.jpg


The bridge comes with tiny notches in the gold colored octave string inserts but the regular string notches will need to be filed in. The octave insert is attached to the saddle so it raises and lowers with the parent string and a small Allen screw allows for the insert to be moved forward and backward for intonation adjustments.

Since I've never made a 10 string the first thing we need to do is get some strings on this bridge and calculate the width of the neck. I've got an older 5 string that I'm soon putting out of commission so before it goes to the old basses home we'll use it to calculate our measurements.

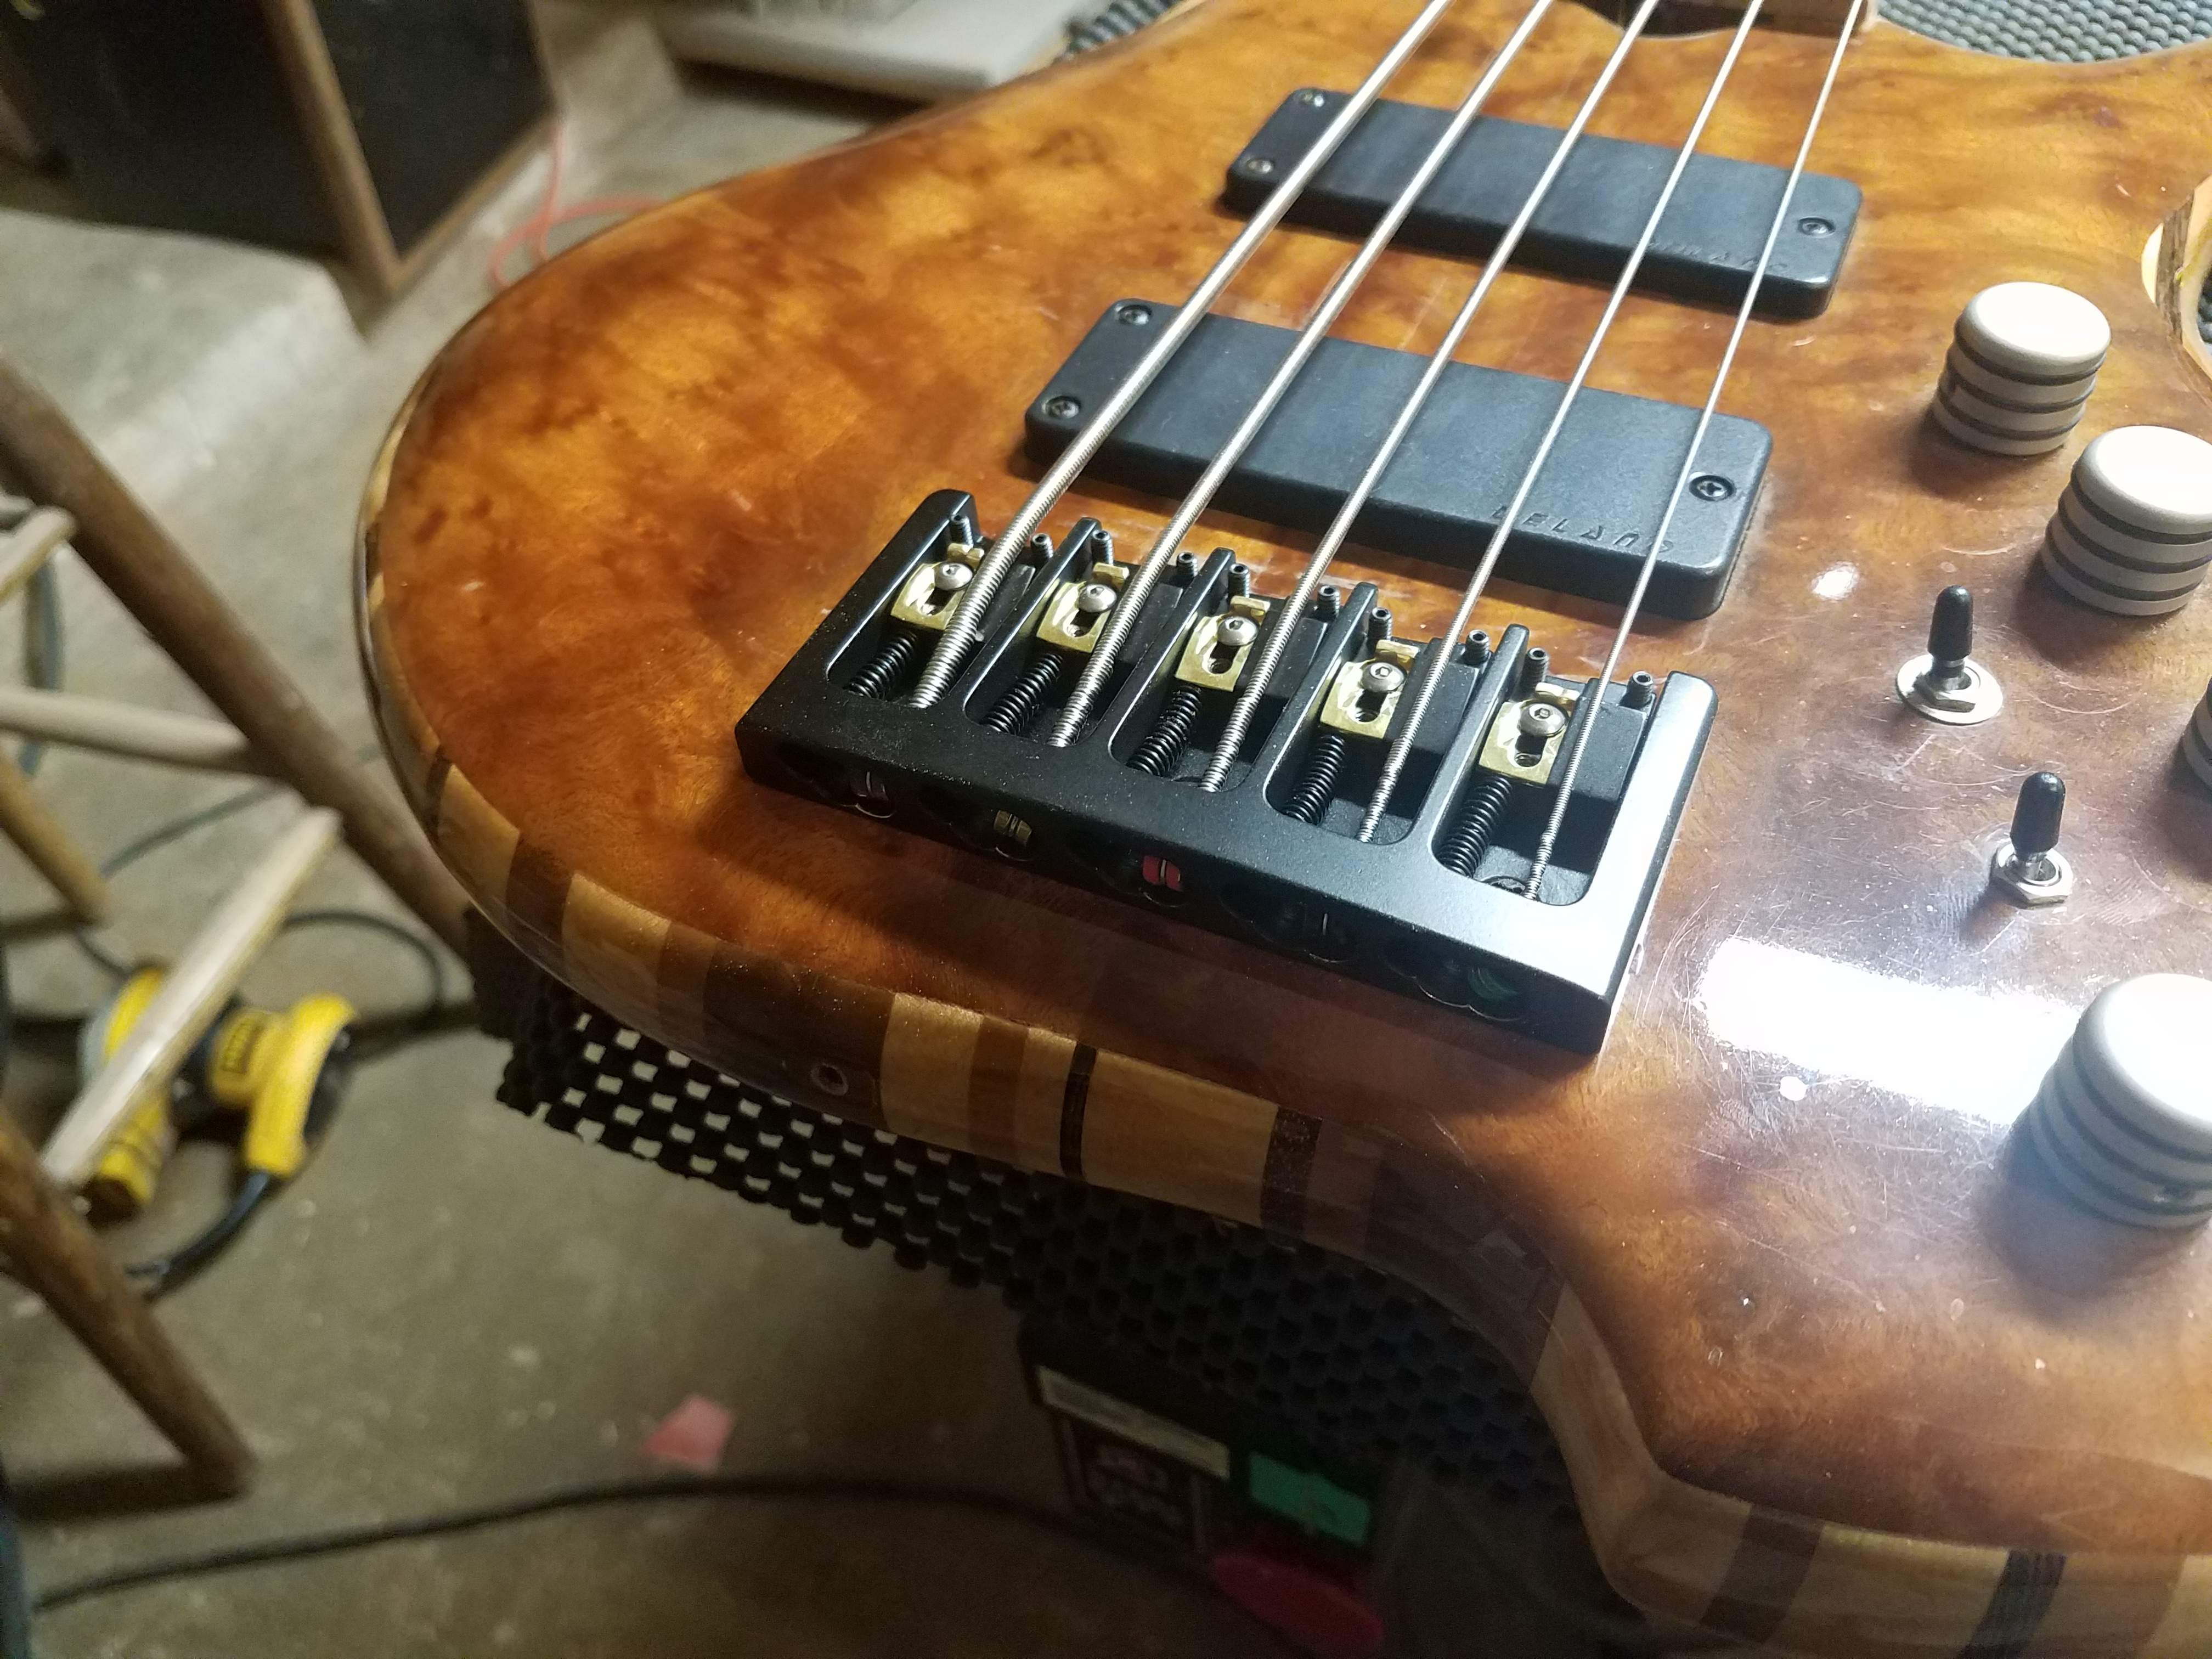
First we mount the bridge to the bass and string up the normal strings.
20180302_221709.jpg


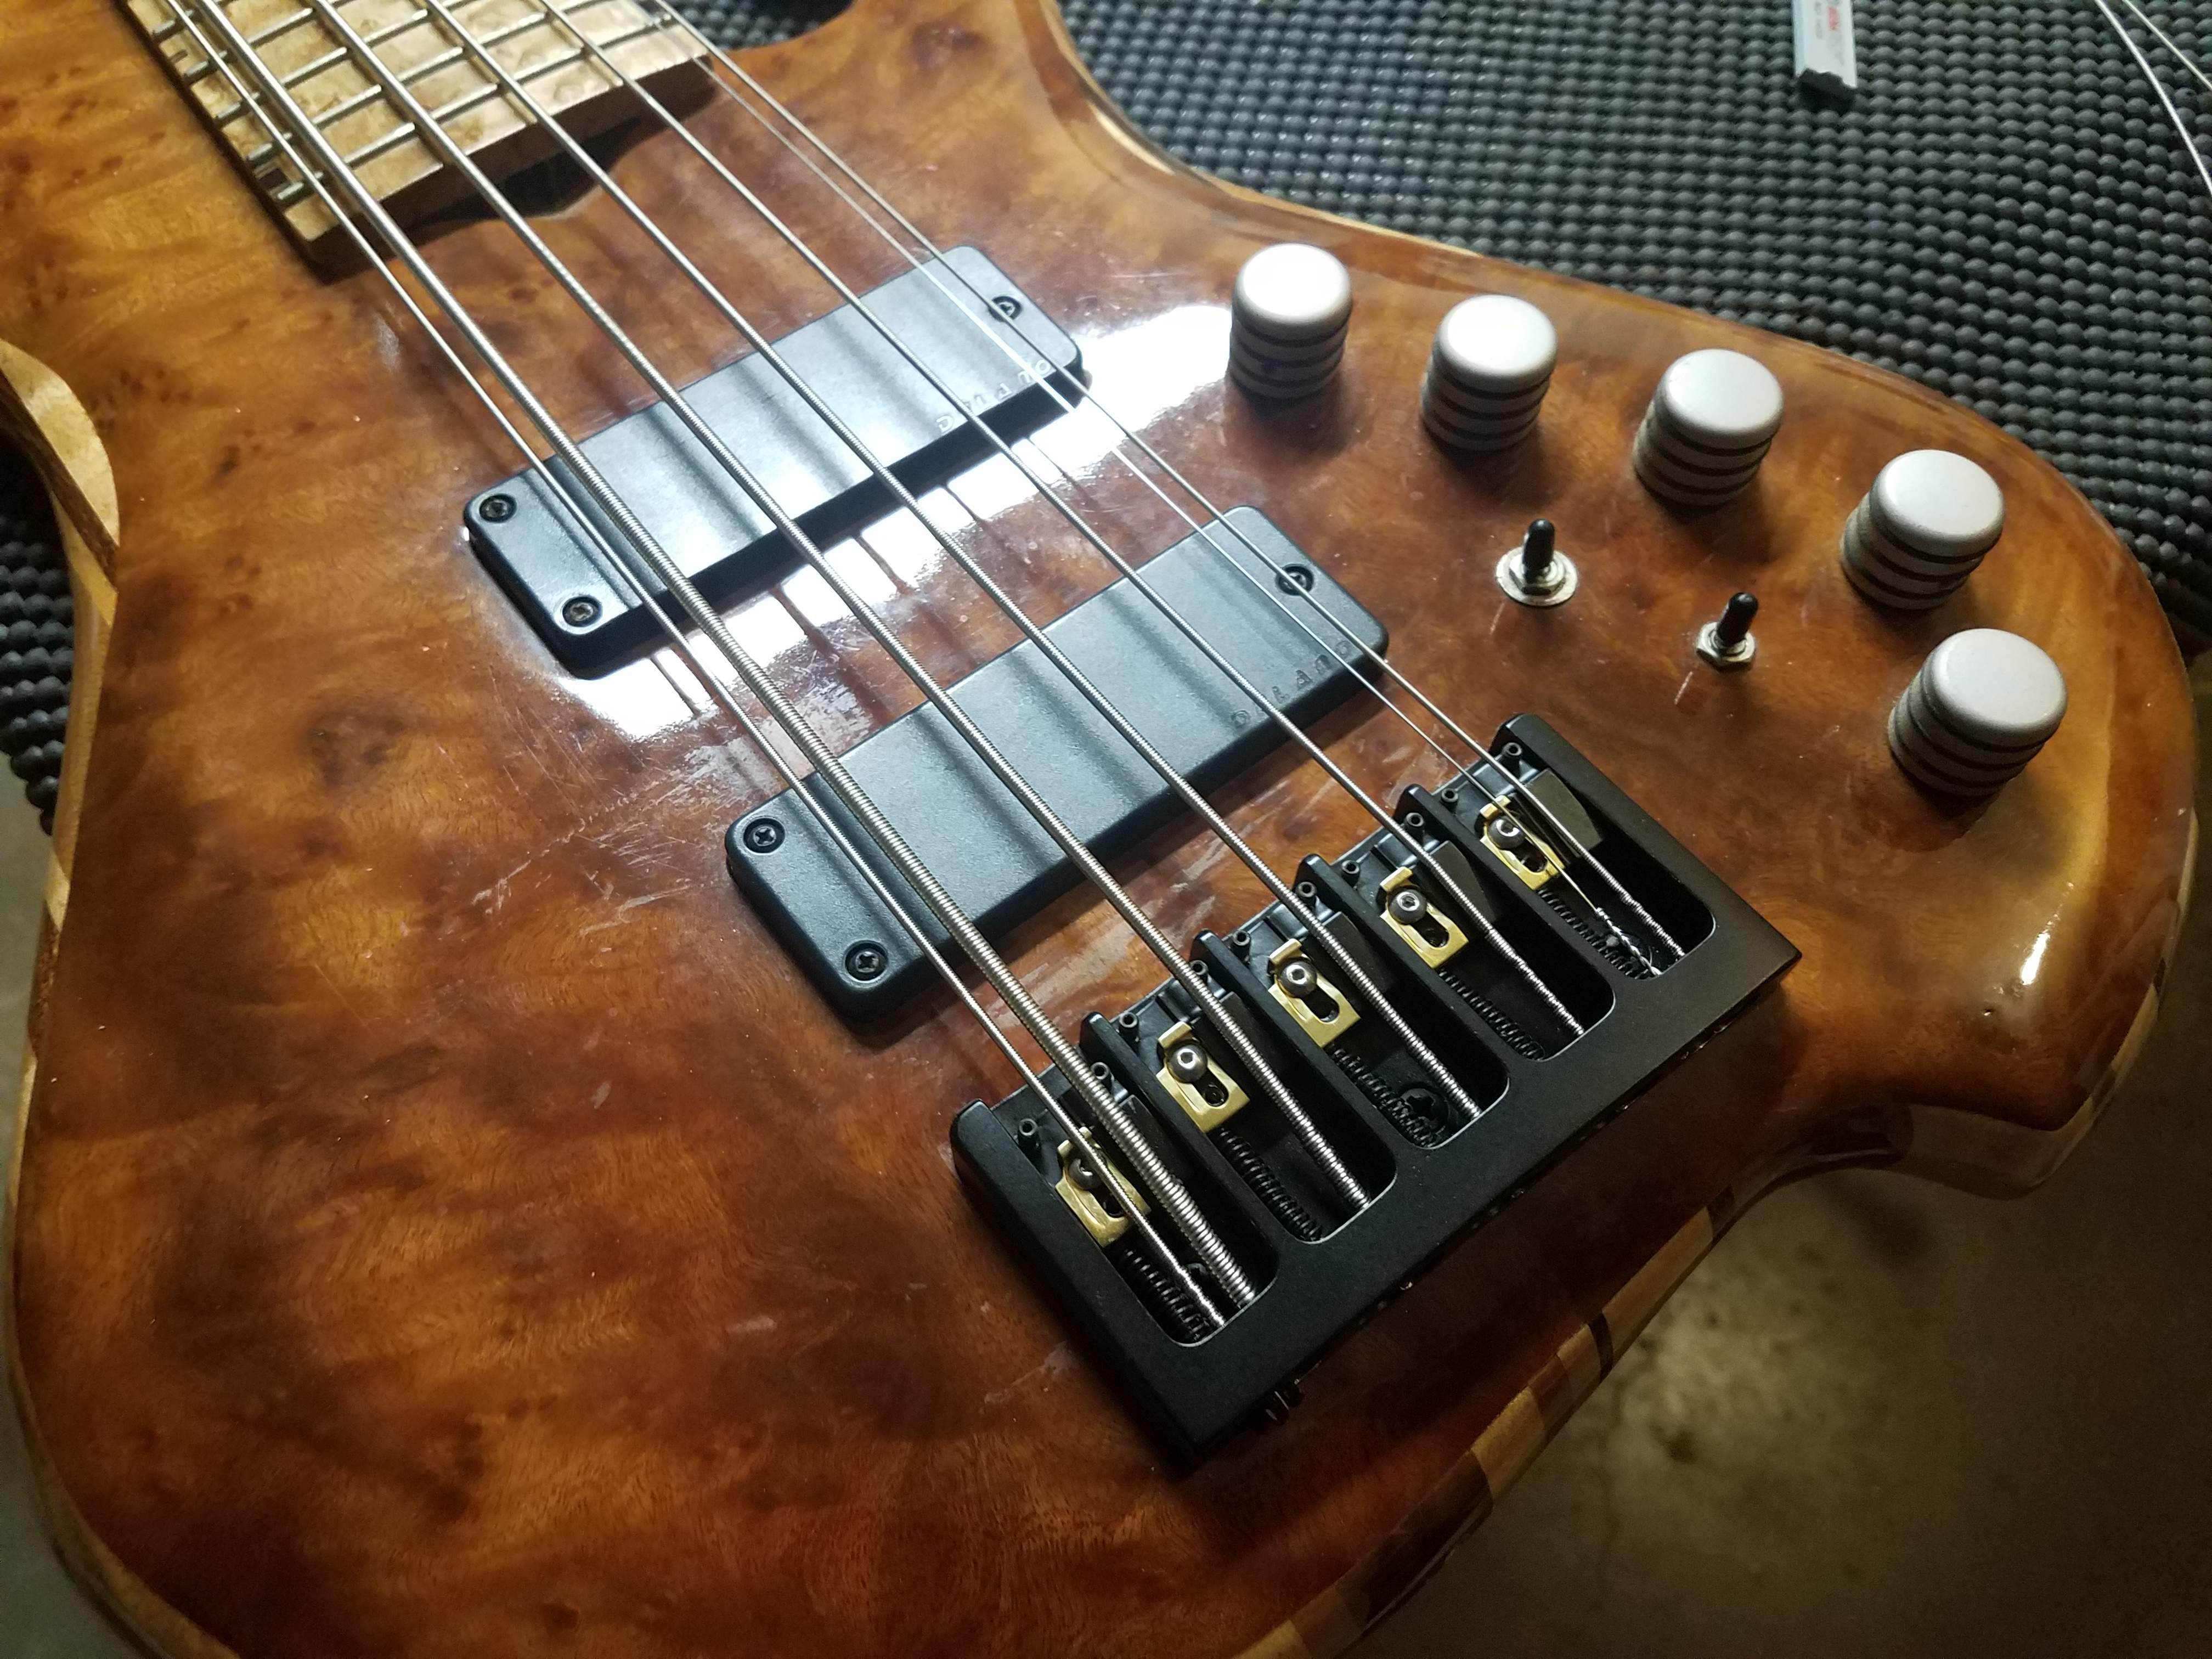
Once those string are attached to the post we'll take an old A string to use as a pair to the B string and a set of guitar strings to compliment the others. The guitar strings are too short to reach the tuners except the G string, which is perfect for our plan. We'll thread the B and G octave string through the string that's already on the post and then tighten the two strings together to bring them up to some tension. Having these two pairs of strings allows us to make the width measurements for the taper of the neck and fingerboard.
20180302_230221.jpg


Now this is plenty of info to get the measurements we need but while we're here we all want a little preview right? Stringing the other strings through I managed to get some pics to foresee the future.
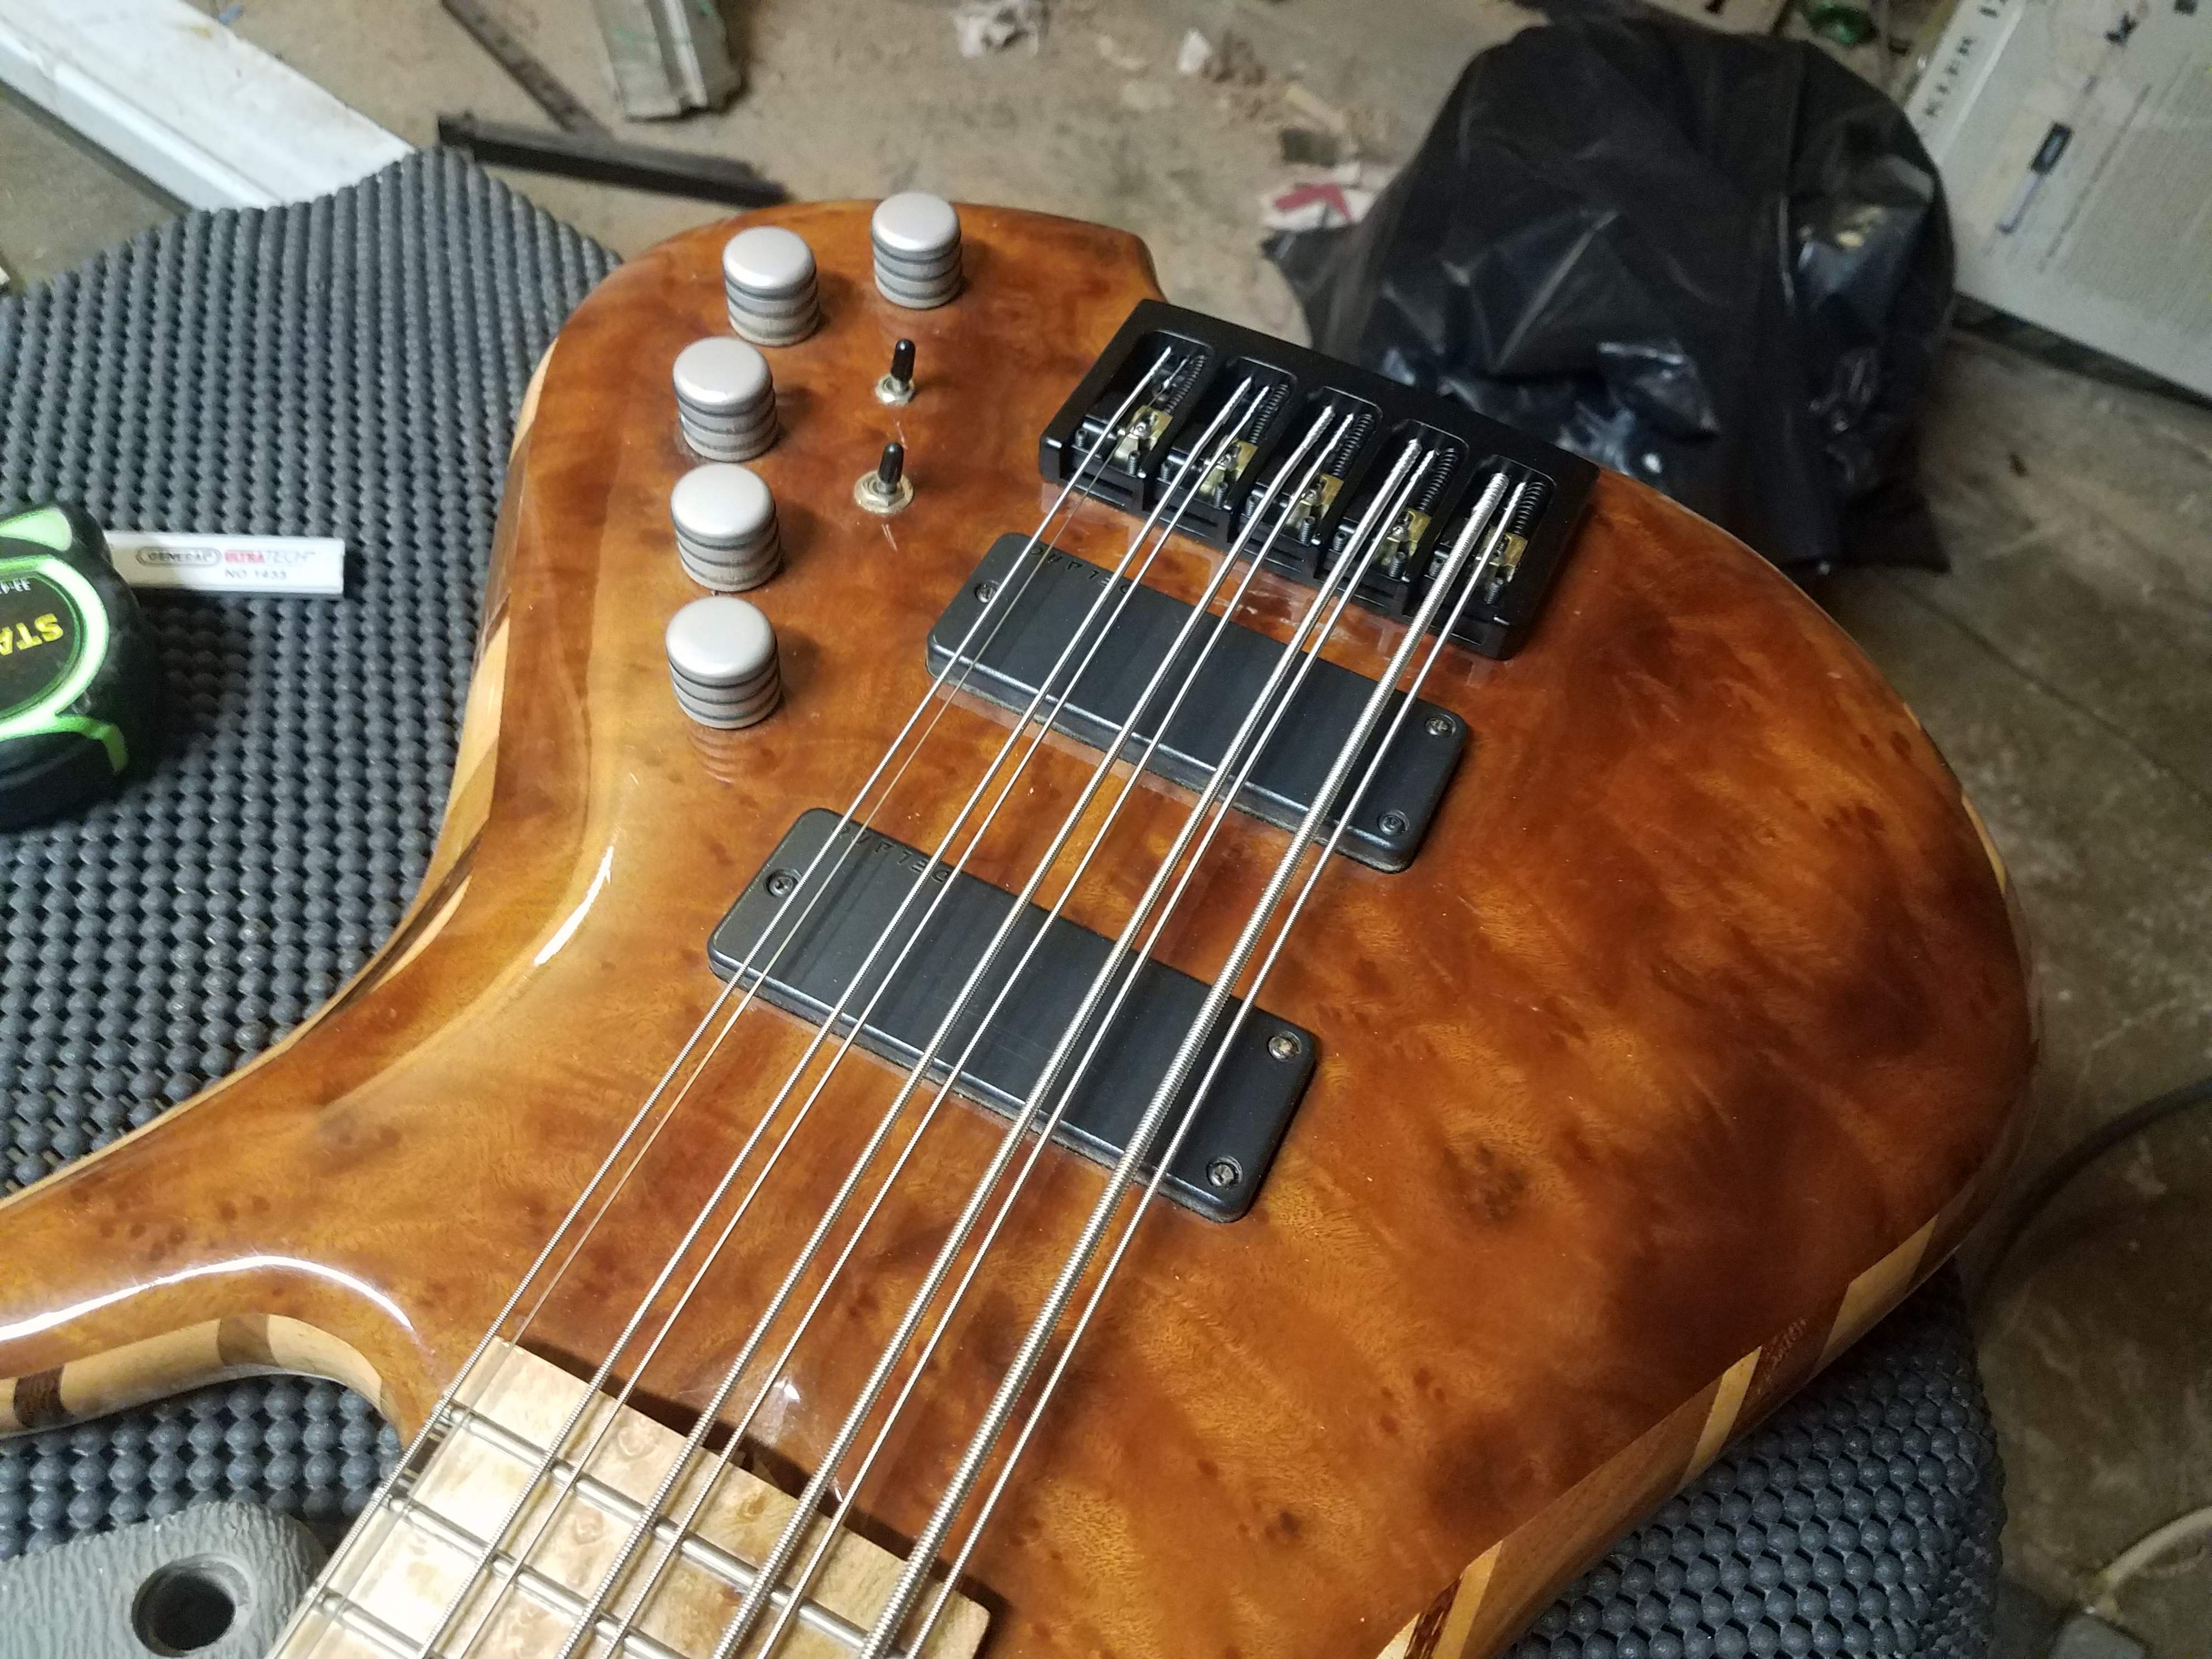
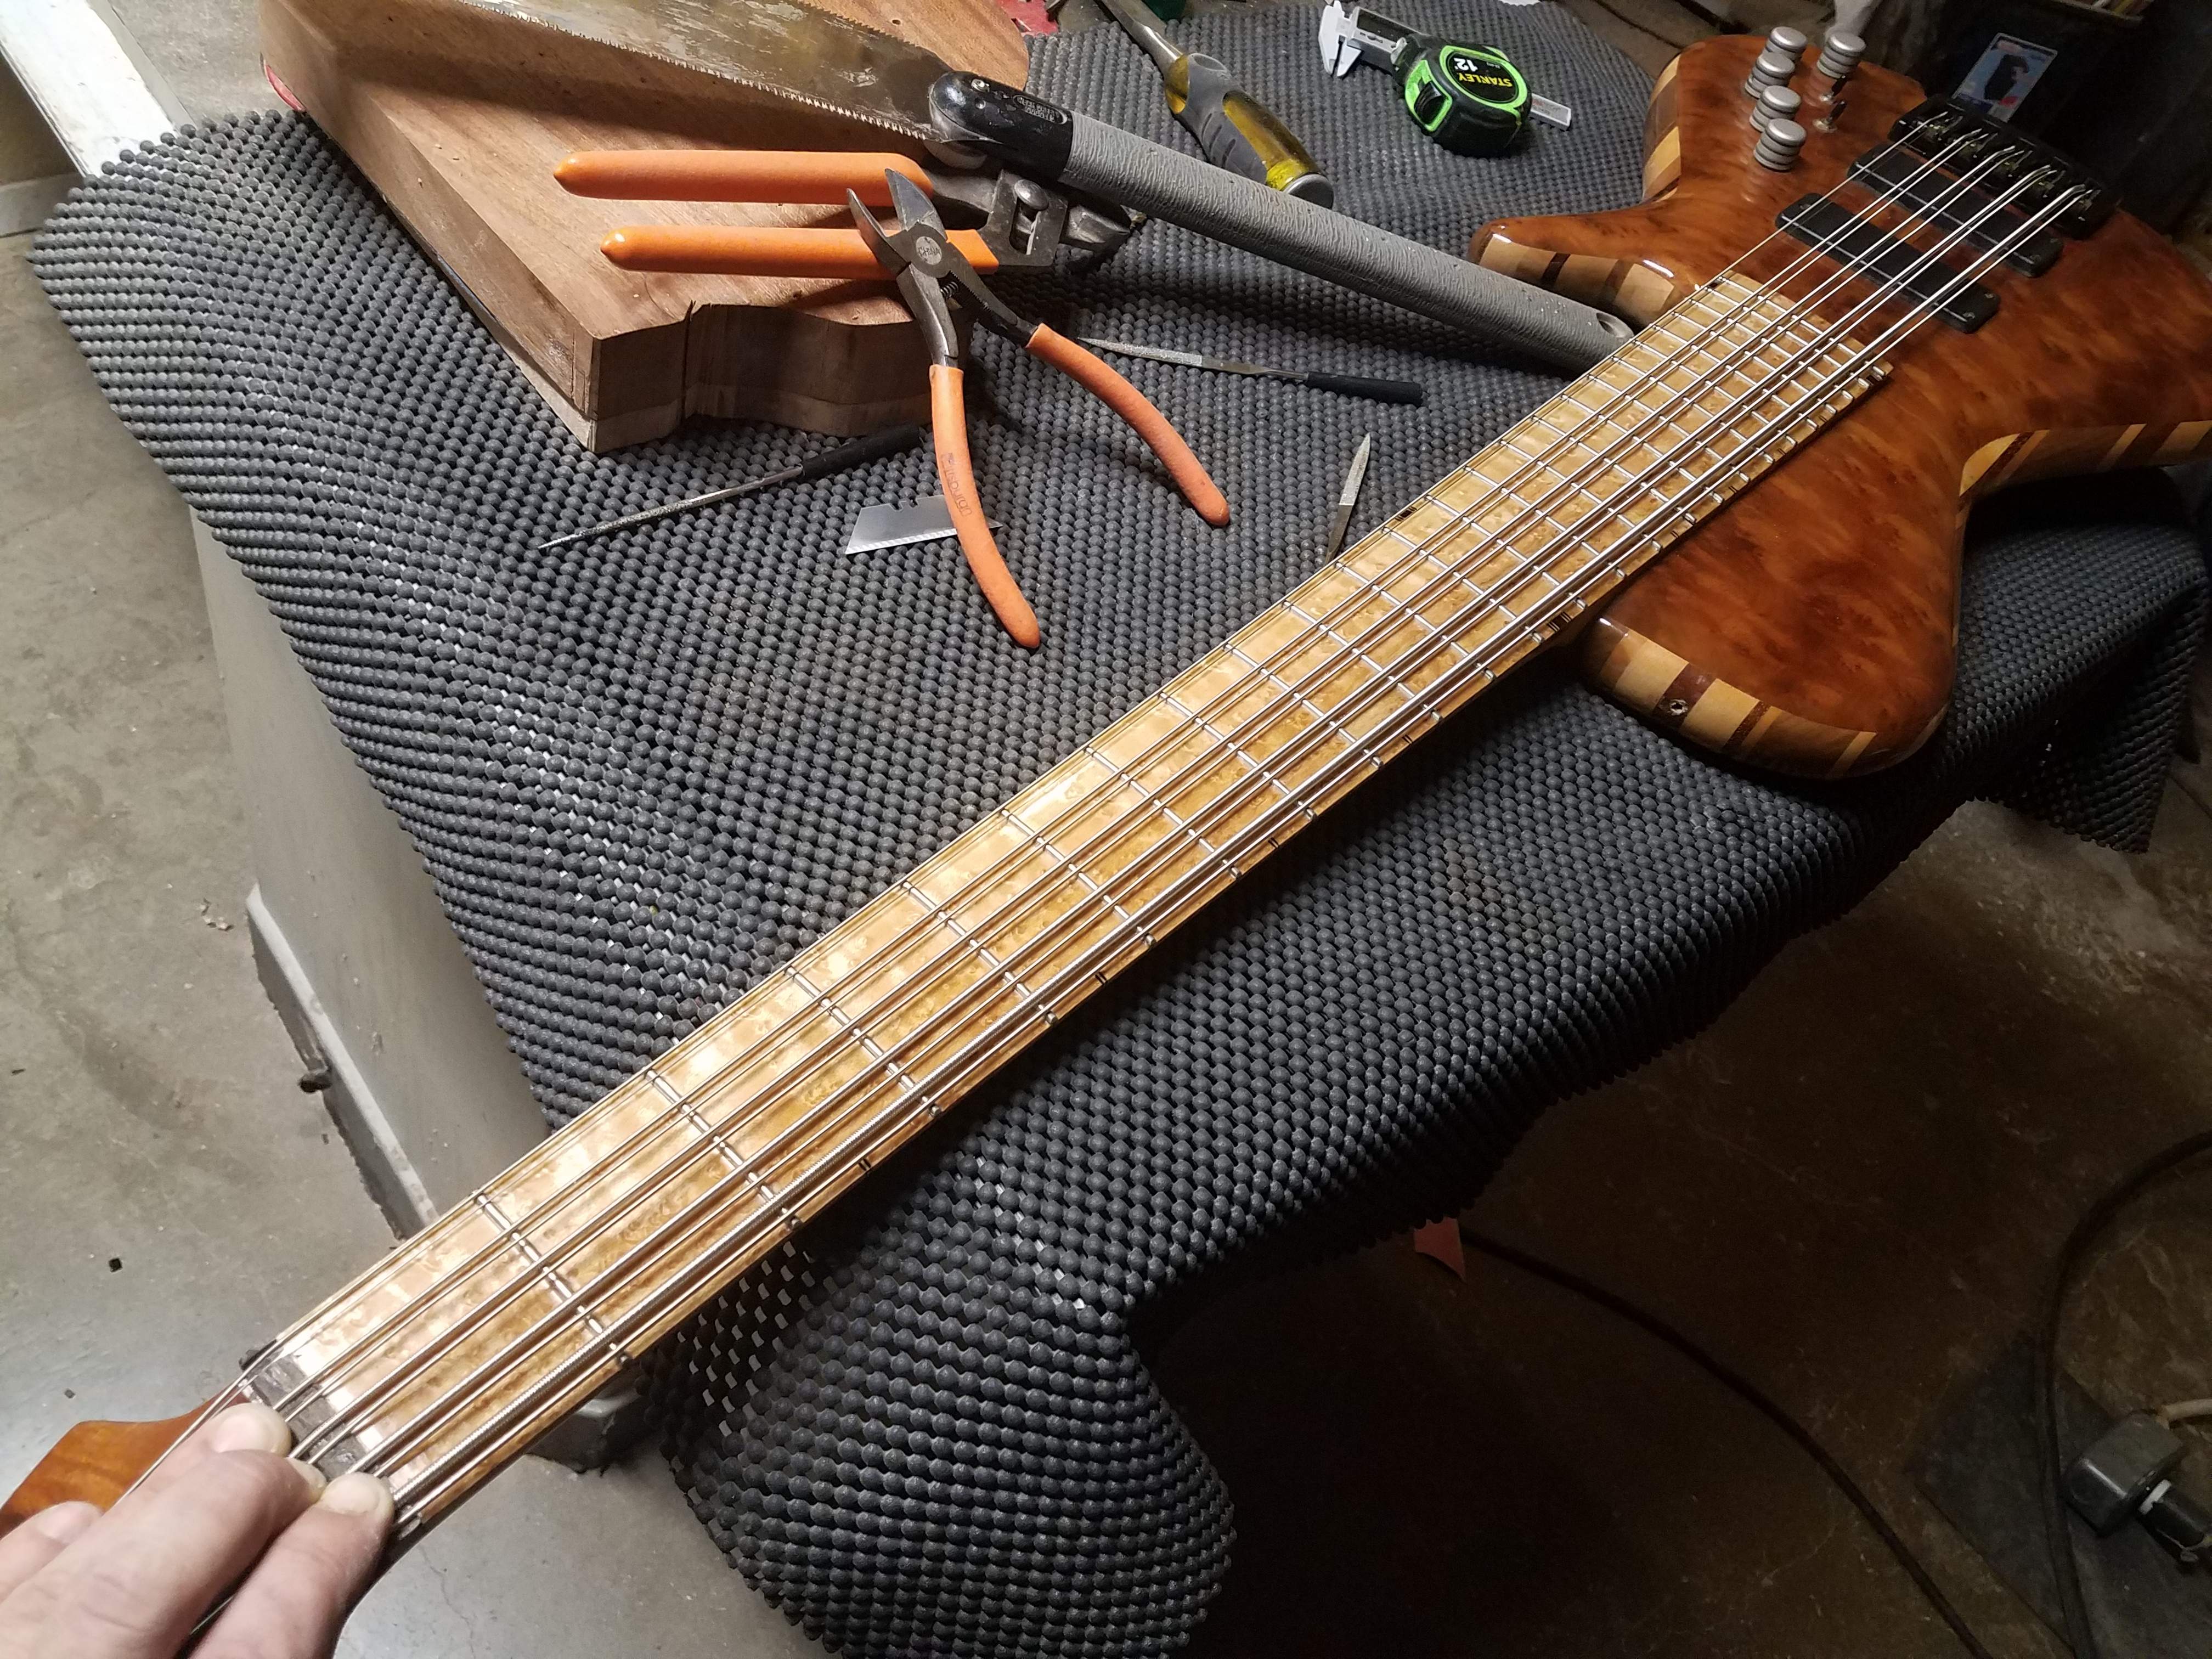
20180302_225306.jpg


20180302_225333.jpg


And a little close up so we can see what's going on with the bridge.
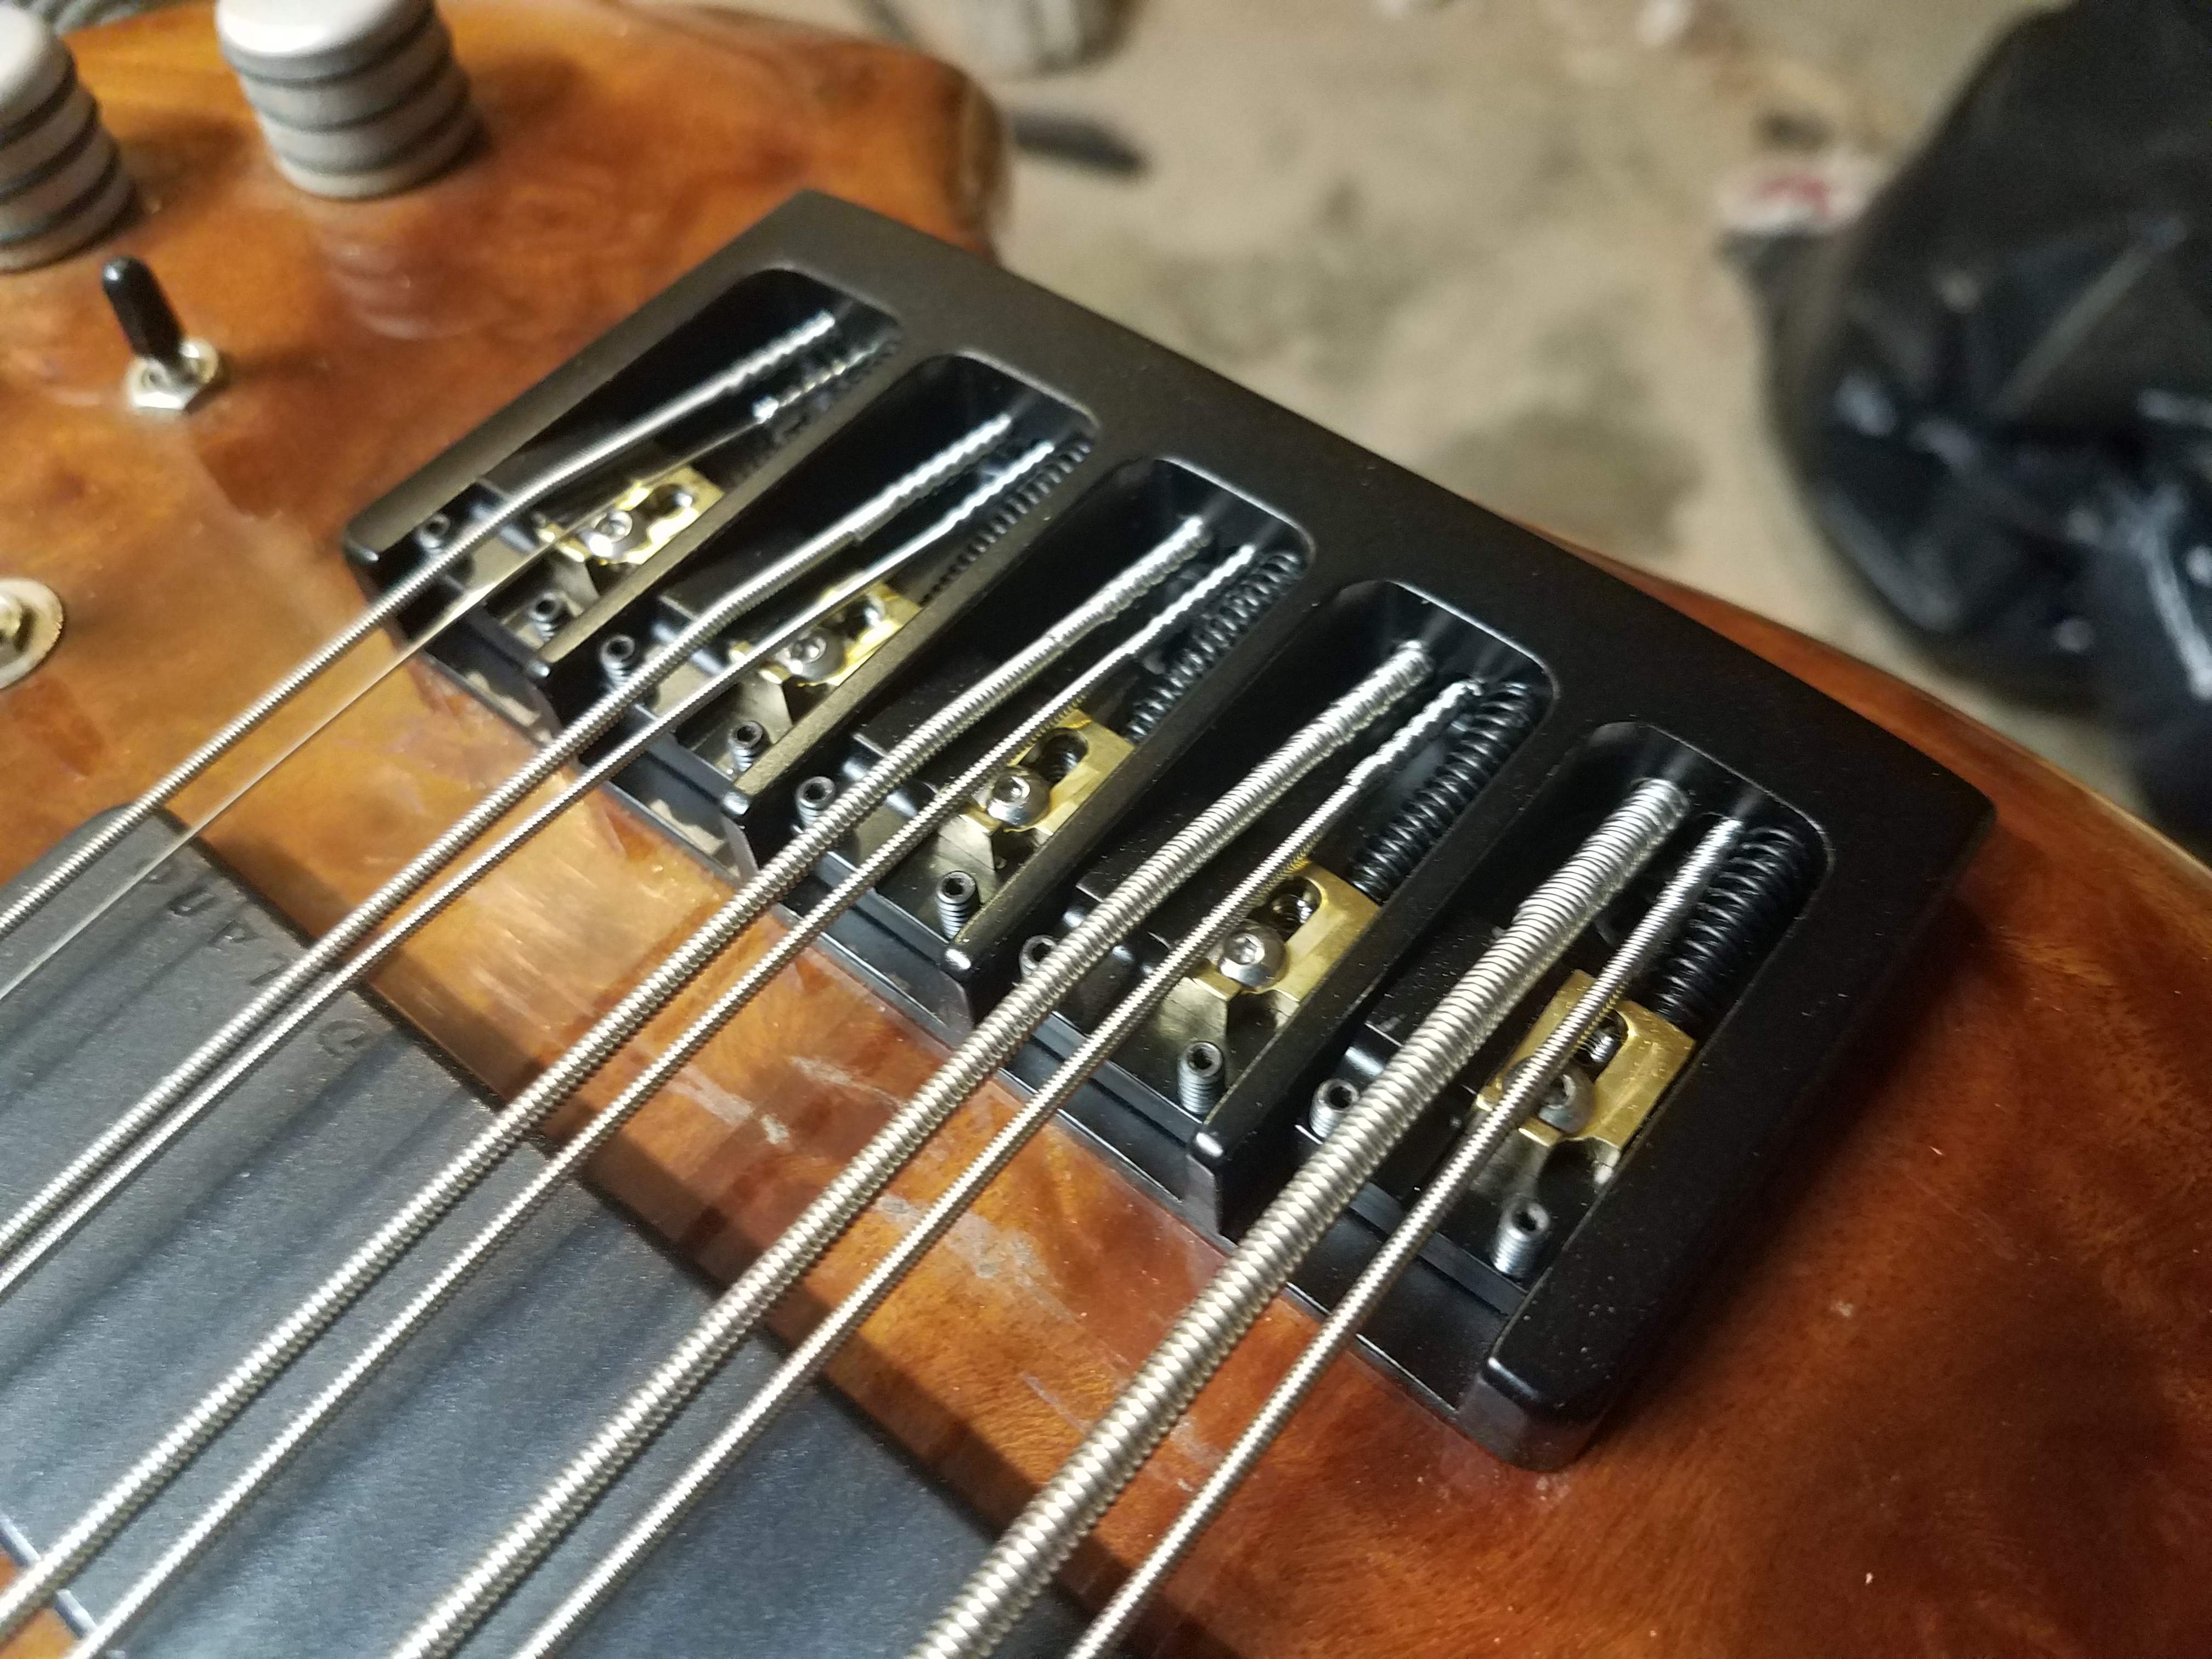
20180302_225611.jpg


Now that our neck measurements are set we lay them out on our neck blank and we've got somewhere to work from.
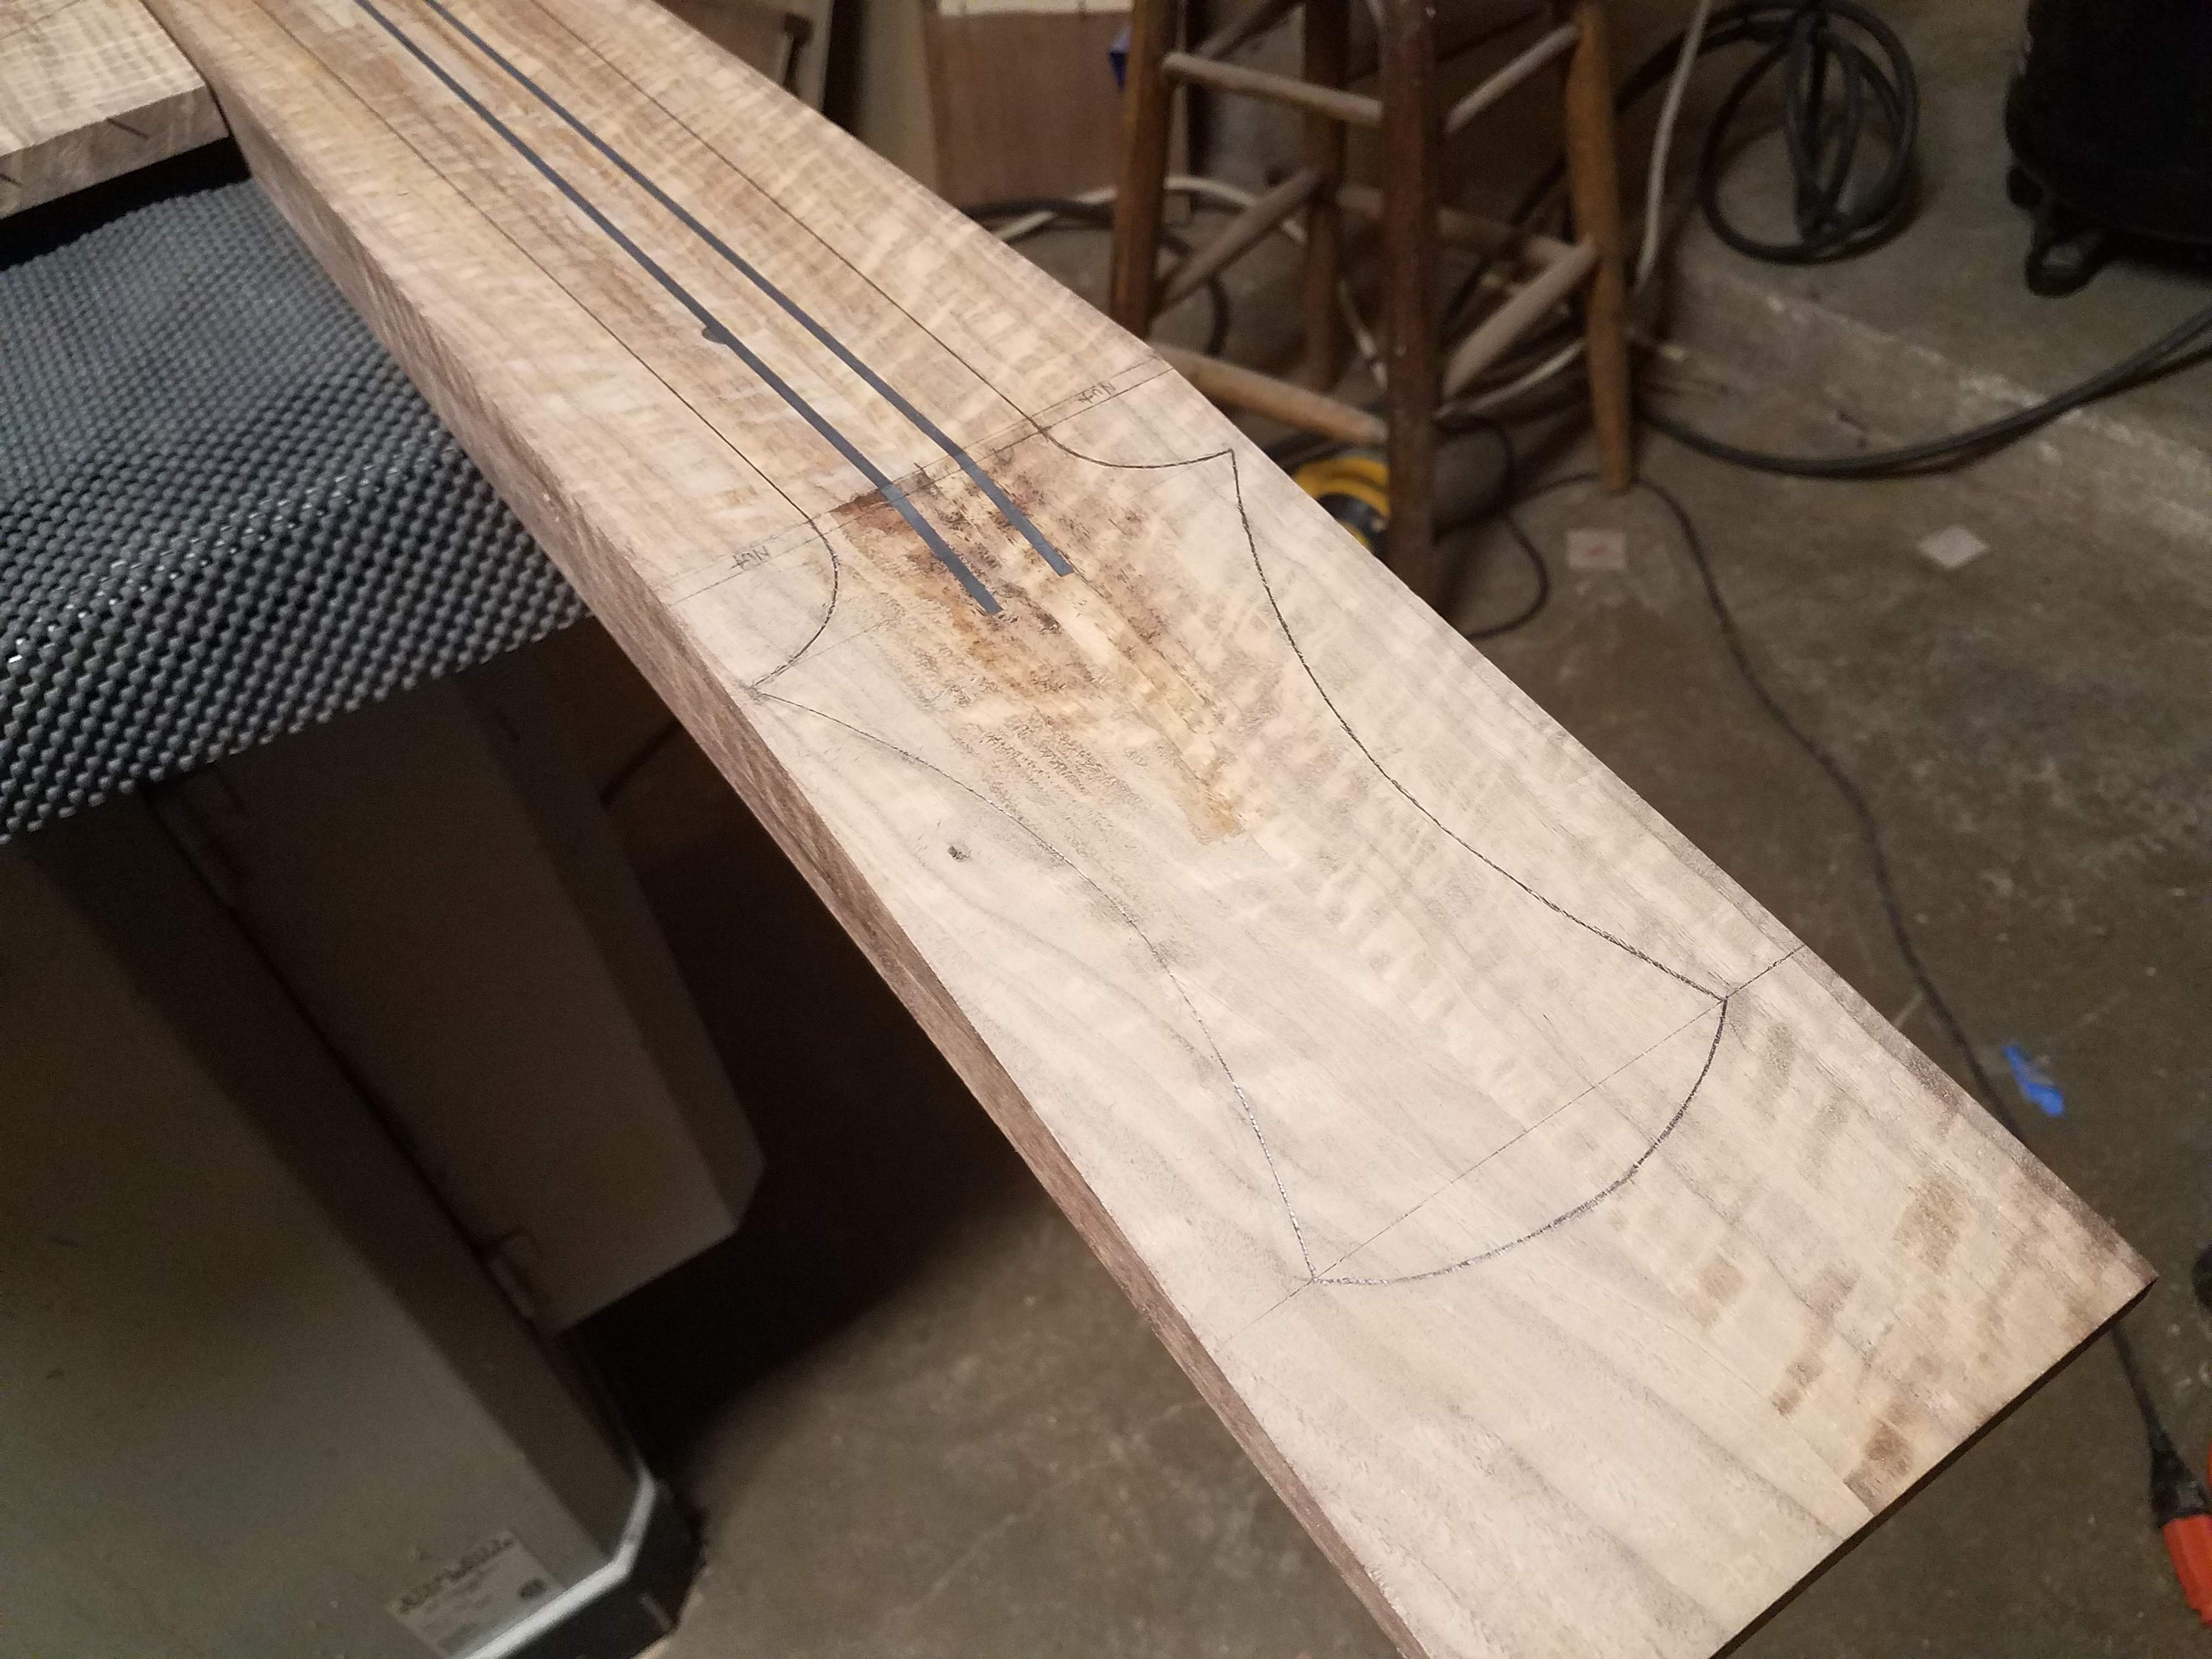
20180302_235250.jpg


I'll be spending the better part of the weekend in the shop so hopefully we'll be moving right along with this one.
 
Last edited:
Now that our neck measurements are set we can get to work on the fingerboard. I was initially going to go fretless on this one but the fretted just has more uses for me, though in the future I definitely want to make a fretless 10 string as well. That means that for this bass we'll be using our gaboon ebony fingerboard with a 35" scale length.

First we set our tapering sled on the saw with the blade set touching the edge. We'll adjust the fingerboard so that the cut line is in line with the edge of our sled and then screw down some blocks to hold the board in place.

20180303_192308.jpg


With the blocks set we taper the first edge and then we repeat the same process to taper the opposite edge.

20180303_193311.jpg


With the fingerboard tapered to size we'll start installing the position markers. A 7 piece marker for the octave and a 3 piece marker everywhere else.

We'll use our feet slotting blade and miter sled to cut the notches for the markers.

20180303_195320.jpg


20180304_135352.jpg


Once the notches are cut we coat the notches with super glue and tap the markers in with a small hammer.

20180303_210258.jpg

Once they dry we cut the excess material with a flush cut saw and use a sharp chisel to even them out with the fingerboard. Finally they are sanded flush.

20180303_235124.jpg


Once the small markers are in we cut notches for the octaves markers and install them as well.

20180304_121150.jpg


20180304_125528.jpg


Next up we'll start working on the body wings.
 
Last edited:
Now that our fingerboard is out of the way we'll take a minute to find our wings. :hyper:

Way back when, we glued up some body wing blanks and now it's time to knock the dust off and make some woodchips. First we'll bandsaw the rough profile of the wings, leaving an extra 1/2" on the inside to be trimmed off just before we glue the wings to the neck.

Next we'll stick our blank down with double sided tape and then line up our routing template and attach it the same way.

20180304_112620.jpg


I see the question asked fairly often about what bits to use when trimming bodies to shape. For a long time I was looking for bigger and better bits but ultimately I find a router is just to small to do the job properly in one pass without tearout. My first choice would be a large shaper with a spiral head but until then the best method I've found is going smaller and taking more passes. I'm using a 1/2" diameter pattern bit and taking 1/4" or so on each pass.

20180304_112911.jpg


20180304_113052.jpg


20180304_113226.jpg


20180304_114835.jpg


Now once we go too deep for our pattern bit we switch to the router table for the last pass.

20180304_121557.jpg


The plan is beginning to come together now.

20180304_130117.jpg
 
Last edited:
When we first glued up the blanks for our body wings you'll remember that we resawed a slice off the back of each blank for grain matched plates.

First we'll rough cut the profile and then use double sided tape to attach them to the wings.

20180304_123549.jpg


20180304_124033.jpg


We use the router table to trim the profile against the body blanks. Then we rough cut the plate and attach our template with double sided tape. We'll use the same setup as before to trim the plate to the template.

20180304_183306.jpg


We use our opposite body template and work our way back with the router until the template matches the lines we drew before.

20180304_190949.jpg


Our plate fits nice and snug and the grain is a very close match.

20180304_192615.jpg


To make the control cavity we trace the template onto the wing and remove the majority of the material with the drill press.

20180304_201430.jpg

Then we attach our template and use a 1/2" router bit to clean up the cavity.

20180304_201742.jpg


20180304_203353.jpg
 
Last edited:
We repeat the process on the other wing for the battery cavity and template and then drill all the screws in with a countersink and drill press.

20180304_214307.jpg
20180304_215231.jpg
20180304_222349.jpg
20180304_230823.jpg


The screws and hardware will be black but for now these will do.

I've actually made quite a bit more progress on the bass but I dont have the energy to post more pics tonight. Next time we'll talk headstocks and neck angles. Until then... :bassist:
 
Before we move on to the neck blank we'll set up a 3/4" roundover bit in the router table and roundover the edge in several passes.

20180306_214403.jpg


20180306_220447.jpg


You'll remember we left about 1/2" of extra width on the inside of the wings. This was to allow for any tearout that may happen during the roundover but these blanks came out very cleanly. Walnut really is a great wood to work with.

So, now that our wings are done we can focus our attention on the neck blank. Before we can go any further we need to attach the headplate veneer to the blank. We'll take the offcut from the treble wing's figured top and resaw and glue it.

20180305_083714.jpg


20180305_084515.jpg


Once the pieces are glued we run our blank through the wide belt sander down to 1/16" thickness.

20180305_103337.jpg


Next up we trace out our headstock on the blank and use a tiny bit of glue to attach our Big B. Guitars logo template.

20180305_193637.jpg


We'll use a drill bit to punch out the small circle and then take the blank to the scroll saw. Well thread the blade through the drilled hole and then complete the cut with a unidirectional spiral blade. A small file and sandpaper cleans up our edges.

20180306_185638.jpg


Now to make our logo pop we'll need something to contrast against. We sand down a scrap piece of ebony to 1/8" thick and cut it out a bit larger than our logo.

20180306_194235.jpg


We'll then trace the shape onto the headstock and route it in to the thickness of our ebony block.

20180306_204312.jpg


A little bit of CA glue and a clamp and our ebony "tone block" is set.

20180306_202835.jpg


With the scroll saw we'll rough cut the shape of our headstock, adding some alignment points.

20180306_203934.jpg


Using some toothpicks as aligning pins we'll clamp our template veneer in place, being careful that the plate is sufficiently glued without squeezing out of the cutout.

20180306_231157.jpg


With our headstock prepped the next post will get into the fun business of sawing our neck blank down to final size. :bassist:
 
Last edited:
So at this point our neck blank is still a big, square chunk of walnut. Using the big bandsaw at work we'll rough cut the blank to match our neck. 4 cuts have to be made.

First we saw the neck angle into the face of the blank. This allows the strings to hit the bridge saddles at the right height to allow for proper adjustment.

20180305_143540.jpg


The saw leaves a nicely square cut so a bit of block sanding levels out the face. Our body thickness will finish at 1 1/2" but we'll cut it 1/8" heavy on the back side and will level it out once the wings are glued to the neck.

We'll also saw the headstock down to a heavy 5/8" thickness and cut a taper from the break angle to the body cut.

20180310_000607.jpg


20180310_000658.jpg


Fortunately our blank stayed straight and true after sitting overnight so we won't need to re-flatten the front face. Before we cut the taper of the neck blank we'll route in the truss rod. We'll start by using double sided tape to stick a straight-edge to our blank and then we can clamp a stop block on the end to stop the cut.
20180309_223312.jpg


We'll use a 1/4" ball ended spiral bit to route the truss rod slot in a few passes. Once the initial slot is cut we'll use a 3/8" bit to route a slot for the nut end of the rod.

20180309_233010.jpg


Finally, we need a slot to allow for the Allen wrench to access the adjustment nut. I use a 5/8" radius bit and a jig to route a short channel at the end of the fingerboard.

20180309_234624.jpg


20180309_235349.jpg


Looks good.

20180309_235437.jpg


With the truss rod ready to go we can finally route the taper on the edges of the neck blank.

Again, using double sided tape we attach our straightedge to the blank and using our 1/2" pattern bit we'll route the edge in multiple passes.

20180310_004622.jpg


We'll repeat the process on the other side of the blank, leaving us with a blank that matches the fingerboard taper.

20180310_011448.jpg


With the blank tapered we'll align the wings and then drill for two 1/2" dowels, walnut of course, in each wing for alignment with the neck blank.

20180310_134818.jpg


Finally we can clamp it all together and see what we've got.

20180310_140405.jpg


Its beginning to look like a bass now. :bassist:
 
When I started this build-off I neglected to check and see that the final week of the build was the same week as the South by Southwest festival here in Austin. Unfortunately after 8 shows and 50 hours of work in the last week I've barely been able to touch the bass so I'll be removing my submission from the competition. I'll still be finishing the bass in short order and will continue the thread until it's complete but that month waiting on the bridge really put the nail in the coffin. I hope you all continue to follow along and best of luck to the other entries. :bassist:
 
When I started this build-off I neglected to check and see that the final week of the build was the same week as the South by Southwest festival here in Austin. Unfortunately after 8 shows and 50 hours of work in the last week I've barely been able to touch the bass so I'll be removing my submission from the competition. I'll still be finishing the bass in short order and will continue the thread until it's complete but that month waiting on the bridge really put the nail in the coffin. I hope you all continue to follow along and best of luck to the other entries. :bassist:

Yes, this is unfortunate.

Please be sure to keep us posted with the progress of this build.

You will have a gorgeous instrument when done, and many people will want to drool on it