

Enjoy the benefits of a premium membership!
Upgrade Account
-
TalkBass has been independent since 1998. Add your voice.
Create a free account to reply to discussions, view embedded media, and browse with fewer display ads.
Join free Log in
Want zero display ads or expanded classifieds tools? Compare plans.
You are using an out of date browser. It may not display this or other websites correctly.
You should upgrade or use an alternative browser.
You should upgrade or use an alternative browser.
More options
Who Replied?

Today's plan was a tough one, first I refined the neck shape. I'm still not sure I'm there. I want the neck to feel slimmer on the treble side and will probably do some more refinements one I have the board radiused and set in. For now, it still feels a little too chunky for this bass.
Planing down the top was the next job. I took off 2mm from the top and from the bottom with a freshly sharpened plane iron. Took some good 30 minutes per side. I achieved a great flat surface for glueing to the body and a nice flat top. Overall thickness went down 4mm and the bridge now sits low enough to meet the fretboard surface. Thanks @Jisch for sharing your approach!
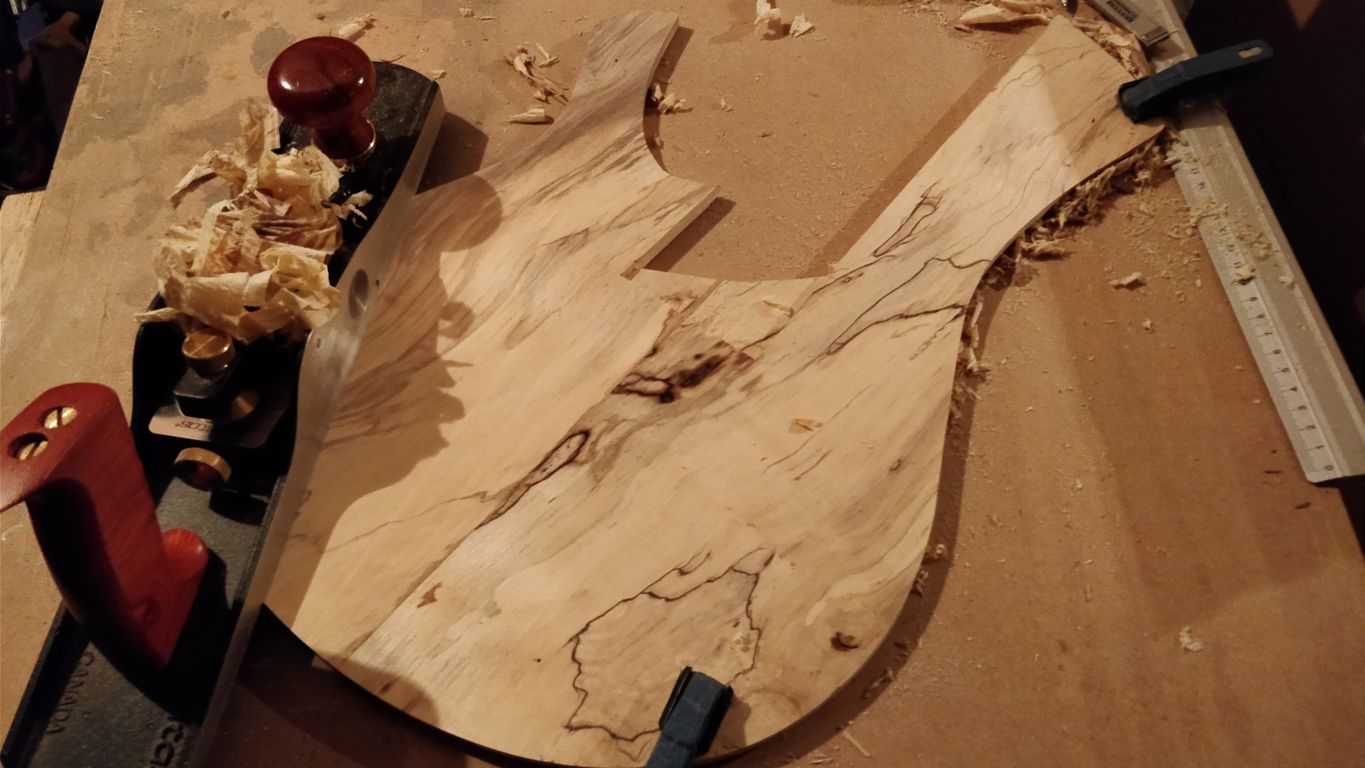
The next part will show you all the ugliness and beauty of working with chisels I wanted to reshape the lower bout ( which I will be able to further shape after glue-up) and finish the top bout, which would be too tricky to handle after glue-up. I roughed up the lower bout with a straight chisel:
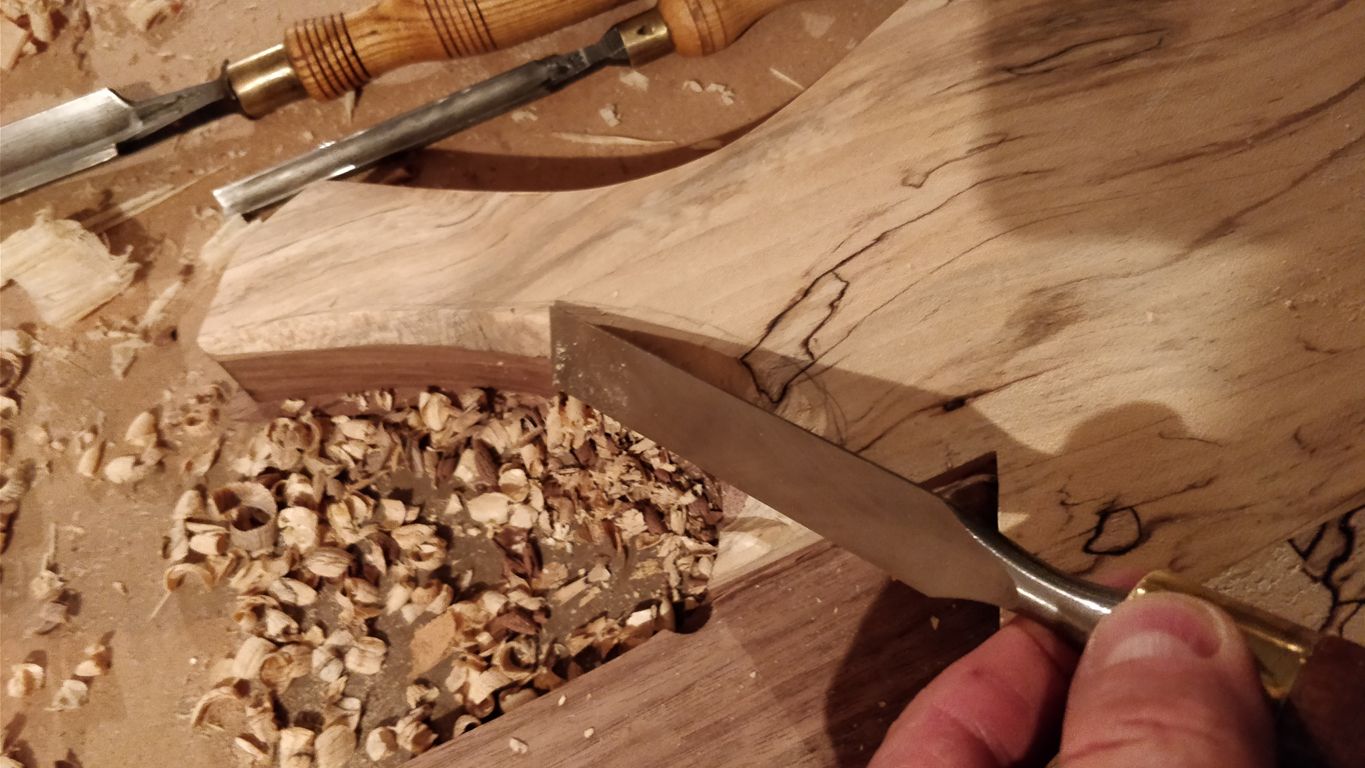
The upper bout (now comes the ugly part) was roughly shaped with a gouge and a straight chisel. I started by drawing the line, then chiselling out a channel with the gouge near to the line. Then rapidly removing material, before I switched to refining:
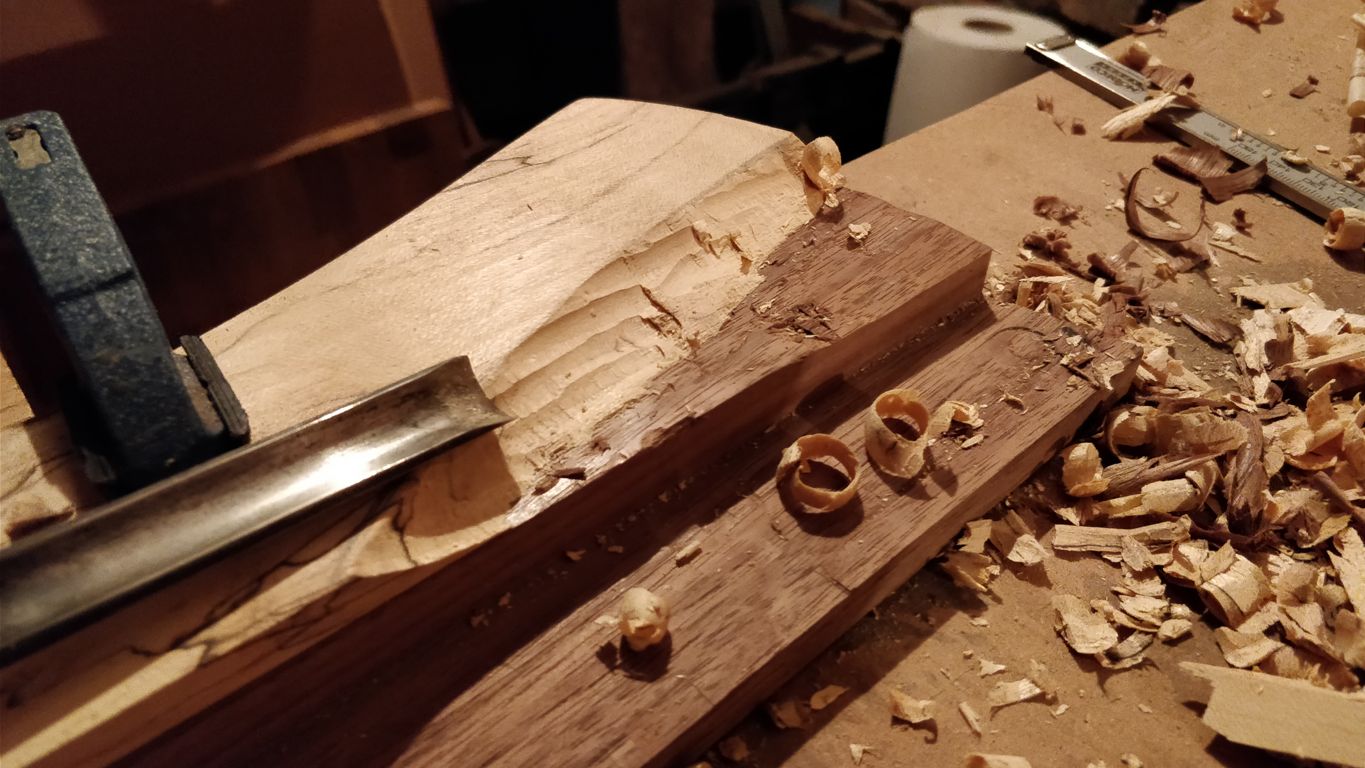
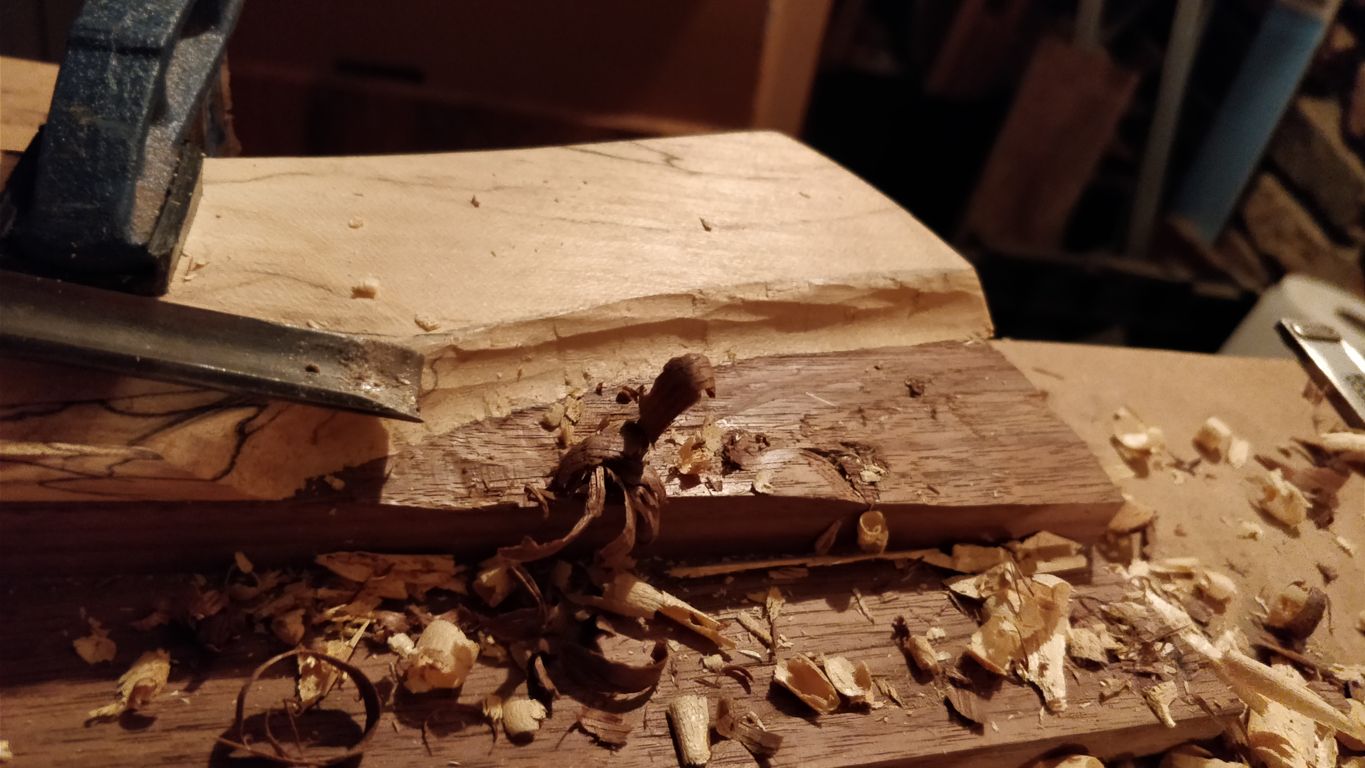
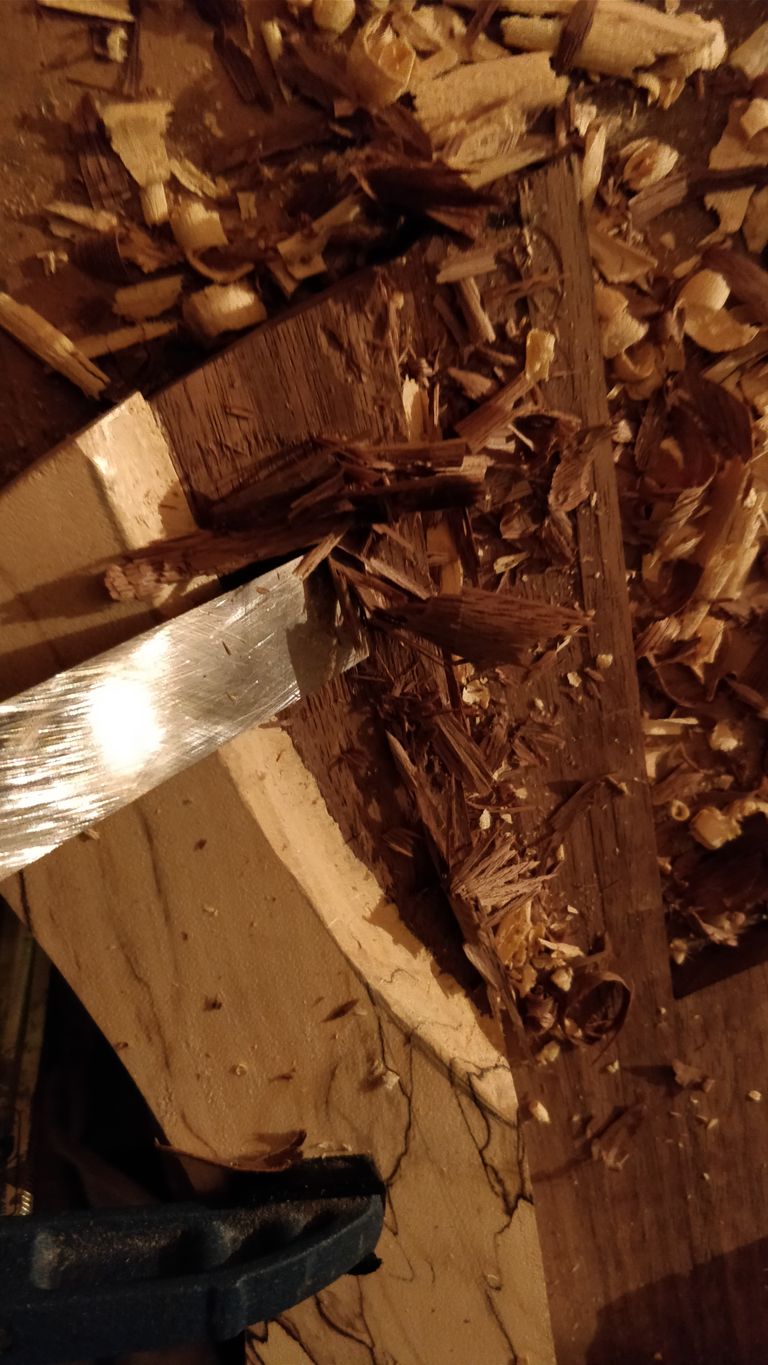
After finishing the surface with a flat chisel I switched to my little double bevelled plane for the final shaping (the nice part):
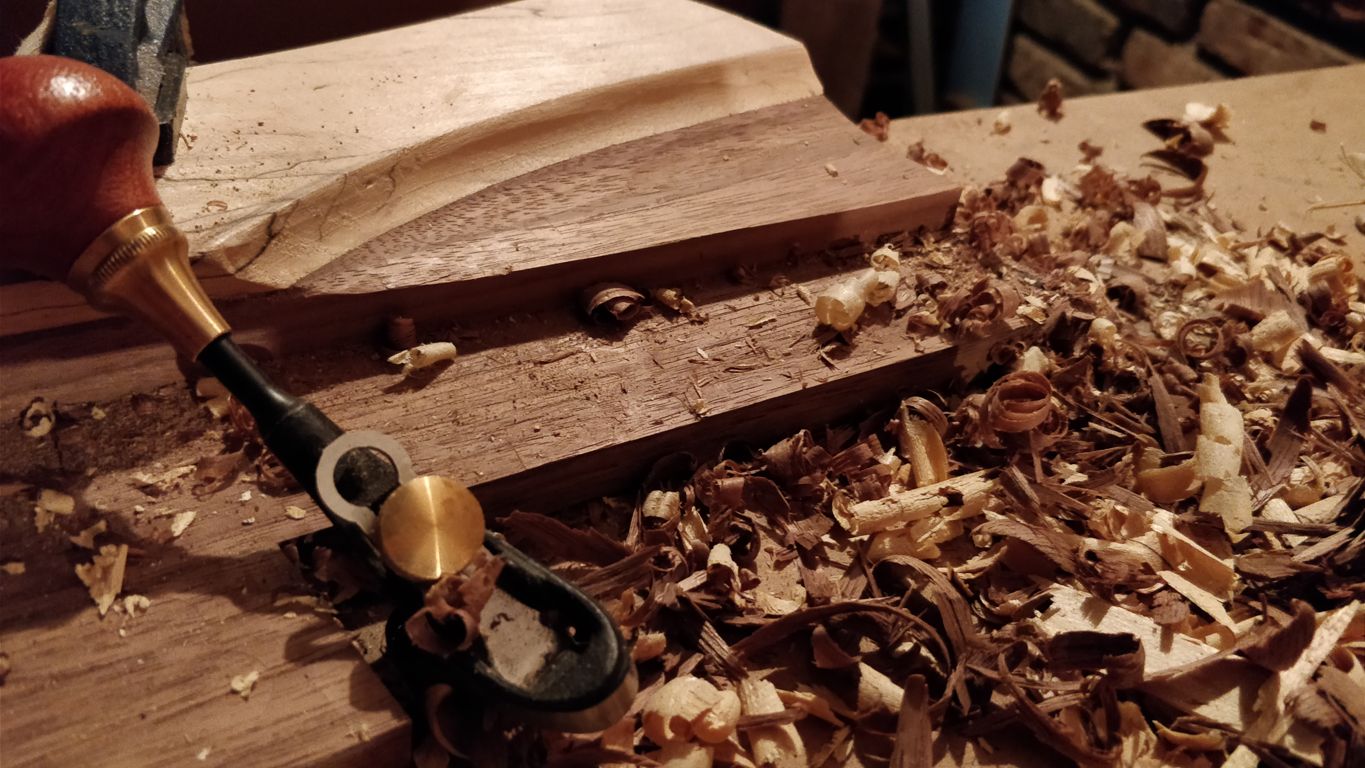
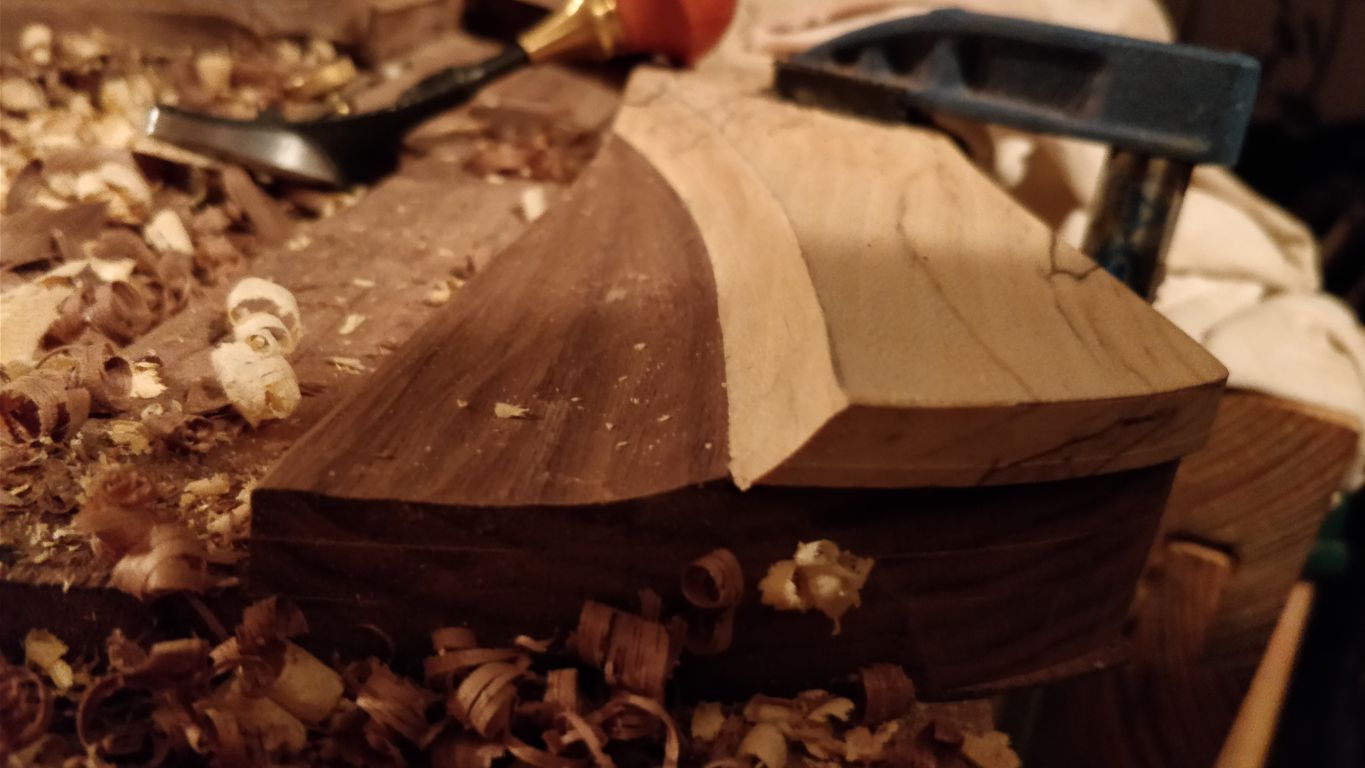
I used a scraper to remove the plane marks. The two pieces of wood were held together by a clamp the whole time. They might shift a little after glue-up, but that shouldn't be a big issue to get straight. I'm happy about the shape, although I'm still a little overthinking the top thickness and wondering if I should maybe sculpt the top a little to bet it thinner at the edges. Here is the final cutout and a pic with the neck to show you how it comes together:
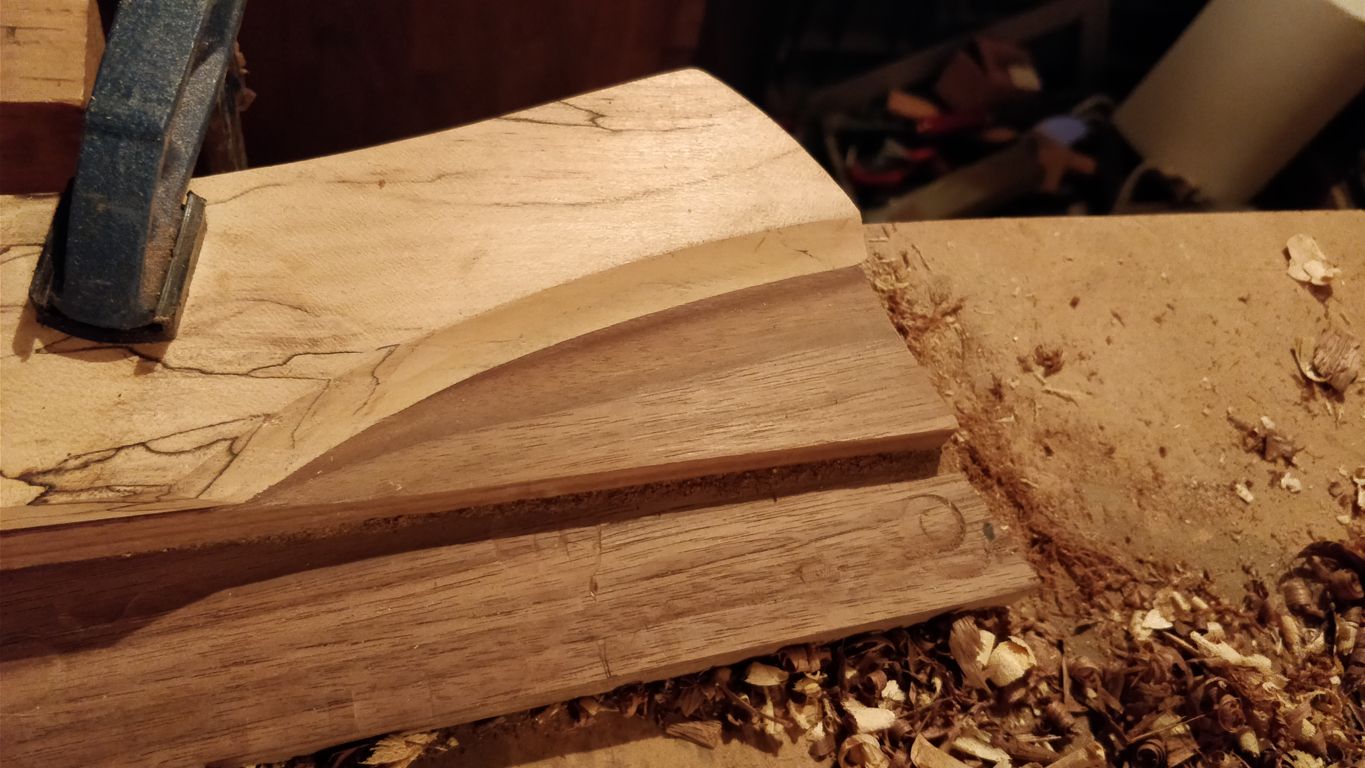
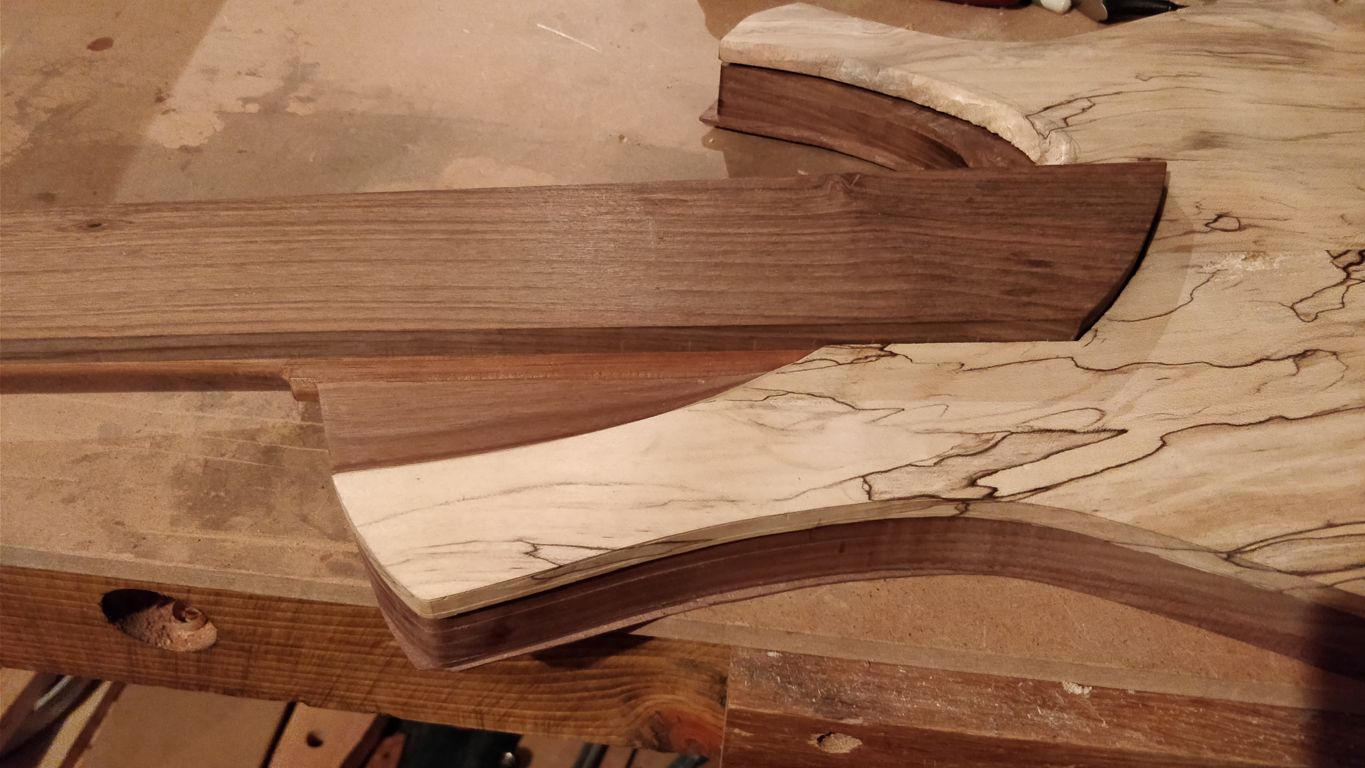
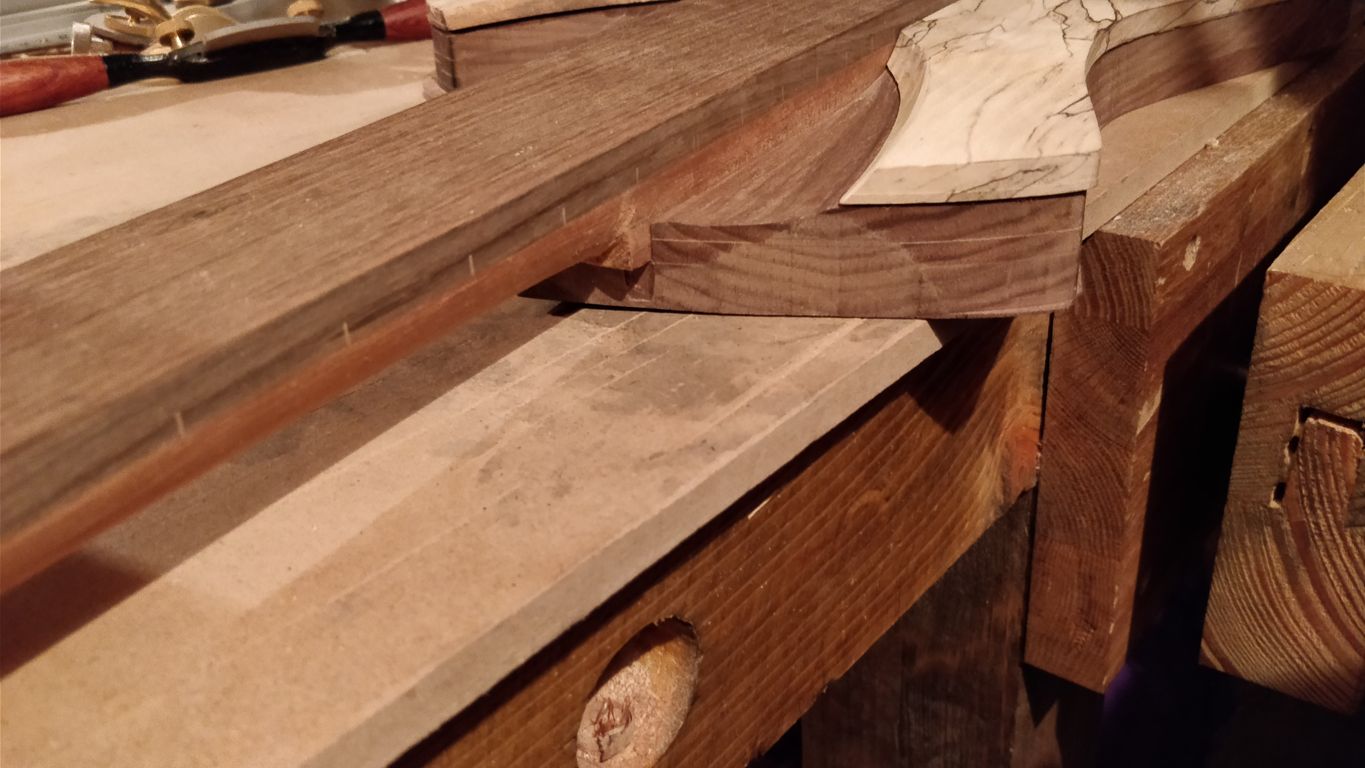
I hesitated for a moment today thinking if I should do that top bout cutout at all... but now, I guess that was a good choice. The shape looks much lighter this way. What I find for now, that the balance of the instrument is very good. I wonder if it stays the same after the installation of all parts. What is interesting, the neck is set in really deep into the body, they meet on the 11th fret. That makes it really comfortable to reach the first positions.
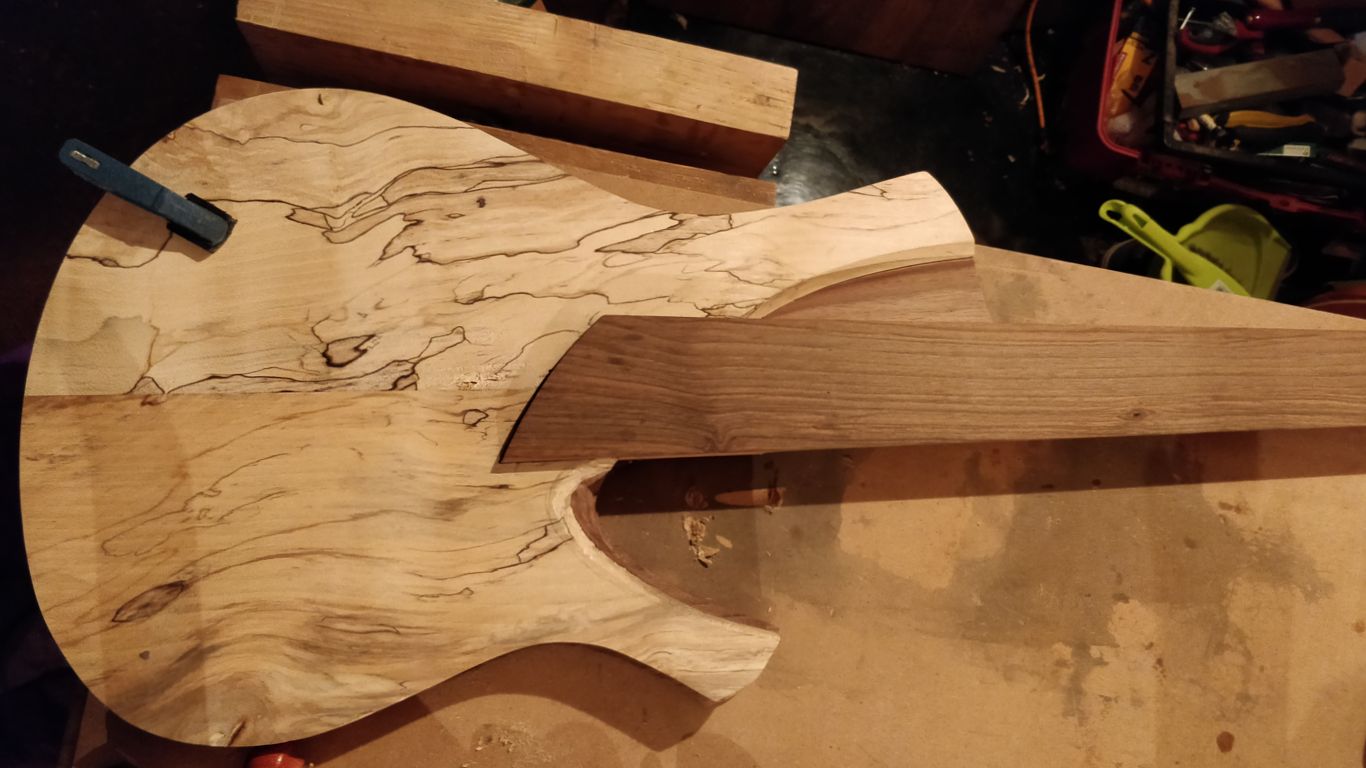
Planing down the top was the next job. I took off 2mm from the top and from the bottom with a freshly sharpened plane iron. Took some good 30 minutes per side. I achieved a great flat surface for glueing to the body and a nice flat top. Overall thickness went down 4mm and the bridge now sits low enough to meet the fretboard surface. Thanks @Jisch for sharing your approach!
The next part will show you all the ugliness and beauty of working with chisels
I wanted to reshape the lower bout ( which I will be able to further shape after glue-up) and finish the top bout, which would be too tricky to handle after glue-up. I roughed up the lower bout with a straight chisel:The upper bout (now comes the ugly part) was roughly shaped with a gouge and a straight chisel. I started by drawing the line, then chiselling out a channel with the gouge near to the line. Then rapidly removing material, before I switched to refining:
After finishing the surface with a flat chisel I switched to my little double bevelled plane for the final shaping (the nice part):
I used a scraper to remove the plane marks. The two pieces of wood were held together by a clamp the whole time. They might shift a little after glue-up, but that shouldn't be a big issue to get straight. I'm happy about the shape, although I'm still a little overthinking the top thickness and wondering if I should maybe sculpt the top a little to bet it thinner at the edges. Here is the final cutout and a pic with the neck to show you how it comes together:
I hesitated for a moment today thinking if I should do that top bout cutout at all... but now, I guess that was a good choice. The shape looks much lighter this way. What I find for now, that the balance of the instrument is very good. I wonder if it stays the same after the installation of all parts. What is interesting, the neck is set in really deep into the body, they meet on the 11th fret. That makes it really comfortable to reach the first positions.


I know, right?))) Hahaha, I thought I should share the whole experience, cause it does look really bad in the middle. But then, there is a tipping point 
))) Hahaha, I thought I should share the whole experience, cause it does look really bad in the middle. But then, there is a tipping point
Btw, I was wondering.. if you make wooden knobs, do you use some kind of tubing inside of them? How do you attach the knobs securely to the pots?
some will cry foul, but I just put a set screw in the side of the knob and I don't put any kind of insert in the knob. I will soak the threads in CA, just to make sure they don't go anywhere. I have basses I set up like that and there is no issue years later, maybe I don't twist knobs enough? :-D I don't see this as a high stress connection. If someone's twisting the knob hard enough to strip something out, they are doing something wrong.


I use CTS. Split shaft pots and drill the knobs with a 15/64 bit. They're tight going on but stay put.

I have several sets of knobs where I did like Jisch and tapped the wood and ran some CA glue down the threads to harden them up a bit.
Others, I have used a 6-32 helicoil. Again, used their tool to tap the wood and installed the insert. Both have worked well.
I usually use the Helicoils in material that is just too soft to really hold a thread. They work well and are a lot smaller then the brass or steel inserts from the hardware store, which is a good thing on something like a knob. I’m sure they have metric thread sizes also.
Invalid Link Removed
Others, I have used a 6-32 helicoil. Again, used their tool to tap the wood and installed the insert. Both have worked well.
I usually use the Helicoils in material that is just too soft to really hold a thread. They work well and are a lot smaller then the brass or steel inserts from the hardware store, which is a good thing on something like a knob. I’m sure they have metric thread sizes also.
Invalid Link Removed

I've done press-on knobs, by using an old pot with a sliver of metal cut to fit the slot, then wax it and put that into a knob that has a slightly oversized hole with epoxy in it. The wax usually lets it slide right out - it will sometimes stick firmly and wreck the pot in the process of removal, so that's why I use an old crappy one. 
After that you have a tight press-fit wooden knob. I also have done the same thing using hot glue in a pinch, and it has worked well, but tends to be looser, as it's softer.
After that you have a tight press-fit wooden knob. I also have done the same thing using hot glue in a pinch, and it has worked well, but tends to be looser, as it's softer.
Thank you for all the input, great to know it works without any inserts. I struggled to find the right ones. Still trying to figure it all out, but It looks like it's a lot of fun, doing your own knobs

This is looking damn cool, good job!
I'm currently messing with the knob making process and having all kinds of "fun" with that.
The hack that I'm using is taking an old plastic knob with a set screw and metal insert, breaking off the plastic part, then stealing the insert. You can easily drill out a wood knob to accept those pieces and glue it in once it's fit correctly.
I don't doubt that more basic methods would be fine, but this was something that was really cheap and gets the knob attached like it's a real knob.
I'm currently messing with the knob making process and having all kinds of "fun" with that.
The hack that I'm using is taking an old plastic knob with a set screw and metal insert, breaking off the plastic part, then stealing the insert. You can easily drill out a wood knob to accept those pieces and glue it in once it's fit correctly.
I don't doubt that more basic methods would be fine, but this was something that was really cheap and gets the knob attached like it's a real knob.
Thank you all for the encouragement! I will be doing knobs
But.. it's soo far away, I don't even know where to start, every day is a fight with time now. I won't sacrifice the quality though. I want it to be a good instrument still in the first place. Two weekends and 6 weekdays left, not including the 20th. Ok, where are we?
Glueup. After having the neck heel put at the correct angle, I've adjusted the heel to square again, chamfered the edges lightly and glued in the neck. I glued it in in the evening, so I could wake up earlier, check the fit of the top plate and glue it on before leaving to work. I'm stealing time wherever I can. My girlfriend will kill me for sure for that build, therefore since it will be my last build, it has to be perfect
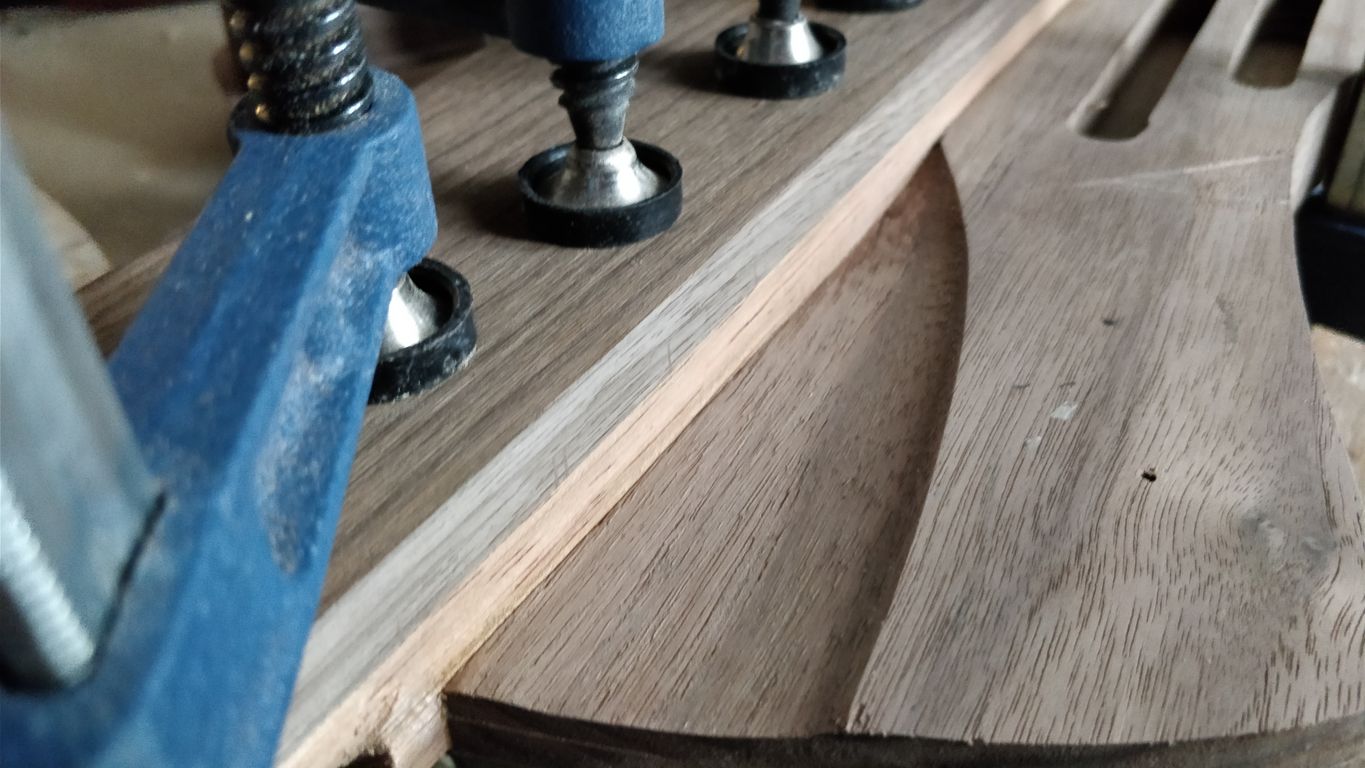
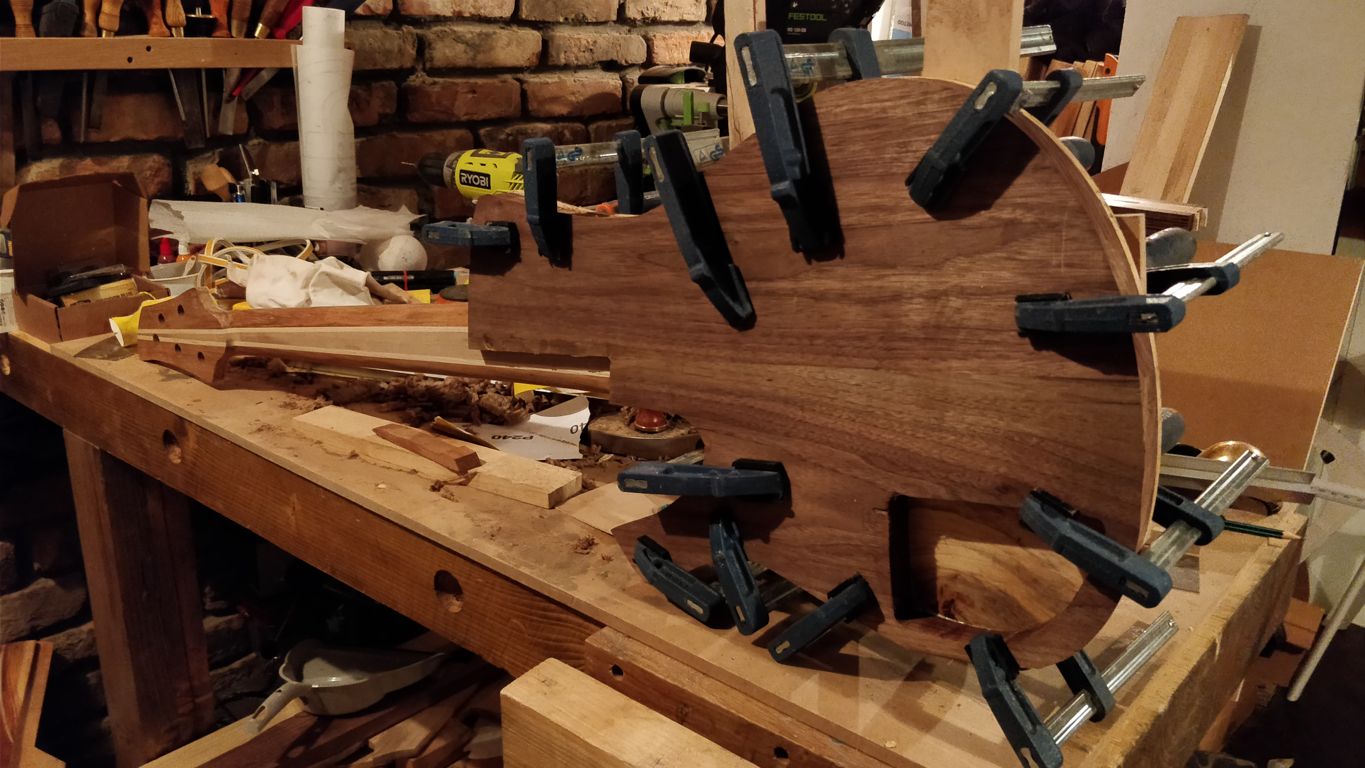
After everything dried, I moved on further with sculpting the lower bout and the rear access. For those, with a weak heart, there are again rough pictures to follow. Please beware, wood is treated roughly.
The idea was to draw a line first, then chisel the wood with a gouge starting from the line towards the hollow, but the first passes were rather about scoring below the line to avoid chip out.
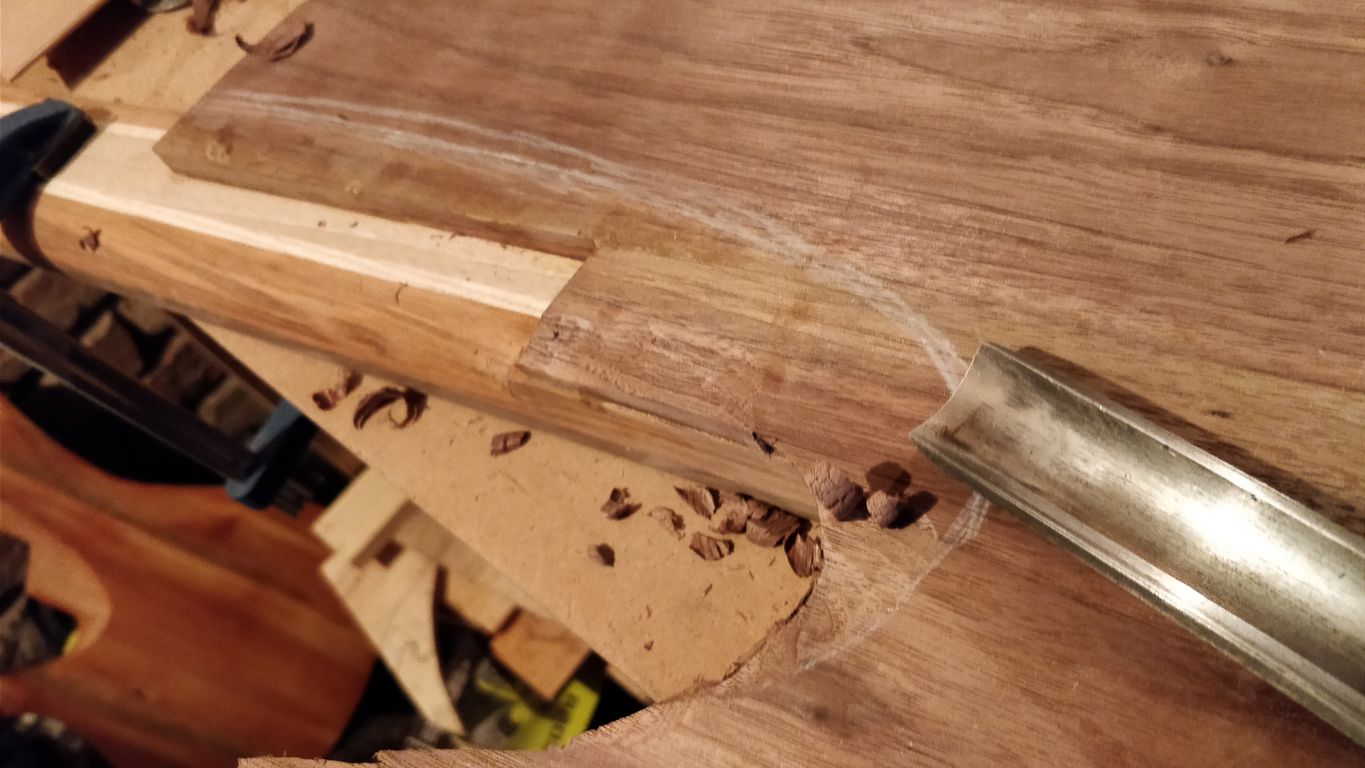
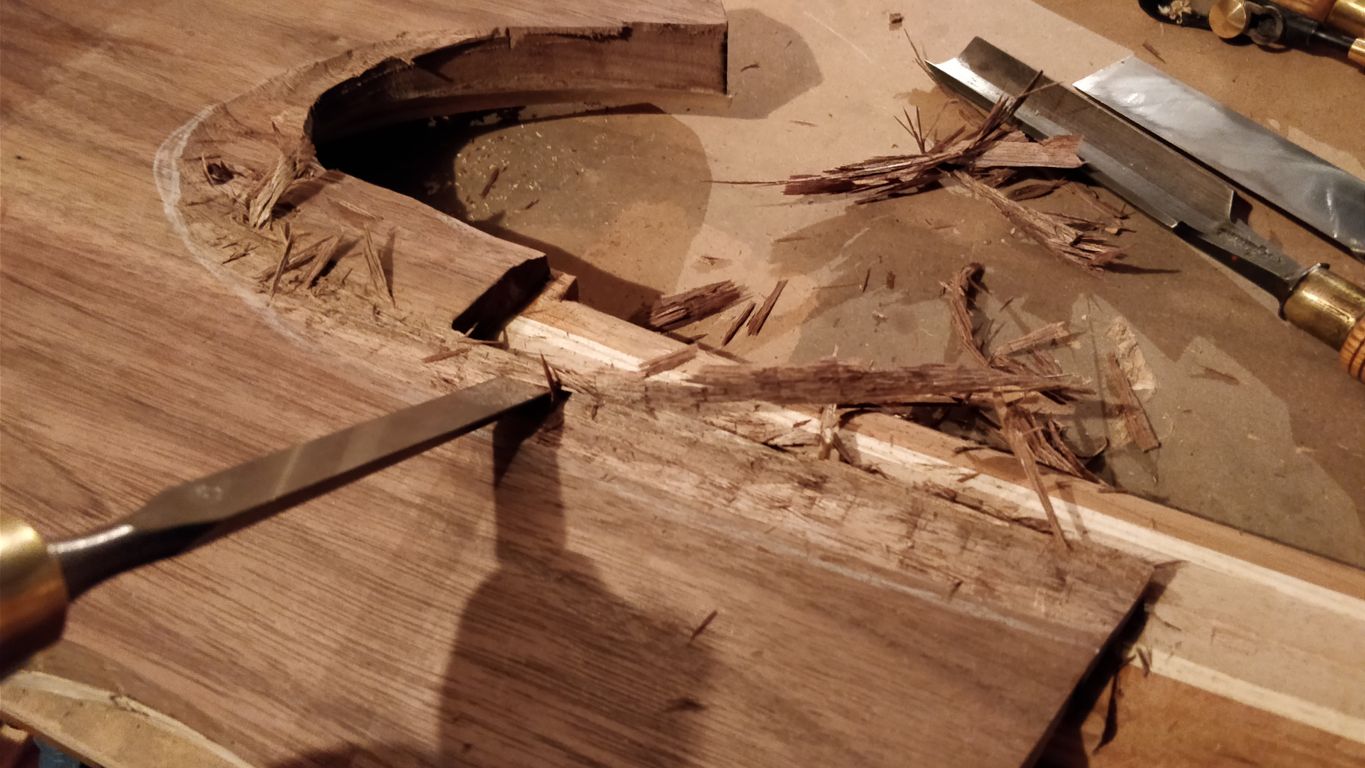
I did the majority of the deepening with a small flat chisel, that allows me to remove material faster. Having the shape roughed out I took care of the bulk in the middle
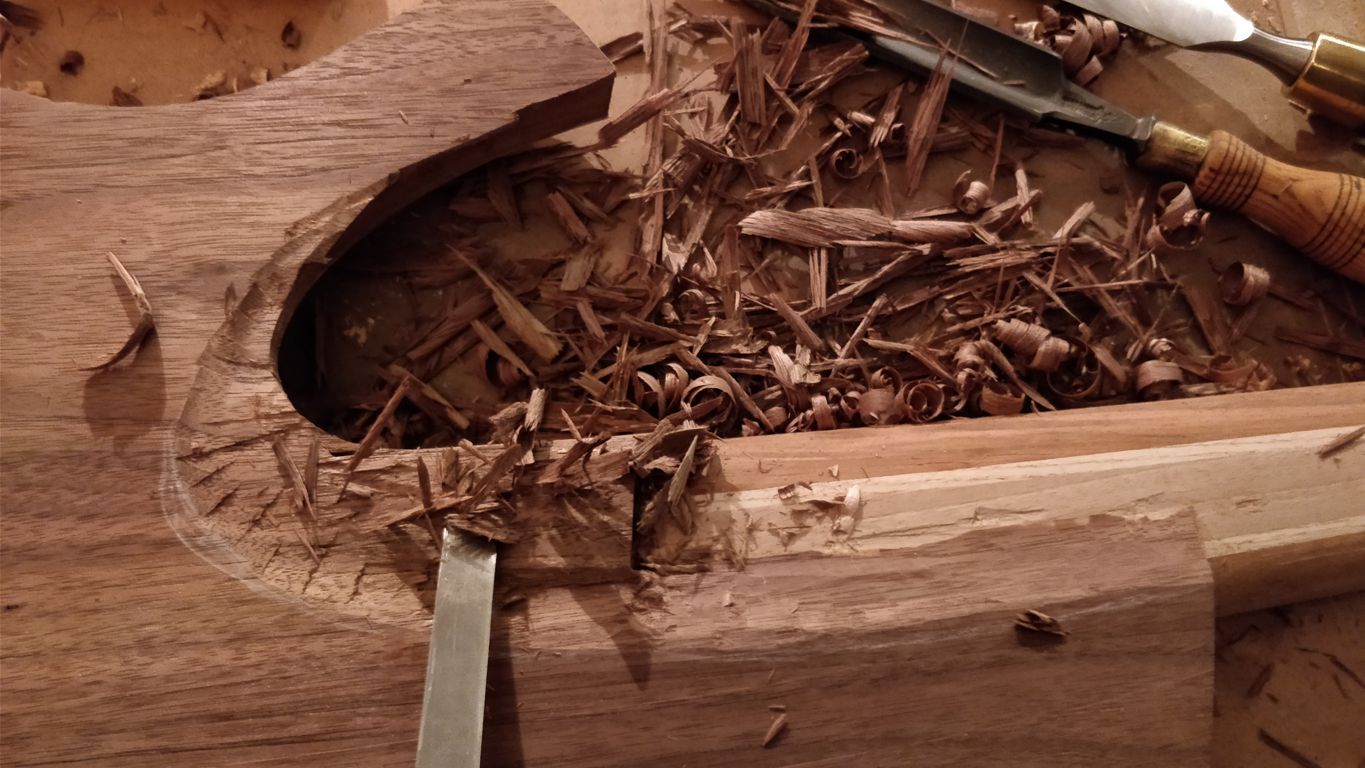
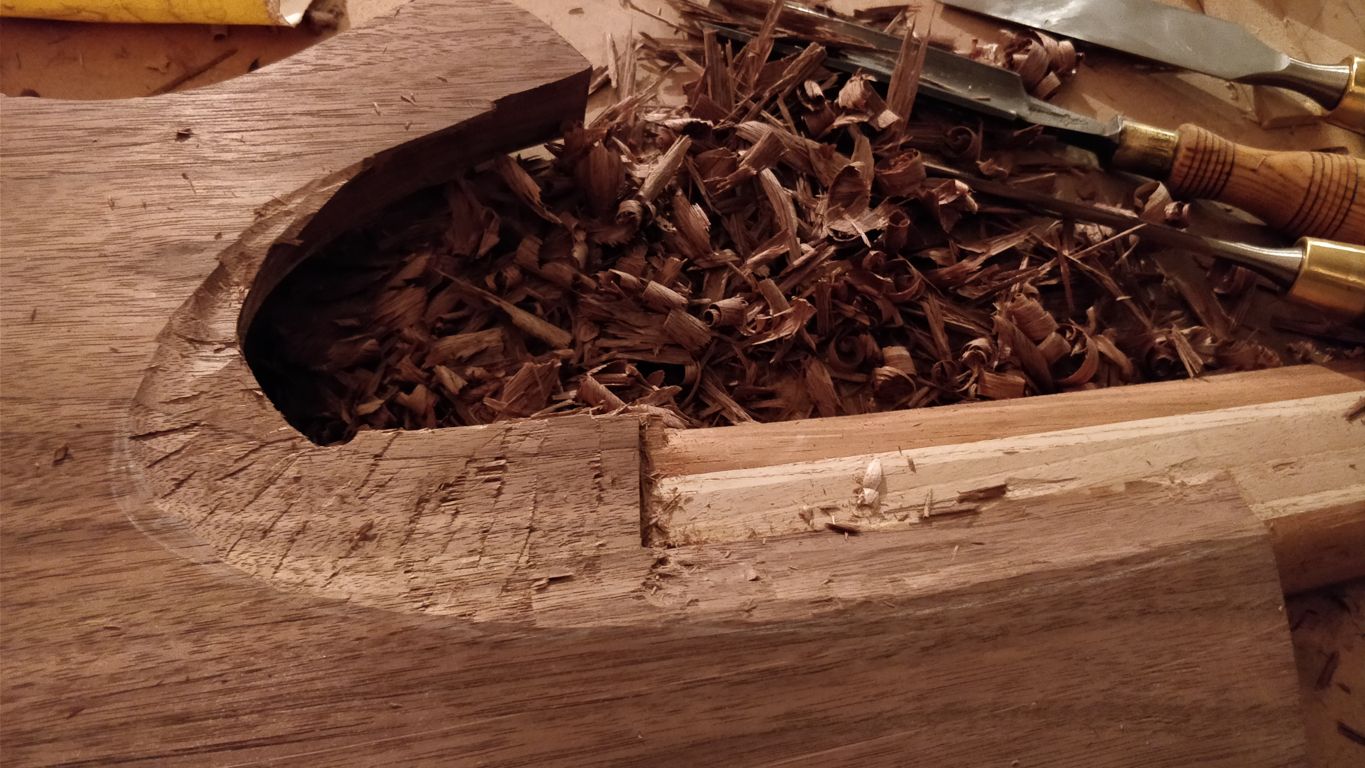
Then switched to a gouge again and my tiny double bevelled plane to work on the hollow until I nearly reached the neck.
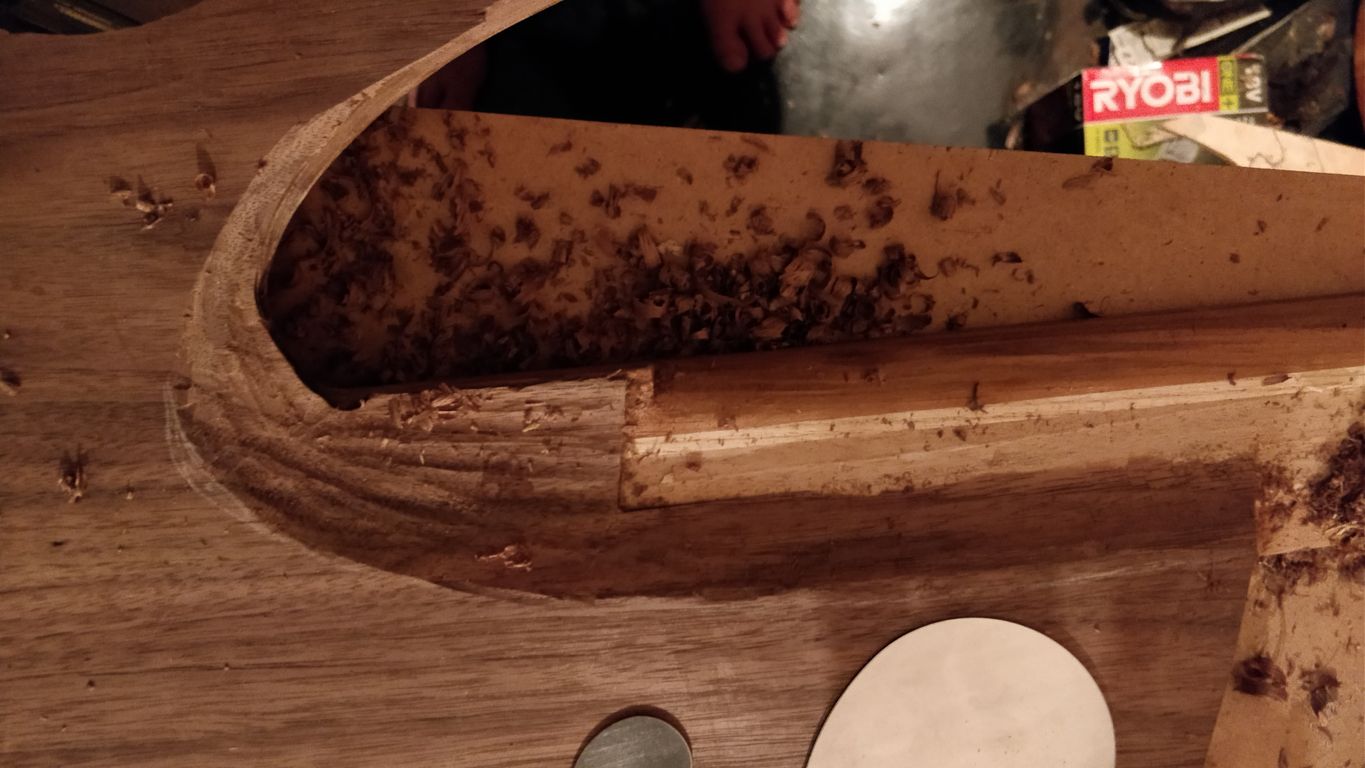
Now was the time for the scraper, which works as a subtle plane. You have to watch for grain direction, but you have a lot of control with it. Used well, it leaves a great surface, which actually doesn't need further sanding.
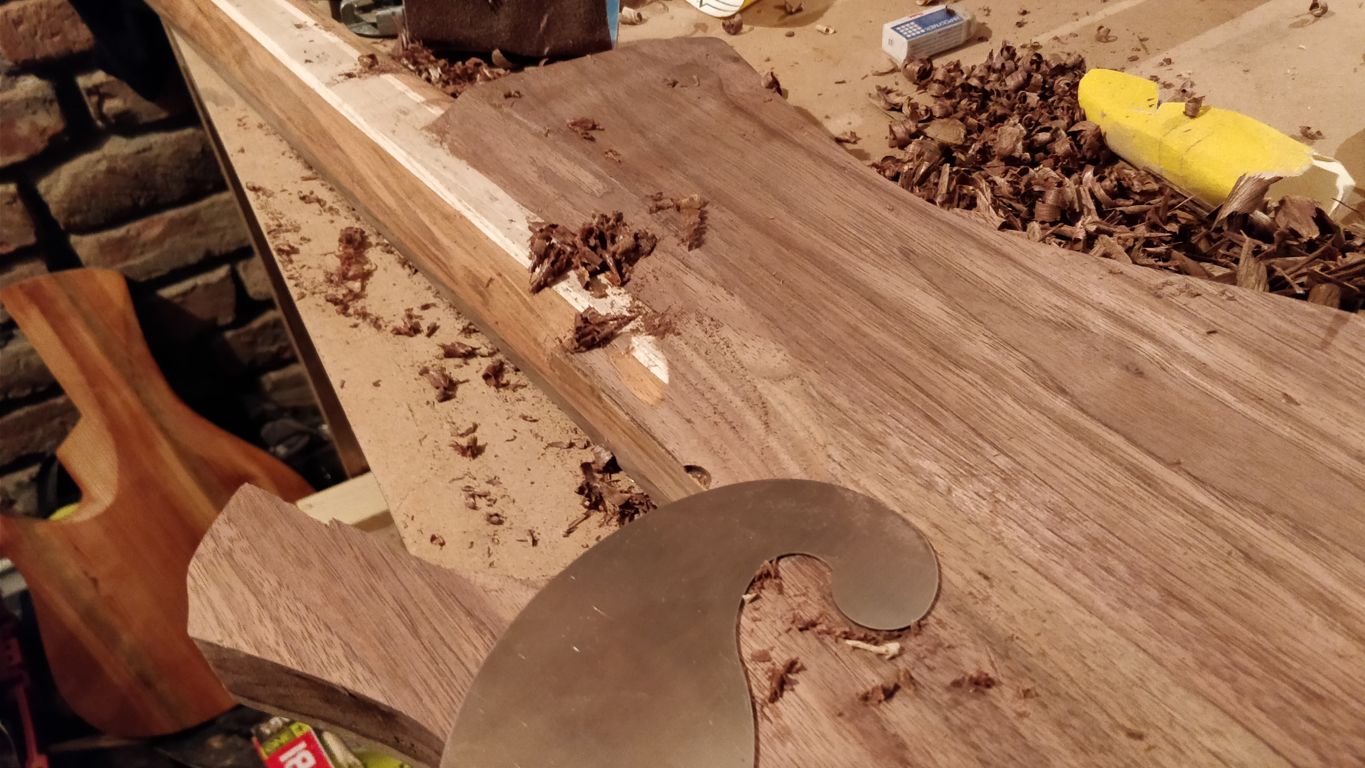
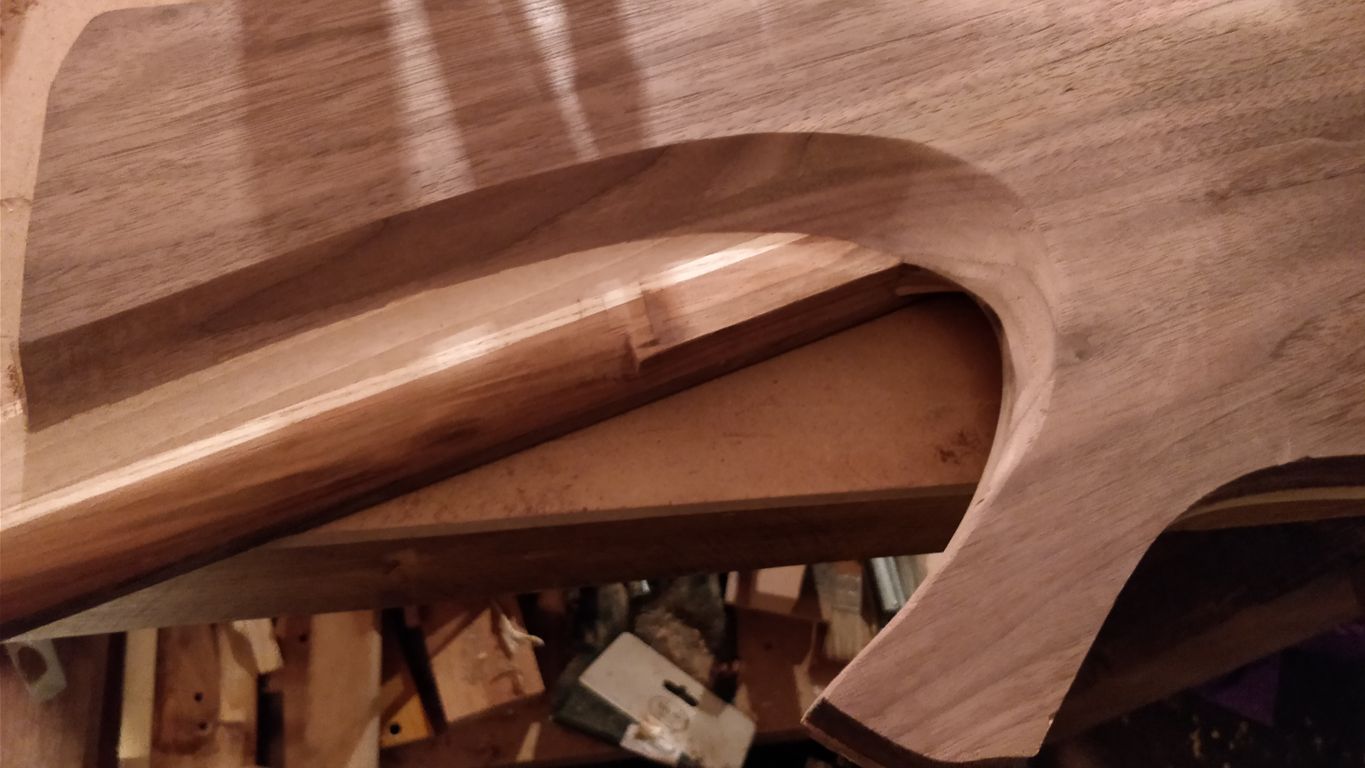
The lines are still a bit rough. There is also some work to be done at the neck at this point, both in the hollow and at the top bout
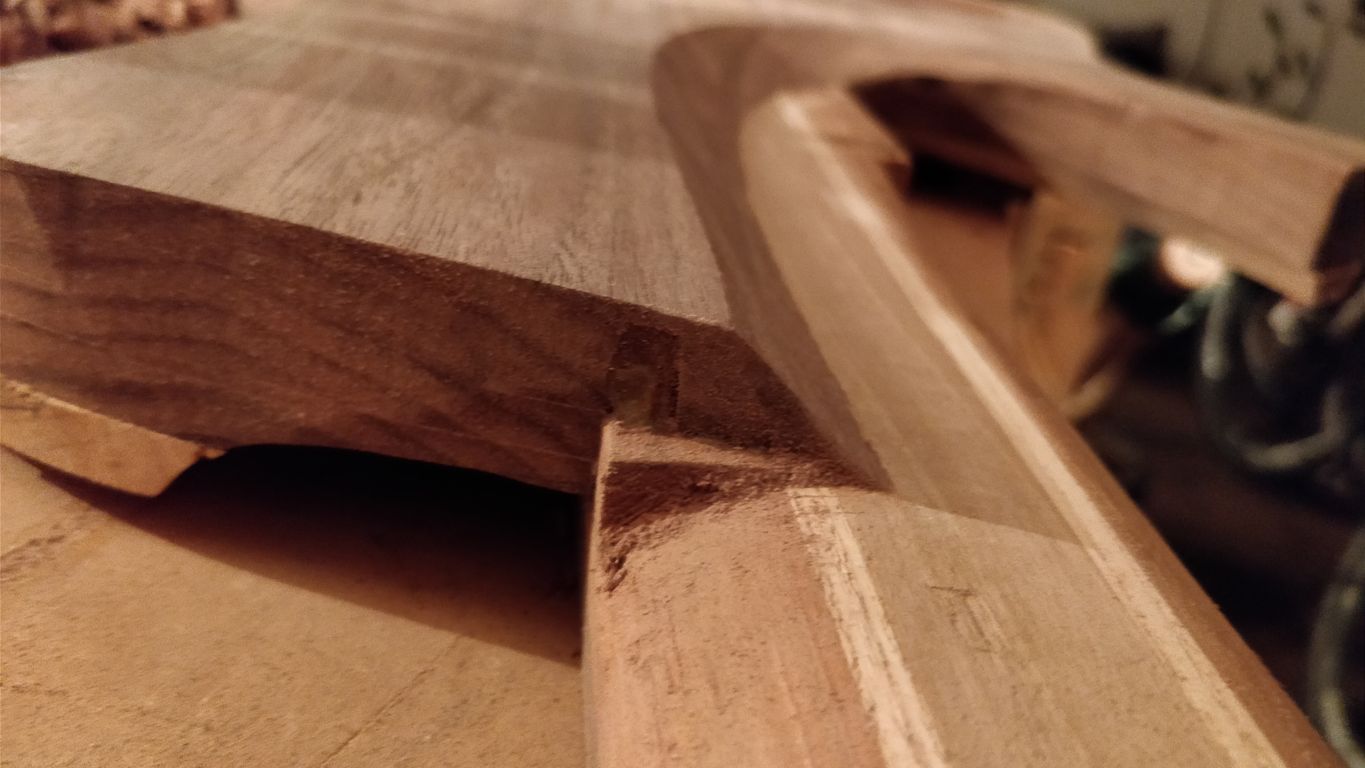
I took some time with chisels, planes and scrapers to blend it in. I'm still not very fond of the neck shape in the lower part and will probably flatten it some more, so it feels thinner at the bottom. I will also have to decide whether to blend the upper bout rear a little bit more or leave it as an edge. So far it is roughly smoothed and will be handled more during final sanding
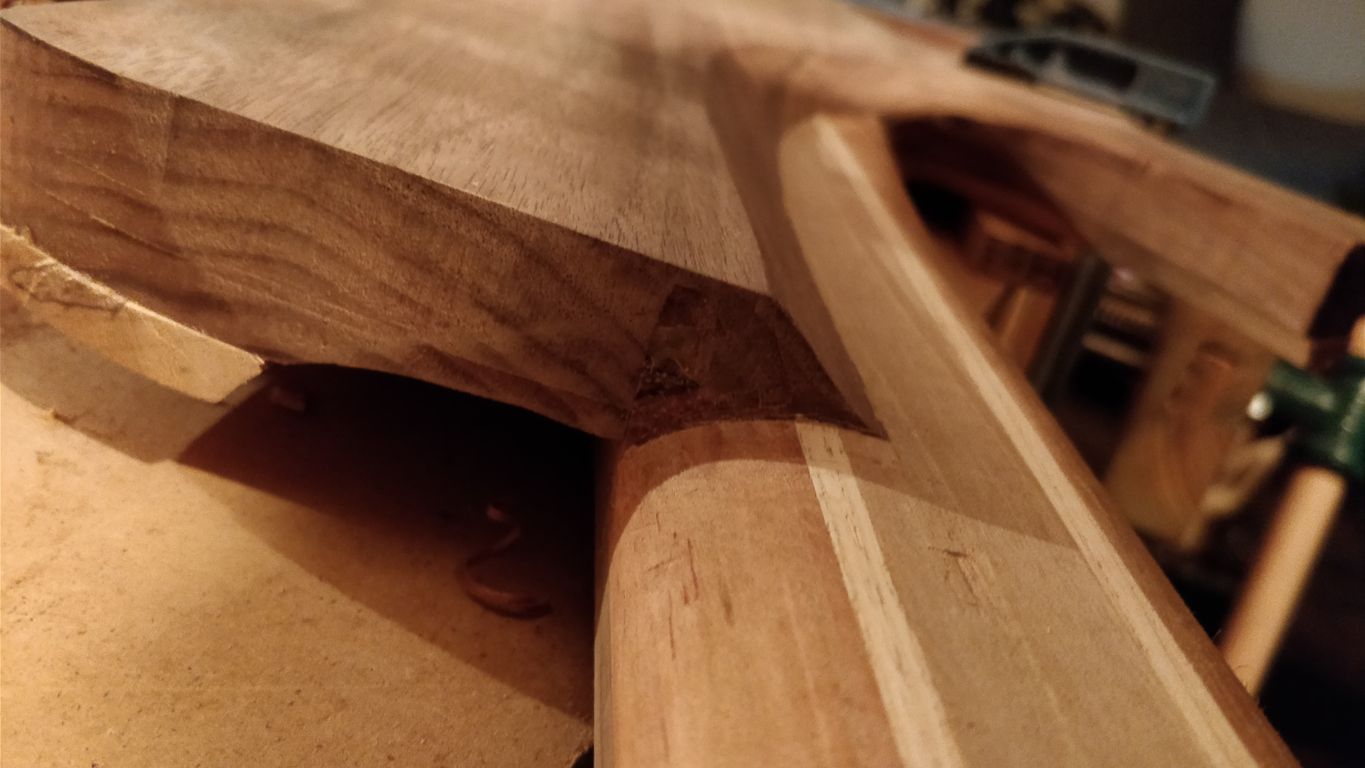
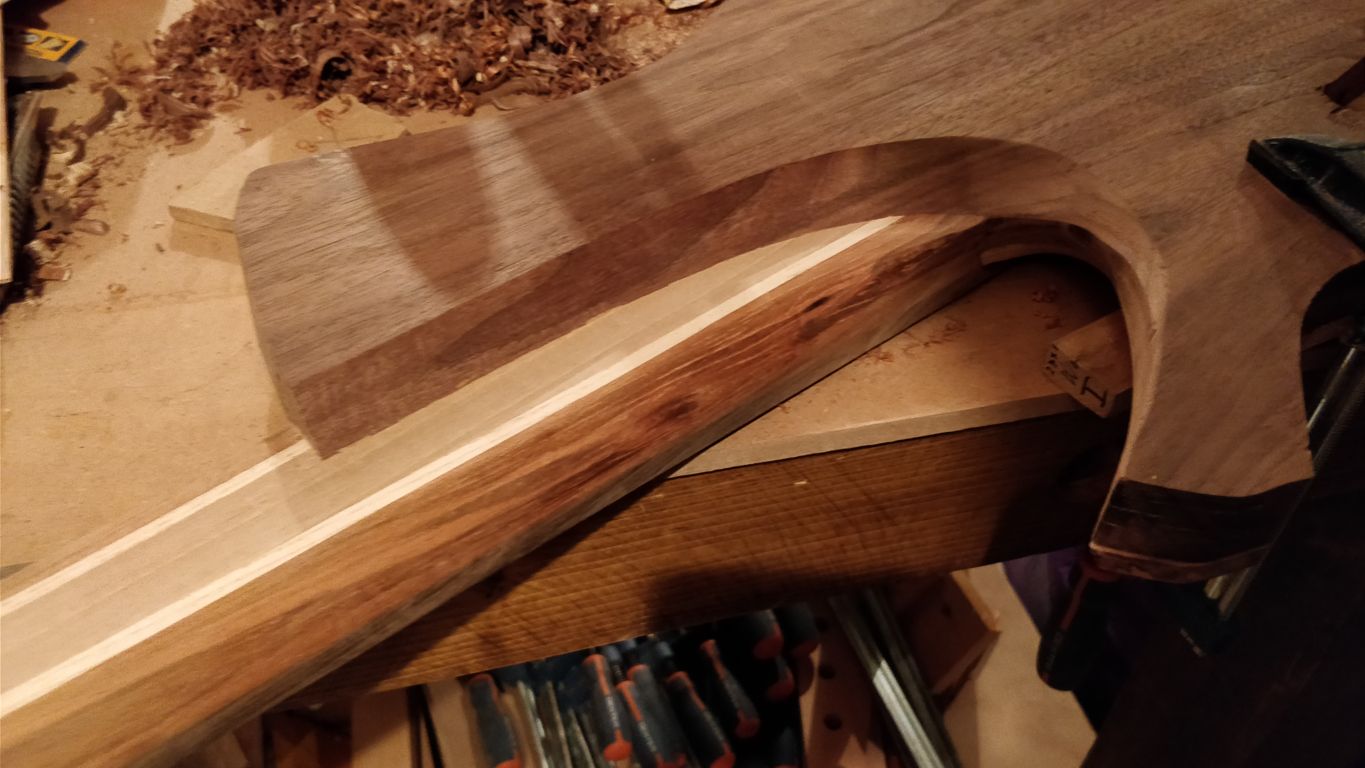
The lower bout has been also sculpted and prepared for sanding:
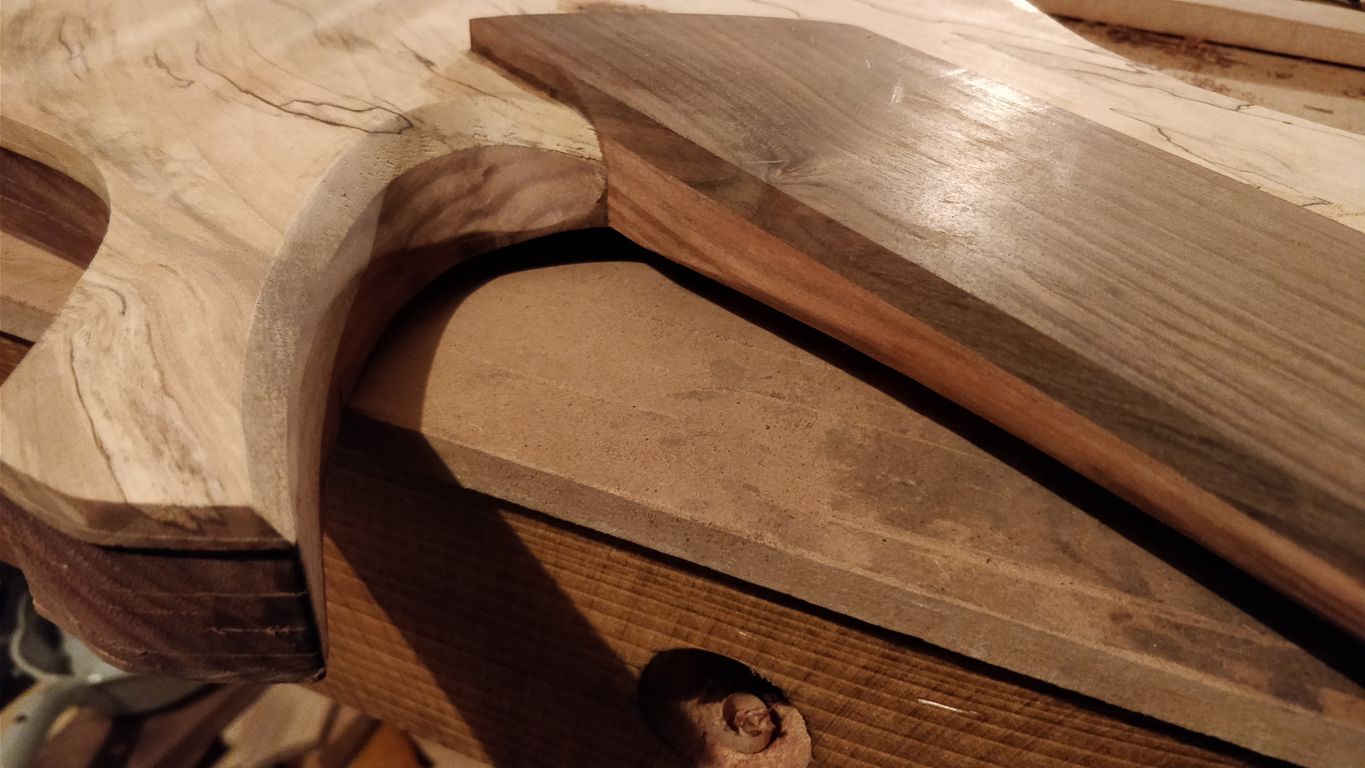
The last thing I did today was put on some strings and measuring the bridge position. I marked the screw holes with a punch. Oh, did I mention, I levelled the fretboard to a 16-22" compound radius? No I didn't.
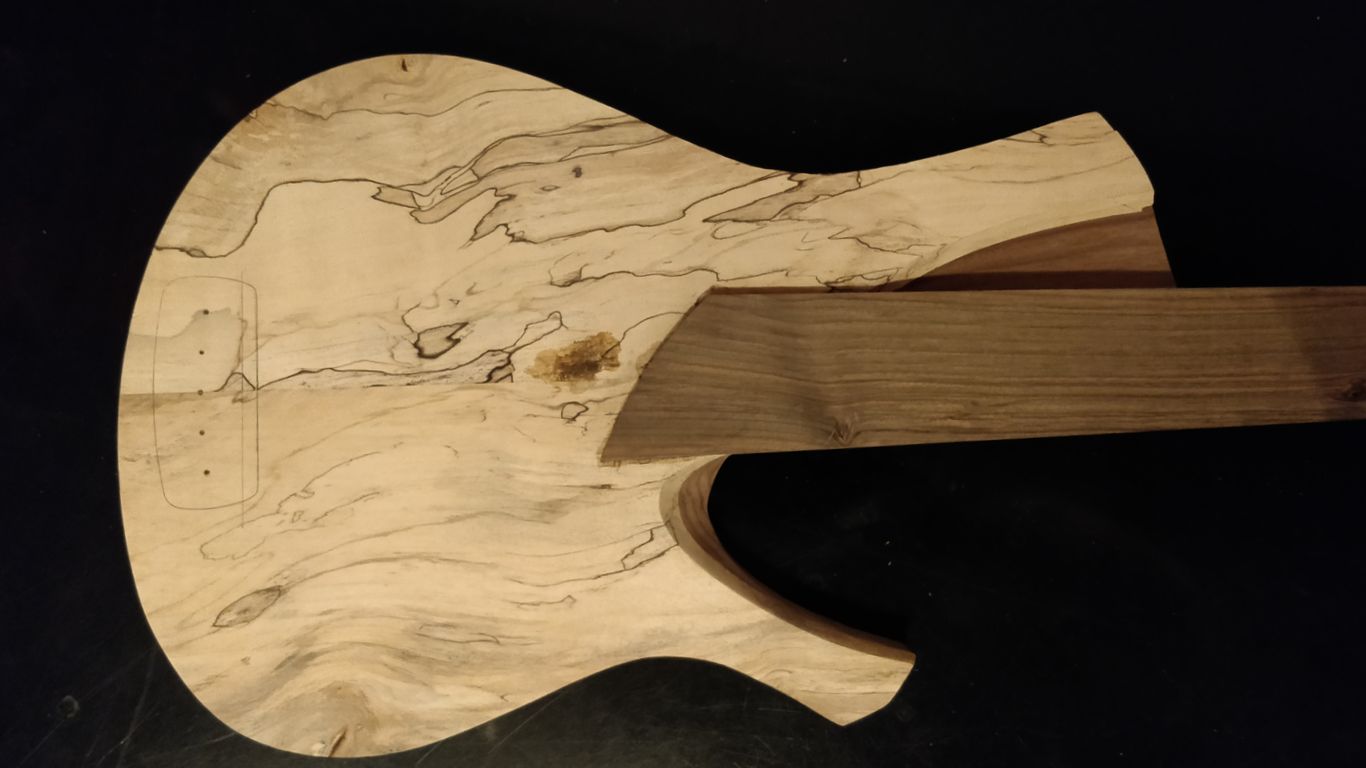
Anyway, the decision I'm making now is, should I make the armrest deep, so it exposes the walnut, or should I make it shallow, so the maple doesn't lose its shape. I kinda like the lines now. I don't know, it's late, I'm tired, that's it for today, I'll have a drink. Cheers!
But.. it's soo far away, I don't even know where to start, every day is a fight with time now. I won't sacrifice the quality though. I want it to be a good instrument still in the first place. Two weekends and 6 weekdays left, not including the 20th. Ok, where are we?
Glueup. After having the neck heel put at the correct angle, I've adjusted the heel to square again, chamfered the edges lightly and glued in the neck. I glued it in in the evening, so I could wake up earlier, check the fit of the top plate and glue it on before leaving to work. I'm stealing time wherever I can. My girlfriend will kill me for sure for that build, therefore since it will be my last build, it has to be perfect
After everything dried, I moved on further with sculpting the lower bout and the rear access. For those, with a weak heart, there are again rough pictures to follow. Please beware, wood is treated roughly.
The idea was to draw a line first, then chisel the wood with a gouge starting from the line towards the hollow, but the first passes were rather about scoring below the line to avoid chip out.
I did the majority of the deepening with a small flat chisel, that allows me to remove material faster. Having the shape roughed out I took care of the bulk in the middle
Then switched to a gouge again and my tiny double bevelled plane to work on the hollow until I nearly reached the neck.
Now was the time for the scraper, which works as a subtle plane. You have to watch for grain direction, but you have a lot of control with it. Used well, it leaves a great surface, which actually doesn't need further sanding.
The lines are still a bit rough. There is also some work to be done at the neck at this point, both in the hollow and at the top bout
I took some time with chisels, planes and scrapers to blend it in. I'm still not very fond of the neck shape in the lower part and will probably flatten it some more, so it feels thinner at the bottom. I will also have to decide whether to blend the upper bout rear a little bit more or leave it as an edge. So far it is roughly smoothed and will be handled more during final sanding
The lower bout has been also sculpted and prepared for sanding:
The last thing I did today was put on some strings and measuring the bridge position. I marked the screw holes with a punch. Oh, did I mention, I levelled the fretboard to a 16-22" compound radius? No I didn't.
Anyway, the decision I'm making now is, should I make the armrest deep, so it exposes the walnut, or should I make it shallow, so the maple doesn't lose its shape. I kinda like the lines now. I don't know, it's late, I'm tired, that's it for today, I'll have a drink. Cheers!

- Apr 18, 2008
- 16,013
- 1
- 31,727
- Disclosures
- I'm highly opinionated and extremely self-assured
Wooooo, I got light-headed there for a bit. Woozy...
I vote shallow! I’ve never seen anybody do a single-cut with a faux double-cut cap. That’s really clever, stylistically. I never liked the aesthetic of a single-cut bass (except for Les Paul basses), even though they have a structural advantage. Yours looks like a double-cut from a distance, which is neat!
I vote shallow! I’ve never seen anybody do a single-cut with a faux double-cut cap. That’s really clever, stylistically. I never liked the aesthetic of a single-cut bass (except for Les Paul basses), even though they have a structural advantage. Yours looks like a double-cut from a distance, which is neat!

I agree, the lines are nice as is, exposing walnut on the body will change emWooooo, I got light-headed there for a bit. Woozy...
I vote shallow! I’ve never seen anybody do a single-cut with a faux double-cut cap. That’s really clever, stylistically. I never liked the aesthetic of a single-cut bass (except for Les Paul basses), even though they have a structural advantage. Yours looks like a double-cut from a distance, which is neat!



