

Enjoy the benefits of a premium membership!
Upgrade Account
-
TalkBass has been independent since 1998. Add your voice.
Create a free account to reply to discussions, view embedded media, and browse with fewer display ads.
Join free Log in
Want zero display ads or expanded classifieds tools? Compare plans.
You are using an out of date browser. It may not display this or other websites correctly.
You should upgrade or use an alternative browser.
You should upgrade or use an alternative browser.
More options
Who Replied?

b3e
Words of advice
1) You have to finish this for voting
2) If you are married, divorce your wife, she'll definitely get in the way
3) If you have kids, sell them. They will distract you
4) If you have a day job, quit it. Who needs money when you can compete in the TB buildoff
That's all for now

Words of advice
1) You have to finish this for voting
2) If you are married, divorce your wife, she'll definitely get in the way
3) If you have kids, sell them. They will distract you
4) If you have a day job, quit it. Who needs money when you can compete in the TB buildoff
That's all for now

Thank's for all the input! ) I woke up, looked at the shape and I'll go shallow and see how it will work out. The body is around 35mm (1 3/8 ") thick, so there really is no really need to go very deep I guess
@Scoops, you made my day! That sounds like a badass evil plan to proceed. I'll stick to point 1) for now, you have to have milestones, right? 
I tried some wood samples in the morning with shellac and true oil to see how the finish might look. The spalted maple darkens a lot under tru oil (top left side), in the middle is light shellac, which remains pretty transparent, on the right amber shellac that also gives a yellow-ish hue, though doesn't darken the spalting that much. I've also applied some tru oil and shellac to a piece of headstock scrap. It reacts different tonally than the top, so the matching of color will be important.
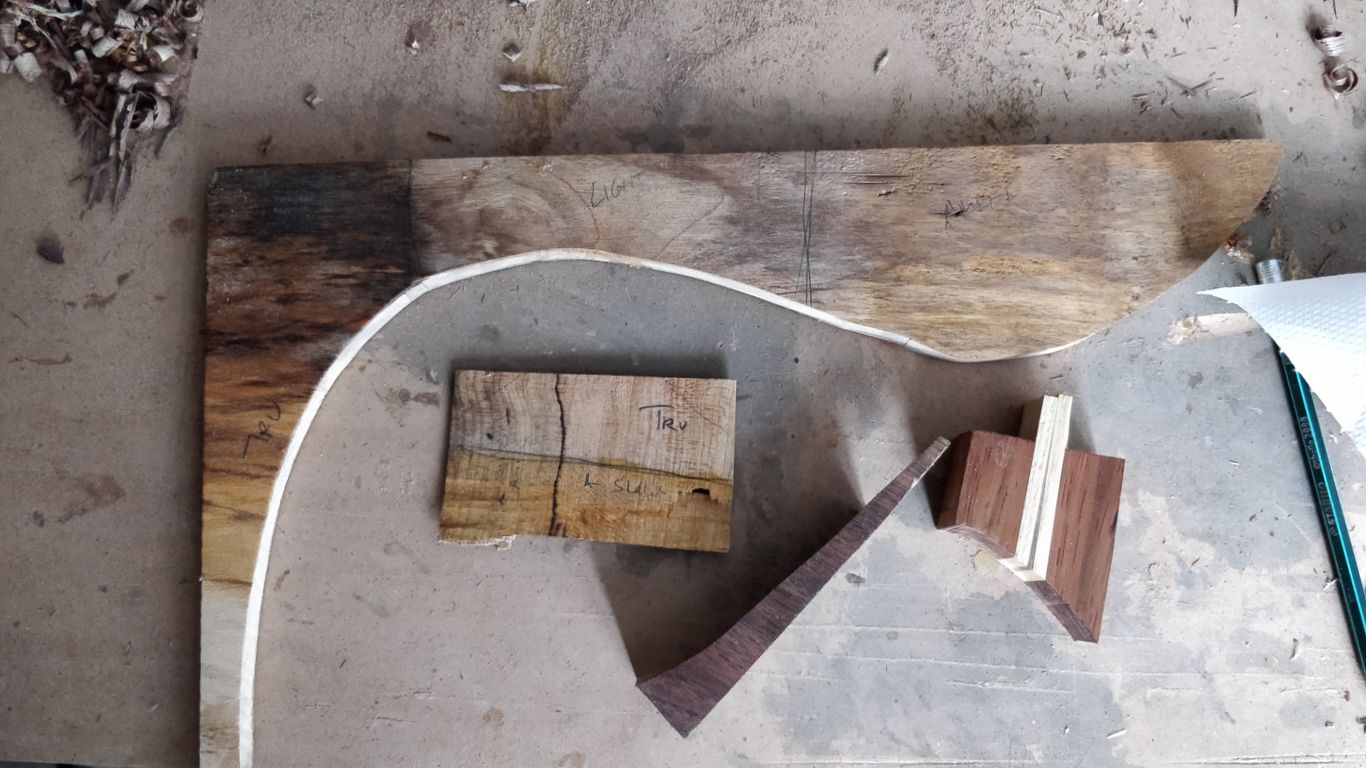
I also considering going with wipe-on poly to keep the top as light as it gets. Will do some more scrap tests before the final decission.
) I woke up, looked at the shape and I'll go shallow and see how it will work out. The body is around 35mm (1 3/8 ") thick, so there really is no really need to go very deep I guess @Scoops, you made my day!
That sounds like a badass evil plan to proceed. I'll stick to point 1) for now, you have to have milestones, right? I tried some wood samples in the morning with shellac and true oil to see how the finish might look. The spalted maple darkens a lot under tru oil (top left side), in the middle is light shellac, which remains pretty transparent, on the right amber shellac that also gives a yellow-ish hue, though doesn't darken the spalting that much. I've also applied some tru oil and shellac to a piece of headstock scrap. It reacts different tonally than the top, so the matching of color will be important.
I also considering going with wipe-on poly to keep the top as light as it gets. Will do some more scrap tests before the final decission.
Today I wanted to rout the pickups, but I didn't get past laying out and pre-drilling. I made a routing template on the way, but it was no good, so I dropped the idea and figured out an easier way to do it. The next step is using some straight cuts to connect the bits.
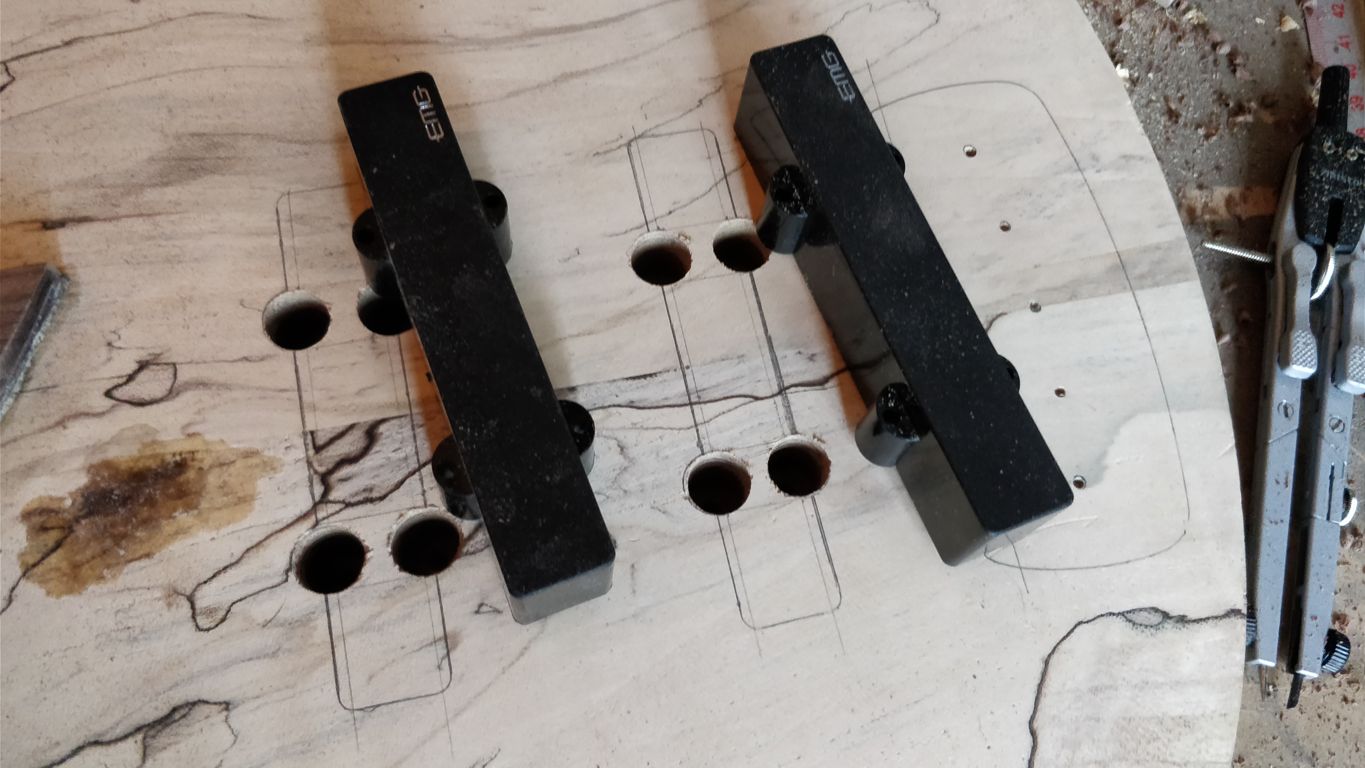
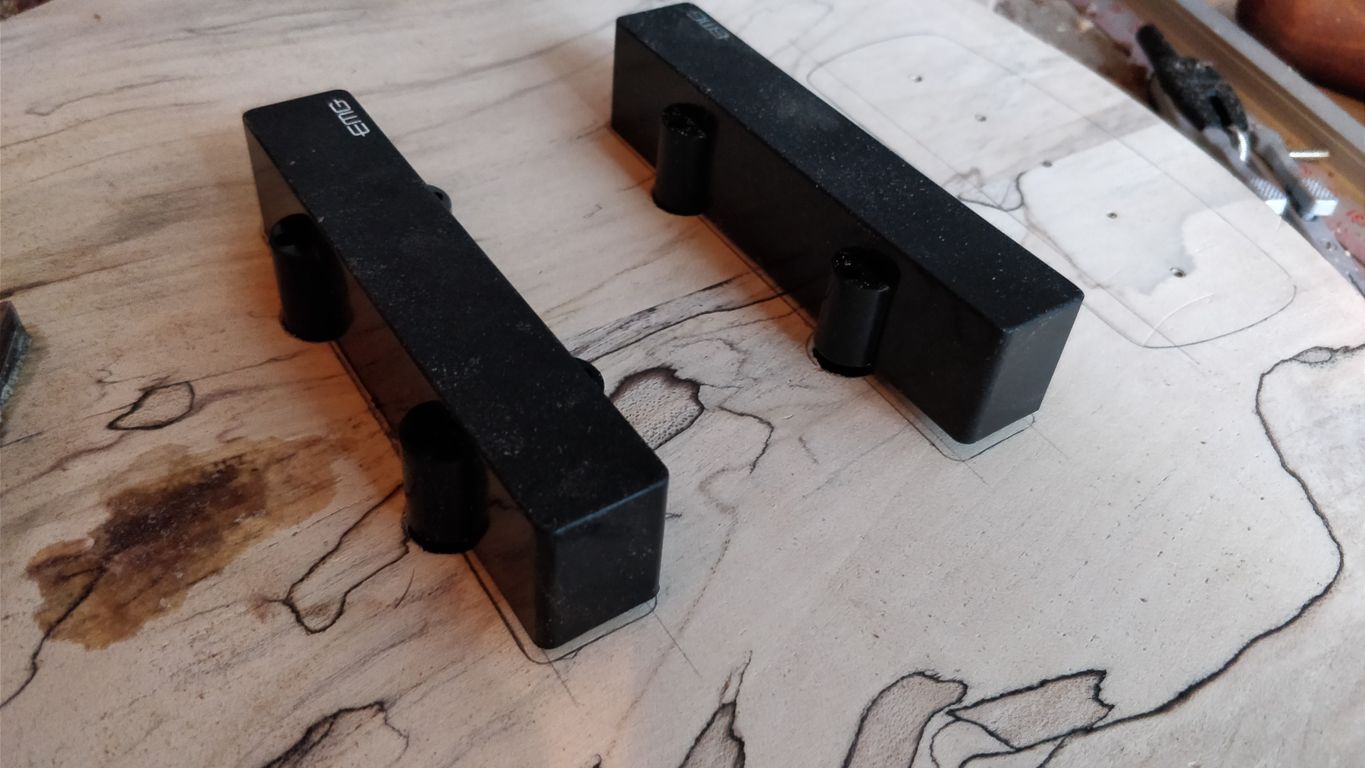
As you can see, the ears match the holes really well, I used a 12mm drill bit and the center is moved by 1mm inside the cavity. I used 4mm bits to mark the corners.
Then I planned the final pots layout and pre drilled the holes with a 2mm bit and widened them to 8mm. The jack got a 10mm bit. I had to sink the jack and the pots into the top plate, otherwise they wouldn't protrude properly. I used a 25mm and. 20mm forstner bits for that.
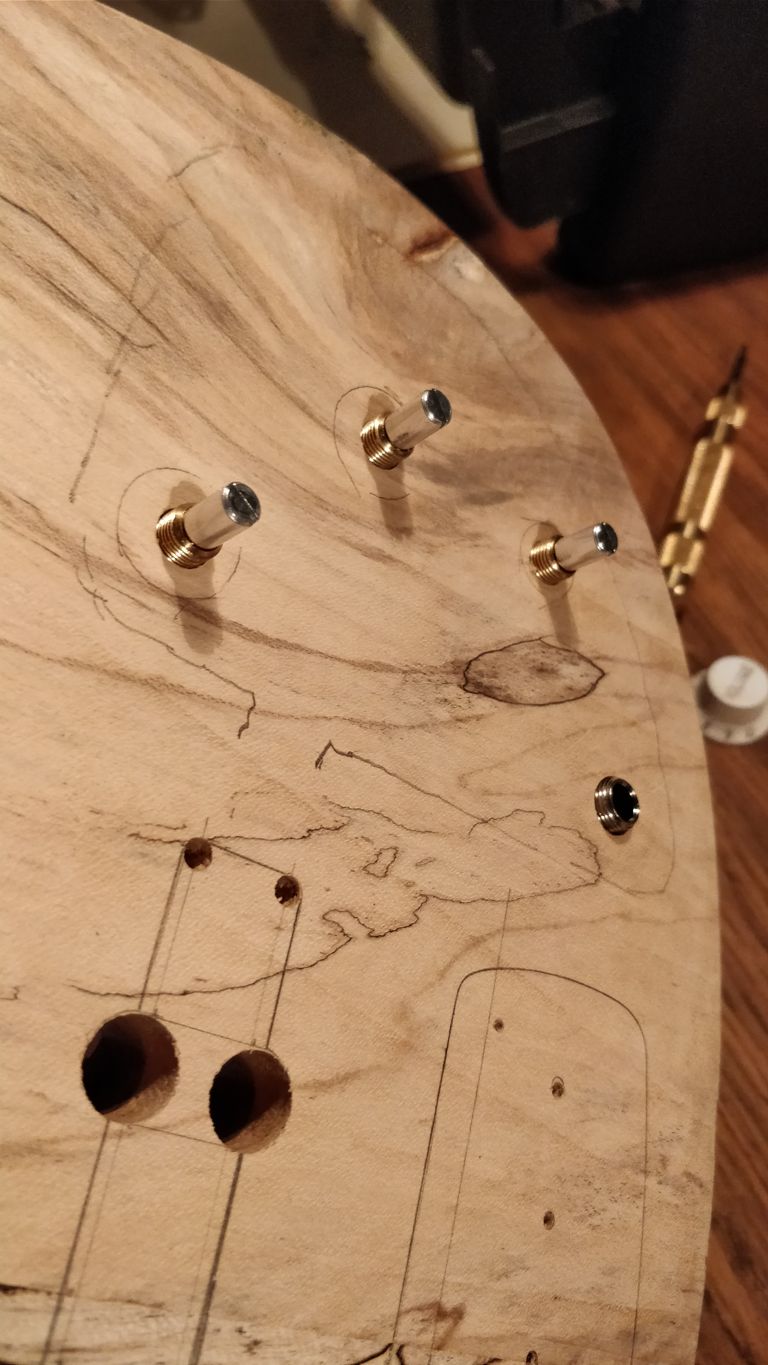
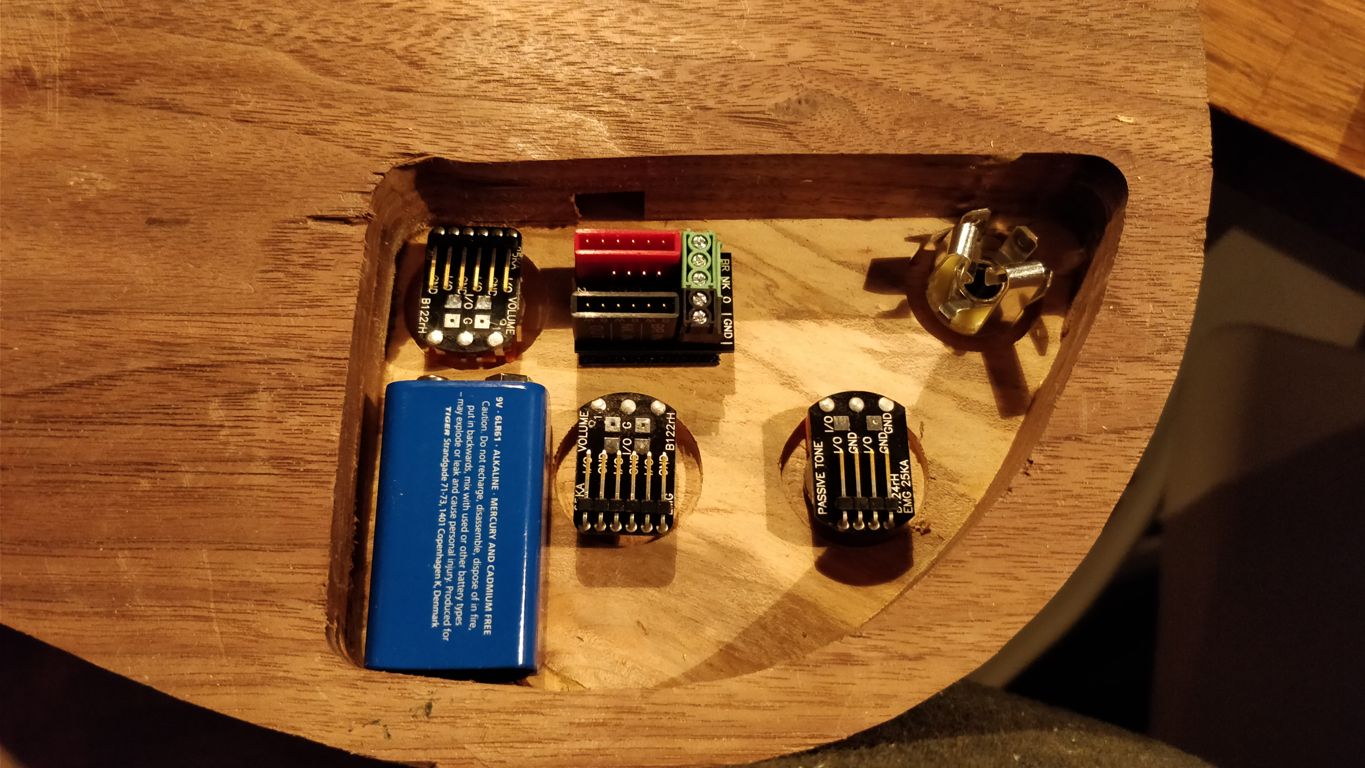
The cavity is just deep enough to accommodate the jack and the cover. 2mm more and it wouldn't fit anymore.. phew.. that was luck, I have to admit. The battery has to lay flat though.
Everything is ready for routing tomorrow. Then I start the final contouring, work a little more on the neck, the body and move to sanding everything for the finish. Sounds like a job for at least a couple of days. I hope I can start finishing on Wednesday. Here is everything pre-drilled.
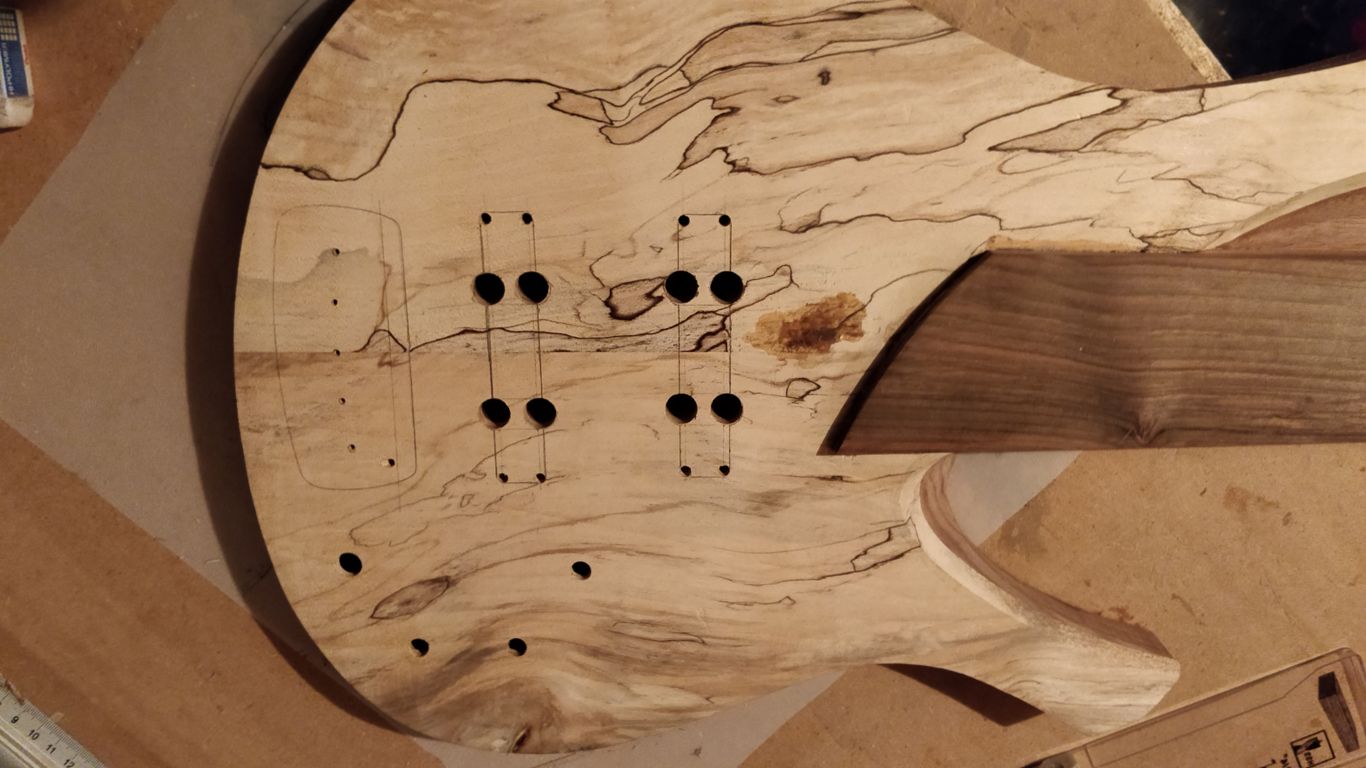
As you can see, the ears match the holes really well, I used a 12mm drill bit and the center is moved by 1mm inside the cavity. I used 4mm bits to mark the corners.
Then I planned the final pots layout and pre drilled the holes with a 2mm bit and widened them to 8mm. The jack got a 10mm bit. I had to sink the jack and the pots into the top plate, otherwise they wouldn't protrude properly. I used a 25mm and. 20mm forstner bits for that.
The cavity is just deep enough to accommodate the jack and the cover. 2mm more and it wouldn't fit anymore.. phew.. that was luck, I have to admit. The battery has to lay flat though.
Everything is ready for routing tomorrow. Then I start the final contouring, work a little more on the neck, the body and move to sanding everything for the finish. Sounds like a job for at least a couple of days. I hope I can start finishing on Wednesday. Here is everything pre-drilled.


- Apr 18, 2008
- 16,015
- 1
- 31,728
- Disclosures
- I'm highly opinionated and extremely self-assured
The first question that popped into my head was “did he use a hand drill?” 

I always wondered how to install J pickups and seeing you having used a drill for the ears ... well why didn't I think of that?
Routing day, yaay!!) I constructed the routing templates around simple straight lines, fitted the pickups to see if they match with some slack and moved on with the standard procedure: removed the waste with a forstner bit, than routed the cavities clean. I did one after the other. Some trimming was left to do afterwards in the corners
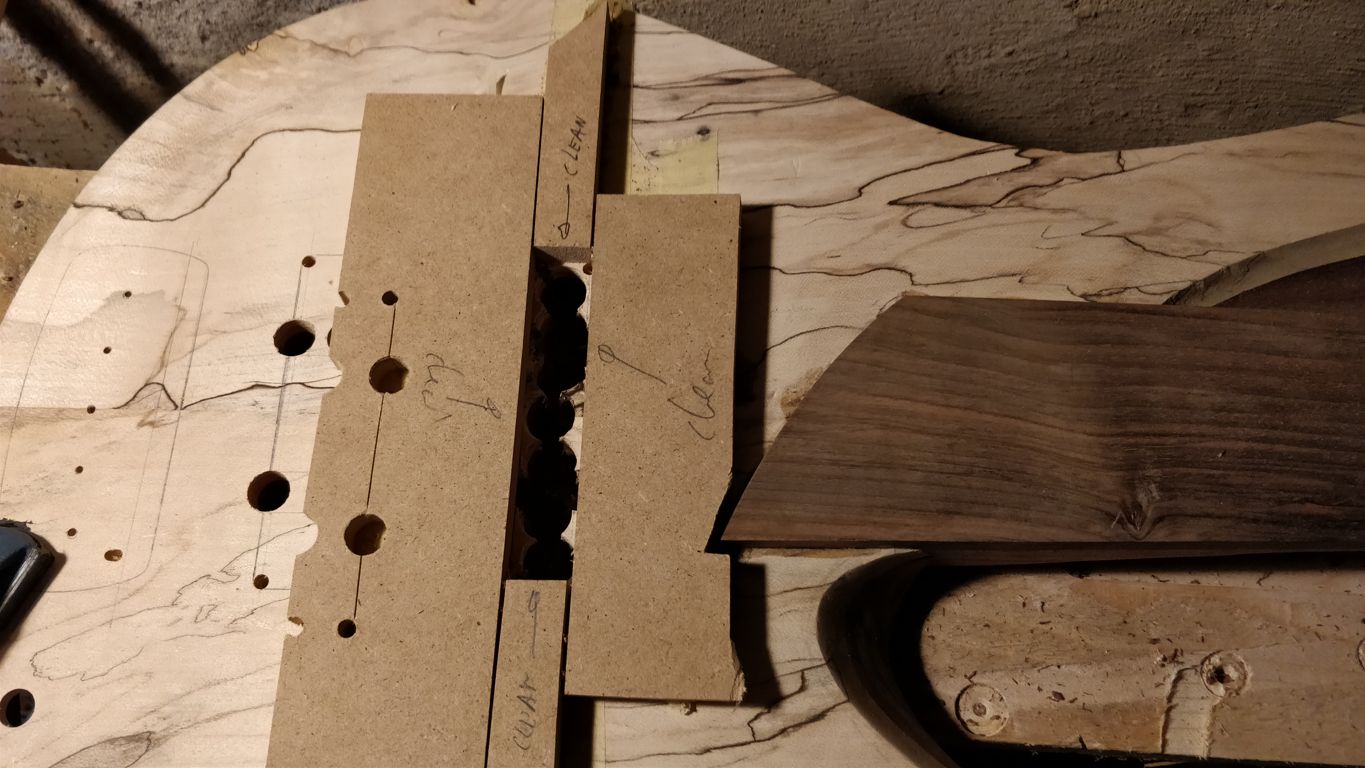
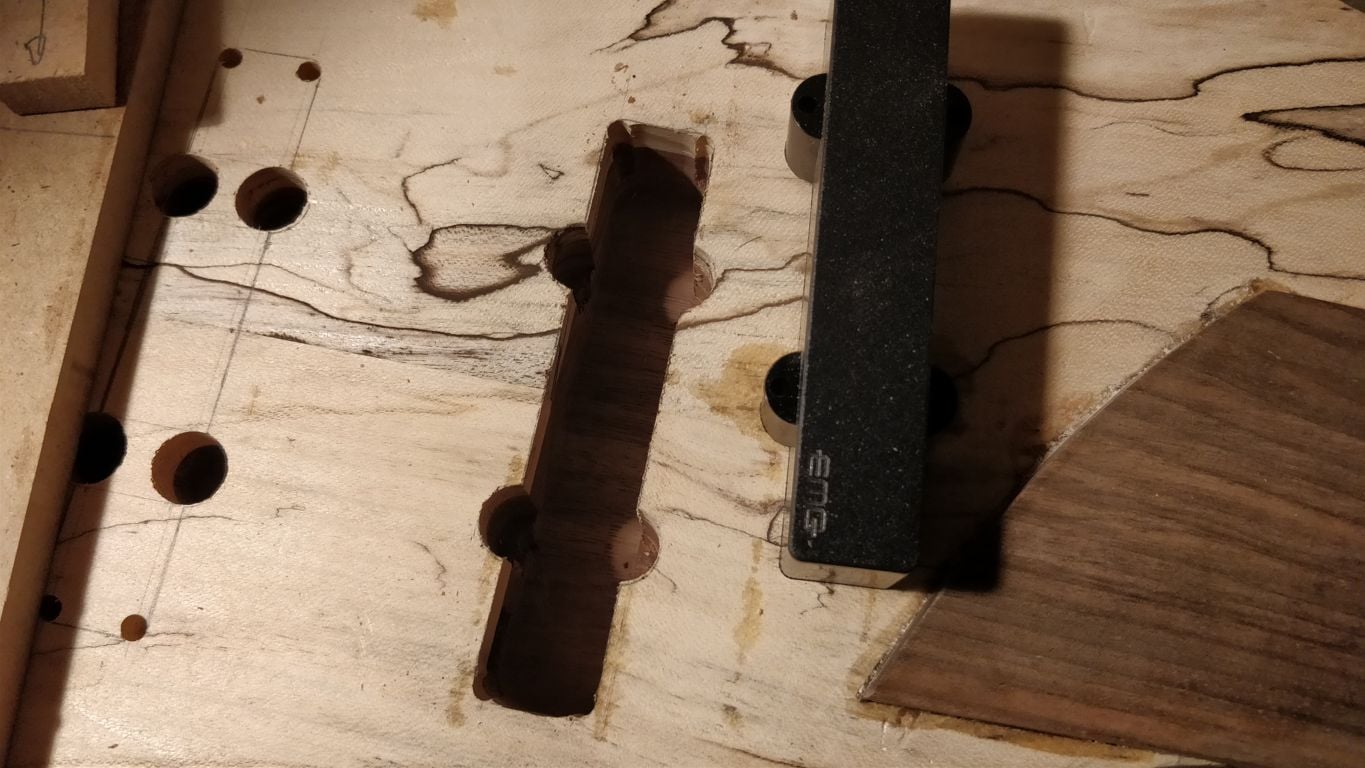
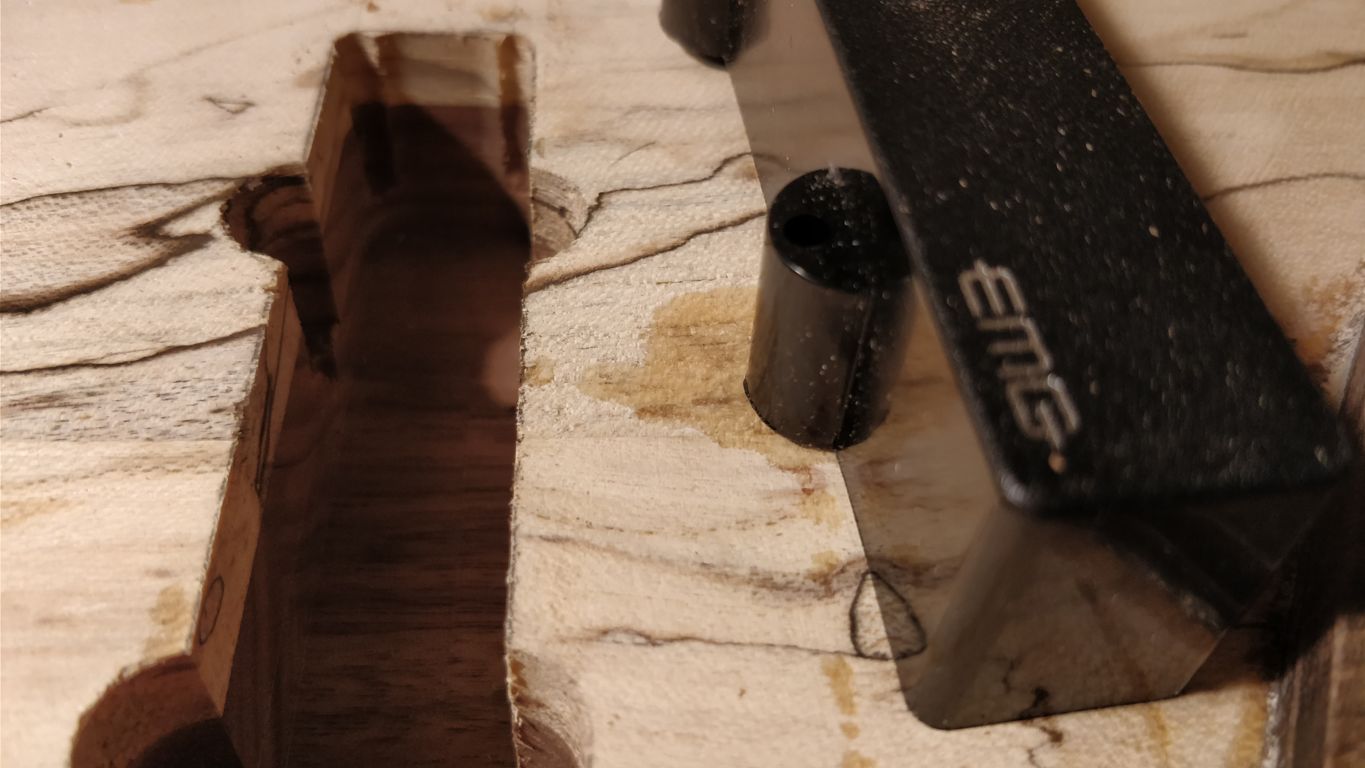
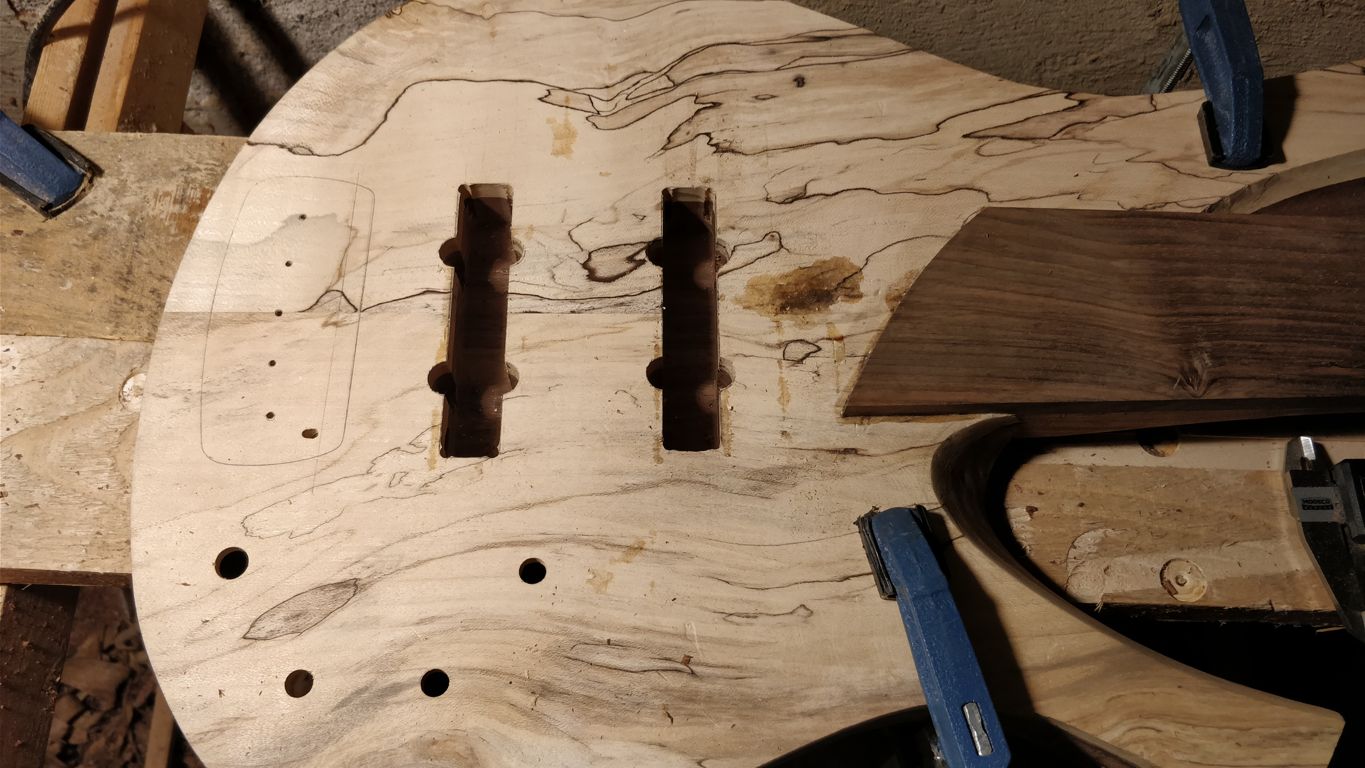
I used a chisel and a Dremel to fine tune the cavities. I missed the ears by half a mill on a couple of places, also I could have leave more slack for the pickups. Routing is more precise than chiselling out the cavities.. well at last la takes less time to make it near acceptable or perfect. In the end I got a fit, that is ok. Still will be working on those to make them close to perfect than good.
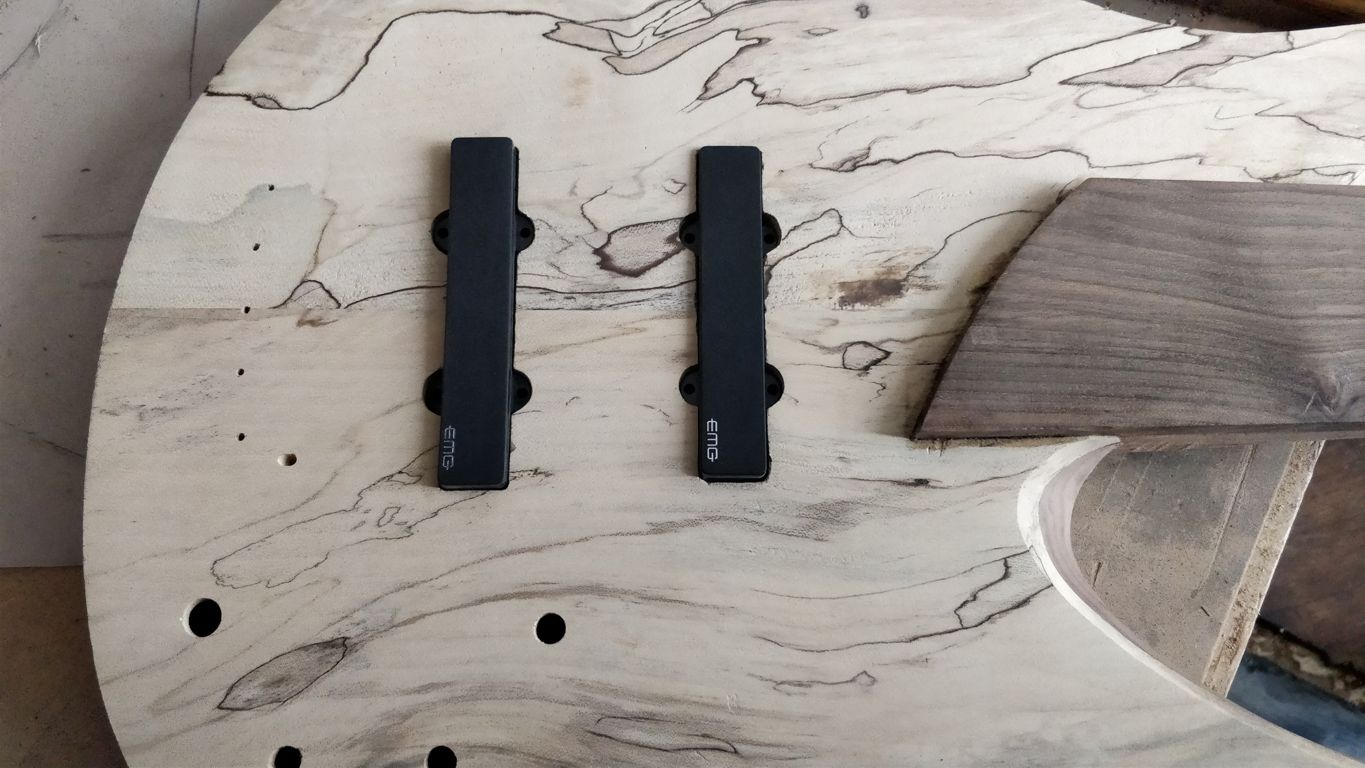
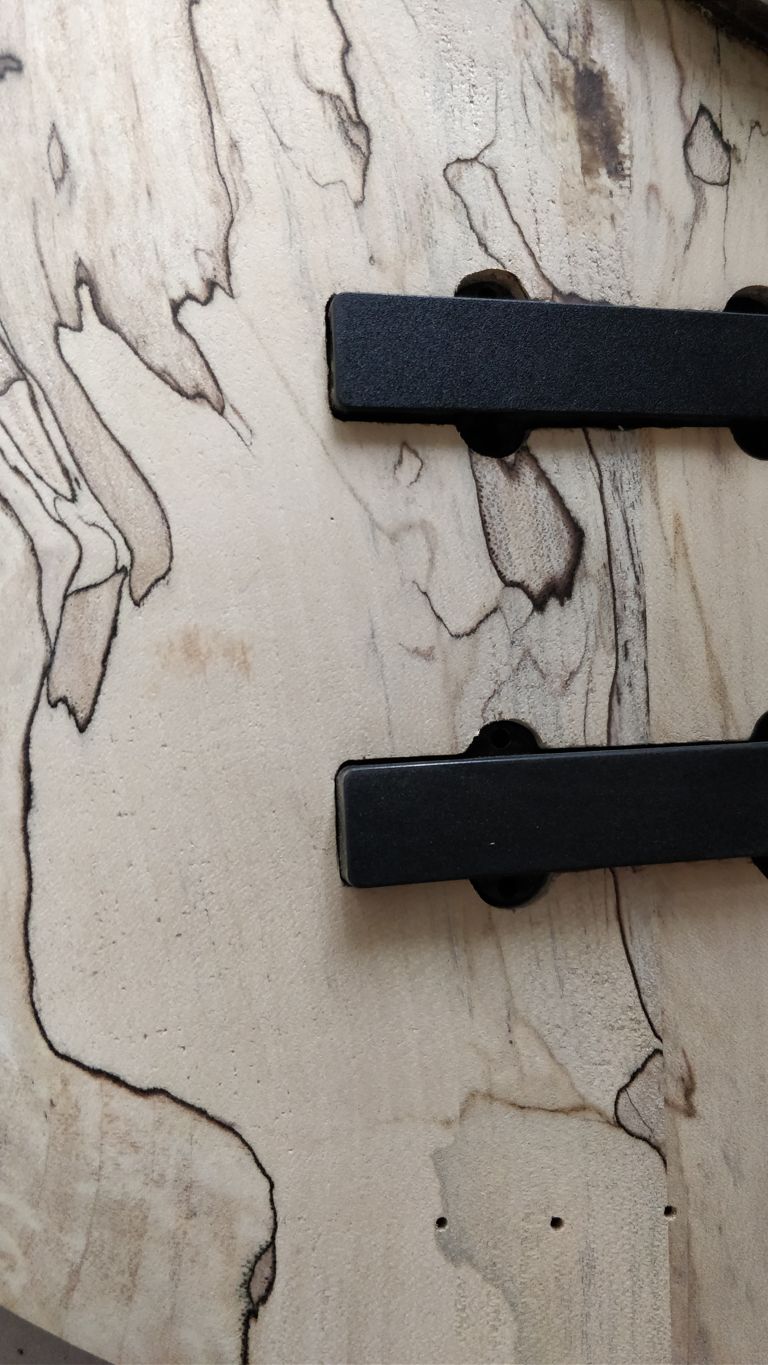
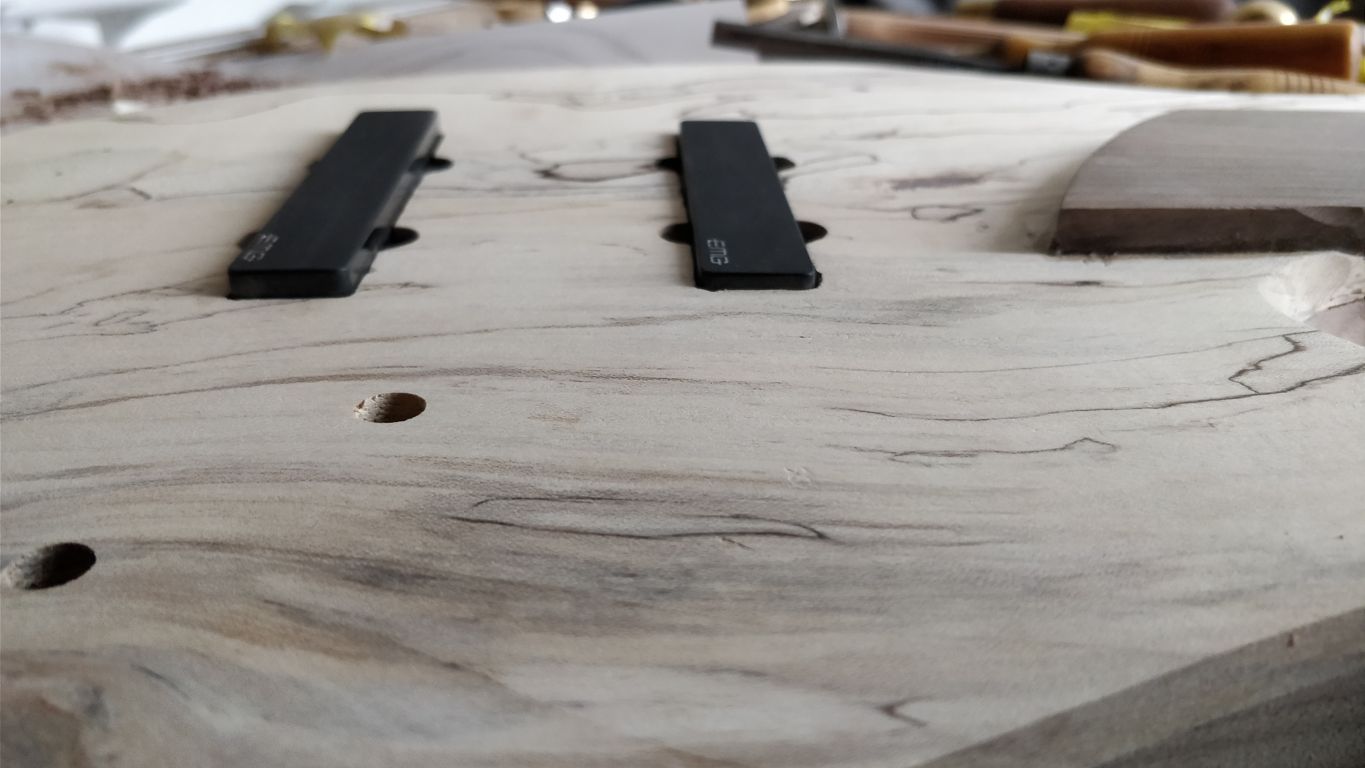
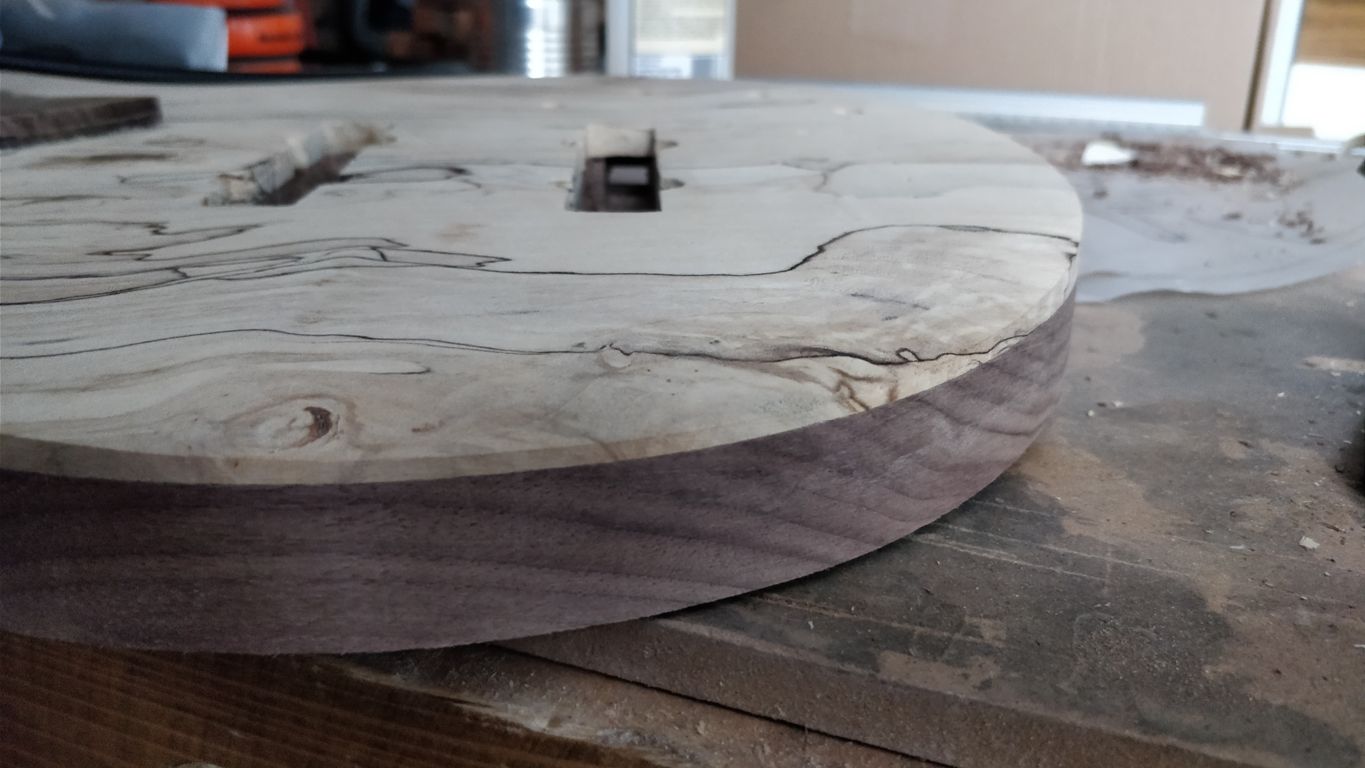
I've sunken the pickups fairly deep, as I wanted to have the eight amount of adjustment. I also started to sand. Corrected the neck profile, sanded the top, back and the sides to 120, sanded in the rib cavity and a shallow arm rest, nearly noticeable but perfectly useful:
I finished the day fixing a small chipout at the upper bout:
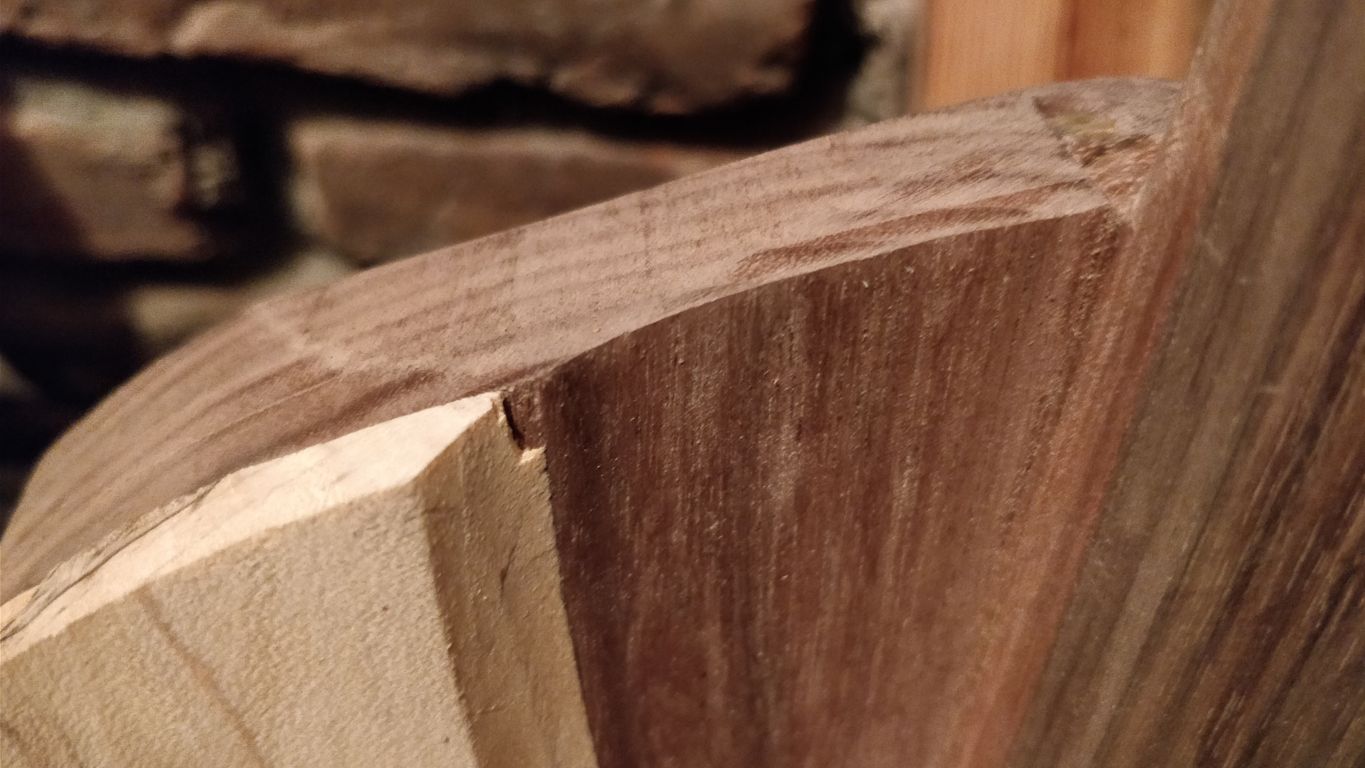
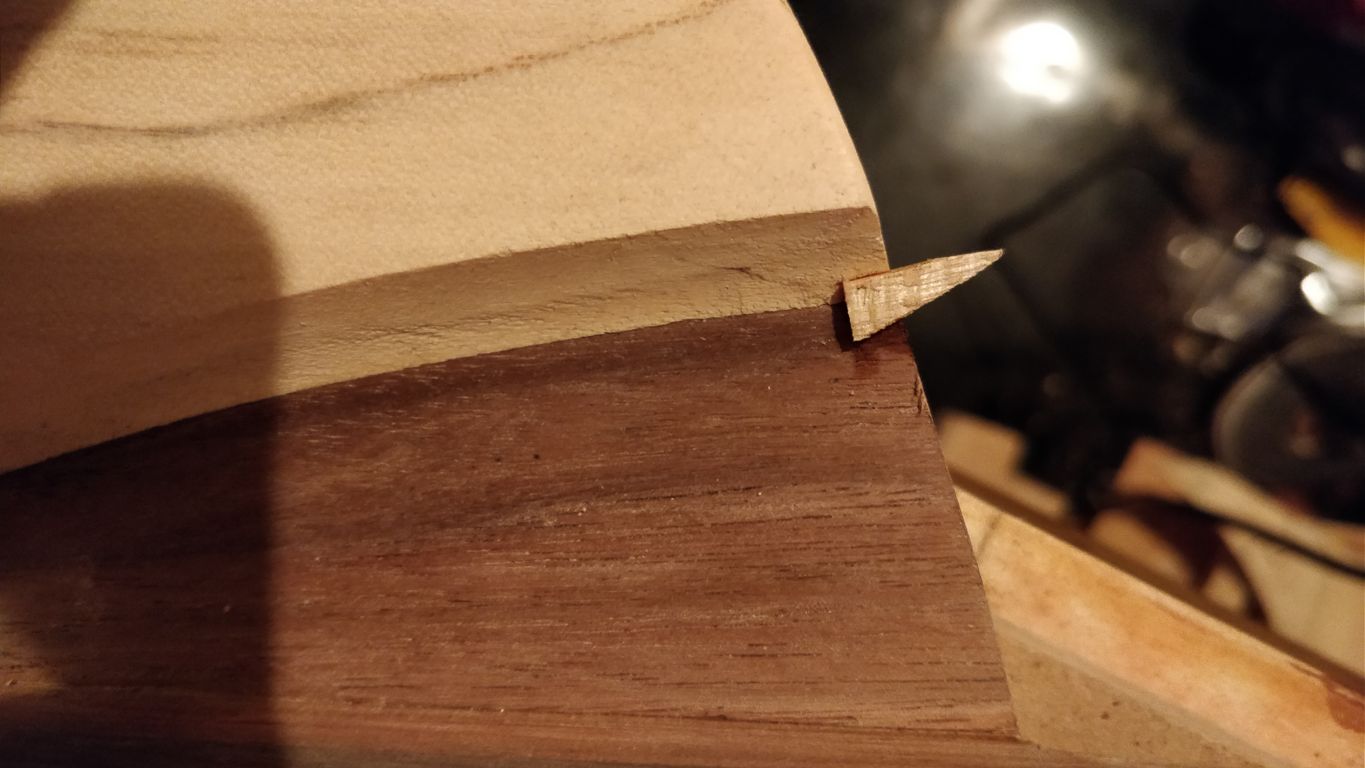
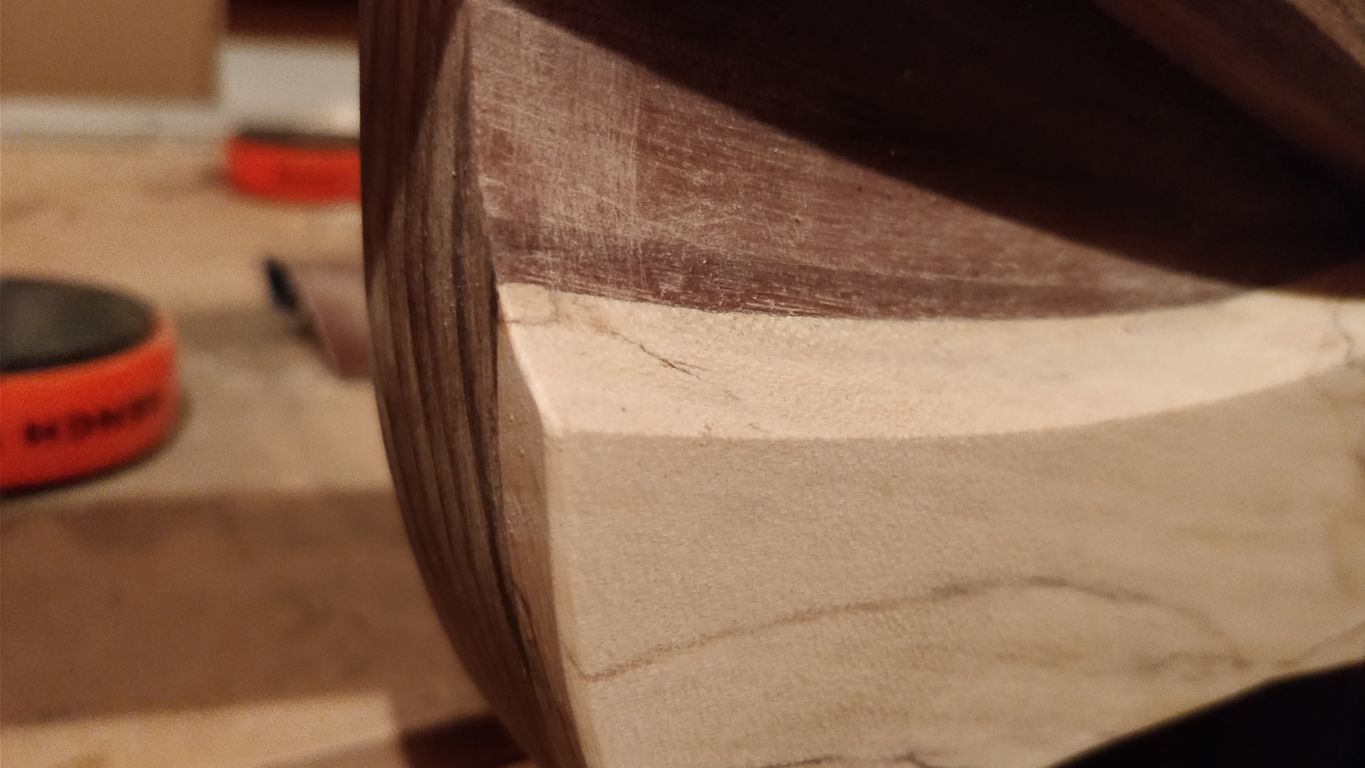
It should disappears under the finish.. well, nearly. Tired of the day, I made some chicken strips and poured myself a glass of wine. I'm done for today.
) I constructed the routing templates around simple straight lines, fitted the pickups to see if they match with some slack and moved on with the standard procedure: removed the waste with a forstner bit, than routed the cavities clean. I did one after the other. Some trimming was left to do afterwards in the cornersI used a chisel and a Dremel to fine tune the cavities. I missed the ears by half a mill on a couple of places, also I could have leave more slack for the pickups. Routing is more precise than chiselling out the cavities.. well at last la takes less time to make it near acceptable or perfect. In the end I got a fit, that is ok. Still will be working on those to make them close to perfect than good.
I've sunken the pickups fairly deep, as I wanted to have the eight amount of adjustment. I also started to sand. Corrected the neck profile, sanded the top, back and the sides to 120, sanded in the rib cavity and a shallow arm rest, nearly noticeable but perfectly useful:
I finished the day fixing a small chipout at the upper bout:
It should disappears under the finish.. well, nearly. Tired of the day, I made some chicken strips and poured myself a glass of wine. I'm done for today.
I'm so glad the last two days were so long, cause I could push through the sanding. Going over all the details, scraping everything clean, knocking of some sharp corners around the body, cleaning the neck and body joint, the headstock, all the curves here and there.. making the pickup cavities look decent at the edges and ears. That was a lot a lot.
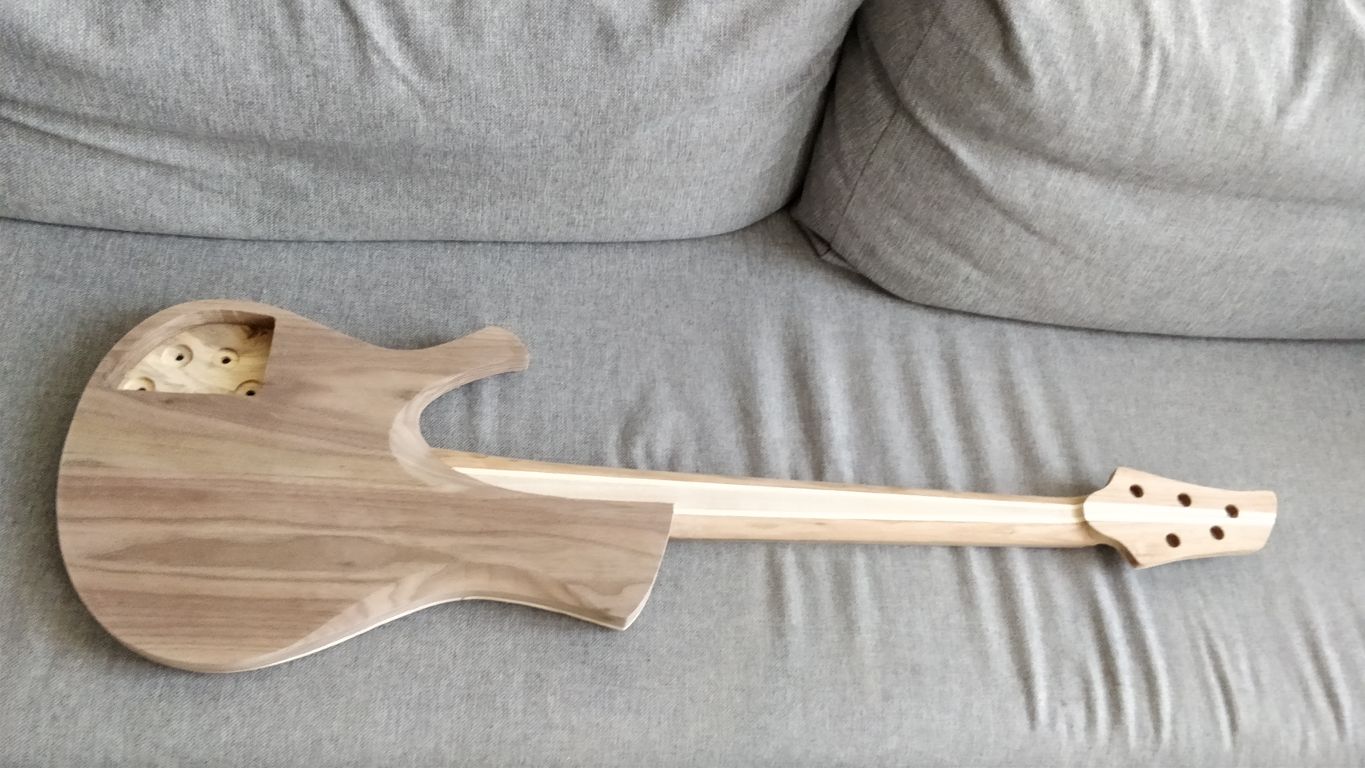
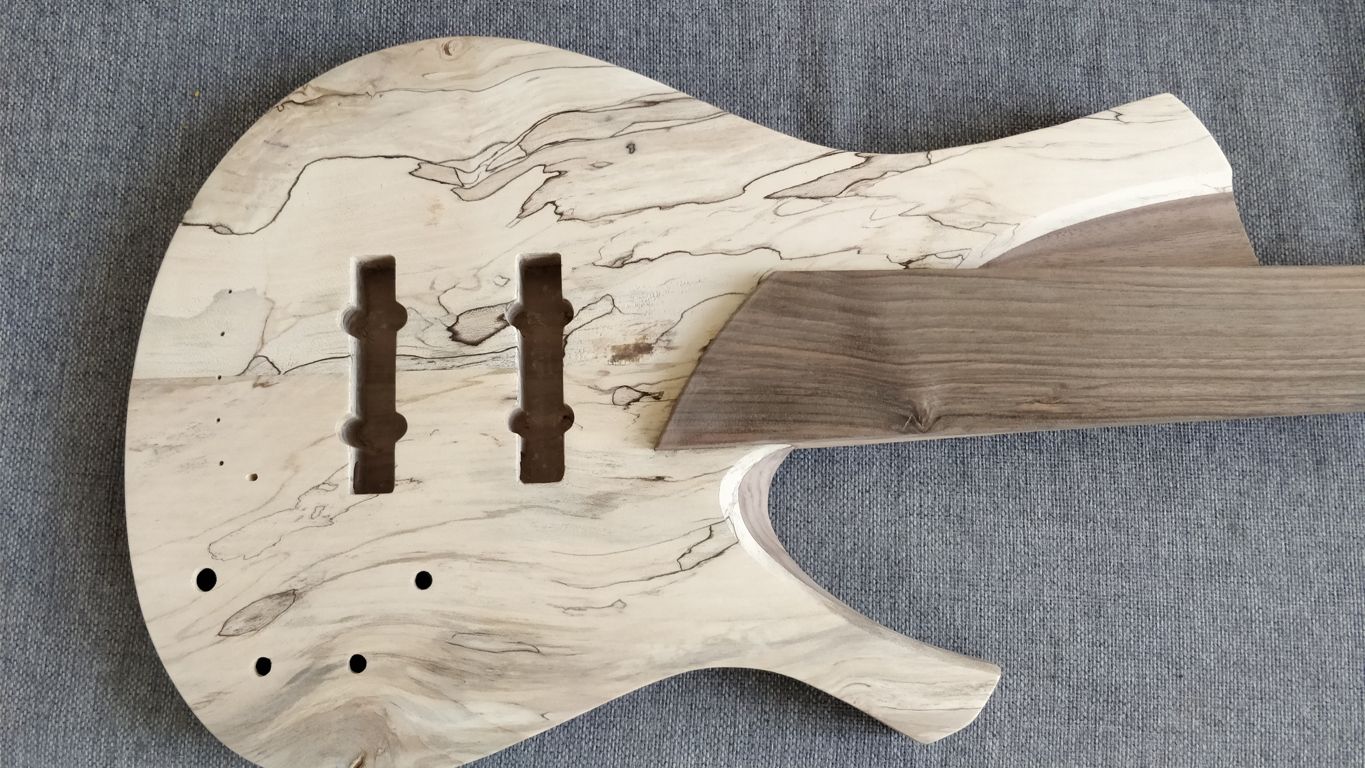
I even managed to steam out a few dents that I made somehow on the way. Anyway, I decided between the shellac and Tru oil in the favour of the latter and gave the body and neck a coat. Starting from the back, then the neck and sides and switching to the top.
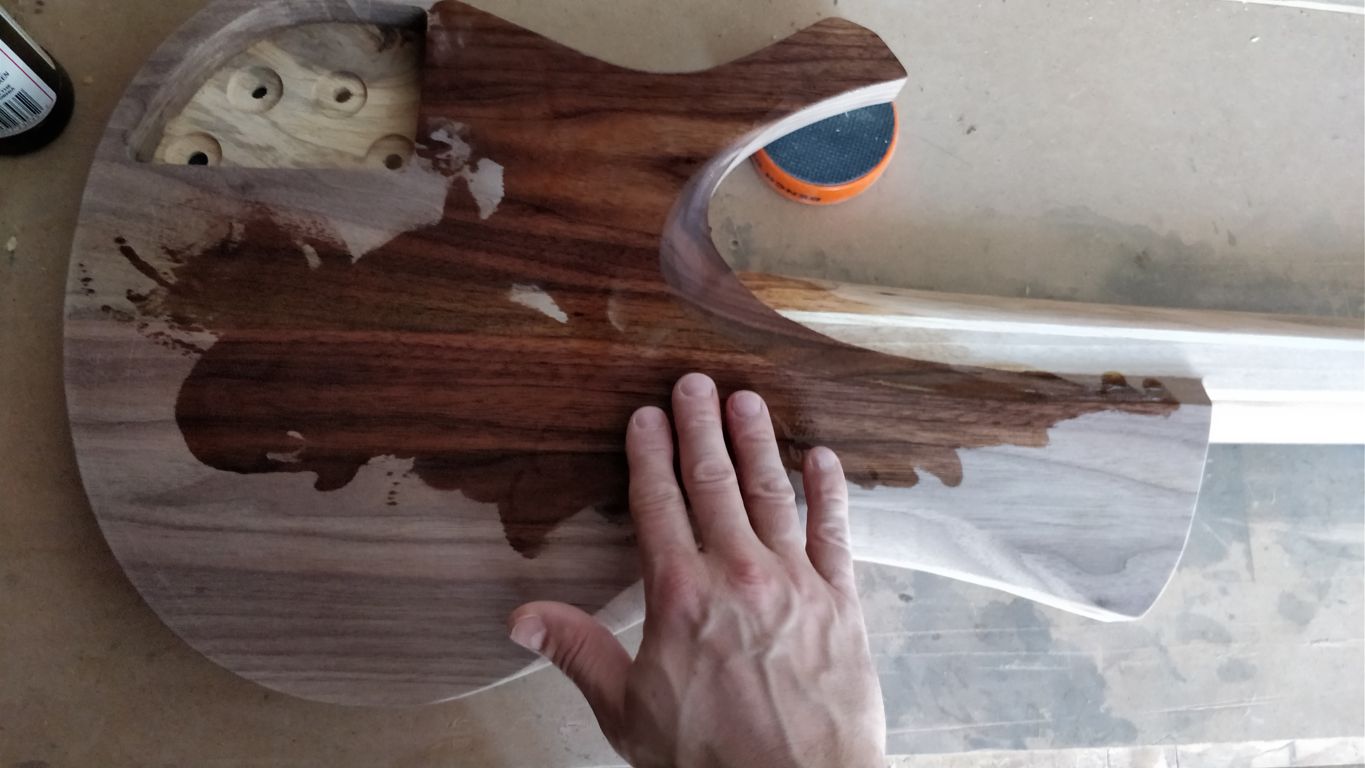
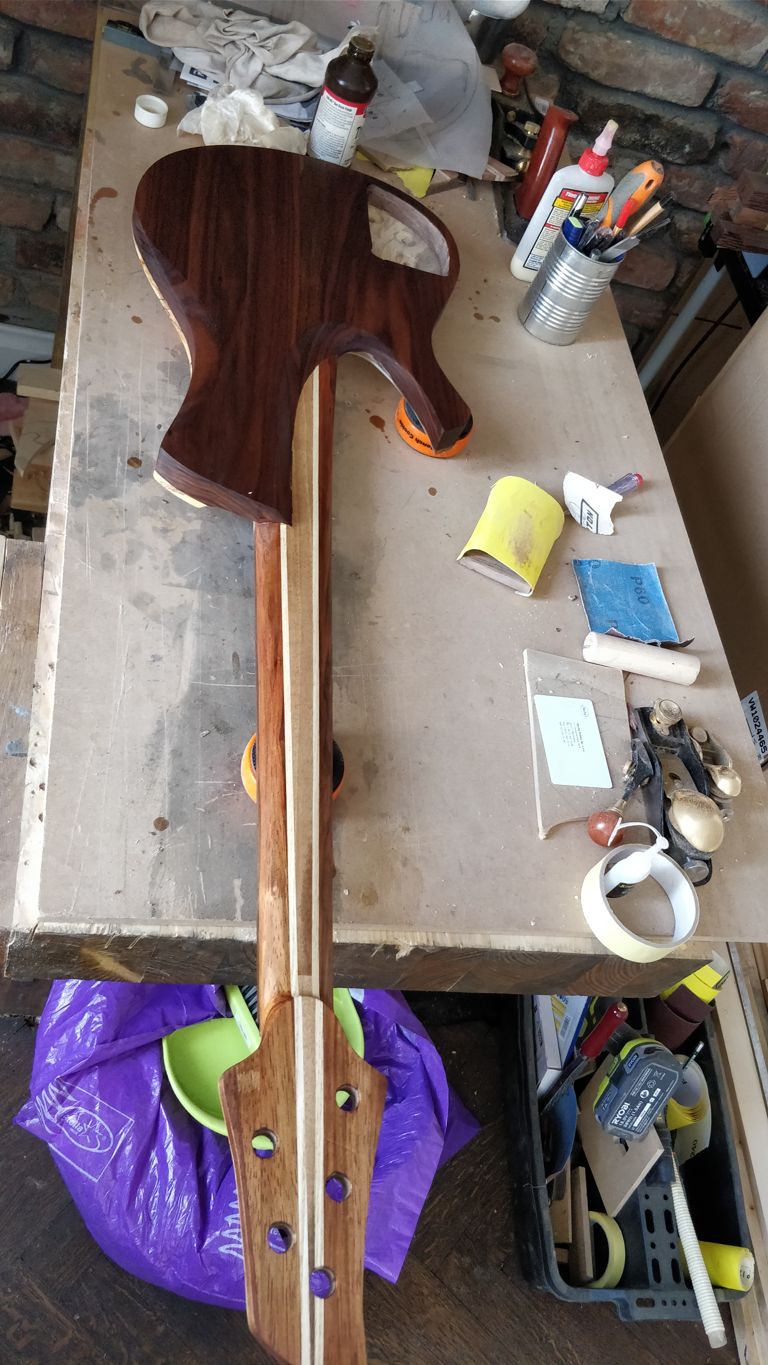
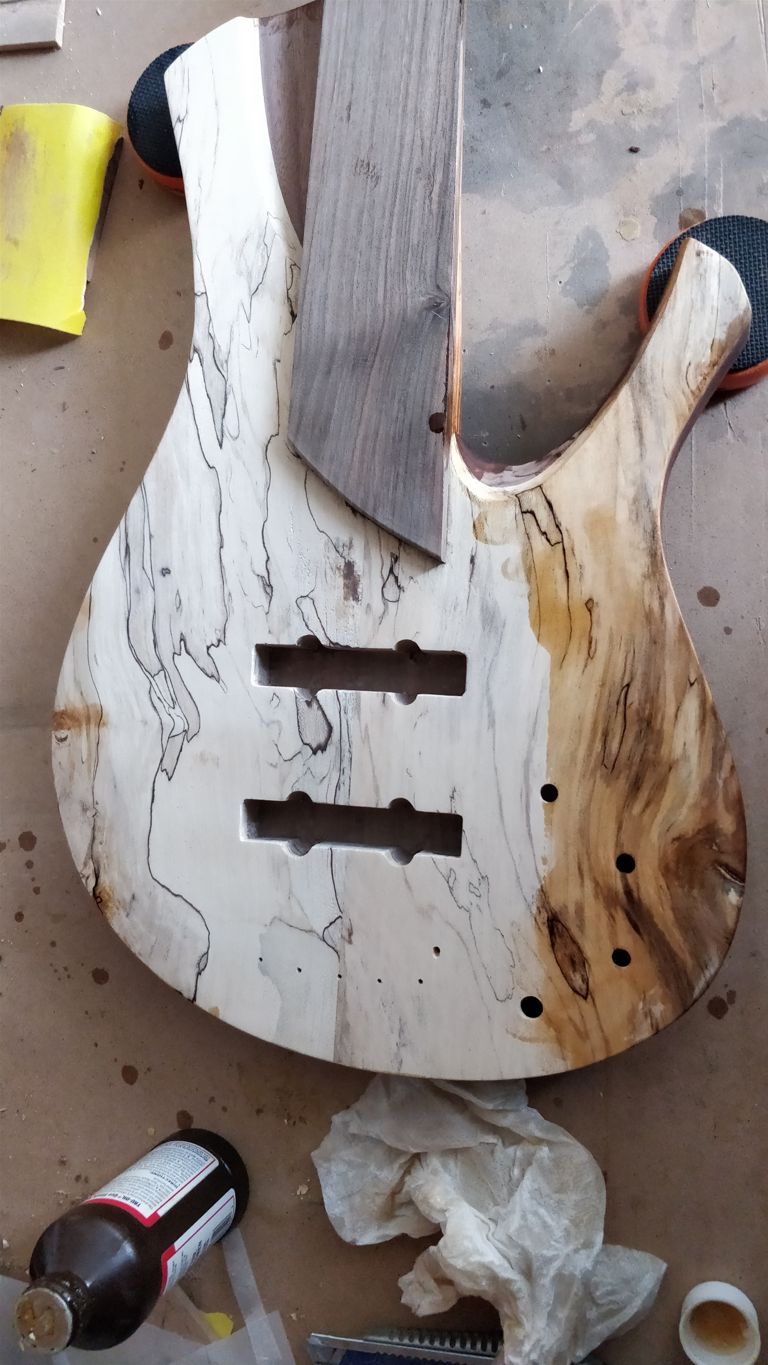
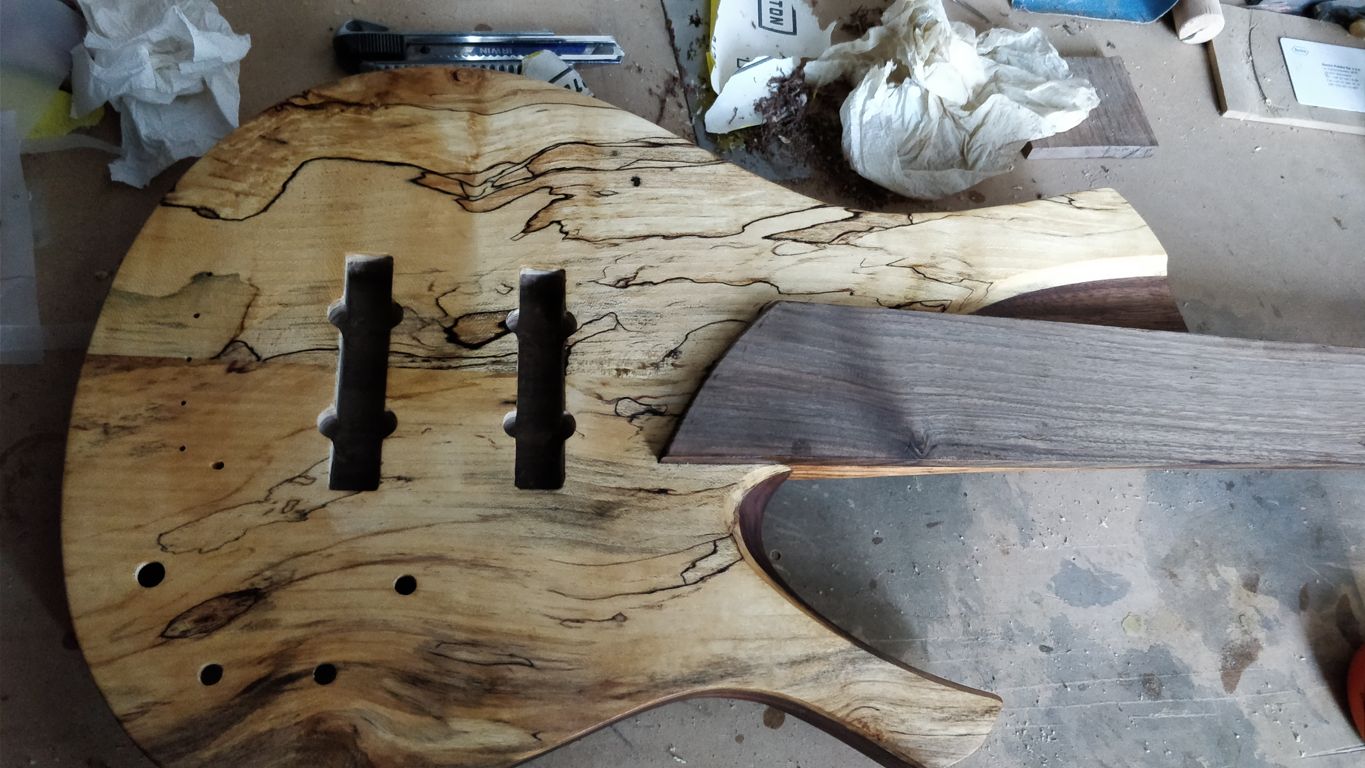
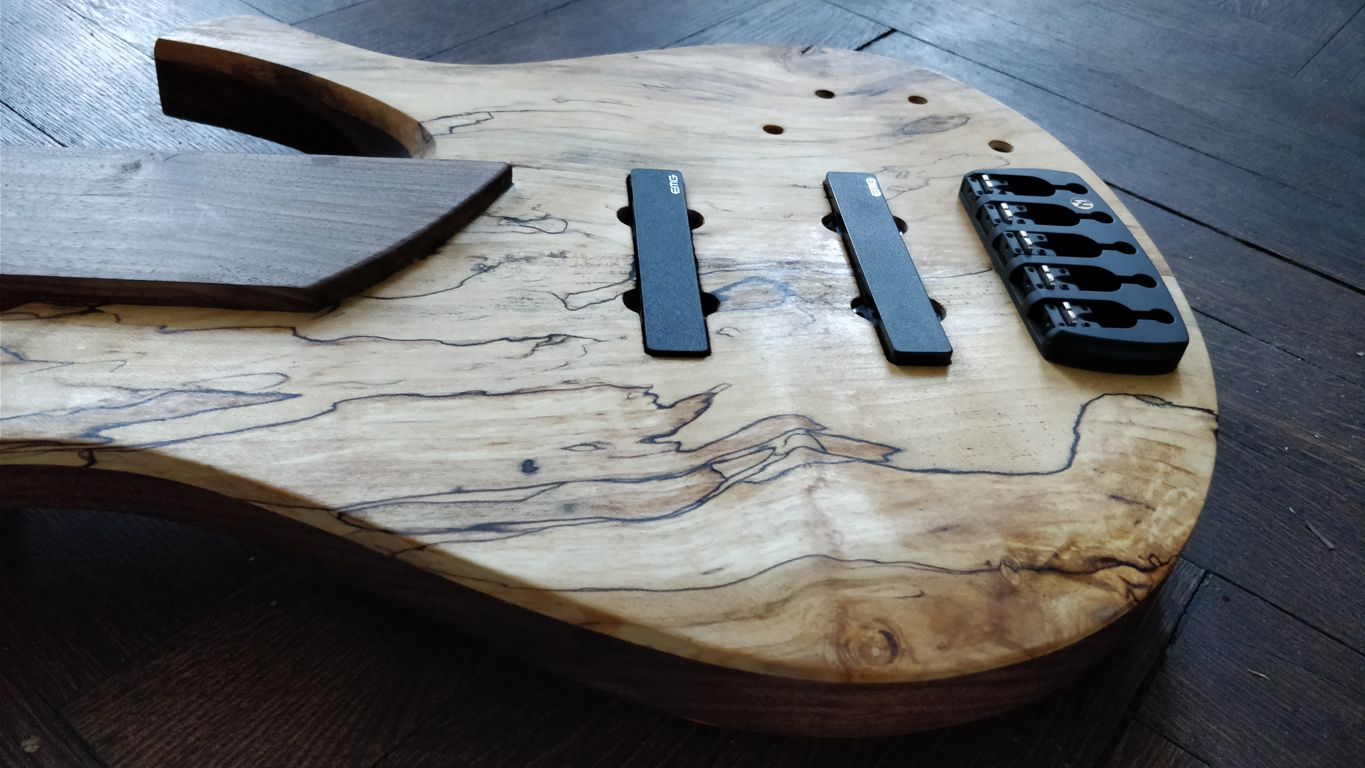
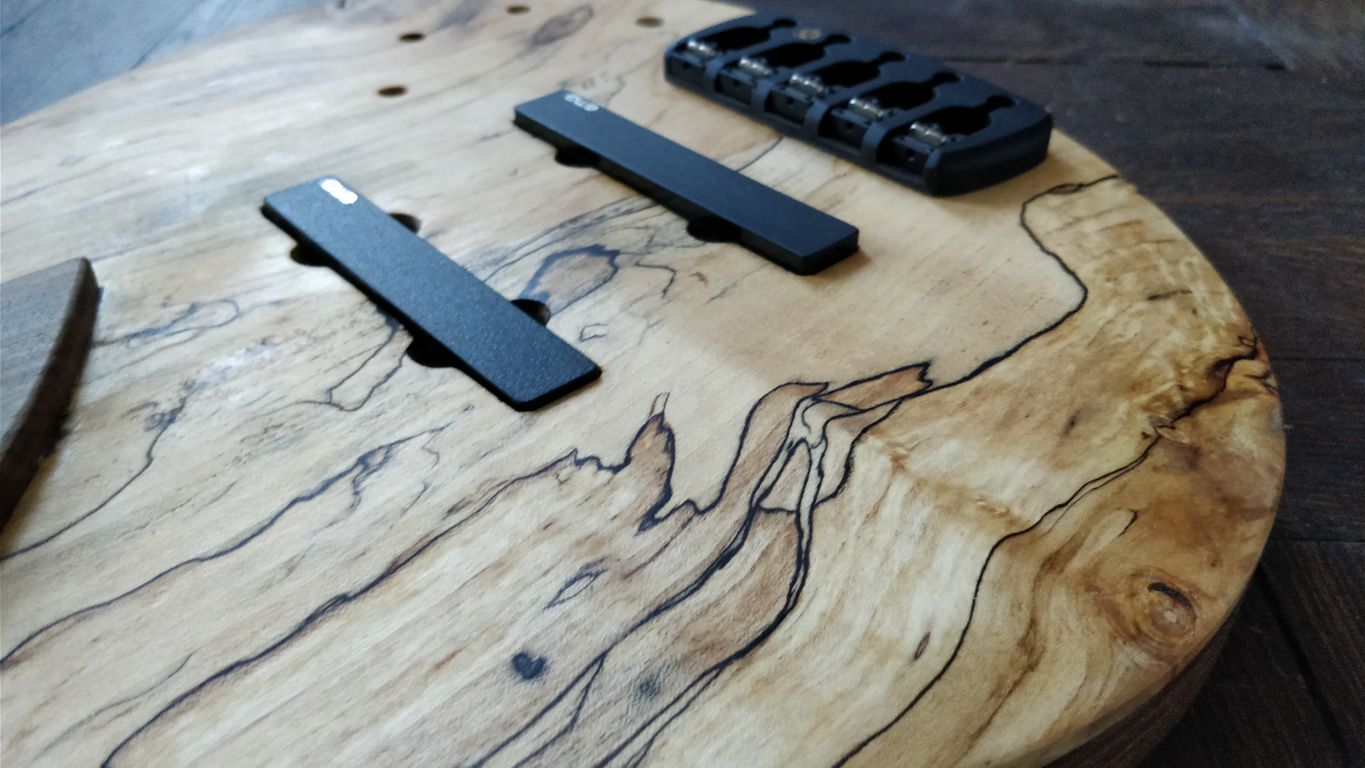
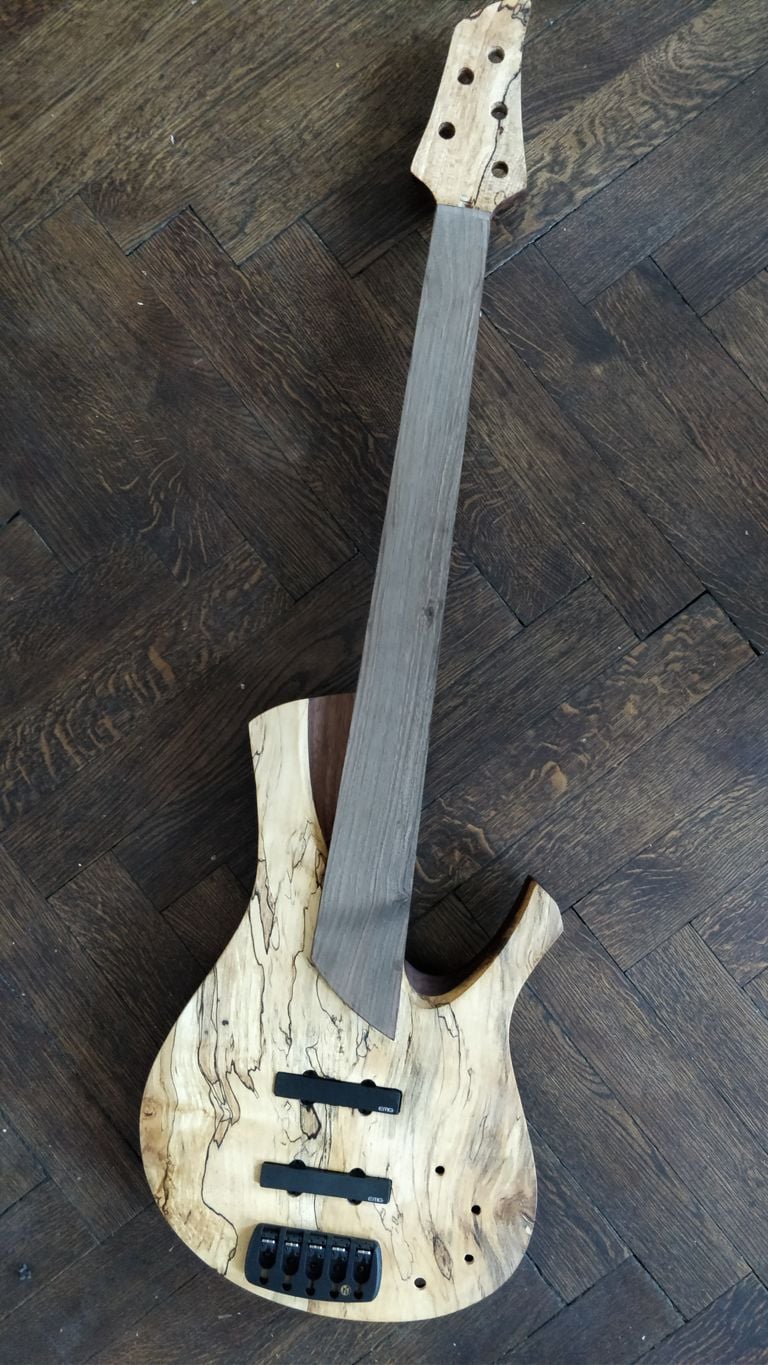
The Tru oil soaked in nearly immediately. I hoped for some more vivid pattern, it also darkened substantially around some more irregular areas. You can also see the joint on the top plate, as the color of the two wood pieces differ. That's what you get for flipping the wood as you wish and not going bookmatched. It may get a little more uniform still, as the oil spreads in the wood. After it dried I put in some parts to see how it comes together now, so here are some detailed pics:
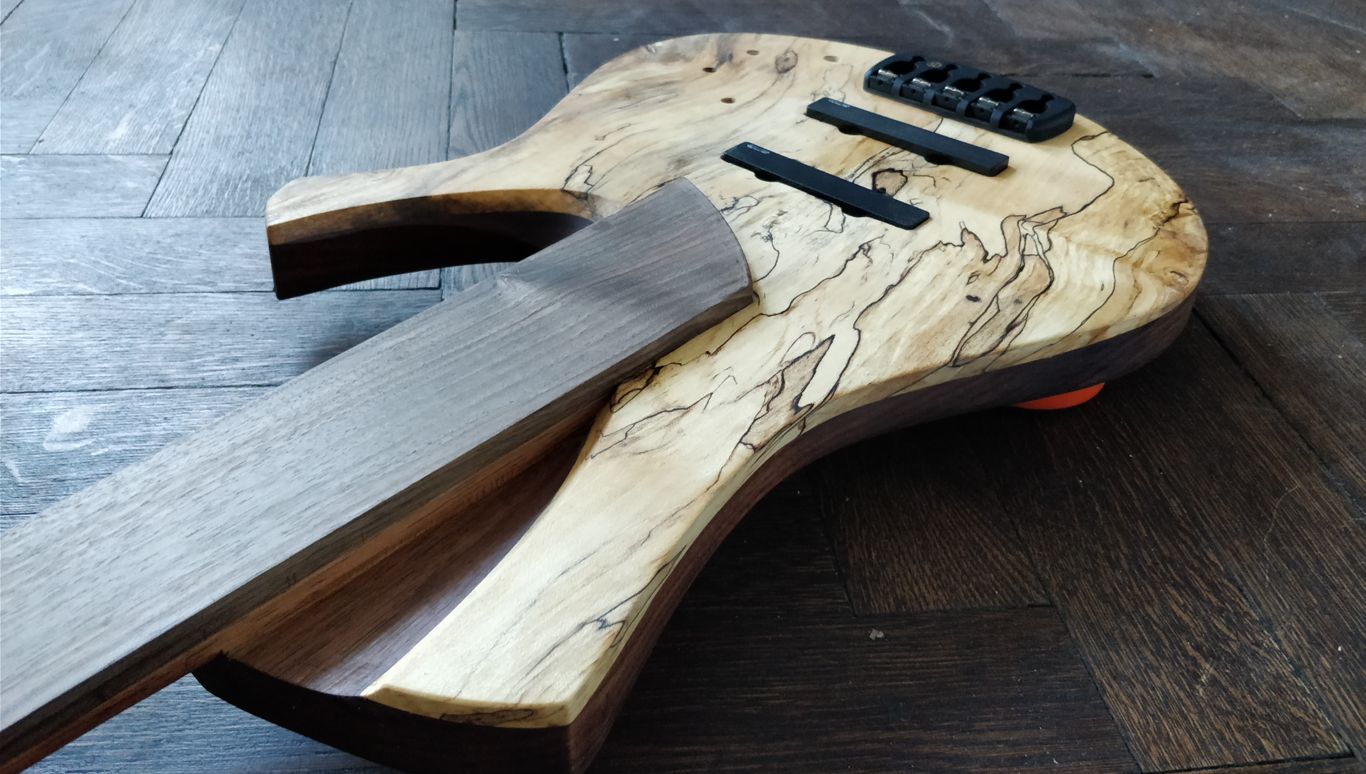
Good news are:
1. I will make it!
2. My girlfriend didn't kick me out yet (she is the loveliest and most patient person I've met! )
The bad news is one - there is still so much to do! I'm gluing up some material for the knobs, I also have to make the back cover, finish up the fingerboard ( I will probably go with @Jisch 's method of CA coating), make a nut out of ebony, finish the body and assemble everything.
I've read some threads about wipe on poly on Tru oil, are there any cons of it? I actually thought of a more durable finish than Tru oil this time.
I even managed to steam out a few dents that I made somehow on the way. Anyway, I decided between the shellac and Tru oil in the favour of the latter and gave the body and neck a coat. Starting from the back, then the neck and sides and switching to the top.
The Tru oil soaked in nearly immediately. I hoped for some more vivid pattern, it also darkened substantially around some more irregular areas. You can also see the joint on the top plate, as the color of the two wood pieces differ. That's what you get for flipping the wood as you wish and not going bookmatched. It may get a little more uniform still, as the oil spreads in the wood. After it dried I put in some parts to see how it comes together now, so here are some detailed pics:
Good news are:
1. I will make it!
2. My girlfriend didn't kick me out yet (she is the loveliest and most patient person I've met!
)The bad news is one - there is still so much to do! I'm gluing up some material for the knobs, I also have to make the back cover, finish up the fingerboard ( I will probably go with @Jisch 's method of CA coating), make a nut out of ebony, finish the body and assemble everything.
I've read some threads about wipe on poly on Tru oil, are there any cons of it? I actually thought of a more durable finish than Tru oil this time.
Attachments


That coat of oil really made the different walnuts pop! That is amaze-z-zing!
- Apr 18, 2008
- 16,015
- 1
- 31,728
- Disclosures
- I'm highly opinionated and extremely self-assured
Wowzers, that looks killer! How many votes do I get again?


Nice!! I love the way those dark lines pop on the top! The TruOil looks great. Perhaps Minwax water based oil-modified poly would be a good hard top coat... I hadn’t used it yet but have it.
Bruce suggested it to me on a thread and I’m giving it a go on my Neck. And West Systems Epoxy on my body.
Bruce suggested it to me on a thread and I’m giving it a go on my Neck. And West Systems Epoxy on my body.

That is awesome. Congratulations so far!!
Ok, knobs time. 
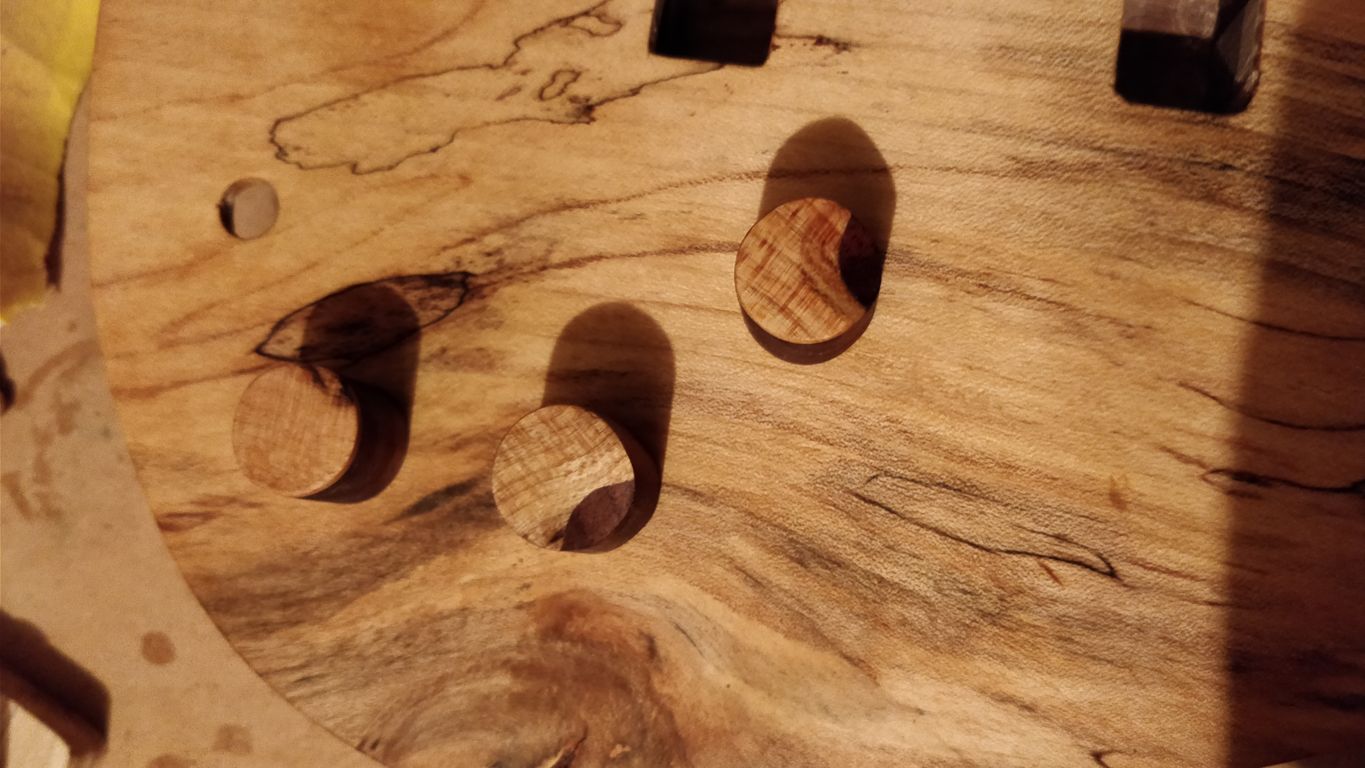
I have to say, I'm not very impressed with my knob making skills. It's probably a thing of proportions or maybe it's about the right concept. Anyway, I found myself sanding like crazy to get those done, then I started comparing them to standard knobs. The problem is, I don't like either. I guess I would expect the knobs for that bass to be tall and slim, black if possible, or just dark. They seem to be too prominent either way. Or maybe I'm just not used to such tall objects on a body that I've seen to be flat so far? I don't know Anyway, this is a rally between factory and handmade knobs, and none seem to win so far ))
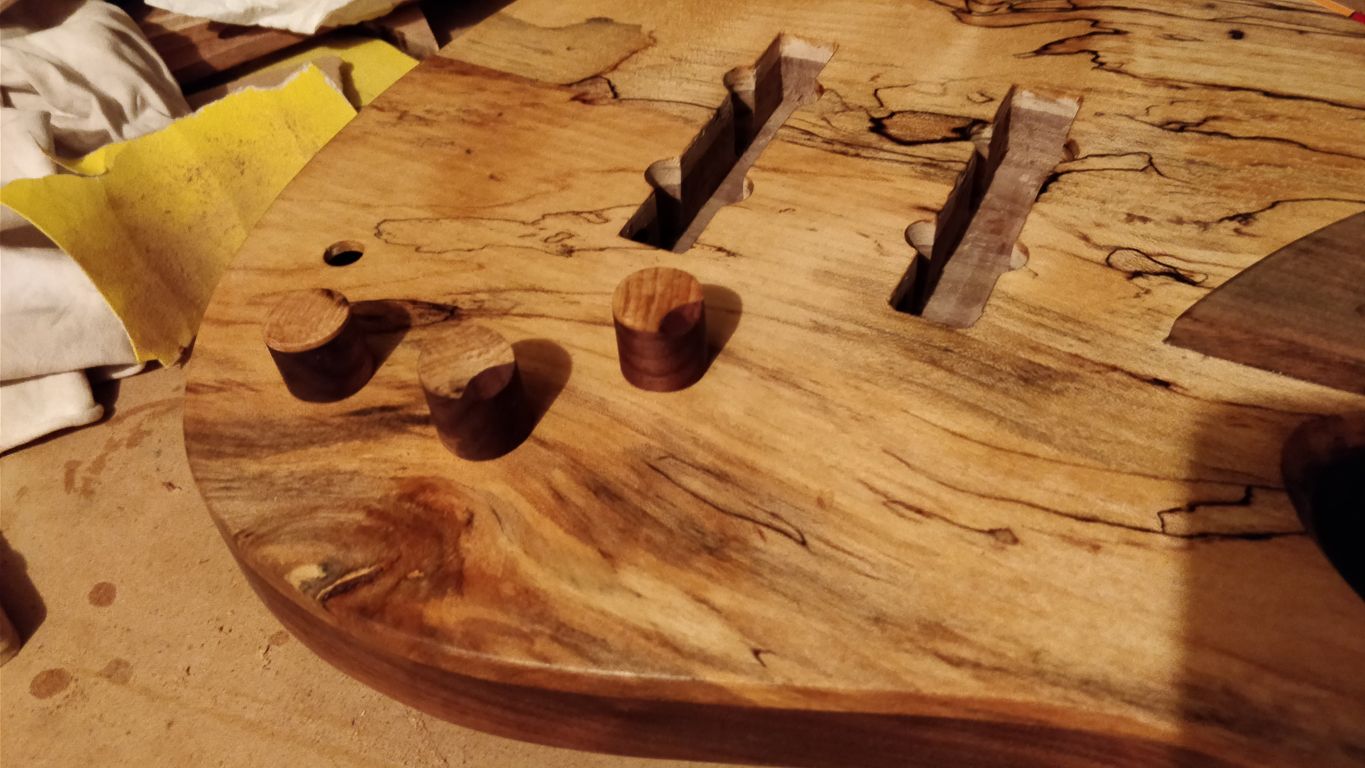
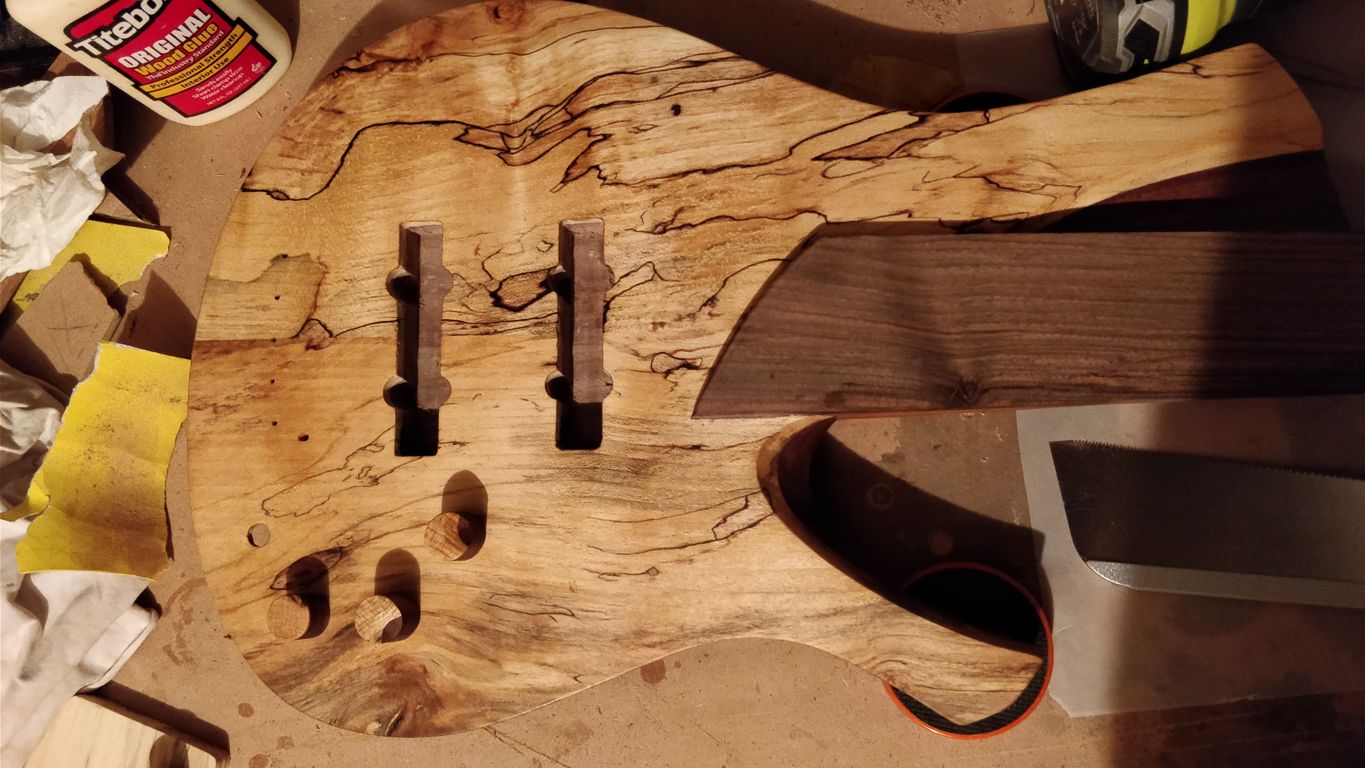
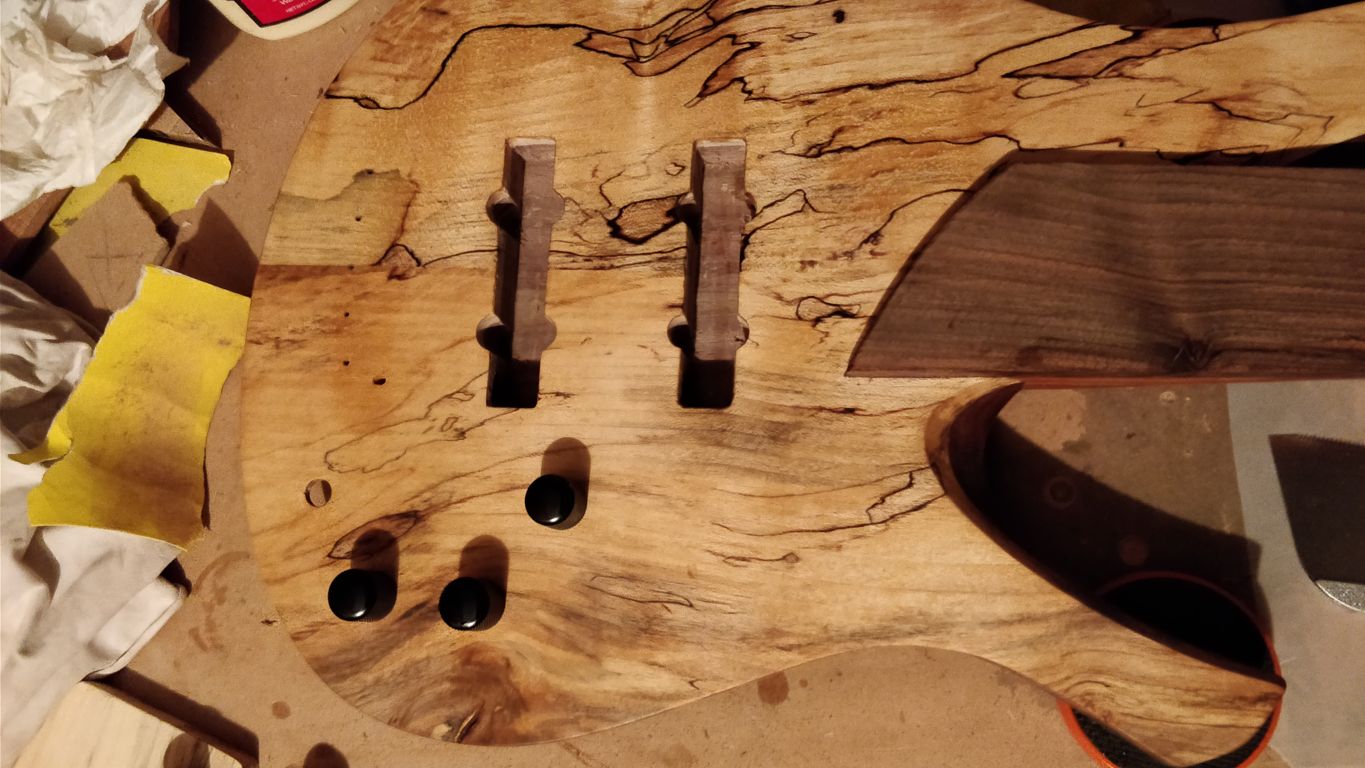
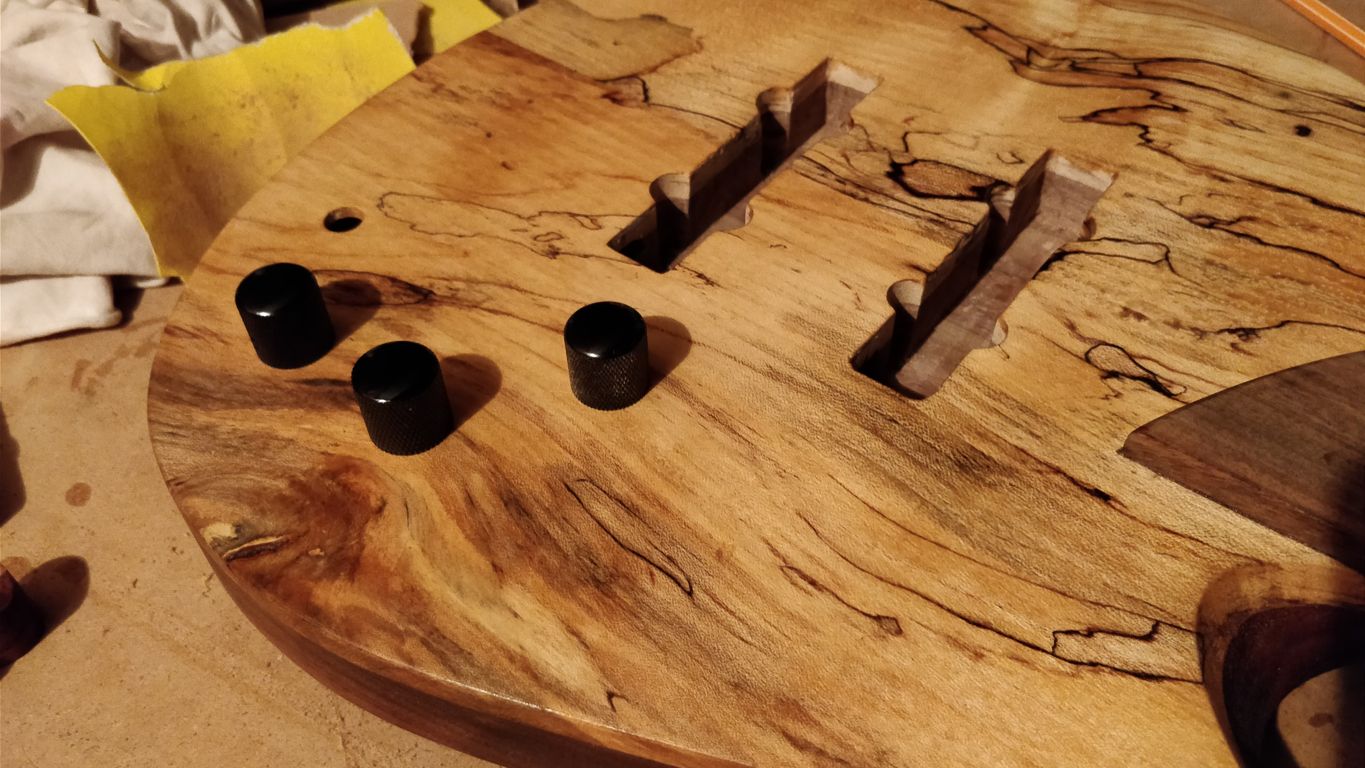
Sorry for the dark pics, One of the Lightbulbs just burned down and I don't have a replacement at hand, but you get the idea Geronimo!
I have to say, I'm not very impressed with my knob making skills. It's probably a thing of proportions or maybe it's about the right concept. Anyway, I found myself sanding like crazy to get those done, then I started comparing them to standard knobs. The problem is, I don't like either. I guess I would expect the knobs for that bass to be tall and slim, black if possible, or just dark. They seem to be too prominent either way. Or maybe I'm just not used to such tall objects on a body that I've seen to be flat so far? I don't know
Anyway, this is a rally between factory and handmade knobs, and none seem to win so far ))Sorry for the dark pics, One of the Lightbulbs just burned down and I don't have a replacement at hand, but you get the idea
Geronimo!
Last edited:
What he said ^Mmmmmn.... wood knobs for sure
Latest posts
-
-

-
 The Bartolini BH2: Why Does It Sound So Dark? My EHB1265MS Experiments
- Latest: Riff Ranger
-
