• TalkBass has been independent since 1998. Add your voice.
    Create a free account to reply to discussions, view embedded media, and browse with fewer display ads.
    Join freeLog in
    Want zero display ads or expanded classifieds tools? Compare plans.

Winter Build Off 2018 - WalnutKarma Bass

Thank you! :)

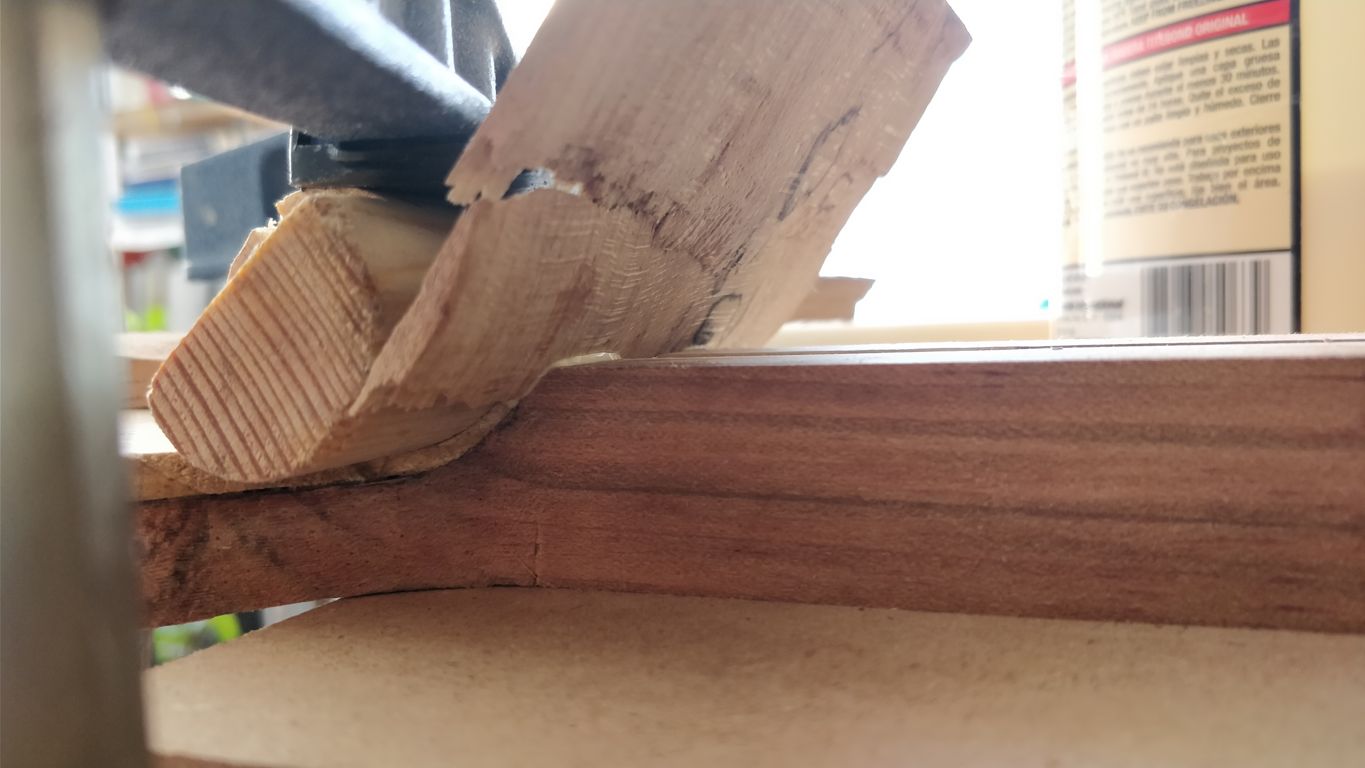
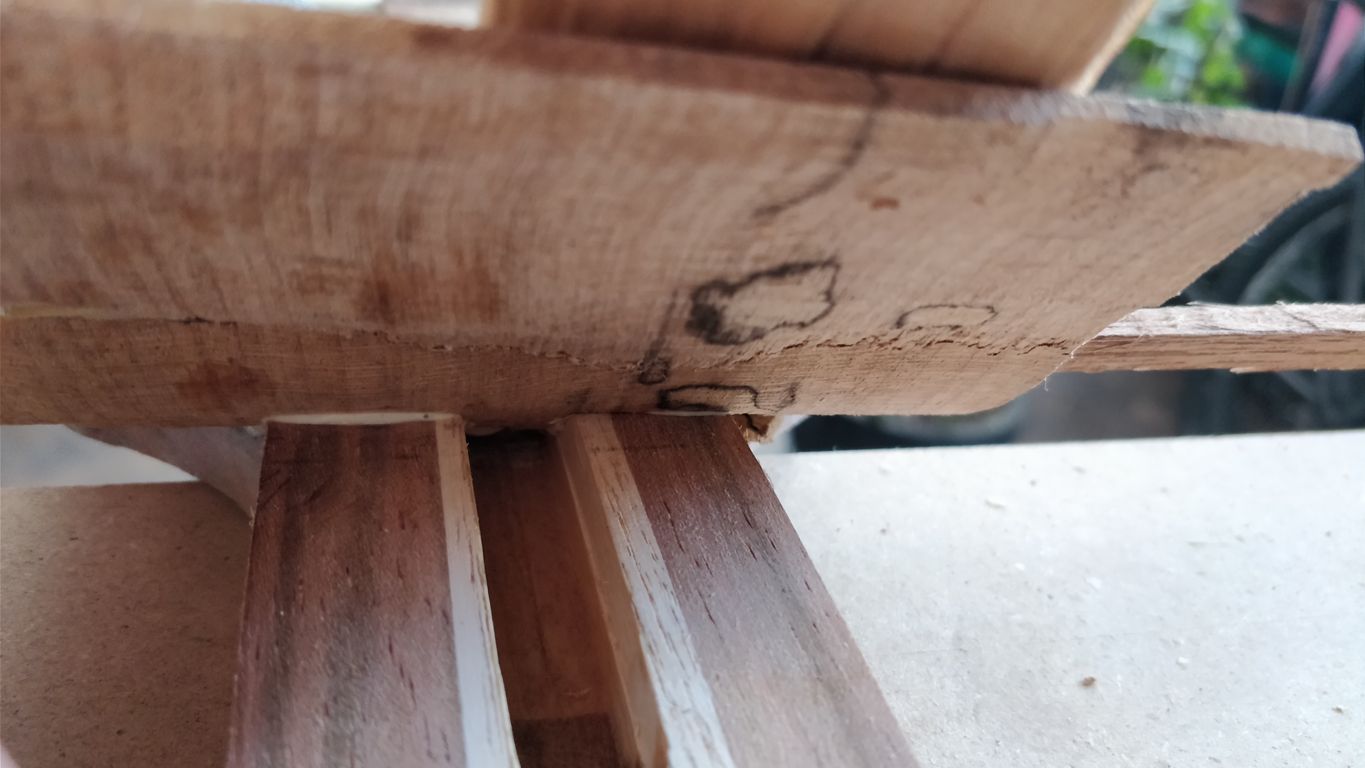
Well, the story continues.. after removing the clamps, this is what I had:
IMG_20180225_085145-01.jpeg

IMG_20180225_084529-01.jpeg


I know it doesn't look very promising, right? But the joint was great and the wood did follow the curve perfectly. That's a good starting point. So I decided to move on and tried on the remaining piece. I remember it matched together much better when it was hot and flexy, so I steamed the remaining piece and glued it in while still hot, letting it dry until it was ready to handle further:

IMG_20180225_085427-01.jpeg

IMG_20180225_090603-01.jpeg

IMG_20180225_090615-01.jpeg

IMG_20180225_090641-01.jpeg


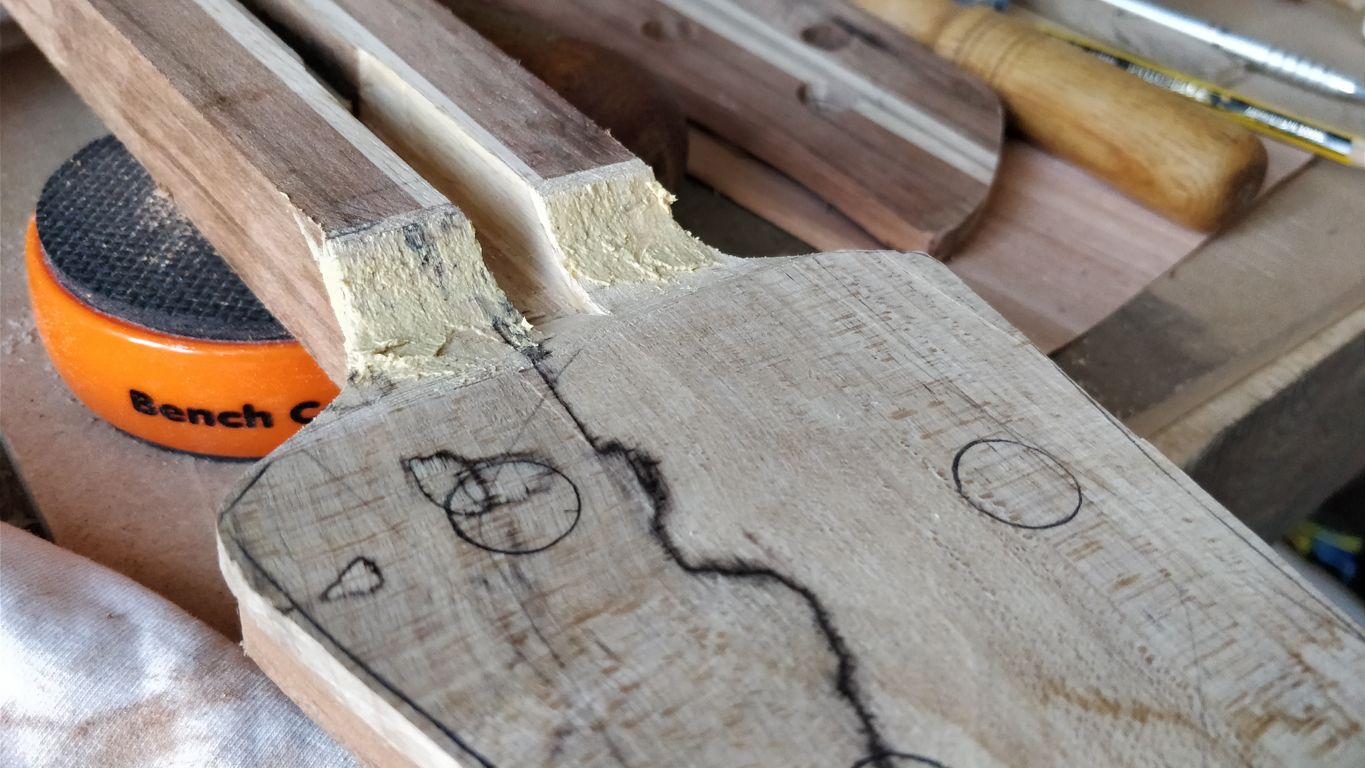
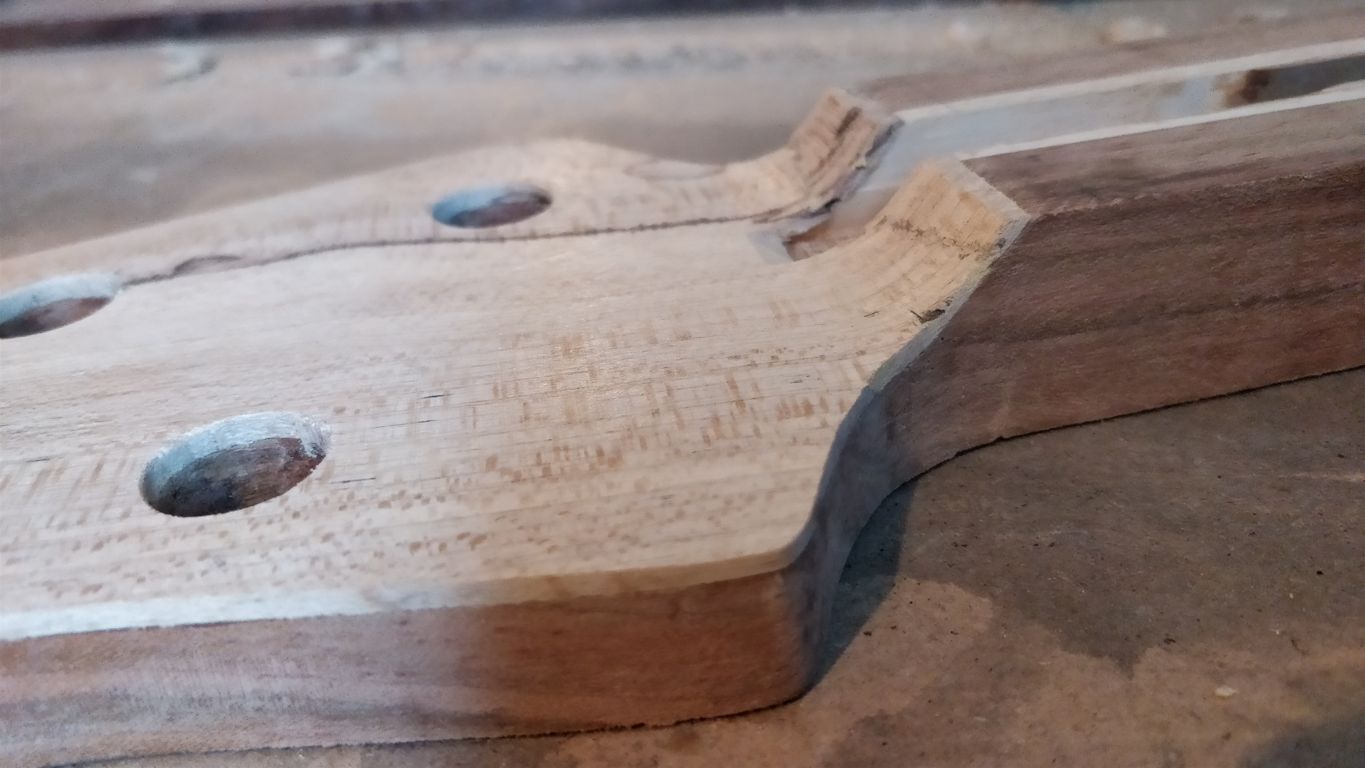
The clamping was tricky but worked fine. I was worried about the joint - if it will be tight enough and if I can make it invisible from the sides and the top. This is what I found after unclamping it:

IMG_20180225_143111-01.jpeg


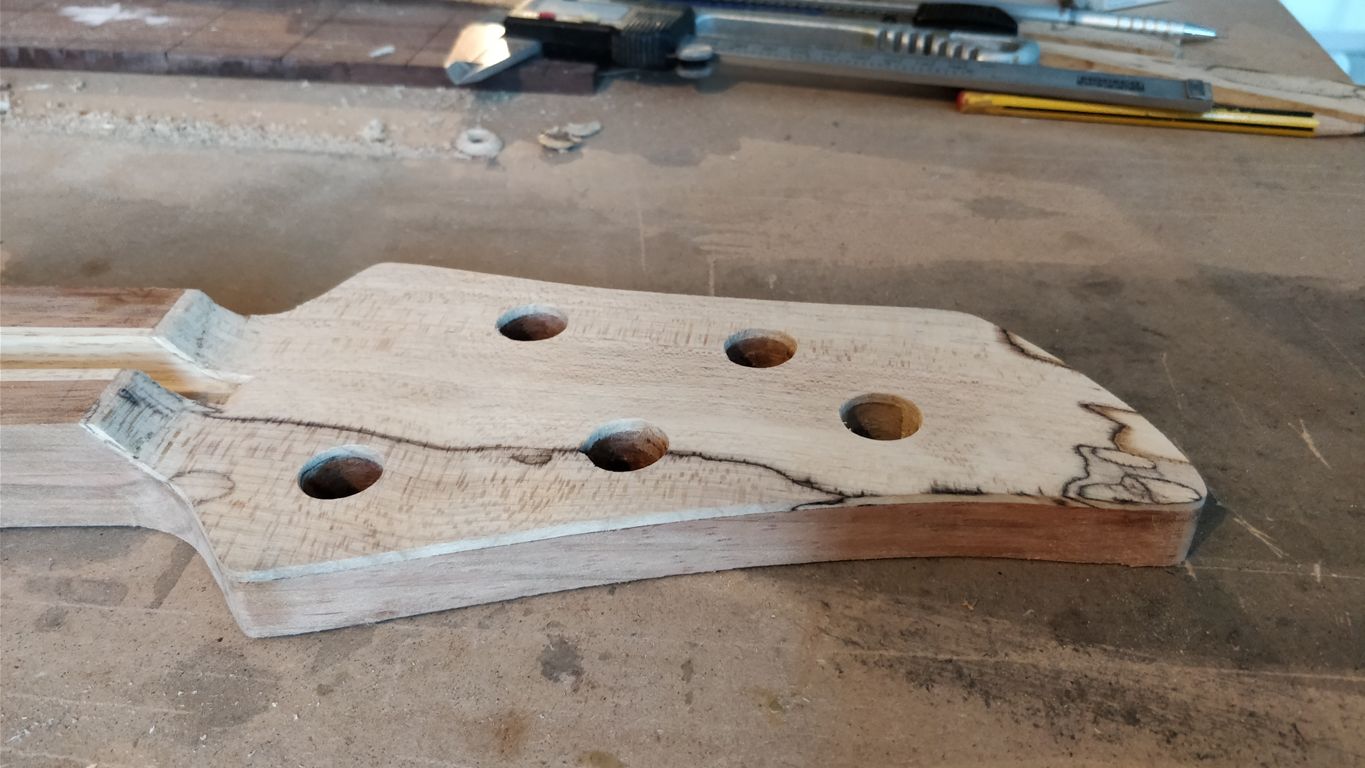
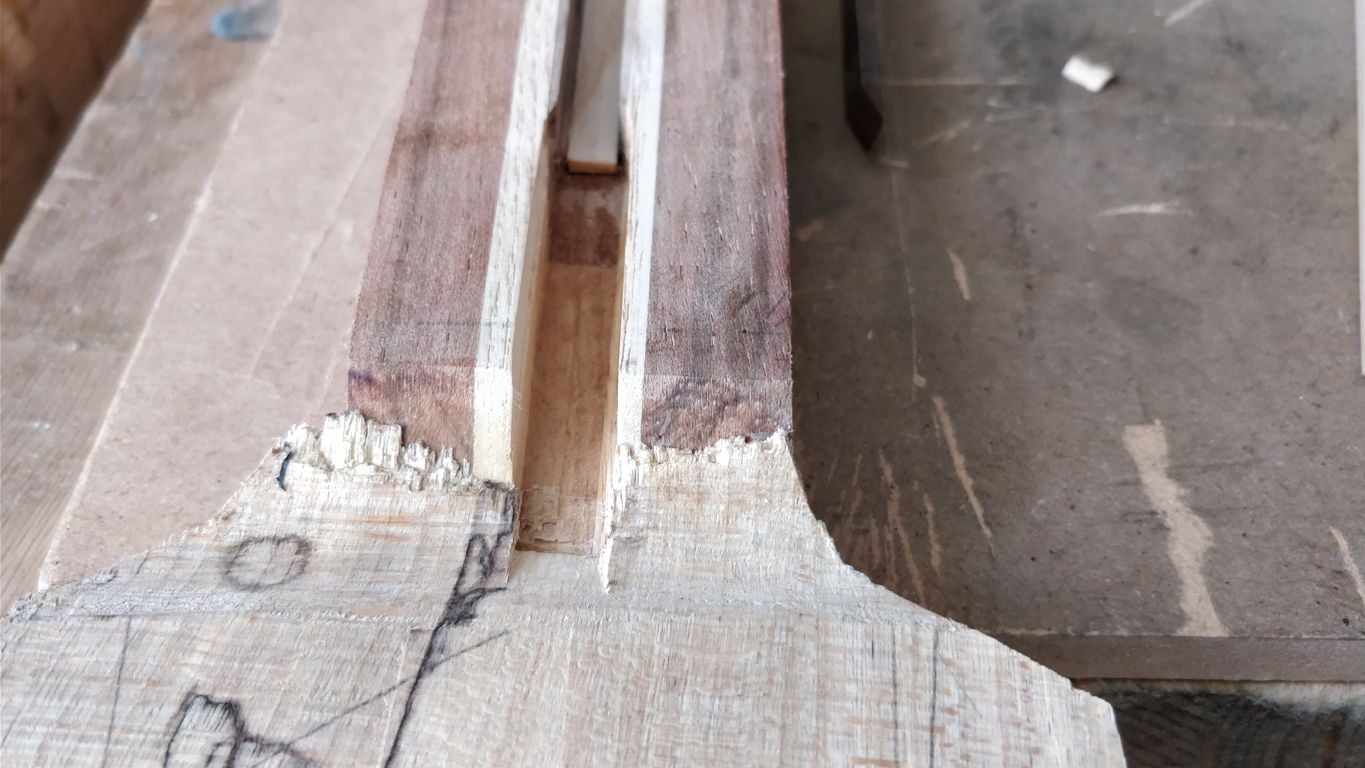
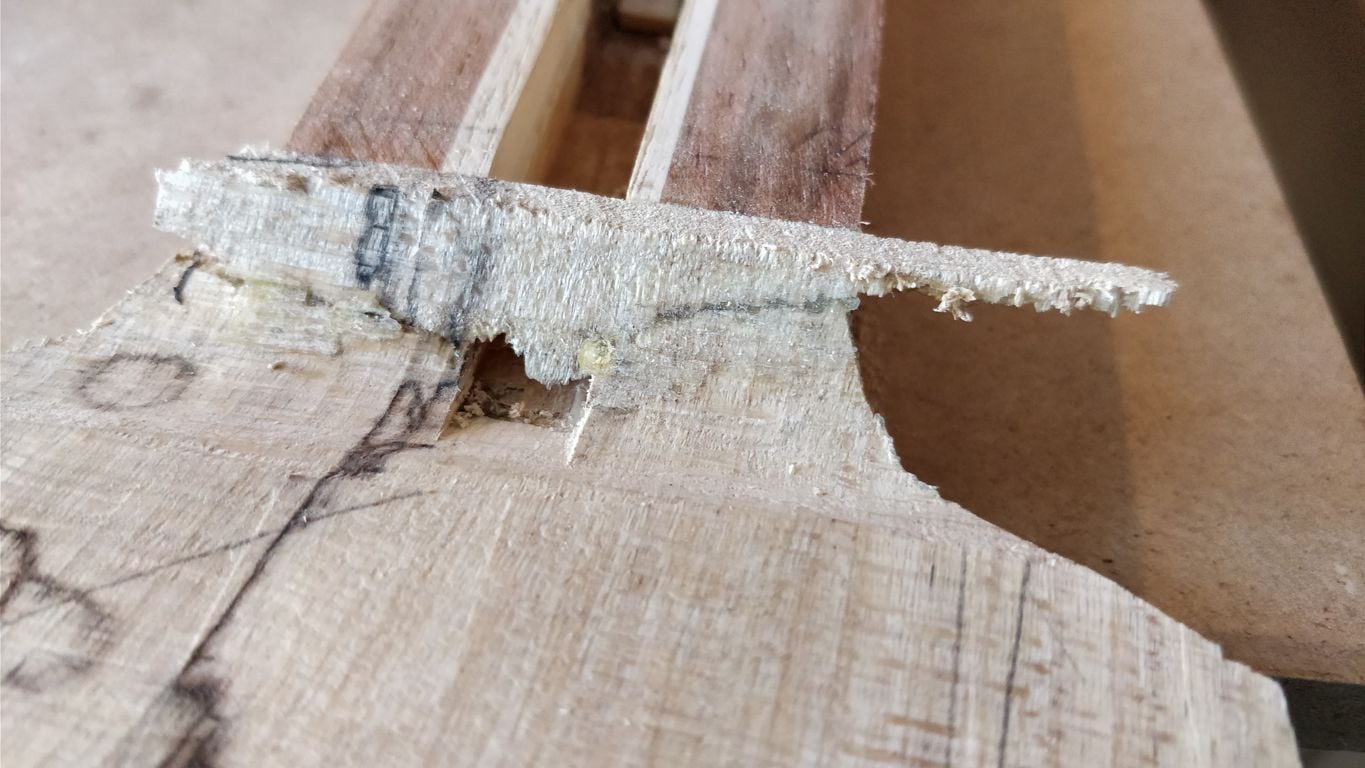
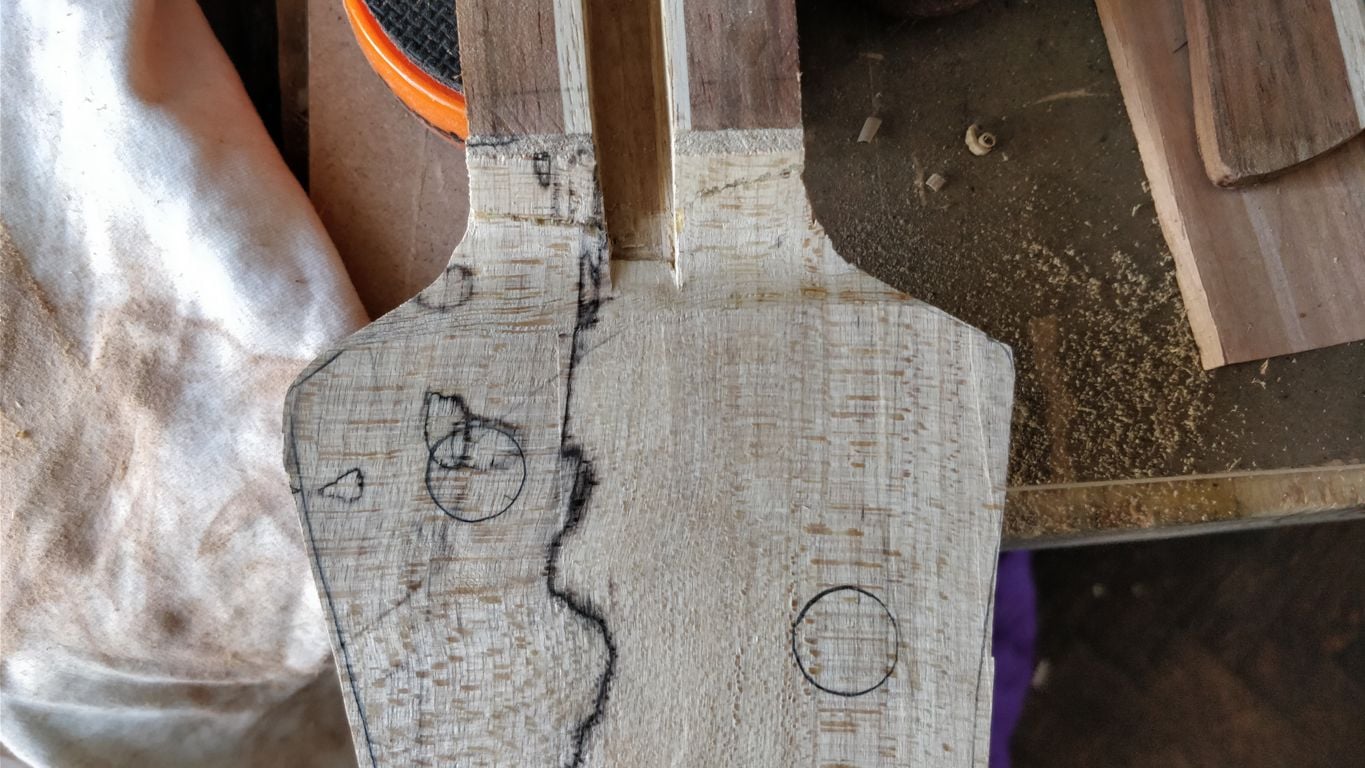
It was not perfect, but I decided, it was workable and worth a try. So I trimmed the wood to final dimensions, cleared the truss rod channel entry (it still needs to be rerouted or chiselled out perfect), removed the overhang and planed the thickness down from 6mm to around 2.25mm. Meanwhile, I put also some wood filler on to see how it will sand down later, then scraped everything clean and sanded lightly with 120.

IMG_20180225_143243-01.jpeg

IMG_20180225_150819-01.jpeg

IMG_20180225_151050-01.jpeg

IMG_20180225_161209-01.jpeg

IMG_20180225_161251-01.jpeg


As you see, the joint is not perfect yet and it will probably never be. The options from here are:
a) remove that dang thing and start over...
b) ok, I was kidding :)) I'll probably fix the sides a little more and will imitate the spalting on the face cracks since it is spalted maple :)

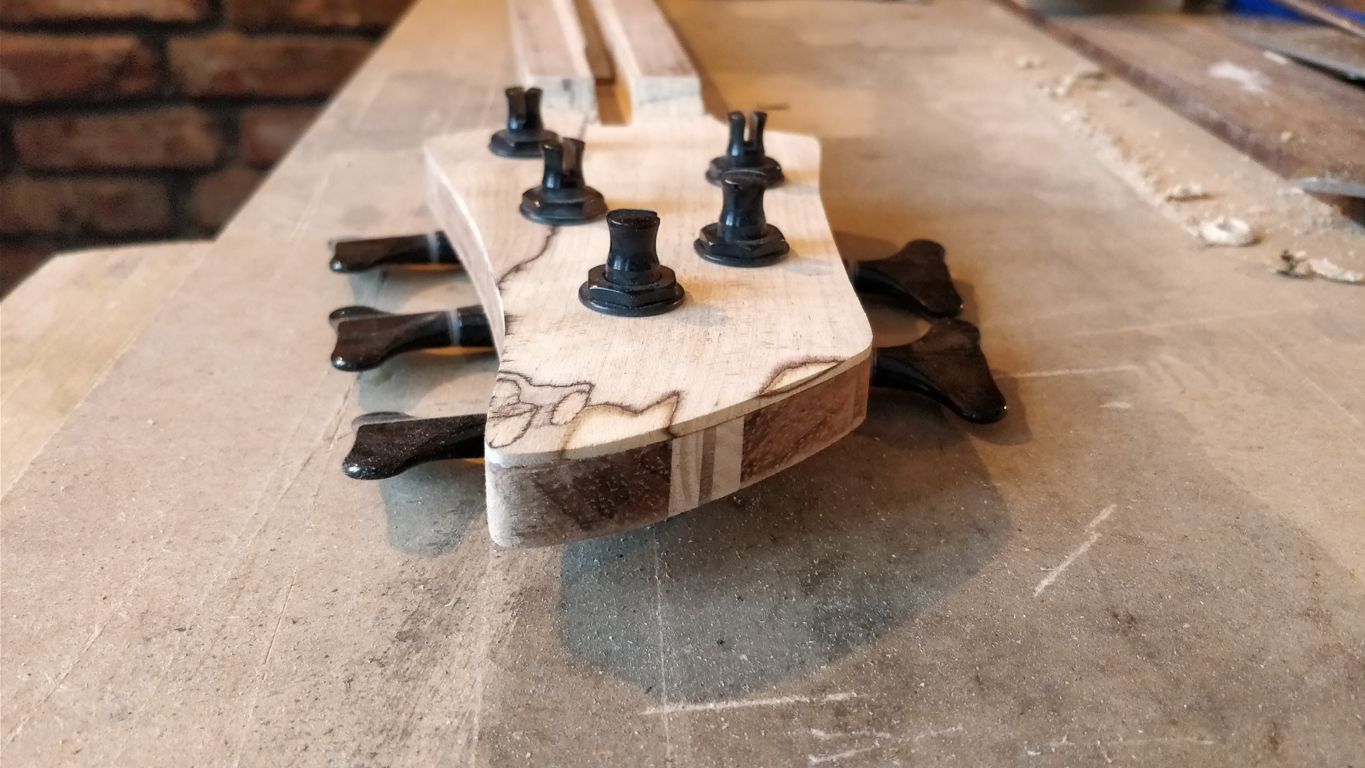
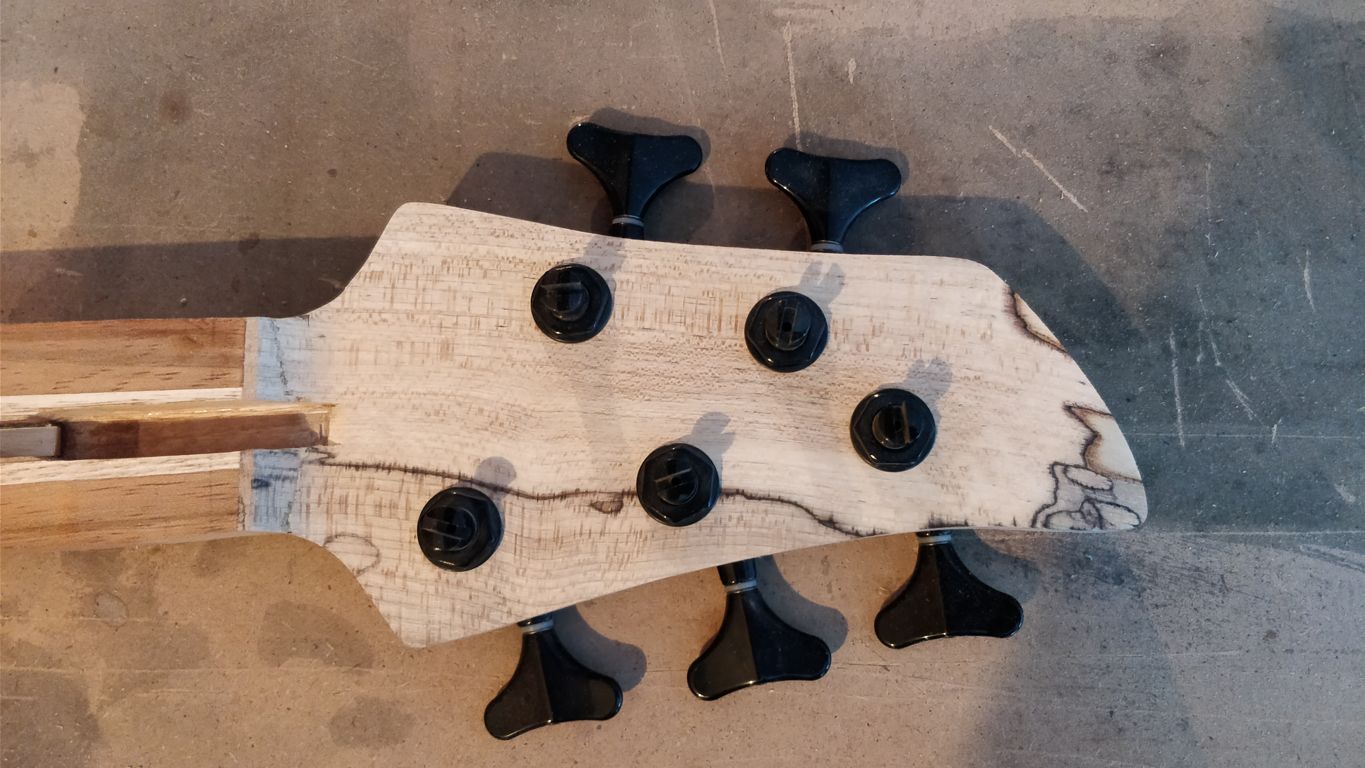
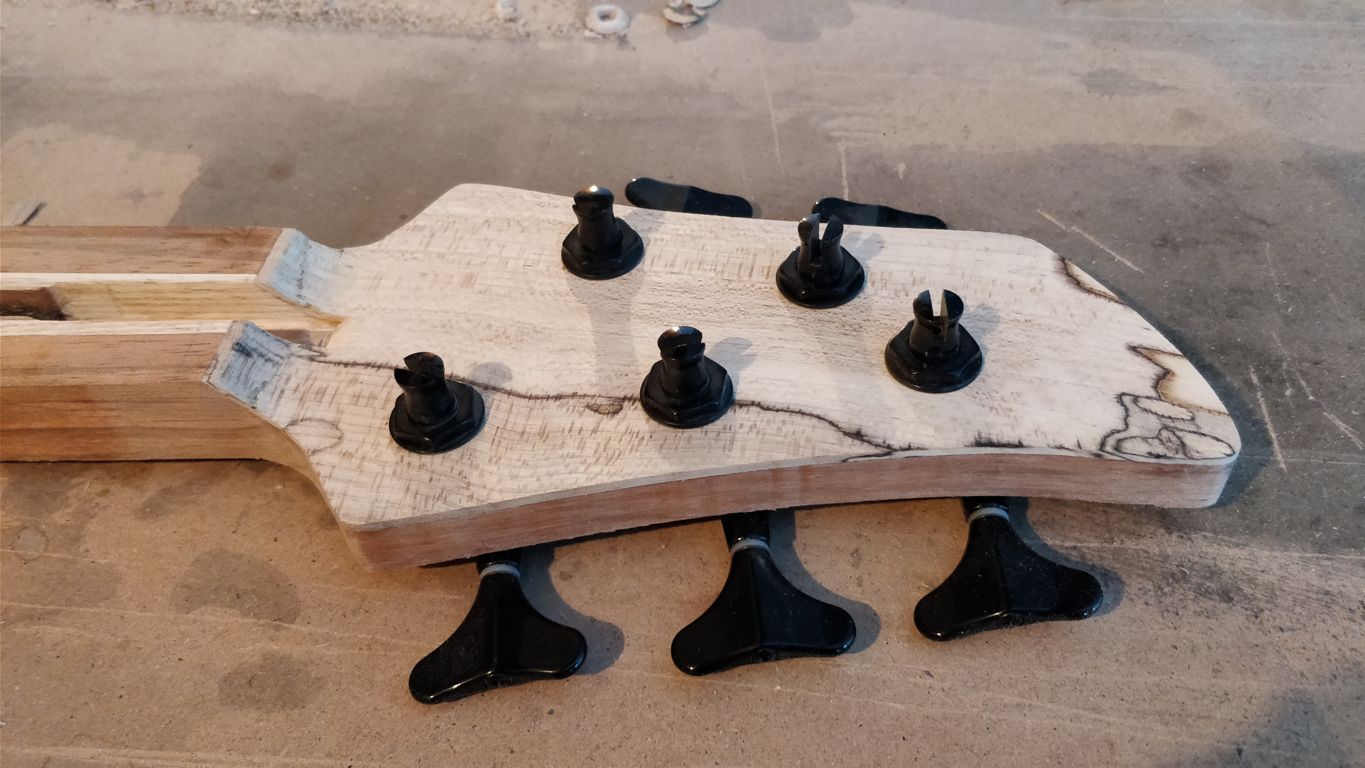
Anyway, that was a fun lesson to fix this thing. And since it is not structural, I will not mind having it unperfect. I will get back to it in the finishing stage. I dry fitted the tuners in the redrilled slots and it started to look like a bass, yay! :)

IMG_20180225_161628-01.jpeg

IMG_20180225_161644-01.jpeg

IMG_20180225_161633-01.jpeg


I guess I can really lose the cracks, although if anyone has a good suggestion on how to further hide them, I'm totally open to considering all options. Cheers! :)
 
Thank you for all the thoughts! I'm considering exaggerating the spalting a bit, or hide it using a sophisticated colouring. Have to do some tries on some scrap first.

I was speeding lately to catch up, since there are under 20 days left, yikes! :facepalm:

Since the last update I worked further on the neck, prepared the fretboard and glued it on. I decided to go with walnut . It's actually a pretty tough piece of walnut, well dried and hard. I plan to bring it to a 12 or 16" radius and put on a coat of epoxy. It will make a good fretless board hopefully. I cut some slots for the markers and glued in some strips of cherry veneer. The markers will be very subtle, because endgrain will probably soak in a lot of oil and darken.
IMG_20180225_132753-01.jpeg

IMG_20180225_141658-01.jpeg

IMG_20180226_194105-01.jpeg

Next I finished the sides with a block plane, cut the fretboard to size and laid out the neck on the walnut board, planned out the bridge and routed the neck pocket. Fits good so far. It is currently 14mm deep, and I plan to rout in an angle of 2 degrees to tilt the neck slightly. The top with be glued in after I rout the electronics chamber and the wire channels between the pickup positions.
IMG_20180302_181758-01.jpeg

IMG_20180302_183719-01.jpeg

IMG_20180302_183752-01.jpeg

I decided to go with EMGs J5 actives for this build, which would hopefully deliver a good spectrum of sounds with a flatwound set of strings. The current challenges are:
a) lay out the pots in an ergonomic and elegant way.. I really can't decide right now on the layout :/
IMG_20180302_185613-01.jpeg

IMG_20180302_185549-02.jpeg

IMG_20180302_190300-01.jpeg

I will probably opt for option 2, but I wonder if it is not cramped too much in that space. Will probably mock it up and try it out somehow first. Any thoughts are highly appreciated :)

b) ..is figuring out how to piece together a good set of flats for a 33" inch scale with a high C. I might have hit a niche here with this setup :)

Karma continues!:)
 
Today I did a lot of routing, starting with some chambers, than routing the electronics cavity, finally trimming and flushing the body and the maple cap to it's final shape. The inner routings are maybe not too clean, but they will be covered anyway. I also routed in the wire channels. Here is where I am, prior to any sanding:
IMG_20180303_131453-01.jpeg

IMG_20180303_131530-01.jpeg

IMG_20180303_131614-01.jpeg


I will now focus on the neck heel. The fretboard end has to be shaped and the neck thickness brought down at the heel, to fit under the make cap. The white line shows how the cutout will be made
IMG_20180303_090442-01.jpeg


Now it is going to be tricky, I have to prepare everything very detailed for the final glue up, because afterwards I will have a big chunk of wood to handle. So, I want to stack the body parts together with pins for routing the pickups and carving the body, also prepare the neck and fretboard. Once everything is in the near final shape, I'll do the glue up. So far, I hope I didn't forget anything until this point. Thinking of doing a list of steps :)

By the way, how do you set up the bridge height on a fretless? From my measurings, i'm landing around 2.5 - 2.8mm at the 24th fret.

IMG_20180303_090547-01.jpeg
 

Attachments

  • IMG_20180303_131648-01.jpeg
    IMG_20180303_131648-01.jpeg
    166 KB · Views: 36
I like to be able to bottom out the strings, then go up from there (fretless or fretted). I set the bridge a below mid point in the travel (but not bottomed out) of the string saddle and make the fingerboard that height. Depending on the instrument I like either extremely low or "normal" action. Anything I'm going to slap on (which is most of my instruments) I want some room to slap, which requires a bit higher action.
 
Thanks @Jisch , I see how this can be a benefit. Will have to thickness the top plate a bit more probably to get it right. I'll do some more measuring once I have it seated flat on the body.

Meanwhile I worked on the neck heel to have a the fretboard end curved as I wanted it to:
IMG_20180303_195253-01.jpeg

IMG_20180303_195233-01.jpeg

The maple cap will sit on top locking the neck in place. It will have to have a groove to accommodate the sticking out portion of the neck heel. This will lock the neck in place. On the downside, it will make it unreplaceable. Here is the cut out, which I approached with my saw and chisels:
IMG_20180303_200332-01.jpeg


I stopped for today with a sloppy fit, that I will have to refine further on Monday, which is in two days, which ticks my panic factor further. Tomorrow I'm going to visit my father for his 70s birthday :) it will be a non build day ;)

IMG_20180303_214320-01.jpeg

IMG_20180303_214325-01.jpeg


In the next step I'll fix the fit and make sure the neck has an angle in the pocket. I guess I'll use this thread more for making notes of the next steps, before I forget something important. Anyway.. it starts to look like a bass :))

IMG_20180303_214316-01.jpeg
 

Attachments

  • IMG_20180303_131648-01.jpeg
    IMG_20180303_131648-01.jpeg
    166 KB · Views: 33
Back to business today... although, it's not a business ;)

Rushed home from work with a plan on how to proceed. I wanted to plane in an angle in the neck, but it was so hard to operate the plane to achieve this, that I decided to shape the neck first, the plane the angle in. And this is how it went. Sorry if you would find the post to be a little long, but I thought, I can give back some knowledge for everybody, who will be attempting to try neck shaping for the first time. :) The tools involved are a saw, a plane, a chisel.

The method I used is the faceted method, that proved for me to work great and that is hard to screw up. First I drew a line to which I wanted to flatten the back too. I've chosen a consistent depth of 15mm of body wood, which together with the 10mm fretboard adds up to 25mm (around 1"). The fretboard will be shaped later on. What I accounted for is the carbon fibre TOW in the truss rod channel, which is seated at around 12.5mm (0.5") and that will leave a strip of wood of around 2.5mm (3/32"). I saw down nearly up to the line on both ends using several parallel cuts, then removed the waste and chiselled the space clean

IMG_20180305_154857-01.jpeg
IMG_20180305_155251-01.jpeg

I connected those areas. You can use any tools to do that: planes, chisels, also a spokeshave, even a router. I just don't happen to have a sledge for it, nor fancy to build one, so I used a plane for the majority of the waste removal. Next, I traced another set of lines on the back and on the sides, to connect them and create the next facets. You can really adjust the sizes here. If you like a smoother C shape, the lines on the back should be deeper than those on the sides. For a D feel I would go for similar depths. You can also go for an asymmetrical neck with a bigger shoulder on the bass side and a smoother on the treble side. The procedure is the same - mark some lines and again, make some cuts, remove the waste from both ends and connect the areas.

IMG_20180305_182358-01.jpeg

IMG_20180305_182420-01.jpeg

IMG_20180305_182930-01.jpeg

Repeating the procedure on both sides gives you a rough neck shape.

Then I used a scraper to blend in the facets into a smooth shape. You can really use a rasp, a file, sandpaper, even a small block plane or a spokeshave. The reason I've chosen the scraper is, that the African walnut has a lot of interlocking grain and basically you create tear out with nearly any tool you use unless it is super sharp - including sandpaper :)

IMG_20180305_190522-01.jpeg

I moved on to shaping the headstock heel and for that, I used a flat chisel of a medium size. I don't really like to use a gouge for shaping a transition like this. A flat chisel is much easier to guide. I prefer gouges for inwards curved surfaces. Shaping goes actually very easy, just remember to keep your tools sharp and to have patience. Go slow, don't rush, or you will drive the chisel into the neck with ease.

IMG_20180305_191446-01.jpeg

IMG_20180305_191731-01.jpeg


The final product, chiselled and scraped clean looks like this:

IMG_20180305_195019-01.jpeg


What I could do now is actually plane the angle into the neck heel. I measured 2 degrees and traced the lines on both sides, then planed to the lines starting at the lowest part and lengthening the strokes gradually until I reached the most shallow ones. Checked for squareness and flatness:
IMG_20180305_195512-01.jpeg

IMG_20180305_200513-01.jpeg


...and assembled everything to check how the bridge and string eight will be. So far so good I would say. If you are thinking about shaping the neck by hand, it's a 2-3 hours job, with a lot of joy! :)

Ok, this is how she looks so far, couldn't resist it, soooory! :)

IMG_20180305_202125-01.jpeg

IMG_20180305_202148-01.jpeg

IMG_20180305_202738-01.jpeg

IMG_20180305_202731-01.jpeg
 

Attachments

  • IMG_20180305_195050-01.jpeg
    IMG_20180305_195050-01.jpeg
    208.4 KB · Views: 31
  • IMG_20180305_195101-01.jpeg
    IMG_20180305_195101-01.jpeg
    220 KB · Views: 31
Thank you! :)

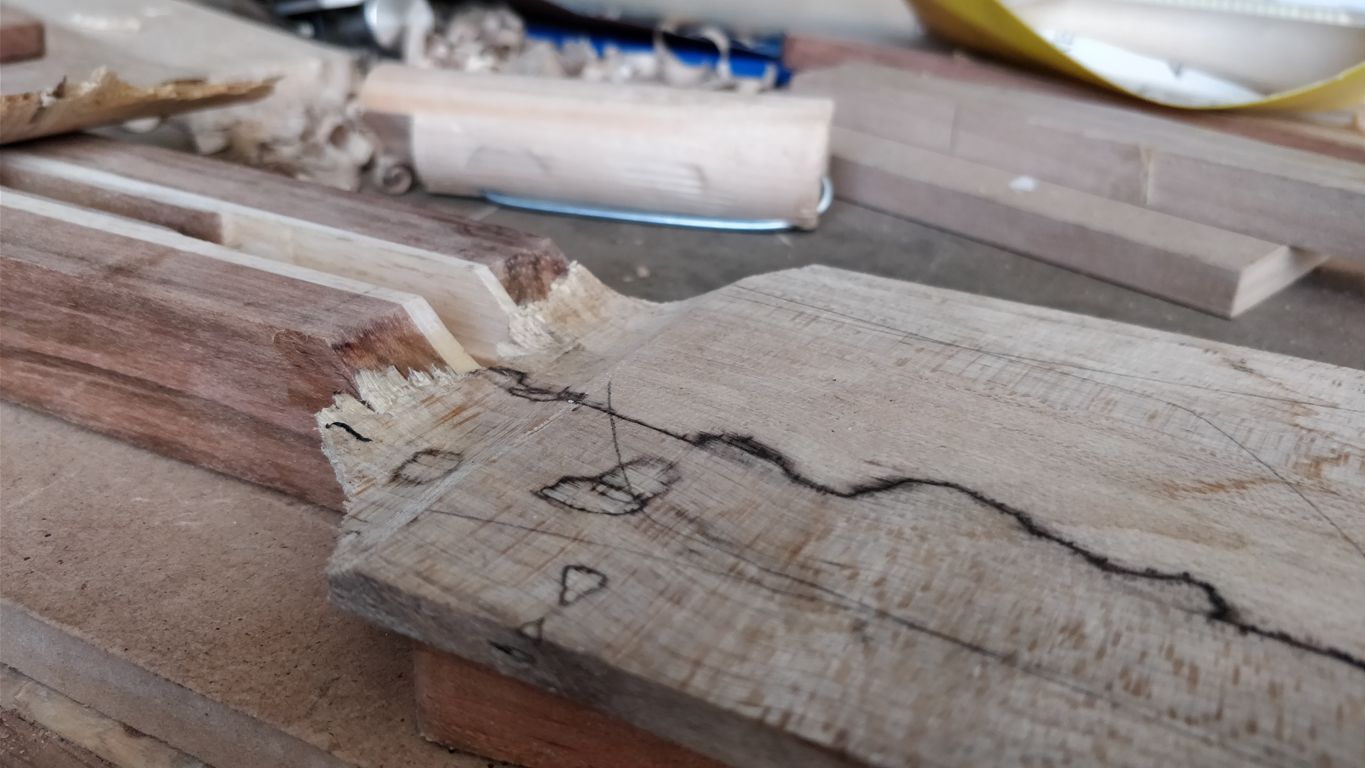
Well, the story continues.. after removing the clamps, this is what I had:
View attachment 2929179
View attachment 2929182

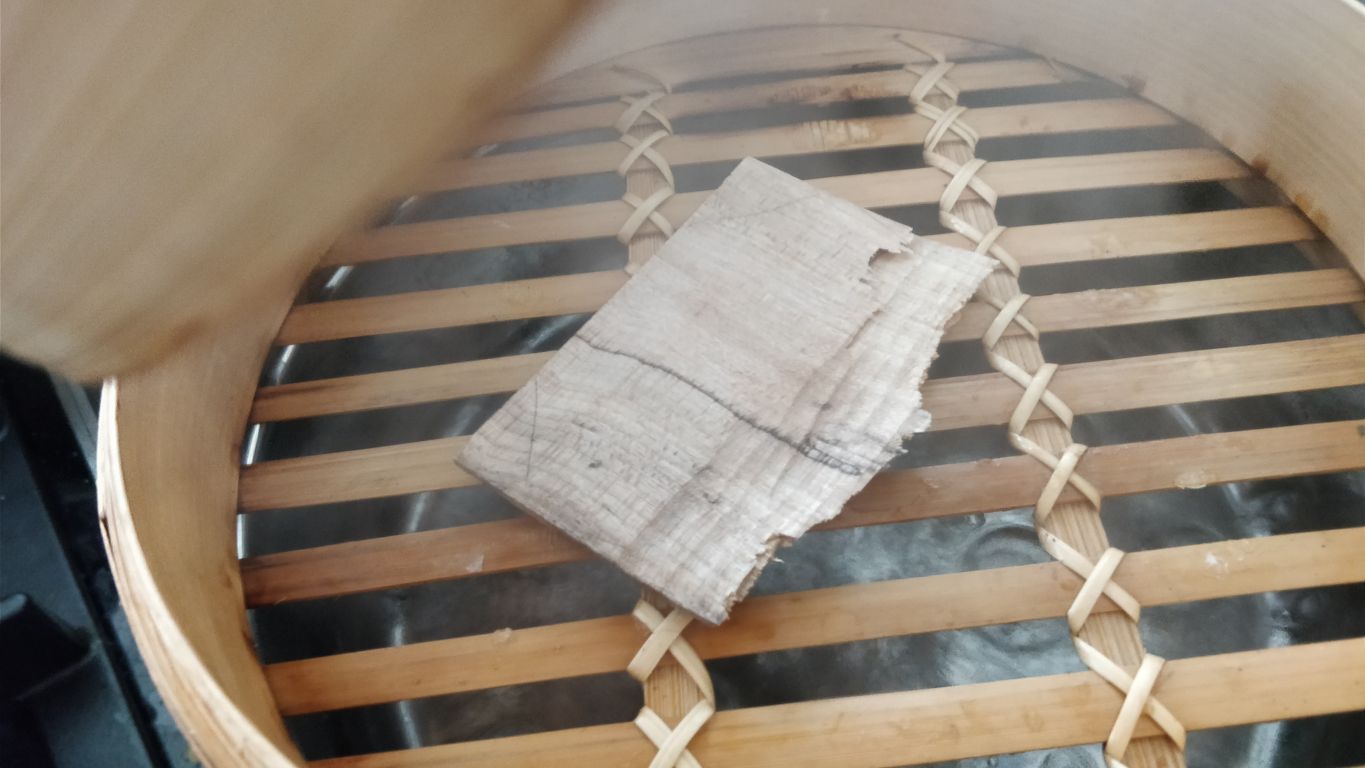
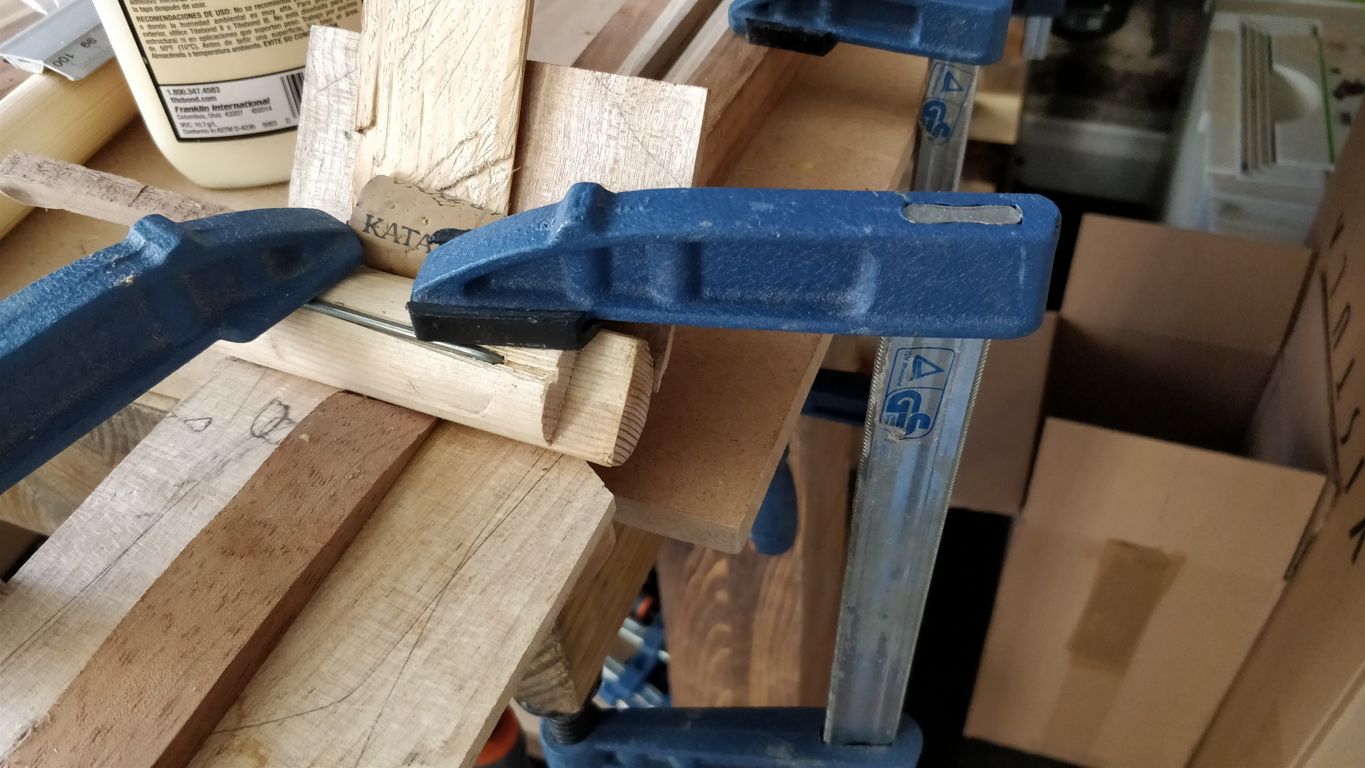
I know it doesn't look very promising, right? But the joint was great and the wood did follow the curve perfectly. That's a good starting point. So I decided to move on and tried on the remaining piece. I remember it matched together much better when it was hot and flexy, so I steamed the remaining piece and glued it in while still hot, letting it dry until it was ready to handle further:
View attachment 2929183
View attachment 2929184
View attachment 2929185
View attachment 2929186

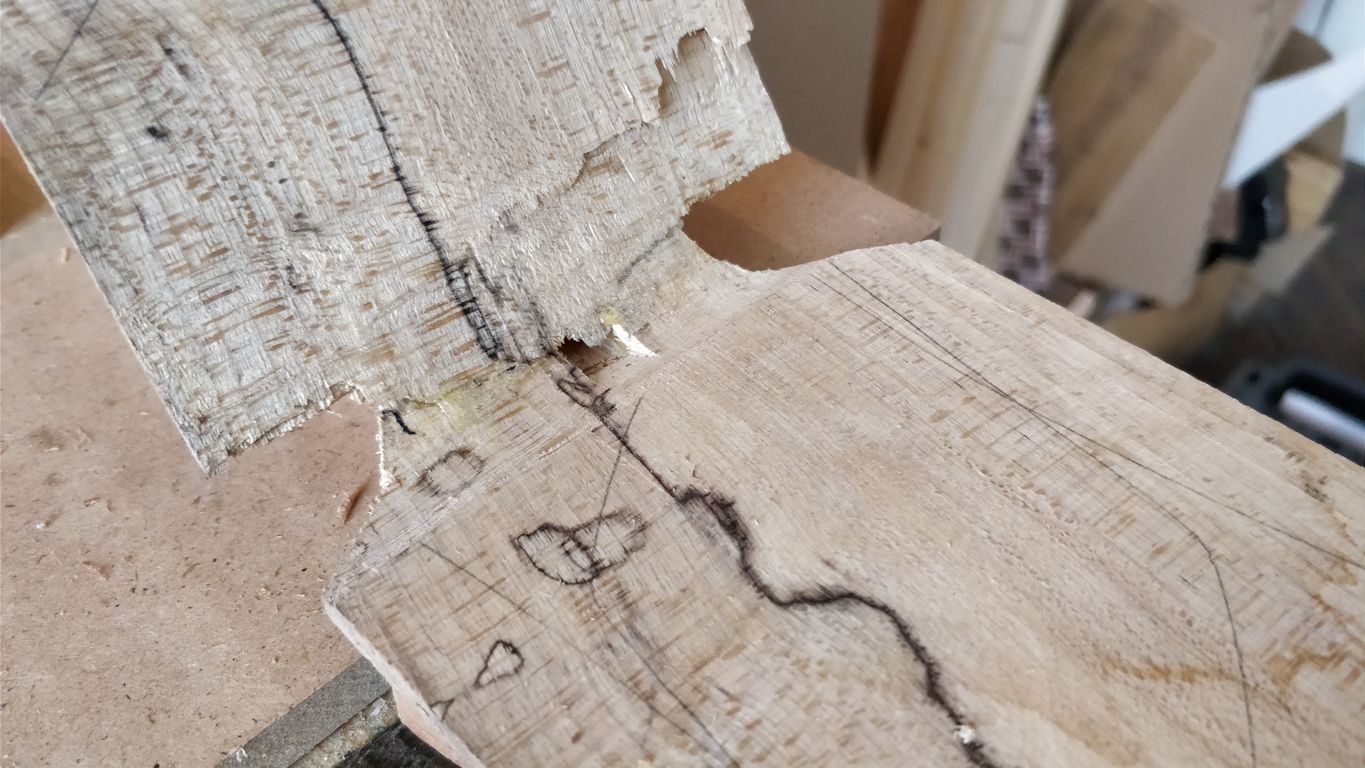
The clamping was tricky but worked fine. I was worried about the joint - if it will be tight enough and if I can make it invisible from the sides and the top. This is what I found after unclamping it:
View attachment 2929189

It was not perfect, but I decided, it was workable and worth a try. So I trimmed the wood to final dimensions, cleared the truss rod channel entry (it still needs to be rerouted or chiselled out perfect), removed the overhang and planed the thickness down from 6mm to around 2.25mm. Meanwhile, I put also some wood filler on to see how it will sand down later, then scraped everything clean and sanded lightly with 120.
View attachment 2929195
View attachment 2929196
View attachment 2929197
View attachment 2929198
View attachment 2929199

As you see, the joint is not perfect yet and it will probably never be. The options from here are:
a) remove that dang thing and start over...
b) ok, I was kidding :)) I'll probably fix the sides a little more and will imitate the spalting on the face cracks since it is spalted maple :)

Anyway, that was a fun lesson to fix this thing. And since it is not structural, I will not mind having it unperfect. I will get back to it in the finishing stage. I dry fitted the tuners in the redrilled slots and it started to look like a bass, yay! :)
View attachment 2929214
View attachment 2929215
View attachment 2929216

I guess I can really lose the cracks, although if anyone has a good suggestion on how to further hide them, I'm totally open to considering all options. Cheers! :)

What cracks, like others have said, they look like spalting, you clever little person.
 
  • Like
Reactions: Beej and b3e

Latest posts