
Enjoy the benefits of a premium membership!
Upgrade Account
-
TalkBass has been independent since 1998. Add your voice.
Create a free account to reply to discussions, view embedded media, and browse with fewer display ads.
Join free Log in
Want zero display ads or expanded classifieds tools? Compare plans.
You are using an out of date browser. It may not display this or other websites correctly.
You should upgrade or use an alternative browser.
You should upgrade or use an alternative browser.
Winter Build Off 2020 - Kuun Space
- Thread starter Jisch
- Start date
More options
Who Replied?

yeah, that would definitely be stronger, but I think I will feel better with screws. I've got some good ideas from v1. I think I will make it so you install the strings from the front too. I have a feeling I'll be on v3 before too long here :-D There's still plenty of time to finish it!


Unless you design a straight string pull from the tailpiece to the bridge you will need it to flex or pivot at the edge of the body.

You could mount the tailpiece to the top and just have the strings pass through it. It would be easier to make the stop for the ball ends. Essentially it would be a wooden stop bar tailpiece in a fancy shape.
EDIT: I just checked out the pics and this would mean making a whole new piece
EDIT: I just checked out the pics and this would mean making a whole new piece
yeah, you're right, it either needs to be fixed to the bass or pivot as the strings tension. hmmmUnless you design a straight string pull from the tailpiece to the bridge you will need it to flex or pivot at the edge of the body.
I'm beginning to think this is my best bet. HmmmYou could mount the tailpiece to the top and just have the strings pass through it. It would be easier to make the stop for the ball ends. Essentially it would be a wooden stop bar tailpiece in a fancy shape.
EDIT: I just checked out the pics and this would mean making a whole new piece
Current thinking is glue a tailpiece on the top, put ferrules in the back and feed the strings through.

I made a similar floating tailpiece from a gate hinge and a piece of perforated metal... it's not terribly ugly as is, and works great, and, I'm sure it could be refined/prettified, but I largely went for function over form (kinda my thing, apparently). 
A similar thing could be made from wood plates, using hinge fingers or similar.
A similar thing could be made from wood plates, using hinge fingers or similar.

I considered/am considering doing that. I am really warming up to the idea of feeding the strings through ferrules, it is a very clean look, which would work equally well with this design. I may not doing anything for a bit while I consider options.I made a similar floating tailpiece from a gate hinge and a piece of perforated metal... it's not terribly ugly as is, and works great, and, I'm sure it could be refined/prettified, but I largely went for function over form (kinda my thing, apparently).
A similar thing could be made from wood plates, using hinge fingers or similar.
It's dyed poplar, you can buy it on Ebay among other places, and thanks!This is looking outstanding, fantastic timber choices you have made there (as usual). I may have missed it, but what specifically do you use for the thin black layer you referred to as laminate?
I just went back and looked at that pic @ctmullins posted, it looks so clean. I'm about 90% sure that's what I'm doing. I like where he put the ferrules, but I'm not sure I have the room, I might have to do them from the back, but either way I think that's the way I'm going.
I looked at how I could @ctmullins -ize this bass. My first problem was that there is a hole where I put the string ferrule. I plugged that with two different diameter hardwood plugs. The second problem was that the back end of the bass had a radius, which would send the strings off in different directions. It wasn't that much of a radius, I flattened that out on the drum sander and smoothed it in as a transition.
Then I needed to cover up the plug as it wouldn't be covered by a ferrule. I don't like having a species of wood show up in only one place on an instrument. Right now there is only ebony on the pickup cover. I really liked the way the ebony looked when it was inlayed in V1 of the tailpiece, so I figured I'd inlay a piece of ebony, which will show up as a thin stripe on the bottom of the instrument after I get it rounded over. The back end will likely flare up a bit where the ferrules go in.
This is a 34" scale, so I think I'll be ok with string length, but I need to verify. The ferrules will add an inch or so to the required length of the strings.
Today is beautiful here, a rare 60 degree day in January - so weird. I got a mountain bike ride in this morning, this afternoon I'll make a semi-permanent place for that log I got cut up. I have it by the edge of the driveway, which isn't a great place for it. I bought some straps to put it under tension while it dries reducing the chance of it warping.
I might get some more time in the shop later this afternoon when I install the ferrules.
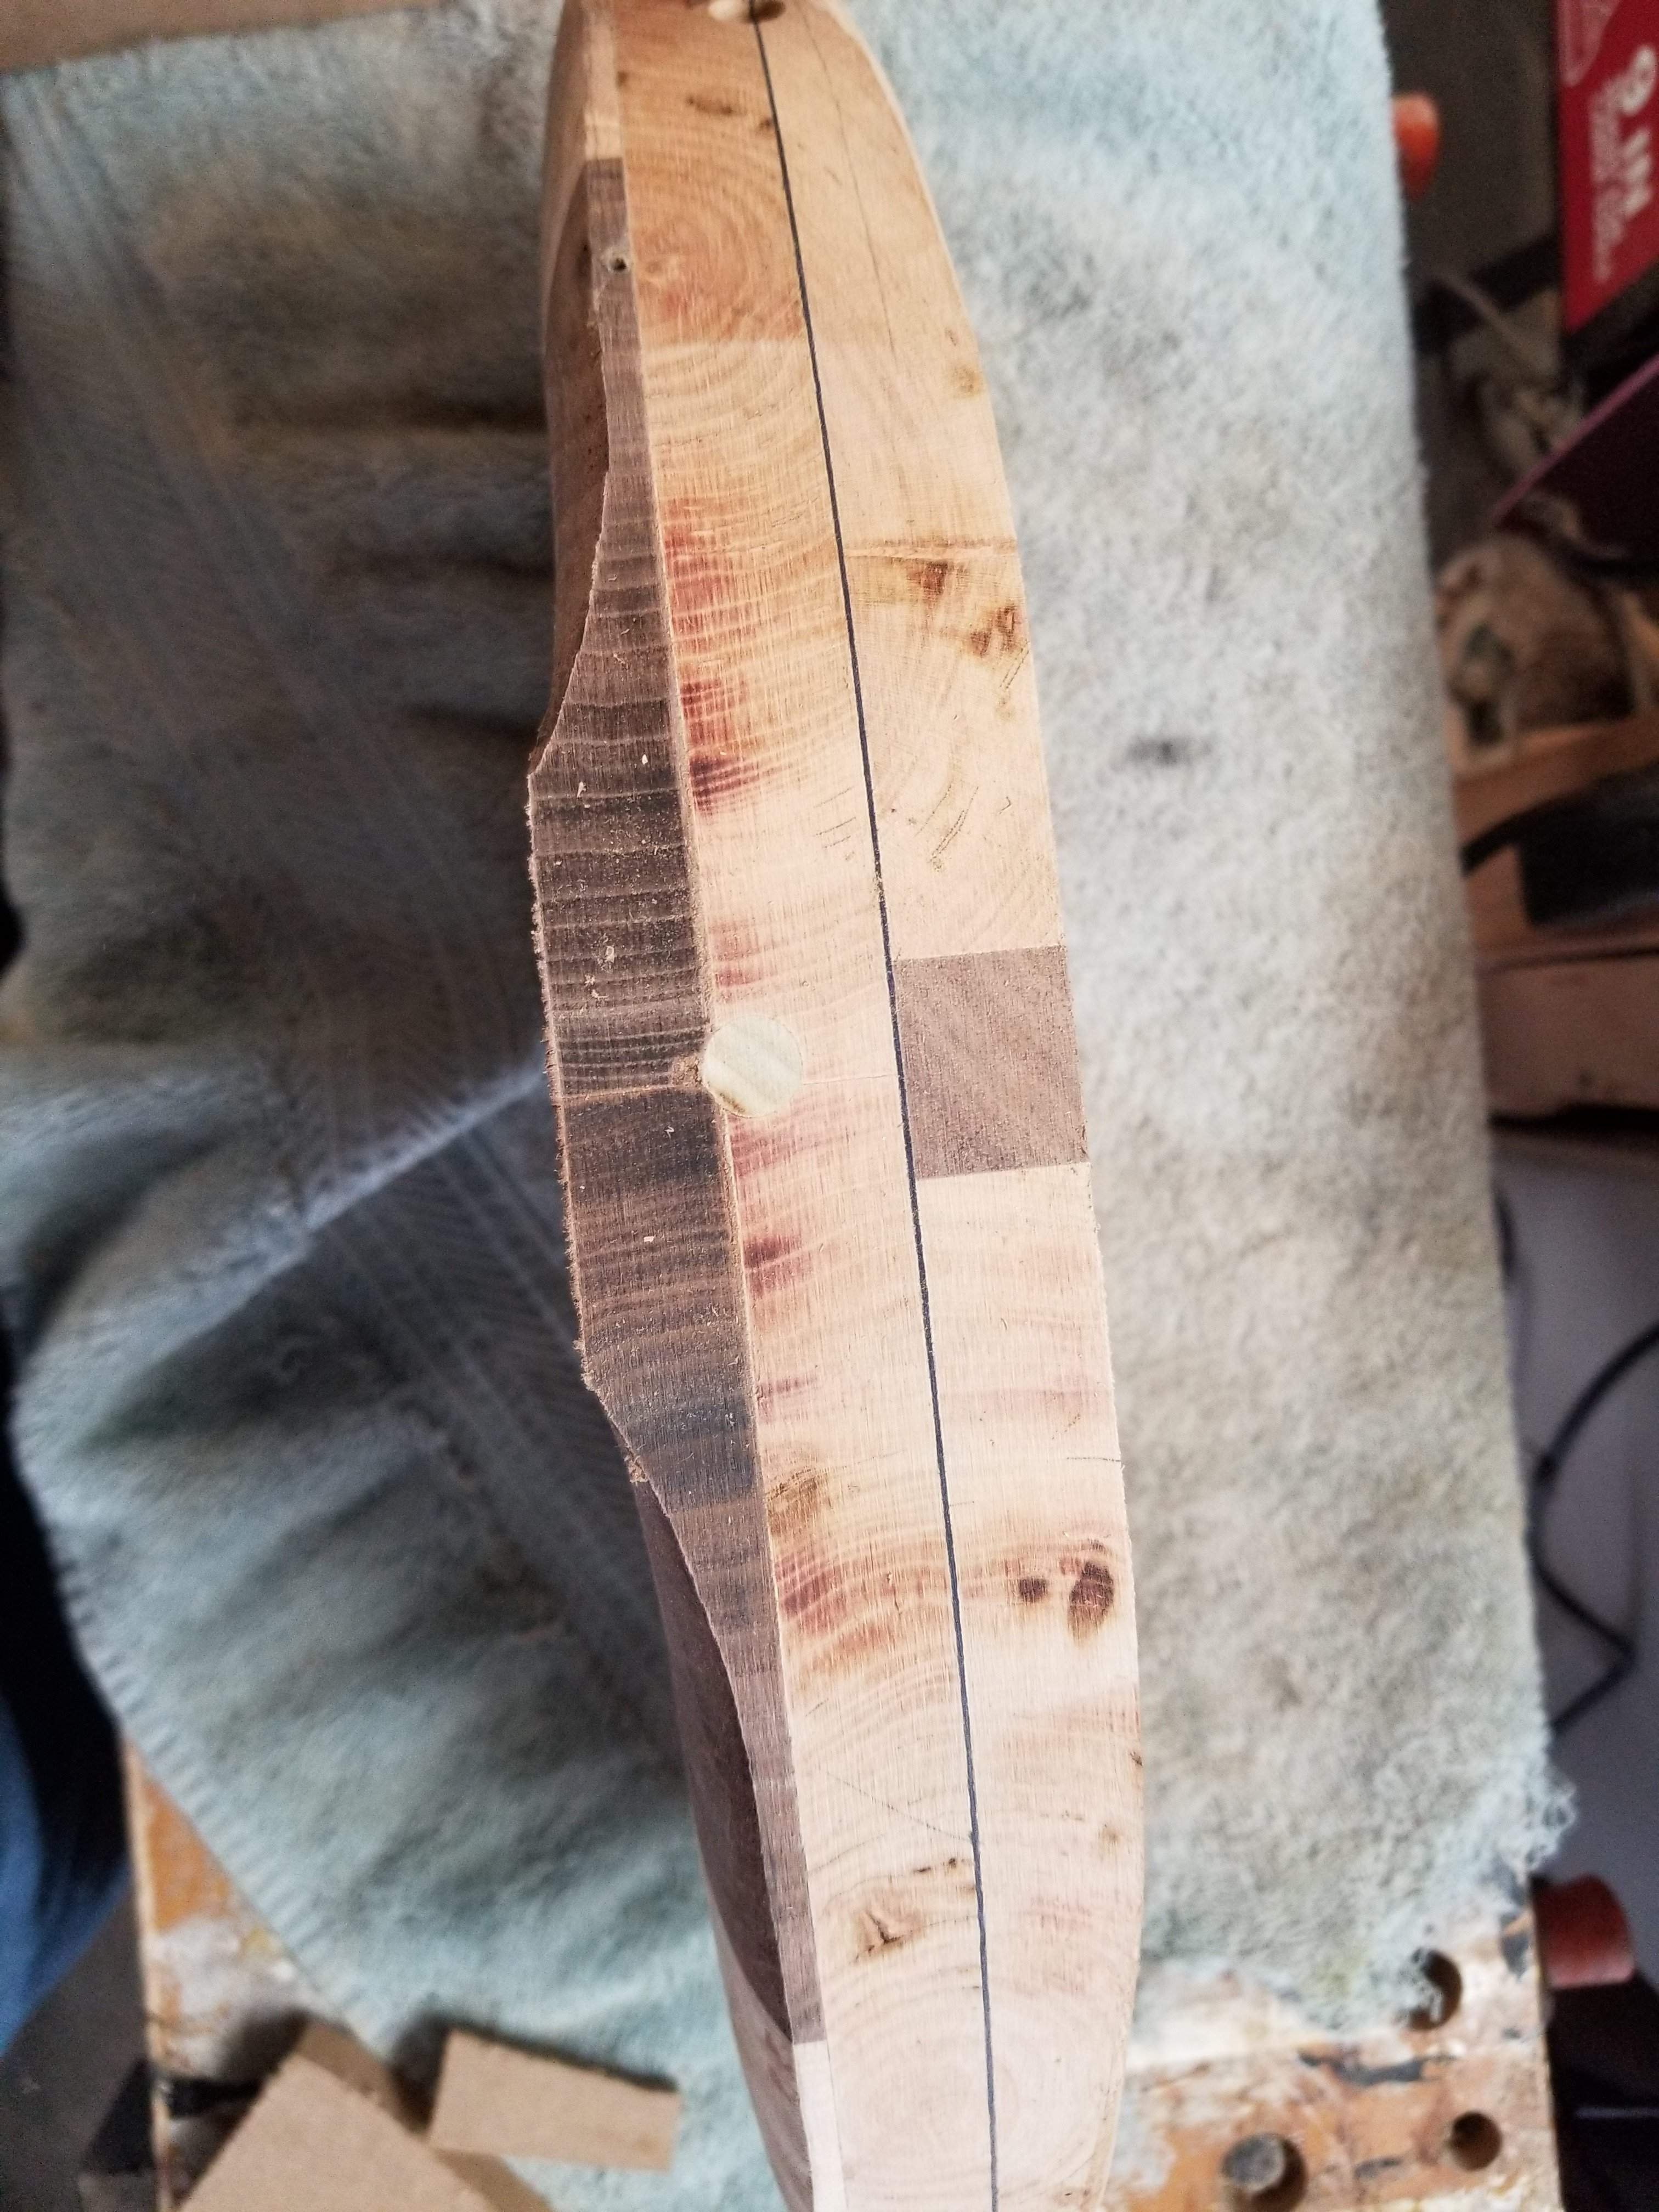
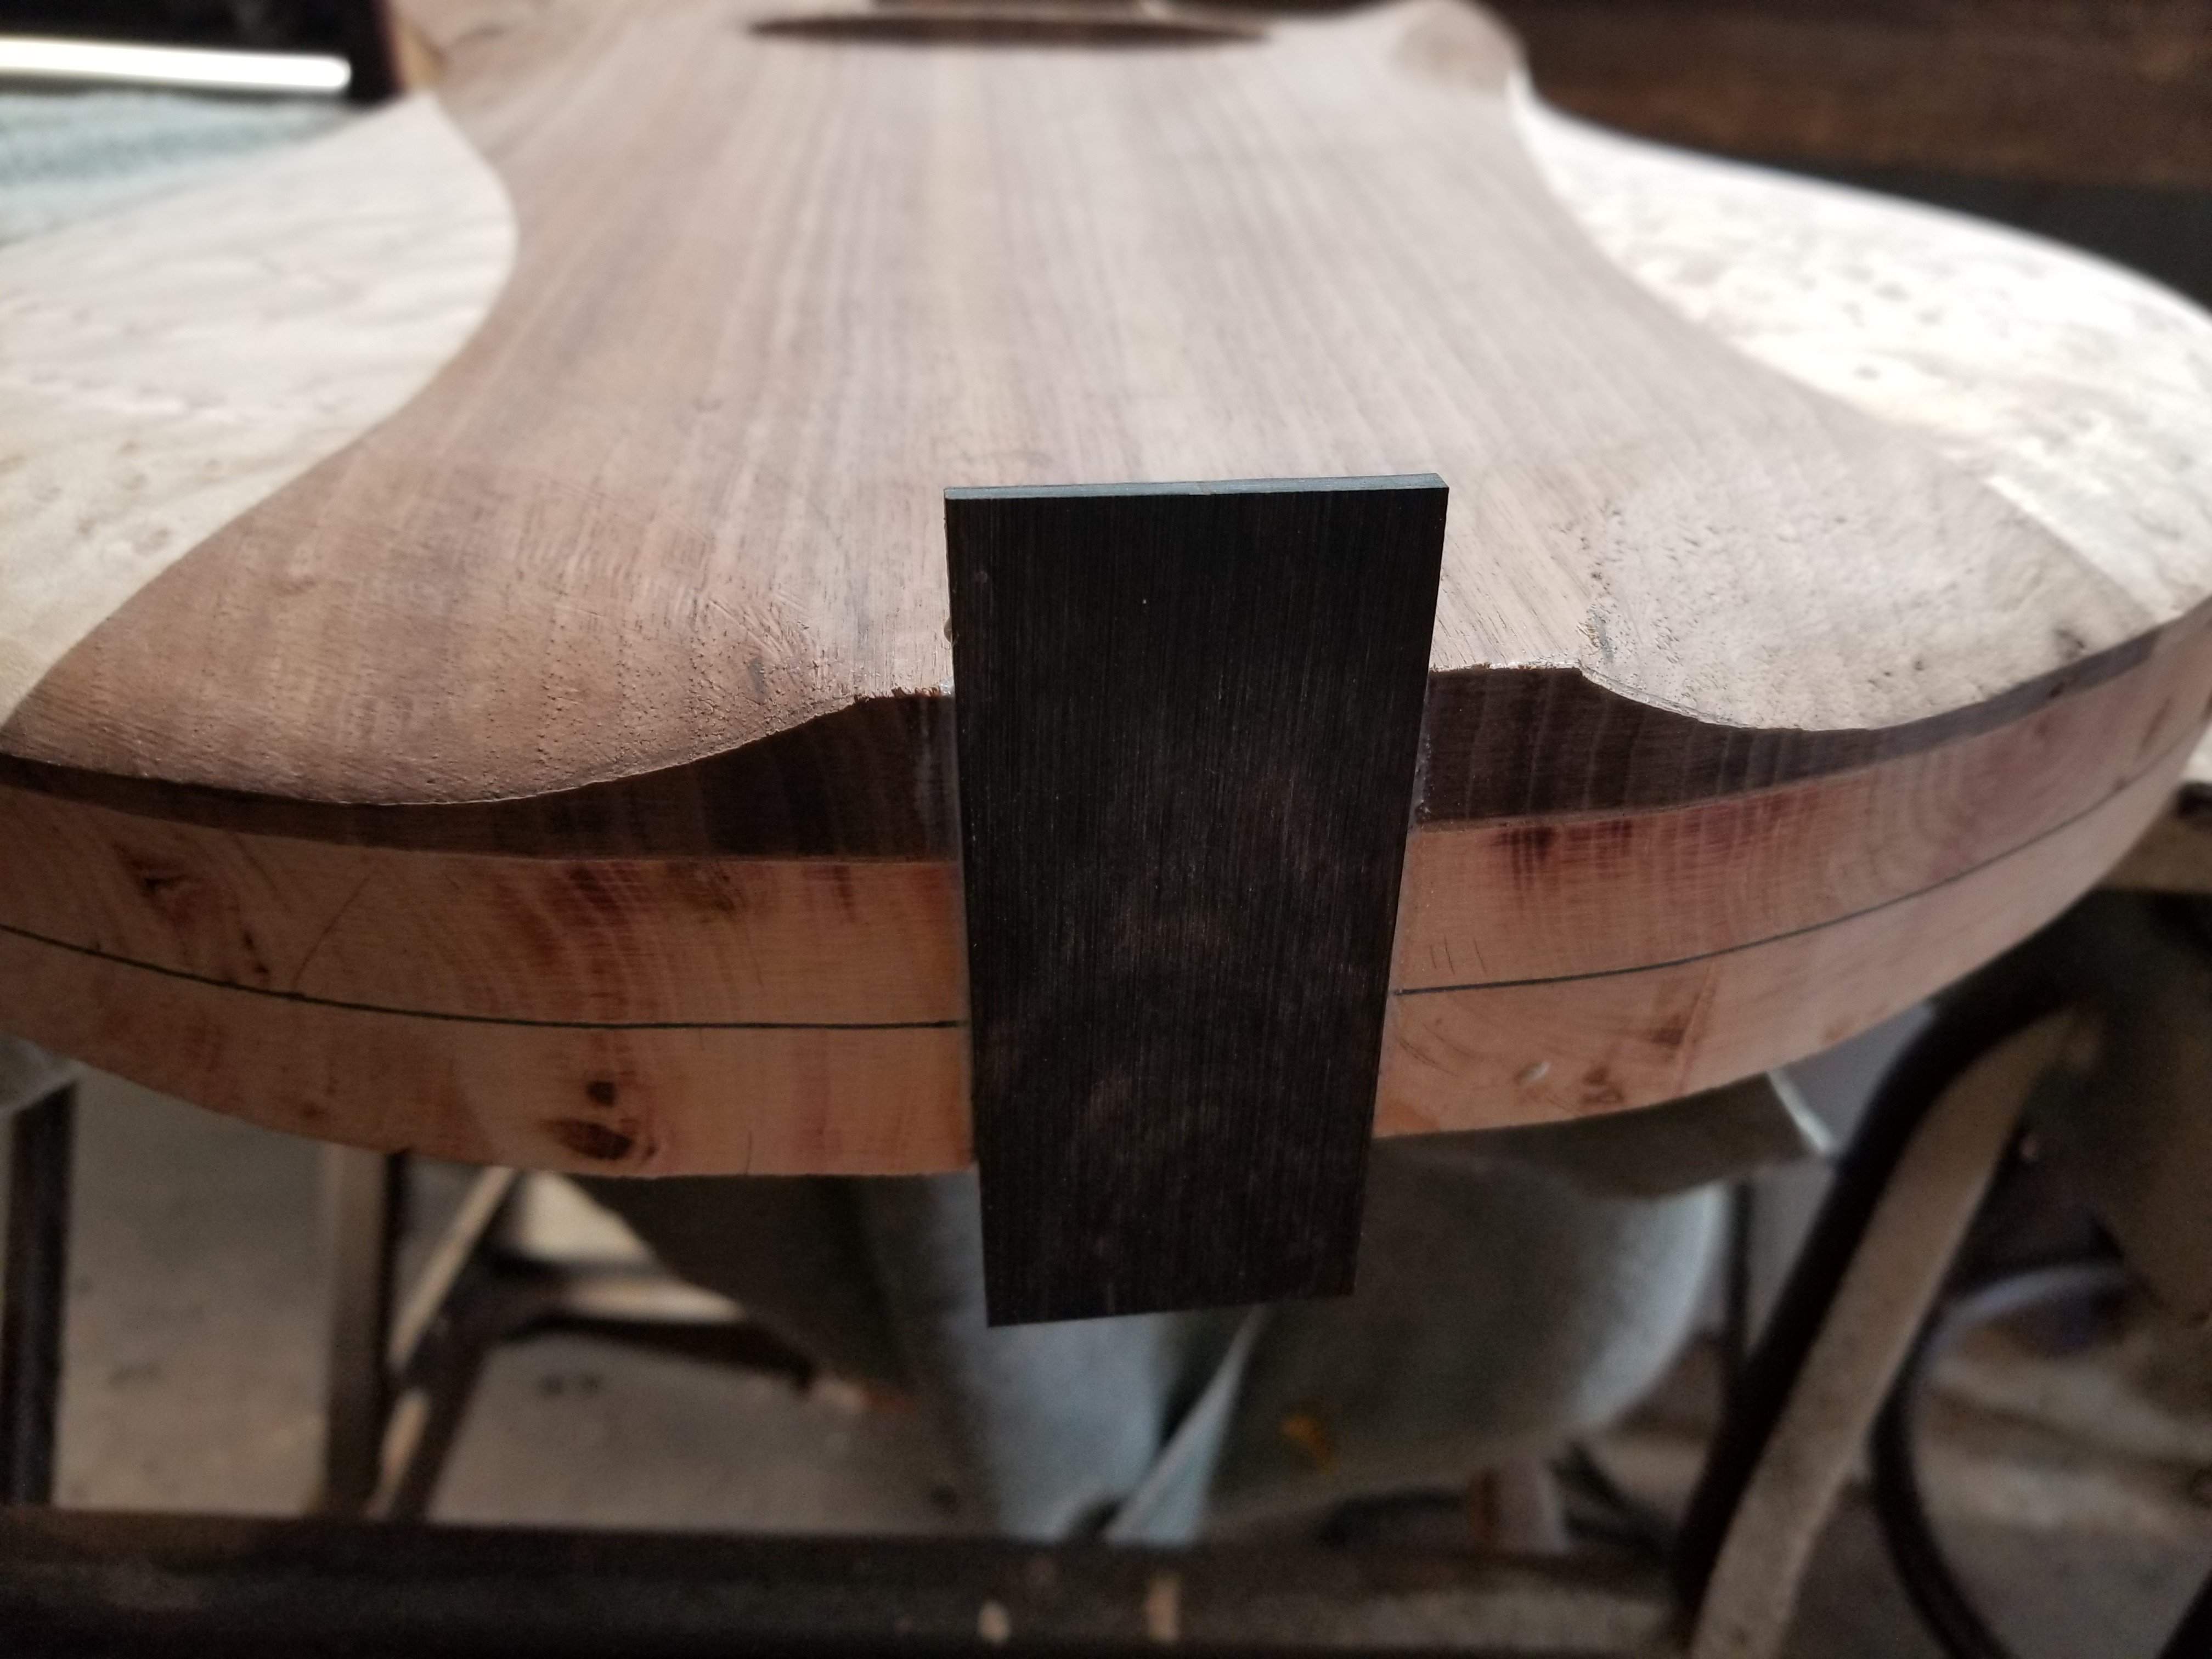
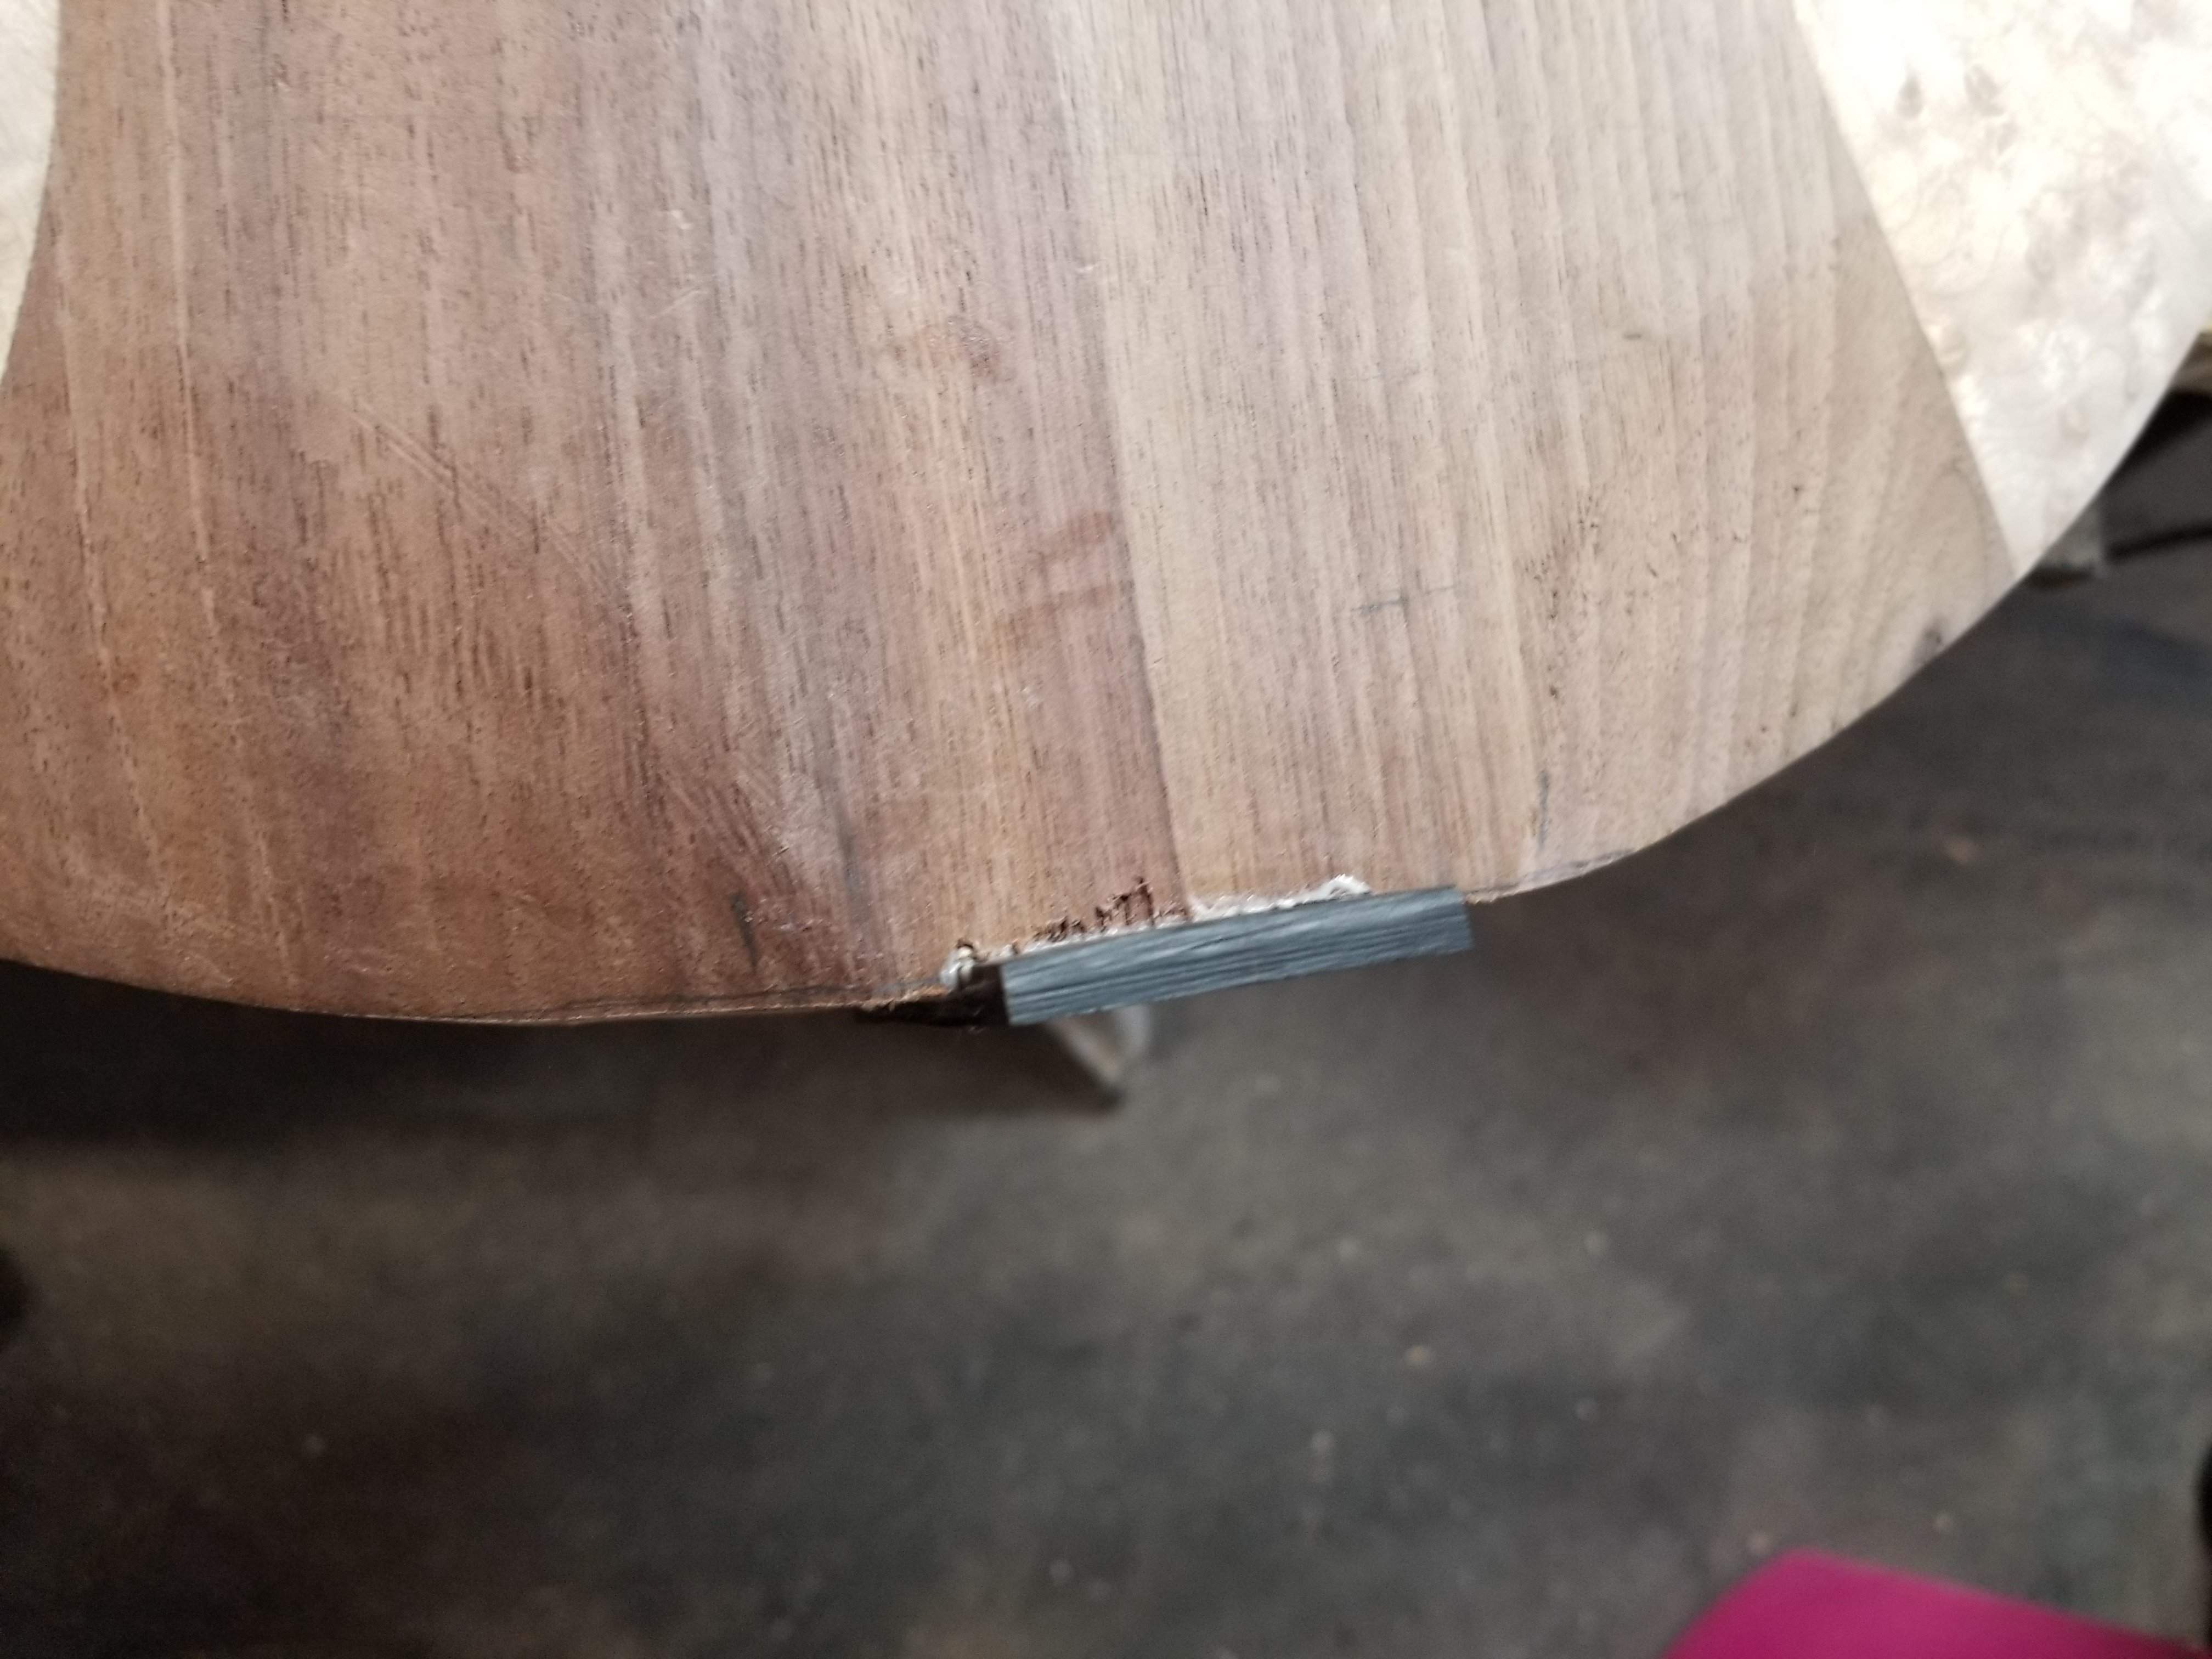
Then I needed to cover up the plug as it wouldn't be covered by a ferrule. I don't like having a species of wood show up in only one place on an instrument. Right now there is only ebony on the pickup cover. I really liked the way the ebony looked when it was inlayed in V1 of the tailpiece, so I figured I'd inlay a piece of ebony, which will show up as a thin stripe on the bottom of the instrument after I get it rounded over. The back end will likely flare up a bit where the ferrules go in.
This is a 34" scale, so I think I'll be ok with string length, but I need to verify. The ferrules will add an inch or so to the required length of the strings.
Today is beautiful here, a rare 60 degree day in January - so weird. I got a mountain bike ride in this morning, this afternoon I'll make a semi-permanent place for that log I got cut up. I have it by the edge of the driveway, which isn't a great place for it. I bought some straps to put it under tension while it dries reducing the chance of it warping.
I might get some more time in the shop later this afternoon when I install the ferrules.
It's funny, I just read your early morning post and I was nodding my head and thinking, "yeah that tailpiece was starting to look awful heavy for this design, something simpler would definitely be better. What about just a piece of contrasting wood for the ferrules to sit in, which could sort of suggest a tailpiece without looking bulky?" And then I read your more recent post, and that's what you arrived at too!
It probably doesn't look like much progress, but I got the ferrule holes drilled. This was a bit problematic because the 1/2" drill for the outer edge left a large guide hole in the center, too big for the 3/8" drill for the body to center itself. I made a wood paste with water, wood glue and sawdust and filled the center of the hole back in. Another 60 degree day here so I went for bike ride.
Then I used a punch to put a centering hole back in, once I got the 3/8" hole drilled I carefully cleaned out the 1/2" hole using the forstener bit again. It seemed to work well. I would test it, but I know once I get the ferrule in I won't be able to get it out, that 3/8" is tight and I can't get to the back to push it out. I guess I could rig up a screw or something to pull it out.
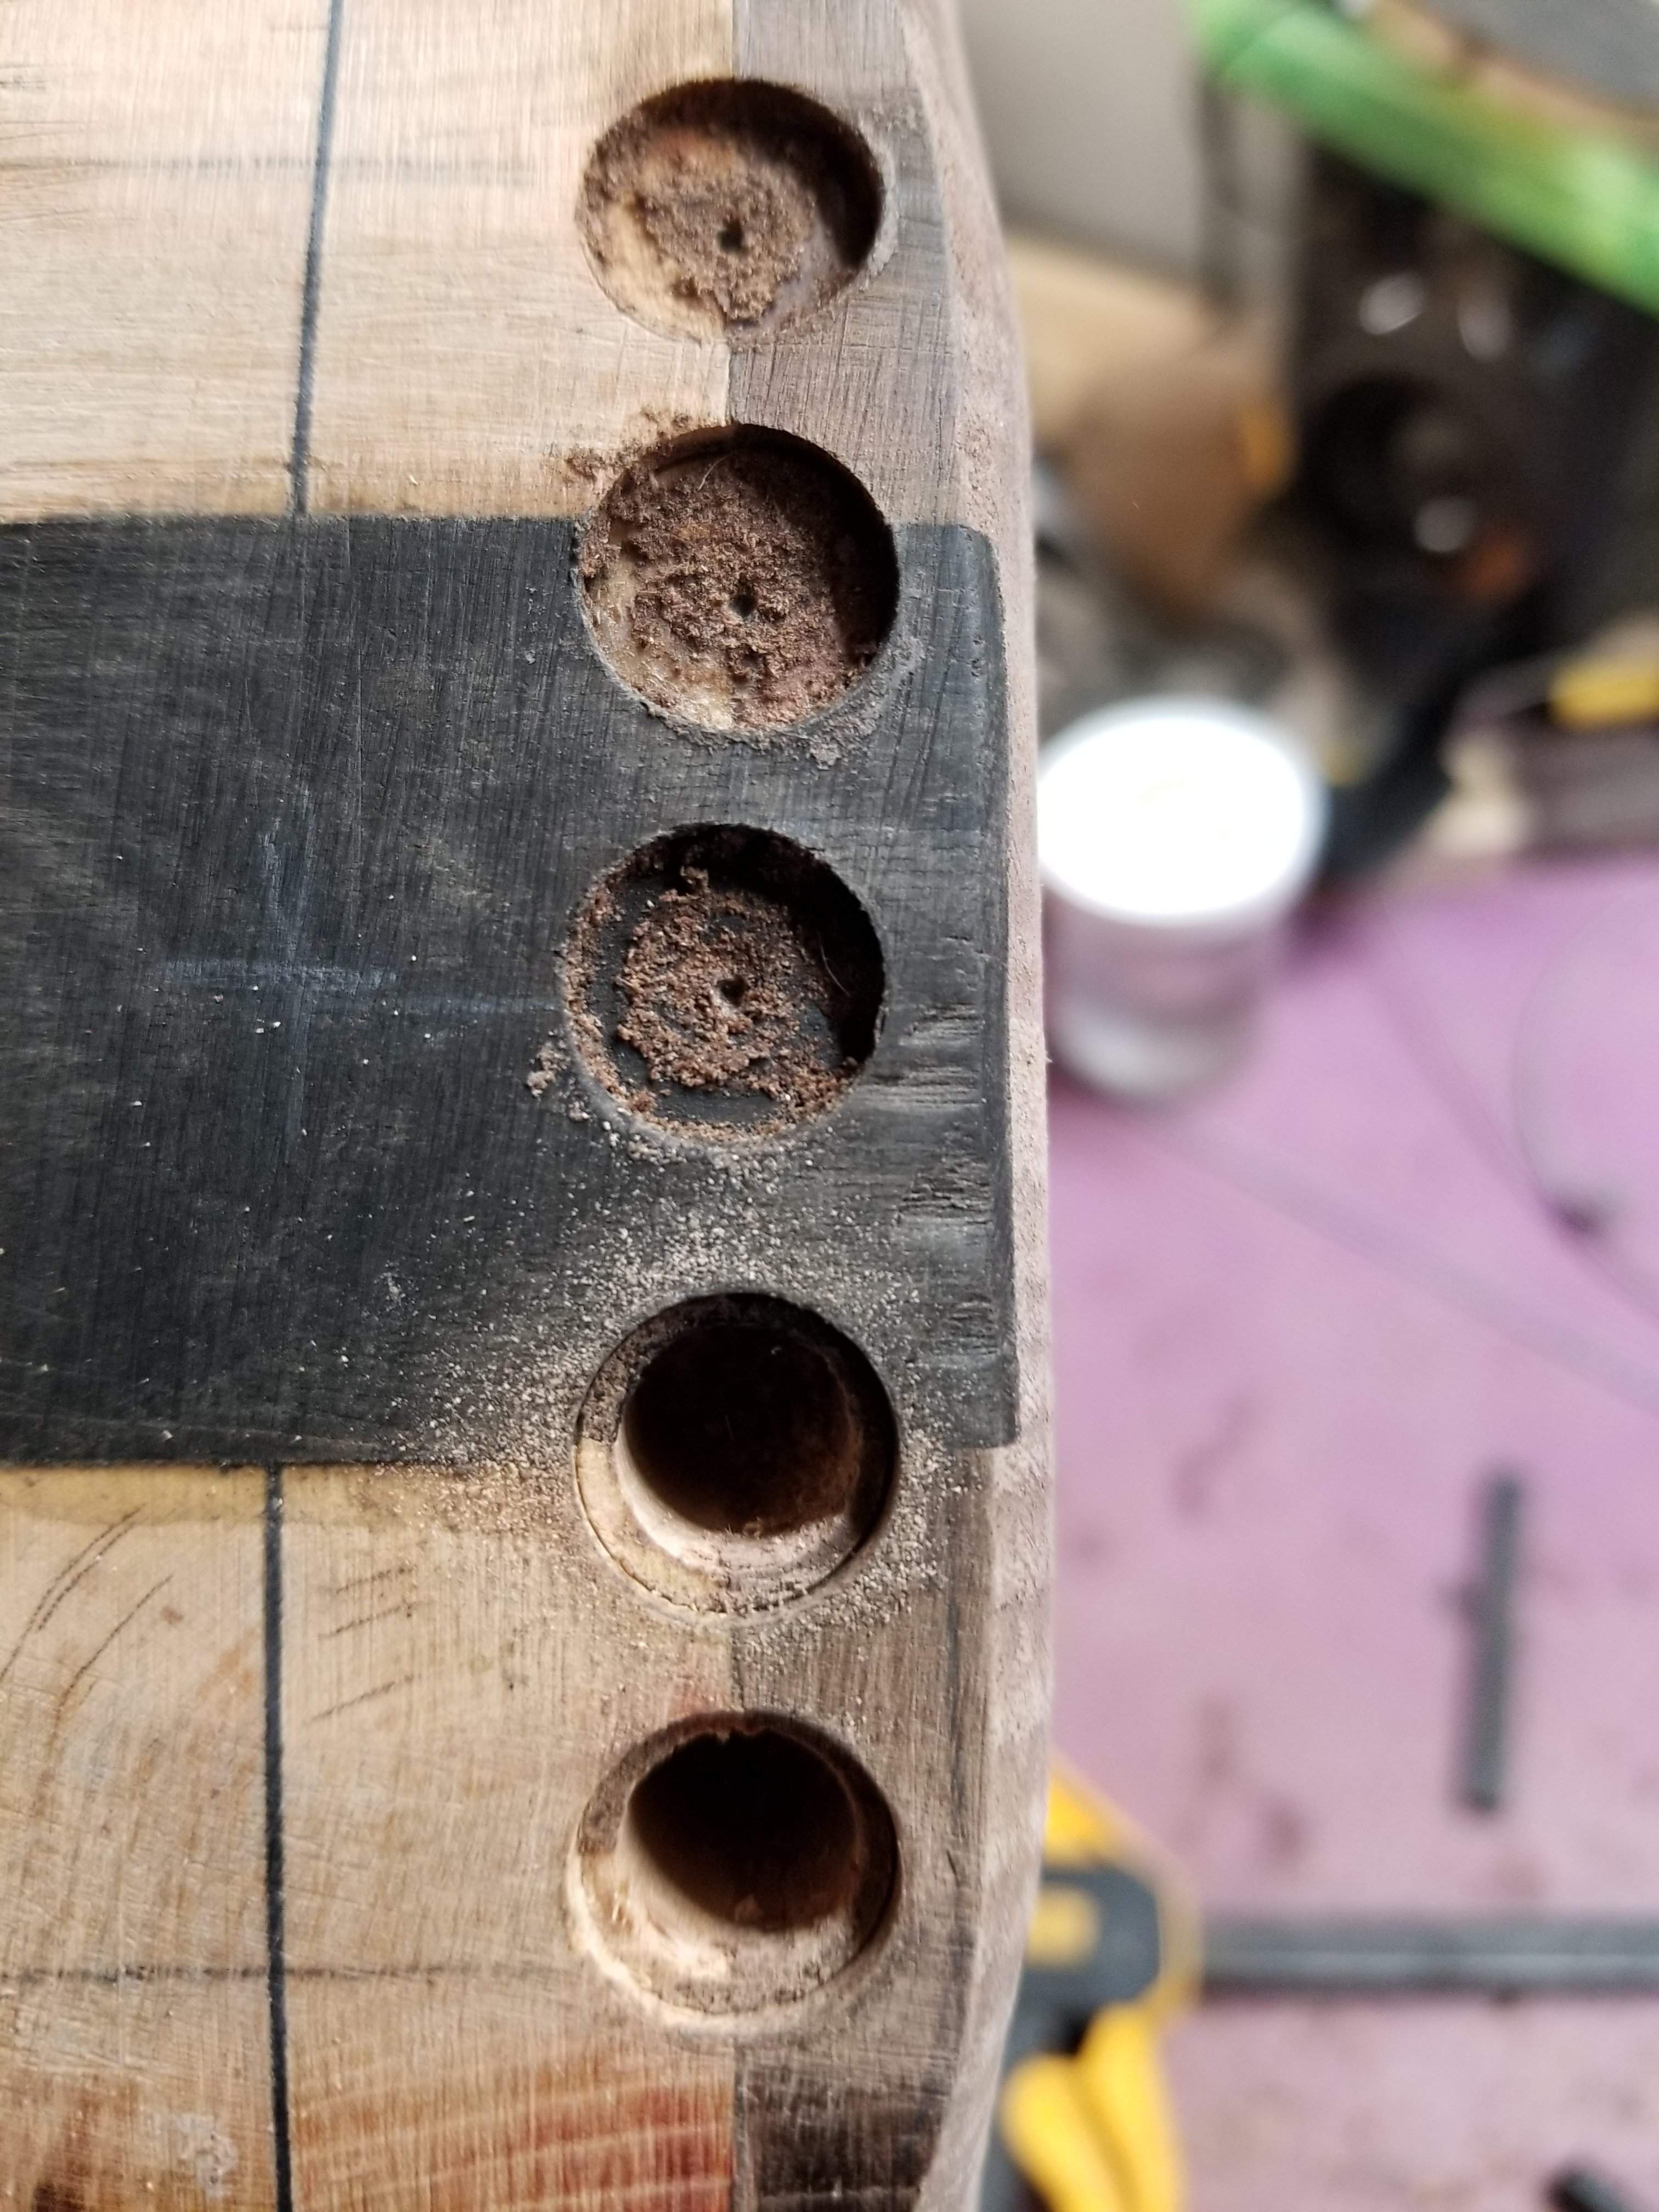
Then I moved on to the top. I'll admit that I stared at this for a long time before doing the first hole and I did a few tests. I drilled straight down with a 1/4" brad point bit, then switched to a regular bit to drill at an angle to hit the hole I drilled from the back. After I got that done I carefully filed the holes until they met the line I drew. I then ran an E string through each hole from the top to the back and I used the round wound string as a file of sorts to file out the string path through the body. All of the holes met inside the body, which was nice considering I had to use a hand drill to drill the ferrule holes. I suspect getting the strings through with the ferrules in will be more difficult than it is right now.
The B string hole will need further filing, but I don't have a round wound B string that hasn't been wrapped around a peg. I'll get to that later when I put on the new strings. If I recall correctly from the last time I used ferrules on a five string I'll have to drill out the ferrule a little for the B string to fit.
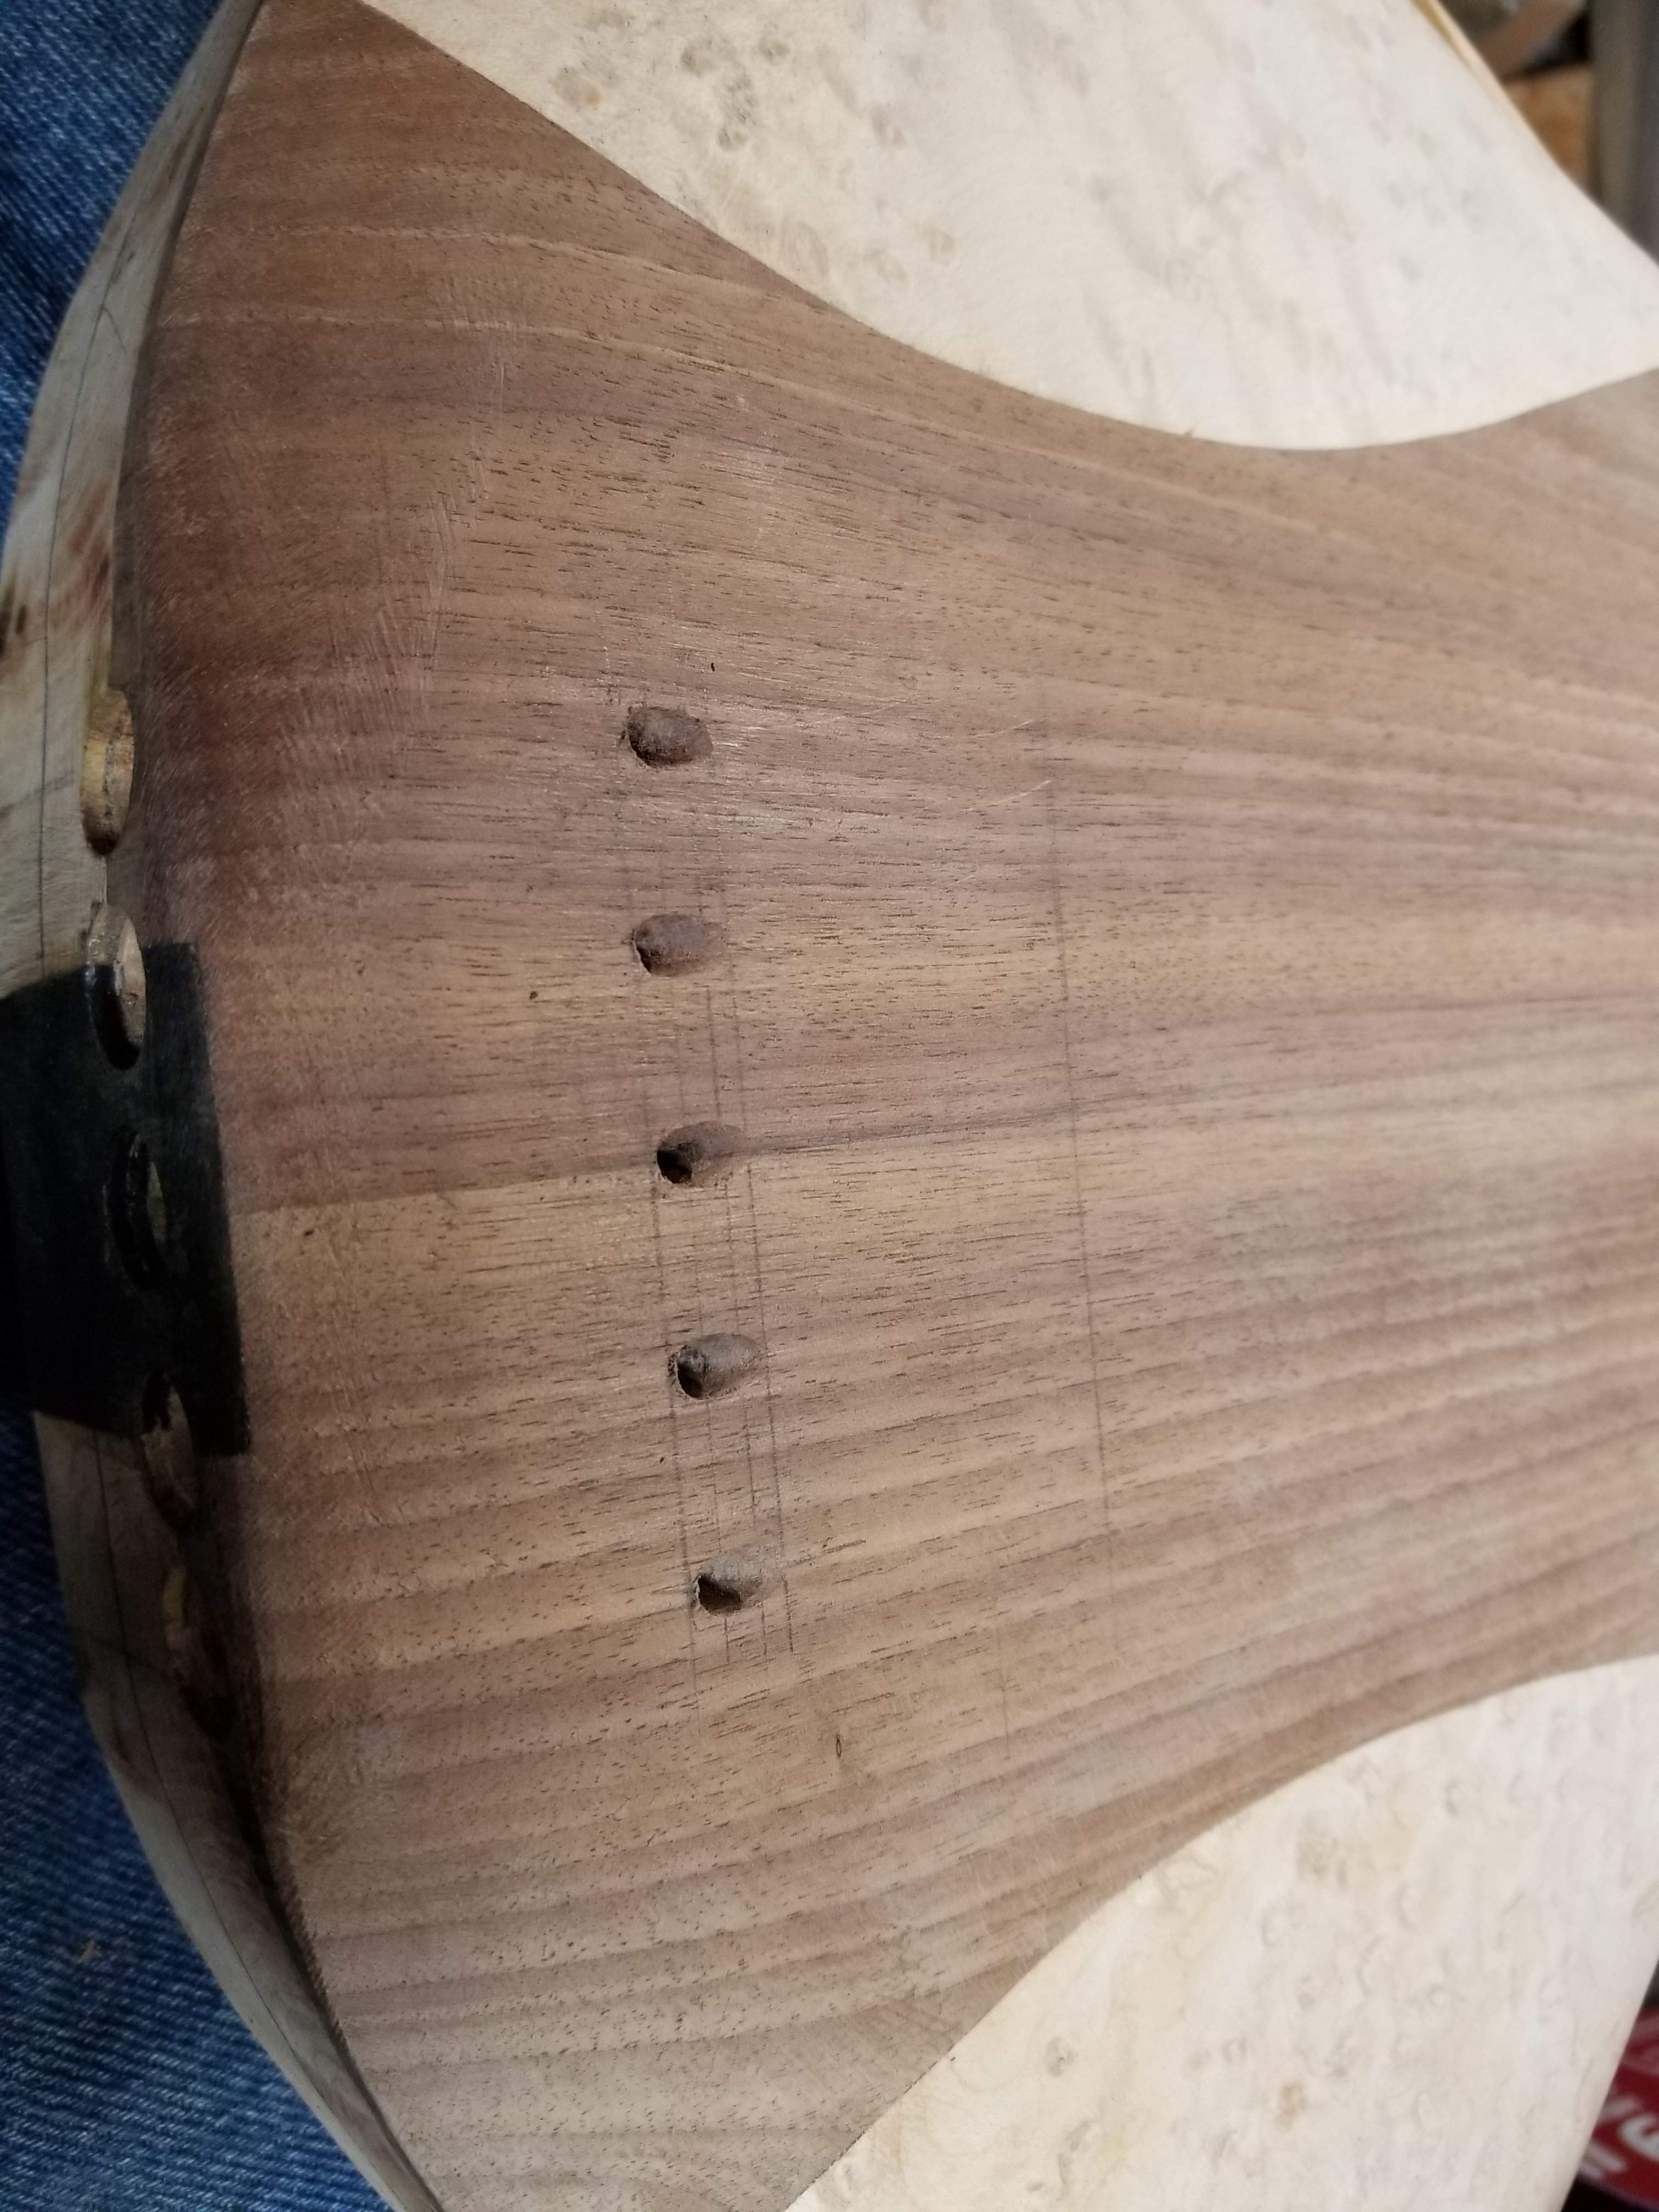
I've got to round over the back, it's not rounded back by where the ferrules exit. I did round over the top more than what is shown in the pic above. While I think a tail piece would have been nice, I am 100% confident that these strings won't pull through or break anything :-D, the fact that it looks great is just a side bonus.
Then I used a punch to put a centering hole back in, once I got the 3/8" hole drilled I carefully cleaned out the 1/2" hole using the forstener bit again. It seemed to work well. I would test it, but I know once I get the ferrule in I won't be able to get it out, that 3/8" is tight and I can't get to the back to push it out. I guess I could rig up a screw or something to pull it out.
Then I moved on to the top. I'll admit that I stared at this for a long time before doing the first hole and I did a few tests. I drilled straight down with a 1/4" brad point bit, then switched to a regular bit to drill at an angle to hit the hole I drilled from the back. After I got that done I carefully filed the holes until they met the line I drew. I then ran an E string through each hole from the top to the back and I used the round wound string as a file of sorts to file out the string path through the body. All of the holes met inside the body, which was nice considering I had to use a hand drill to drill the ferrule holes. I suspect getting the strings through with the ferrules in will be more difficult than it is right now.
The B string hole will need further filing, but I don't have a round wound B string that hasn't been wrapped around a peg. I'll get to that later when I put on the new strings. If I recall correctly from the last time I used ferrules on a five string I'll have to drill out the ferrule a little for the B string to fit.
I've got to round over the back, it's not rounded back by where the ferrules exit. I did round over the top more than what is shown in the pic above. While I think a tail piece would have been nice, I am 100% confident that these strings won't pull through or break anything :-D, the fact that it looks great is just a side bonus.

- Apr 18, 2008
- 16,011
- 1
- 31,720
- Disclosures
- I'm highly opinionated and extremely self-assured

Thanks, I stressed a lot before drilling those holes.Nicely done! Your exit holes line up better than mine...
I spent an hour or so working on the body this morning. I started by smoothing out the spots that were in need of it. Once I got that done I moved on to removing tooling marks, then I smoothed those areas and finally did a 120 grit sand of the whole body. I always love removing all the grime from a body like this, the wood looks so great and clean. I will need to drill the string and neck ferrule recess holes a bit deeper after that. Overall I'm very happy, things are looking good even under the light which enhances all flaws.
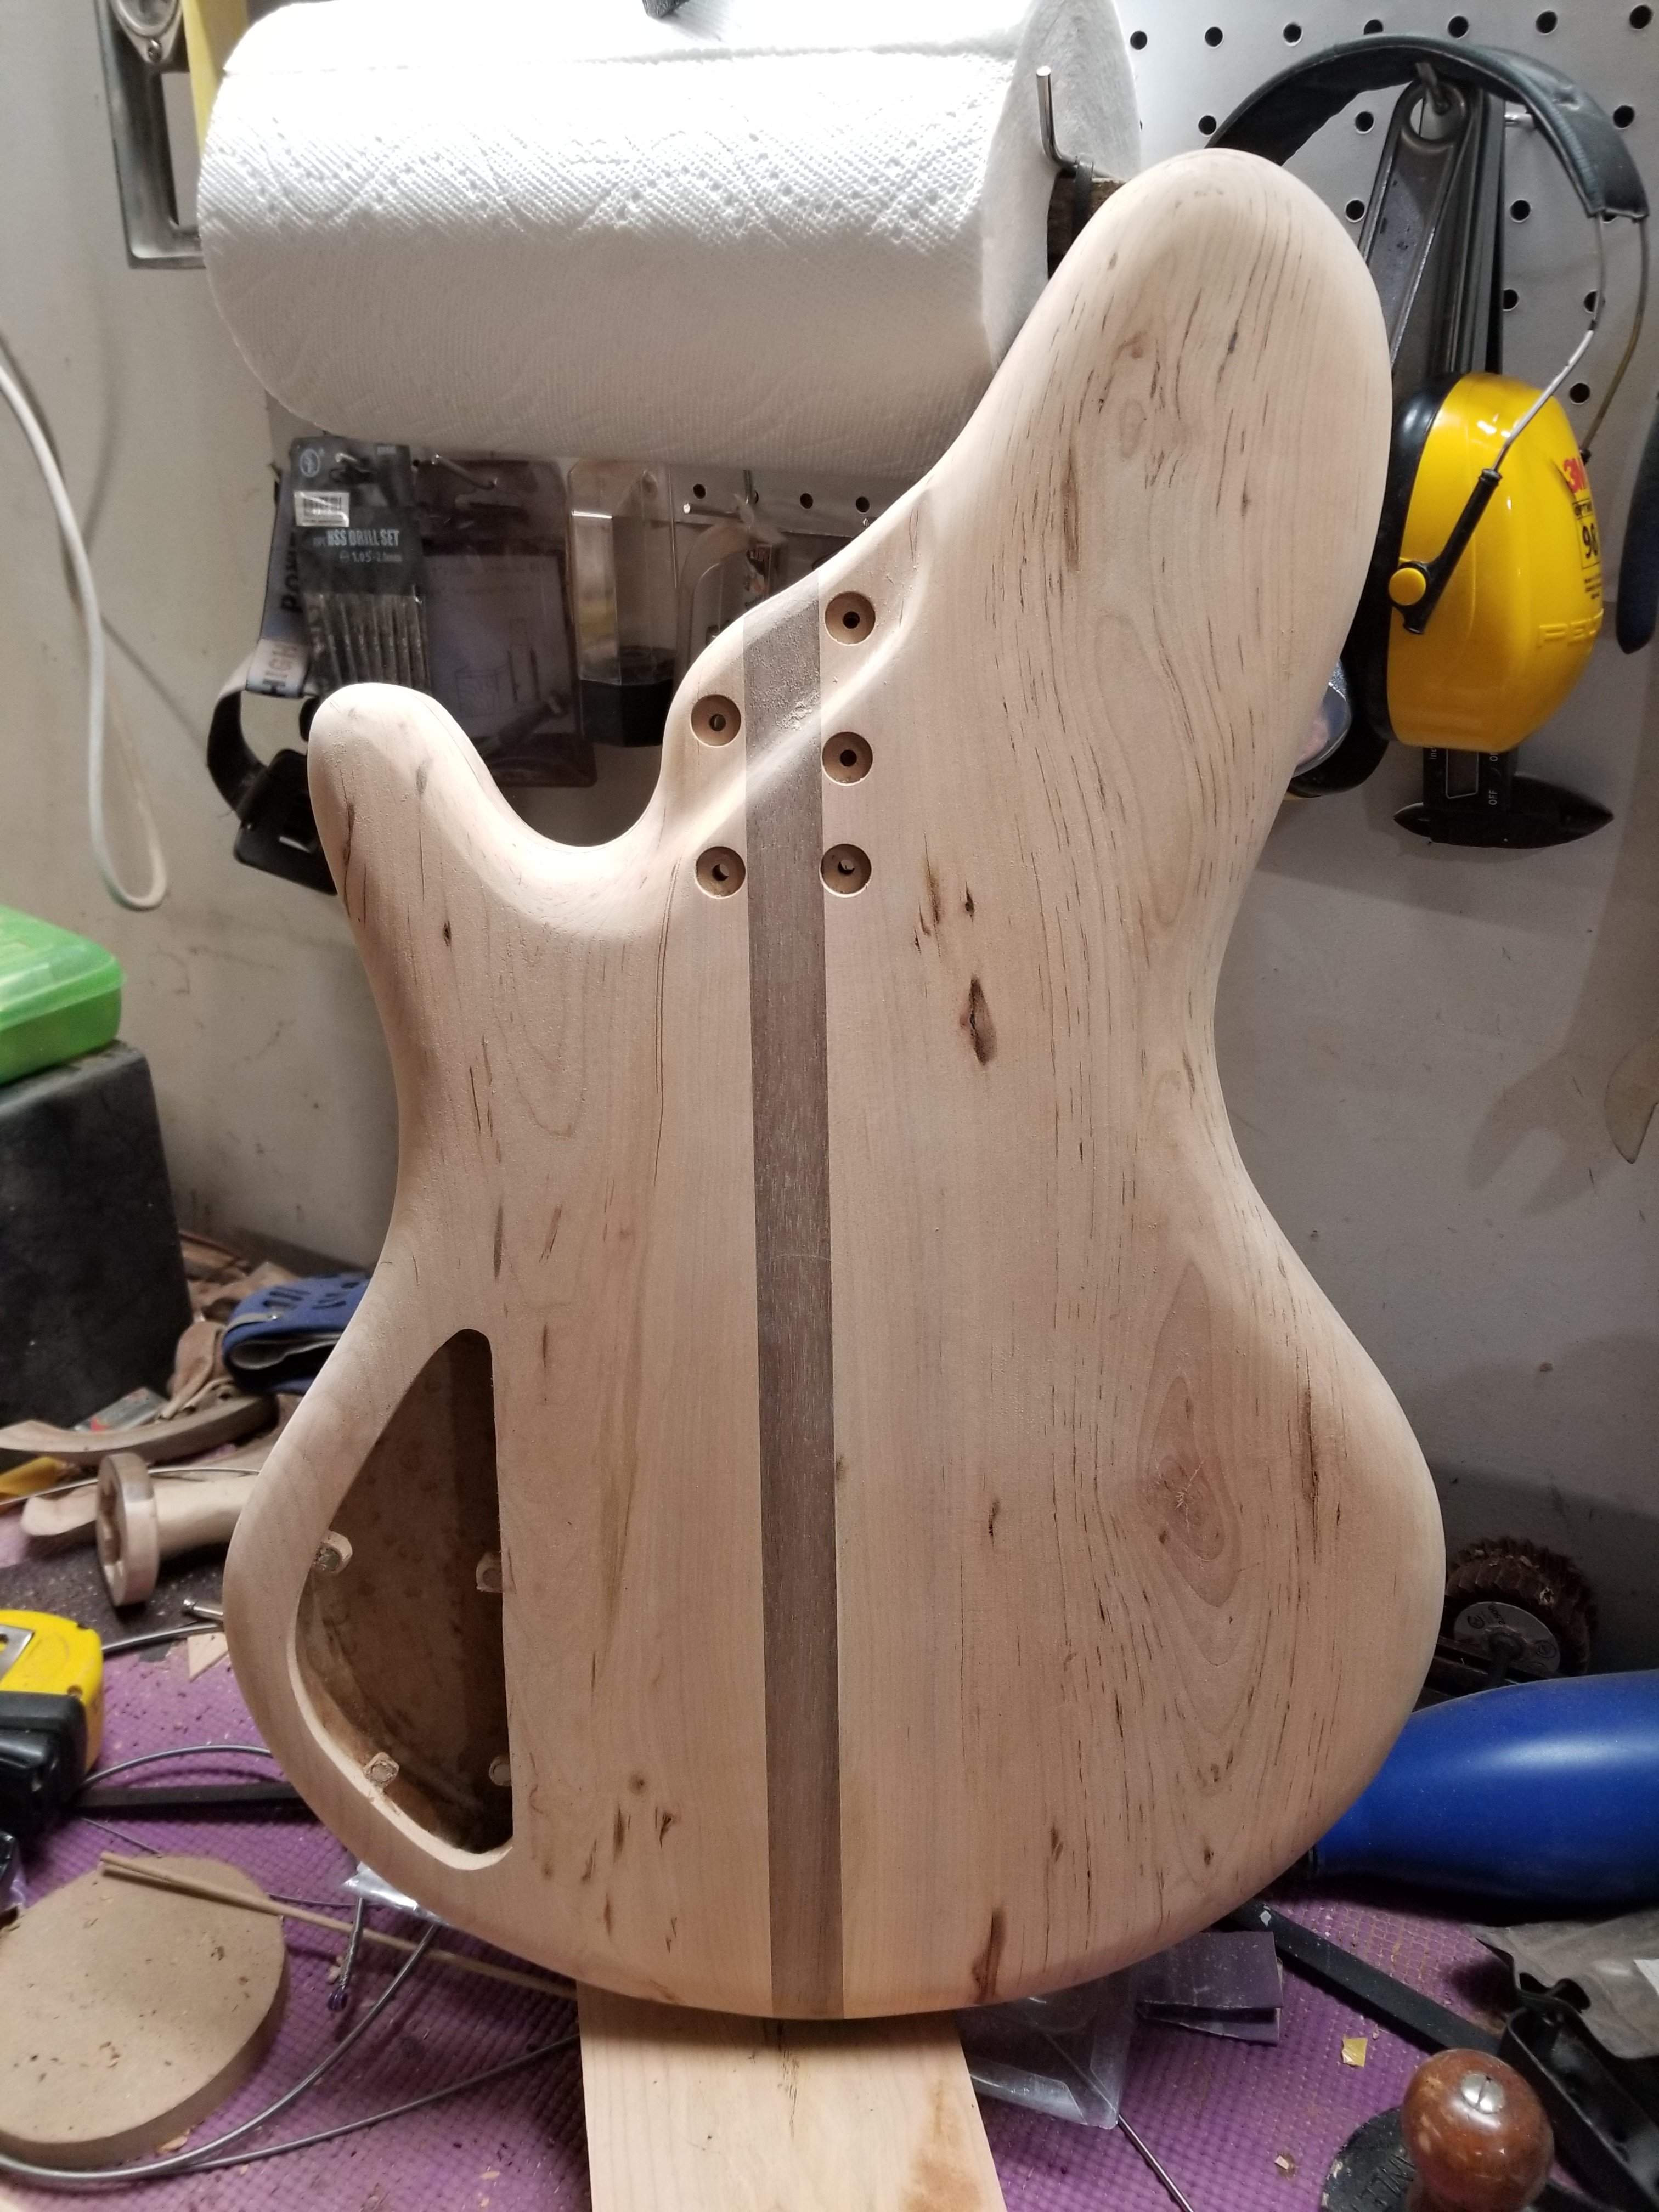
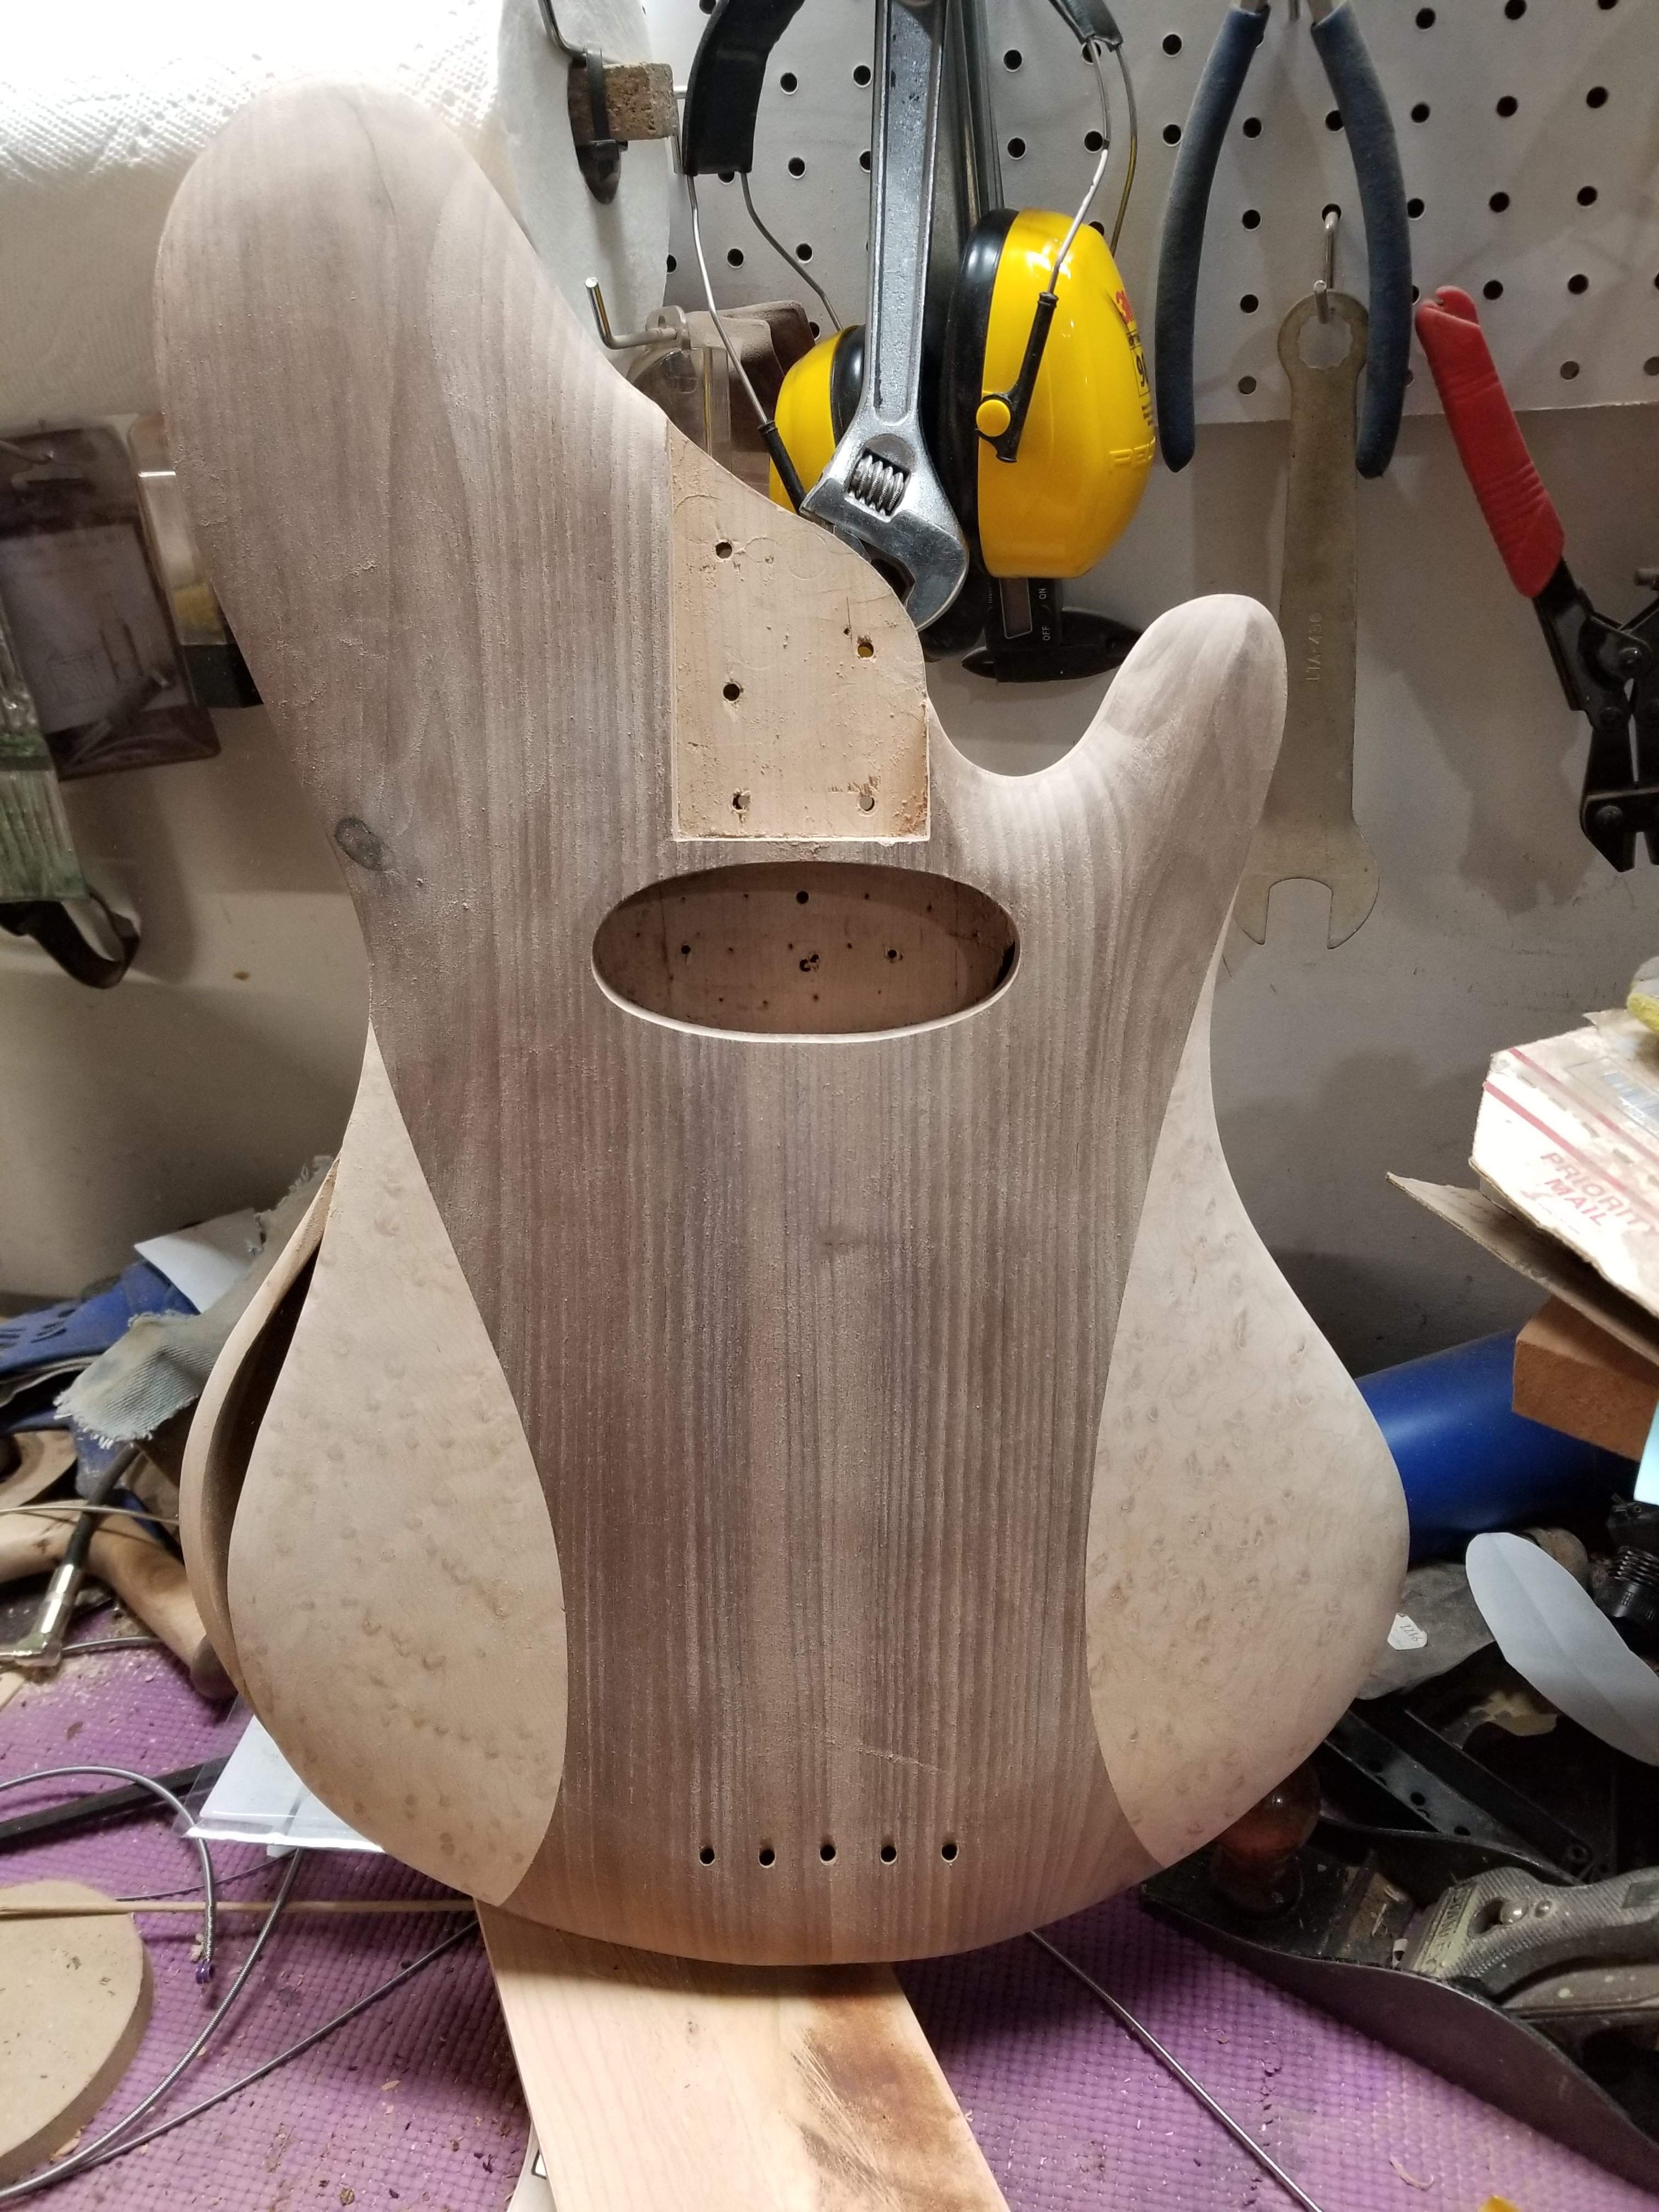
I kind of wish I had a thicker piece of ebony, it's barely visible from the front, it's all good, but it could have been a more pronounced accent than it is.
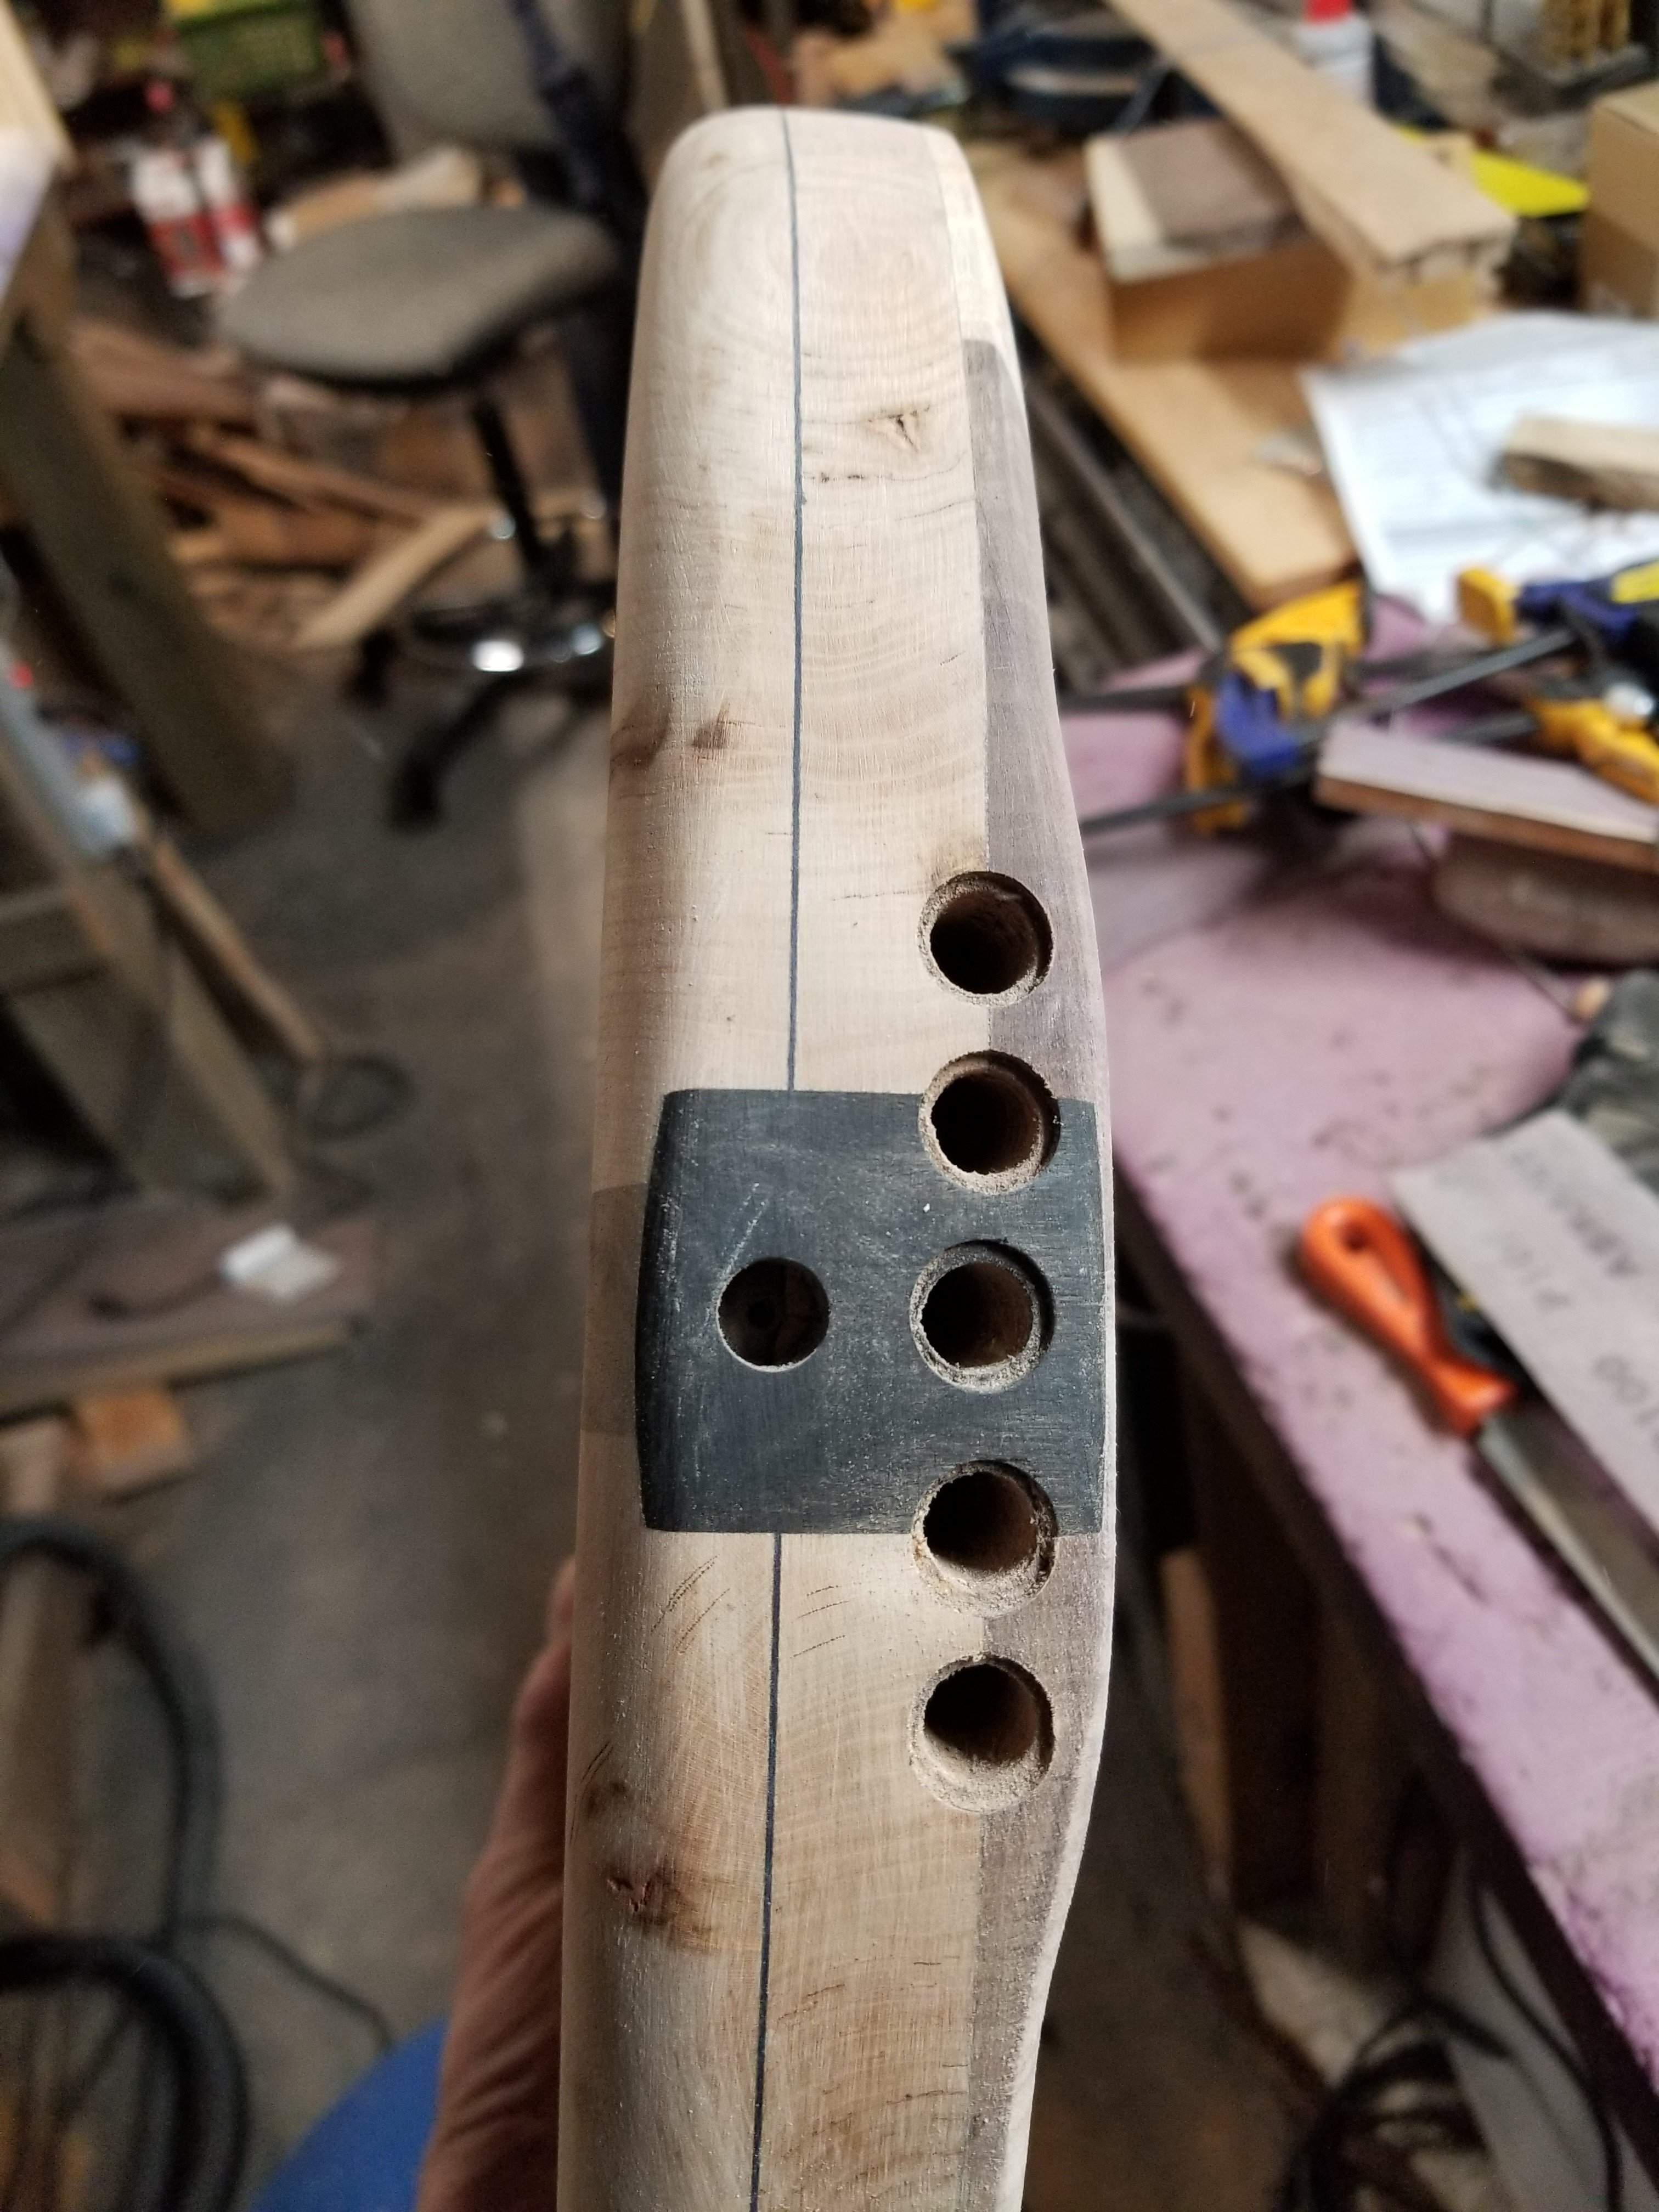
Next I need do the same thing on the neck. I haven't really paid any attention to that part since I started working on the tailpiece, I'm sure there's a lot to address there. I also need to plane down the control cover. I put the body through the planer to even out the pieces of cherry after I cut the control cavity out, I just realized that this morning while test fitting everything, the cover is proud of the back by a significant amount. That will be tricky as I don't think I can necessarily sand against the cover holders, I don't think they'll handle that stress. I'll have to think about how to do it. I can do the whole thing by hand if I need to, it will just take a bit of time.
From a construction perspective I guess the only things left are knobs, floating bridge and truss rod cover. I'll probably work on those after I start the finishing process on the rest of the instrument. I am not sure what I'm going to make the bridge out of, I may do aluminum.
I kind of wish I had a thicker piece of ebony, it's barely visible from the front, it's all good, but it could have been a more pronounced accent than it is.
Next I need do the same thing on the neck. I haven't really paid any attention to that part since I started working on the tailpiece, I'm sure there's a lot to address there. I also need to plane down the control cover. I put the body through the planer to even out the pieces of cherry after I cut the control cavity out, I just realized that this morning while test fitting everything, the cover is proud of the back by a significant amount. That will be tricky as I don't think I can necessarily sand against the cover holders, I don't think they'll handle that stress. I'll have to think about how to do it. I can do the whole thing by hand if I need to, it will just take a bit of time.
From a construction perspective I guess the only things left are knobs, floating bridge and truss rod cover. I'll probably work on those after I start the finishing process on the rest of the instrument. I am not sure what I'm going to make the bridge out of, I may do aluminum.
