• TalkBass has been independent since 1998. Add your voice.
    Create a free account to reply to discussions, view embedded media, and browse with fewer display ads.
    Join freeLog in
    Want zero display ads or expanded classifieds tools? Compare plans.

Winter Build-Off 2020 - Semi-Hollow Six String

Hi folks, here's my entry, I'm looking forward to trying to get it done.

I accidentally bought a wide 19mm six-string bridge this summer when I meant to buy a narrow-spaced one. Instead of sending it back, I bought another bridge for that build, and kept the wide one, thinking I'd just build one with a wide spacing one day. And here we are with this build off - I thought I'd go ahead and try to make one with some kind of semi-hollow and F-hole setup. 19mm spacing and 35" scale, it's a big ol' bass setup. Just for fun. :laugh:
I also wanted to enter to make myself figure out a way to keep working in winter, since my garage is detached and uninsulated. My building time really hit the wall when it got cold. So, I bought a propane heater that really cranks, and have worked in there a couple times now with it. It should work.

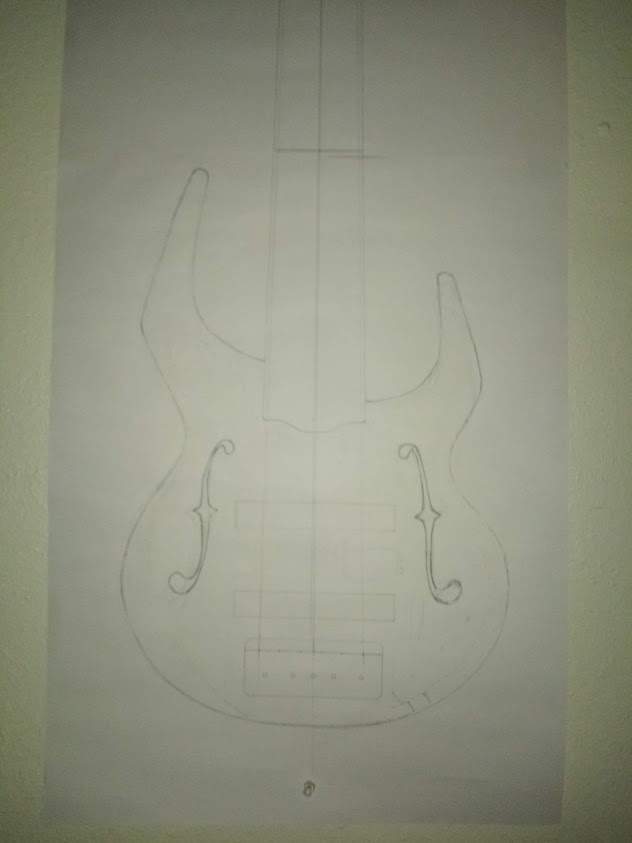
Here's the drawing I made with 19mm spacing. The lower bout can not be that long, so it'll get shrunk as I go along to something more reasonable. Pickups are Bartolini split-coil candybars, and I have a Bartolini pre-wired pre-amp and harness to go with it. Hardware is hipshot black finish. It's hard to see in this pic, but I've got the cavities and electronics/parts layout on here
Will it have frets? I'm not 100% sure but I need to decide in the next couple days. Then I'll select the fretboard wood, but I'm leaning toward ebony. I bought some ebony blanks that are wide enough recently.
bo-1.jpg


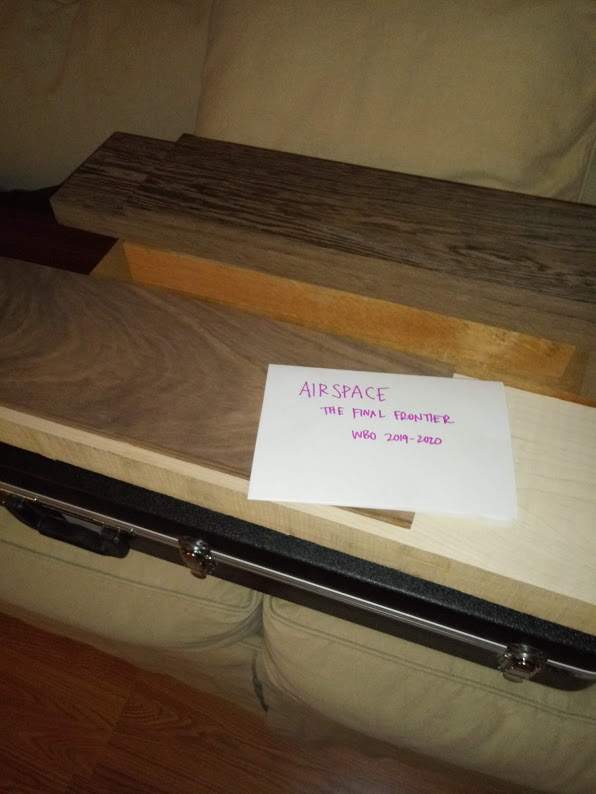
Neck-through; I'm using Maple/African Mahogany/Wenge in the neck.
Body is African Mahogany with a Wenge middle layer and a figured walnut top.
bo-2.jpg
 
It's been pretty warm here in CO front range the last couple days, making it a lot easier to get something done. I got a little work in on this one today.
I drew up the side elevation and thought through the body angle, fretboard height, bridge height, body layers, etc.
Then, I cleaned up the neck blank on the jointer, planer, and compound miter saw. I think it's reasonably straight and even. Not very straight grain, and not too sure I lined up the grain the way you're supposed to. Oh well, this is how it is. Looks ready to go.
bo-8.jpg

bo-5.jpg

I routed the truss rod channel, and 1/8" channels for the two CF rods
bo-6.jpg


Then I cut the headstock face angle on the bandsaw and cleaned it up with the hand plane. I'll fine-tune this, but it's roughly in the right shape.
bo-7.jpg

Good to get this one underway. I'm having a good time!
 
Got a little work in on this one. I'm also trying to get through a clear-coat finish on my other build, so I'm needing to balance getting things done on these two builds.

Going to try a little bit of fancy piece-work on the backstrap and heel area. Gluing up some matching stripes, we'll have to see how it turns out before I decide to include it.
bo-9.jpg

Starting to assemble the body wing layers.
bo-10.jpg

Today, I'll build the other body wing. I'll plane down and trim out these stripes and that wenge layer and make some decisions hopefully on whether or what to include there. I'll probably fine-tune the neck/headstock work I've done so far. Then, I'll probably see if I can get a couple more coats of poly on the other build.
 
Have gotten some work in here and there. I've spent a lot of time trying to finish the other build, but it also still needs some work.

Built the other body wing layers, and cleaned up the stripe set I made. It looks nice, I'll have to make a final decision as I move onto building out the neck.
bo-11.jpg


Assembling the top. I decided to add an ebony strip to the top wood. The top was just barely wide enough to use ad I wanted a little more wiggle room. I also think it'll look cool, as it matches the fretboard ebony, and I'm going to shape the end of the fretboard to accentuate the stripe, hopefully.
bo-12.jpg

Yesterday, I made the basic fretboard out of ebony and slotted the fret slots. Then I made some ebony strips to glue up to the sides for hiding the end of the tangs. I've never tried the technique, but I think I can picture what to do. I need to keep rolling if I can, I feel like I need to shoot to be be applying finish by March 1st, or I won't be done in time.
 
Can do a little update here.

In with the CF rods and the truss rod, on with the fretboard. I tried little sections of round toothpicks as locating pins this time instead of little bits of wire. I wasn't as happy with how firmly they were holding but the glue-up seems to have gone ok.
bo-13.jpg

bo-14.jpg

I'll need to recess this part of the neck for the top (and at a little angle, too). Plan is to use the fretboard end as a template and rout that part. Then I'll have to carefully fit the top to that shape. That will take some patience, but it basically has to go right or I'm kinda screwed. :D I did it once before and it went ok, I'll just have to do the best I can.

bo-15.jpg

Once I get this part recessed, I'll shape the neck up a little and radius the fretboard.
 
Quick update, I made the top of the neck recessed for the drop-top.
I got rid of the angle because it was complicating the interface between the top and fretboard. I just recessed the top more at the fretboard end, so it's level to the board and not angled.
Then I routed around the end of the fretboard shape. Then I put the first 2 (of 3) layers onto the back of the neck for thickness and style.
I used more toothpick parts to pin the stripes into the right position.
Stripes and wenge. The top layer is african mahogany and will match the back of the body wings.
bo-16.jpg


The backstrap glue-up. You can kind of see in the pic how I recessed the neck blank and routed around the fretboard end.
bo-17.jpg


A little clearer shot of how the end of the board looks. It's a little rough still, I ran out of shop time.
Next steps are to clean this up a tad, add the final backstrap layer, then rough cut the neck and headstock shape out and radius the board. After that, I should be able to carve the neck.
bo-18.jpg


Coming along. I need to push through the rest of the neck build, this is the hardest part.
 
Got some work in on this neck. I attached the last layer to the backstrap and cleaned up the edges to be flush. Now I have a neck of the right thickness to proceed.

Carved out the truss rod access with a 1/2" and a 1/4" chisel and a little sandpaper.
bo-19.jpg


Laminated the face of the headstock with some ebony veneer.
bo-20.jpg


I wasn't going to use any inlays or anything, but I decided some faux abalone dots at the 12th and 24th fret would be subtle and a nice touch.
bo-21.jpg

bo-22.jpg


Now I can rough shape the neck and headstock and then think about getting a radius on the board and a neck carve going.
 
This build has come along a little bit. I finally finished the other build I was working on, so now I can focus on this one.

Rough cut the neck shape and the headstock shape. I radiused the fretboard to a 14" radius using a flat block, a radiused block and some grunt work. It would be nice to come up with a more efficient way to do it, but if I'm only building 3 a year, I can suck it up I guess.
The headstock ears were supposed to be pointy-er, but I tore a good chunk of the ebony veneer out with a coarse file and now they will be more rounded. :D Still trying to decide exactly how I'll shape this headstock
bo-25.jpg

Here's how the heel pieces stack up. It'll be fun to carve up the heel with this pattern in it
bo-23.jpg

Cut the neck to roughly the right thickness and started into the first facets before I had to leave the shop.
bo-24.jpg

Tomorrow is a holiday at my work, so I should be able to get a neck carve done.
 
Neck and volute carve is mostly in place. I had a nice chunk of wenge chip out at the tip of the headstock, I'll have to work up a CA/wenge fill of some kind. The neck's really wide and thin, it's got a little bit of an extreme "D" shape, but I don't really see how it could be otherwise. It feels nice.
Time to start thinking through the next few steps here, will be some template making to do soon.
bo-26.jpg

bo-27.jpg

bo-28.jpg
 
I had some solid shop time today, and turned my attention to the body.
First, I cleaned up the body wings a little and thicknessed them.
bo-29.jpg

I cut some of the pieces of my 1:1 drawing up to get ready to make templates for the chambers
I have some funky old coarse MDF from like the 80's or 90's. I think it may have been here when I moved in 15 years ago. It works well enough but I need to get some of that nice smooth stuff I see at Lowe's. Here's the bass side chamber template
bo-30.jpg

Treble side. It doesn't have the notch between the pickups because that's where the battery will be, routed from the rear.
bo-31.jpg

Hogging out some airspace with the forstner bit and my smallish benchtop drill press. Took some patience.
bo-32.jpg

Mounted the template with the masking tape and super glue trick, and made several passes with the router.
bo-33.jpg

Little bit of a router wobble at one spot in the bass chamber, but it'll be our little secret once the top is on.
bo-34.jpg

I need to sand the bottoms and clean the chambers up a bit. I like the idea of a dark brown stain in the chambers like some of the other builds have. I'll probably do that once they're cleaned up.
I still have to go in from the back for the control access and cover, and for the battery box.
bo-35.jpg

Airspace!

