• TalkBass has been independent since 1998. Add your voice.
    Create a free account to reply to discussions, view embedded media, and browse with fewer display ads.
    Join freeLog in
    Want zero display ads or expanded classifieds tools? Compare plans.

Winter Build Off 2022 - Leo Bass JazzRay

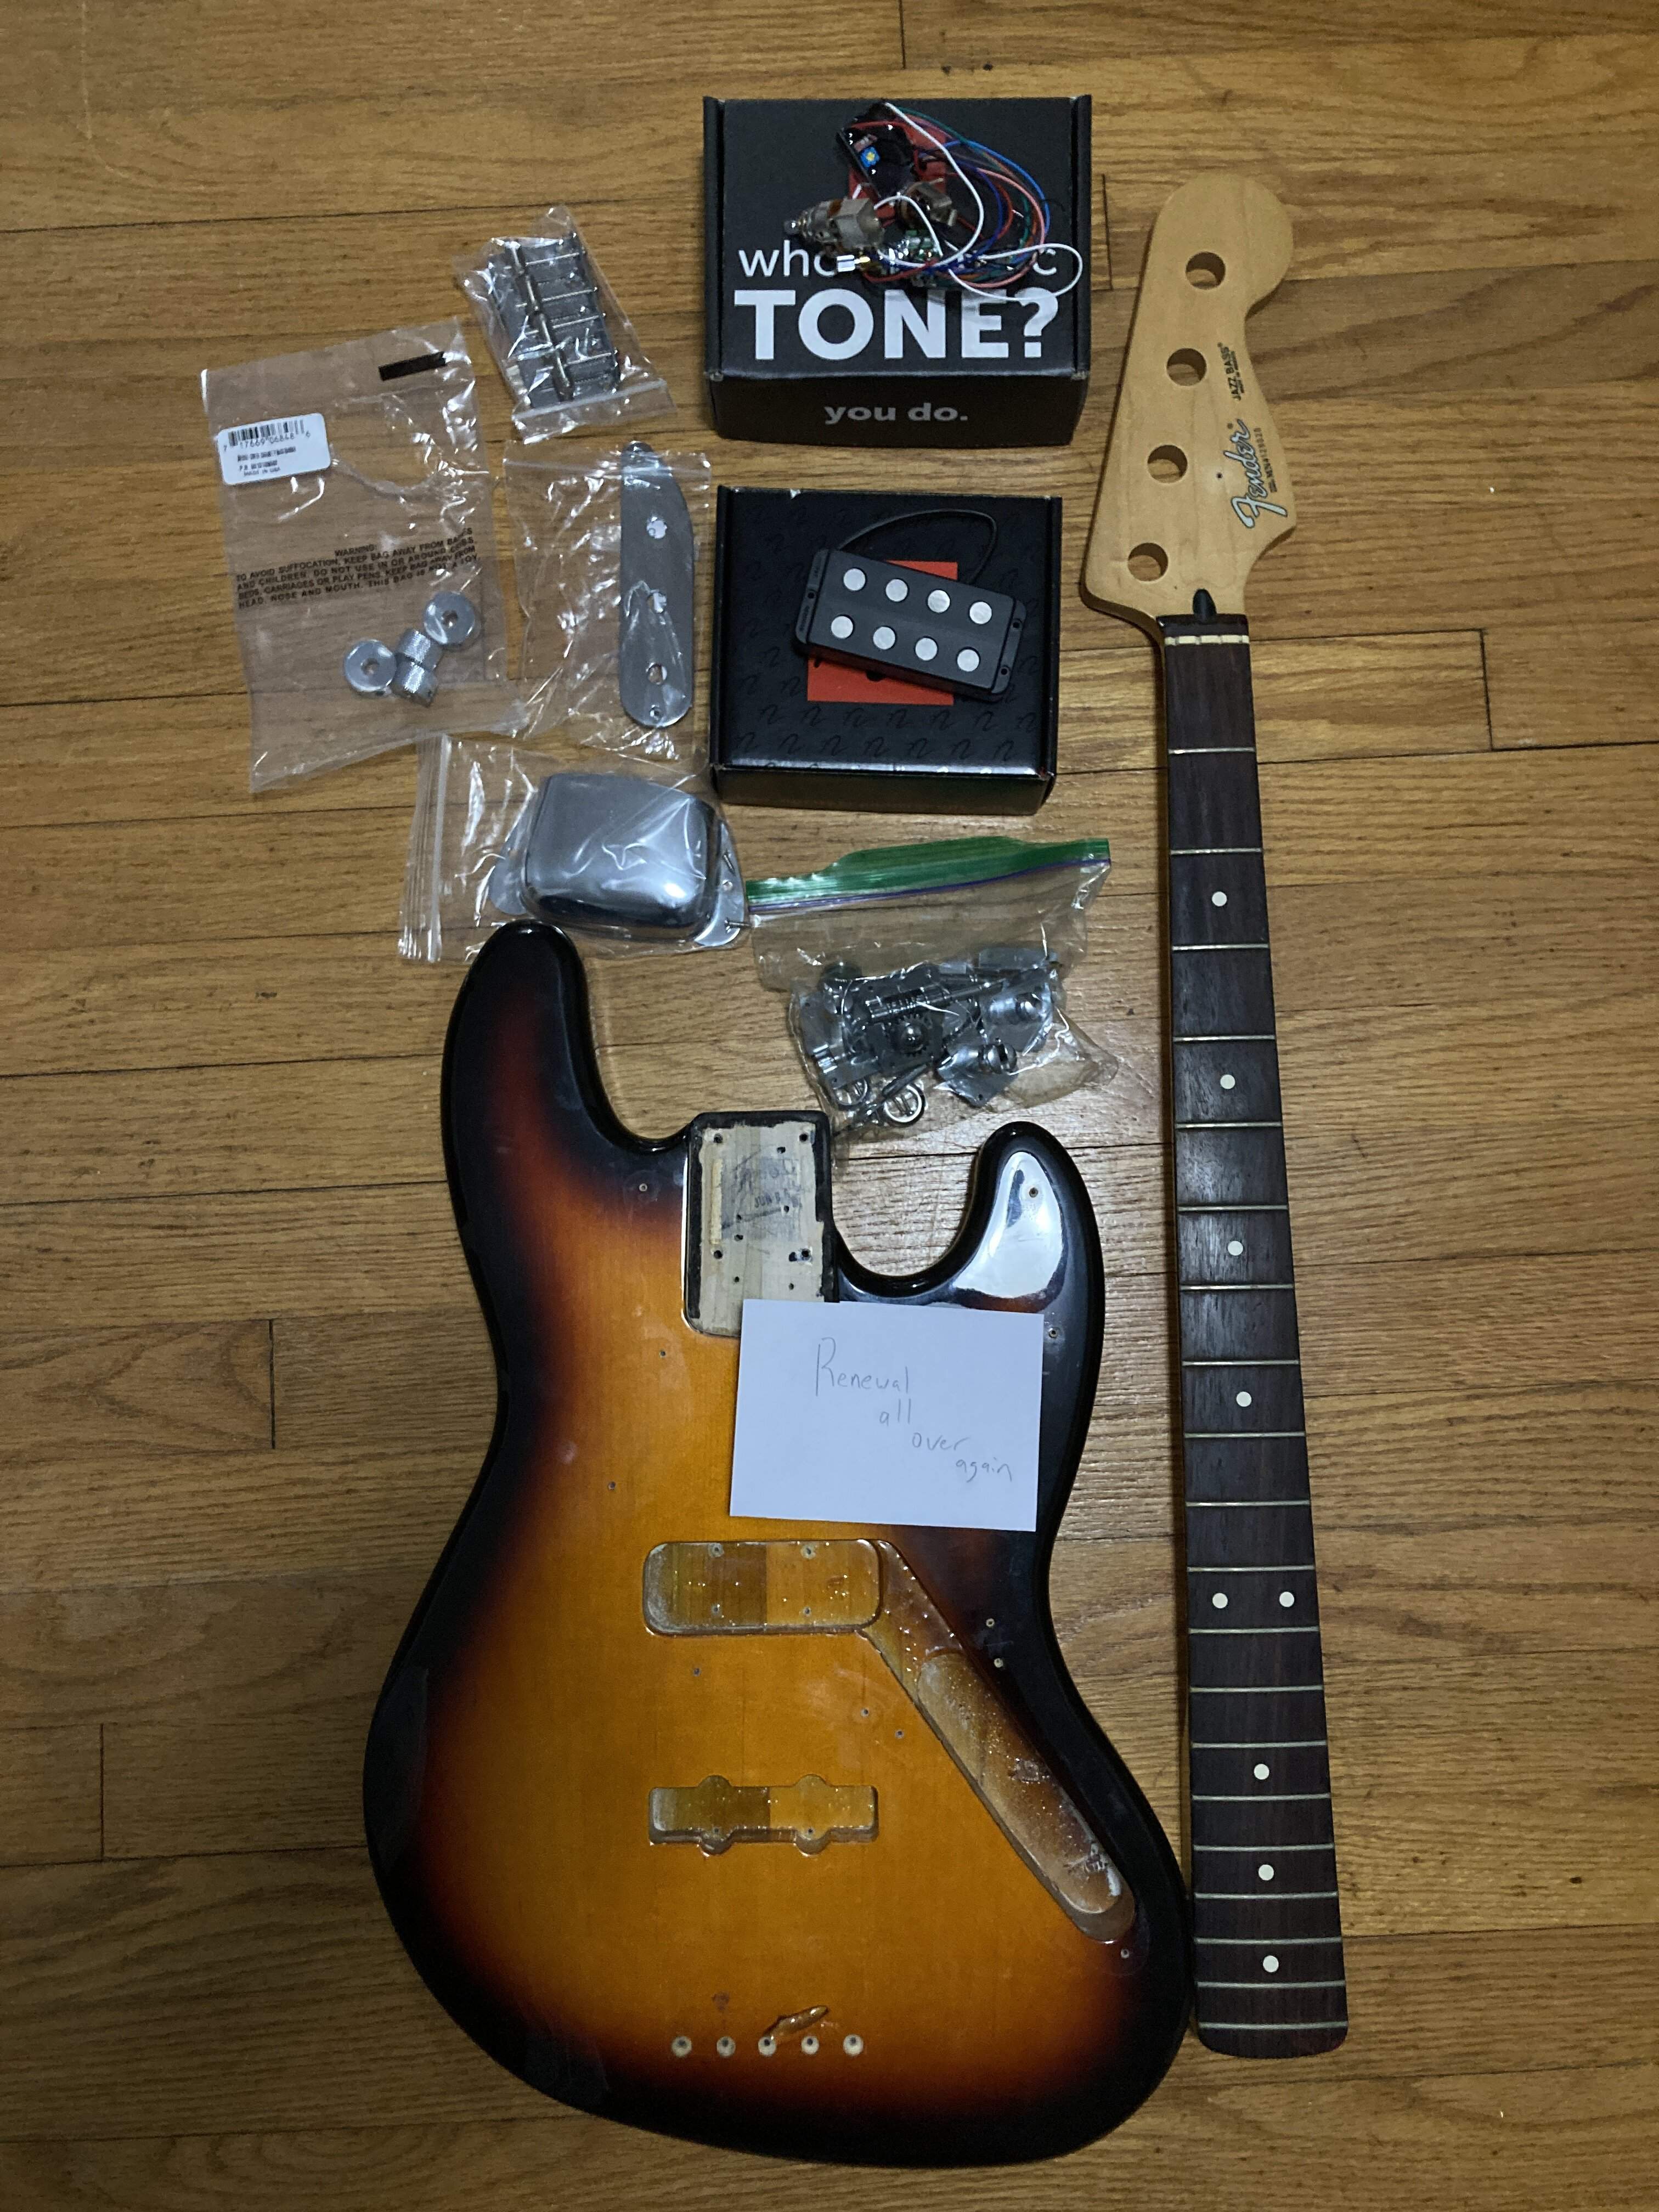
This is my Assembly Build:
IMG-6915.JPG


Had:
1994 Mexican J-Bass

Bought:
Bridge cover
Control plate
Stacked knobs
Threaded bridge
Nordstrand MM4.2 Pickup in MFD cover
Nordstrand 2 band with stacked Treble/Bass

Need:
Pickguard
Paint
Water slide decal “Leo Bass” in Fender font, JazzRay in “jazz bass” font

This bass was didn't get any play time once I got my Lakland J-Sonic. I thought a StingRay bass would also be nice as a different tone palette, and had the thought of turning my J bass into one. This is a Renewal of a bass that I don't play into something I will.

Why “Leo Bass JazzRay”: It hit me that I would be putting Leo Fender products from different eras/manufacturers together, so I though it might be fun to run with that idea for every part of the bass and have things from Fender, MM, and G&L. I ended up with a ‘51 P control plate, ‘60s P bridge cover, StingRay pickguard, and '60s J stacked knobs (didn't end up with the right color, but close enough). A threaded saddle bridge will allow the strings to line up with the pickup pole pieces.

I went back and forth with the pickup. I was going to go G&L MFD to include that era/design of Leo, but wasn’t convinced that was the tone I wanted. But then one day, Matt R posted the perfect solution in the Classifieds- a Nordstrand 4.2 in a G&L shell. It’s paired with a special order Nordstrand 2-band with stacked T/B- I’ll still use the stacked knob on the volume knob as well. Lining up the back of the G&L shell with the back of where the MM pickup would go is within 1/4" of the MM spot- the skinnier G&L shell helps make up for the missing 20th to 21st fret distance.

Color will be British Racing/Sherwood Green with white pearloid pickguard and painted headstock, a reference to the Adam Clayton J Bass, as he was one of my first bass playing influences.

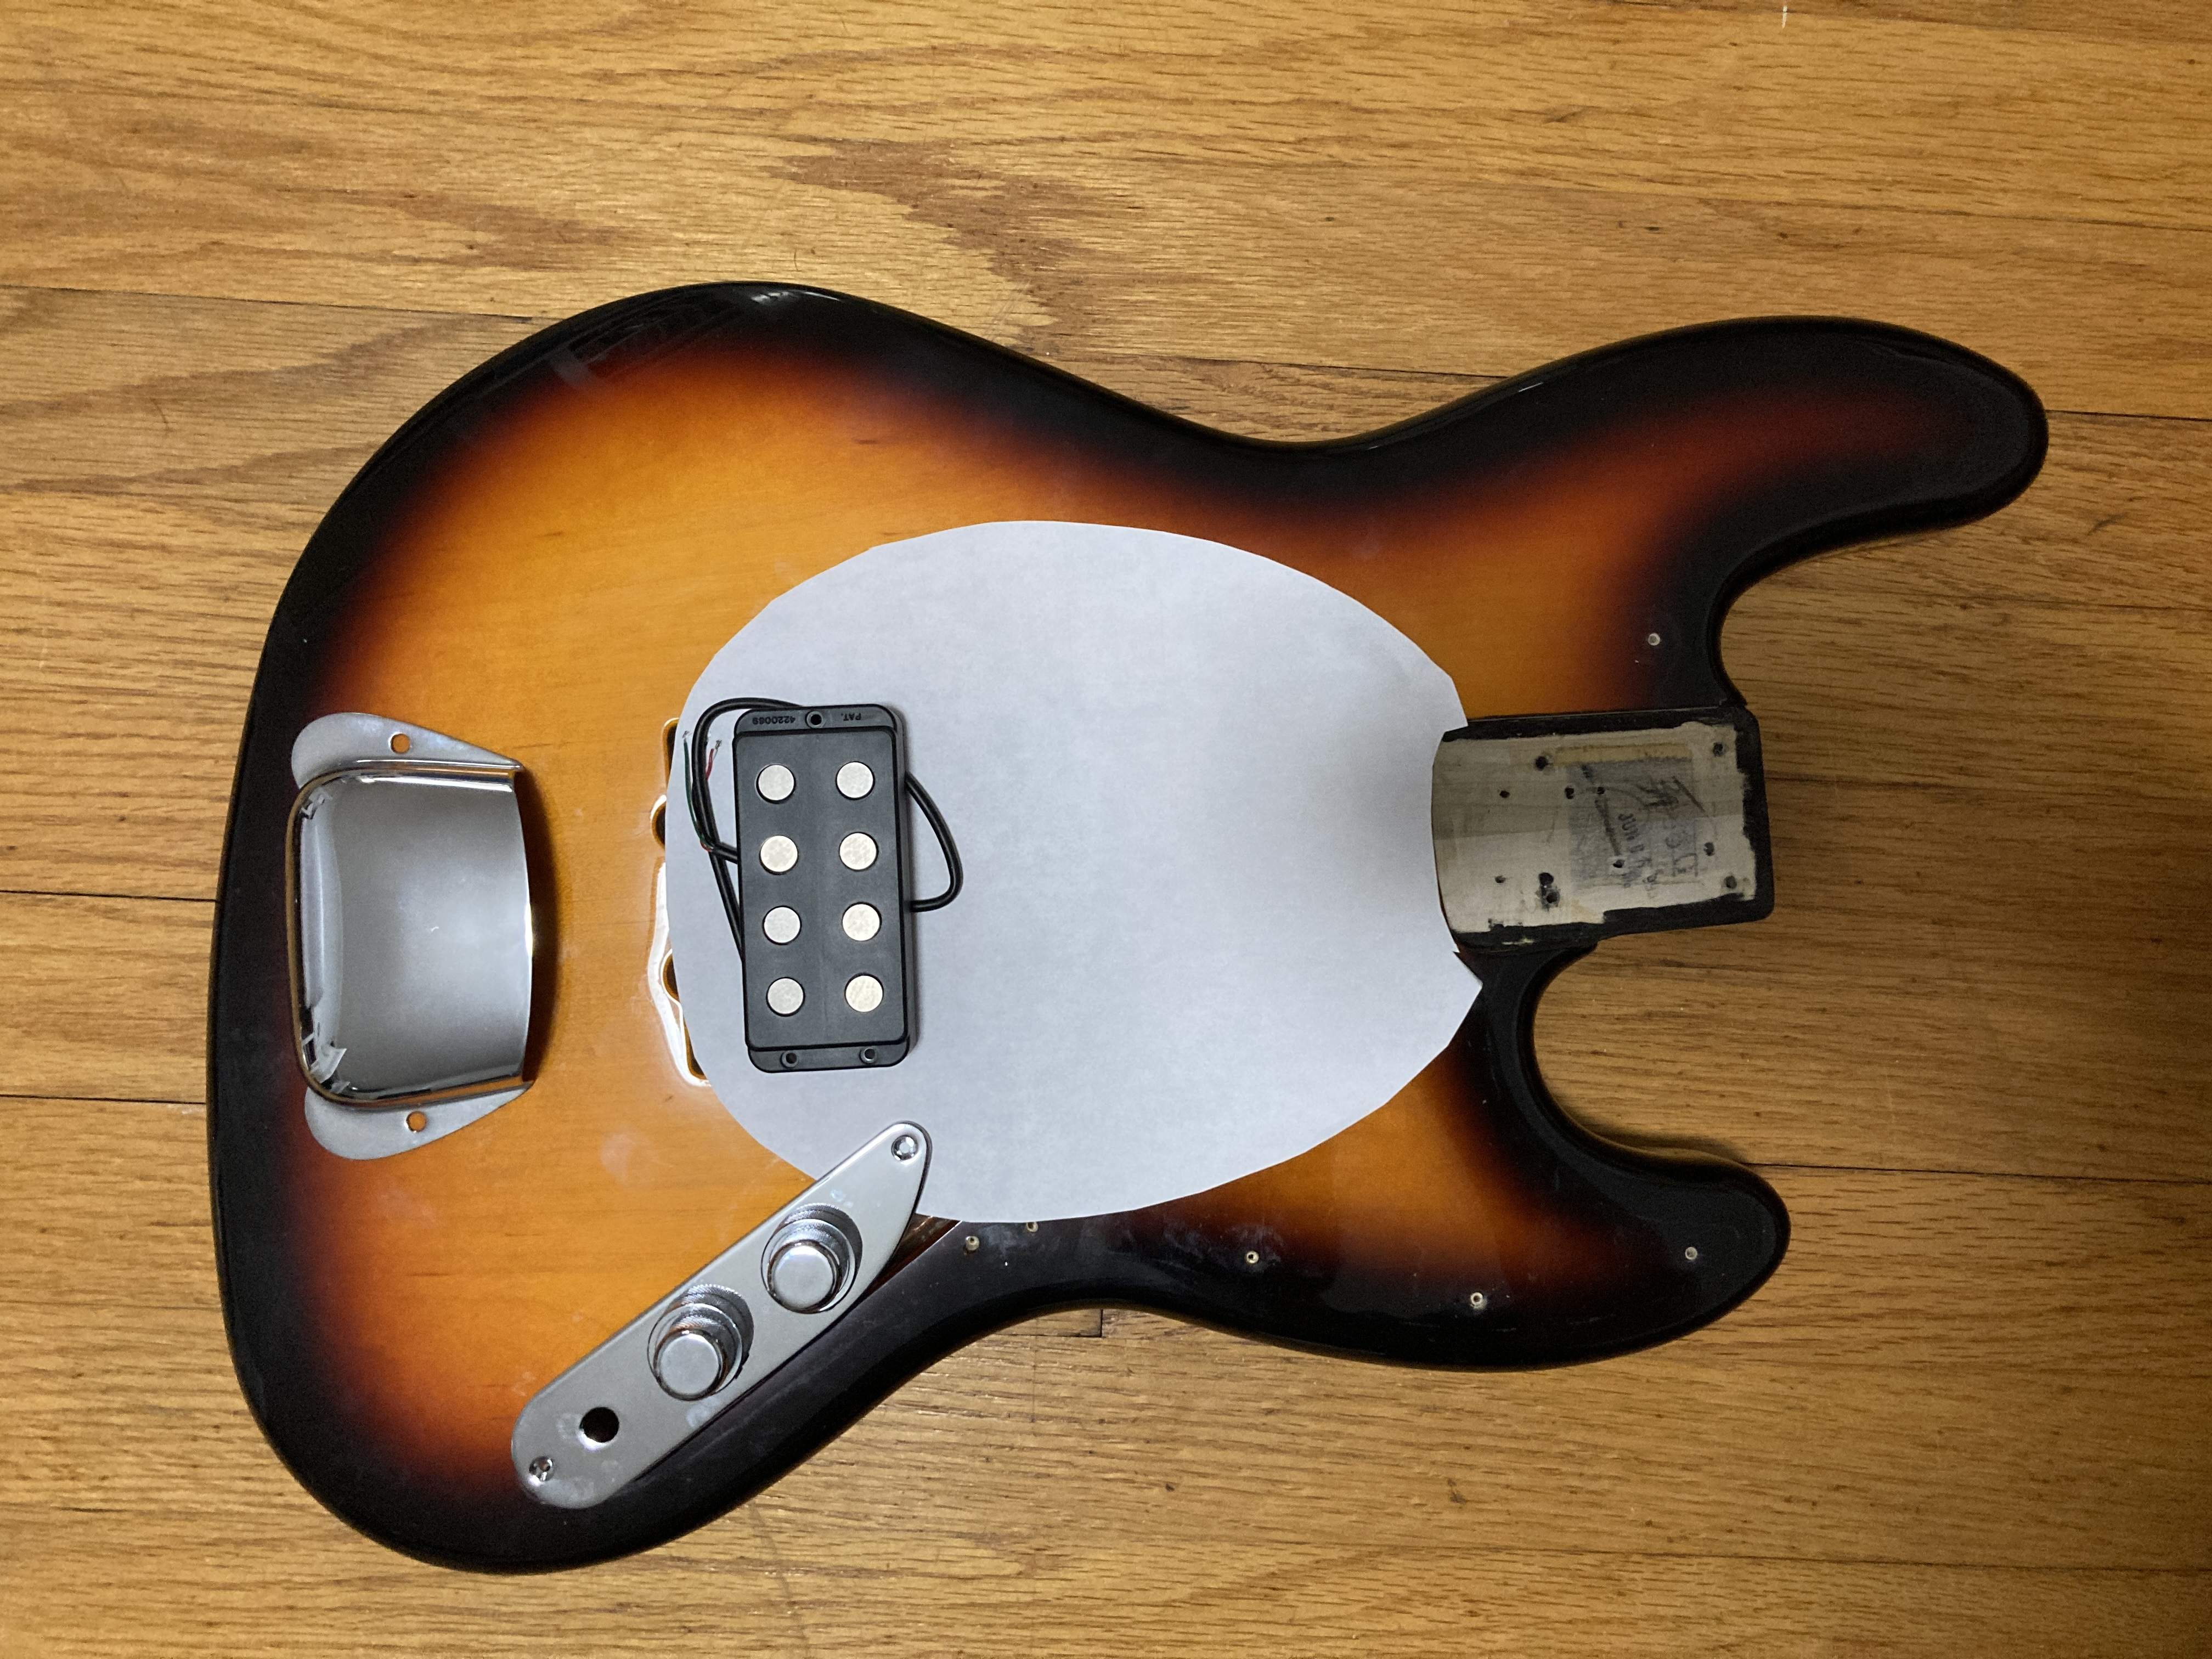
It'll roughly look like this:
IMG-6916.jpg


Challenges-
Routing for pickup and battery box which will go in the neck pickup spot
Wiring, especially since I don't think my battery leads are long enough
Filling in pickup and control areas that won't be covered
Cutting pickguard
Painting
Completing on time
Getting over the fact that all the time and intention spent trying to make something fun and unique left me with a Flea bass. :D
 
Last edited:
Yep, a silver decal was where I landed too! Thinking specifically of the decal and keeping in mind wanting to incorporate Fender elements, I came up with this idea. I flipped the Fender F to become an “L” and the smaller capital E still connects to the “o”.

I was going to order an enter your own text decal so that I didn’t have to worry about sizing and all that, but now that it’s a custom design, it’s a little less straightforward. A friend has a Cricut machine, so maybe chrome vinyl decal? Maybe do a vinyl stencil and use a silver paint pen?

Also, I’m going to hit the body with 320 for paint prep, and start planning out the fills and routes I need to do.
 

Attachments

  • 958BA0B3-1AB4-423A-88DA-5FDFC2F25CCF.jpeg
    958BA0B3-1AB4-423A-88DA-5FDFC2F25CCF.jpeg
    12.9 KB · Views: 91
Made some progress the last few days, although not much physical work has been done.

- I sanded the body.

- I spent an hour with a friend drawing up a pickguard design. I realized that if the StingRay pickguard was a little bigger, it would cover the bridge J pickup route. So we massaged things a little and enlarged the pickguard by about 3 or 4 %. We then realized one of the screw holes was in the control cavity, so we moved the screw holes around. The final product maybe isn't exactly a StingRay pick guard, but it's close enough it's still pretty clear what I'm going for. I'm going to look at it one more time just to be sure then send it off to get a pickguard made.

- Another friend came over to use my router, and while he was here I had him show me how to use it. I've watched videos and such, but I was a little worried about trying by myself the first time. It was super helpful watching him make a few passes, then he had me do a few. I feel so much better about routing for the pickup now. Speaking of which, I think I'm just going to do a swimming pool route as that'll be the easiest. T think the only issue I have is that the straight bits I have are bottom, so I'll need to look into that.

I think I'm pretty close to the point where I've finally thought through everything enough that I'm close to just being able to start doing things. I might be able to pull this thing off before march 21!
 
Some more progress-

IMG-7128.JPG

Here's the pickguard design. Turned out pretty well! We moved a few screw holes to fit the Jazz body. The last bits I'll need to do in the body is fill in the gap between the pickguard and control plate, figure out how to anchor the top screw of the control plate- probably KISS and get a long screw, maybe add a bit of depth to the bottom.
IMG-7129.JPG

And I got the body route done. I might need to tweak the side a hair, but for my first time using a router, I'm pretty pleased! I didn't get pics since I was focused on not taking any fingers off, but I clamped the body to my table saw table, then clamped a small piece of wood along the line and used a straight bit with a template guide. Once I got the sides done, I free handed the rest. I can now see why folks drill out most of it before running the router.

Checked out the spray paint while at Lowe's this morning and there wasn't much. I'll hopefully find time to do the last bit of body work (including one more round of sanding) to start paint next weekend. Oh, I do need to get a batter box too, so I'll order that as well. I'll also send out my order for my custom guard this week. Once I get that in I can finesse the pickup placement and get that set.

Paint will be black primer, which I'll also get inside the cavities, especially so I don't have bare wood. A couple layers of Sherwood Green and then some satin clear, and then some paint on the headstock and a decal and some clear and then wiring and then assembly and then I'm done, hopefully by March 21st!
 
Got the battery box in and the tracing of the custom guard mailed off. Shouldn't be too much to get the battery box routed this weekend. Still need to get paint- finding a metallic green is harder than I thought, and it's more pricey than I thought since a lot of what I'm seeing online is paint/primer/sealant/buff/ tax prep in one and I just want paint. Walmart has metallic gold/silver/copper/blue for $5/12oz but the only green I'm seeing is at auto shops for $13/8oz. I'll make a stop by a few stores this weekend and see what comes up. Recommendations might be helpful.

Also on the docket this weekend should probably be getting the harness installed in the control plate to look for any clearance issues (hopefully none) and figuring out how much extra length to put on the battery leads. I can also start work on the headstock.
 
Last edited:
I like where this is going. Been gassing for a MM style bass myself. Can't wait to see this finished.

Color will be British Racing/Sherwood Green with white pearloid pickguard and painted headstock, a reference to the Adam Clayton J Bass

Yeah, love that look also

Checked out the spray paint while at Lowe's this morning and there wasn't much.

If you like this color.... Wall 1 (2).jpg it is Army Green (aged white pearloid guard) from the Rustolium. Part of the Rustolium Camouflage Spray. I got it at a local hardware store.

https://www.rustoleum.com/product-catalog/consumer-brands/specialty/camouflage-spray/
 
  • Like
Reactions: Beej and Reedt2000
C0F9DF33-C963-4892-82A4-1A6C193344DE.jpeg

I have a battery box! I’m not showing the other side because it looks terrible! Routing the pickup area went so great I could just freehand the battery box, right??!? :D I knew it would be bad, but kinda just wanted to see how bad it actually would be, if that makes sense- the cover and pickguard would hide the terribleness, so it was a pretty “safe” place to try. Lesson learned to take the time to use template insets and such going forward- sure it’s more time initially, but the results are worth it.
 
I believe @JIO has used Rustoleum glitter to some success. Should be cool.

I have and I like it - I apply it as a dusting over a base colour and then seal it with light coats of satin lacquer. I don't go for a thick clear-coat so it has a subtle satin texture that feels good. The basic process with sparkle or glitter finishes is - once applied, you bury it in multiple clear coats and level sand/polish to a high sheen if you want a flat/smooth high-gloss "factory" finish. Frankly - that route is a lot of work and requires finishing skills. And, it is best done using professional spraying equipment/ventilated spray booth.
 
I apply it as a dusting over a base colour and then seal it with light coats of satin lacquer.

Thanks for the input!! That was the plan, with the same reasons for going for a Satin finish instead of a thick gloss. I did have a few lingering questions on if it would work out like I thought it should, so it's reassuring to hear you say that. Also helpful to think in terms of a dusting- I returned by original base color to get the next lighter purple shade as that'll work better.

I hadthoughts of doing back and sides the darker shade of purple and the top the lighter sparkly purple, but that sounds like a lot of taping, particularly with the rounded edges. I'll continue to go ahead with my plan.
 
Thanks for the input!! That was the plan, with the same reasons for going for a Satin finish instead of a thick gloss. I did have a few lingering questions on if it would work out like I thought it should, so it's reassuring to hear you say that. Also helpful to think in terms of a dusting- I returned by original base color to get the next lighter purple shade as that'll work better.

I hadthoughts of doing back and sides the darker shade of purple and the top the lighter sparkly purple, but that sounds like a lot of taping, particularly with the rounded edges. I'll continue to go ahead with my plan.

I use is Krylon Glitter-Blast - it comes in lots of colours. If 'dusting' it on, you can effect the final colour by what your base colour is and which glitter-blast colour you choose. You can also blend GB colours - I've mixed light applications of orange and gold, over 'rustic orange' - subtle but nice. Glitter Blast™ - | Krylon

upload_2022-2-13_9-11-57.jpeg
upload_2022-2-13_9-13-35.jpeg
 
The plan for this weekend (weather dependent ) is to get the body primed and the pickguard template done. I heard back from the custom pickguard place, and the price was more than I hoped with a 5 week lead time. That doesn't work for right now, so I figured I'd have a go at making my own. Just ordered a sheet of cheap white pearl material, and if nothing else it'll get my by until I order one from the pros. Typing the rest of this to help sort/order things in my head-

Pickguard
Glue the print out to a sheet of plywood I have in the garage (I think it's 1/2", but at least a decent thickness). I'll use a jigsaw to cut as close as I can to the edge. I'll drill a hole in the pickup area to get in there and cut it out. I then use files/sandpaper/drum sander on my drill press to true up the edges. Then I'll use double sided tape to put the material on the template and use my router with a pattern bit to shape it. A quick pass with a round over bit to put in the bevel (mental note- just on the outside!!) then a then drill bit to mark screw holes and I should be OK. I'll try adding the beveled screw holes on some scrap first, but I'll toss that out if it's a little too east to drill straight through. Once that's done, I'll put some masking tape on the lower part, put it on the bass with the control plate, trace out the area where the control plate will go, and very carefully cut it out.

Body
Add a plug to fill in the gap that the control plate wont cover. Glue will likely work fine, I might use a small screw or something just to help it stay put. Add something for the top screw of the control plate to bite into (or a longer screw... Still working on that one.) I'll clean up the inside of the battery box route since it is a little tight. I do need to fill in old screw holes as well. Hopefully I can have the body ready to paint (neck pocket taped off, handle screwed in, primed) by the end of the weekend.

Electronics
Put knobs and such on control plate. Extend battery lead length. Figure out where pickup wires and bridge wire go.

Headstock
Sand, tape off, prime, order/make decal. The concern I have with this is the glitter paint. I'd want the decal on top of it, but if the glitter paint isn't flat, I'm not sure if it will stick or look good. I'm thinking I might go with a silver vinyl decal thanks to a friend with a Cricut. If so, I can lay down the base color, but the silver decal on, add a coat or two of clear, use a second decal to mask the first, spray the glitter paint, then remove the mask and clear the whole thing.

Thanks everyone for the input and for following along!
 
This just can't be easy can it....

I put the knobs on the control plate for a fit test, both of the knobs and pots/preamp in the bass. Both failed! Hooray!!

The stacked pot was too tall for the knobs I bought.
IMG-7202.JPG

The brass collar for the outer pot and the inner shaft were both too long. So, before I could talk myself out of it, I took it over to my Dremel and used a cutting disc to trim them both down:
IMG-7203.JPG

I did put everything in a plastic bag and had just the shaft sticking out of the corner to make sure I didn't get anything into the pots them selves. The stacked knob on the volume pot didn't work either as the outer knob grabbed onto the shaft in a way that interfered with the push/pull. Those knobs are currently being super glued.

The preamp itself doesn't currently fit, but it'll take some more body routing to deepen the area where it can fit. What joy. I might get a top bearing straight bit to make this a little easier.

I just need to keep reminding myself this is the first time I've done anything like this so it's fine. It's all fine.

Taking a break from the body stuff to finalize the decal and get that ready.
 

Latest posts