As a self-proclaimed nerd, geek, and likely dweeb, I couldn't not participate in this WBO.
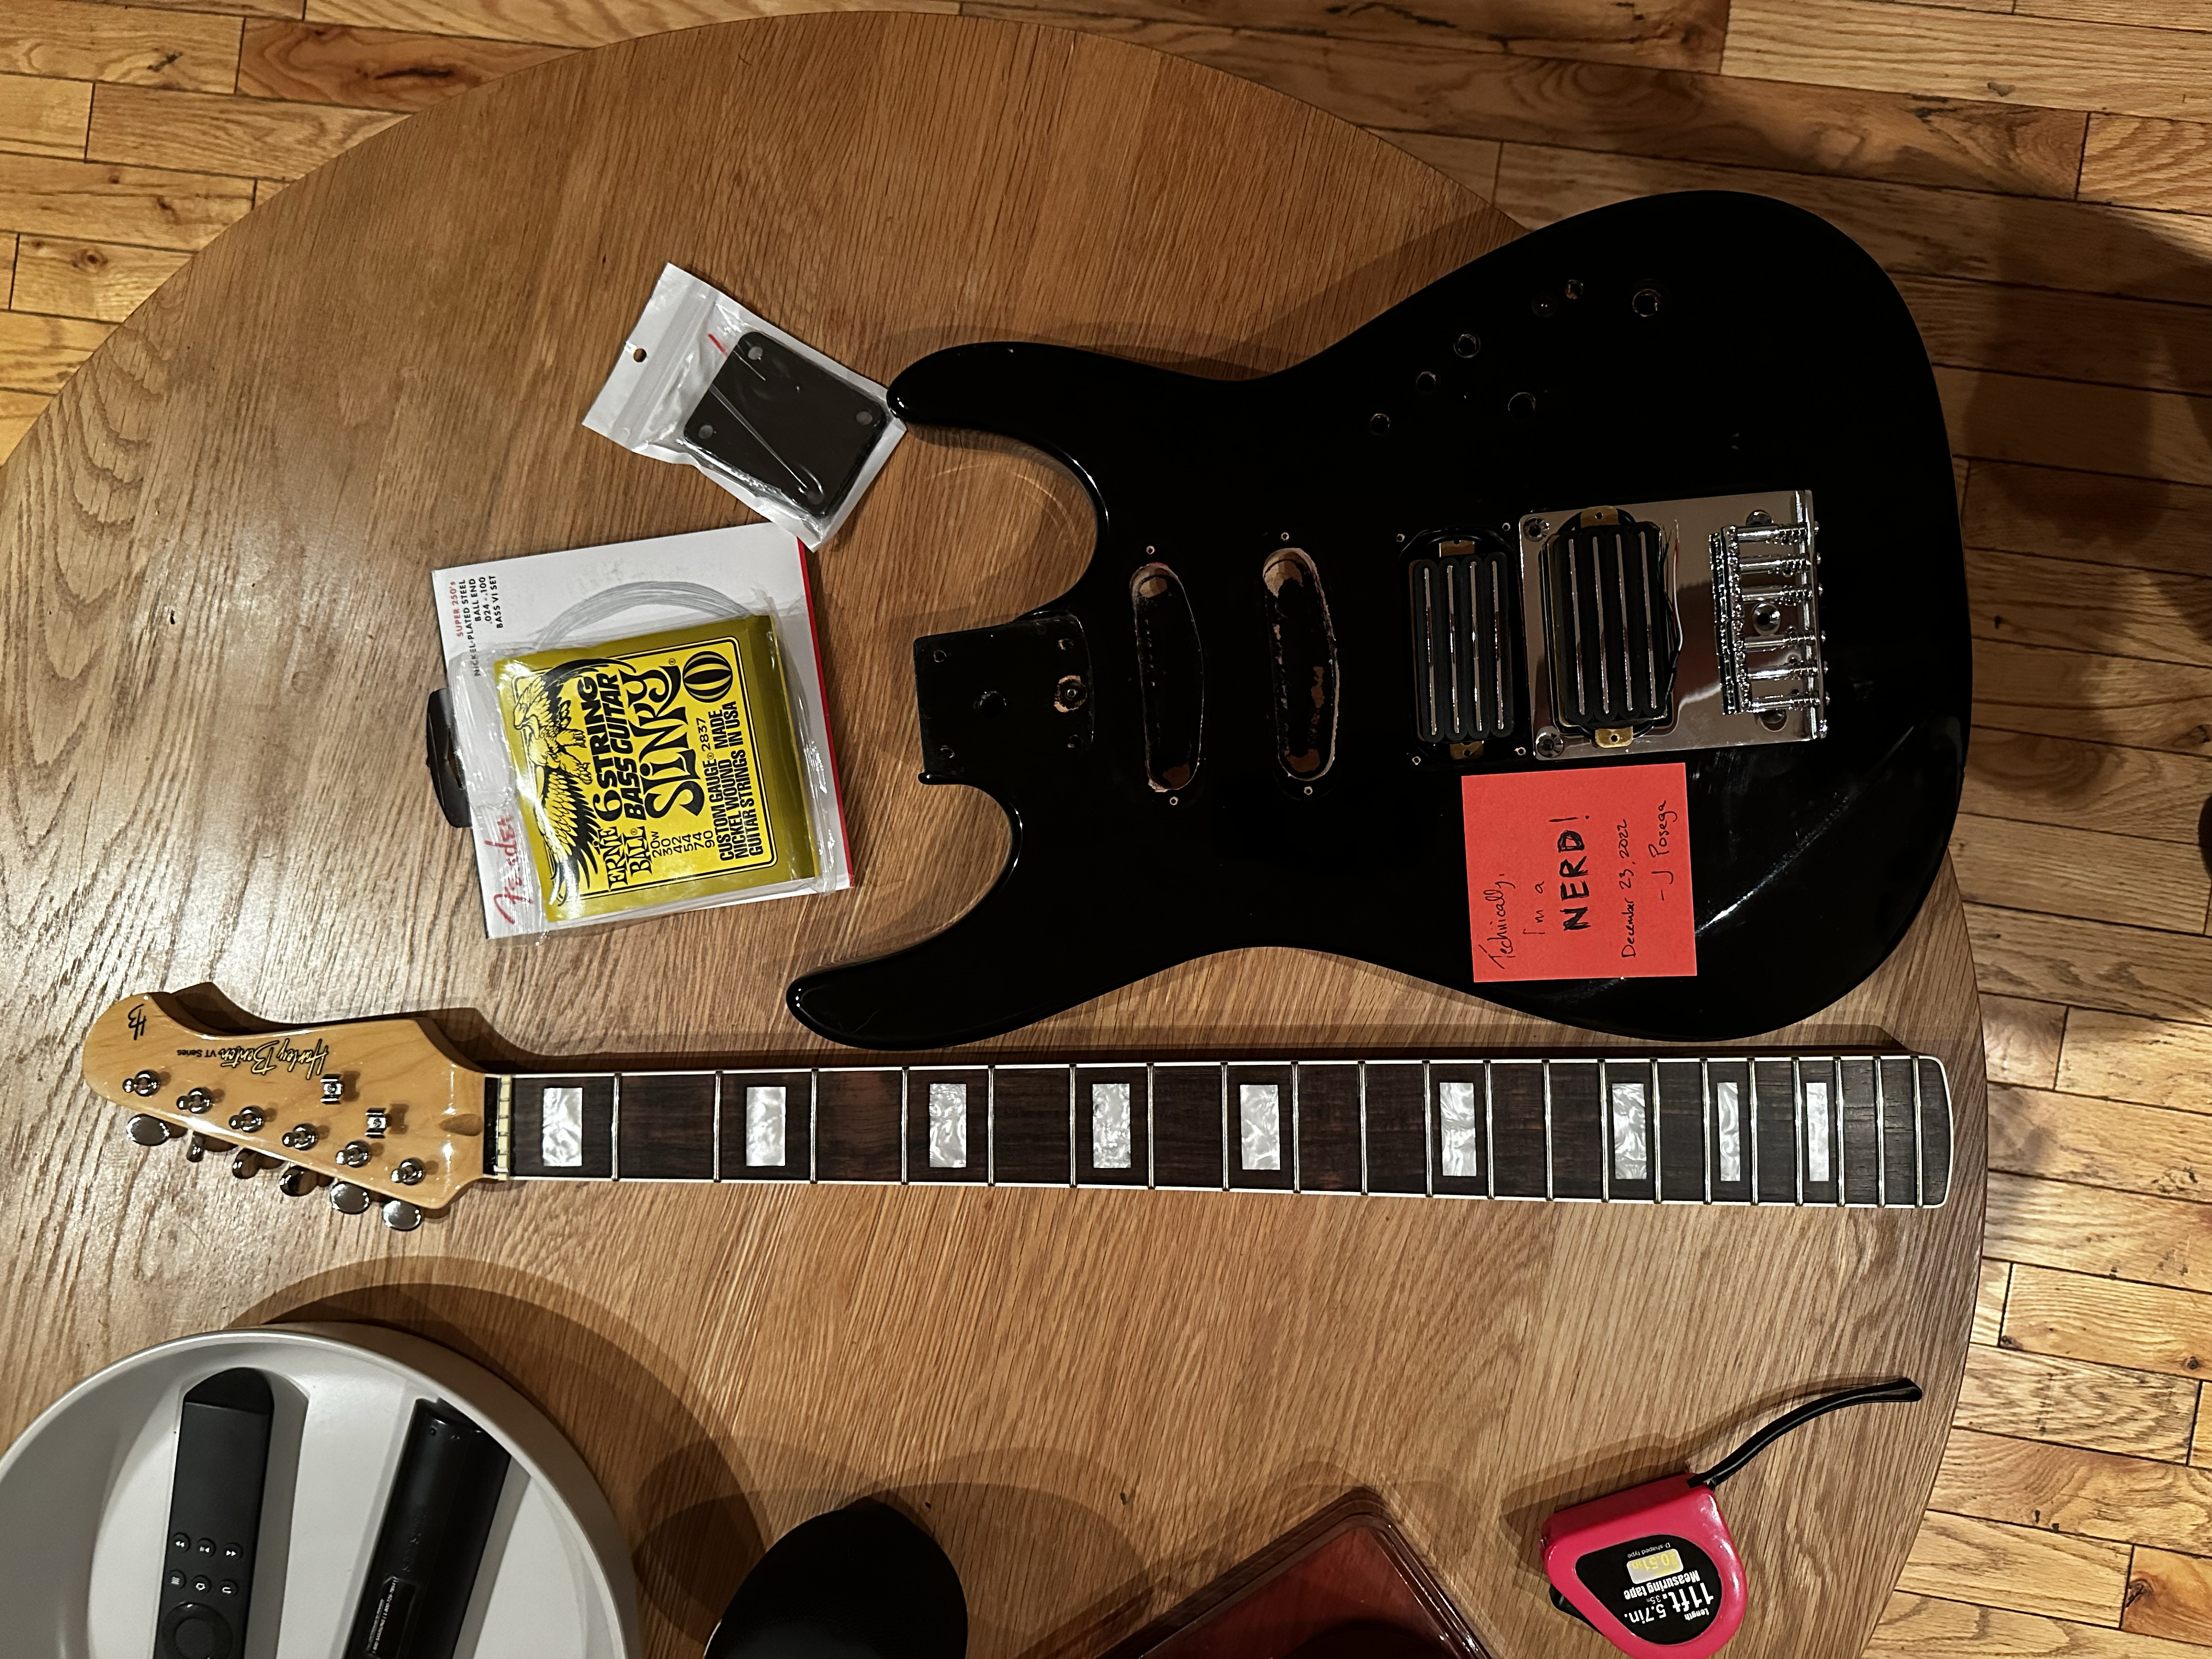
What we have here is the dumbest collection of parts I've ever had at one time.
It's also got guitars! That look cool!

Of course, Johnny Silverhand's guitar here has both headstock and headless tuners. I won't be doing that. I will be using my local library's makerspace, specifically their laser cutter, to make a pickguard of sorts. As for the finish... I'll probably slap some stickers on it and relic it up some more.
My plan is to knock out the wall between the neck pocket and neck pickup route, which will allow me to inset the neck far enough to be able to mount the bridge where I want it. I'll probably reshape the headstock, too.
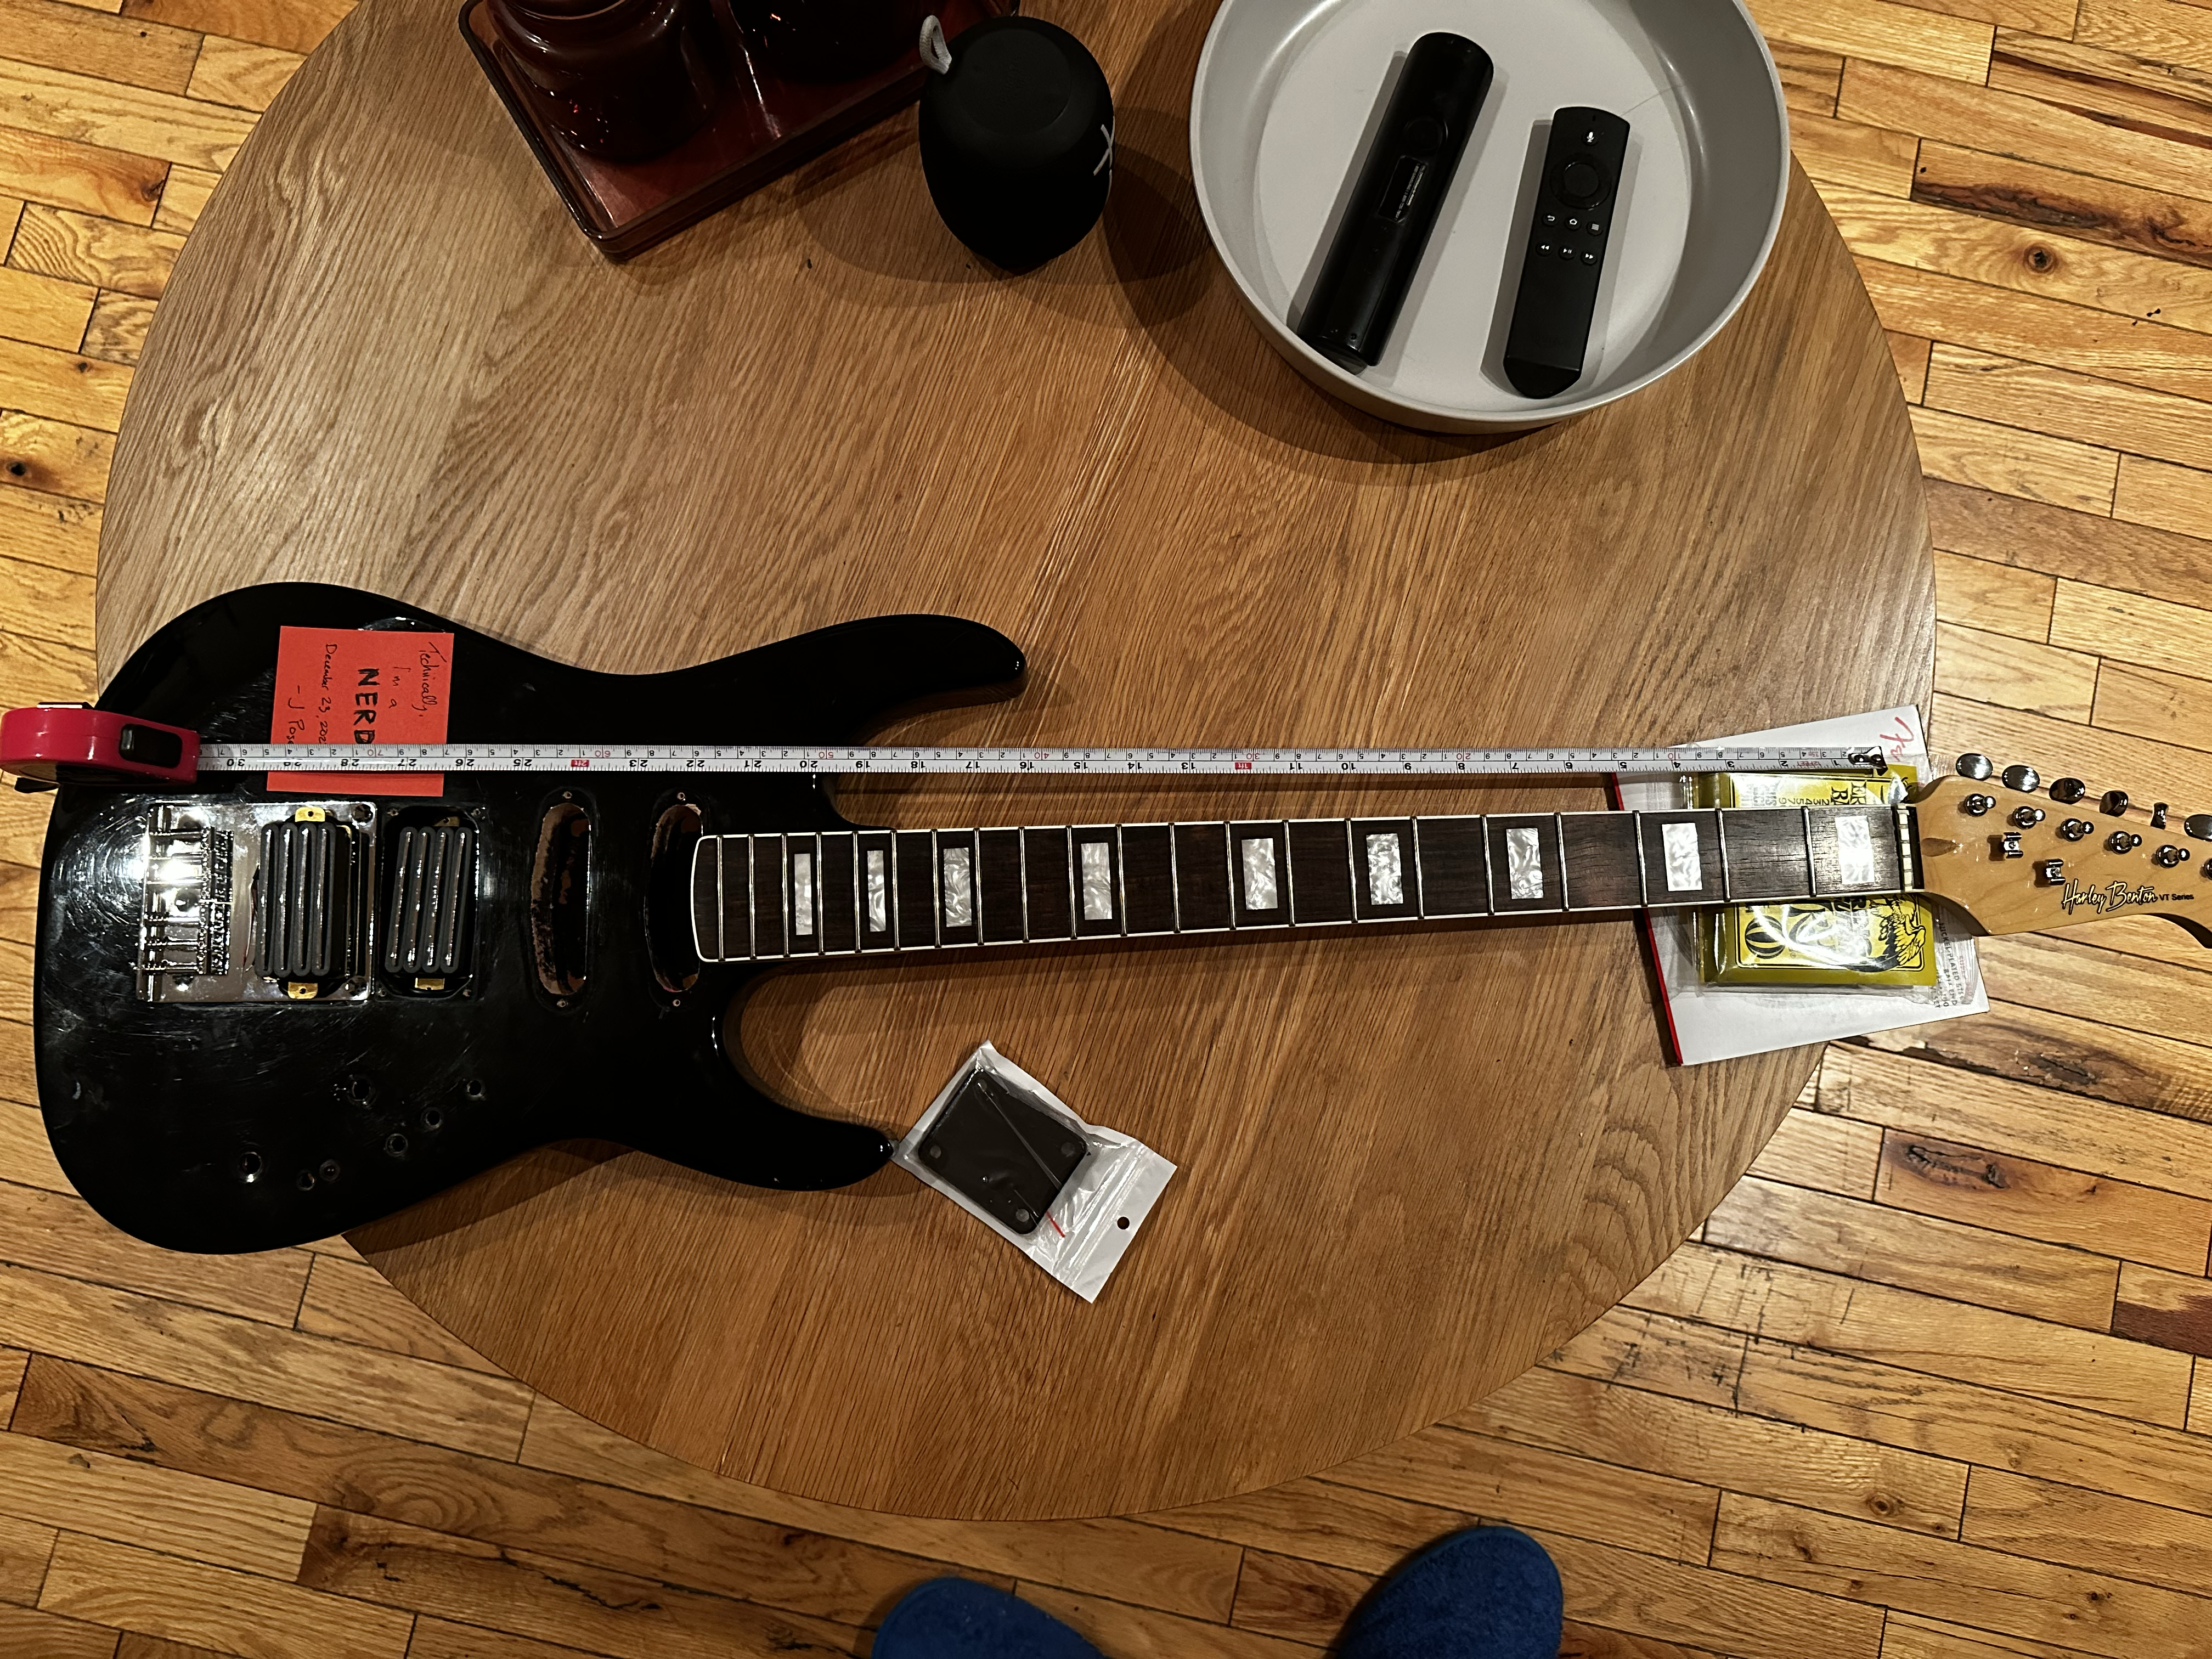
I have about 1/4" of leeway to move the bridge forward, so I'm going to disassemble the bridge and get some longer intonation screws from the hardware store.
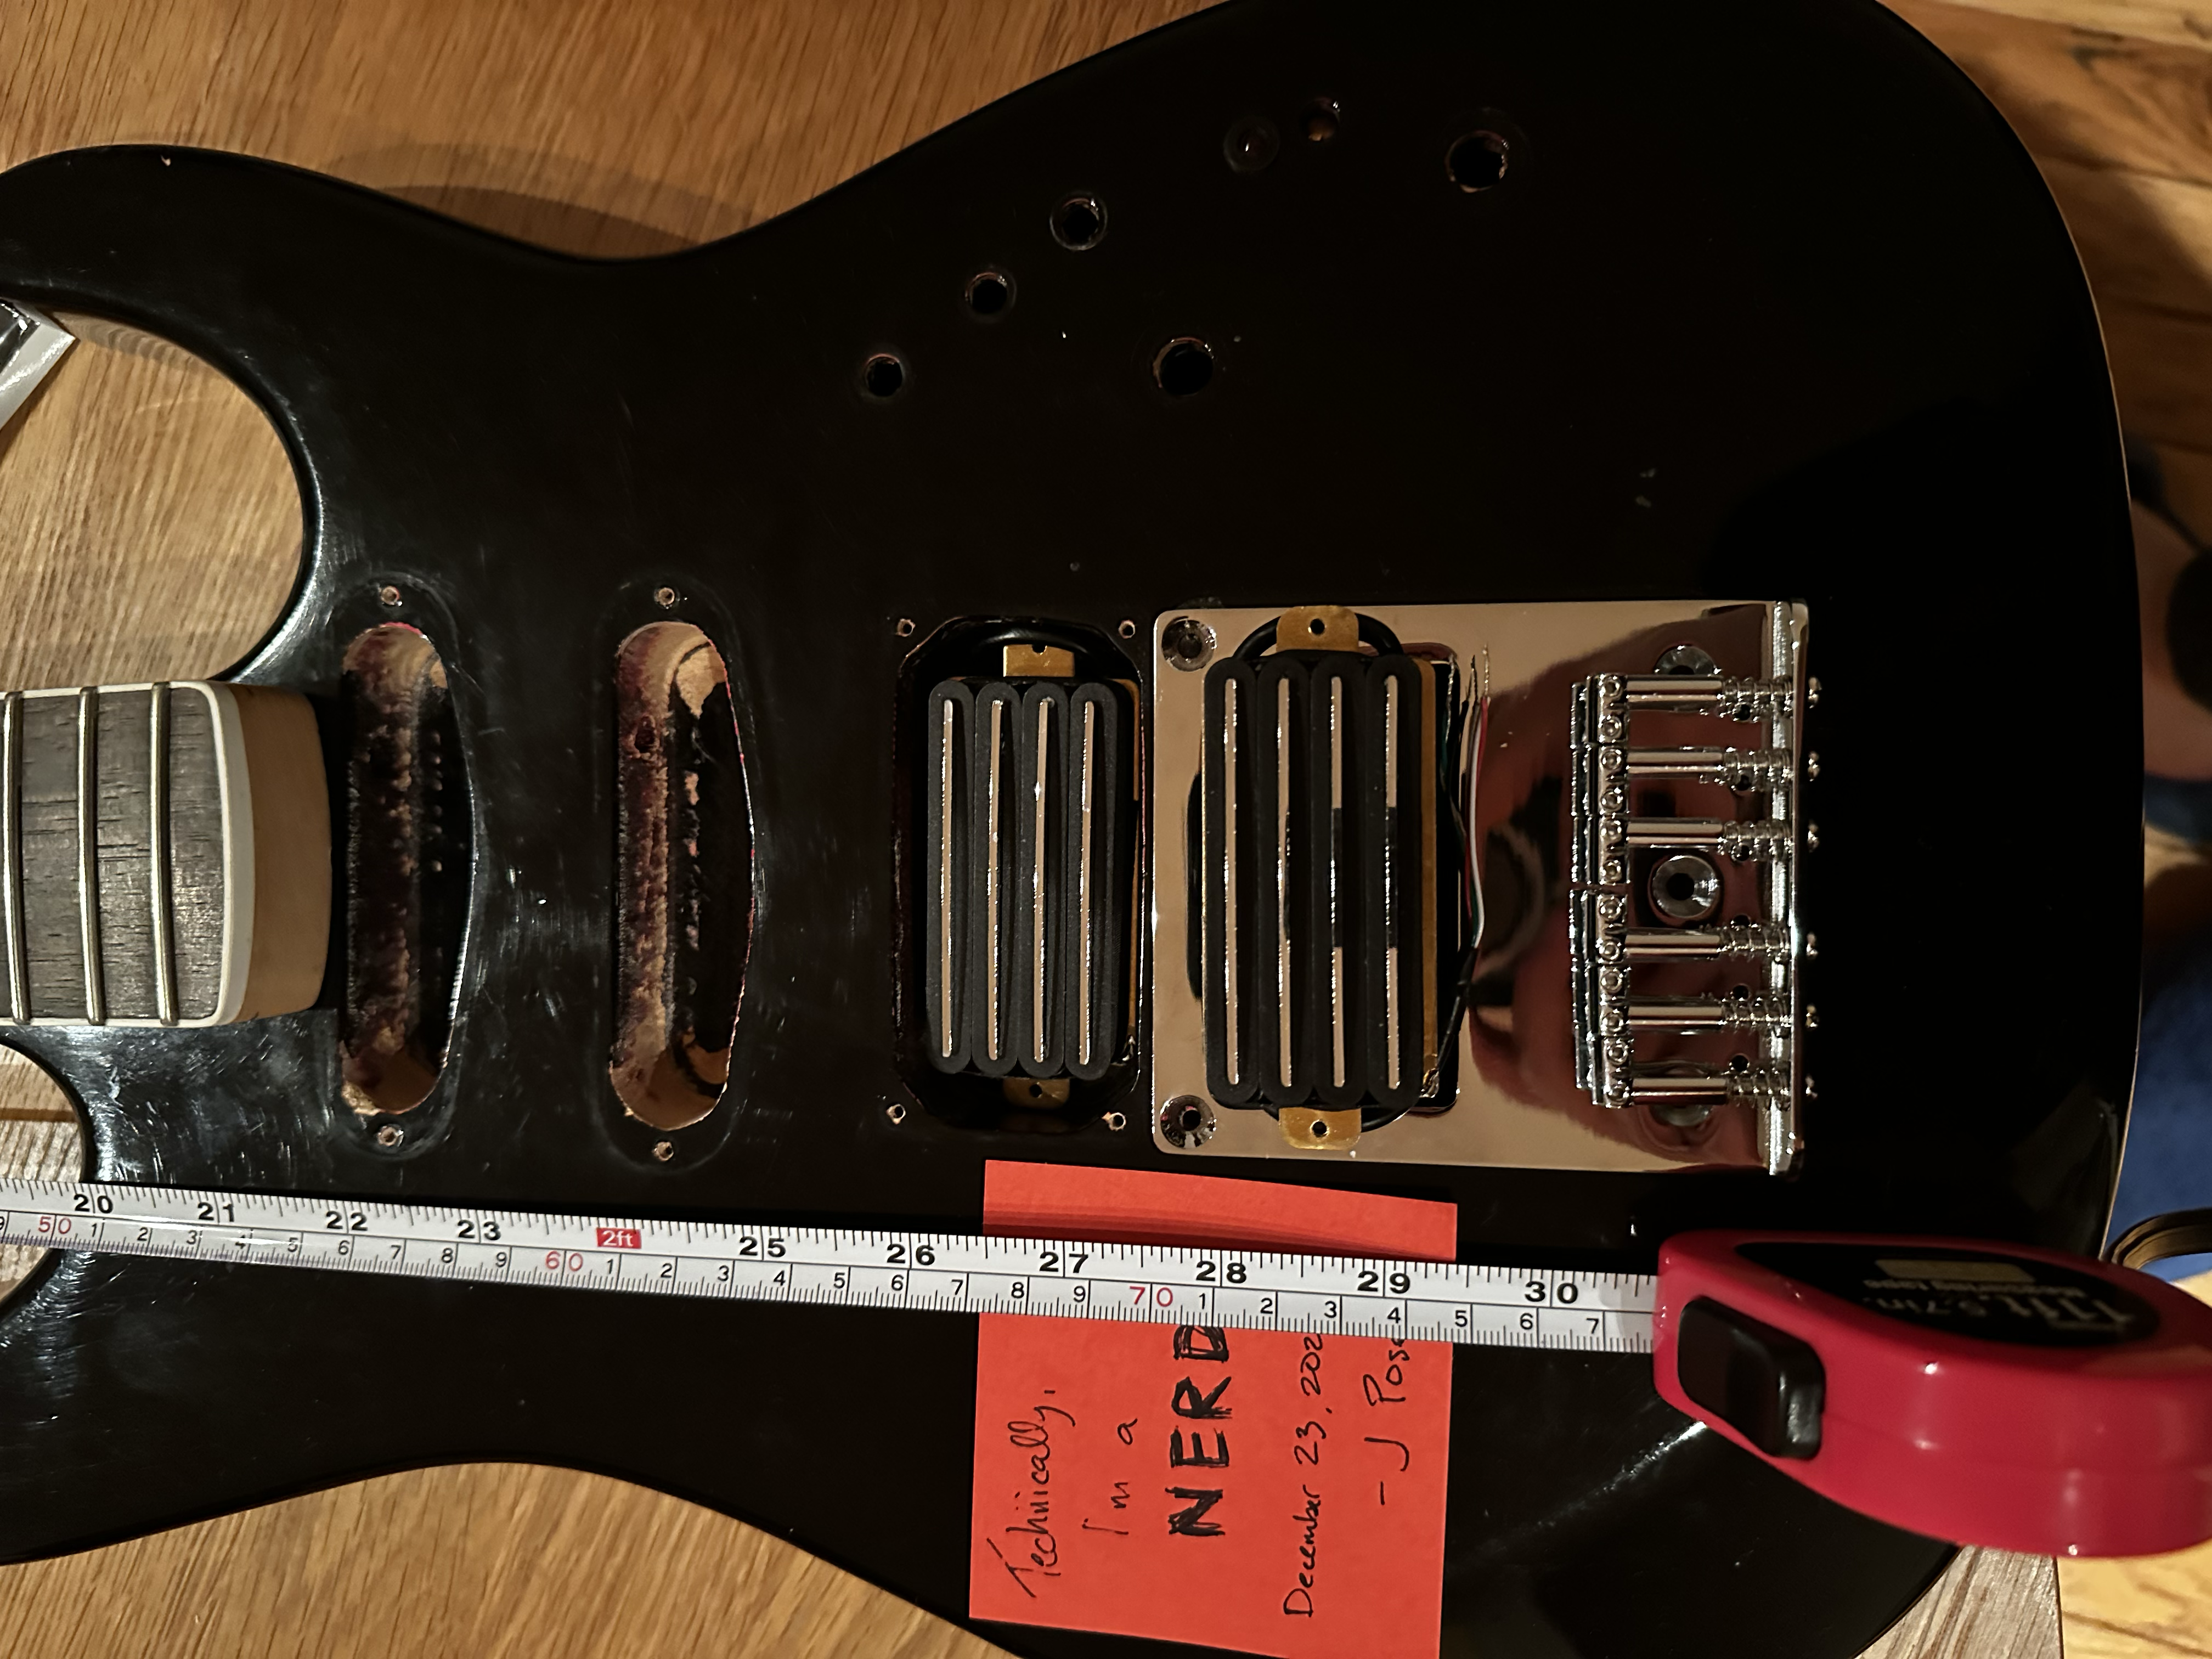
My original idea was to build a bunch of effects into the body using some DIY PCBs, but I'm not confident enough in my soldering at the moment to do that yet. I'll probably keep it simple with a pickup switch and a big honkin' arcade button killswitch. Maybe I'll fill the other holes with LEDs. Each dumbucker only has 4 wires, so I can't get any true single coil sounds, but who the **** needs those anyway?
I already have a beautifully handmade custom Bass VI with handwound P90s from Rukavina Guitars, so the DDVI is meant to complement it. This thing will definitely straddle the line between a Bass VI and a seriously downtuned baritone guitar thanks to the 'neck' pickup being close to the bridge like the Stephen Carpenter signature guitars.
Maybe I'll get this thing put together before CDPR drops the one and only major story DLC for Cyberpunk 2077 in February!
What we have here is the dumbest collection of parts I've ever had at one time.
- Harley Benton Guitarbass VS neck - this is their take on the Fender Bass VI. The neck came up randomly on Reverb one day and I bought it with zero plans except to put it on a body.
- JB Player Super Strat body - an 80s Strat copy that featured HSS pickups, mini switches, and an Accutune bridge. Someone definitely added more holes to the face for more switches and an LED. There's a big gaping route under the Tele bridge where the tremolo assembly used to fit into - that big ol' route is exactly why I bought this body on eBay.
- A paid of the dumbest pickups I've ever seen. They're each a pair of blade humbuckers; like Seymour Duncan Hot Rails. But, you know, two of them. To make one massive pickup. Thus I've dubbed them the Double Dumbuckers.
- A cheapo Tele style bridge - I needed a bridge that I knew I could modify to fit some fat Bass VI strings through. Most Tele bridges are through-body, but I'm not going to mess with that. This one has both options. Bonus: Without having measured a damn thing, this bridge perfectly covers the big route for the old tremolo.
- A neck plate - it'll hold the neck to the body. Or is it the other way around?
- Two different sets of Bass VI strings. I'll mix and match from both sets to have a heavier bottom and lighter top set.
It's also got guitars! That look cool!
Of course, Johnny Silverhand's guitar here has both headstock and headless tuners. I won't be doing that. I will be using my local library's makerspace, specifically their laser cutter, to make a pickguard of sorts. As for the finish... I'll probably slap some stickers on it and relic it up some more.
My plan is to knock out the wall between the neck pocket and neck pickup route, which will allow me to inset the neck far enough to be able to mount the bridge where I want it. I'll probably reshape the headstock, too.
I have about 1/4" of leeway to move the bridge forward, so I'm going to disassemble the bridge and get some longer intonation screws from the hardware store.
My original idea was to build a bunch of effects into the body using some DIY PCBs, but I'm not confident enough in my soldering at the moment to do that yet. I'll probably keep it simple with a pickup switch and a big honkin' arcade button killswitch. Maybe I'll fill the other holes with LEDs. Each dumbucker only has 4 wires, so I can't get any true single coil sounds, but who the **** needs those anyway?
I already have a beautifully handmade custom Bass VI with handwound P90s from Rukavina Guitars, so the DDVI is meant to complement it. This thing will definitely straddle the line between a Bass VI and a seriously downtuned baritone guitar thanks to the 'neck' pickup being close to the bridge like the Stephen Carpenter signature guitars.
Maybe I'll get this thing put together before CDPR drops the one and only major story DLC for Cyberpunk 2077 in February!


 Ooo! Wait… wire everything in series and add an octave down effect in the body chamber. That should do it!