• TalkBass has been independent since 1998. Add your voice.
    Create a free account to reply to discussions, view embedded media, and browse with fewer display ads.
    Join freeLog in
    Want zero display ads or expanded classifieds tools? Compare plans.

Winter Build Off 2025 Tele

I took a (very) non-extensive look at what was out there and saw whole systems from $585 (presumably not up to "healthcare" PPE standards) on up to $2500+

If rolling your own I suspect you'd want a squirrel cage fan to handle the back-pressure (friction) of the hose effectively - axial fans (the usual computer fan, though there are very whiny little squirrel cages they put in rack servers) does not deal well with back pressure. I think the built-to-purpose machines use a turbine fan of some sort (but I repeat, this was a very not extensive look.) Put the fan inside a box with a good filter, and let the filter suck air that's not full of dust/fumes so it doesn't have to work too hard or be too perfect.
My last sidetrack in this thread, I swear! I found the 3M replacement motor, ain't cheap, but I think you nailed it. :woot:
 
  • Like
Reactions: T_Bone_TL
OK, Got some more walnut, on sale no less.

NewWood.jpg

I'll start on the new body later today or tomorrow.
 
Body pieces.jpg

Cut some new pieces. Tomorrow, I'll rout the wiring path, and glue them up.

Could you not just make a new wing, rather than a whole new body?
Yes, but it's as much trouble to do that, as it is to just make a new body. There's a couple of other things I can fix as well, like make the pickup rout ever so slightly larger to allow for the thickness of the finish, and make the neck rout ever so slightly smaller. There was a little too much play.
 
Yes, but it's as much trouble to do that, as it is to just make a new body. There's a couple of other things I can fix as well, like make the pickup rout ever so slightly larger to allow for the thickness of the finish, and make the neck rout ever so slightly smaller. There was a little too much play.

And besides, you get to enjoy the thrill of controlling a screaming router. It keeps you feeling young!
 
Oddly enough, the sander accessories were in a clear plastic container that I had stared at multiple times previously, but neglected to open because "they couldn't be in there - it's a clear plastic container, and if they were in there, I'd see them" situation.
I’m not going to say how many times I’ve done the same. So, so familiar.
 
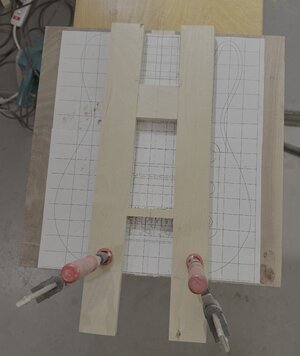
I had an eventful morning. First I took the new body out of the clamps and cleaned it up.

2nd Body Cleaned Up.jpg

Then I applied the paper template to the body with double stick tape.

Template 2nd Body.jpg

Then I clamped down the neck cavity template.

Neck Template Clamped.jpg

And started routing. I've decided the next band I'm in will be called the Screaming Router", thanks to @Bruce Johnson for the idea.

And then the template slipped.

Slipped Template.jpg

I just can't seem to get a break here.

Slipped Template2.jpg

I decided this was yet another unrecoverable mistake. So I cut off the walnut wings just past the neck cavity, and cut out the center maple runners, and started again. First I routed the wire path.

wire path.jpg

Then I mixed up some more epoxy and glued up the body. Again.

2nd glueup.jpg

I also poured the remaining epoxy in that shallow on the left side of the lower body. Most of it will likely be removed when I carve the arm contour, but we'll see. Now I'm going to watch some Star Trek with my Teddy Bear.
 
And then the template slipped.

Aargh. Since you still have the excess wood around the outside of the blank, just put two screws or pins in opposite corners, to lock the template down to the blank. It's a good reason to not cut out the body perimeter until the internal routing is finished.

I think Nexy and the Screaming Routers would be a good band name. As long as they are doing the screaming, not you.
 
  • Like
Reactions: mapleglo
Aargh. Since you still have the excess wood around the outside of the blank, just put two screws or pins in opposite corners, to lock the template down to the blank. It's a good reason to not cut out the body perimeter until the internal routing is finished.

I think Nexy and the Screaming Routers would be a good band name. As long as they are doing the screaming, not you.
Yeah, the screws or pins in the corners is a great idea. I'll do that tomorrow. Thanks!
 
  • Like
Reactions: BassHappy
Removed the clamps this morning and cleaned up the slab.

OutFromClamps.jpg

Applied the body template and clamped (and pinned) the neck cavity template.

ReadyForNeckPocket.jpg

Of course, I set the template about a 1/4" too high - there's a bit of a gap between the previously routed pocket and this one. But I'll be able to cover that with the pickguard.

NeckPocketComplete.jpg

Neck pocket complete. Next, to the control cavity, probably tomorrow. We have a few appointments later today.
 
I progressed a little more on the build this morning. First I started getting ready to rout the pickups.

Starting PU Routs.jpg

I could not pin the template down like I did with the neck cavity, so I clamped blocks to help maintain the position of the template.

PU Routs Done.jpg

That seems to have worked. Of course the top pickup rout is ever so slightly too small. I'm not sure what it is with me and pickup routs but this is an ongoing problem in many of my builds. I remember one build several years ago, the pickup was so tight I had to break it to remove it. And it wasn't a cheap pickup. In any event, I'll have to spend a few minutes sanding it a bit. The bottom one seems to fit normally.

Rough Cut Body.jpg

Then I spent a few minutes doing a rough cut around the body on the band saw. I'll sand it closer either later today or tomorrow. For now, I'm pretty tired.
 
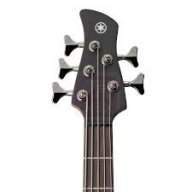
So I decided I'd work on the headstock this morning. First, I taped on the template to drill the tuner holes. I also drilled a hole in a test piece to make sure I had the right sized drill bit.

Headstock work1.jpg

After I drilled the holes, I went to test fit all the tuners.

Tuner Error.jpg

Once again, I just can't seem to get anything right on this build. I needed to reverse that last tuner, but it appears it can't be done.

Hipshot Tuner 1.jpg Hipshot Tuner 2.jpg

I think these may be the import versions, not the USA versions. And thinking back, I do seem to remember buying a set of imports, just to see how they are. Well, they do seem to be heavier than the USA versions, and they are NOT reversible, without some machining.

Looking at Amazon for today or tomorrow delivery, because I am not very patient, I can buy a USA Hipshot for $36 (because they don't have single imports) , or two sets of Guyker Cloverleaf tuners (because no one offers a 4+1 set) for $23.24 x 2 and it'll get here tomorrow. I'm tending toward the Guyker tuners because they'll match each other. They may be heavier than the Hipshots. Or, I can order a Licensed Ultralite tuner from BBG for $21.78 (plus tax and shipping) and it'll be here in probably a week - turns out shipping is over $10 so it's cheaper to get the USA Hipshot from Amazon. Decisions...
 

Latest posts