
• TalkBass has been independent since 1998. Add your voice.
    Create a free account to reply to discussions, view embedded media, and browse with fewer display ads.
    Join freeLog in
    Want zero display ads or expanded classifieds tools? Compare plans.

Winter Buildoff 2022: Still A Diva

Still playing with finish, trying to get educated. After a long chat with @Rôckhewer I sanded my test pieces back to bare wood and started over. Using his method, I came up with this -
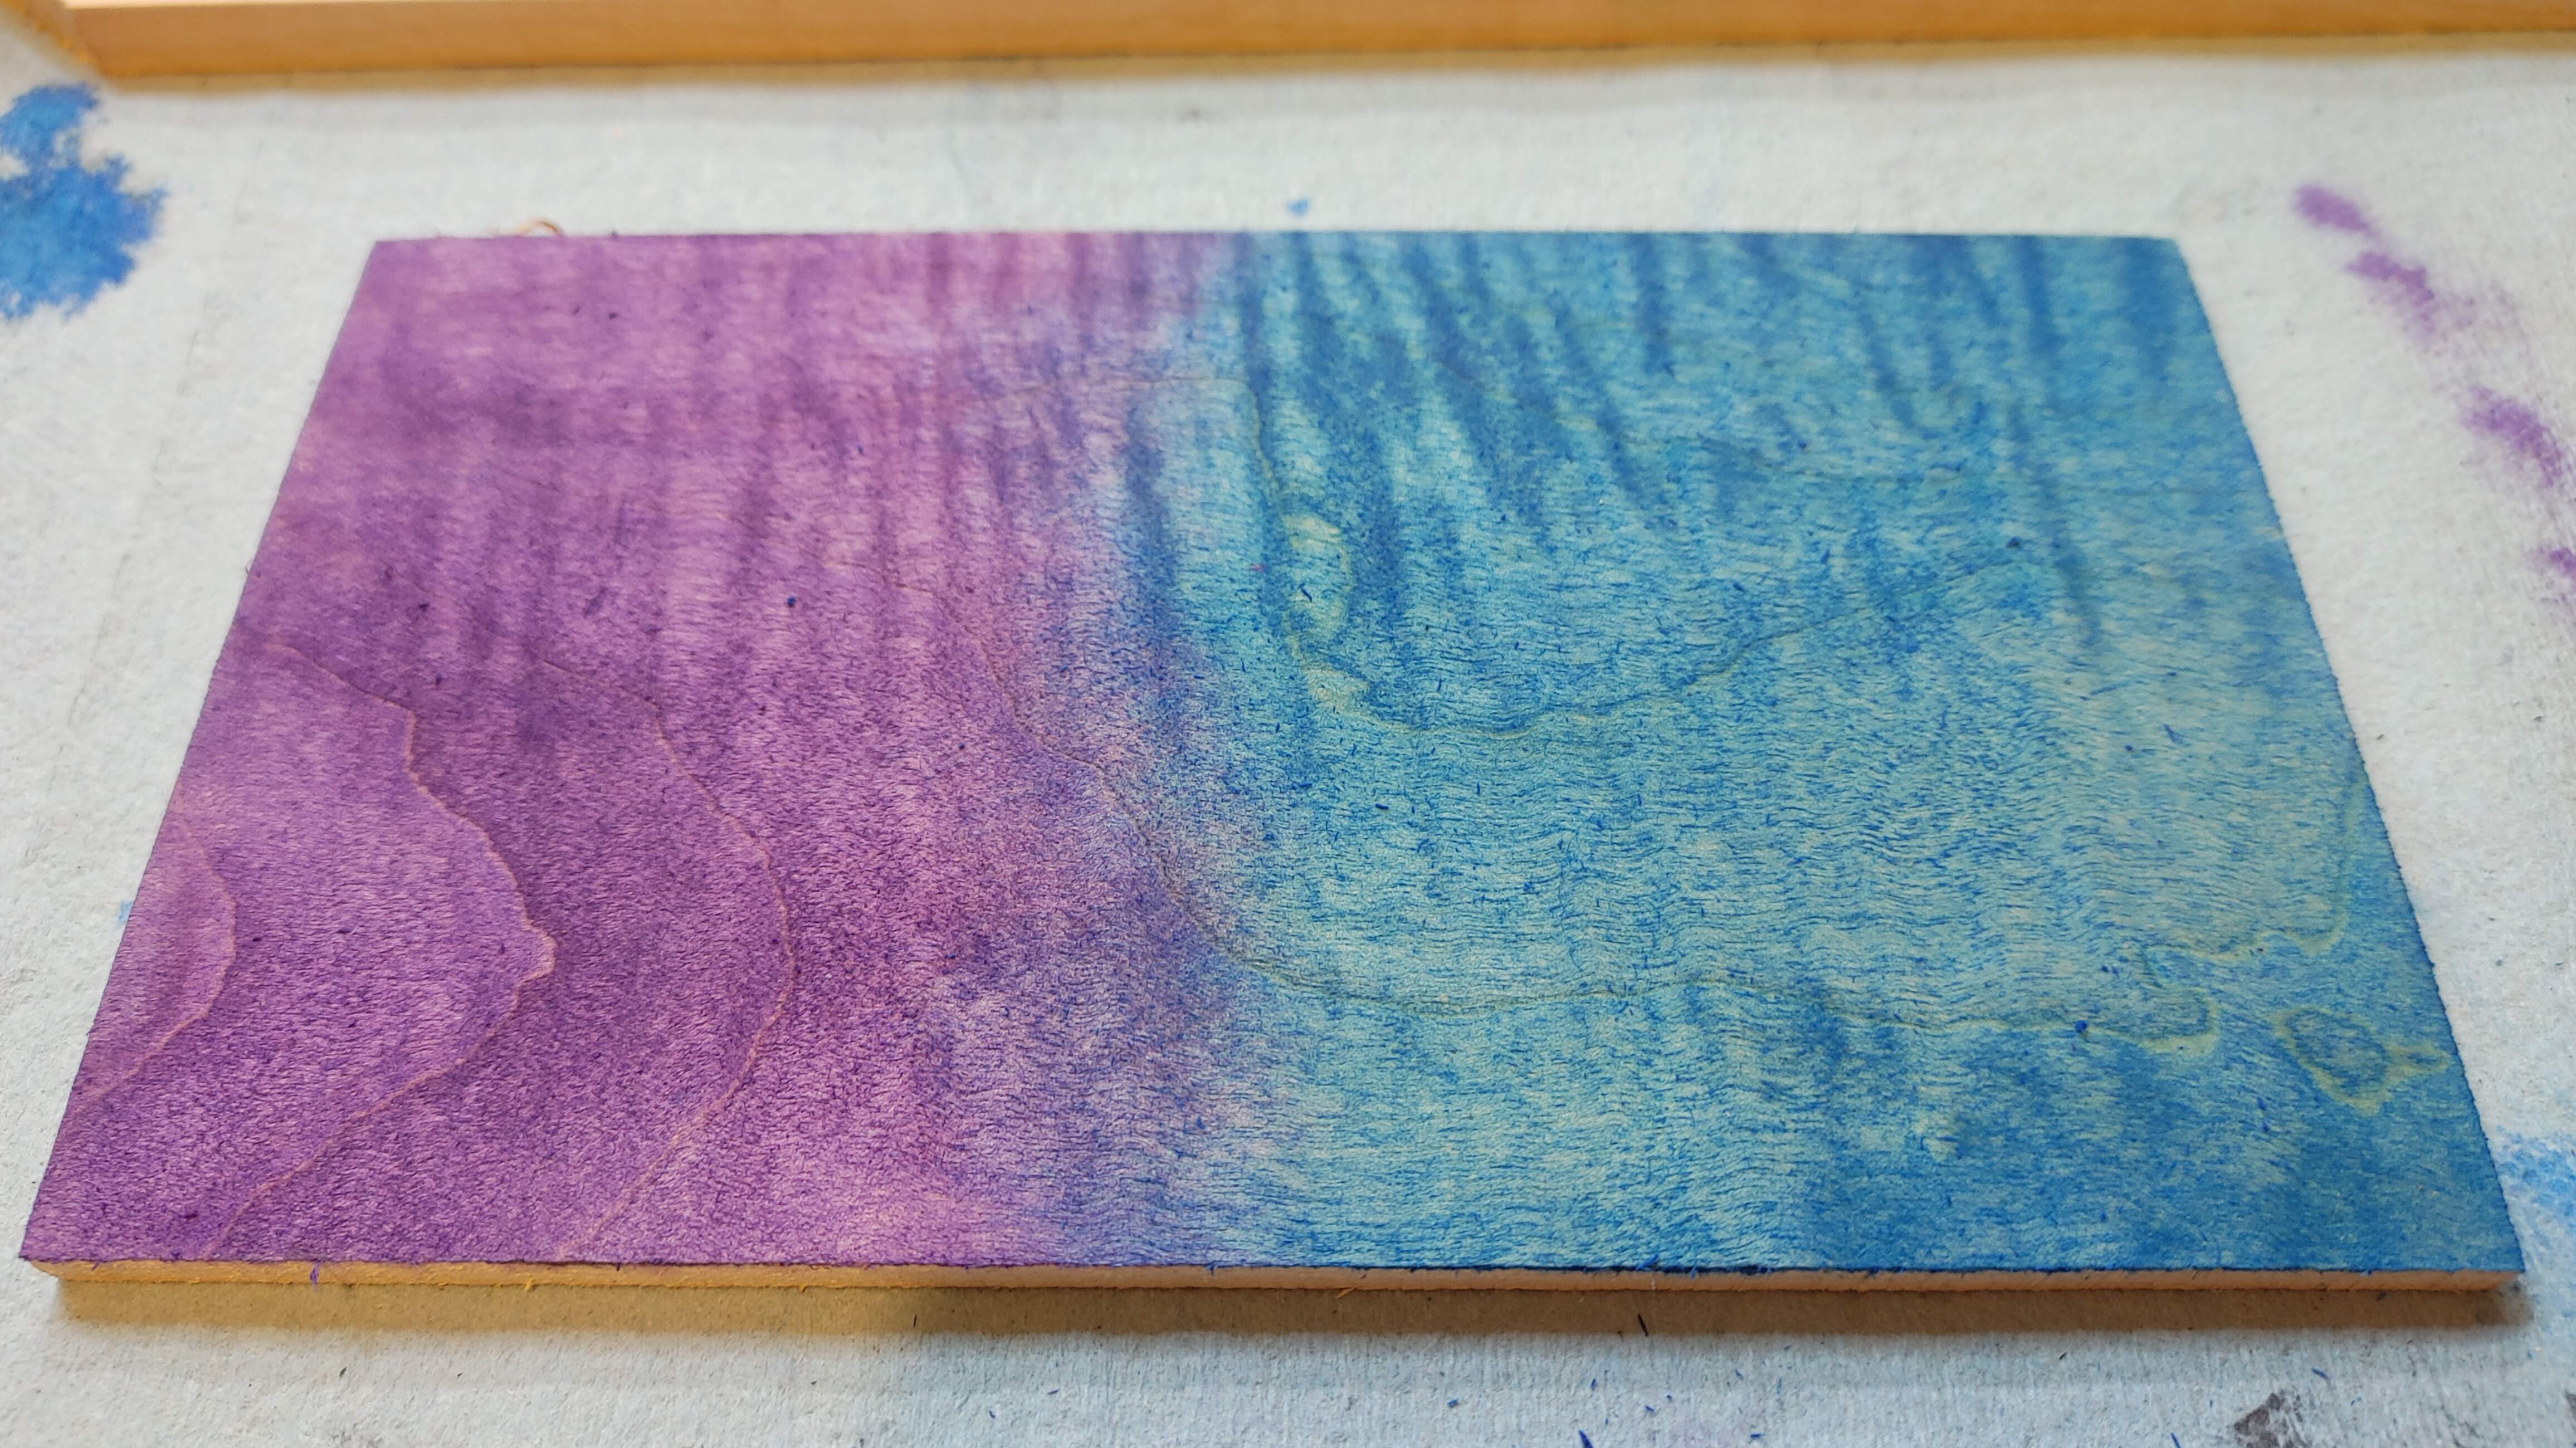
20220119_204338.jpg


Now, keep in mind that this isn't dry yet and it has no clear of any sort over it. But yeah man, I think I've landed on the method. I want to practice a few more times but I'm also worried about using up what stain I have and then running out. So there's that. But I will say, if I could recreate this one a larger scale I'd be insanely happy. :cool:

Oh, the one who purchased the piece of wood said "Yup, that's it babe, you've nailed it." :smug:
 
Still playing with finish, trying to get educated. After a long chat with @Rôckhewer I sanded my test pieces back to bare wood and started over. Using his method, I came up with this -
View attachment 4550090

Now, keep in mind that this isn't dry yet and it has no clear of any sort over it. But yeah man, I think I've landed on the method. I want to practice a few more times but I'm also worried about using up what stain I have and then running out. So there's that. But I will say, if I could recreate this one a larger scale I'd be insanely happy. :cool:

Oh, the one who purchased the piece of wood said "Yup, that's it babe, you've nailed it." :smug:

Wet on wet... (no water... deno-alclohol only)
Sand back?.... or...wash back... :eyebrow:
Trust in Bob.
Bob's your uncle. ;)
CgUYMVwIG54is.gif
 
Wet on wet... (no water... deno-alclohol only)
Sand back?.... or...wash back... :eyebrow:
Trust in Bob.
Bob's your uncle. ;)
View attachment 4550113
So, I actually wet the board first, then applied each color, dark first, then pull the light into it. It went on VERY muted and pale. So I let it dry for like 20 minutes and then put a second coat on and BAM! :cool:
 
Checking off a few more items on the list. I rigged up the ol' ShopSmith as a horizontal boring machine and decided to tackle that jack hole. First we clamp the bass down to the table, then line everything up with a forstner bit to create a recess (I want the jack recessed just enough) -
20220120_195904.jpg


20220120_195909_HDR.jpg


Then we drill about 1/4" depth, swap to a brad point drill bit and punch it out -
20220120_200119_HDR.jpg


20220120_201031_HDR.jpg


Yeah man, looks good. :cool:
Let's move on to that volume knob, it needs a hole too. After a bunch of measuring, I drilled a hole with a tiny pilot hole from the inside of the cavity, then came at it from the top side with the proper size bit -
20220120_204045.jpg


Now we got a volume knob hole. :cool:
I think the placement worked perfectly, it seems perfectly the same distance from every edge. I'm happy.
Okay, I decided to go ahead and do a mock up just so I can see where I am here. The fretboard is just held on by "The Trick", but here's a good shot of the overall thus far -
20220120_211749.jpg


Yeah man, I'm digging it. I will have my string ball end retainers tomorrow, so I can finish the last modification they will need. I really need to start working this body over so I can get the stain on it. I can't glue the fretboard on until then. Well, I can, but I really don't feel like trying my first ever burst stain with it in my way.
 
Put A Glove On It -
Just sharing this for those like me who, when they see it, go "Son of a...."
So, Cam over at Blacktail Studios (if you love watching people build super high end mega expensive furniture, look him up on the tubes) uses this trick for hand sanding. Take any old worn out glove, cover it in contact cement, and stick some strips of velcro on it -
20220121_185319.jpg


Then you can stick one of your random orbital sander sheets on it -
20220121_185338.jpg


Thus eliminating that awesome cramping your fingers get. ;) :cool:
I got a LOT of sanding to do. Chat with ya later.
 
Retaining The Court -
So, my BiL got those string ball end retainers cut for me. I didn't ask him to machine the whole thing, because I wasn't exactly sure how it would work out, I just had him make me four of these -
20220121_200741_HDR.jpg


And then I would take it from there. With the strings in hand, I could use them to fit it precisely (and by precisely, I mean it's good enough). I got out the Dremel with a little diamond bit and started going at it, a little bit at a time, until I could fit the ball end in, and then rotate it so it catches on the lip down inside -
20220121_201459_HDR.jpg


And with the string in it -
20220121_201511_HDR.jpg


Seems pretty good, I gave it a good tug and basically pulled it right out of the vice and the string never let go. Sweet! make the other three look just like it and we have these -
20220121_203303.jpg


They aren't super pretty, but I'll shine them up some and it'll work just fine. With the strings in them, you really don't see too much anyways. I'll drill a hole for these to press down into so that they sit just above the fretboard, or maybe flush. I'm not sure yet, I gotta think on it and look at photos, maybe go back and see what Mapleglow did, all that stuff. ;) :smug:

I also drilled an access for the truss rod adjustment -
20220121_204811.jpg


Anyways, after way too much sanding I think the top is ready to stain. I even taped it off in preparation for it, and then I quit for the night. Maybe we'll see about doing that tomorrow. Part of me is scared, part of me just didn't feel like being out in the garage till 10:30pm. Whatever.
 
Color Me With Envy -
Okay, I decided to just do the dang thing. Paralyzing fear can bite me. It's also possible i woke up with way too much spunk this morning, but sometimes you just gotta leap. Worst case scenario, I sand this whole thing back off, whatever. This is probably not the "correct" method, but this is the method I used.
So the first step here is to wet the top -
20220122_074718.jpg


The purpose here is to allow the stain to soak down in a little better than if you just lay it on a dry surface, it also helps the stain move around during application. Think Bob Ross, he never applied anything on a dry surface, right? Don't ask me why, just trust that it helps.
Then we lay on the purple in the middle -
20220122_075041.jpg


Yes, with the surface being wet it goes on kind of muted. Trust in the process, don't freak out just yet (I'm partly telling myself, but you can follow along too).
Then we apply the blue around the outer edge and we now have a "reverse-burst" -
20220122_075549.jpg


I know, it looks a little crappy right now, but trust the system! I let this sit for 15 minutes without touching it. Don't ask me why. I watch a lot of Derek's videos over at "Big D Guitars" and he always lets the first coat sit for 15 to 20 minutes before doing a second coat, so I figure Derek probably knows what he's talking about.
Then we come back in 15 minutes and do a second coat -
20220122_081525_HDR.jpg


Yeah, that's much better. Here's another angle, just for fun -
20220122_081530.jpg


I see we have some glue squeeze out causing some issues right along the tape edge, we'll need to deal with those at some point. I'm not super worried yet. My gut says "peel the tape, run a card scraper over it and touch it up."
I also laid the fretboard on it, because I couldn't help myself -
20220122_081749.jpg


I'm thinking I may do a third coat, just to see if it'll get better. But I'm liking this.:cool:
 
For those curious, the third coat literally did nothing other than move the blend edge around a bit. The color did not change, so clearly this is what we've got. Now all I need to do is recreate this on the headstock after I get tuner holes drilled. Because I don't think I want to drill holes in a freshly stained top.

As for the next steps on this top, I was a video on this method for furniture and the guy said "rub some wax on it to help bring out the grain shimmer, then apply your finish after the wax dries." Part of me thinks he crazy because the wax would keep the finish from bonding, but I tried it on my scrap test piece and it seems to work okay with Tru-Oil and it does help it pop a bit. I've also seen Derek go over the whole thing with the white scotch-bright too. Anyone got some experience with this?

Edit To Add: mostly I wanted to get this done so that I am set up to glue the fretboard on. There's a lot of stuff waiting on that, like routing for my bridge recess and drilling for string retainers. So I really need to get that fretboard glued on so we can start figuring out all of that stuff. Pickup arrives Monday and it will go right where the fretboard "bookmatch" is. Not because that's "the right spot", but because that's the joint in my fretboard blank. I did place that joint where the Marleaux pickup location is, so there was some thought put into it. ;)
 
Last edited:





