
Enjoy the benefits of a premium membership!
Upgrade Account
-
TalkBass has been independent since 1998. Add your voice.
Create a free account to reply to discussions, view embedded media, and browse with fewer display ads.
Join free Log in
Want zero display ads or expanded classifieds tools? Compare plans.
You are using an out of date browser. It may not display this or other websites correctly.
You should upgrade or use an alternative browser.
You should upgrade or use an alternative browser.
Winter Buildoff 2022: Still A Diva
- Thread starter TerribleTim68
- Start date
More options
Who Replied?


I ordered the "Xtender 4 HE/S", which is listed as a "dual coil humbucker". So I assume it'll arrive with 4 wires -

Moving On -
Took it out of the clamps after dinner tonight. -
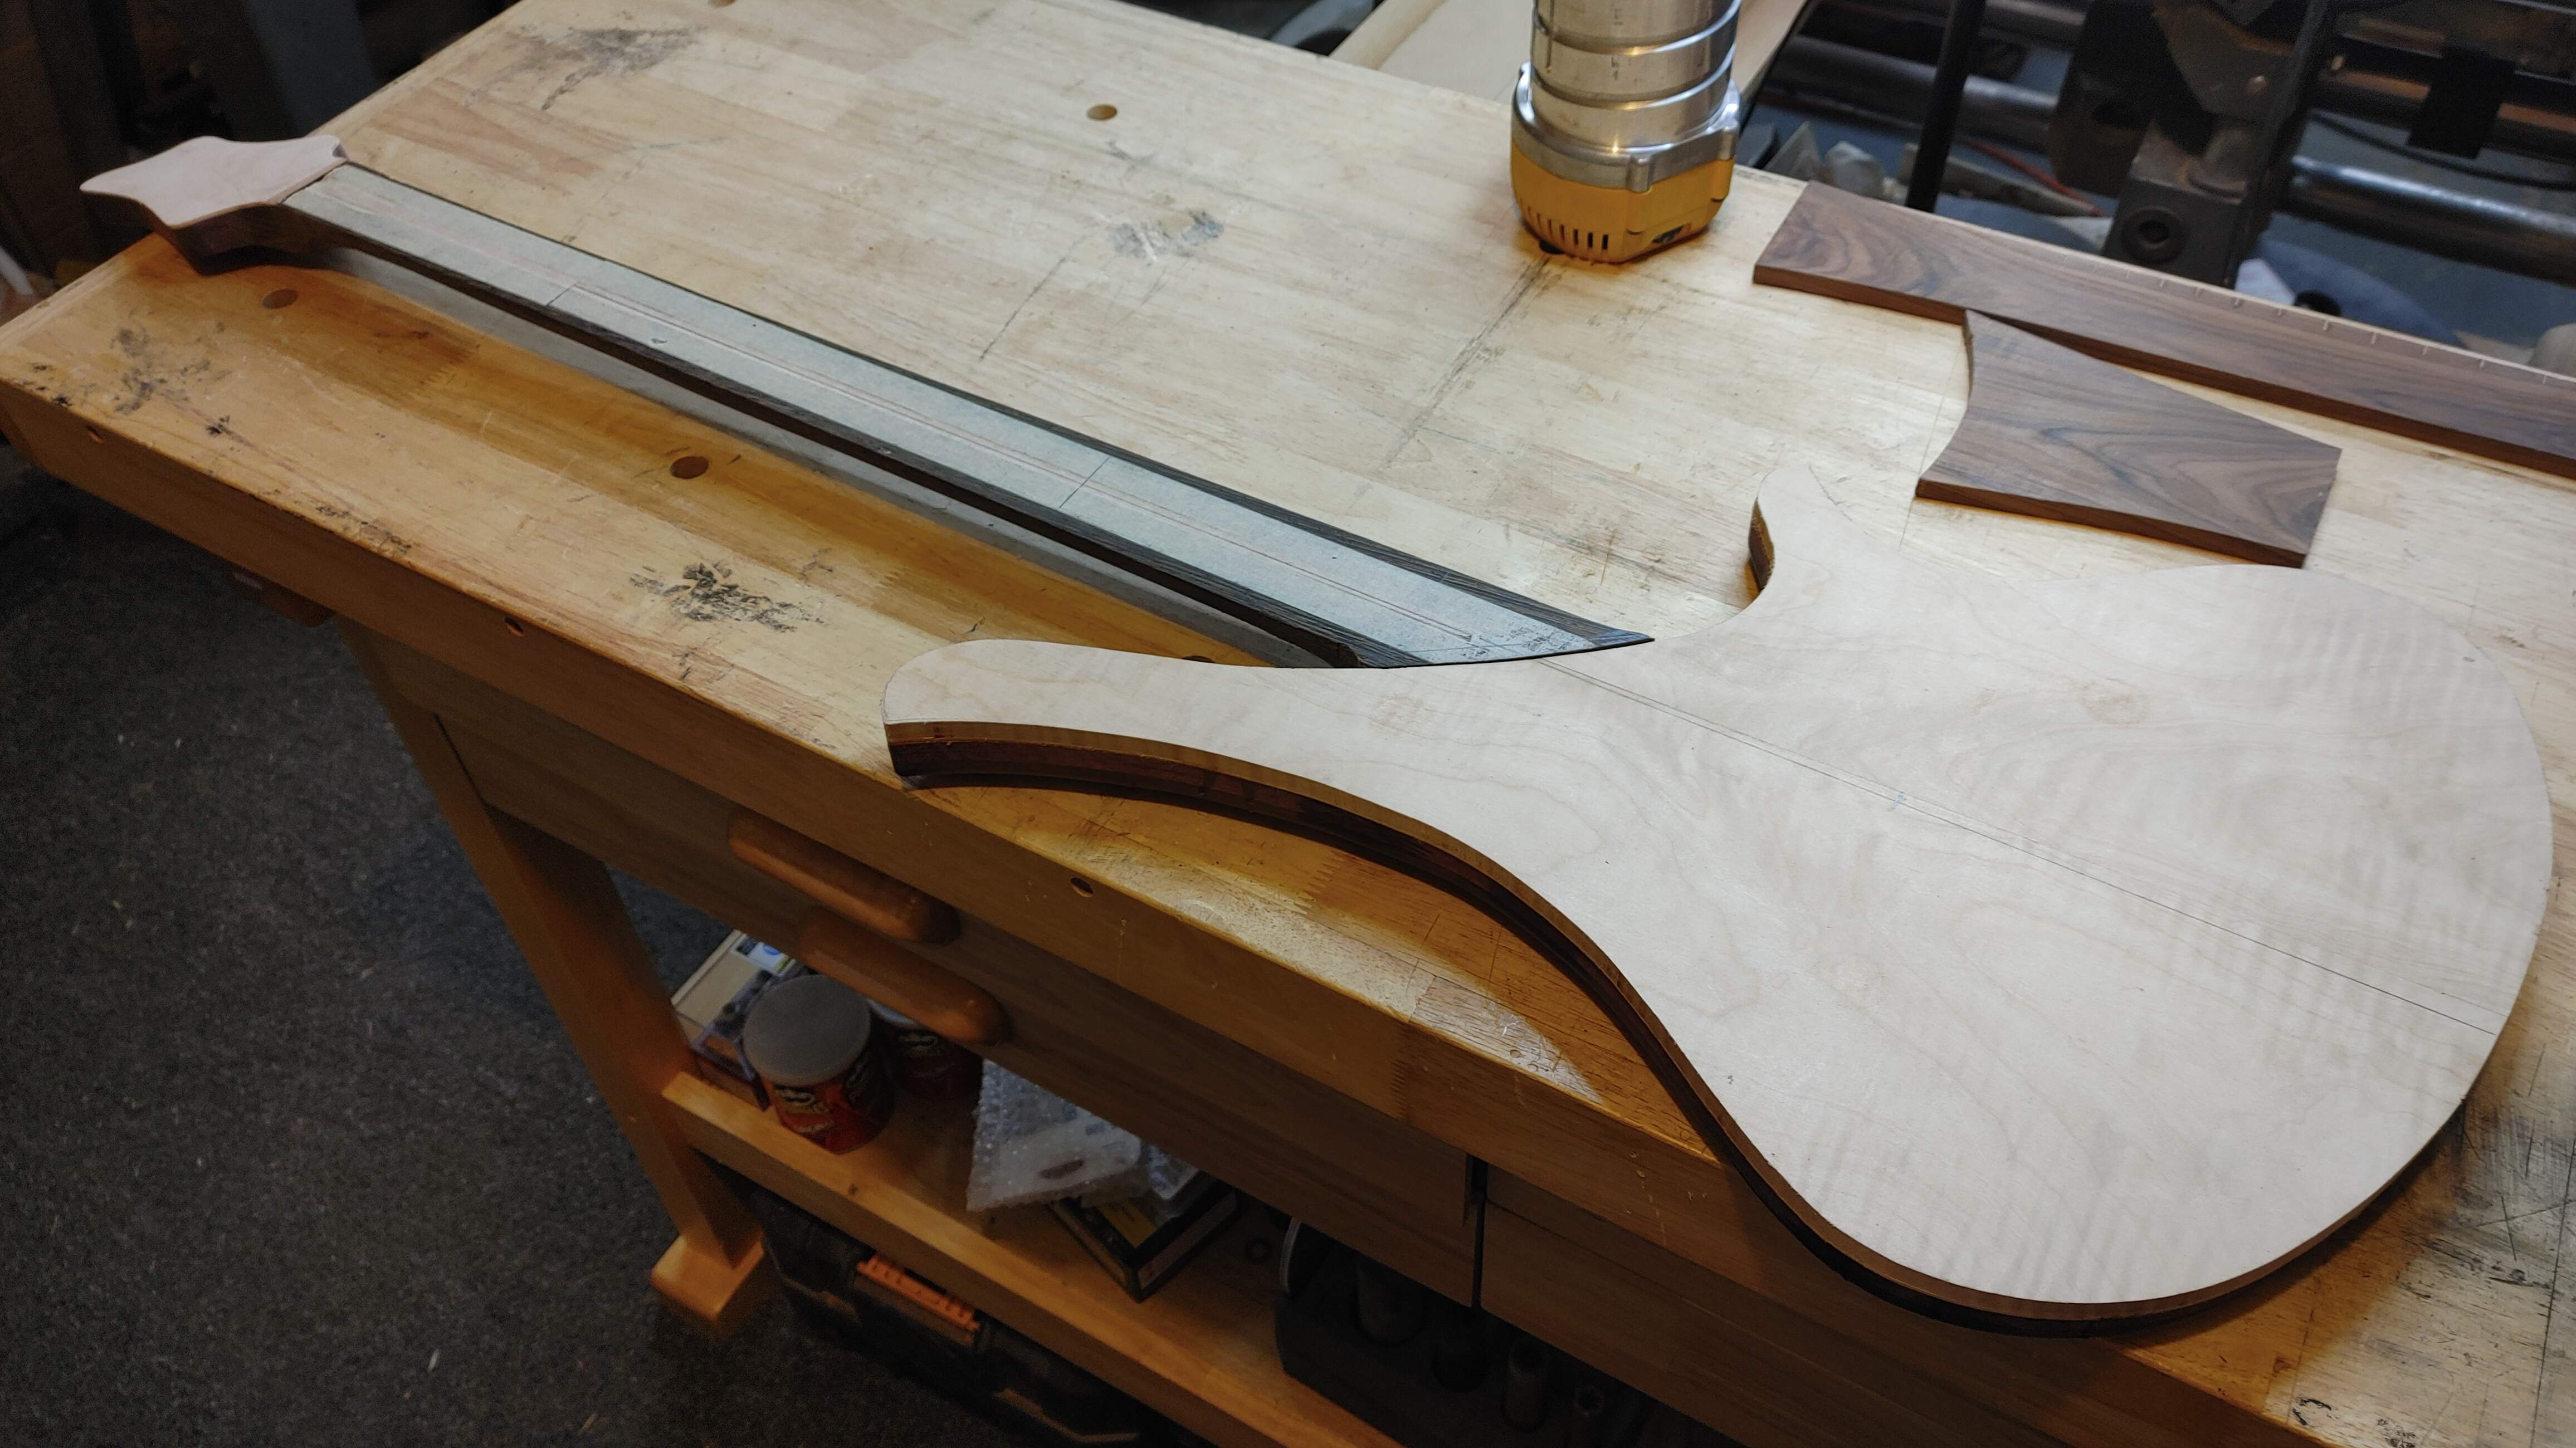
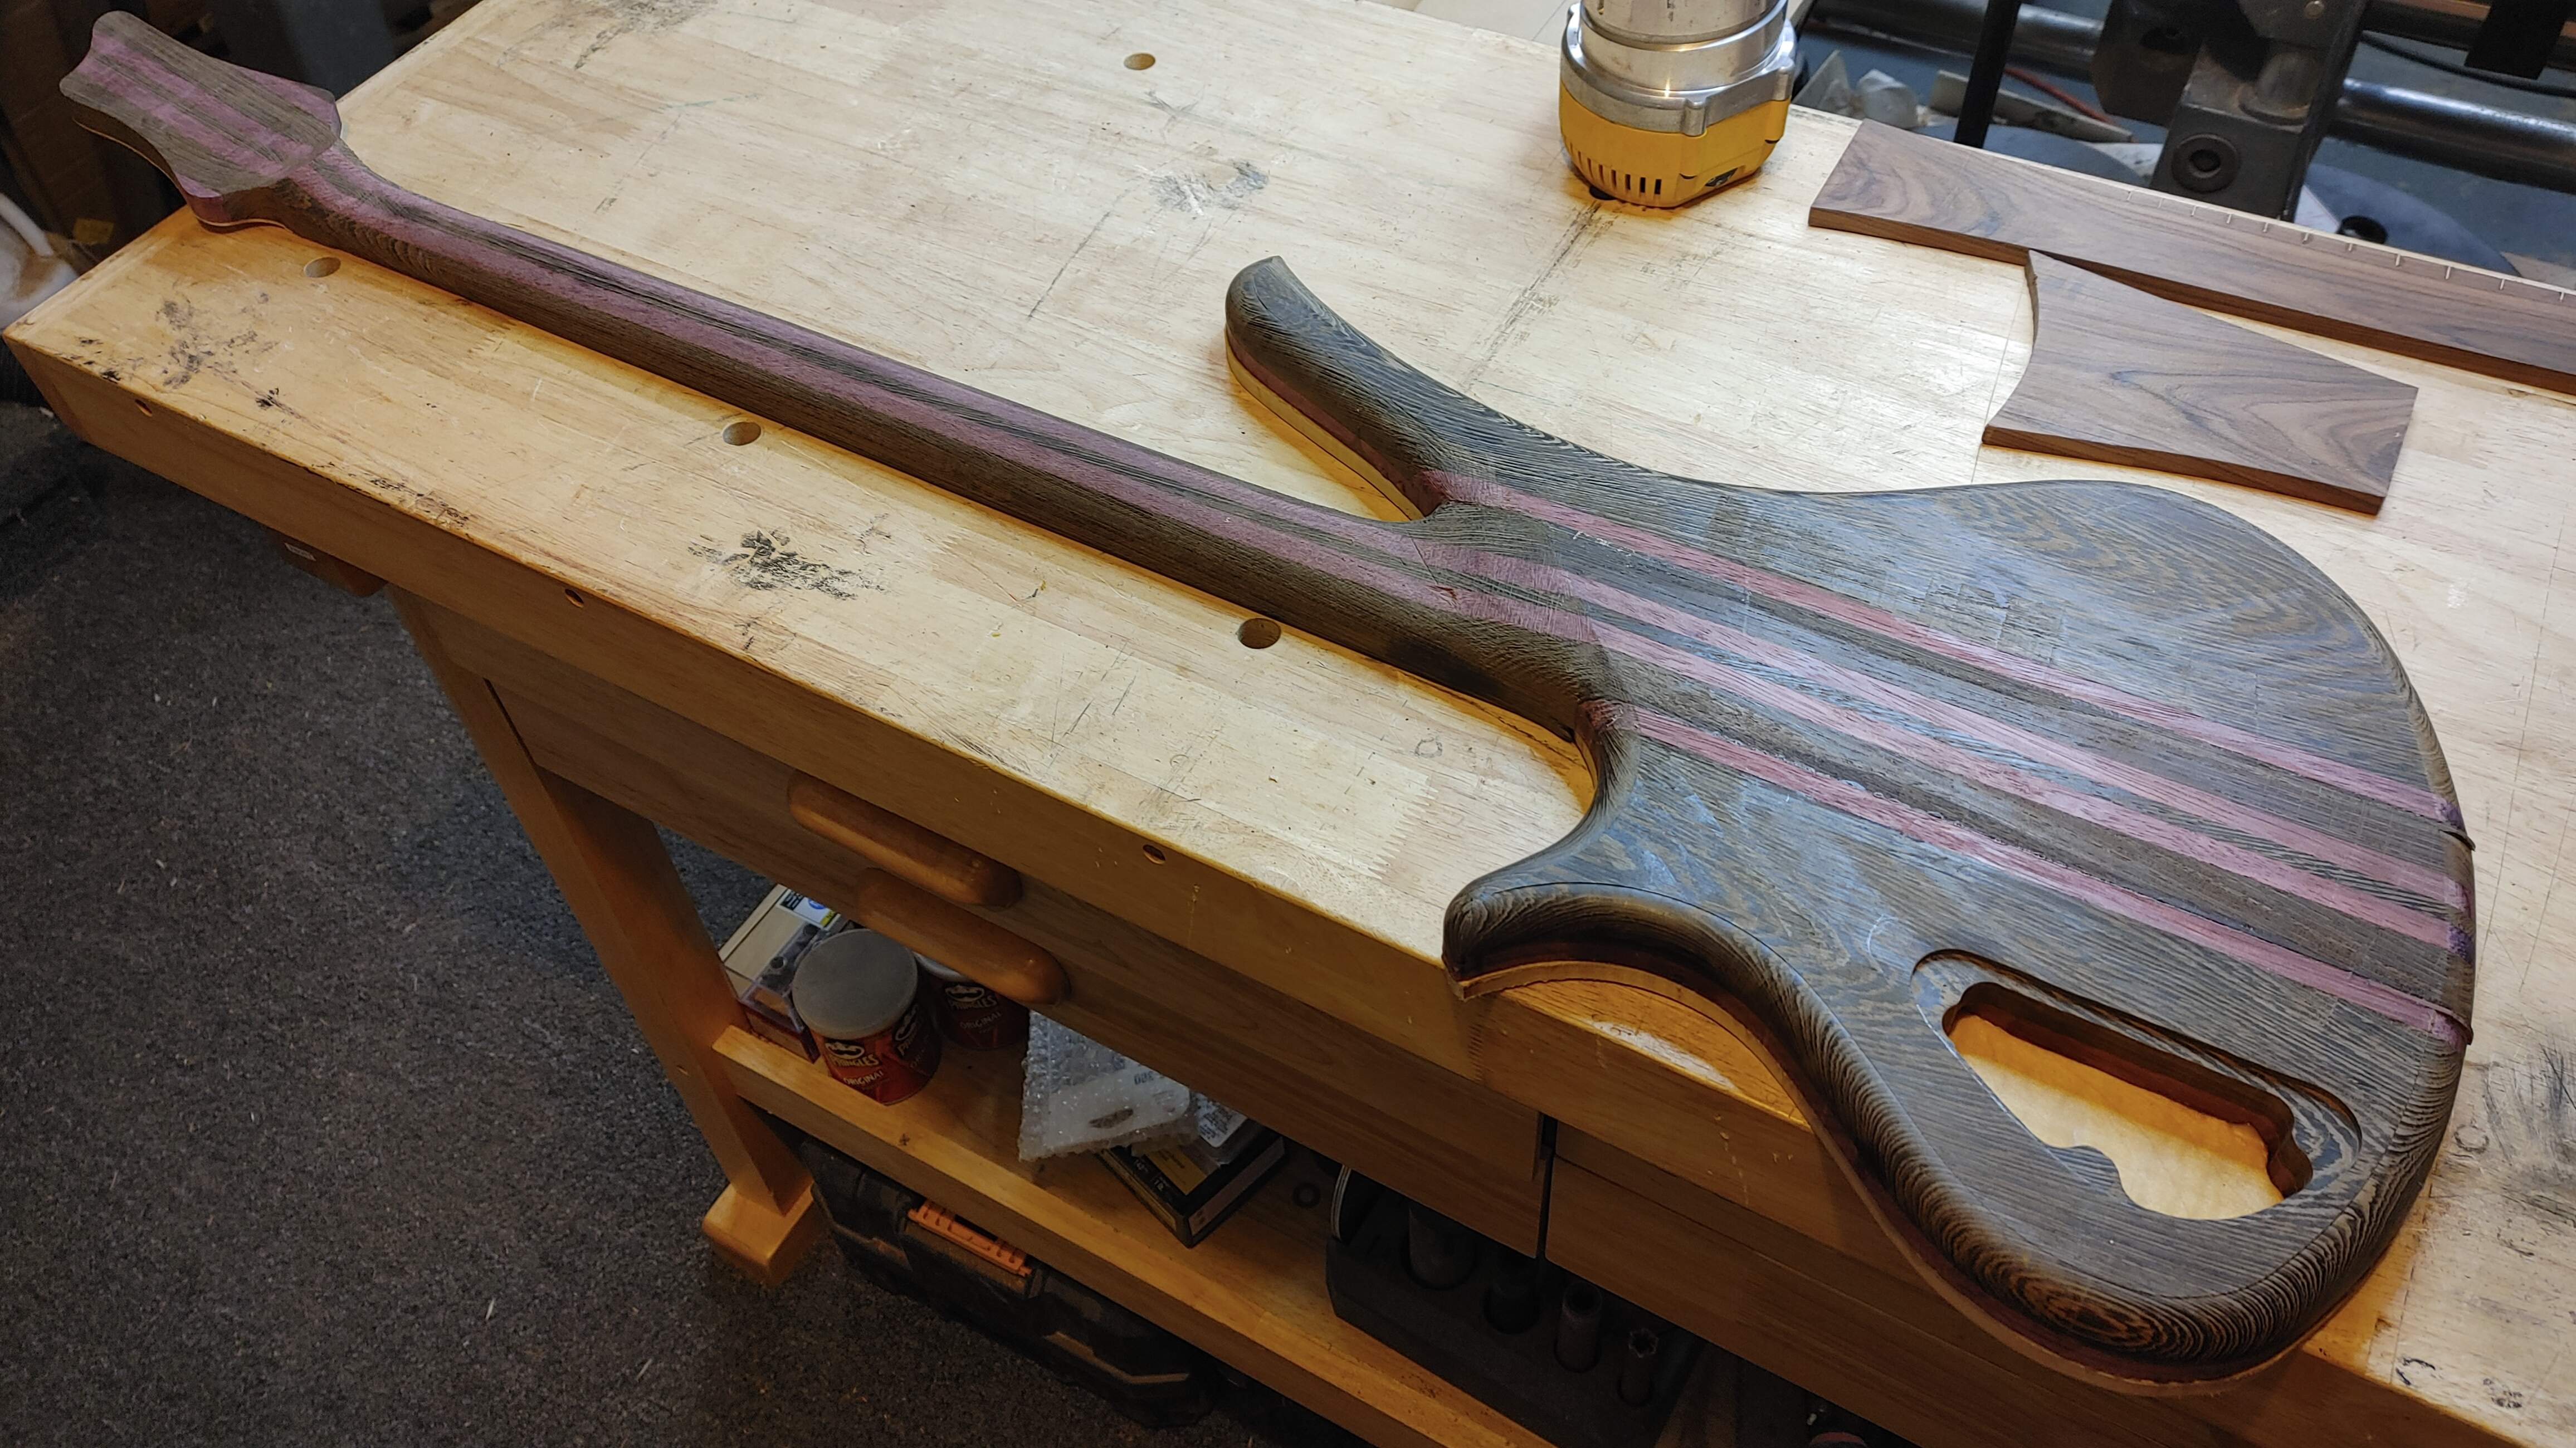
This let me start working on a lot of steps. The first one I wanted to sort out was the control cavity cover. So I went over to the disk sander and worked on it until it fit -
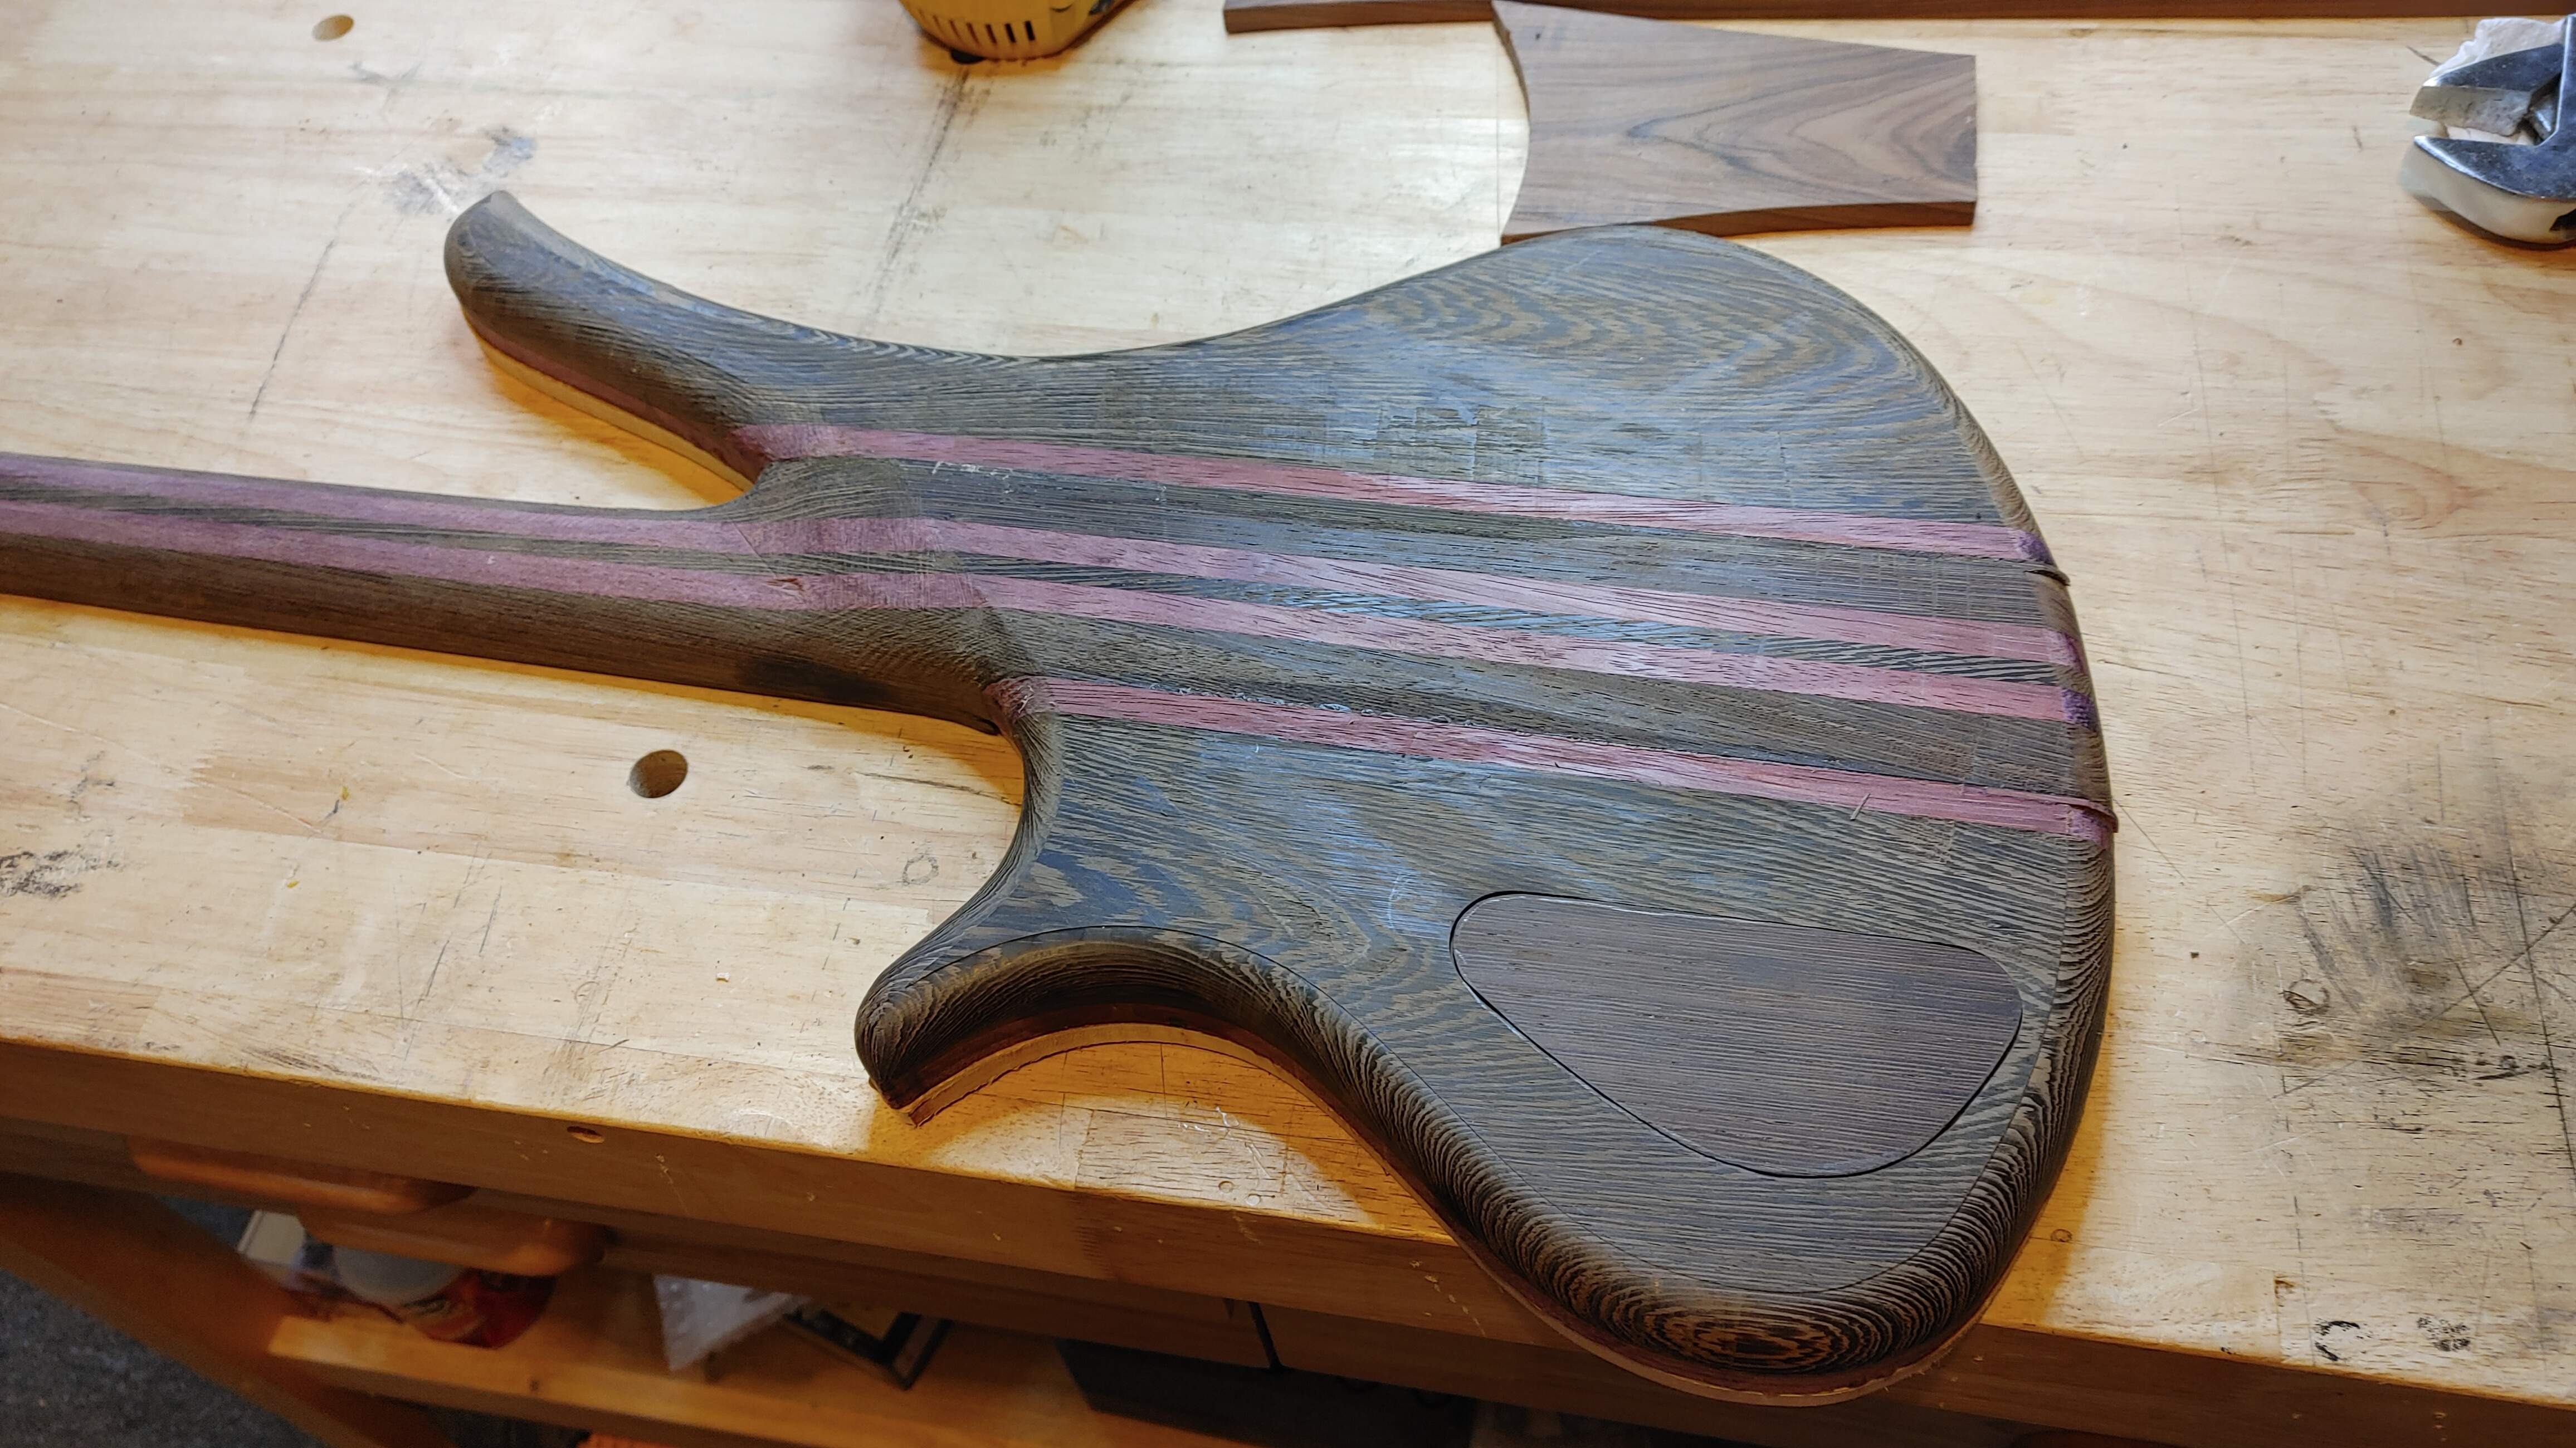
Yeah, that'll do. It's a good snug fit. It could be better, but I haven't honestly figured out the best method for that just yet. I know a lot of you do that Bondo trick and whatnot, not sure I'm ready for that just yet. Anyways, this is good. Let's get some screw holes and screws in it -
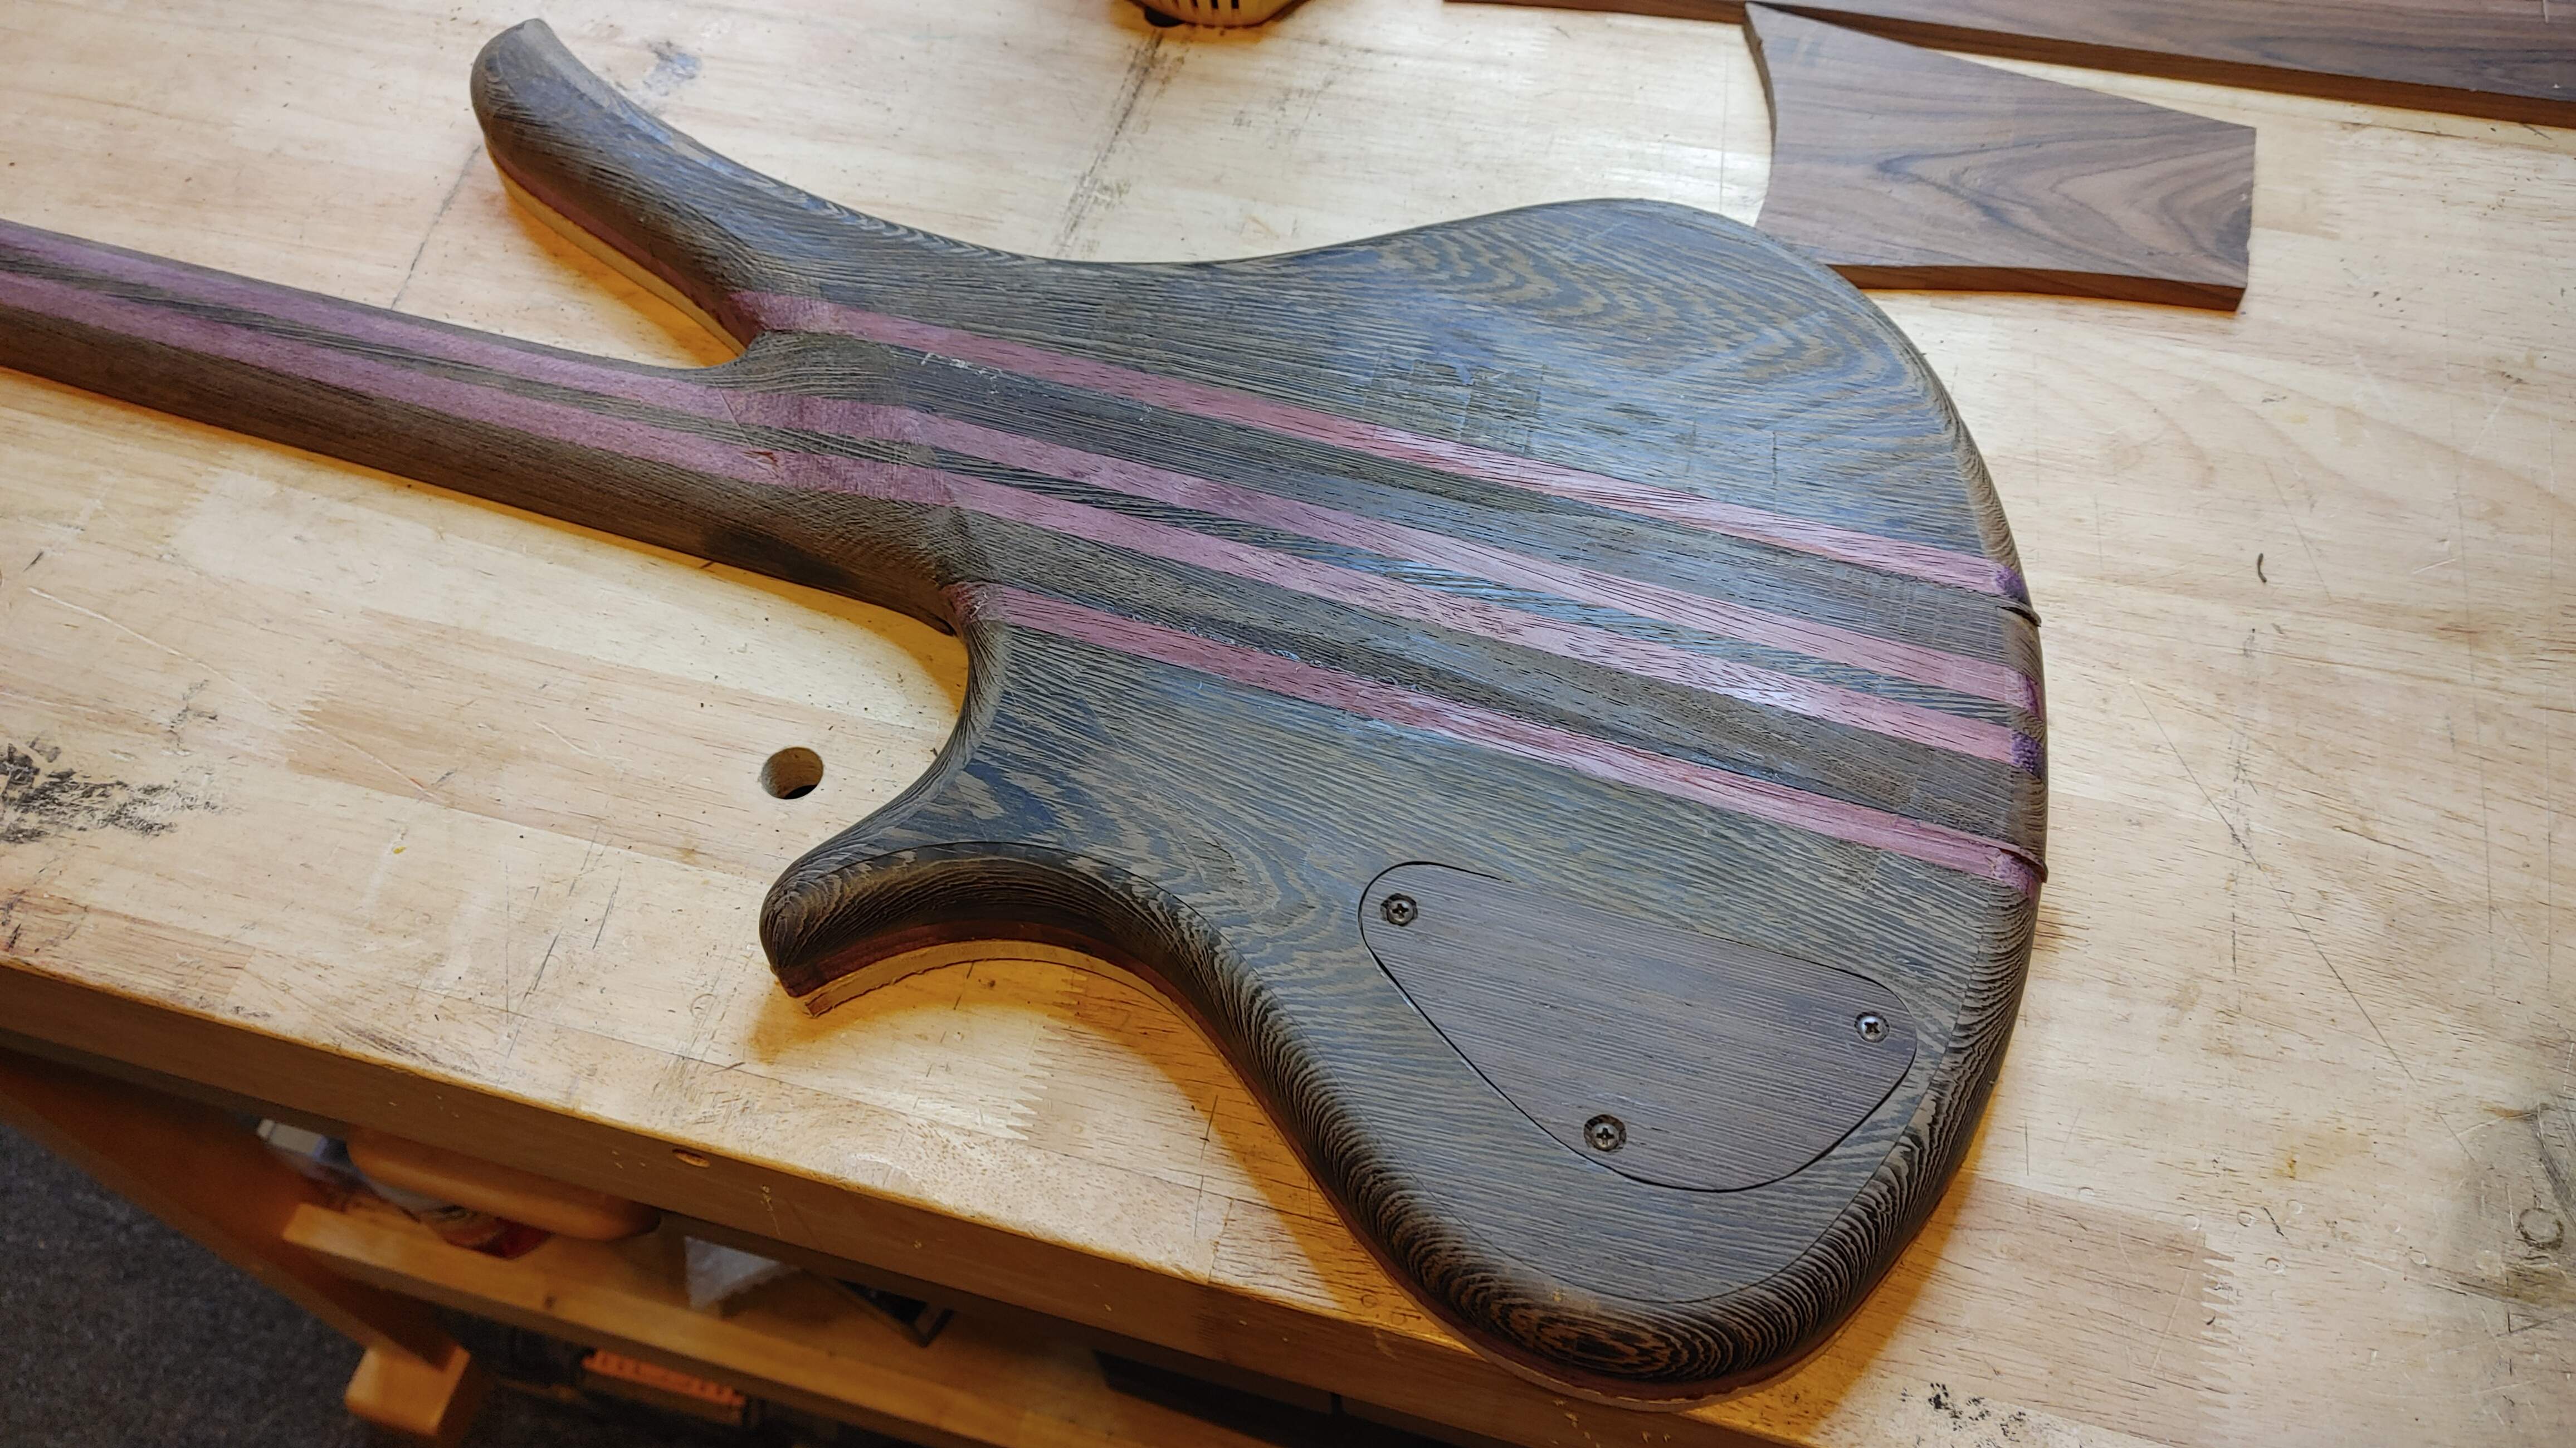
Sweet! Mark that one off the list! The next thing I did was take it to the spindle sander and start working on flushing up the top to the wings. The router scared me, so we'll sand it. In the end, I think it was the right choice. From there we can go back over it with the round over bit on the back and clean that up now that the body shape got modified by the spindle sander (because, you know, that happens). From there I decided to carve a belly carve on it. But I didn't want to get carried away, so it's really subtle -
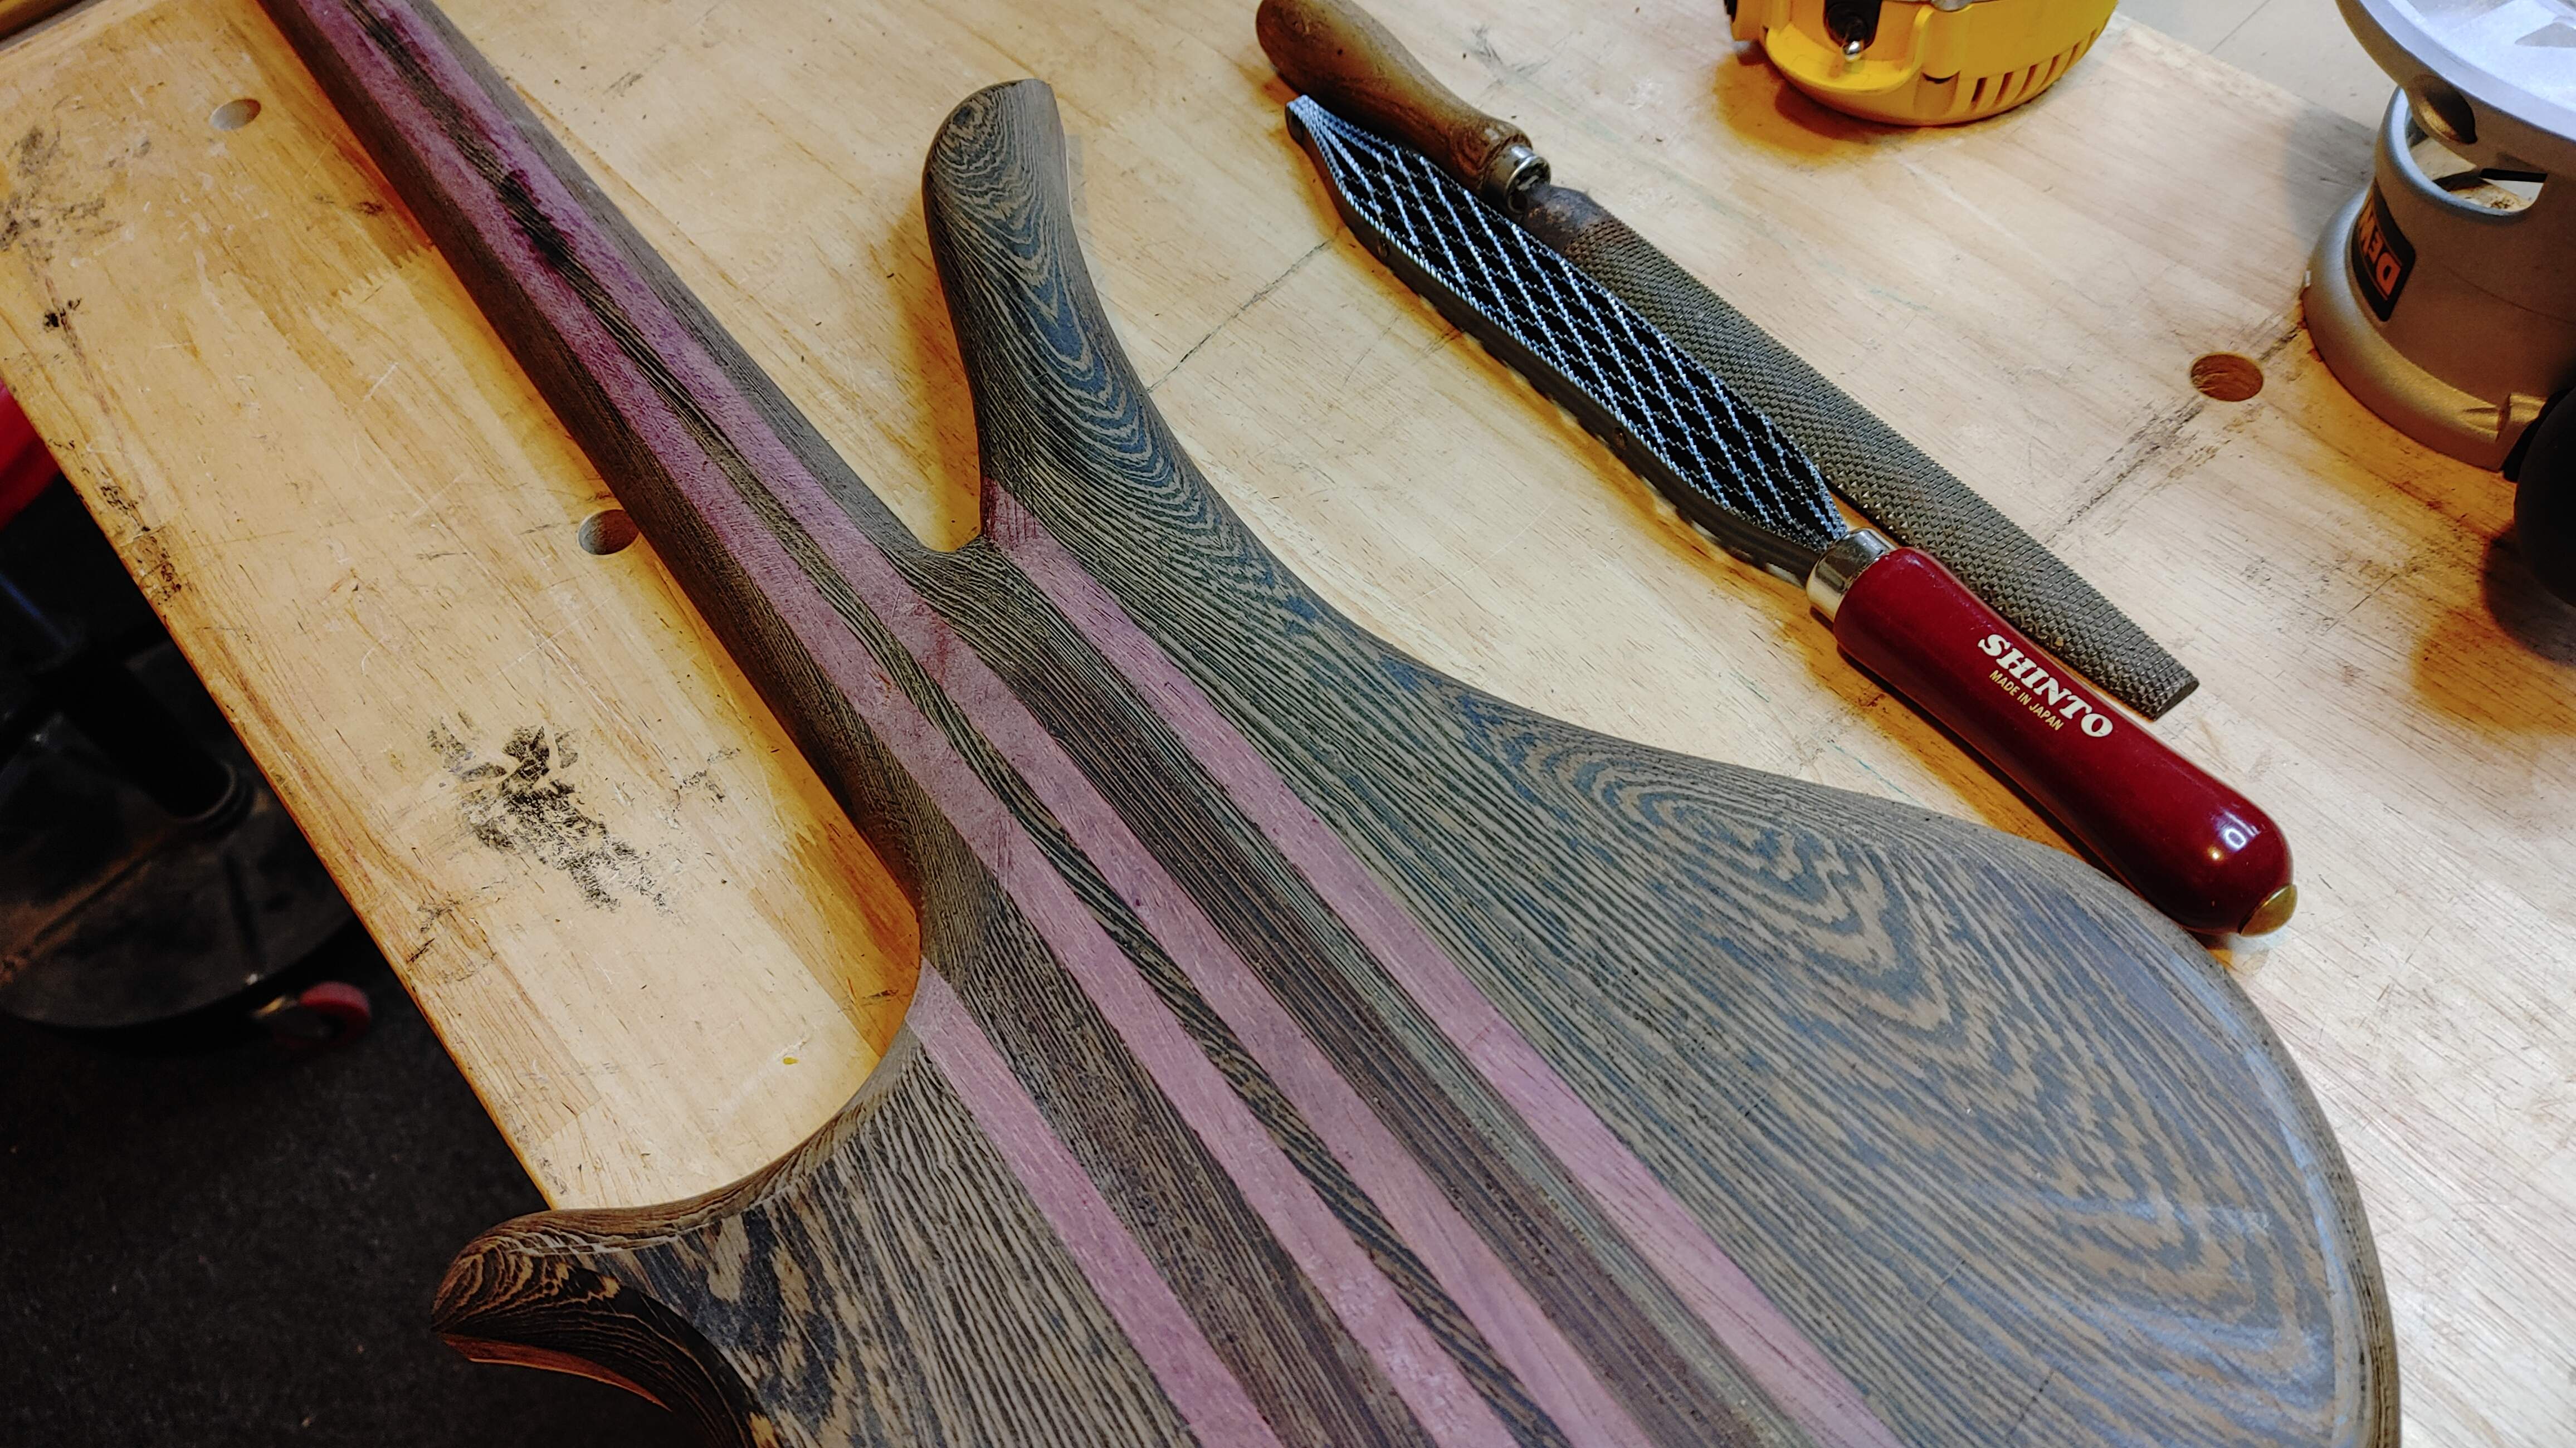
I know, hard to see, but it's there, trust me. I just didn't want something large and obnoxious. This body is pretty thin overall, so I wanted to keep things to a minimum. I'm good with it, I think it works. After that I decided the front needed rounded over too, but let's stay subtle here too! I really didn't want to start showing the purpleheart, because I'm not really into that look and it might look weird on the horns. But yeah, round over on the front -
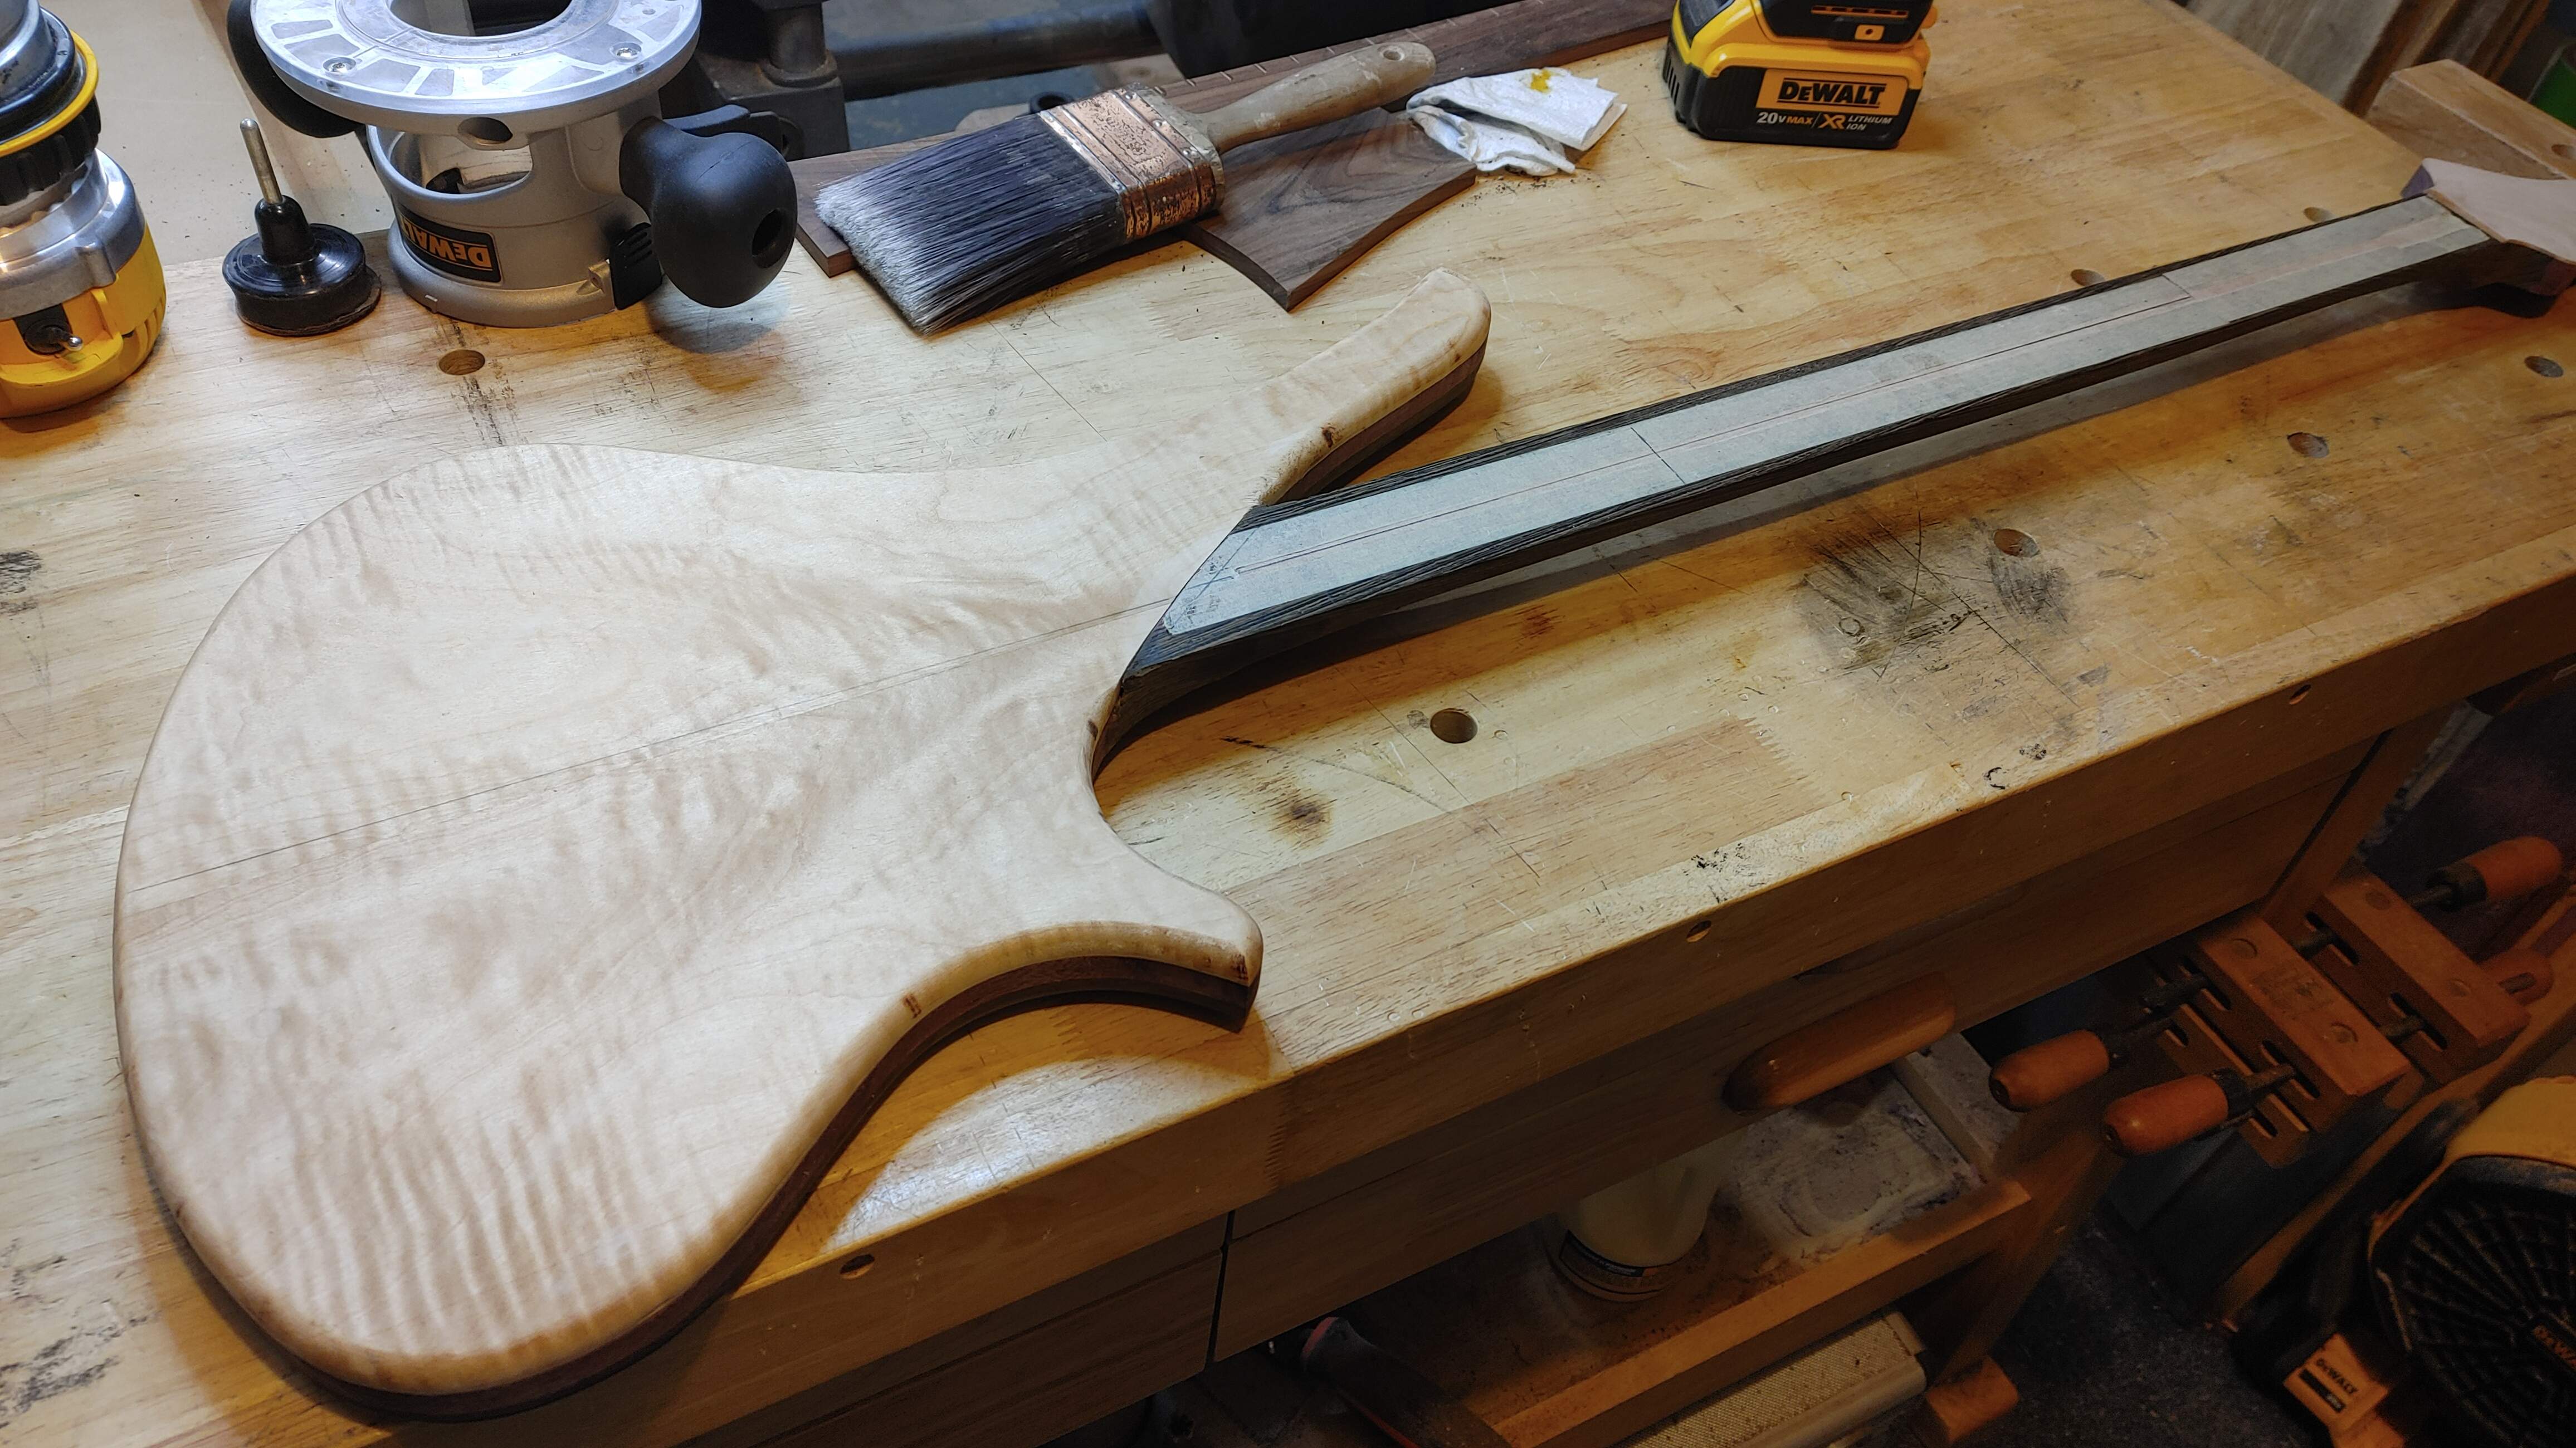
I do love how the flame turns down onto the sides.
Still Fretting Over This -
Okay, I really need to sort out that fretboard. I been putting this off for far too long. Paralyzing fear is a thing, trust me. So how do you deal with it? I guess you just leap. Let's drag out that radius jig I built a few days back, get out the CA glue and tape and do "The Trick", making sure everything is lined up on center. Time to take a deep breath! We either pull this off or we have some really awesome looking kindling for our next S'mores night.
Now, I'm gonna admit, this worked way better than I have any right for it to have. I did a TON of measuring to get my depth where I wanted it, in the end I wound up at exactly 6mm tall in the center. That's where I wanted to be, so I'm calling it a win. I took everyone's advice over in my radius jig thread and ran the router end to end, then slid it over a tiny bit, ran end to end, slid it over a bit, rinse, repeat until you cover the whole thing. I now have a fretboard looking like this -
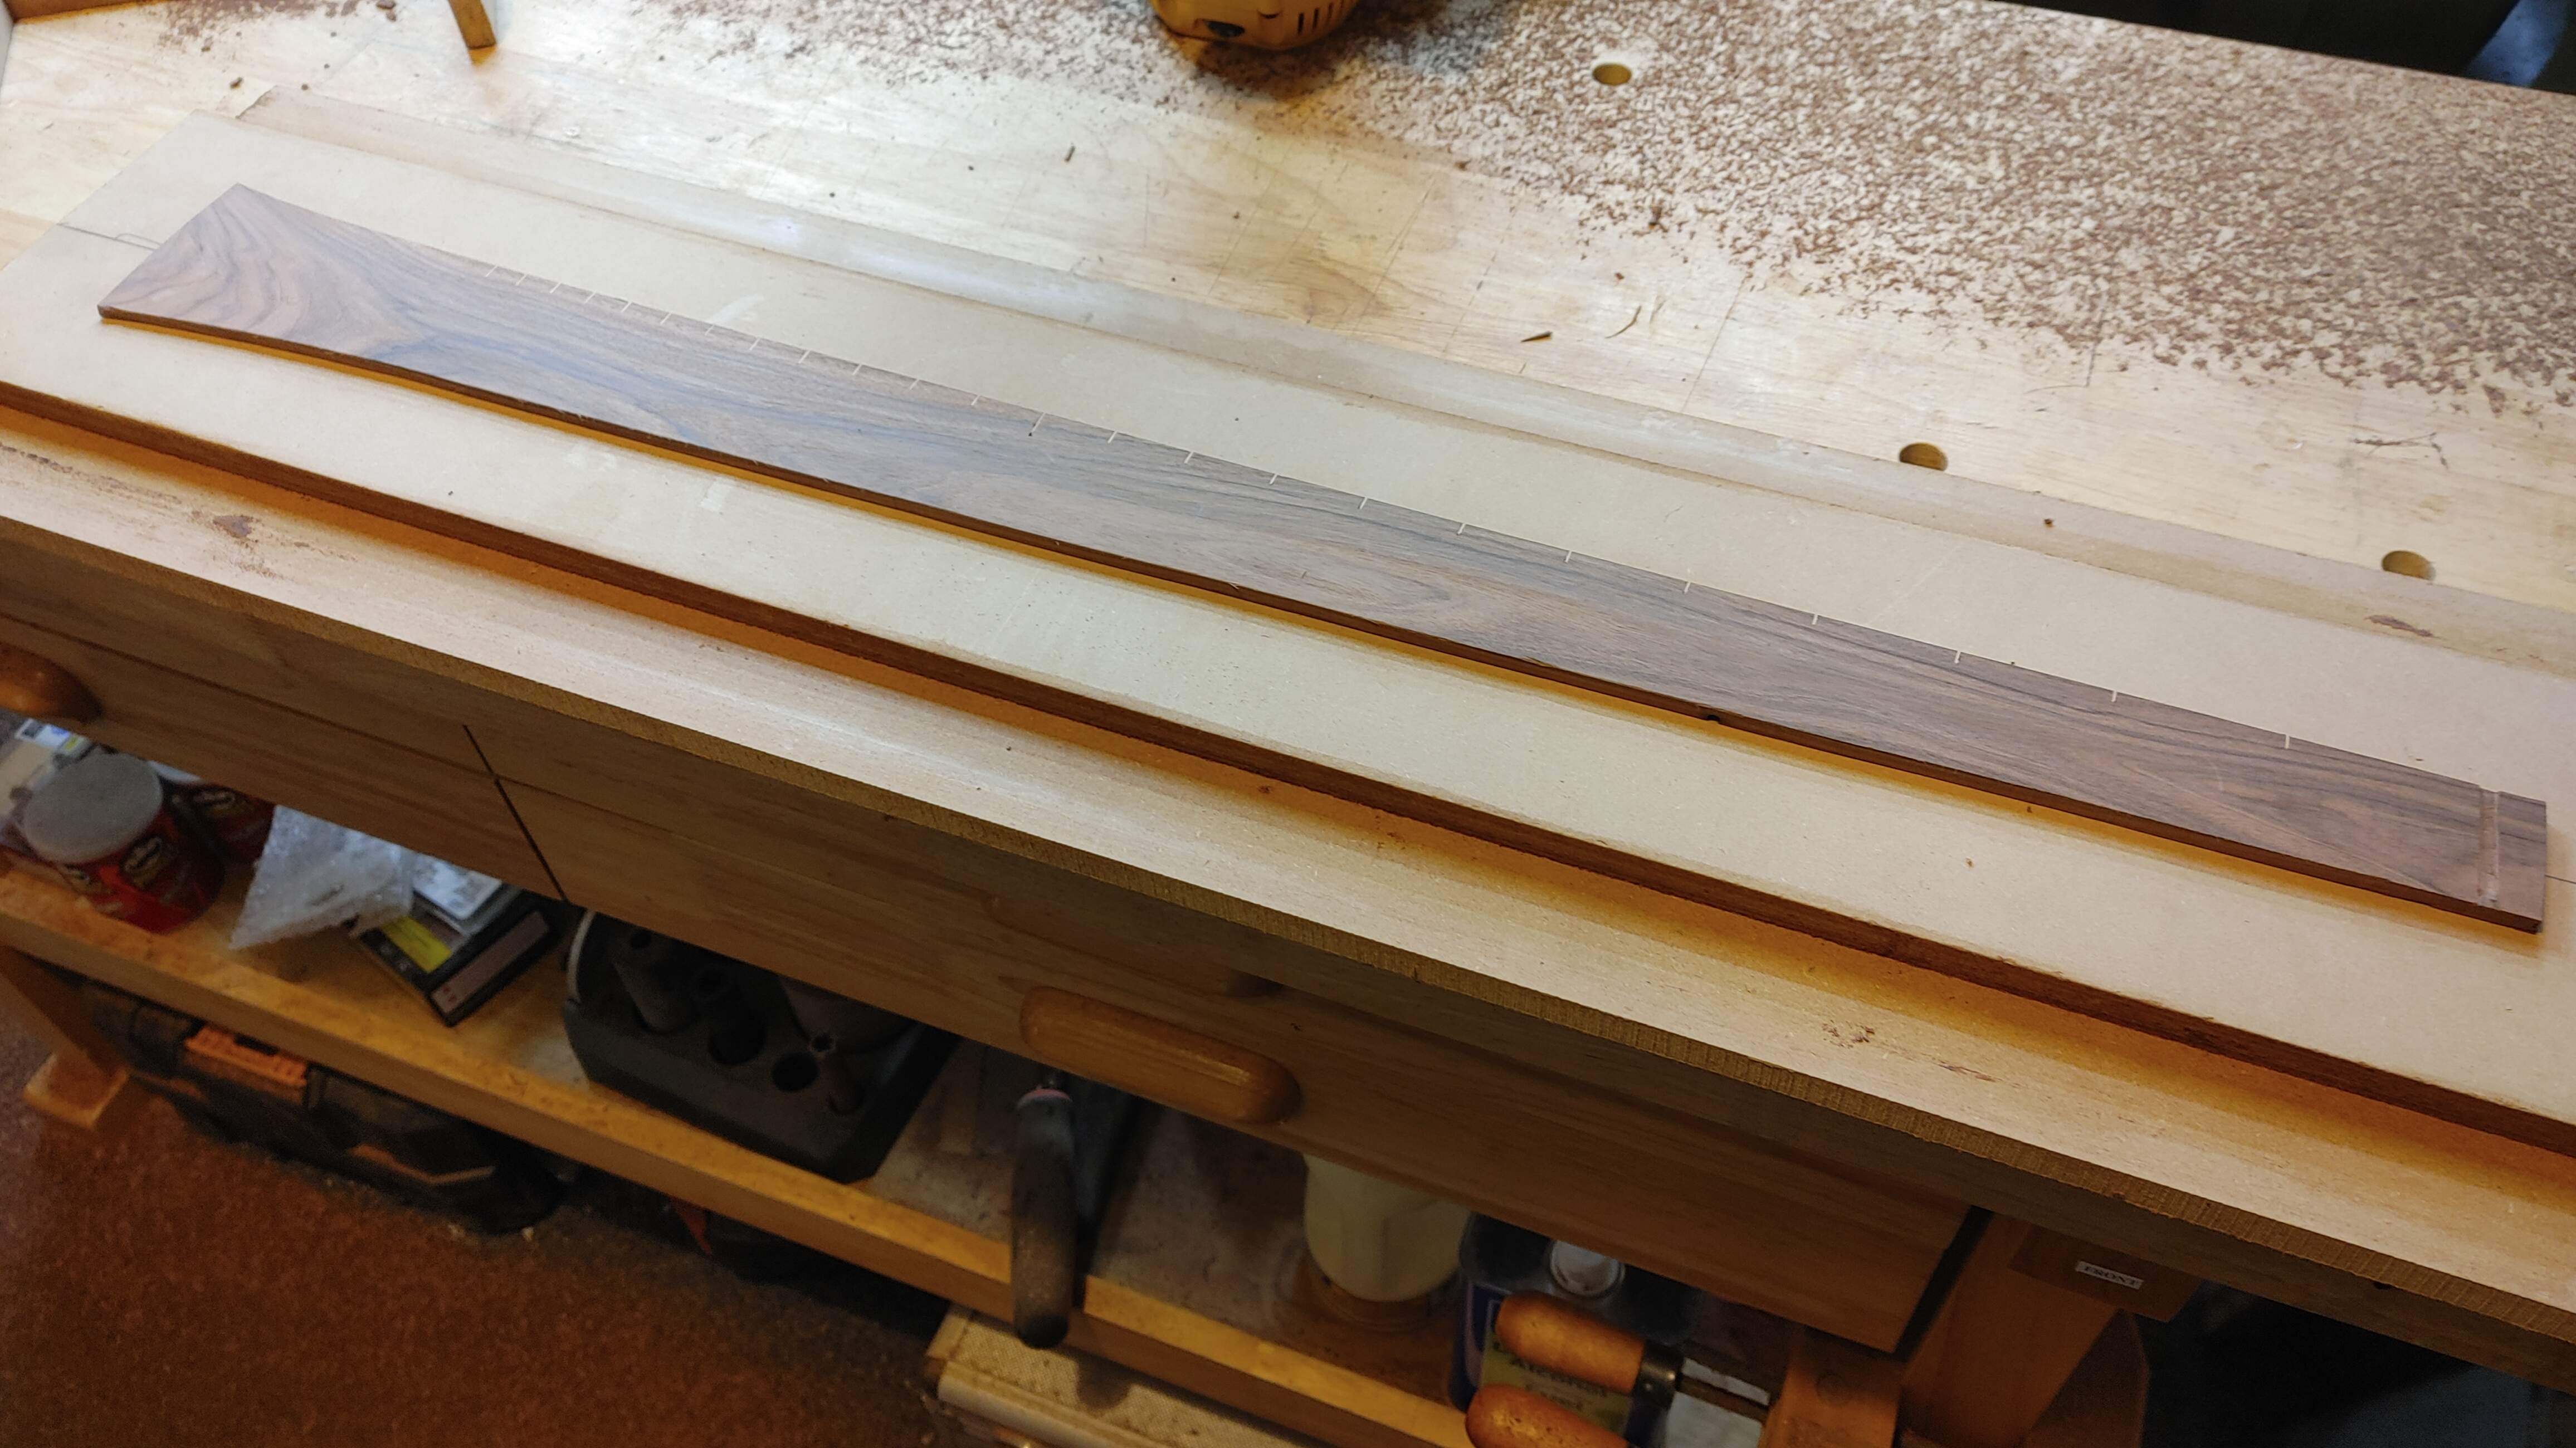
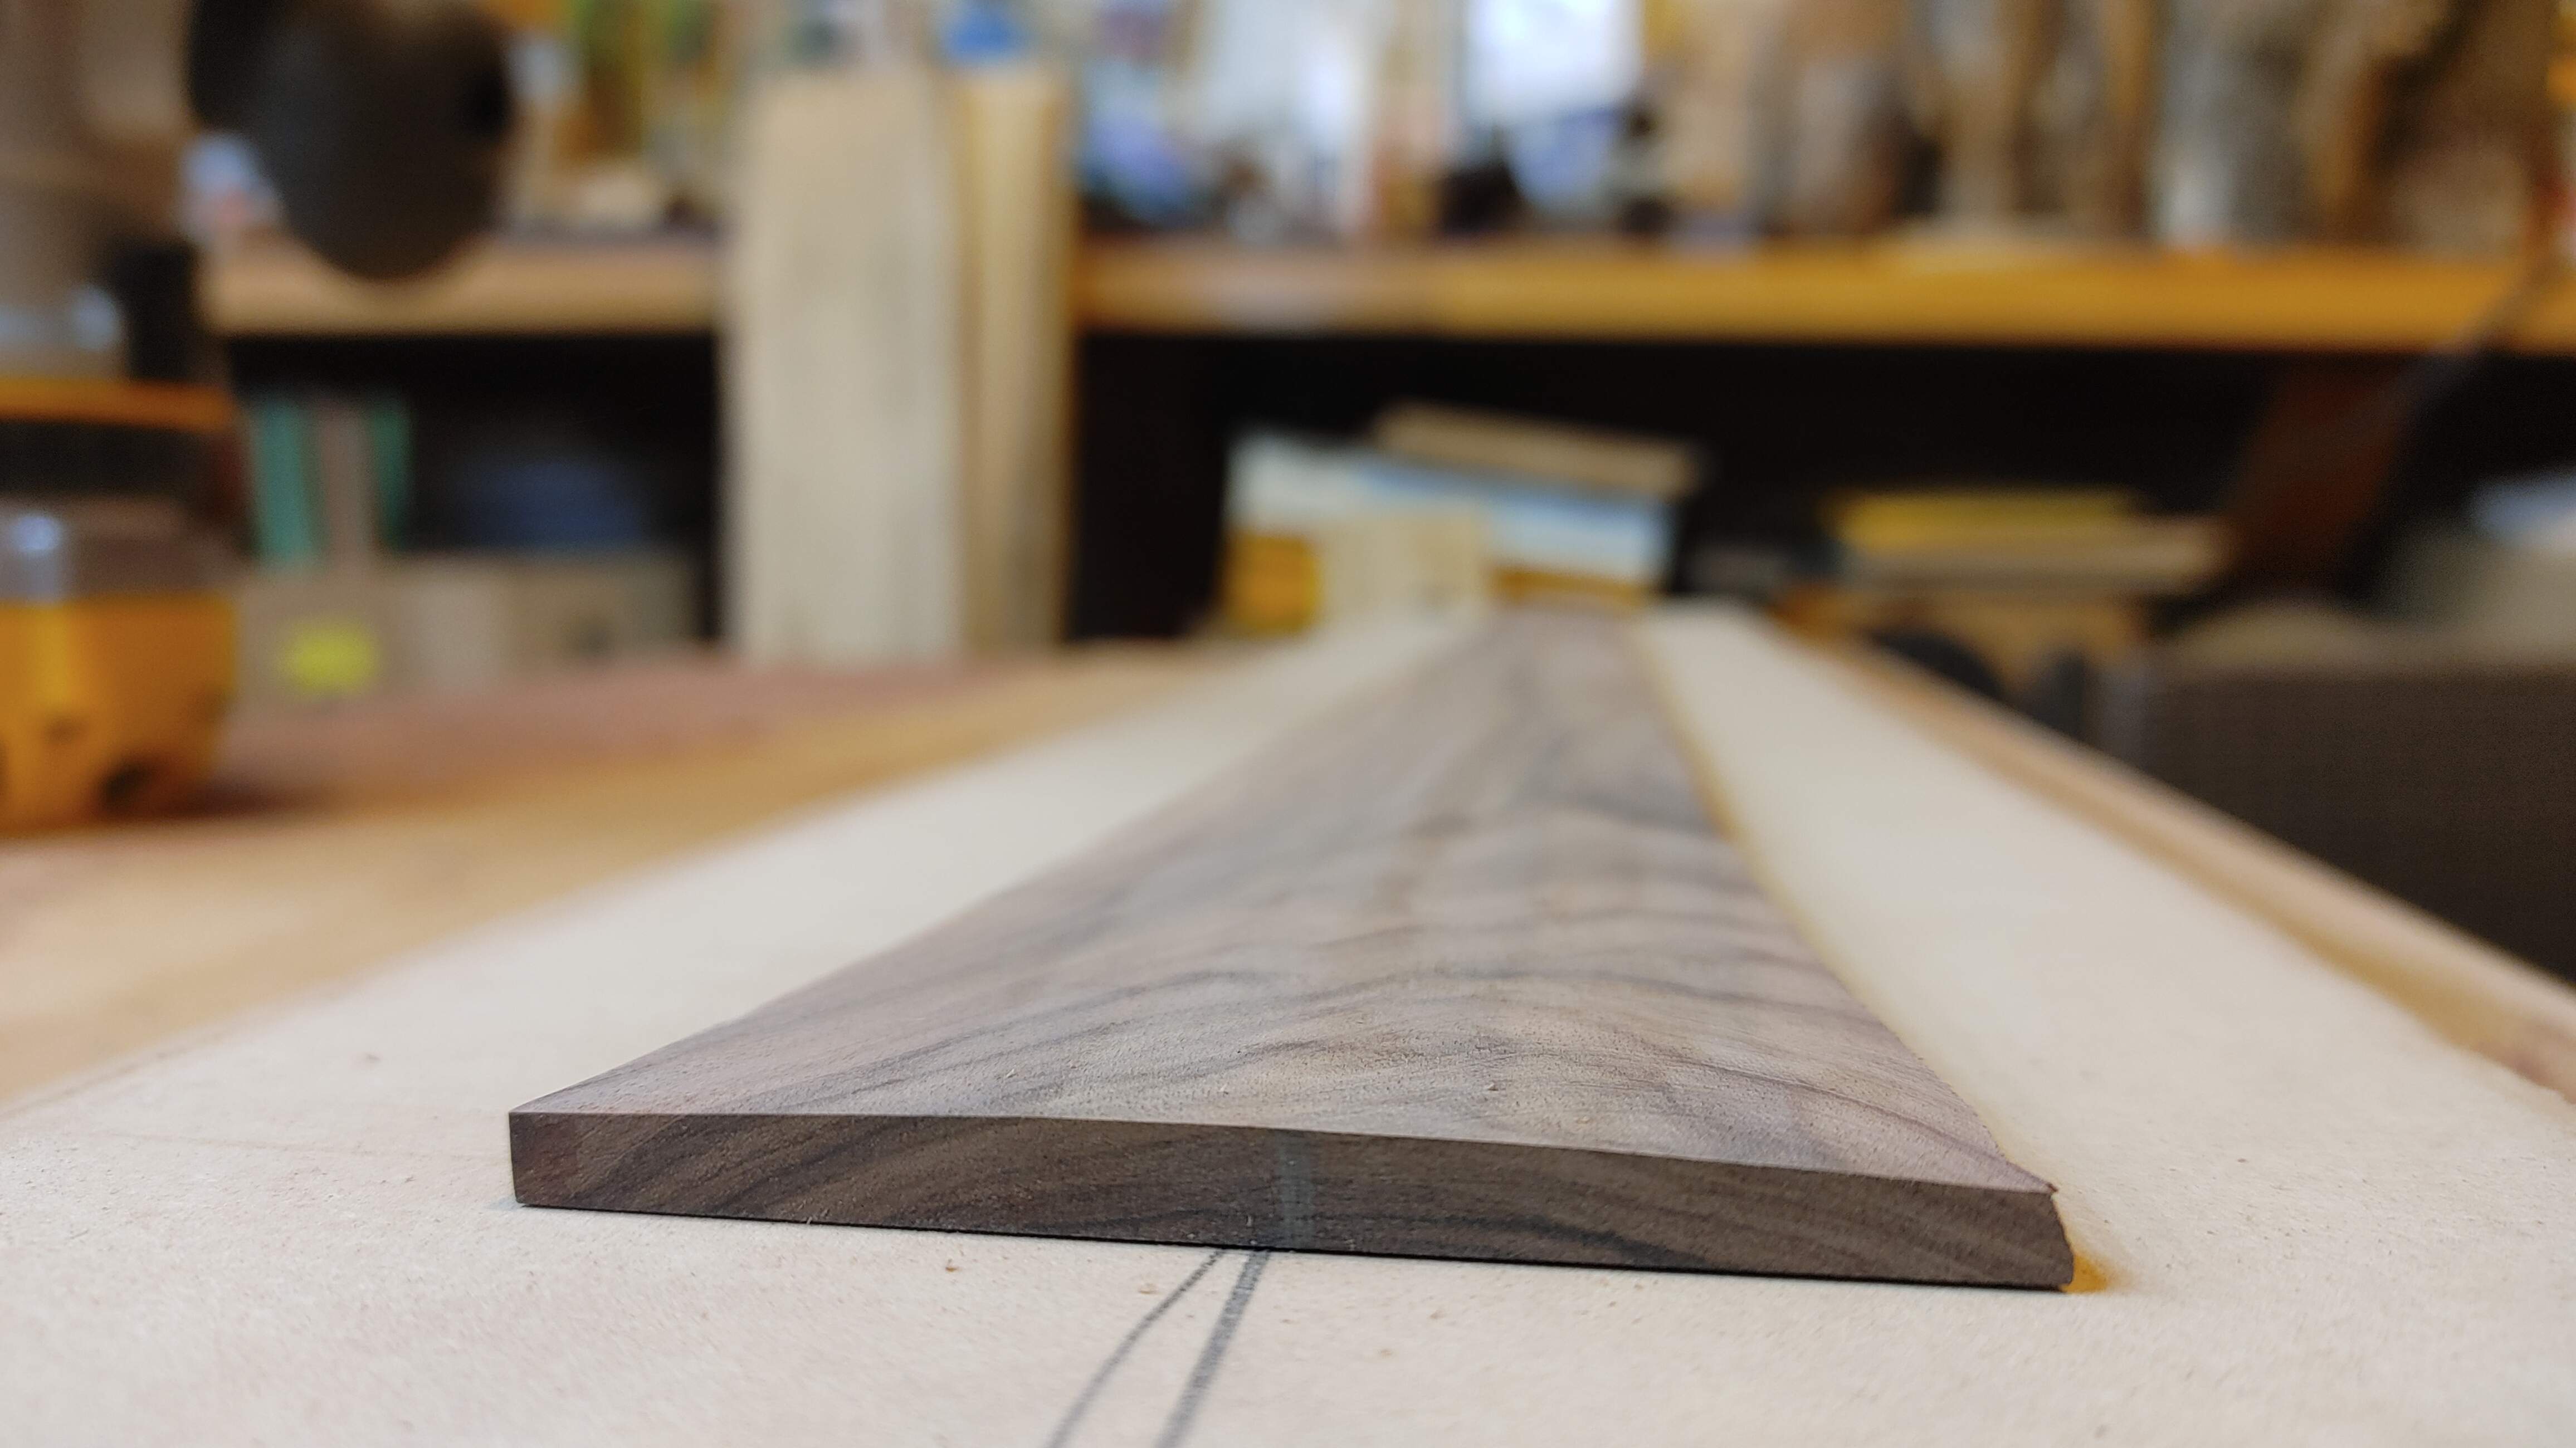
Yeah, it's a 20" radius, so it's not much. But I think I nailed this one, after I hit it with the radius sanding block it's gonna be sweet! Oh, I guess we also need to do the same for that fretboard section that goes behind the pickup, huh? -
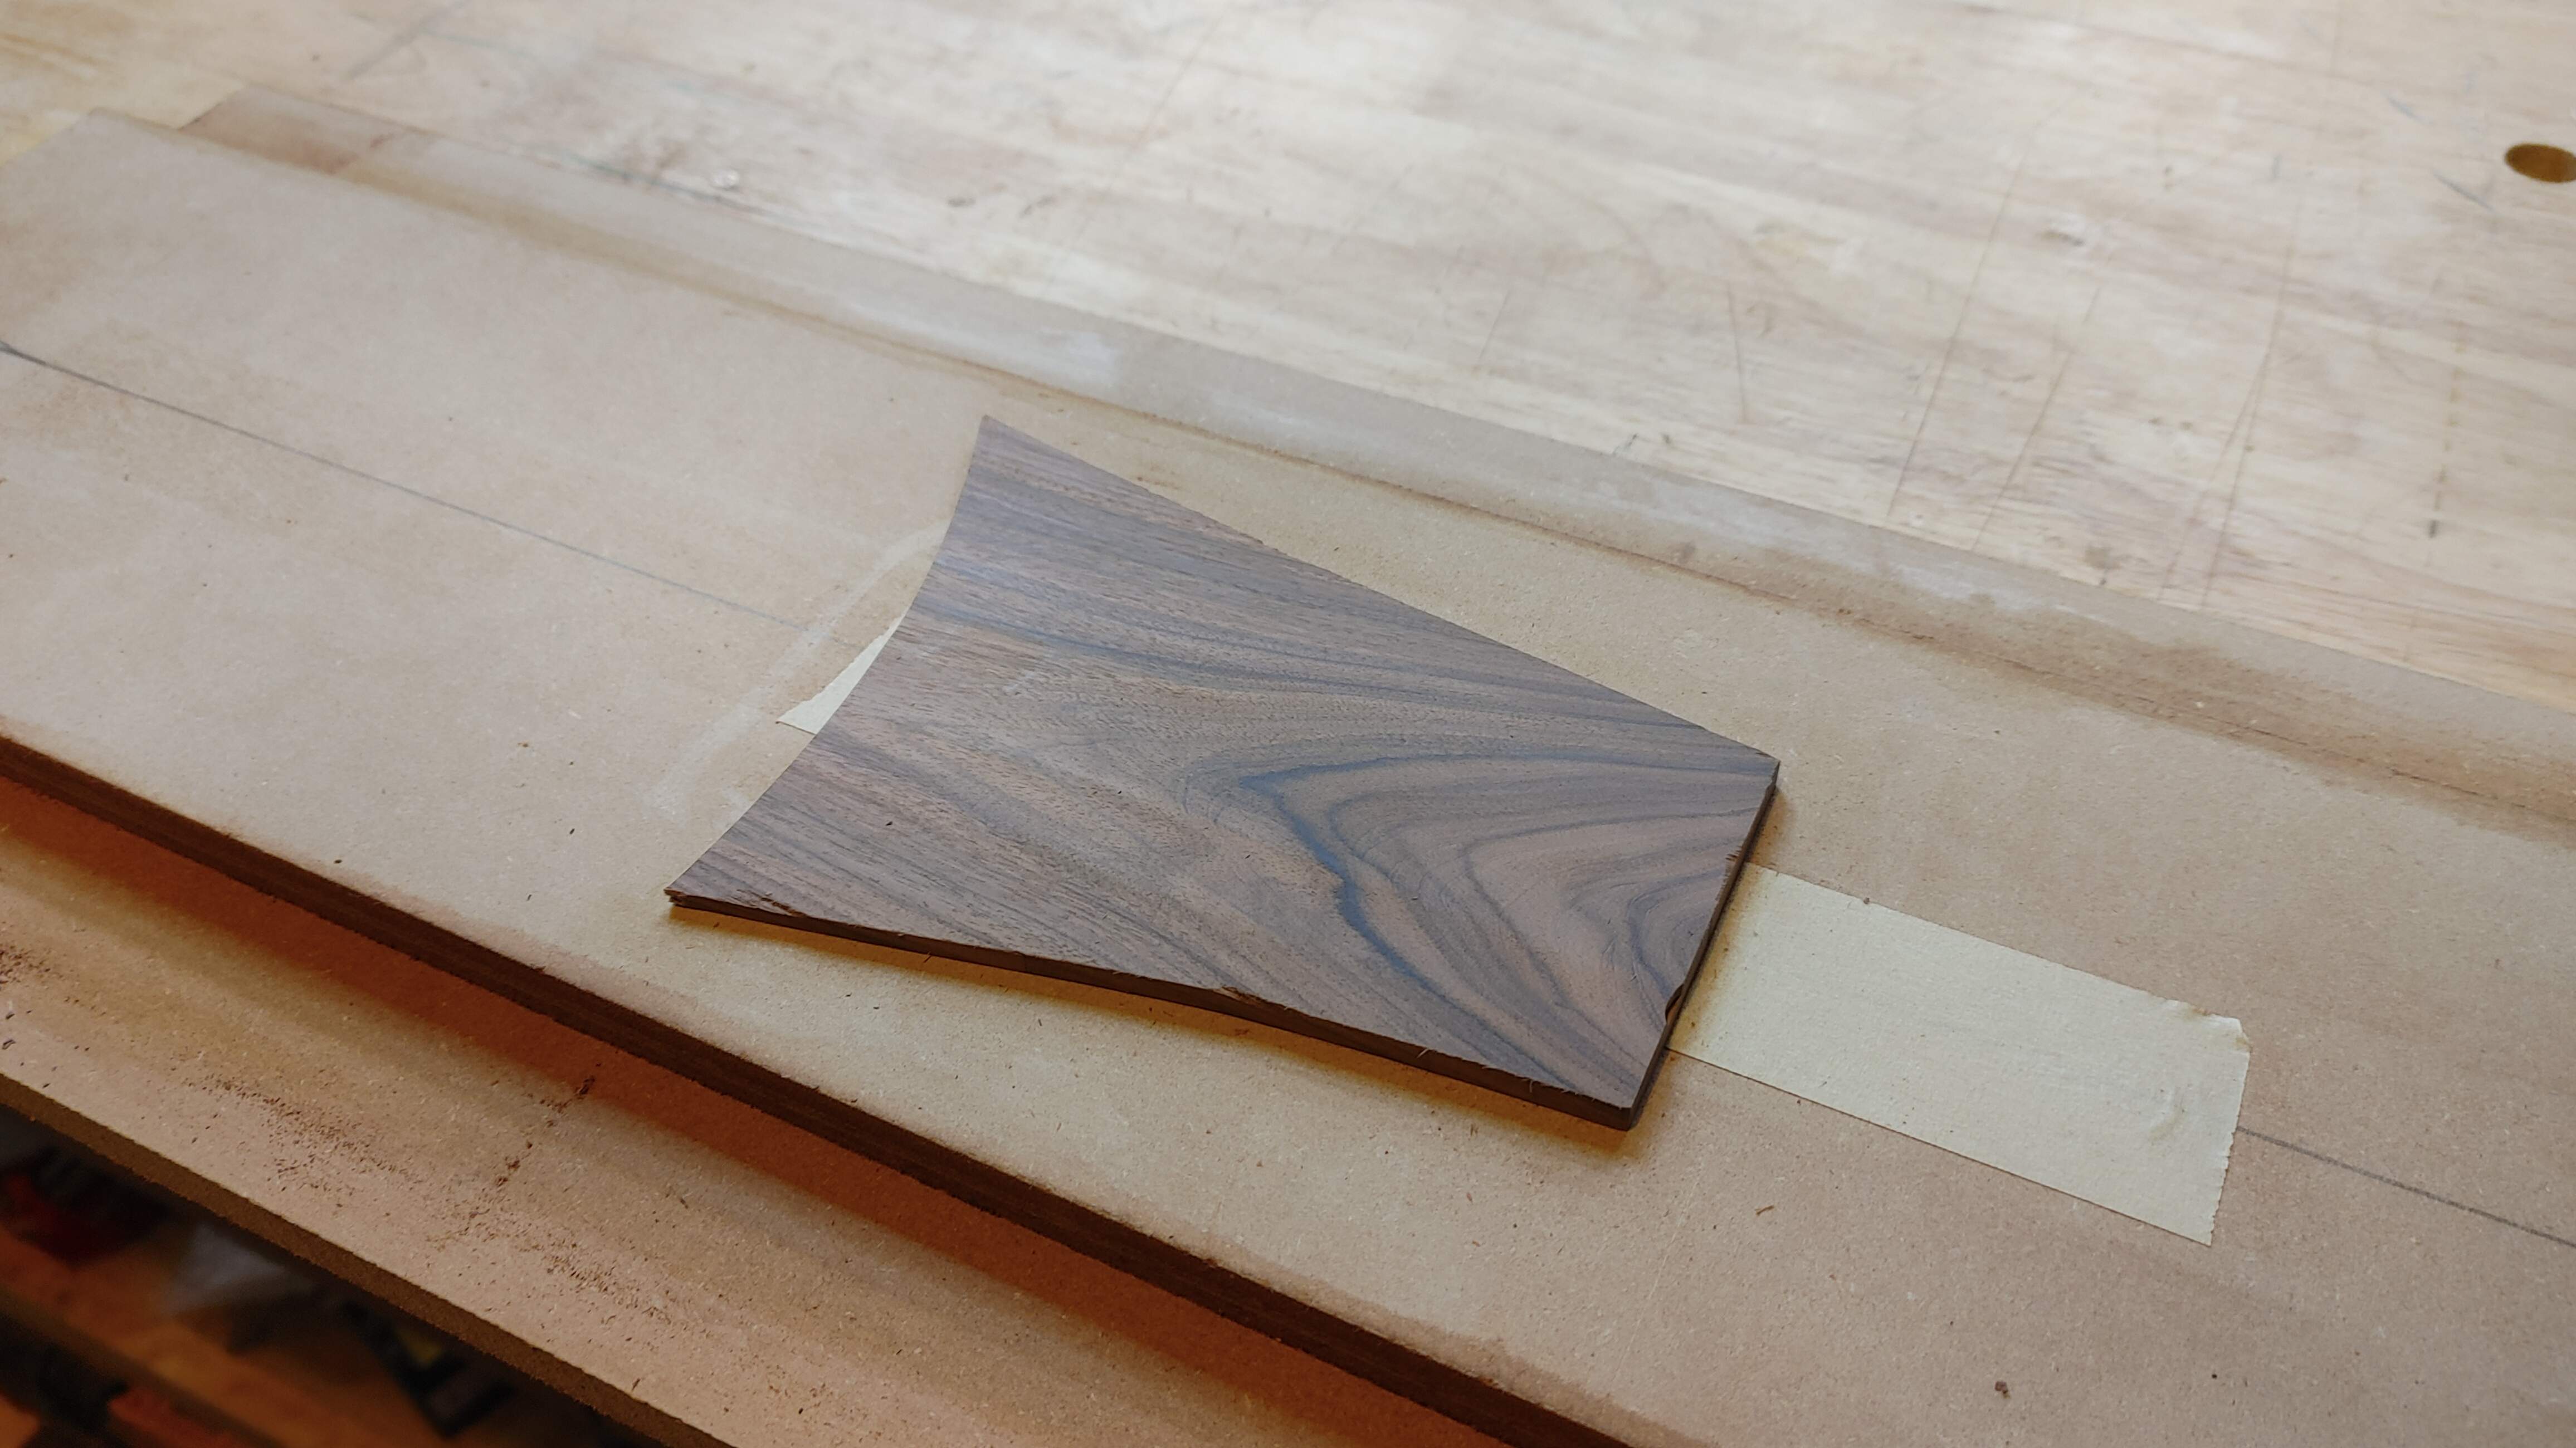
Yeah man, sweet!
I seriously couldn't be happier with tonight's progress. We'll call that a day and come back tomorrow to finish up that nut slot and get that ready to go in. I think I need to sort out the finish plan because this fretboard is going to want to be glued on real soon!
Took it out of the clamps after dinner tonight. -
This let me start working on a lot of steps. The first one I wanted to sort out was the control cavity cover. So I went over to the disk sander and worked on it until it fit -
Yeah, that'll do. It's a good snug fit. It could be better, but I haven't honestly figured out the best method for that just yet. I know a lot of you do that Bondo trick and whatnot, not sure I'm ready for that just yet. Anyways, this is good. Let's get some screw holes and screws in it -
Sweet! Mark that one off the list! The next thing I did was take it to the spindle sander and start working on flushing up the top to the wings. The router scared me, so we'll sand it. In the end, I think it was the right choice. From there we can go back over it with the round over bit on the back and clean that up now that the body shape got modified by the spindle sander (because, you know, that happens). From there I decided to carve a belly carve on it. But I didn't want to get carried away, so it's really subtle -
I know, hard to see, but it's there, trust me. I just didn't want something large and obnoxious. This body is pretty thin overall, so I wanted to keep things to a minimum. I'm good with it, I think it works. After that I decided the front needed rounded over too, but let's stay subtle here too! I really didn't want to start showing the purpleheart, because I'm not really into that look and it might look weird on the horns. But yeah, round over on the front -
I do love how the flame turns down onto the sides.
Still Fretting Over This -
Okay, I really need to sort out that fretboard. I been putting this off for far too long. Paralyzing fear is a thing, trust me. So how do you deal with it? I guess you just leap. Let's drag out that radius jig I built a few days back, get out the CA glue and tape and do "The Trick", making sure everything is lined up on center. Time to take a deep breath! We either pull this off or we have some really awesome looking kindling for our next S'mores night.
Now, I'm gonna admit, this worked way better than I have any right for it to have. I did a TON of measuring to get my depth where I wanted it, in the end I wound up at exactly 6mm tall in the center. That's where I wanted to be, so I'm calling it a win. I took everyone's advice over in my radius jig thread and ran the router end to end, then slid it over a tiny bit, ran end to end, slid it over a bit, rinse, repeat until you cover the whole thing. I now have a fretboard looking like this -
Yeah, it's a 20" radius, so it's not much. But I think I nailed this one, after I hit it with the radius sanding block it's gonna be sweet! Oh, I guess we also need to do the same for that fretboard section that goes behind the pickup, huh? -
Yeah man, sweet!
I seriously couldn't be happier with tonight's progress. We'll call that a day and come back tomorrow to finish up that nut slot and get that ready to go in. I think I need to sort out the finish plan because this fretboard is going to want to be glued on real soon!
Last edited:


Winner! Chicken Dinner! You are killing this, basically a tutorial for my own eventual Diva style Eventual Build. Based on your experience, I may skip the wenge. It is beautiful in combination with purple heart though. I saw a nice cocobolo board at Readers Hardwood Supply but choked on the price, I think it was $20+ a board foot, and you had to buy the whole 8' board, only 6" wide too. Sigh... Expensive hobby.

This build is looking totally gorgeous.
The top is superb, but the combination of purple heart & wenge on the back is drop dead stunning.
The top is superb, but the combination of purple heart & wenge on the back is drop dead stunning.
Thanks for all the kind words everyone. So far I'm pretty happy, I just hope I can push it to the finish line without making any horrible mistakes. Still plenty of stuff left to do, that planned finish has me worried. But worst case scenario there, we just sand it all back off and go natural. 
Thinking out loud again -
Looking at my action list, it looks like the only things I can do at this point are drilling the jack hole and the volume pot hole, and then possibly the side dots in the fretboard. I have great concerns about drilling holes in the sides of my fretboard without it glued to the neck blank just because of blowout or punching through the back or splintering the heck out of it, so I may hold on this as well. Of course, there's lots of final sanding and fine tuning of all the curves/carves to do too. Most everything else is waiting on parts; my headstock is held up until the tuners arrive. I could rob the tuners off Lucifer for mockup, but I would really rather use the actual tuners, just in case. The pickup hasn't arrived yet, so can't really do much there, plus that operation is waiting on a lot of other things, like the fretboard being glued on first. The BiL is machining my string retainers for me. He has the brass rod and the drawing, asked a couple questions and said "Okay, got it" so I assume he has it under control. I told him he has some time, I won't actually need them until next week or so. I'm hopeful he texts me this week to say "Done", but we'll see. He does have a day job to do, this will be on his free time so I need to be patient. Part of why I tend to just do everything myself.
I think the bottom line is, I need to sort out my skillz on that finish staining and get comfortable with that, because that will be one of the next major steps. So figure out the "how" to do it, get the top prepped for it and then DO it. I think that's gonna be the main focus over the next week, finish stain skillz. Outside of that, there probably won't be much updates on this build for a week or so, unless I choose to come ramble to myself like this post.
Looking at my action list, it looks like the only things I can do at this point are drilling the jack hole and the volume pot hole, and then possibly the side dots in the fretboard. I have great concerns about drilling holes in the sides of my fretboard without it glued to the neck blank just because of blowout or punching through the back or splintering the heck out of it, so I may hold on this as well. Of course, there's lots of final sanding and fine tuning of all the curves/carves to do too. Most everything else is waiting on parts; my headstock is held up until the tuners arrive. I could rob the tuners off Lucifer for mockup, but I would really rather use the actual tuners, just in case. The pickup hasn't arrived yet, so can't really do much there, plus that operation is waiting on a lot of other things, like the fretboard being glued on first. The BiL is machining my string retainers for me. He has the brass rod and the drawing, asked a couple questions and said "Okay, got it" so I assume he has it under control. I told him he has some time, I won't actually need them until next week or so. I'm hopeful he texts me this week to say "Done", but we'll see. He does have a day job to do, this will be on his free time so I need to be patient. Part of why I tend to just do everything myself.
I think the bottom line is, I need to sort out my skillz on that finish staining and get comfortable with that, because that will be one of the next major steps. So figure out the "how" to do it, get the top prepped for it and then DO it. I think that's gonna be the main focus over the next week, finish stain skillz. Outside of that, there probably won't be much updates on this build for a week or so, unless I choose to come ramble to myself like this post.

I have great concerns about drilling holes in the sides of my fretboard without it glued to the neck blank just because of blowout or punching through the back or splintering the heck out of it
Concave radius scrap. Fingerboard. Flat scrap. Vise. Drill press. No blowout, I think?
Could you CA and tape the FB to a backer board and do the side holes on a drill press?
Maybe with a fence to keep it square, or just use 2 boards in the shape of an L with some 45s.
Maybe with a fence to keep it square, or just use 2 boards in the shape of an L with some 45s.
Yeah, I thought about that. Just seems like a lot of work jigging something up.Concave radius scrap. Fingerboard. Flat scrap. Vise. Drill press. No blowout, I think?
Tell me about it.
It took me the entire evening to skim a few mm off the sides of my neck blank.
I'm doing essentially the same FB and have the same work around issues with when to do what and when to glue it on.
So, if you could go ahead and get that all figured out, that'd be great.
I'll check back after my nap and see what you came up with.
It took me the entire evening to skim a few mm off the sides of my neck blank.
I'm doing essentially the same FB and have the same work around issues with when to do what and when to glue it on.
So, if you could go ahead and get that all figured out, that'd be great.
I'll check back after my nap and see what you came up with.
Tell me about it.
It took me the entire evening to skim a few mm off the sides of my neck blank.
I'm doing essentially the same FB and have the same work around issues with when to do what and when to glue it on.
So, if you could go ahead and that all figured out, that'd be great.
...

Honestly, I think my "plan" is to do the dye finish on my top, then glue the fretboard on it, then drill my side dots. It's probably not ideal, but it's also not like I know any better either. So that's what I'm currently working towards.
?Yeah, I thought about that. Just seems like a lot of work jigging something up.
Presuming you don't want to use your actual radius block (if you have that) for the caul, making that really seems like the only significant work here (beyond things you'll have to do any way you do it.) If you haven't got a drill press vise, you have got a shopsmith, so leave it down in horizontal boring mode and use a couple of clamps to hold the fretboard sandwich to the table.
Or not, as you like!
I think the body will get in the way of drilling side dots for the higher frets with it glued on...

You know how it works.
Throw crap at the wall. If it sticks, you're a genius.
If it doesn't stick, you're an idiot with crap all over the wall, the floor and your hands.
And in my case, if it sticks, I'm still an idiot and my boss takes credit.
Throw crap at the wall. If it sticks, you're a genius.
If it doesn't stick, you're an idiot with crap all over the wall, the floor and your hands.
And in my case, if it sticks, I'm still an idiot and my boss takes credit.
You are 100% correct, it does and it will. I had that problem on Lucifer...I think the body will get in the way of drilling side dots for the higher frets with it glued on...


Really in awe of this. It looks like something that you would really really want to play.
Thank you. Much appreciated.Really in awe of this. It looks like something that you would really really want to play.


