My two month old project is finally done!
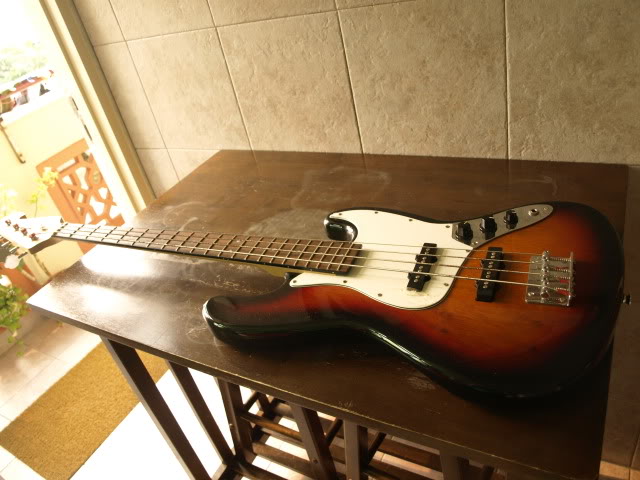
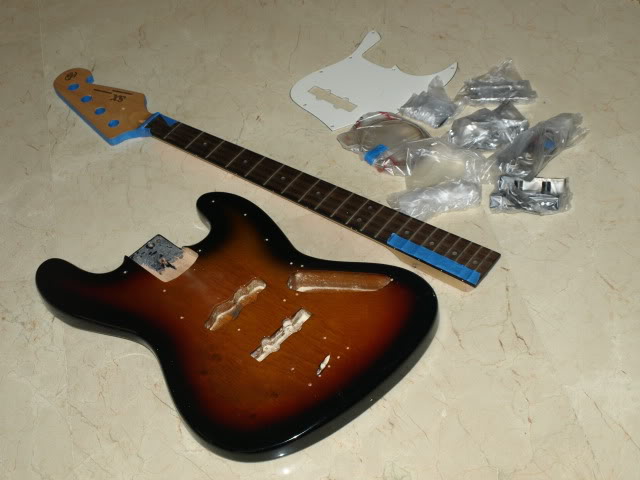
It started off as an SX jazz that my friend wasn't using and sold to me.
Took it apart.
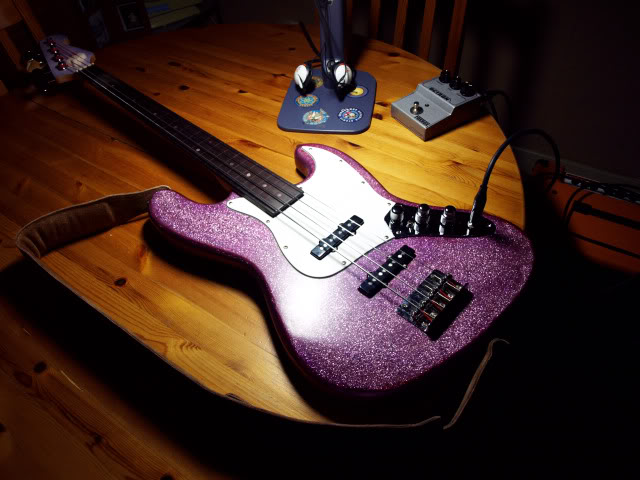
After sanding and applying the initial finish... it sparkles!
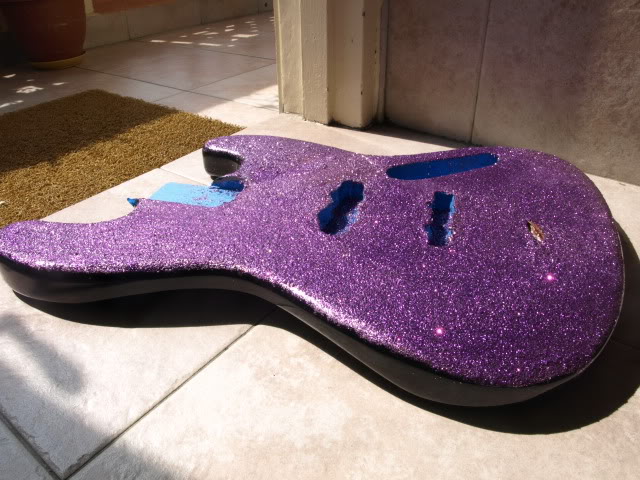
This step is what sets it apart from other finishes, I think. Getting this kind of finish involves applying several layers of glitter on the surface. I did mine by applying lacquer, sprinkling a bit of glitter over (taking care to let it settle naturally so that it falls in a random pattern) and let it dry. When it's dry, I put another coat of lacquer, and sprinkle another layer of glitter.
While it looks good, it's insanely bumpy, which leads to a hell of a time sanding down later.
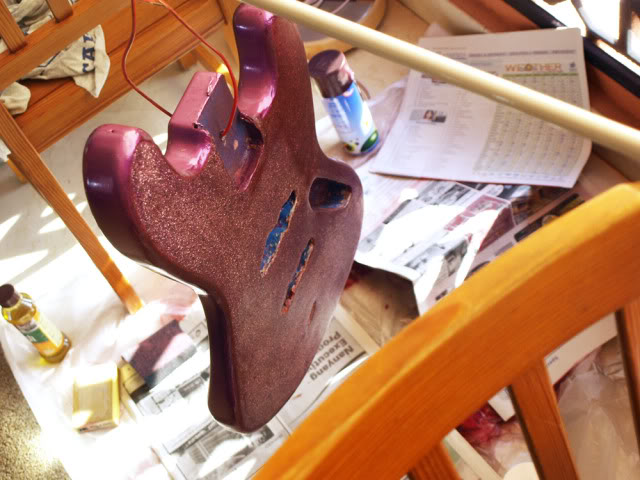
This took up a lot of lacquer and polishing and sanding and more lacquer and more polishing and more sanding and more lacquer and more polishing and sanding...... glitter finishes are highly uneven and need a lot of work to clear the "orange peel".
The back has a simple spraypaint finish, because honestly, I don't see the point adding so much effort and weight on something that no-one will see anyway.
While that was going on, I started work on the neck.
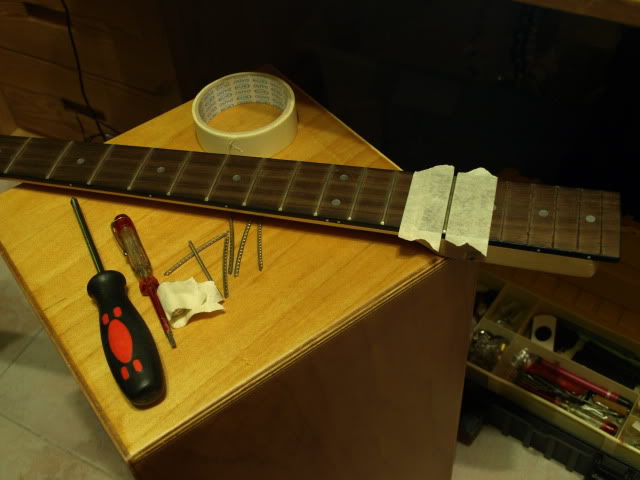
Defretted!
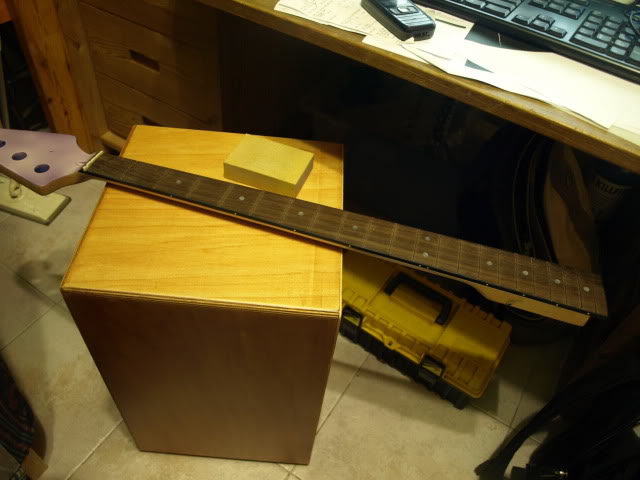
Then, to fill up the gaps in the wood I used wood filler.
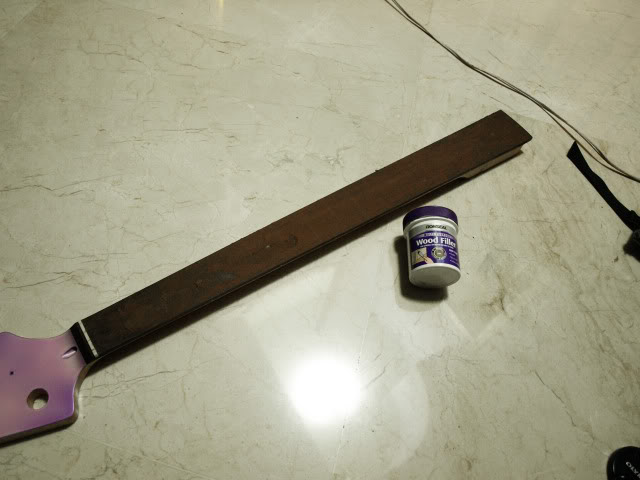
The neck was introduced to the joys of sanding and more sanding and more sanding.
You can see that near the end of the neck (i.e. the pickups side) my defretting technique was not as good and I hurt the wood somewhat. But the technique improved as I worked up the neck.
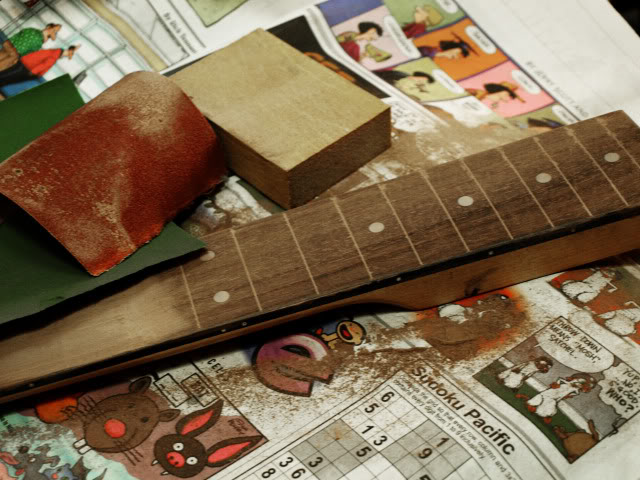
Just after I finished work on the body, my Nordstrands arrived!
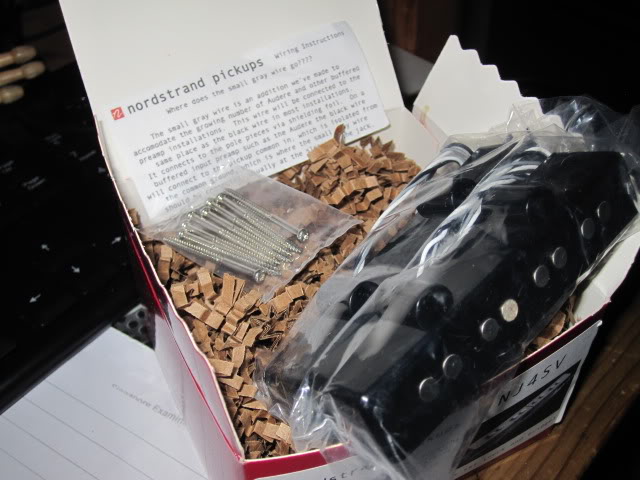
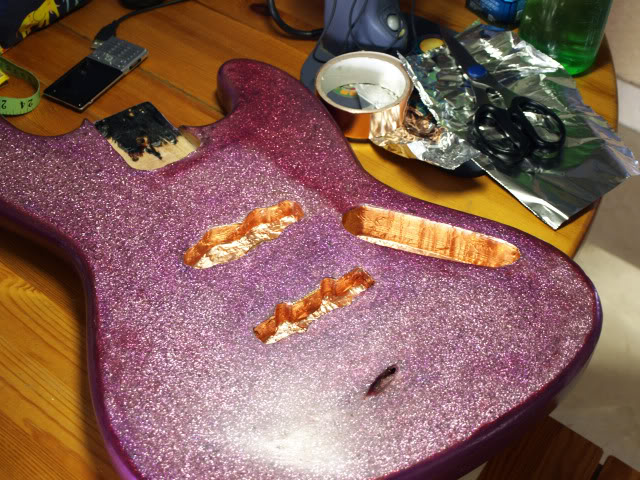
Shielded the cavities; they're all connected by little copper foil tubes in the tunnels between the cavities.
Shielded the wires and held them together with aluminium foil, I think it oughta work...
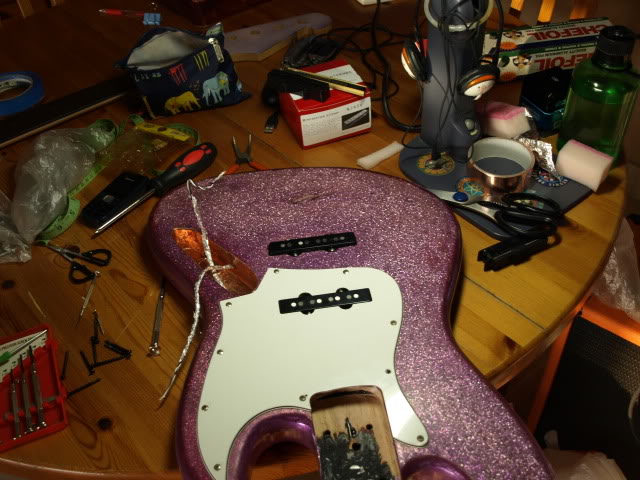
Neck and bridge in; installed the ground under the bridge. The cavities will also be connected to the ground later.
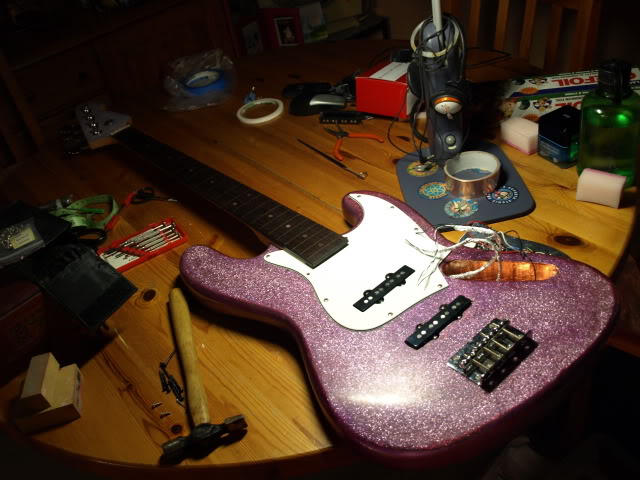
Stringing up the nice new TI Jazz Flats.
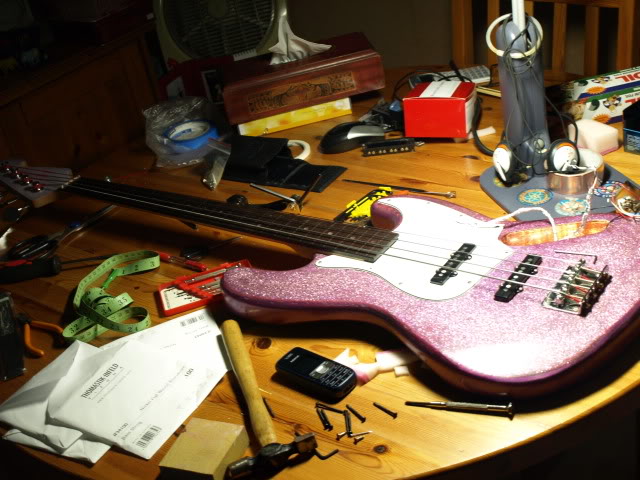
A temporary connection with blue tape with the original electronics while waiting for my Audere. Actually, it already works quite well...
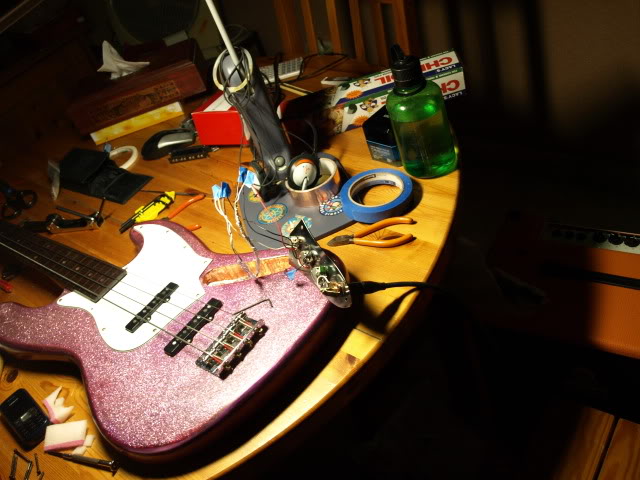
And installed in so that I can set it up, adjust action, intonate, and generally play around with it first!
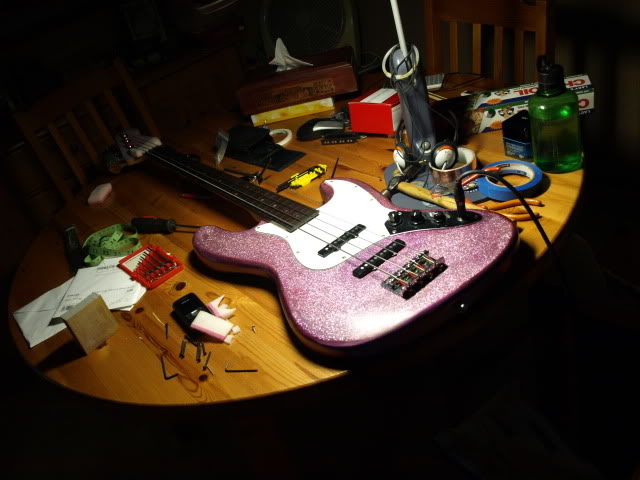
Finally, the Audere arrived a week later from RDM, and I installed it.
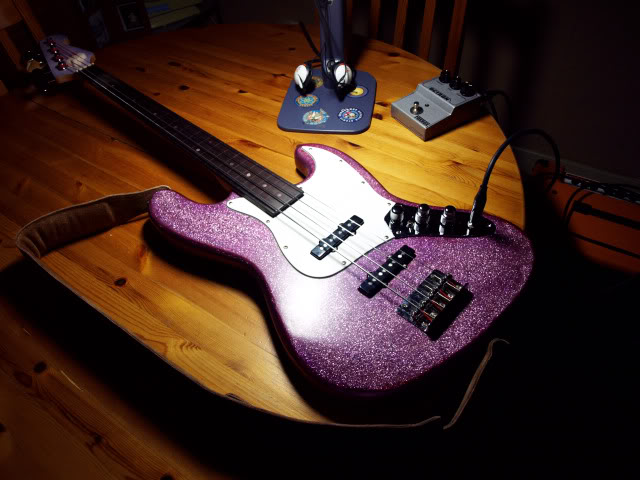
At first I had problems with strange buzzing noises and a weird rattling resonance on E notes. I got frustrated and put it away in the gigbag... and the next day when I took it out all the problems magically disappeared.
It was already pretty nice sounding with the Nords and stock electronics; this preamp just gives me much more choices of sound!
I guess maybe I'm biased since I spent so long working on it, but it plays and feels and sounds better than my Yamaha BB2004 that I was using previously. For now it's my primary bass. Pretty heavy, though, and for some reason it doesn't fit into my hardcase. The body seems fatter and bigger than usual.
A lot of thanks goes out to Cherns from RDM (Link Removed) for the help with ordering the parts! Also, to a member from Pearldrummersforum, where I learned how to apply a glitter finish (http://www.pearldrummersforum.com/showthread.php?t=196050). (Yes, I am a drummer, and this is my first bass refinish project; previously I have had experience with refinishing drums so it helped)
It started off as an SX jazz that my friend wasn't using and sold to me.
Took it apart.
After sanding and applying the initial finish... it sparkles!
This step is what sets it apart from other finishes, I think. Getting this kind of finish involves applying several layers of glitter on the surface. I did mine by applying lacquer, sprinkling a bit of glitter over (taking care to let it settle naturally so that it falls in a random pattern) and let it dry. When it's dry, I put another coat of lacquer, and sprinkle another layer of glitter.
While it looks good, it's insanely bumpy, which leads to a hell of a time sanding down later.
This took up a lot of lacquer and polishing and sanding and more lacquer and more polishing and more sanding and more lacquer and more polishing and sanding...... glitter finishes are highly uneven and need a lot of work to clear the "orange peel".
The back has a simple spraypaint finish, because honestly, I don't see the point adding so much effort and weight on something that no-one will see anyway.
While that was going on, I started work on the neck.
Defretted!
Then, to fill up the gaps in the wood I used wood filler.
The neck was introduced to the joys of sanding and more sanding and more sanding.
You can see that near the end of the neck (i.e. the pickups side) my defretting technique was not as good and I hurt the wood somewhat. But the technique improved as I worked up the neck.
Just after I finished work on the body, my Nordstrands arrived!
Shielded the cavities; they're all connected by little copper foil tubes in the tunnels between the cavities.
Shielded the wires and held them together with aluminium foil, I think it oughta work...
Neck and bridge in; installed the ground under the bridge. The cavities will also be connected to the ground later.
Stringing up the nice new TI Jazz Flats.
A temporary connection with blue tape with the original electronics while waiting for my Audere. Actually, it already works quite well...
And installed in so that I can set it up, adjust action, intonate, and generally play around with it first!
Finally, the Audere arrived a week later from RDM, and I installed it.
At first I had problems with strange buzzing noises and a weird rattling resonance on E notes. I got frustrated and put it away in the gigbag... and the next day when I took it out all the problems magically disappeared.
It was already pretty nice sounding with the Nords and stock electronics; this preamp just gives me much more choices of sound!
I guess maybe I'm biased since I spent so long working on it, but it plays and feels and sounds better than my Yamaha BB2004 that I was using previously. For now it's my primary bass. Pretty heavy, though, and for some reason it doesn't fit into my hardcase. The body seems fatter and bigger than usual.
A lot of thanks goes out to Cherns from RDM (Link Removed) for the help with ordering the parts! Also, to a member from Pearldrummersforum, where I learned how to apply a glitter finish (http://www.pearldrummersforum.com/showthread.php?t=196050). (Yes, I am a drummer, and this is my first bass refinish project; previously I have had experience with refinishing drums so it helped)