• TalkBass has been independent since 1998. Add your voice.
    Create a free account to reply to discussions, view embedded media, and browse with fewer display ads.
    Join freeLog in
    Want zero display ads or expanded classifieds tools? Compare plans.

1st neck-thru build....

1st neck-thru build
5 string
34” scale
Blk hardware
24 frets
12 degree angle neck
J style / soapbar pickups.. (I Might)
Active / passive electronics….
Pau Ferro/Morado Fingerboard
7 piece neck… (ash/bubinga/ash/purple heart/ash/bubinga/ash) back side of neck, body end will be laminated…Curly maple/quilted maple/walnut…
4 piece body…(quilted maple/African mahogany/curly maple/quilted maple)
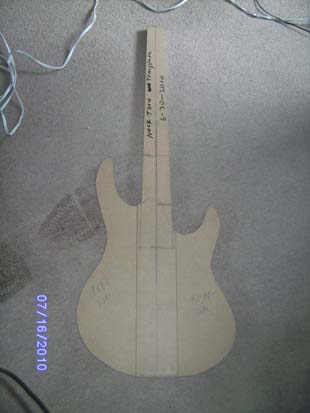
SANY0073.jpg

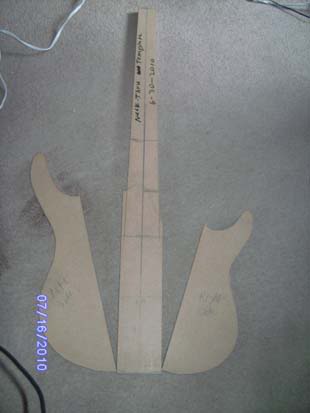
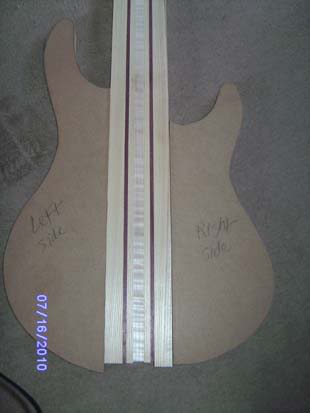
Here is my neck-thru template……

SANY0074.jpg


SANY0075.jpg

This is just a mock up of what it will look like with the neck coming thru the body…(not this neck)

SANY0076.jpg

Top……. (1)

Core will be African Mahogany…..(2)

SANY0077.gif

(3)

SANY0078.gif

Back……..
 
Very nice.

I like the way you are building the body before gluing the fingerboard and shaping the neck.

I have done them neck first, but I am currently trying to design a single cut-neck through with a neck angle, and building and shaping the body first may solve some issues I am having. (in my mind)

Next thing I'll watch for is do you glue on the board before tapering the neck, or do you taper them seperately before gluing on the board.

I'll sub to this one.
 
Niiiiiice! Could you explain your routing jig in a bit more detail please?
......Well in total its 8 pieces of 2X4…one side of the jig is 50 inches long on top the bottom is 46” long and I have a piece of 2X4 in Btween to give me the height that I need…so I have two of them (the arms/jig).. I put the neck in the middle clamp it in… I use a 1X2X24” piece of wood..(on the face / top).... so that my router can ride it…as I route down the center of the neck blank….basically I made a “Craftsman Professional Height Adjustable Clamping Table”
 

Attachments

  • TABLE.jpg
    TABLE.jpg
    6.6 KB · Views: 58
Very nice.

I like the way you are building the body before gluing the fingerboard and shaping the neck.

I have done them neck first, but I am currently trying to design a single cut-neck through with a neck angle, and building and shaping the body first may solve some issues I am having. (in my mind)

Next thing I'll watch for is do you glue on the board before tapering the neck, or do you taper them seperately before gluing on the board.

I'll sub to this one.
...I just did that part..(tapering the board) I taper the FB glue it to the neck blank.. then I will put the neck / FB template back on the fingerboard and route down .13" around the FB..and knock the rest down by hand.(the body part of the neck)..and thank you.....OH and I will basically.. finish the neck B4 I glue the wings on...by finishing I mean freting.. and shaping the neck...Rickett Customs recent thread.. helped me out big time...
 
...I just did that part..(tapering the board) I taper the FB glue it to the neck blank.. then I will put the neck / FB template back on the fingerboard and route down .13" around the FB..and knock the rest down by hand.(the body part of the neck)..and thank you.....OH and I will basically.. finish the neck B4 I glue the wings on...by finishing I mean freting.. and shaping the neck...Rickett Customs recent thread.. helped me out big time...

I had missed the part where you said the wings were not glued on. That makes so much more sense.

I am glad, I was thinking about gluing on the wings before shaping the neck. That would not have been a good idea, but I was thinking it.

As my dad used to say, "That's what ya get fer thinkin" :o

And I really like the idea of routing just a little bit onto the neck. That will estabilish a solid edge on the neck, but still allow you to hand shape the neck. (which is my favorite part of a build I think)
 
Fingerboard being glued on…. different shot angles………

11-1.jpg


12-1.jpg


13-1.jpg


14-1.jpg


Shots of my jig for routing truss rods on angle back necks….

15-1.jpg


16-1.jpg


17-1.jpg


Neck goes Btween the to “arms”…then clamp.. to hold in place… router goes on top, center of neck.. 1X2 is clamped on top of 2X4 as a guide for my router…
 
my personal thought there, is that for the final shaping you have to have them glued on, unless you know the exact shape, like if you using a cnc machine.


(that's with all of my 3 build experience)

hopefully some of the masters on here will chime in.