• TalkBass has been independent since 1998. Add your voice.
    Create a free account to reply to discussions, view embedded media, and browse with fewer display ads.
    Join freeLog in
    Want zero display ads or expanded classifieds tools? Compare plans.

4001 Mashup

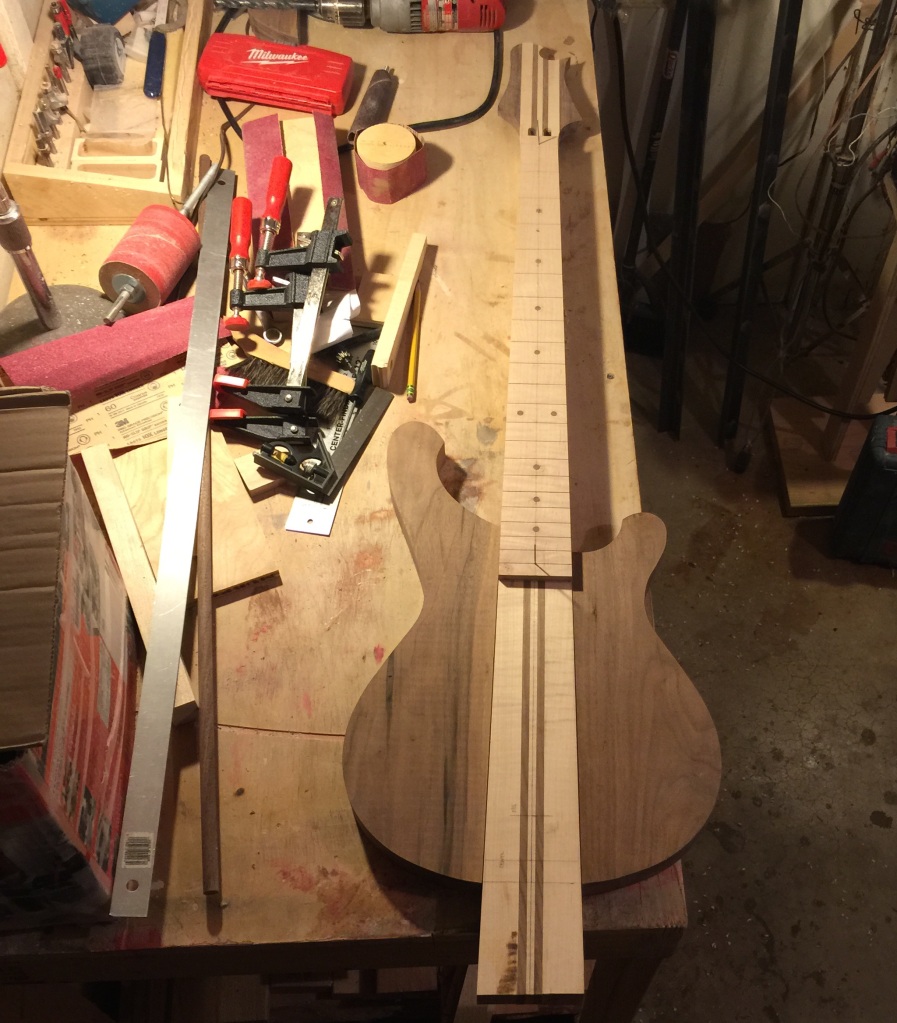
A little more progress today. More sanding, and I started making arrangements for the positioning dowels.
15dxgck.jpg


31506c8.jpg


I'm getting close to gluing the body wings on.

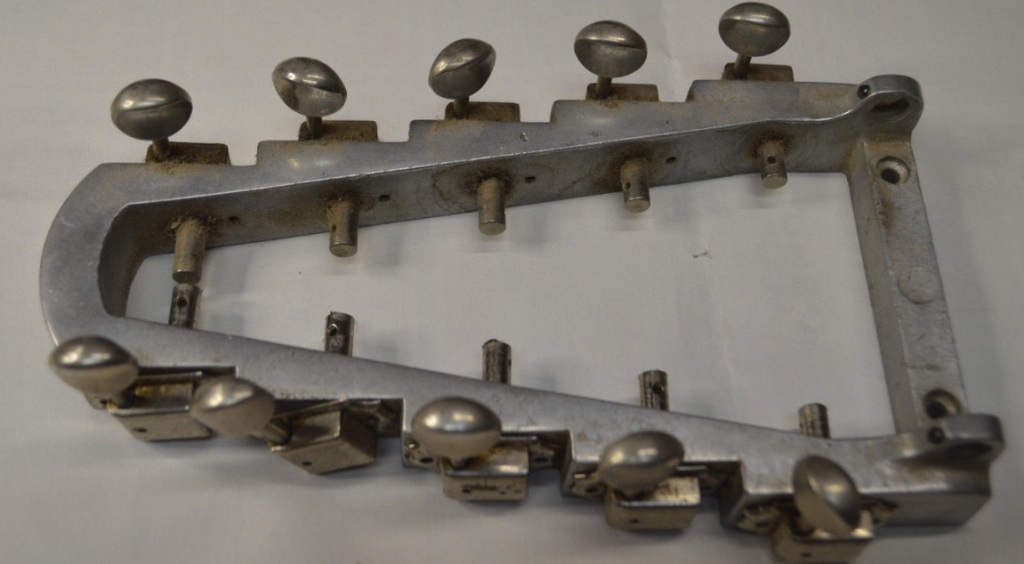
And in other news, I won this auction on eBay today.
2u4keo1.jpg


It's a tuning head for a pedal steel guitar. I'll make some kind of body, and start a build thread for it. I'm looking forward to starting that build.
 
A little more sanding, trimming, and futzing.

25hp99d.jpg


It's starting to look like a bass. I've been meaning to get a proper size bit for drilling the tuner holes. I've been drilling them undersized, and then sanding them to size, which is a major pain. I'll see if there's one available locally today, and drill the tuner holes. After that, I'll glue up the body wings - they're just together with the dowels.
 
A little more sanding, trimming, and futzing.

25hp99d.jpg


It's starting to look like a bass. I've been meaning to get a proper size bit for drilling the tuner holes. I've been drilling them undersized, and then sanding them to size, which is a major pain. I'll see if there's one available locally today, and drill the tuner holes. After that, I'll glue up the body wings - they're just together with the dowels.

A large step-bit is the way to go for controlled enlarging of holes short of a drill press. You start smaller and expand to the exact size needed.

These 2 will get the job done. (first centered hole with a standard bit)

IMG_6923_zpsrmheehhe.jpg
 
  • Like
Reactions: mapleglo
A little more sanding, trimming, and futzing.

25hp99d.jpg


It's starting to look like a bass. I've been meaning to get a proper size bit for drilling the tuner holes. I've been drilling them undersized, and then sanding them to size, which is a major pain. I'll see if there's one available locally today, and drill the tuner holes. After that, I'll glue up the body wings - they're just together with the dowels.

Hey!

Geeeeeeez, I turn my back for a day or two and I miss a couple of pages of stuff. Looking so fine - that is really going to be a nice bass! That walnut is really special - I love the wood combination.

Looking so forward to the pedal steel project too - that was quite an ebay find on that tuner headstock! I must admit, I have to agree with Bruce that you should make some kind of wild and wooly pedal steel bass though!
 
  • Like
Reactions: mapleglo
A large step-bit is the way to go for controlled enlarging of holes short of a drill press. You start smaller and expand to the exact size needed.

These 2 will get the job done. (first centered hole with a standard bit)

IMG_6923_zpsrmheehhe.jpg


I actually have a step drill. I used that to enlarge the hole on either side to the correct diameter, but sanding out the center section was a pain. I just went ahead and bought an 11/16" forester bit at the wood store.

1zqg8ld.jpg


It makes beautiful, correctly sized tuner holes.

2w3x3px.jpg


Notice too, that the G string tuner hole leaves plenty of room beyond the truss rod rout on this version.

Hey!

Geeeeeeez, I turn my back for a day or two and I miss a couple of pages of stuff. Looking so fine - that is really going to be a nice bass! That walnut is really special - I love the wood combination.

Looking so forward to the pedal steel project too - that was quite an ebay find on that tuner headstock! I must admit, I have to agree with Bruce that you should make some kind of wild and wooly pedal steel bass though!

Thanks! I am really enjoying the maple and walnut combination. Additionally, walnut is a much easier wood to work than maple, so it's a real pleasure to use as body wings. Cut and sands so easy, yet the wood is rather stable and strong.

And speaking of the pedal steel project, I happen to find myself perusing the wood section while I was at the wood store today picking up the drill bit. I found a nice piece of alder, and a nice piece of ash.

13zbvo0.jpg


I'll decide which piece I'll use for the body, but I'm thinking of the alder. It's a little taller and wider, and the ash I can use for another guitar project. I noticed today that the staff at the wood store know me by name now. I guess that's some kind of milestone. The one guy remembered the neck that warped, and asked how the rebuild was coming along. I showed him some of the pictures. And then he got me started on the pedal steel build. I guess I'll start another thread when the tuner comes in.

Well, time to start thinking about gluing up the body wings.
 
I actually have a step drill. I used that to enlarge the hole on either side to the correct diameter, but sanding out the center section was a pain. I just went ahead and bought an 11/16" forester bit at the wood store.

1zqg8ld.jpg

Yes, I realized what I stated was not clear - for new holes a forester bit for sure (I have nearly a dozen different sizes) but when enlarging a pre-existing hole the step-bit is the way to go - as in when installing large barrel posts on a hs w/the smaller barrel holes. I apologize for not noting that holes were not drilled when you brought it up.
 
  • Like
Reactions: mapleglo
Pickups just came in.

[snip]

Talk about a radical design. They are as light as a feather. I am looking forward to hearing them.

They are a remarkable design, aren't they? I'm really enjoying mine. Just picked up another in the Classifieds today, a 3.5" version. Guess that validates the need for another build, huh? ;)
 
I love the look of those pickups. I'm definitely using them on my next build, who cares what they sound like :smug:

Are you using a preamp? I think I'm going to make my control cavity big enough for a preamp, but I'm going to try going passive first (the sample I heard passive sounded pretty damn good).

No preamp. I don't believe in needing a 9 volt battery. I have like 10 basses. One is active, but it has a bypass switch. So I keep it on bypass, and threw away the battery.

Your version of the headstock is much better than Rick's

Thanks!

So I removed the clamps.

k3okl4.jpg


Most people use toothpicks for positioning the fretboard on the neck. I used 1/16" drill bits. When I pulled off the clamps, and the piece of plywood I used in the clamping process, I inadvertently broke the drill bits off. Of course, they broke off flush with the fretboard. I couldn't pry them out. So I knocked them in deeper with a mallet and screwdriver. Now I know why people use toothpicks. Yet another lesson learned.
 
Most people use toothpicks for positioning the fretboard on the neck. I used 1/16" drill bits. When I pulled off the clamps, and the piece of plywood I used in the clamping process, I inadvertently broke the drill bits off. Of course, they broke off flush with the fretboard. I couldn't pry them out. So I knocked them in deeper with a mallet and screwdriver. Now I know why people use toothpicks. Yet another lesson learned.

You should not have admitted this.
 
  • Like
Reactions: mapleglo
Most people use toothpicks for positioning the fretboard on the neck. I used 1/16" drill bits. When I pulled off the clamps, and the piece of plywood I used in the clamping process, I inadvertently broke the drill bits off. Of course, they broke off flush with the fretboard. I couldn't pry them out. So I knocked them in deeper with a mallet and screwdriver. Now I know why people use toothpicks. Yet another lesson learned.

Oh my! Not going to interfere with your fretting, I hope? I suppose you could remove a portion of the fret tang in the center if you needed to...
 
  • Like
Reactions: mapleglo