
• TalkBass has been independent since 1998. Add your voice.
    Create a free account to reply to discussions, view embedded media, and browse with fewer display ads.
    Join freeLog in
    Want zero display ads or expanded classifieds tools? Compare plans.

A short scale acoustic bass guitar experiment.

Slotting the fingerboard. I used a Japanese saw until it lost its edge and started sticking in the slots. I think the slots started getting narrower too as I had difficulty getting the frets in. So I bit the bullet and ordered this saw from Stewmac. I had a choice between this one and a Japanese one, but they make quite a point of the fact that this one is made of Sheffield steel (my home town) so I chose this one. It sticks in the slots right from the word 'go'. I managed to cut each slot in three stages by taking it out and rubbing a piece of candle wax down the teeth each time. I wouldn't recommend this saw as an example of Sheffield toolmaking to anyone, but perhaps I got a dud. Then again, there are 14 Sheffields in the US and another 6 in other parts of the world. No doubt one of them is in China.
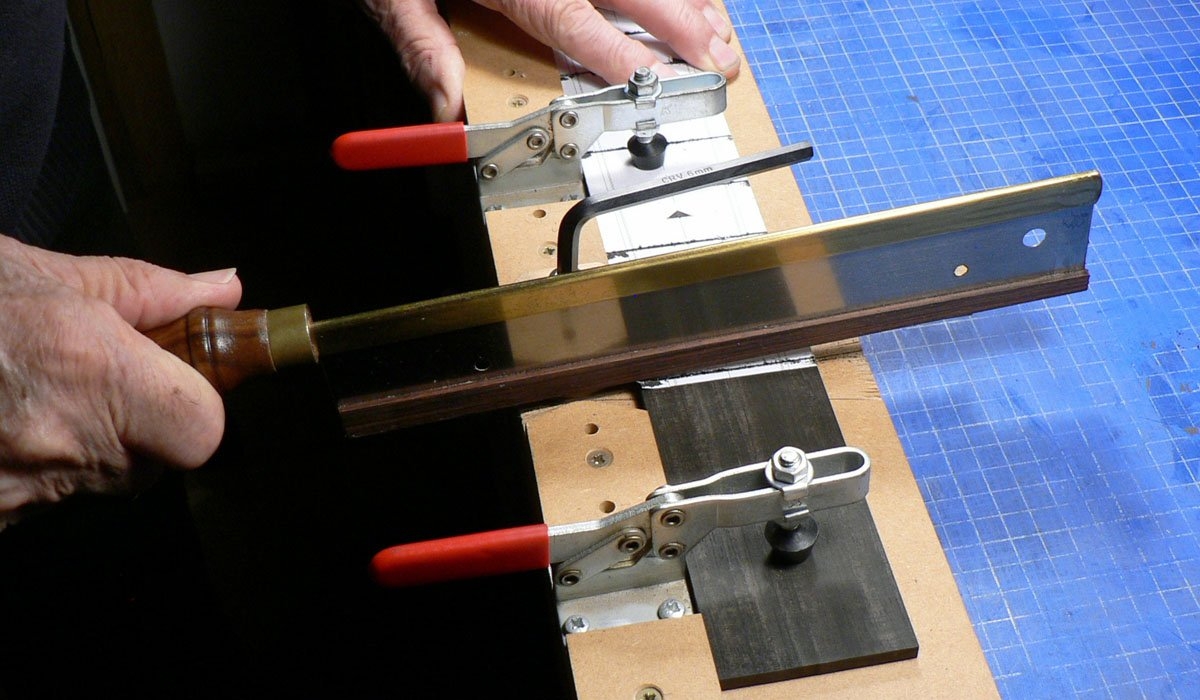
Neck 062.JPG


Trimming the fingerboard to width, minus the binding.
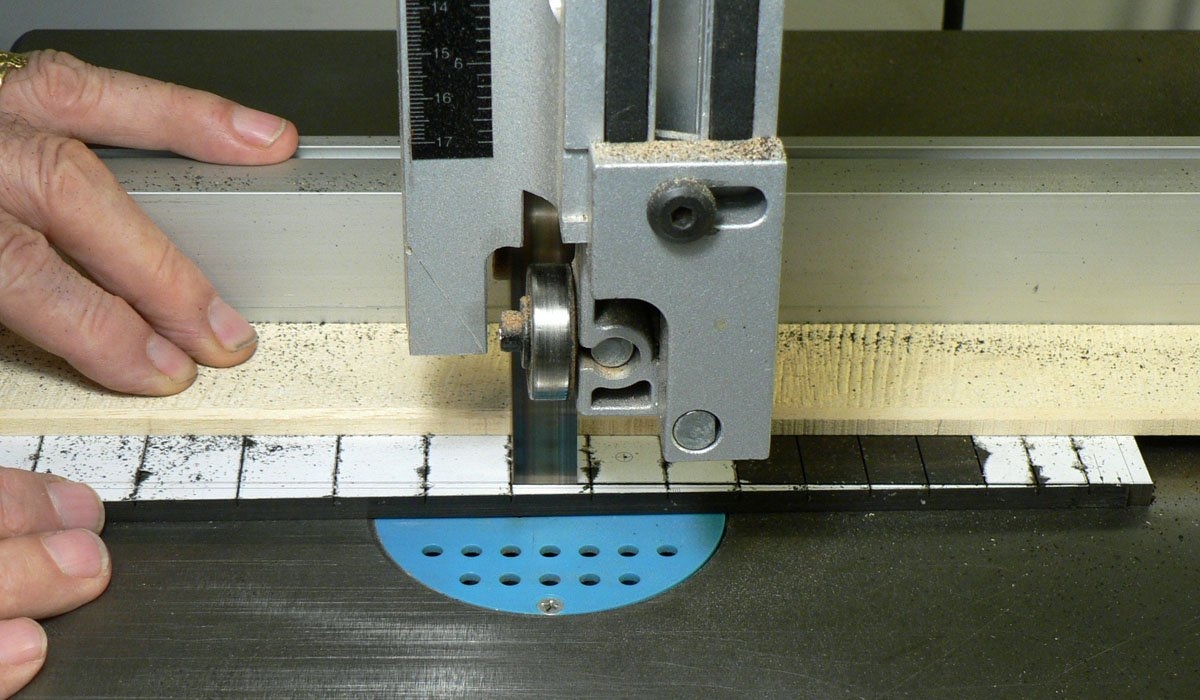
Neck 063.JPG


The trimmings were used to make the bindings along with some maple veneer.
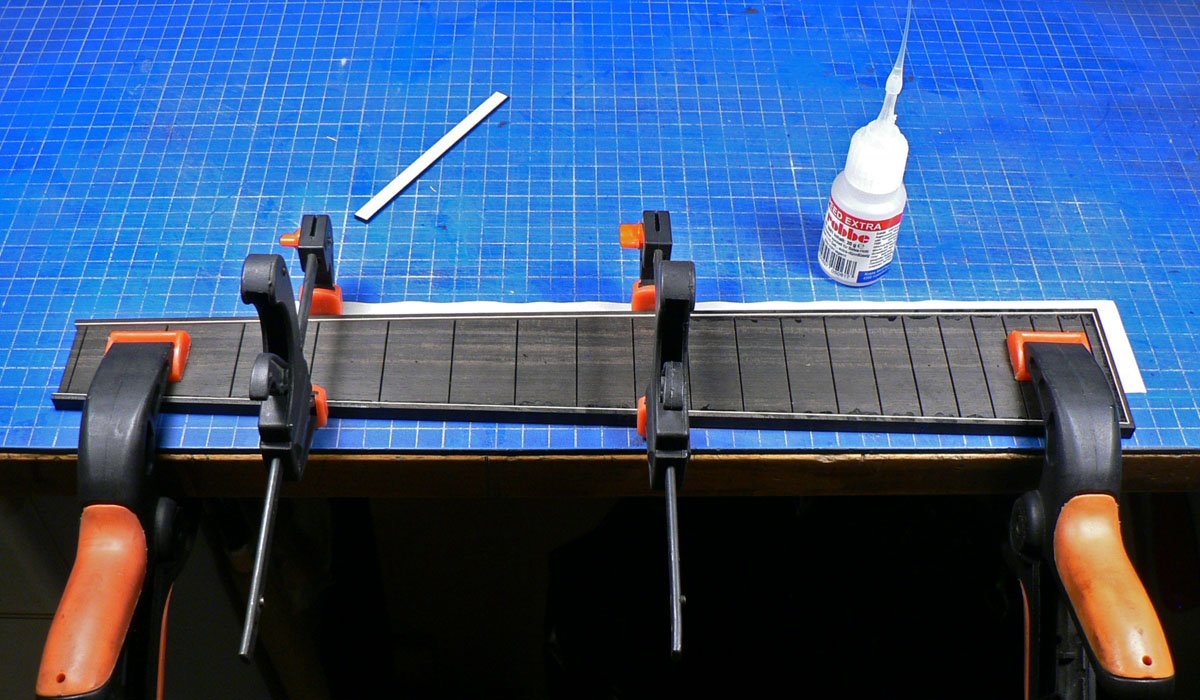
Neck 064.JPG


Binding done and abalone dots installed. The way I do it is to clamp the f'board down and drill a pilot hole through it, then without moving it, change the drill and drill for the size of the dot. That way, if the dot falls into the hole because I've drilled it too deep, or if I push it in too far, I can push it out again from the other side. I glue them in by applying a drop of CA glue in the pilot hole from the other side. No messy glue on the top surface.
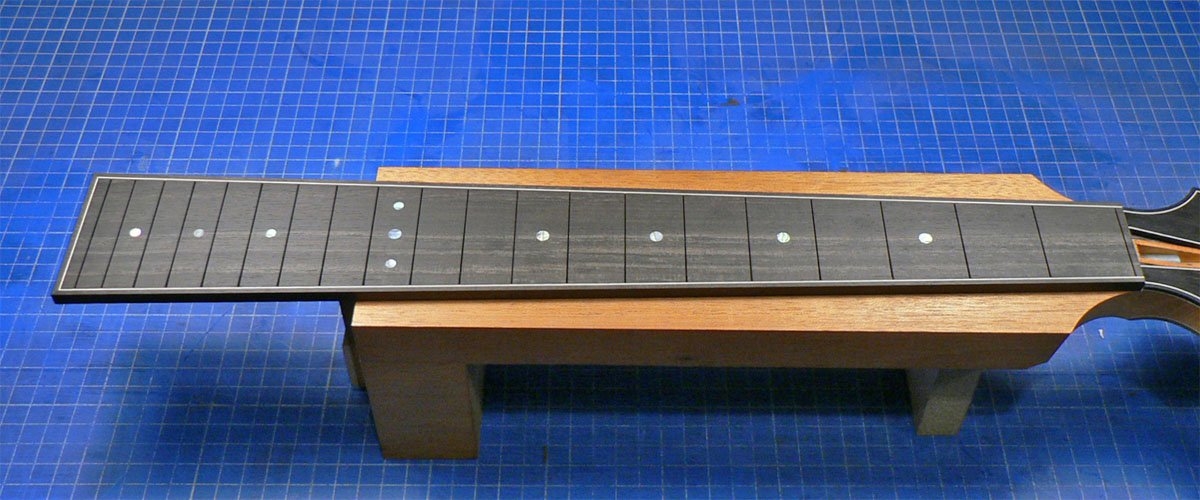
Neck 065.JPG


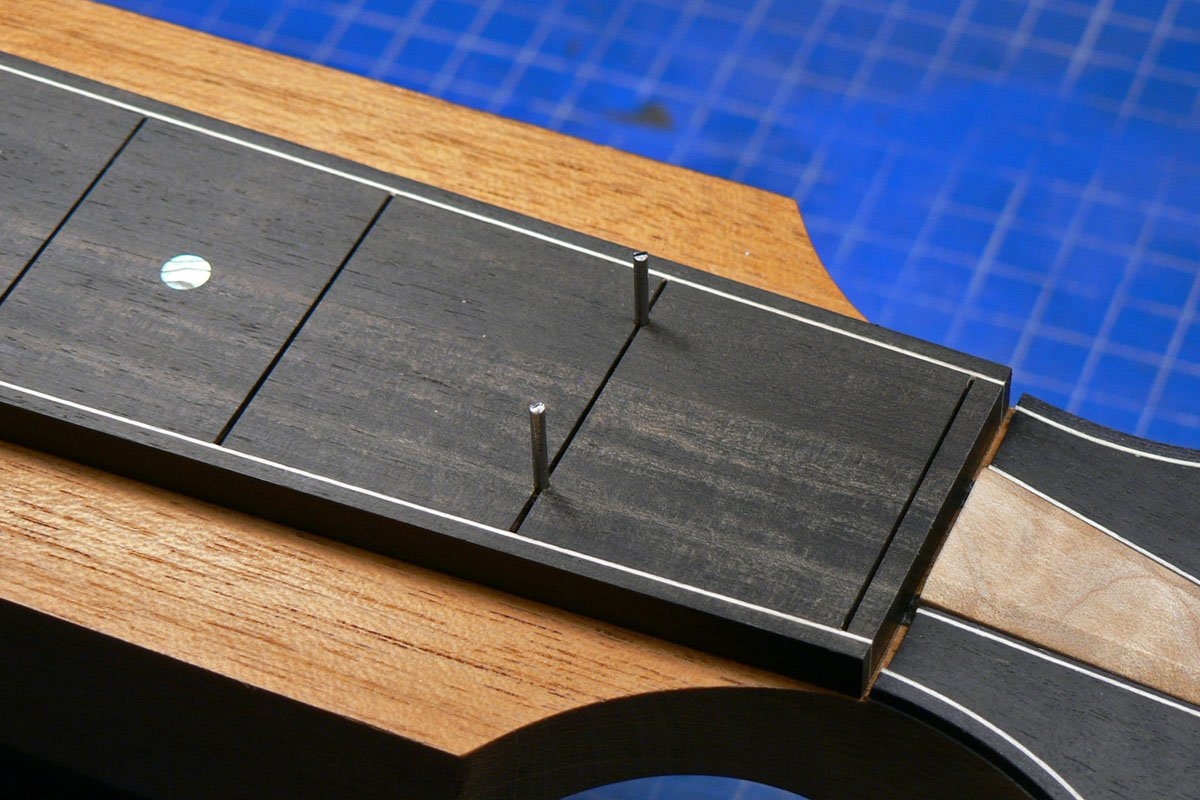
I carefully position the neck and drill holes for location pins through the first and eleventh fret slots.
Neck 066.JPG


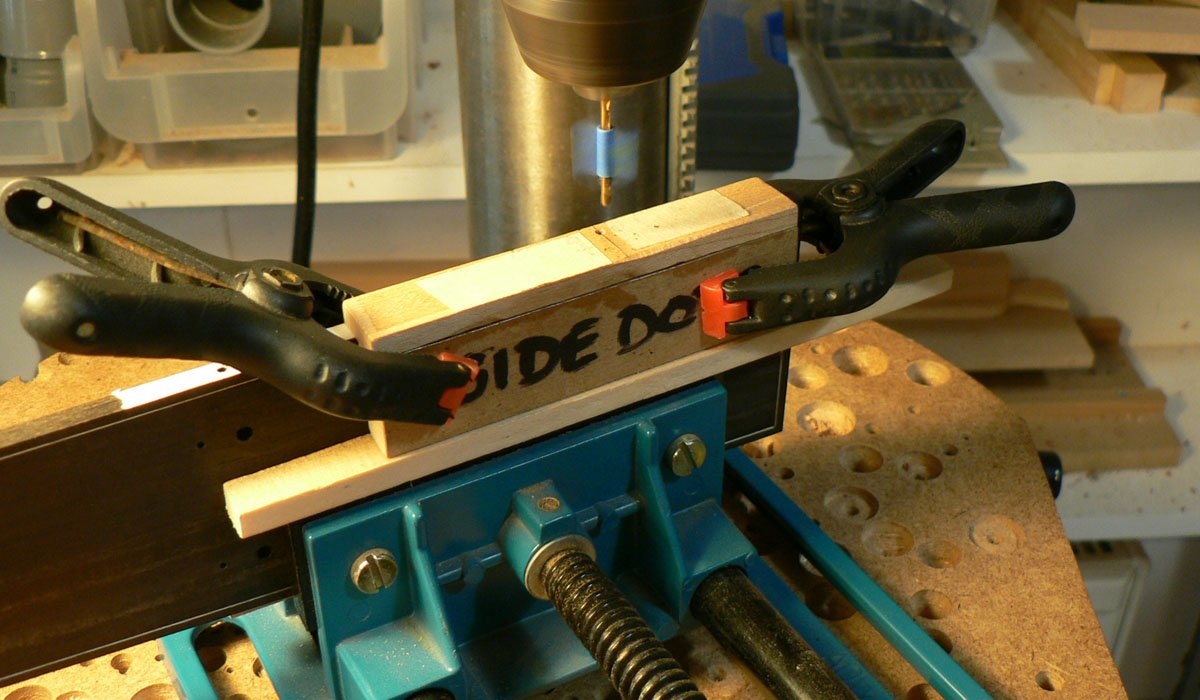
Drilling holes for side dots using a little jig to make sure they are all the same distance from the edge.
Neck 068.JPG
 
Then again, there are 14 Sheffields in the US and another 6 in other parts of the world. No doubt one of them is in China.

:laugh:

That was my experience of that saw too. I eventually upgraded to the Japanese version, which was an improvement but I now use one from Z-Saw (model H-225), which is much better. They're cheap too.. about £25 for the saw and a tenner for new blades. Highly recommended :thumbsup:
 
:laugh:

That was my experience of that saw too. I eventually upgraded to the Japanese version, which was an improvement but I now use one from Z-Saw (model H-225), which is much better. They're cheap too.. about £25 for the saw and a tenner for new blades. Highly recommended :thumbsup:
Thanks @Simo . Can you give me a link to the one you have? I googled 'Z-Saw H225' and got a lot of different results.
 
Sawing out the surplus on the back of the neck in the heel area.

Neck 069.JPG


And sanding it smooth.

Neck 070.JPG


To saw the surplus off either side of the neck, I attach the fingerboard with shorter location pins that don't project above the surface. Then I attach two pieces of wood with double sided tape. Theres a space between the pieces of wood and the fingerboard wide enough for the saw blade to pass through.

Neck 071.JPG


Then I can put the whole assembly face down and saw off the surplus.

Neck 072.JPG


After that, with the fingerboard still pinned to the neck I skim the neck flush on the router table. I've taken the top bearing off the router cutter so I can route straight through the heel area (but didn't take a photo).

Neck 073.JPG
 
At this point the fingerboard finally got glued to the neck but I didn't take any photos. After that I cut the nut slot on my little milling machine, with bits of wood clamped either side are to avoid break-out.

Neck 074.JPG


Shaping the neck in the usual way by cutting facets and smoothing them out. The parts not covered by tape will be the first two facets.

Neck 075.JPG


After all the facets have been cut and smoothed out using strips of abrasive in the 'shoe-shine' method.

Neck 076.JPG


Blending in the volute. I use a mixture of knives, rasps, razor files and abrasive strips. I must get one of those very pointy, Japanese knives.

Neck 077.JPG


Neck 078.JPG


The other end gets the same treatment.

Neck 079.JPG
 
Made a book matched heel cap from off-cuts of the back, glued it on and blended it into the heel.

Neck 080.JPG


Now I open up the body where the neck and fingerboard extension will fit. The opening in the front is finished size allowing a little lateral movement of the fingerboard extension. The opening for the heel is undersize, giving access to the Allen screws on which the neck will sit, but allowing for adjustment of the neck in the body. These two screws are much higher than they will normally be when the neck is installed.

Neck 081.JPG


I can now sit the two plugs embedded in the neck on the two Allen screws and mark the outline of the heel on the body. (That's why the Allen screws are further out of the body than normal.)

Neck 082.JPG


After a certain amount of finessing (is that a word?) with chisels, files and sanding boards, the opening for the heel is done. (I know, it doesn't look much different than it did before.)

Neck 083.JPG


Now it's possible to lower the screws in the body and install the neck. This shows the maximum possible action height adjustment, (more than anyone could possibly want) . . .

Neck 084.JPG


And this shows the minimum. Well, obviously, the strings would be stuck to the fingerboard. "Neck re-set? Certainly sir. Just give me 5 minutes".

Neck 085.JPG
 
Made a book matched heel cap from off-cuts of the back, glued it on and blended it into the heel.

Now I open up the body where the neck and fingerboard extension will fit. The opening in the front is finished size allowing a little lateral movement of the fingerboard extension. The opening for the heel is undersize, giving access to the Allen screws on which the neck will sit, but allowing for adjustment of the neck in the body. These two screws are much higher than they will normally be when the neck is installed.

I can now sit the two plugs embedded in the neck on the two Allen screws and mark the outline of the heel on the body. (That's why the Allen screws are further out of the body than normal.)

After a certain amount of finessing (is that a word?) with chisels, files and sanding boards, the opening for the heel is done. (I know, it doesn't look much different than it did before.)

Now it's possible to lower the screws in the body and install the neck. This shows the maximum possible action height adjustment, (more than anyone could possibly want)
That's totally ingenious!
 
  • Like
Reactions: Polfuste
Thank you @Beej and @TomB . I have to say it's not totally my invention of a fully adjustable neck. It's my version based on several other people's ways of doing it, starting with Rick Turner (RIP) and he borrowed his version from Stauffer. As someone said "There's nothing much new in luthiery that hasn't been done before". I wonder why Ralph Novak was granted a patent for 'Fanned Frets', as were others before him, when they've been around since the early 17th century. :)

Orpharion1617 (2).jpg
 
Back to the other end of the neck. I need to open up the holes for the tuners. I start by drilling a 5mm hole through the sacrificial board on the drill table, and insert a 5mm dowel pin.

Neck 086.JPG


Then I change the drill bit for the 14mm brad-point bit.

Neck 087.JPG


Then install the headstock on the dowel pin, clamp it and drill the hole.

Neck 088.JPG


The brad point pushes the dowel pin down and drills a clean hole, perfectly centered on the 5mm pilot hole.

Neck 089.JPG


Push the dowel pin back up and do the same thing three more times and 'voilà!'.

Neck 090.JPG
 
wow that headstock overlay is tight!
Thank you, although I'm not sure what 'tight' means. But then, I'm a boring old fart who can't keep up with the modern parlance of the 'yooth' where I live (in France) so the way people speak over there in the 'colonies' ;) is a bit beyond me. (I'm English, but have lived here for 39 years.):jawdrop:
I don't even see my grandchildren often enough for them to keep me up to date, but that's OK. When I retired, at 65, I wondered if I'd live to see them grown up, with girl or boyfriends. but that was 19 years ago, so I have! So I have nothing to complain about. It's nice to see a few 'likes' when I post something, but small comments, like yours, are really appreciated.
 
Thank you, although I'm not sure what 'tight' means. But then, I'm a boring old fart who can't keep up with the modern parlance of the 'yooth' where I live (in France) so the way people speak over there in the 'colonies' ;) is a bit beyond me. (I'm English, but have lived here for 39 years.):jawdrop:
I don't even see my grandchildren often enough for them to keep me up to date, but that's OK. When I retired, at 65, I wondered if I'd live to see them grown up, with girl or boyfriends. but that was 19 years ago, so I have! So I have nothing to complain about. It's nice to see a few 'likes' when I post something, but small comments, like yours, are really appreciated.
lol It's a good thing!
Clean lines, classy design, aesthetically pleasing, and demonstrating excellent craftsmanship. :roflmao:
 
Last edited:
Now that I've got to this stage, I've been having a serious re-think.

The problem with the other acoustic bass guitar I made was feedback and what increases the possibility of feedback, apparently, is a large volume, lightly built body, which is what it had. The Taylor GS Mini has a smaller body than the one I'm building, but mine is OM size (because I was already equipped to build that size), but then I decided to make the 'deep body' version. What was I thinking? I should be building a shallower version, nearer to the volume of the Taylor.

What I was hoping for in building this instrument is something that will make enough noise to plonk along un-amplified at home when finding a bass line to go with a new tune or to practise, but will sound OK amplified and look more appropriate when playing in a group with acoustic instruments; guitar, fiddles flute, melodeon, bagpipes (!) etc. In fact, I already have something that almost does that. It's a bass uke with Galli flat-wound strings but it hardly makes any noise acoustically although it sounds almost double-bass-like when amplified, but looks a bit like a toy on stage. It's good for crowded pub sessions though, with a little battery powered amp under my chair. People wonder where the bass is coming from.

So, I've decided to start again on a new body. As the one I've built is a guitar body, I can make a guitar neck for it so I'll finally have a guitar when family members come and say, "Don't you have a guitar I can play?"

There's a limit to how shallow I can make it, as I still want the access panel in the blunt end which has to be big enough to get my hand inside, but there will be one or two things that are different with this one. I'll post photos of the bits that are different as I go along.
 
Now that I've got to this stage, I've been having a serious re-think.

The problem with the other acoustic bass guitar I made was feedback and what increases the possibility of feedback, apparently, is a large volume, lightly built body, which is what it had. The Taylor GS Mini has a smaller body than the one I'm building, but mine is OM size (because I was already equipped to build that size), but then I decided to make the 'deep body' version. What was I thinking? I should be building a shallower version, nearer to the volume of the Taylor.

What I was hoping for in building this instrument is something that will make enough noise to plonk along un-amplified at home when finding a bass line to go with a new tune or to practise, but will sound OK amplified and look more appropriate when playing in a group with acoustic instruments; guitar, fiddles flute, melodeon, bagpipes (!) etc. In fact, I already have something that almost does that. It's a bass uke with Galli flat-wound strings but it hardly makes any noise acoustically although it sounds almost double-bass-like when amplified, but looks a bit like a toy on stage. It's good for crowded pub sessions though, with a little battery powered amp under my chair. People wonder where the bass is coming from.

So, I've decided to start again on a new body. As the one I've built is a guitar body, I can make a guitar neck for it so I'll finally have a guitar when family members come and say, "Don't you have a guitar I can play?"

There's a limit to how shallow I can make it, as I still want the access panel in the blunt end which has to be big enough to get my hand inside, but there will be one or two things that are different with this one. I'll post photos of the bits that are different as I go along.
So you'll reuse the new neck in the new body? Ok then, even more great photos for us!

