• TalkBass has been independent since 1998. Add your voice.
    Create a free account to reply to discussions, view embedded media, and browse with fewer display ads.
    Join freeLog in
    Want zero display ads or expanded classifieds tools? Compare plans.

A short scale acoustic bass guitar experiment.

This is the cross grained sound-hole reinforcement with its clamping caul. This has also had one side sanded in the dish to a 25ft radius. I work on the principle that if the front is supposed to be domed, everything that is glued to it should be sanded to that radius.
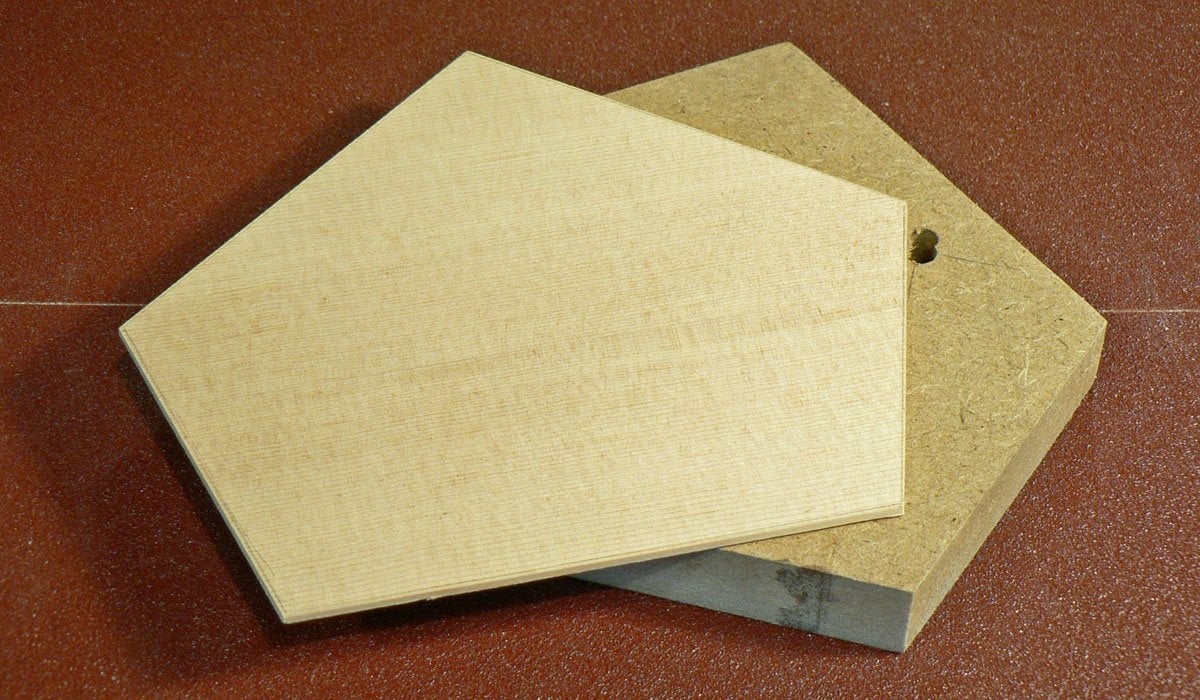
Body 102.JPG


Here it is being glued in place.

Body 103.JPG


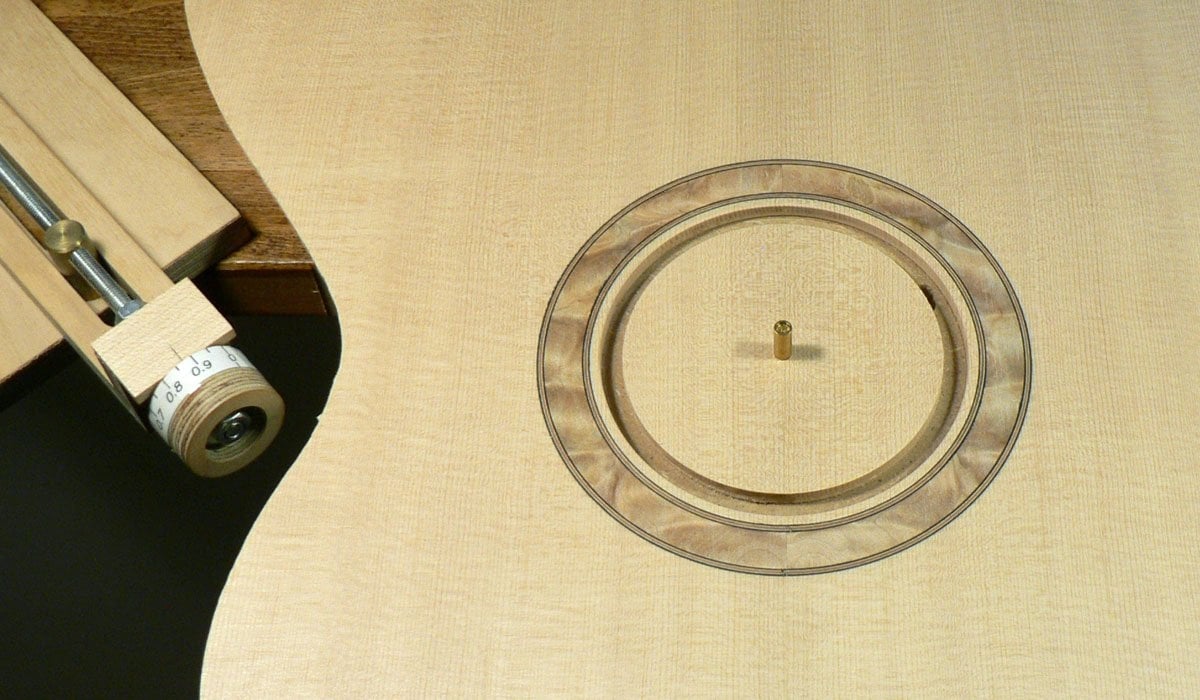
Then the sound-hole is cut.

Body 104.JPG


The bridge plate gets the same sanding treatment and is glued in place.
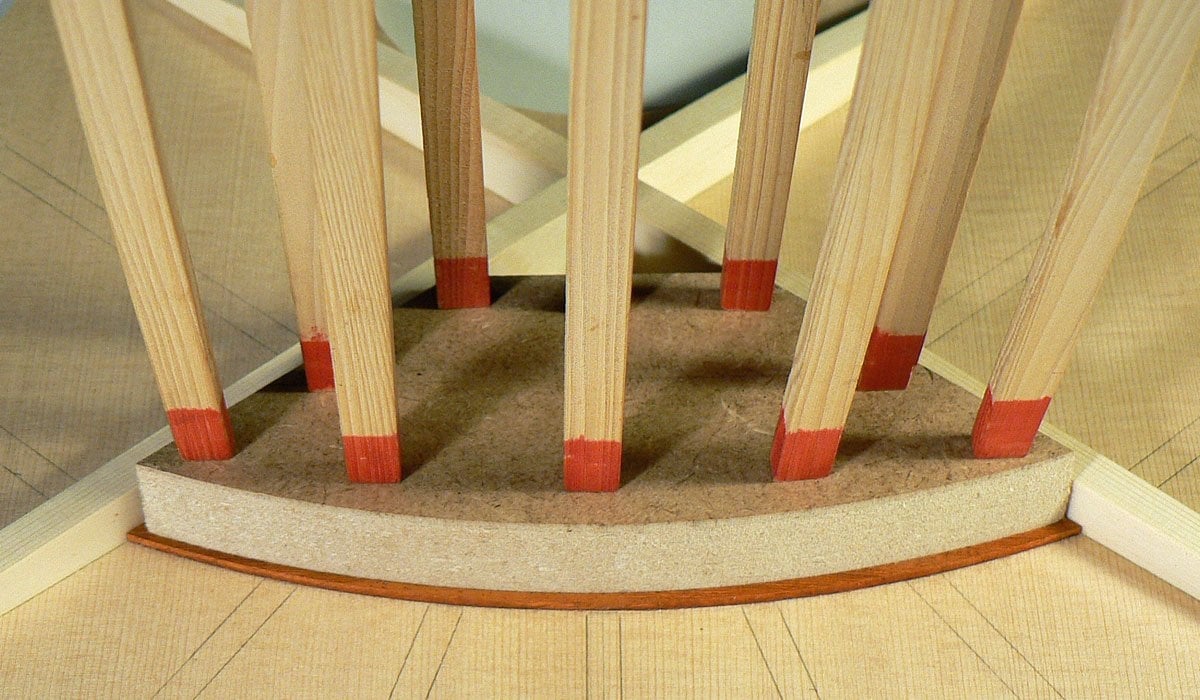
Body 105.JPG


It's padauk, a hardwood as it's what the ball ends of the strings will be in contact with. Another pro luthier, Steve Kinnaird in Nacogdoches, Texas has been so helpful that I now think of him as a friend. He says padauk is "a very musical wood", so if it's good enough for him . . .
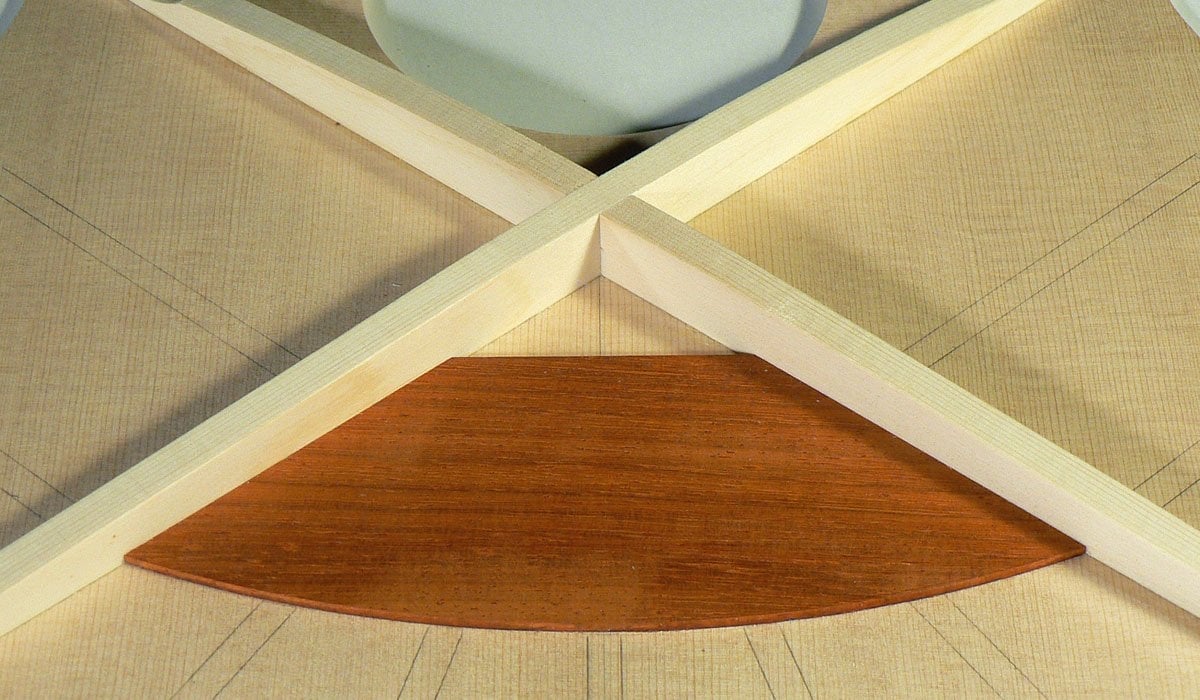
Body 106.JPG


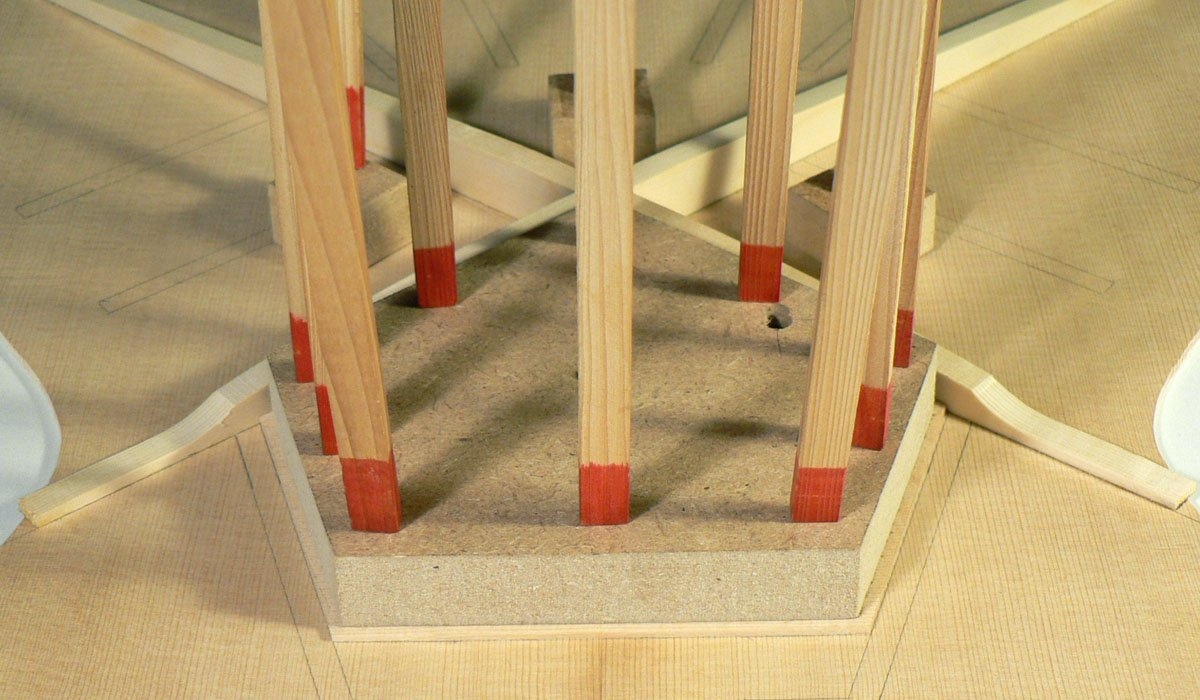
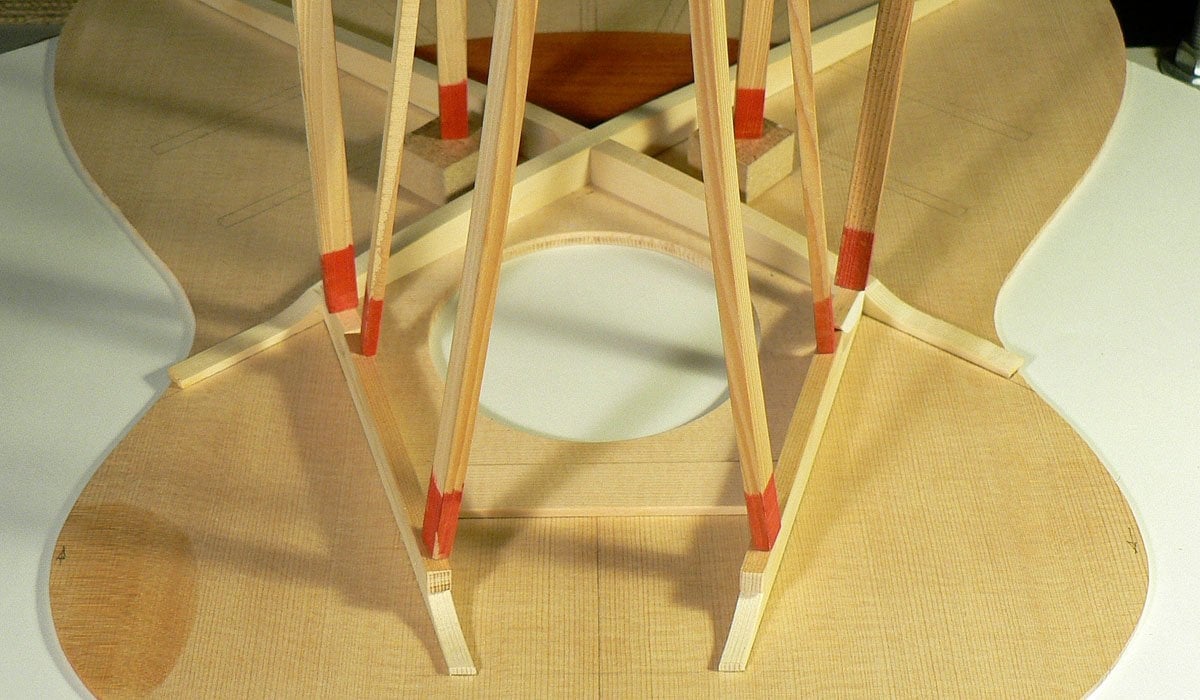
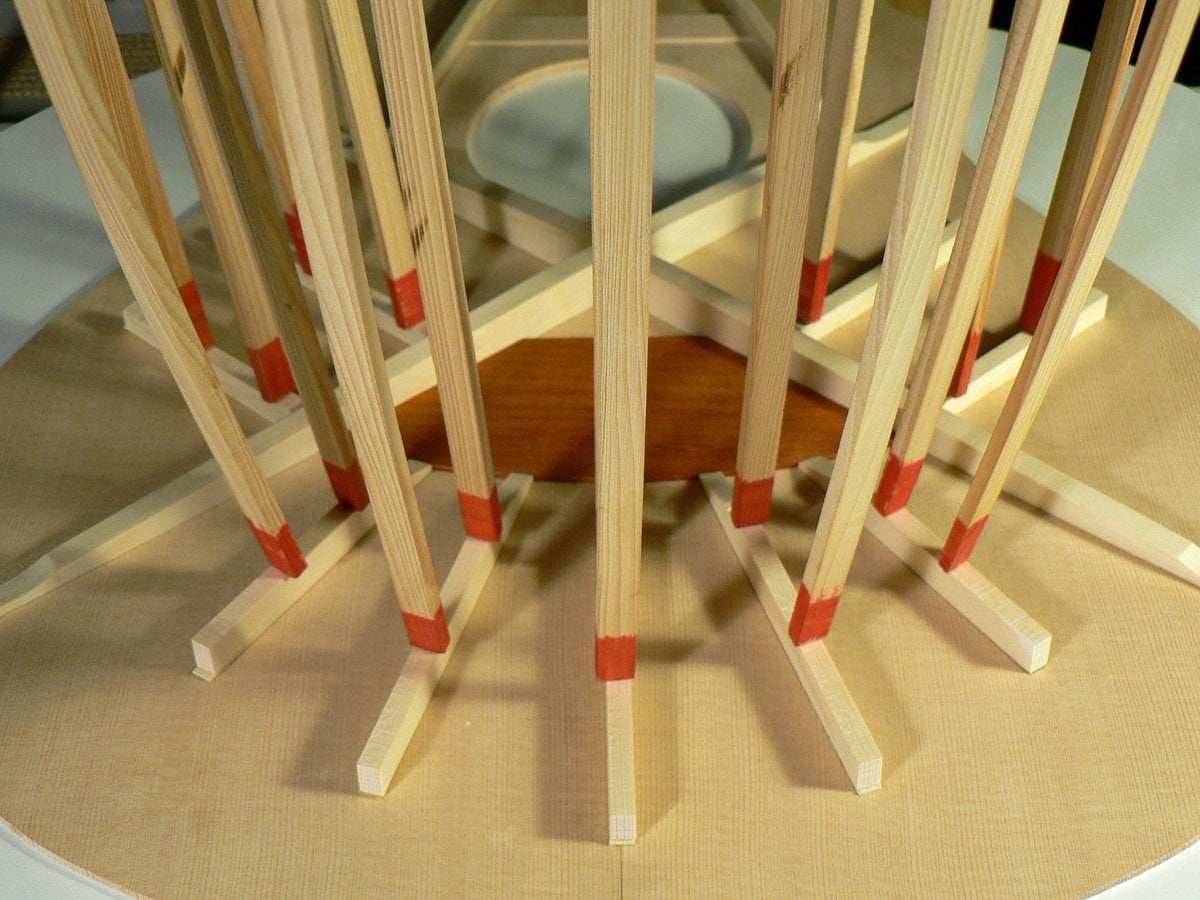
More braces. . .

Body 107.JPG


. . . and even more. That's the lot.

Body 108.JPG
 
This is the cross grained sound-hole reinforcement with its clamping caul. This has also had one side sanded in the dish to a 25ft radius. I work on the principle that if the front is supposed to be domed, everything that is glued to it should be sanded to that radius.

View attachment 7430981

Here it is being glued in place.

View attachment 7430982

Then the sound-hole is cut.

View attachment 7430984

The bridge plate gets the same sanding treatment and is glued in place.

View attachment 7430985

It's padauk, a hardwood as it's what the ball ends of the strings will be in contact with. Another pro luthier, Steve Kinnaird in Nacogdoches, Texas has been so helpful that I now think of him as a friend. He says padauk is "a very musical wood", so if it's good enough for him . . .

View attachment 7430986

More braces. . .

View attachment 7430987

. . . and even more. That's the lot.
View attachment 7430990


One of the acoustic builders I watched on YouTube before he retired did some tap tests both of full boards and bridge plates and things he made out of padauk. It always had a nice, clear tone and good sustain.
 
  • Like
Reactions: Dave Higham
I can move on to the back now. Here are the two halves being glued together, face-down. The two pieces aren't always exactly the same thickness so gluing them with the book-matched faces down means there'll be the minimum sanded off them to clean up, so keeping the grain pattern as much of a mirror image as possible.

Body 112.JPG


It's then cut out about 5mm oversize all round, sanded down to 2.5mm thick and a cross grained centre strip of spruce glued over the butt joint.

Body 113.JPG


I found a piece of perfectly quarter-sawn cedar for the back braces and cut and sanded three pieces to 6mm thick.

Body 114.JPG


These were cut into 6 pieces; four of them 18mm wide for 'ladder' braces and the other two 15mm wide for longitudinal braces. The four ladder braces are clamped together and sanded in the 15ft radius dish.

Body 115.JPG


Still clamped together, they get 6mm notches milled in them for the longitudinal braces.

Body 116.JPG


The ends of each brace are sanded down to 3mm thick.

Body 117.JPG


The two longitudinal braces have notches milled in them and here they are assembled but not glued.

Body 118.JPG
 
So, why the two longitudinal braces? Traditionally, guitar makers just use four lateral (or 'ladder') braces like Martin, Gibson, etc. But even if these are glued with the back pressed down into a dome shaped radius dish, when it's released the back springs back into a cylindrical shape as the braces all have the same radius. The only thing pulling it back into the dome shape is the joint between the back and the sides which have been sanded in the dome-shaped dish.

The notches in the longitudinal braces are deeper at each end to make the ladder braces conform to the dome shape. If the braced are assembled before gluing there's very little spring back.

Body 118a.JPG


Some luthiers go one step further and install lattice bracing over the whole of the back. Others make laminated backs (and sides) which don't need bracing at all.

Here the ladder braces are being glued with the longitudinal braces in place to keep them in position. The back is also being pushed firmly down into the dish.

Body 119.JPG


I took the longitudinal braces off and prettied them and the ladder braces up a bit as you can see them through the sound-hole, before gluing them in. I also remembered to glue the label in. I usually forget and have to do that through the sound-hole.

Body 120.JPG
 
The back and front are almost ready to be glued to the sides now, but to do that the linings have to be notched to accept the cross braces on the front and the ladder braces on the back. Once again got wrapped up in what I was doing and forgot about the photos, so the following are photos of another instrument.

The sides are positioned on the back (or the front) and the positions of the braces marked on the linings. The notches are then cut using a 1/8" downcut cutter in the Dremel which is mounted on a board which spans the whole of the sides so it's very stable.

Body 120a.JPG


Body 120b.JPG


I glue the back to the sides first. The back is placed on the radius dish, fish glue is applied to the linings and the sides positioned and go-bars apply pressure. They are also used to make sure the back is pushed down into the dish. I use fish glue for this as it has a very long open time. It takes a while to apply glue where it's needed, taking care not to get it anywhere else. Some people are very suspicious of fish glue as it can be released using humidity. I think that as long as you don't take the instrument into the sauna with you (and leave it there) you don't need to worry.

Body 120c.JPG


Back to the current project. The front is glued to the sides in the same way.

Body 121.JPG


Body 122.JPG


The box is closed.

Body 123.JPG
 
I now have to dismantle the go-bar deck (my workshop's not big enough to leave it assembled) and use the base to mount the binding rebate contraption made from plywood and two drawer slides.

I trim the back and front flush with the sides using a flush trim cutter. The body is mounted in a cradle. The supports are adjusted so that the sides are vertical.

Body 124.JPG


Body 125.JPG


Body 126.JPG


Bindings and purflings are next. Of course you can buy binding strips, but they are straight. The first time I made a guitar with the 'wedge' body I looked at the side templates and realised that, although the bindings would be bent to match the profile of the body, it wouldn't be easy to make them fit the profiles of the sides. So I made female templates to match the male side templates and bought a pair of Indian rosewood sides from which to make the bindings.

The template is attached to the rosewood with a few bits of double sided tape and run past the same flush trim router cutter to give a smooth gluing surface.

Body 127.JPG


Then the binding strip is cut, slightly oversize, on the band-saw. The sawn edge doesn't need to be smooth as it's the edge that will be trimmed flush with the body.

Body 128.JPG


This is what the four bindings look like. You can see why it would be difficult to make them conform to the shapes of the sides.

Body 129.JPG
 
The bindings have a white maple veneer purfling strip glued to them. PVA glue doesn't have a very long open time, so the little clamps are all lined up ready in the top part of the photo so I can get them on as quickly as possible. This is the only operation where I use waterproof PVA glue as Titebond Original and CA can't stand the heat.

Body 130.JPG


They go into the side bender and after being subjected to heat and humidity look like this. The second from the left is shorter than the others, doesn't have a purfling strip and isn't cut to a profile as it's for the top part of the arm bevel.

Body 131.JPG


The rebates for the binding and purfling on the front are cut in two stages. The purfling rebate is cut first, to the depth of the spruce top and the binding rebate after, narrower and deeper to suit the width and depth of the binding. Difficult to see, but it's a ¼" downcut cutter.

Body 132.JPG


The purfling strips are glued round the top. There are three: a fine black/white one from Stewmac, a strip of pear veneer and a strip of maple veneer. I glue them separately with water thin CA using a Teflon strip to push them well into contact and trying not to glue my fingers too much. I tend to forget about trying to take photos.

Body 133.JPG
 
Have you ever added up the hours you need to spend on an instrument like this?
No, I haven't. I know I certainly couldn't make a living doing it. But it's my hobby (I've been retired for a long time) and I wouldn't want the stress of making instruments for money. I've only made two instruments for money and they were for friends, and they only paid for the materials. One was a Venezuelan cuatro and the bridge came off, although he had put steel strings on it when it was meant for nylon. Even so.
Quite a few of the instruments I've made have gone to family members,( and they all play them!) The family also have 4 basses, 2 Telecasters, another tenor and a baritone ukulele and a classic guitar between them. And I have too many basses.

Instruments & famille 2.jpg
 
Last edited:
No, I haven't. I know I certainly couldn't make a living doing it. But it's my hobby (I've been retired for a long time) and I wouldn't want the stress of making instruments for money. I've only made two instruments for money and they were for friends, and they only paid for the materials. One was a Venezuelan cuatro and the bridge came off, although he had put steel strings on it when it was meant for nylon. Even so.
Quite a few of the instruments I've made have gone to family members,( and they all play them!) The family also have 4 basses, 2 Telecasters, another tenor and a baritone ukulele and a classic guitar between them. And I have too many basses.

View attachment 7447527
That sounds relaxed and generous—and like a really satisfying hobby.
 
  • Like
Reactions: Dave Higham
Without altering the setting on the router, I run it round the body again in the area of this binding. This shaves the ends of this binding strip down to the surface of the purfling. Here's the result near the access panel.

Body 137.JPG


And here's the other end, near the sound hole.

Body 138.JPG


Now comes the really tricky bit (and I forgot to take photos L ) I need to modify the binding rebate on the bass side to accommodate the arm bevel. I drew what should be an almost accurate development of the curve in CAD. I say almost accurate because it assumes the top is flat and not domed, but it will be near enough. I also incorporated this profile into the binding template. I used to use ProEngineer at work which would have given me a perfect profile, but now I use 2D CAD as if I were still using a drawing board.

Body 138a.JPG


I print out the profile and stick it to the side. Then I cut as carefully as I can following the line. This was on another instrument: a Telecaster of all things!

Body 138b.JPG


Cutting and chiselling. I've only done this four or five times and, as there's been a few months between each time, it doesn't get any easier but I managed it OK. Again this is an old photo from another instrument

Body 138c.JPG
 
So although there were no photos of the arm bevel rebate being cut, you can see here that it was. There's always a bit of spring-back when bending the bindings but, as they were pre-profiled, it was easy to push it into place with finger pressure.

Body 139.JPG


So that's what I did and glued it by wicking in water-thin CA. Fortunately, I remembered to take out the access panel, or that would have been glued in too!

Body 140.JPG


The binding on the treble side was glued in in the same way. Can you see the join? I confess to being rather pleased with this one.

Body 141.JPG


You can see it now. People usually do a vertical butt joint on the centre line, which is where you expect to find it. I find that a joint at 45° is less obvious, especially if it's moved away from the centre line. What gives it away is the white purfling. It's almost impossible to make an invisible butt joint with pale coloured wood, which is why I avoid pale coloured wooden bindings.

Body 142.JPG
 
Now I have to cut the bevel which is at 45° (in theory). I take some of it off with a spokeshave but I don't trust myself to cut a bevel at a constant 45° by hand, so I made this 'bevel sander'. It has 80 grit abrasive stuck to it with double sided tape.

Body 143.JPG


As the part doing the work needs to be cantilevered out from the base it wouldn't take much sideways pressure to make it slide up over the top of the body, so I added some weight. Steel, copper and brass.

Body 144.JPG


It still needs a light touch but works quite well. I sand until there's about 1/32" of the top and side purfling surfaces left at the widest part of the bevel.

Body 145.JPG


I've just realised, writing this, that I've being doing it the wrong way round! Instead of sliding the sander round the body, I should clamp it or screw it to the bench and move the body round. That way the sander can't ride up over the body and the body can't slide under the sander. Duh! Next time . . .

Now I need a veneer to glue onto the bevel. First I stick a piece of paper onto the bevel using 3m Spraymount adhesive and trace the profile.

Body 146.JPG


Then cut out the profile with 2-3mm extra all round and stick it to a piece of rosewood. I have several off-cuts of Indian rosewood from the backs and sides of other instruments. This one has already served to make a bevel veneer but isn't quite big enough to make another. But if I cut off the bit that's already been cut in this photo . . .

Body 147.JPG


. . . and move it here, it will do the job.

Body 148.JPG


So I sanded the two edges flat and square . . .

Body 149.JPG


. . . and glued them together.

Body 150.JPG