• TalkBass has been independent since 1998. Add your voice.
    Create a free account to reply to discussions, view embedded media, and browse with fewer display ads.
    Join freeLog in
    Want zero display ads or expanded classifieds tools? Compare plans.

A short scale acoustic bass guitar experiment.

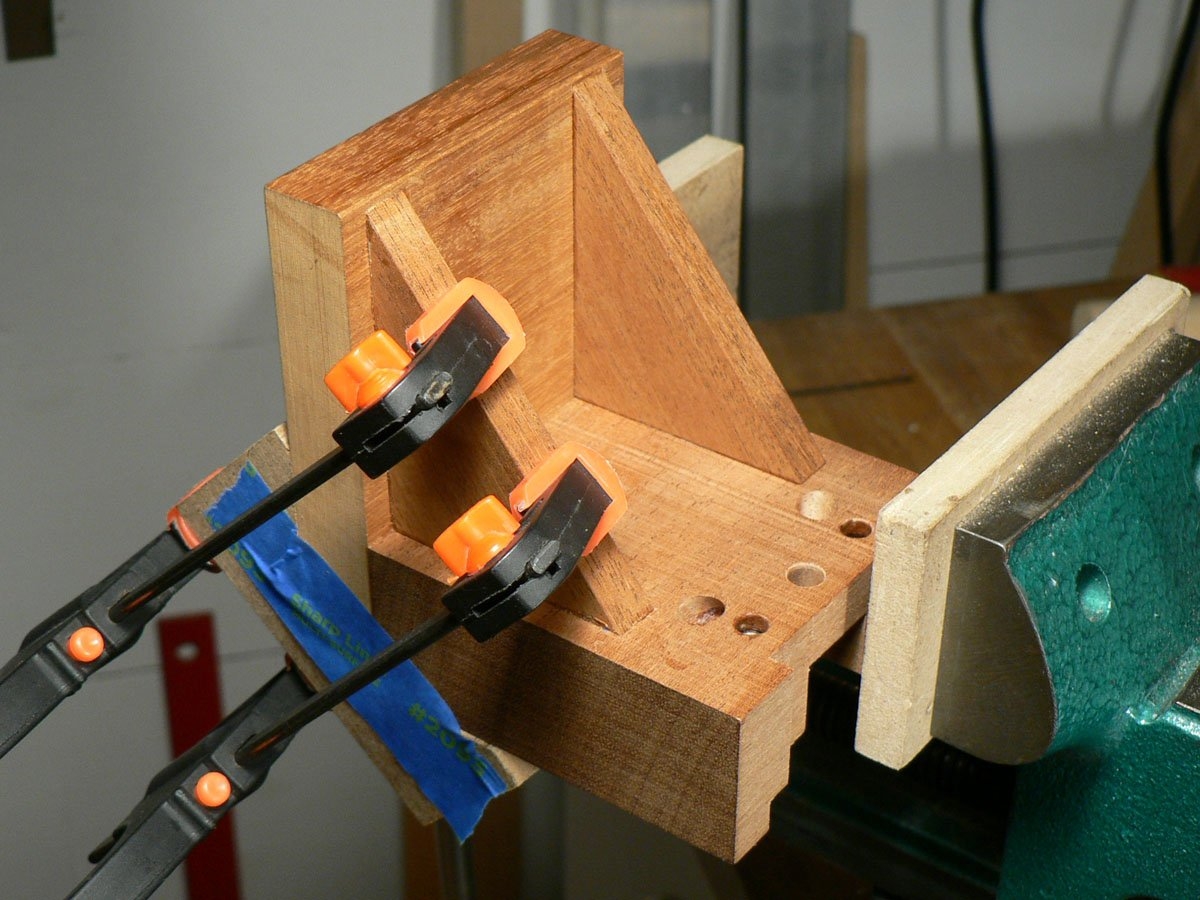
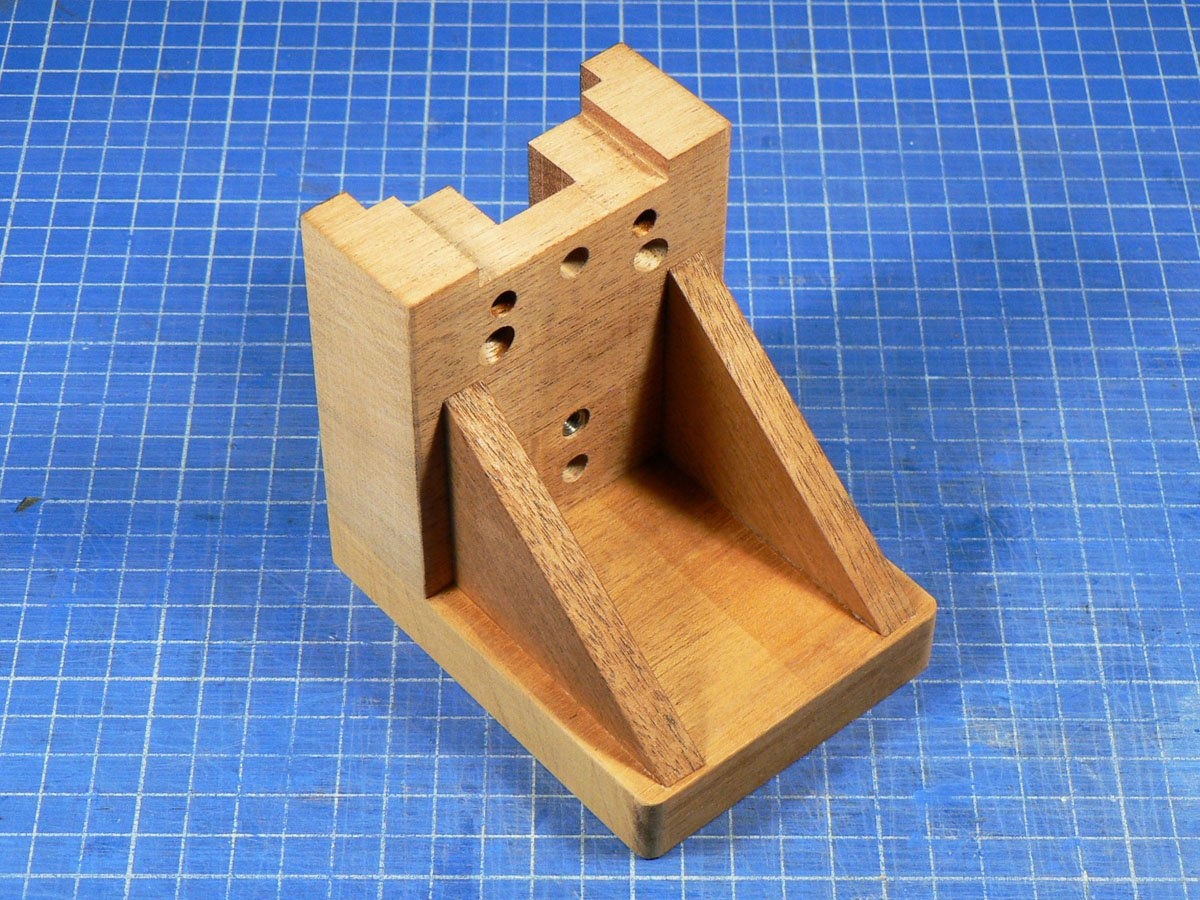
The third piece of wood had two triangular pieces cut out of it and these were glued to the first two pieces to strengthen the joint between them.

Body 023.jpg


Body 024.jpg


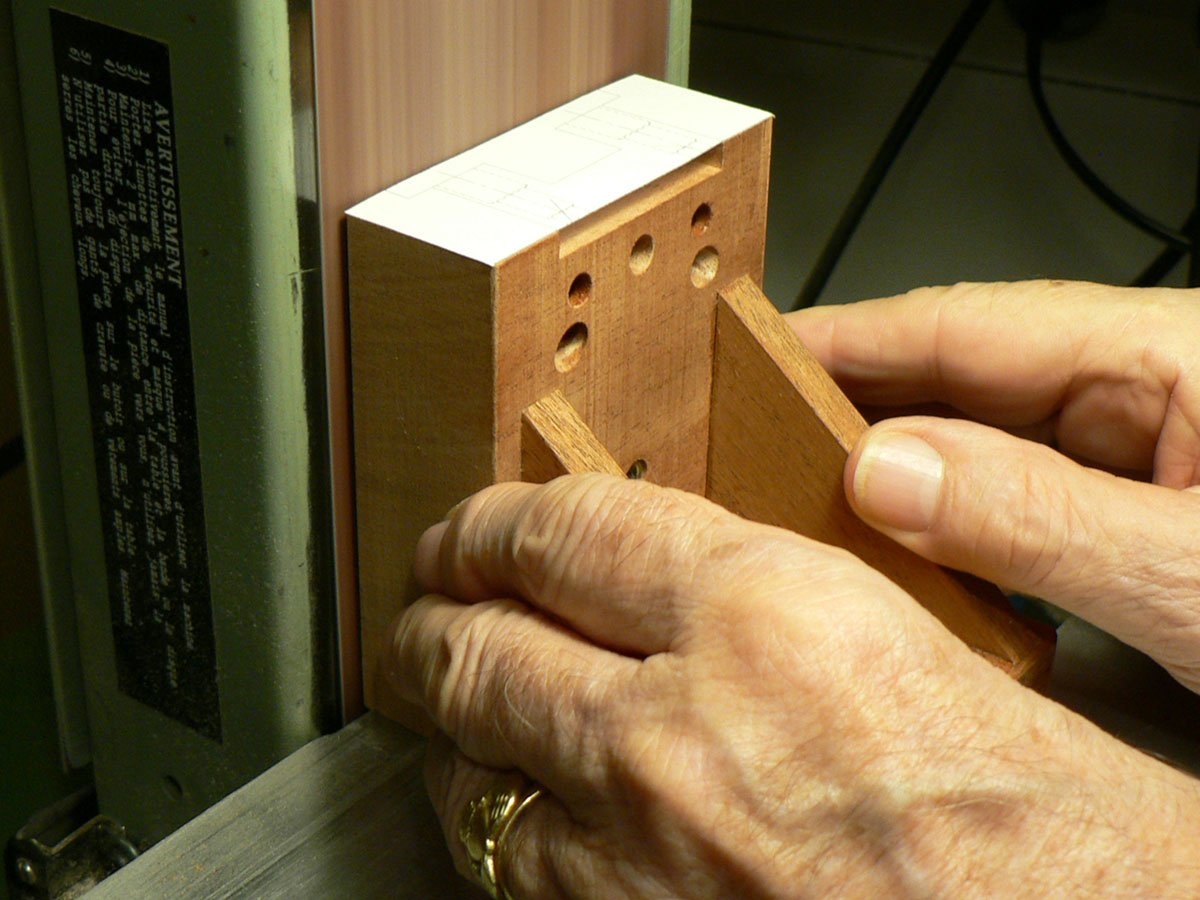
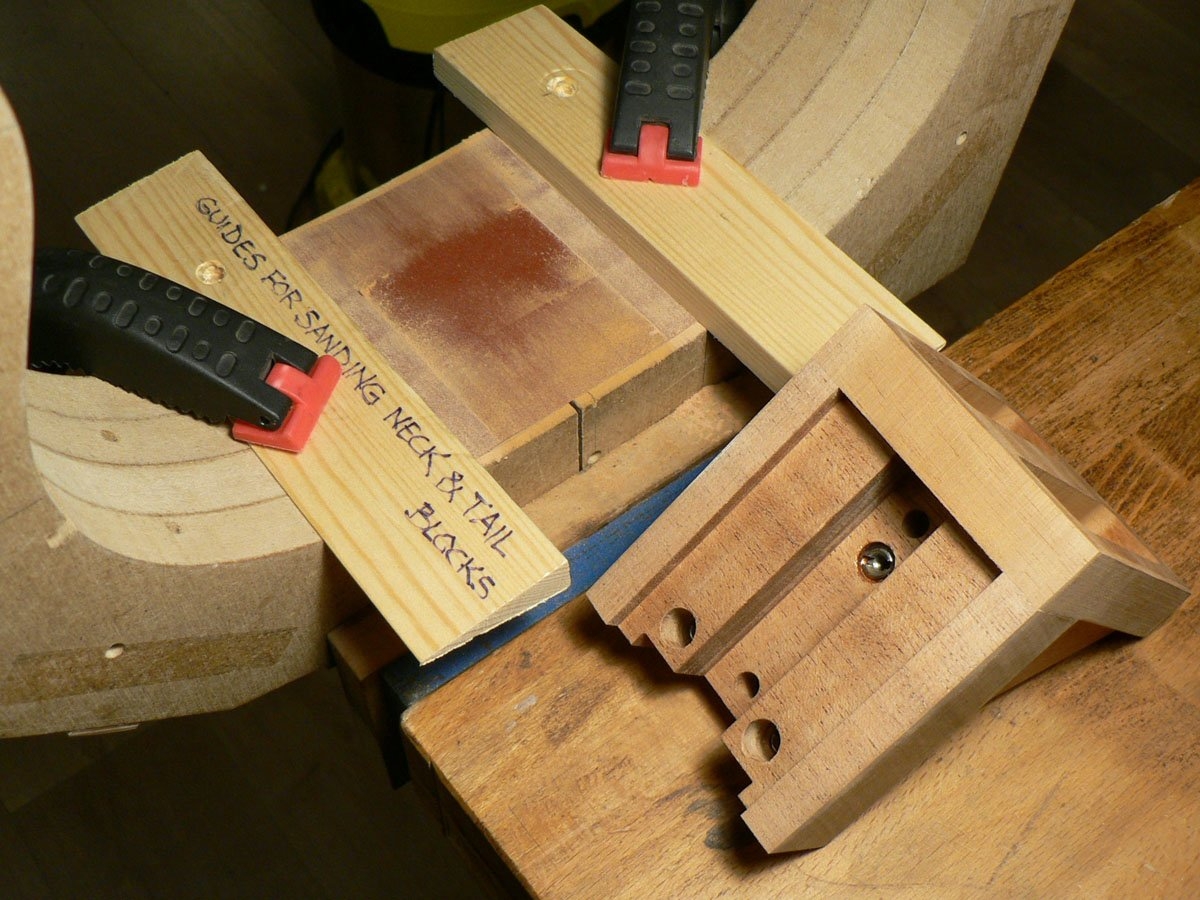
The surface to be glued to the sides is profiled on the belt sander.

Body 024a.JPG


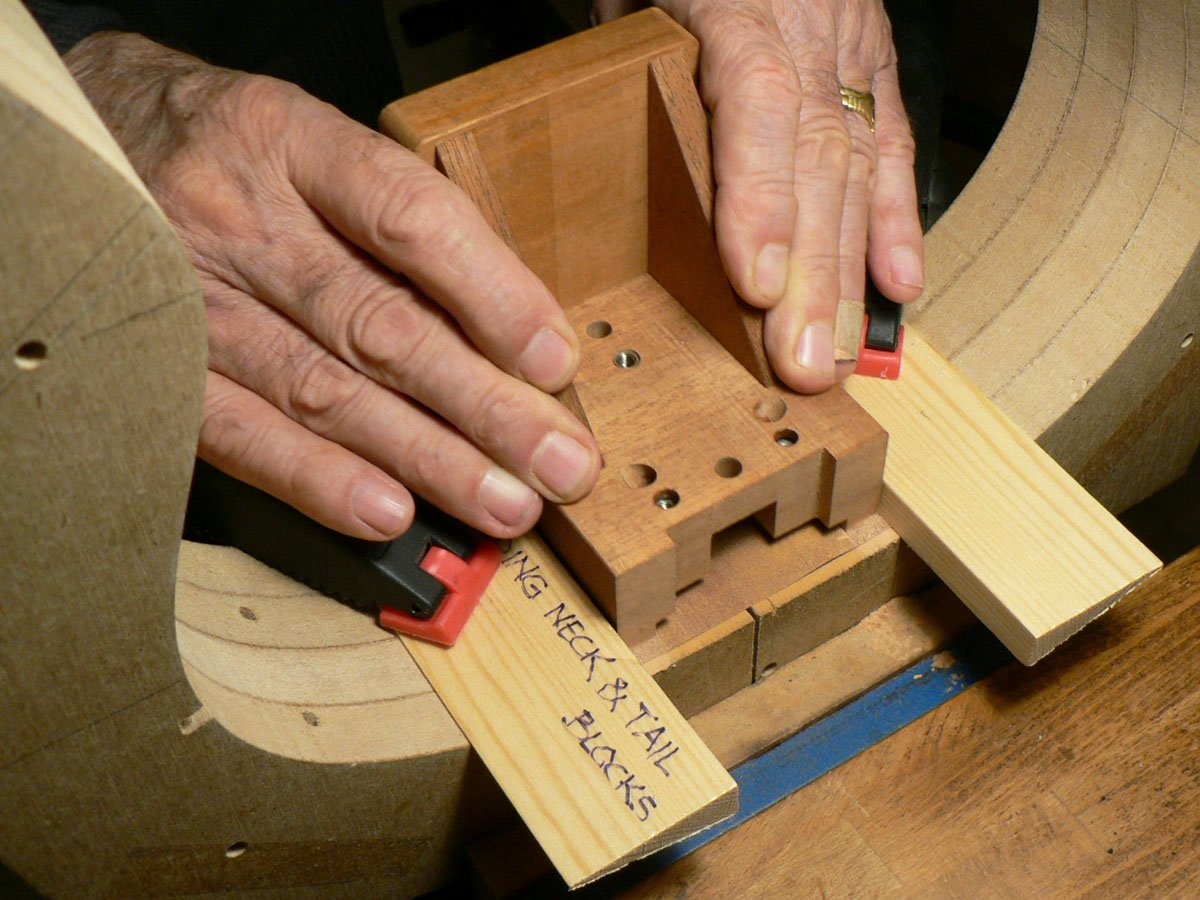
Then finished by rubbing on sandpaper fixed to the mould in the same way as the tail block.

Body 24b.JPG


Body 24c.JPG


So that's the neck block finished.
 
A huge factor of why the Taylor works so well is the decision to use those nylon core strings.

I've played probably a dozen or so acoustic bass guitars over a few decades, and other than a short scale Gretsch which was a bit more than ok but not great, none of them got at all close to how well the GS-mini works.

And I should add that I had a significant bias against Taylor because of their bread and butter acoustic guitars (some based in my actual preference, some based in snobbery).
 
I'd have 2 possible options:
An acoustic guitar style bridge with the strings thru the bridge anchored at the back. Breedlove for one uses this system.
However my preferred type of bridge these days is a suspension bridge, like a Jazz archtop uses with a stop type tailpiece or some such arrangement. The Takamine TB10 uses something like this…it brings to mind an upright bass!
being primarily a fretless player, I don't really get interested in the modern bass bridges with 150 parts and 16 adjustments. I really like a simple bridge. I actually like the old Gibson EB0/1 1 piece bridge with only up and down and back and forth adjustment. If you play fretless and you always use the same strings, it really simplifies what's needed for a bridge
 
Last edited:
  • Like
Reactions: Crawforde
Thanks for the input Ben.
I'm planning on the Pyramid flat-wound strings that I think are made with the GS Mini in mind.
I was reminded of these basses a couple nights ago, and pulled the trigger on one priced really well. Hopefully it shows up and is as described, but if it does, I'm considering those Pyramids as well. I used their regular flats on a Stingray and a Les Paul Jr type guitar for a while years ago, and really liked them. I believe the Pyramid for the GS are also nylon core.
 
  • Like
Reactions: Dave Higham
Dave, very nice project, up to your usual very high standards!

I've been playing around with the idea of top damping for a while, though for the moment I'm still focused on optimizing the acoustic sound of my acoustic basses, so it's never gone beyond background mulling....

Like @Bruce Johnson my thought was an extending damper that could be retracted for full acoustic. Stewmac sell these Prop-jacks that I wondered if they could be repurposed:

(Edit: I've just read you're putting the top damping idea on hold....Let us know if you do it in the future).

With regard to strings, Aquila do a nylon core flat wound ph. bronze string that is designed for your string length. Just as an alternative:
 
Hi @honza992 (what's your name?), I had noticed the Aquila strings but, at around €82 a set, they aren't something you'd want to try and then be disappointed with.
It's John.

Yeah, they are comically expensive. I've got a 34" set, but haven't yet put them on anything. If I do I'll let you know!
 
  • Like
Reactions: Dave Higham
Now it's time to move on to the sides or ribs. A couple of the acoustic guitars I've made were 'deep-body' models. OM size but with bodies about 12mm (1/2") deeper than normal. It brings out the bass notes on a guitar so it seems the obvious thing to do for a bass.

But a deeper body means it's less comfortable under the right arm so it will have a wedge shaped body, i.e. shallower on the bass side (under your arm) and deeper on the treble (on your knee). The body is built with the sides perpendicular to the top and the back swivelled about its long axis. They call this the 'Manzer wedge' because master (or mistress ?) luthier Linda Manzer was the first to do it. If you've never heard of her, Google 'Linda Manzer Picasso guitar'.

Finally, for maximum comfort, I'll put an arm bevel on the bass side lower bout.

Most people build acoustic instruments in an outside mould and this is an old photo of mine. It's sitting on a 25ft radius dish and I'm tracing a line to get the actual profile of the sides.

Body 025.jpg


Body 026.jpg


These are the profiles. Some luthiers leave the sides parallel and cut off all the surplus after bending. I prefer to profile the back edge before bending as there's quite a lot to trim off and I've even been able to use the off-cuts sometimes as bindings. If you trim them after bending, all you have is shavings.

Body 027.JPG
 
The first thing to do is sand the sides down to 2.2mm thick (about 0.090").

Body 028.JPG


Then profile the back edge of each side.

Body 029.jpg


A part of the profile of the front edge is cut at each end so I know where to glue the neck and tail blocks. The rest of the front edges are left straight. It makes it easier to place the sides squarely in the mould.

Body 030.jpg
 
This is the home-made bending rig with the silicone heating blanket and controller.

View attachment 7398744

Each side is placed in a sandwich consisting of:

A spring steel slat
Aluminium foil
Damp kraft paper
The wood
More damp kraft paper
More foil
Another steel slat.
The heating blanket
Yet another steel slat

The centre screw is wound up and the sandwich inserted . The heat is switched on and when it gets up to the required temperature the screw is wound down. Then each end is pulled down and tightened. There are wing nuts on the end of the threaded rods. Then it looks like this. There are no action photos because I'm a bit busy doing all that.

View attachment 7398746

The sandwich is heated up to about 320°F, kept at that temp for about 15-20 minutes, then allowed to cool down to room temp. The heating process is then repeated after which I let it cool down completely overnight.

When it comes to getting the bent side out, the spring steel slat nearest to the bending form will try to straighten out and break the side, so I made these clips. They are plastic covered wire (for garden fencing) with one end flattened.

View attachment 7398748

These are inserted into the form and prevent the innermost slat from straightening out; two at each end and two as near to the waist as possible.

View attachment 7398749

View attachment 7398752

Here's the first side bent and fitted into the mould to prevent any tendency it might have to straighten out again.

View attachment 7398753

Both sides bent, ends trimmed and fitted into the mould.

Bending sides is always a bit stressfull, especially if you don't do it very often. Some wood doesn't want to bend at all. I've had sides where the bend in the waist has come out tighter than the shape of the form, which doesn't seem possible, but walnut has always seems to behave itself and this time is no exception. This is Claro walnut, by the way.

View attachment 7398755


Interesting. Ted on the twoodfrd YouTube channel is building a cello acoustic guitar and mentioned heating and bending the sides, letting them cool then heating them again still on the bender. I don't remember seeing that before.
 
Can anyone see the photos in my last post (yesterday), because I can't? Where there should be a photo there's just the file name but if I click on 'Edit' I can see the thumbnail photos at the bottom of the page as if I hadn't inserted them, although I did. I tried to insert them in 'Edit' but wasn't able to.
 
Can anyone see the photos in my last post (yesterday), because I can't? Where there should be a photo there's just the file name but if I click on 'Edit' I can see the thumbnail photos at the bottom of the page as if I hadn't inserted them, although I did. I tried to insert them in 'Edit' but wasn't able to.
I can't see them
 
This is a repeat of the post which should be before Matt's post #32 because, for some reason, the photos weren't visible.

This is the home-made bending rig with the silicone heating blanket and controller.

Body 031.JPG


Each side is placed in a sandwich consisting of:

A spring steel slat
Aluminium foil
Damp kraft paper
The wood
More damp kraft paper
More foil
Another steel slat.
The heating blanket
Yet another steel slat

The centre screw is wound up and the sandwich inserted . The heat is switched on and when it gets up to the required temperature the screw is wound down. Then each end is pulled down and tightened. There are wing nuts on the end of the threaded rods. Then it looks like this. There are no action photos because I'm a bit busy doing all that.

Body 032.JPG


The sandwich is heated up to about 320°F, kept at that temp for about 15-20 minutes, then allowed to cool down to room temp. The heating process is then repeated after which I let it cool down completely overnight.

When it comes to getting the bent side out, the spring steel slat nearest to the bending form will try to straighten out and break the side, so I made these clips. They are plastic covered wire (for garden fencing) with one end flattened.

Body 033.JPG


These are inserted into the form and prevent the innermost slat from straightening out; two at each end and two as near to the waist as possible.

Body 034.JPG


Body 035.JPG


I'll make the post in two parts, in case it was too big.
 
Here's the first side bent and fitted into the mould to prevent any tendency it might have to straighten out again.

Body 036.JPG


Both sides bent, ends trimmed and fitted into the mould.

Bending sides is always a bit stressfull, especially if you don't do it very often. Some wood doesn't want to bend at all. I've had sides where the bend in the waist has come out tighter than the shape of the form, which doesn't seem possible, but walnut has always seems to behave itself and this time is no exception. This is Claro walnut, by the way.

Body 037.JPG