• TalkBass has been independent since 1998. Add your voice.
    Create a free account to reply to discussions, view embedded media, and browse with fewer display ads.
    Join freeLog in
    Want zero display ads or expanded classifieds tools? Compare plans.

Build thread: fEARful 15 sub

For getting rid of the excess dried PL I've found a utility knife and putty knife to be very effective. The utility knife isn't even strictly necessary, but it can be helpful for shaving off thin layers that the putty knife might not catch.

I’ve been using a utility knife blade, a sharp chisel and a square scraper card to get the inside corners. Between the three tools, it comes off OK.
 
  • Like
Reactions: lucas303
I’ve been using a utility knife blade, a sharp chisel and a square scraper card to get the inside corners. Between the three tools, it comes off OK.
I'm not going to bother taking off any of the excess on the inside, except where necessary to fit pieces together. My thinking is I'll never see it in there, and why not just leave it undisturbed as much as possible?
 
  • Like
Reactions: Bill Whitehurst
I'm not going to bother taking off any of the excess on the inside, except where necessary to fit pieces together. My thinking is I'll never see it in there, and why not just leave it undisturbed as much as possible?

Yeah, I’m leaving the inside alone as well. No point in spending any any time on that, really. When I said “inside corners”, I meant the corners on the speaker-side face of the cabinet. Even though I will be covering that area will grill cloth, it is still an exterior surface.
 
  • Like
Reactions: lucas303
Today, the rear panel bracing:
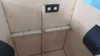
IMG_20201107_153823198.jpg

In order to hold the pieces in place while screwing in the pocket screws, I first got them positioned correctly and then just barely drove in some finishing nails so the bracing pieces wouldn't slide out of position:
IMG_20201107_153041549.jpg
The finishing nails are just barely in...only enough to hold the piece in place while I screwed in the pocket screws. Once the pocket screws went in, it took no effort at all to take out the nails. Before any of this, though, I did a dry fit of all the internal bracing and numbered each piece clearly so I know where it will all end up going.

Tomorrow, once the rear panel bracing is cured, I'll do the bracing for both sides.

I don't think Speakerhardware has shipped the two baffle bracing pieces yet. Pretty frustrating, considering they should've been in the kit to begin with. As long as they show up by the time I'm ready to install them, though, I guess it'll be no harm.
 
Tonight I installed the brace on the top of the cab. I used the nail method again to keep it lined up while I screwed in the pocket screws.
IMG_20201109_174052575.jpg
IMG_20201109_174629394.jpg

According to USPS tracking the missing baffle bracing pieces will be delivered tomorrow. I'm keeping my fingers crossed.

Looking ahead, I'm thinking about water based polyurethane as a finish. I think I'll be happy if I get that done this weekend.
 
I got the MIA baffle bracing pieces on Thursday, and attached the bottom piece:
IMG_20201112_164426113.jpg

Yesterday and this morning I cut out the pieces of acoustic foam and did a dry fit of them:
IMG_20201114_095007622.jpg IMG_20201114_095018332.jpg IMG_20201114_095030602.jpg

After some hemming and hawing about whether to attach the foam before attaching the top, I decided to attach the top first. That will certainly make for some awkward moments when attaching the foam, but I could also foresee awkwardness with doing it the other way. Maybe I made the wrong choice, but it doesn't matter now because the top is on and curing:
IMG_20201114_101605776.jpg
Yes, that's an Acme cab helping to put pressure on the top of the fEARful cab. Yo dawg...

Once the top is cured, I'll just need to attach the last piece of baffle bracing and I'll be done with assembling the wooden parts of the cab. The next real pain in the neck will be sanding. I don't have a router so rounding the edges and corners is going to be...fun.
 
Last edited:
The last piece of wood, the upper bracing piece for the baffle, is attached:
IMG_20201115_180422722.jpg
I went ham with the PL on this part.

I've scraped off almost all of the dried PL on the outside, and in the process I've been thinking more about how I'm going to finish this. Initially I was thinking a natural finish, but now I'm starting to lean towards just painting it. I'd obviously prime it first. No matter what there's going to be a fair amount of effort involved because I'll need to round the edges and corners without a router. I think what I'll do is round those parts off, and do the necessary sanding. At that point I'll see how it looks and make the final call on the finish.

I'm definitely not doing Duratex, or any of the truck bed liners. Also not doing rat fur. It's going to be either some sort of polyurethane or paint. I'm definitely open to ideas though.
 
Rounding the edges and sanding are almost complete. I ended up using a hand plane to do the rough rounding of the edges, then fine tuned it by sanding. It's certainly not perfect. I suppose "rustic" would be my cover story. I couldn't completely get the PL residue off the baffle, so I decided to paint the cab. I'll do the last bit of sanding today and then decide whether I want to glue in the acoustic foam before painting. I'm leaning towards just getting the foam out of the way. Also if there's any stray glue spray that makes it to the outside I can still wipe/sand it off before priming and painting.
 
  • Like
Reactions: YawningJorin
Lots of progress today. I did a little bit more sanding then gave it a wipe down with tack cloth. After that I put the acoustic foam in:
IMG_20201122_103056516_MP.jpg
I ended up having to trim some of my the pieces I pre-cut, but that wasn't a big deal. I had a lot of the foam left over, some of which went into a guitar cab I plan to pair up with the fEARful.

Next I masked off the handles and connector dish:
IMG_20201122_111642013.jpg
I thought about masking off the hole for the speaker, but decided I couldn't be bothered. And yes I know my backyard is a complete disaster. It's all getting torn up this winter so I've let it go to crap.

On to a bush league priming job:
IMG_20201122_112502051.jpg

Then the fun part:
IMG_20201122_125335771.jpgIMG_20201122_181741045.jpg

I'm going to let it sit for a couple days and then decide whether I want to do another coat of paint before clear coating, or go straight to the clear coat.

I'm getting close to the finish line!
 
As the paint dried all these little hair sort of things started showing up on the surface. I'm guessing it's just stuff floating around in the air getting caught on the wet paint...? At any rate, I'm definitely going to do another coat of paint before clear coating. That'll add a couple more days to the process, but at this point what's a couple more days?
 
  • Like
Reactions: YawningJorin