Enjoy the benefits of a premium membership!
Upgrade Account
-
TalkBass has been independent since 1998. Add your voice.
Create a free account to reply to discussions, view embedded media, and browse with fewer display ads.
Join free Log in
Want zero display ads or expanded classifieds tools? Compare plans.
You are using an out of date browser. It may not display this or other websites correctly.
You should upgrade or use an alternative browser.
You should upgrade or use an alternative browser.
More options
Who Replied?

- Jun 30, 2010
- 49,603
- 222,060
- Disclosures
- musician/artist/owner - Gildaxe
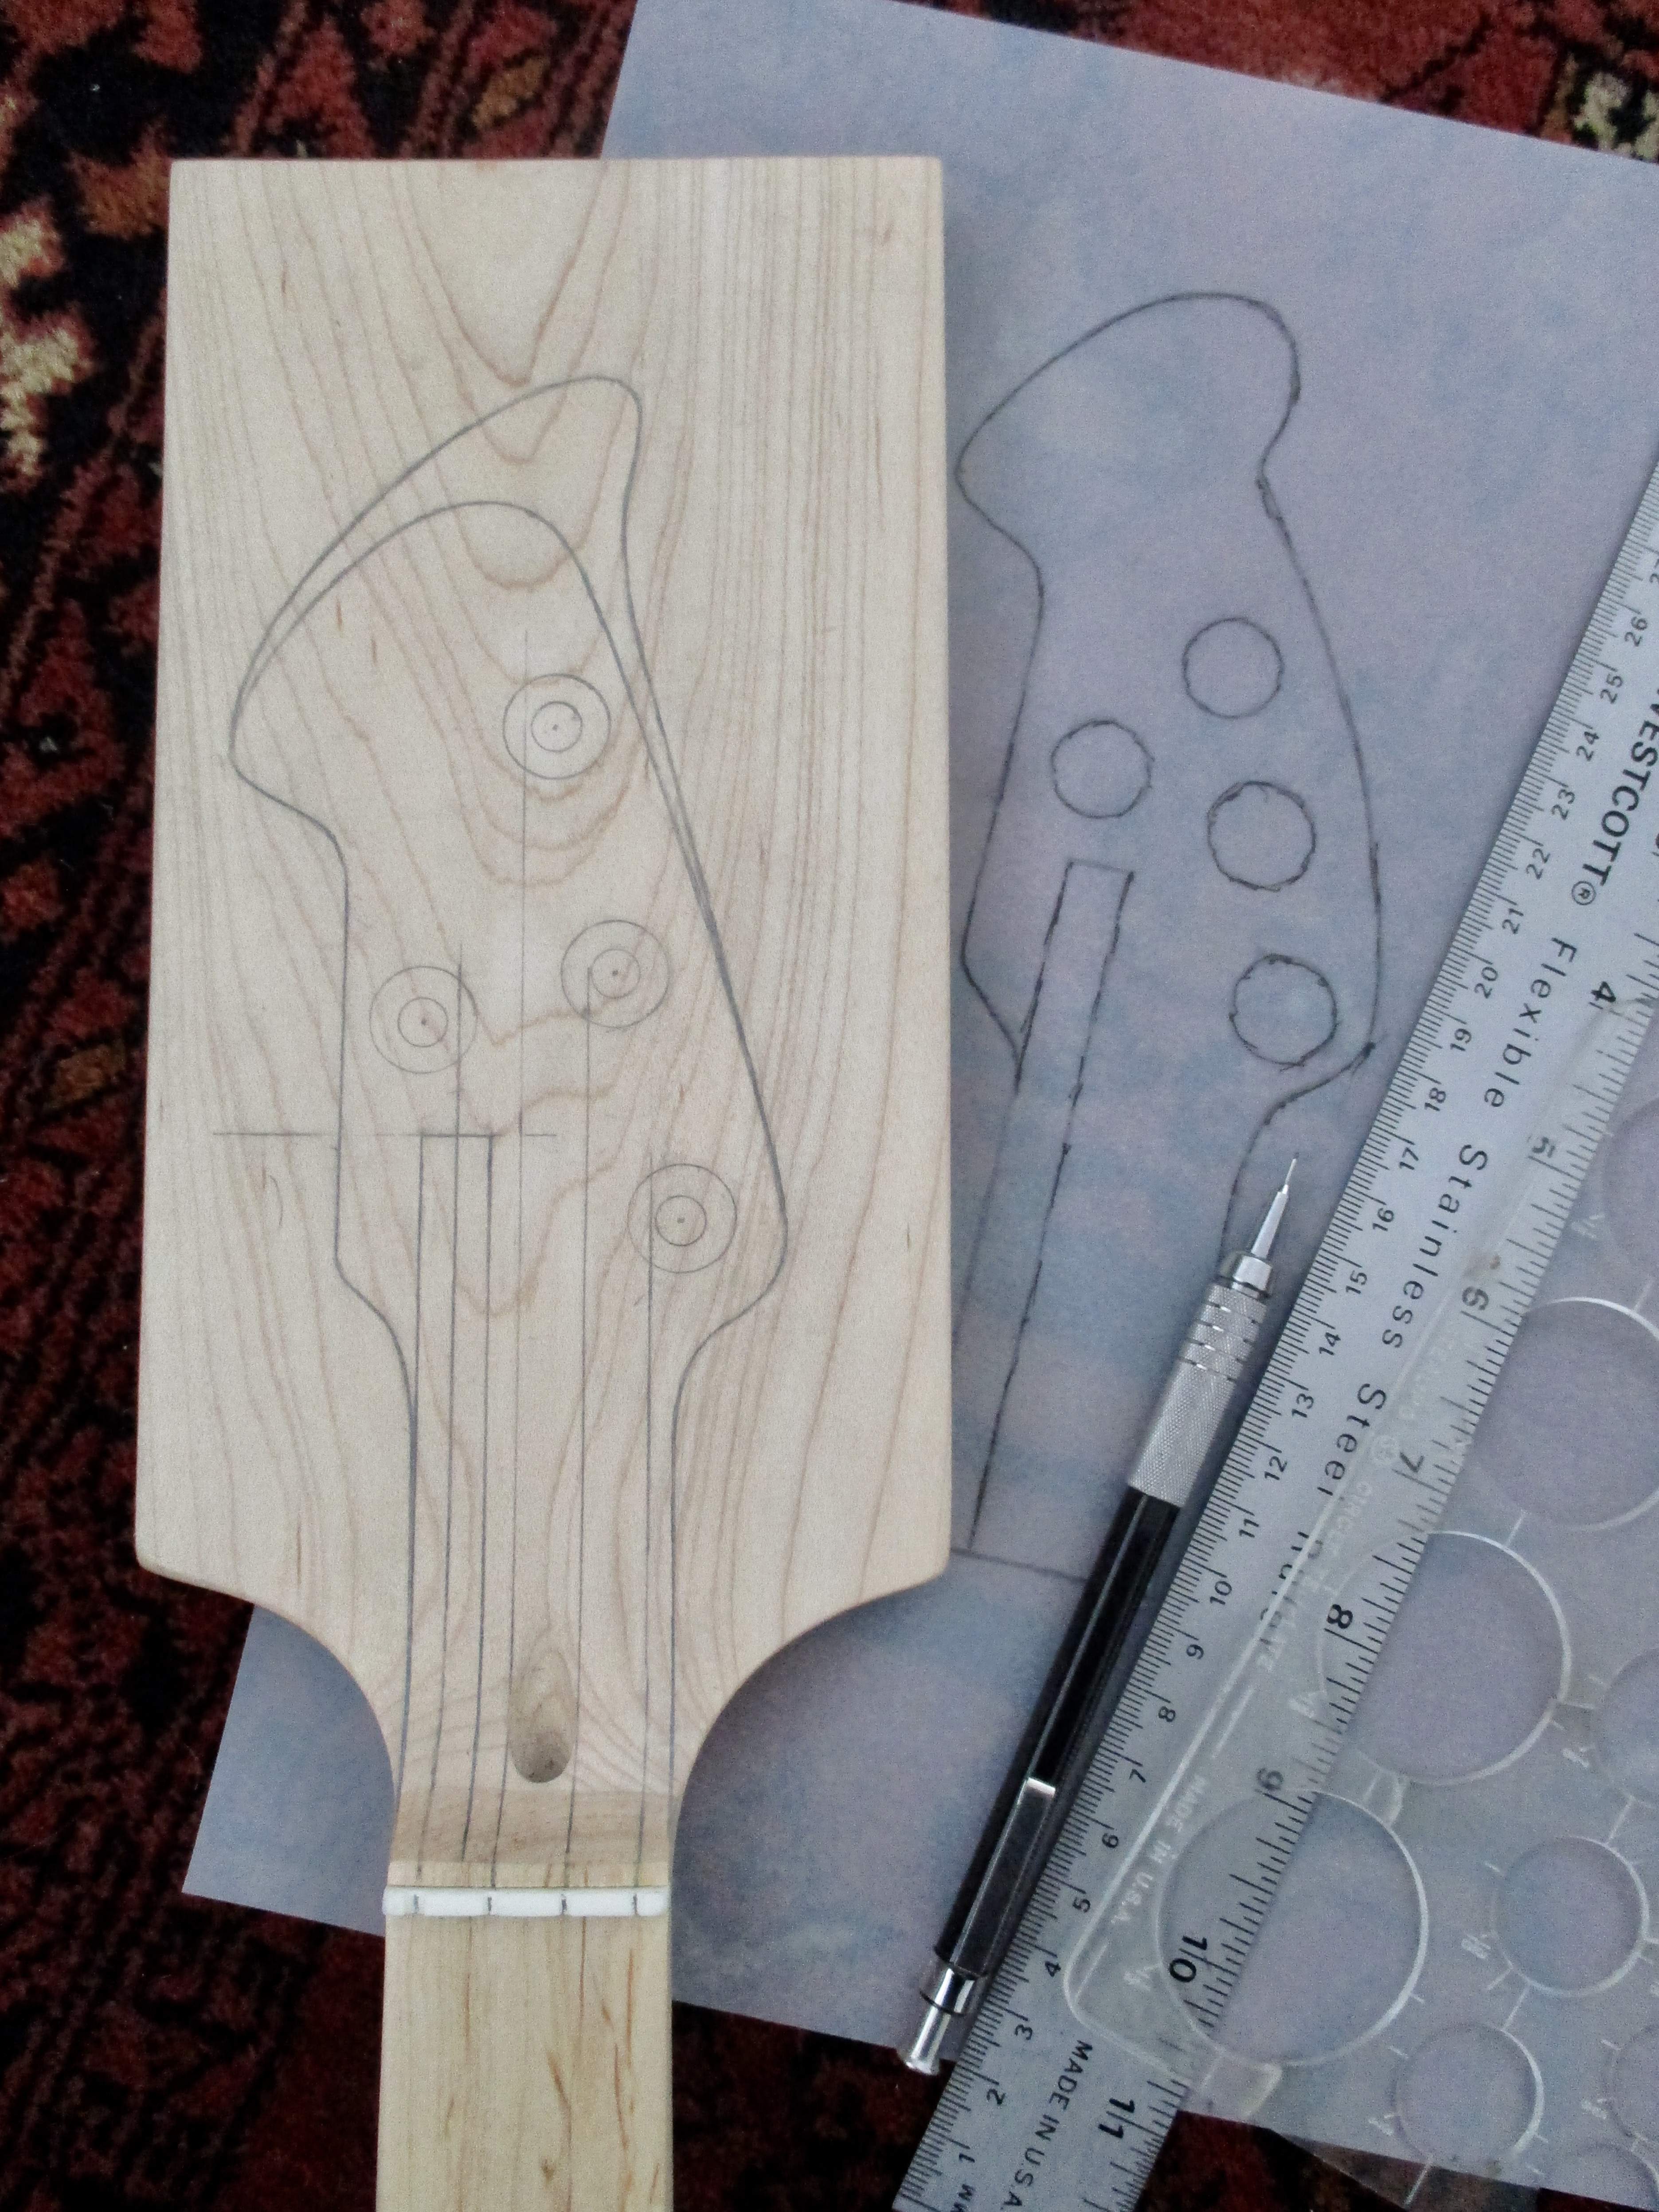
Got the Sperzel tuners and as I knew it would, it helped pin-down the hs shape based on having them physically in front of me. Still haven't found the needed strays I know are somewhere but I can get started in the meantime. If anyone has a black right-side Sperzel tuner they aren't needing, let me know. Lone tuners are available on eBay, and as expected cost as much for one as 2 would cost as part of a set ~ Next step is to cut it out, drill the holes and work on the extension ramp. I'll use material from what is cut-off for it so it will stay 'in the family'. To begin work on the zero-fret/nut, I'll remove the thin upper section above the nut slot and reposition the nut to there. Then I'll install a fret on a section of the maple scrap and cut it down so it slots into the original nut slot. This way I can control the height of that fret and position it at the (center) break point of where the nut is now.

- Jun 30, 2010
- 49,603
- 222,060
- Disclosures
- musician/artist/owner - Gildaxe

At some point Sperzel bass tuners where right side or left side, but for a while now there is only one tuner and you can configure it for left or right side. Thought I'd mention in case it helps you get one sooner.
Source: Link Removed
Reversible Tuners
You can Reverse Sperzel Tuners and Our Bass tuners. See our Youtube videos on how to reverse Sperzel tuners and as of 2014 you can also reverse our Bass tuners
Source: Link Removed
Reversible Tuners
You can Reverse Sperzel Tuners and Our Bass tuners. See our Youtube videos on how to reverse Sperzel tuners and as of 2014 you can also reverse our Bass tuners
- Jun 30, 2010
- 49,603
- 222,060
- Disclosures
- musician/artist/owner - Gildaxe
At some point Sperzel bass tuners where right side or left side, but for a while now there is only one tuner and you can configure it for left or right side. Thought I'd mention in case it helps you get one sooner.
Source: Link Removed
Reversible Tuners
You can Reverse Sperzel Tuners and Our Bass tuners. See our Youtube videos on how to reverse Sperzel tuners and as of 2014 you can also reverse our Bass tuners
Brilliant! Thanks so much
 - that was easy!
  Sperzel tuners rule!
Last edited:
- Jun 30, 2010
- 49,603
- 222,060
- Disclosures
- musician/artist/owner - Gildaxe
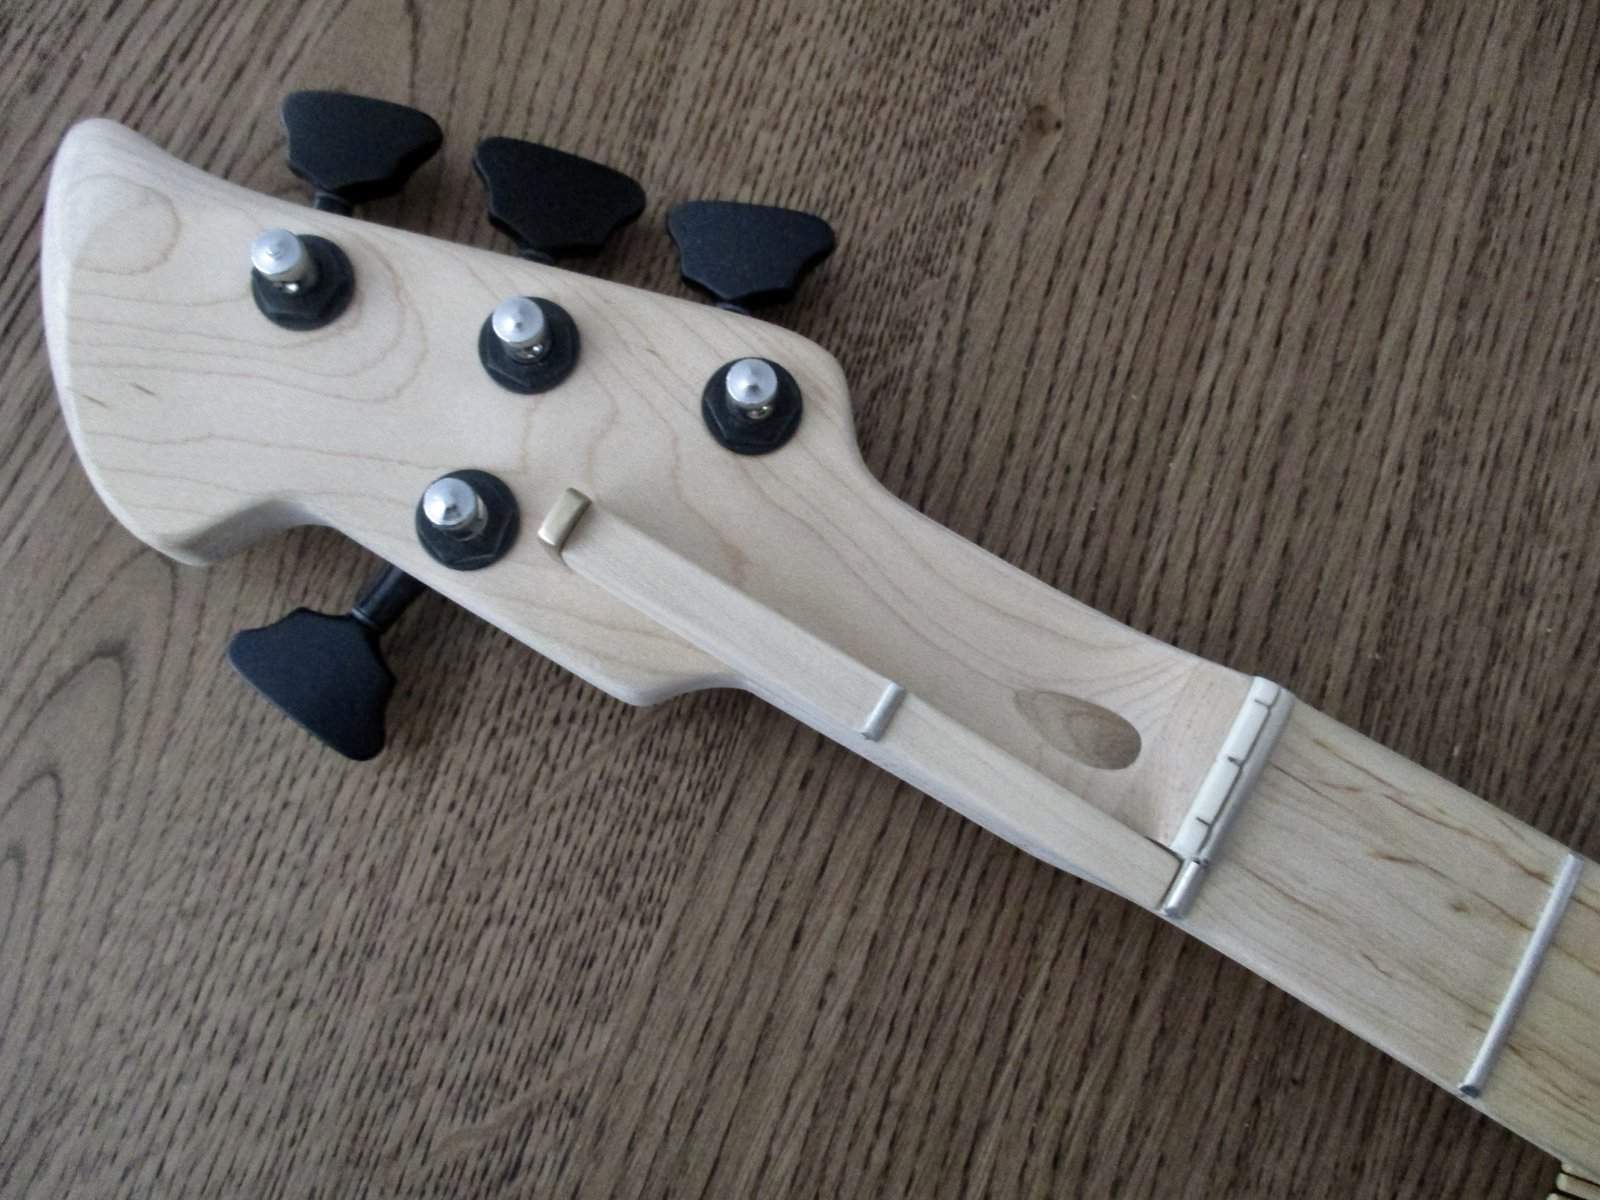
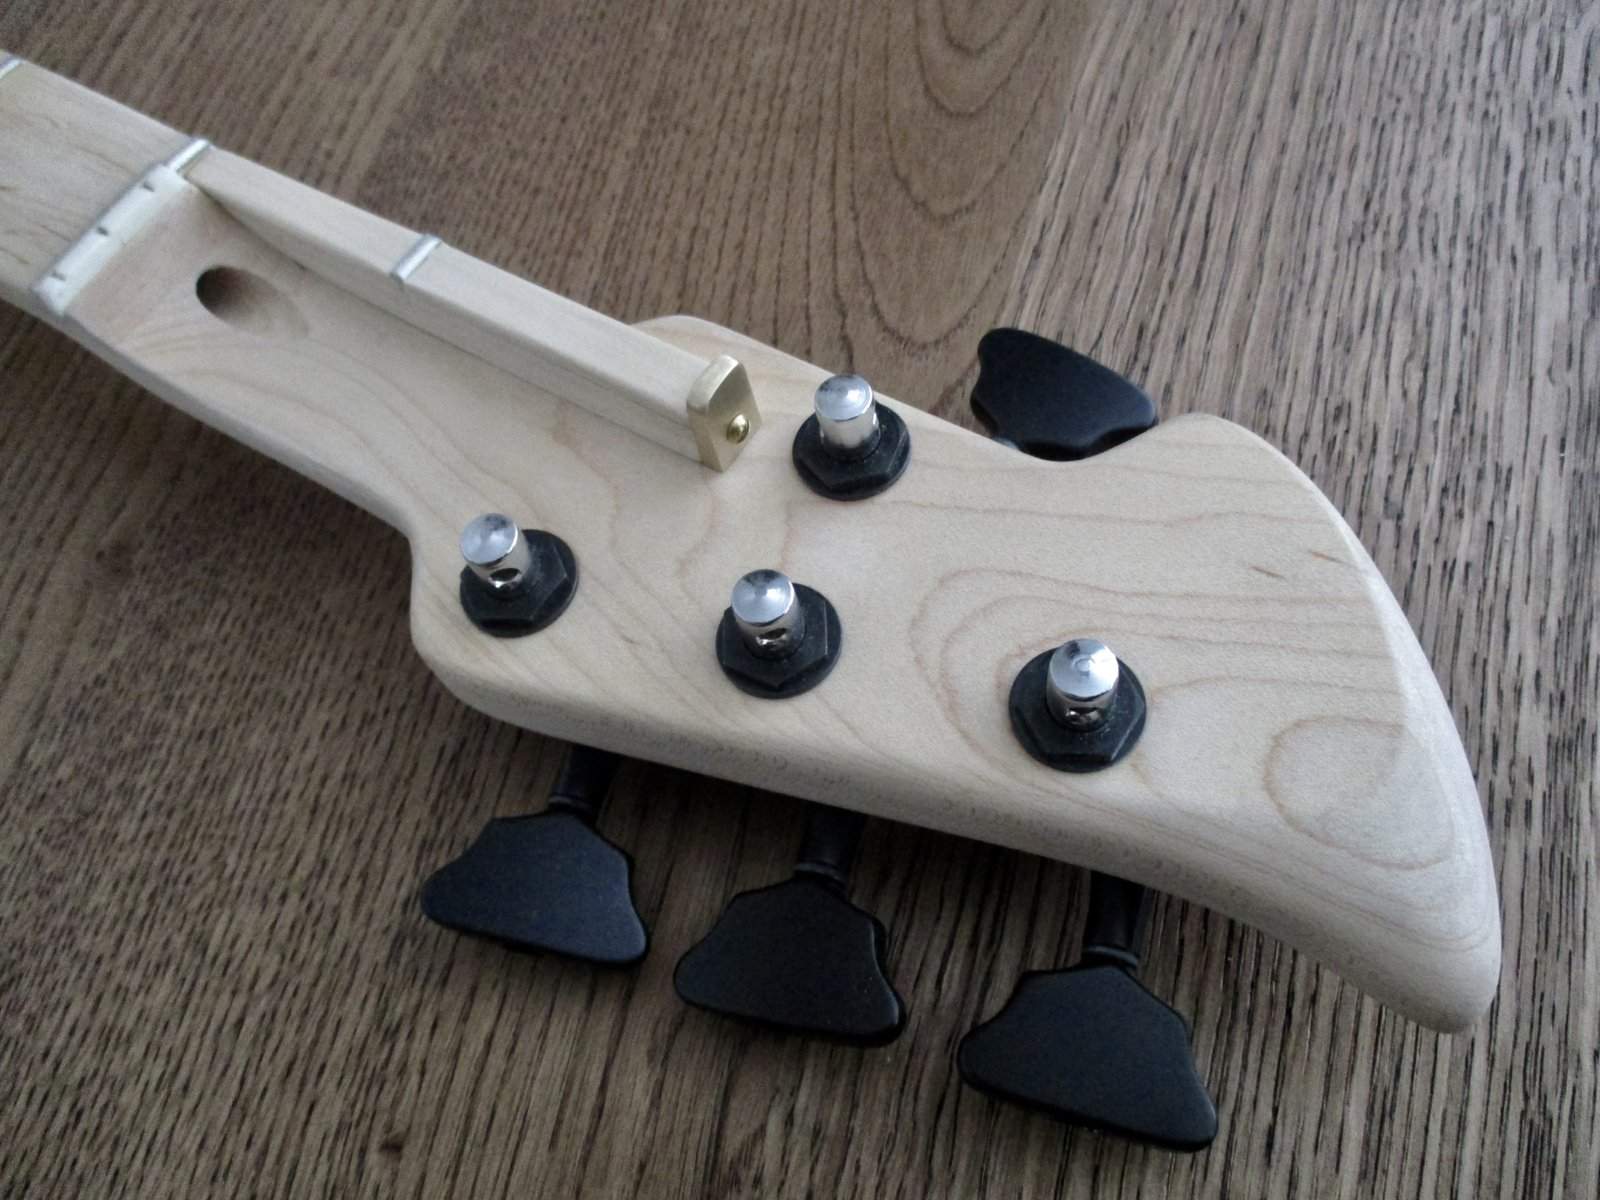
Did the preliminary drilling, cutting-out and shaping - the top of the extension will get a brass cap/nut.
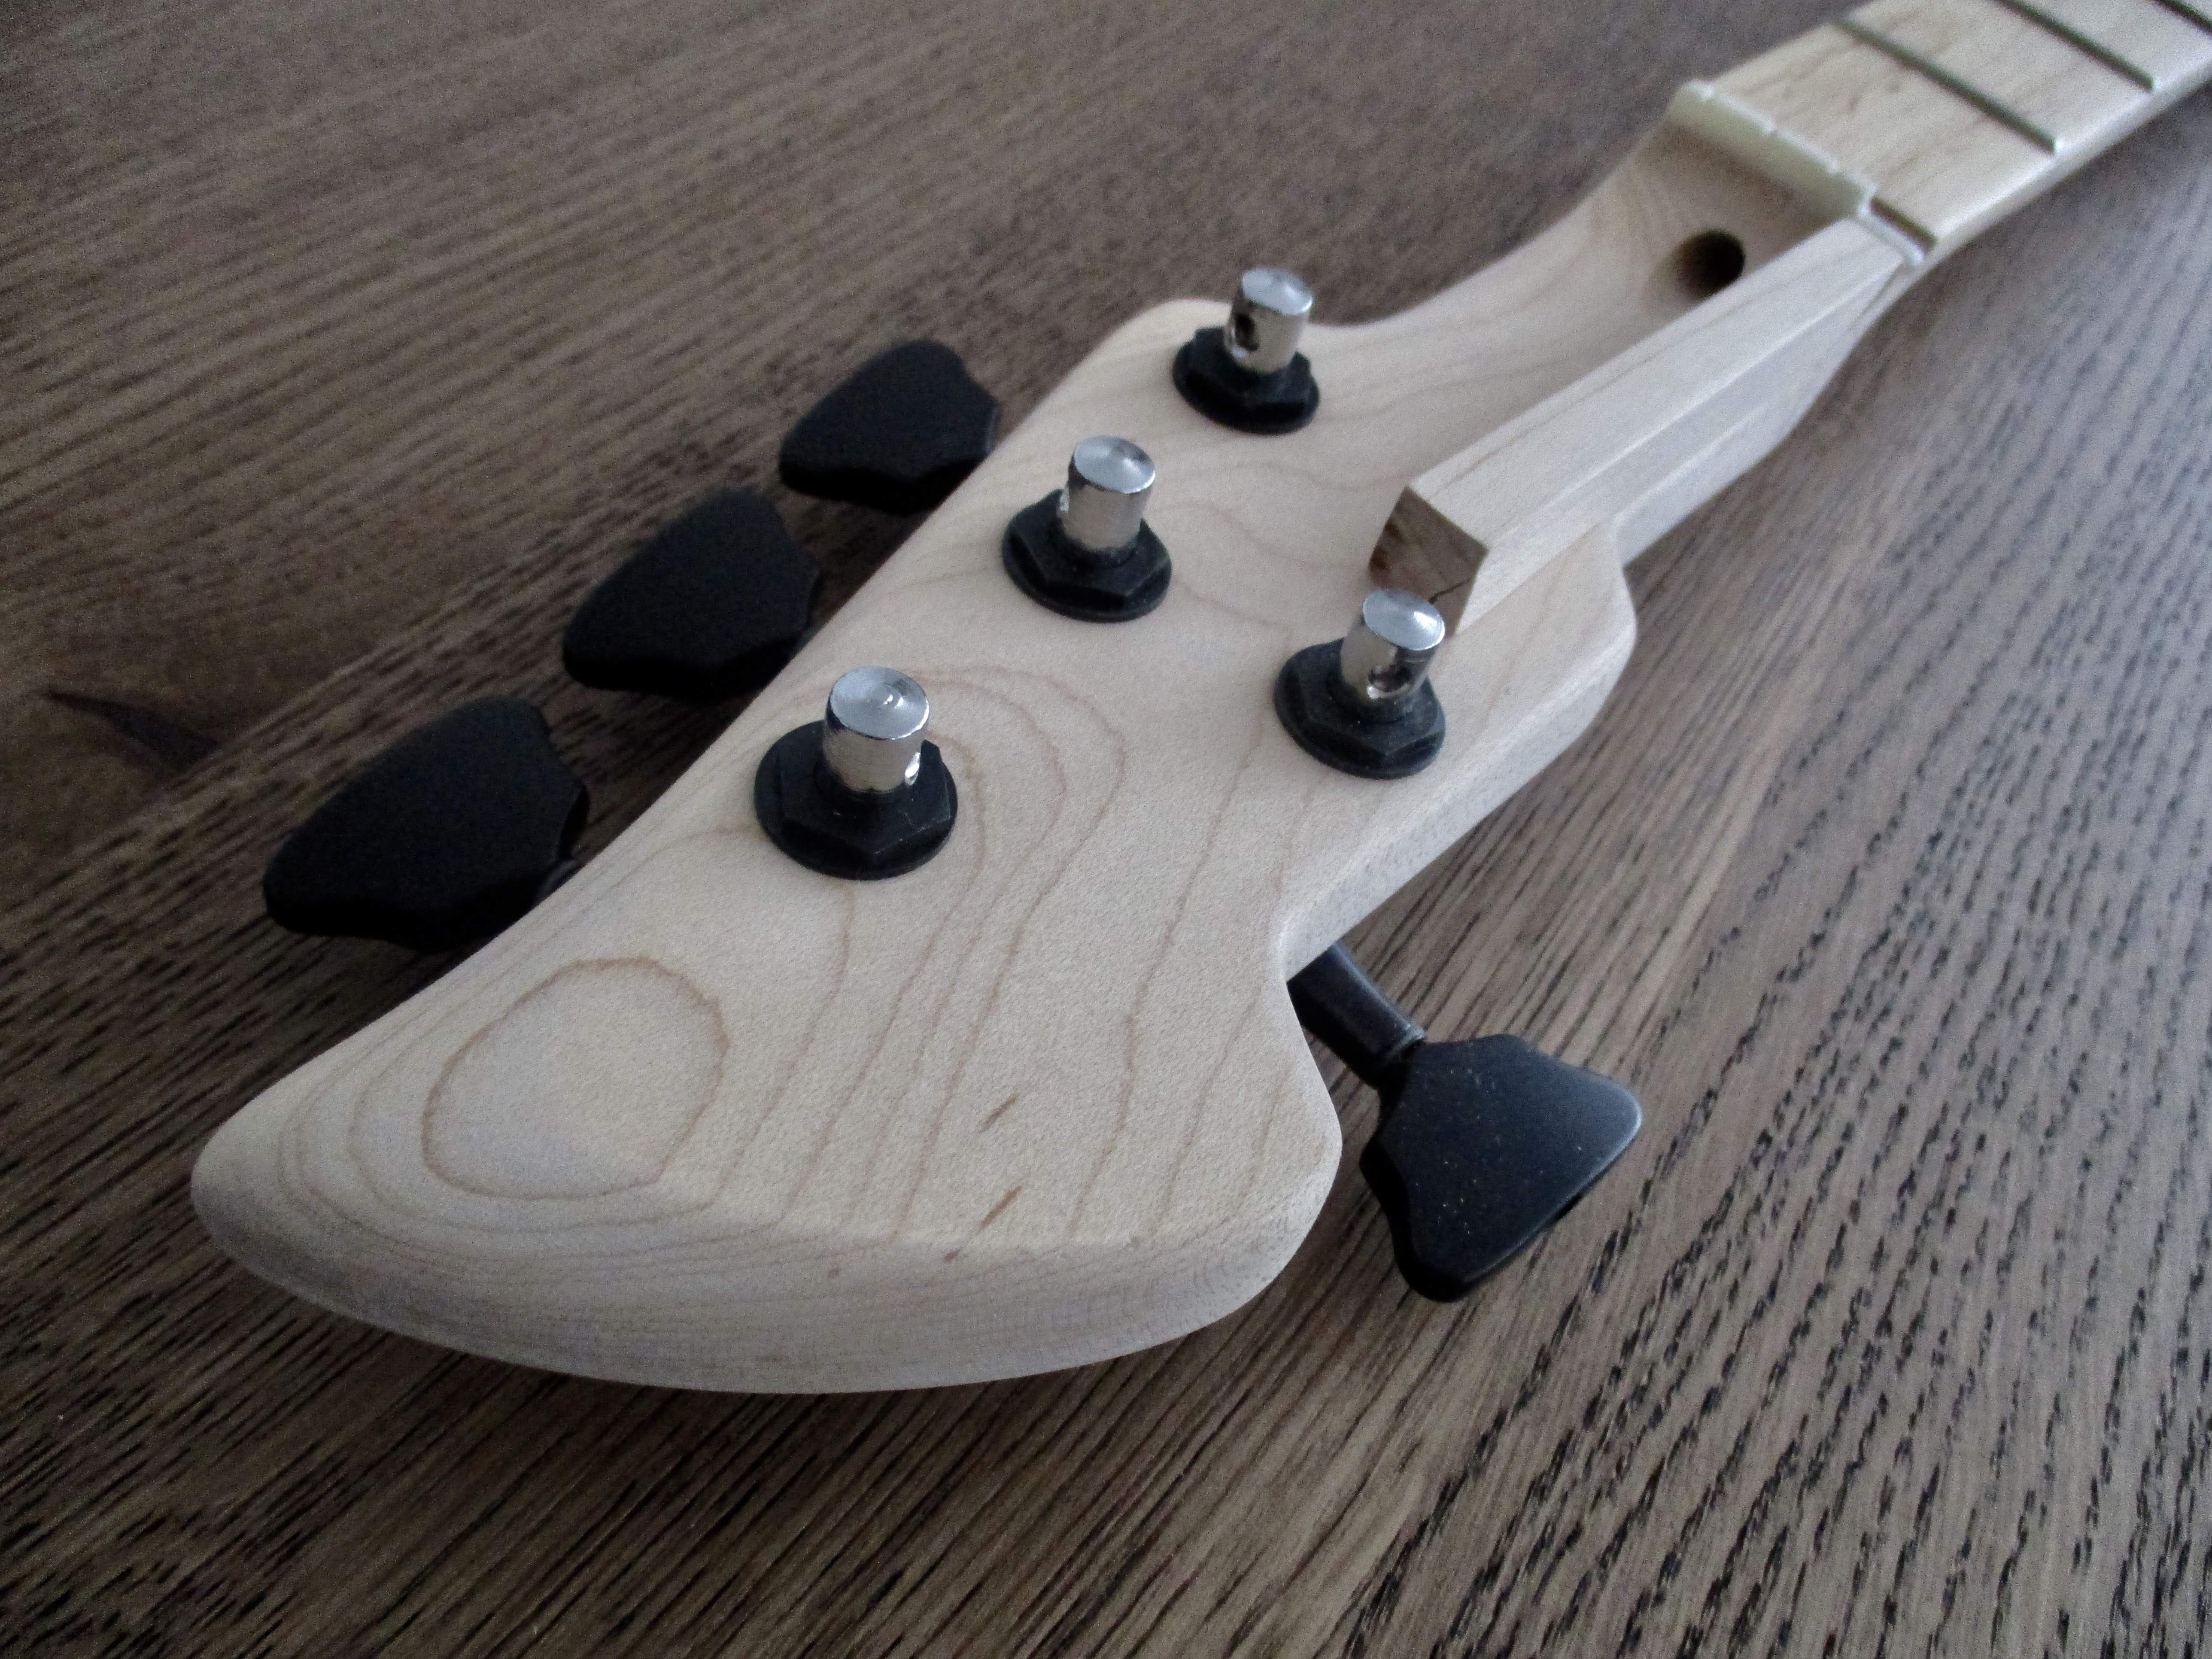
Widened the nut slot and cut back the nut to level the E section to the fb/extension. Further work on it after the zero fret is installed. I need to order a fret-saw from Stew-Mac so no further work until that arrives.
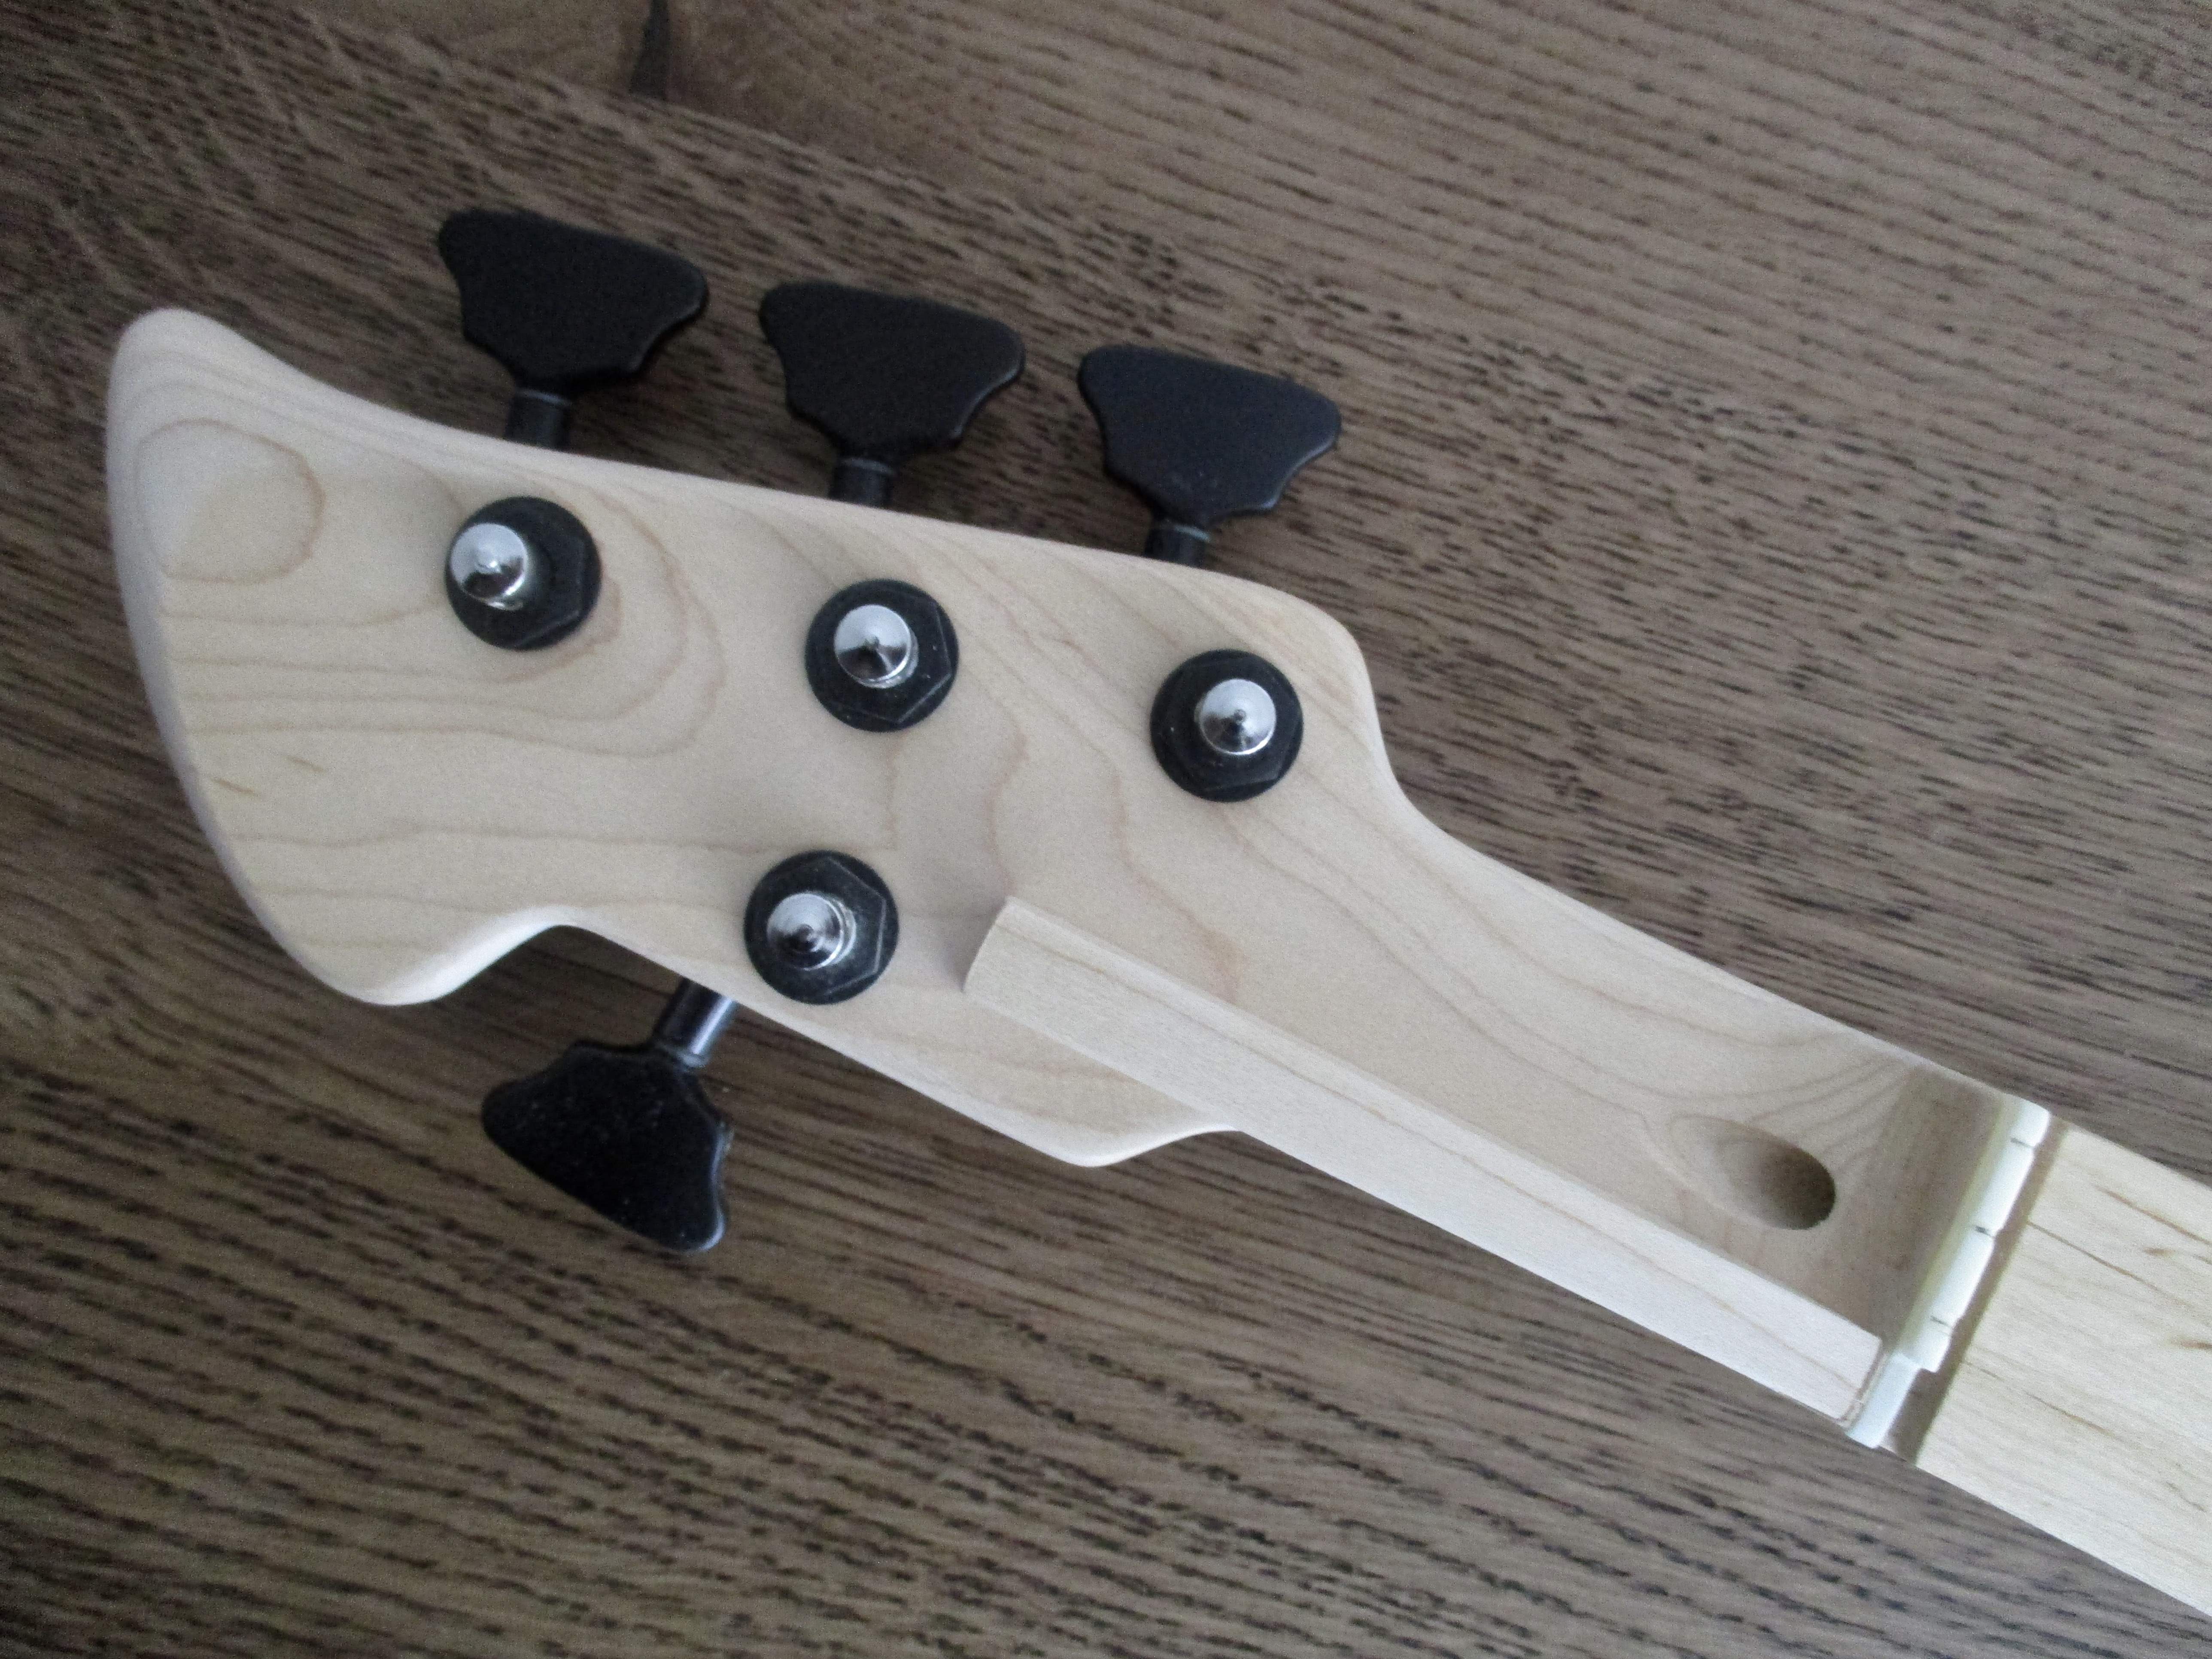
This side stays flat - it's where the capo will live. I'm going to design and fabricate my own version of the Kubicki Ex-Factor capo after some reverse-engineering. The design goal is a unit that is light, durable, minimal and easy to engage/disengage. As Phil's design met those points to a T, it will be tough to come up with something revolutionarily different - but I have some ideas related to ergonomics and aesthetics.
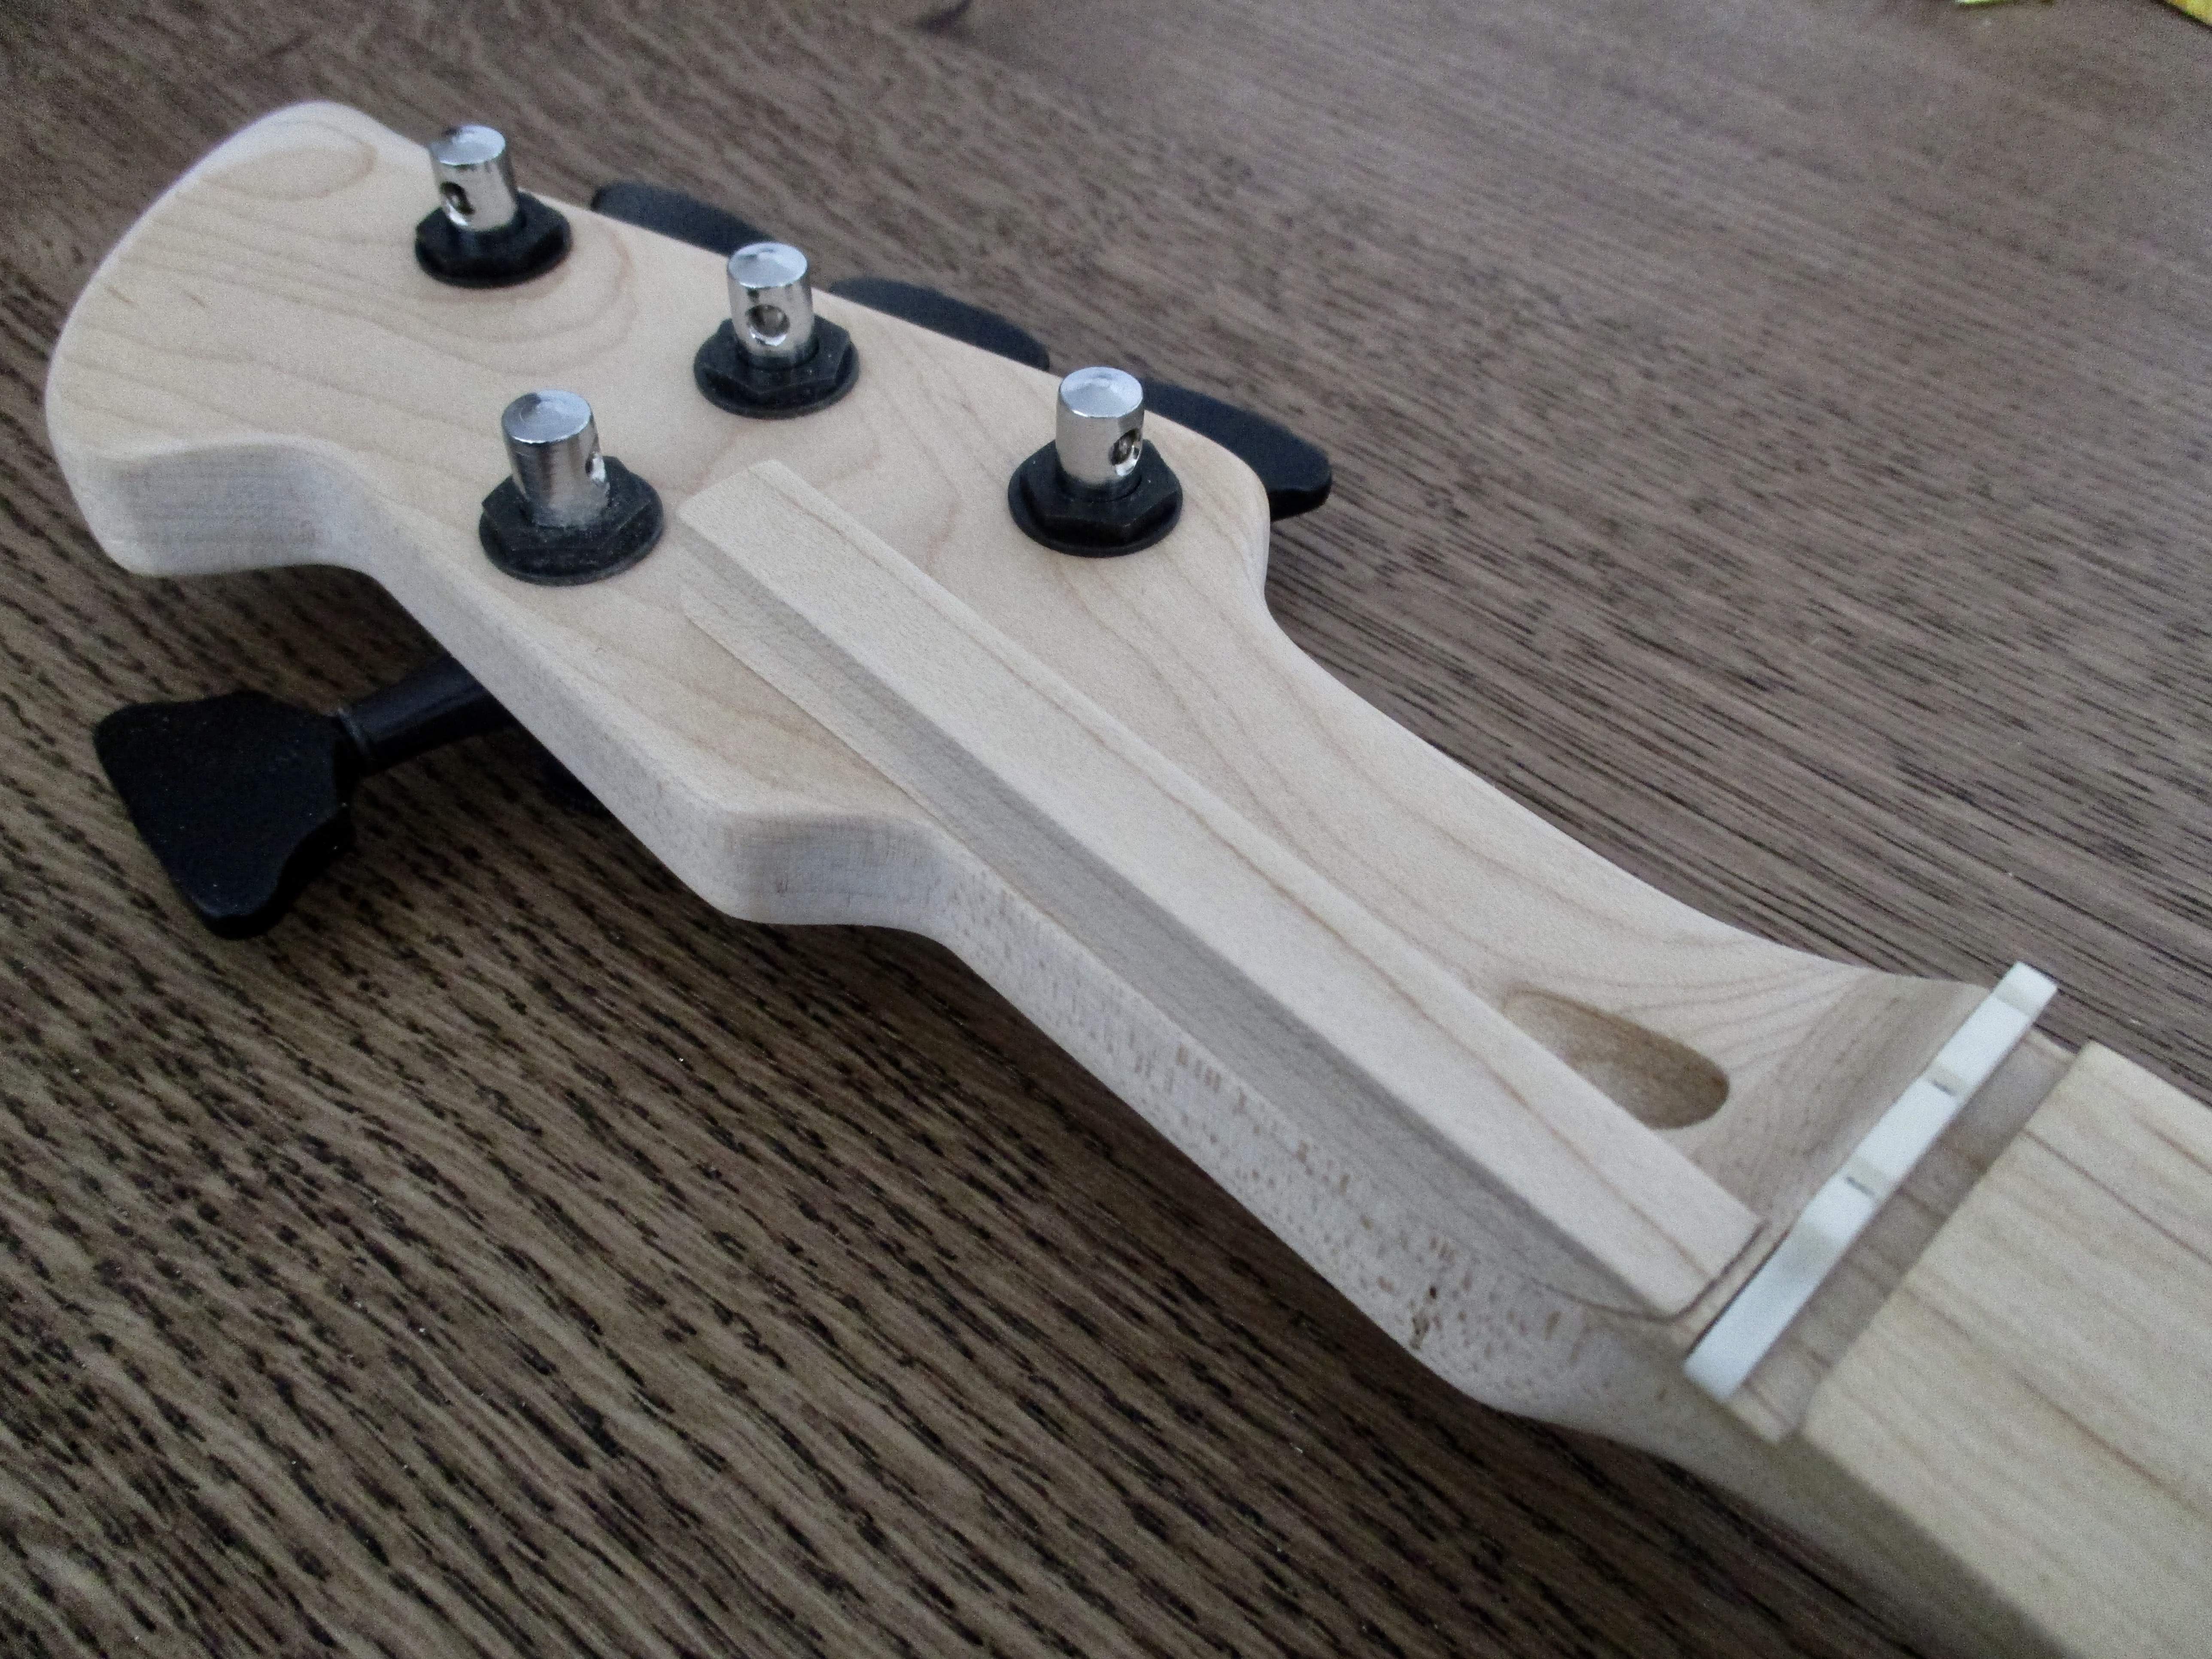
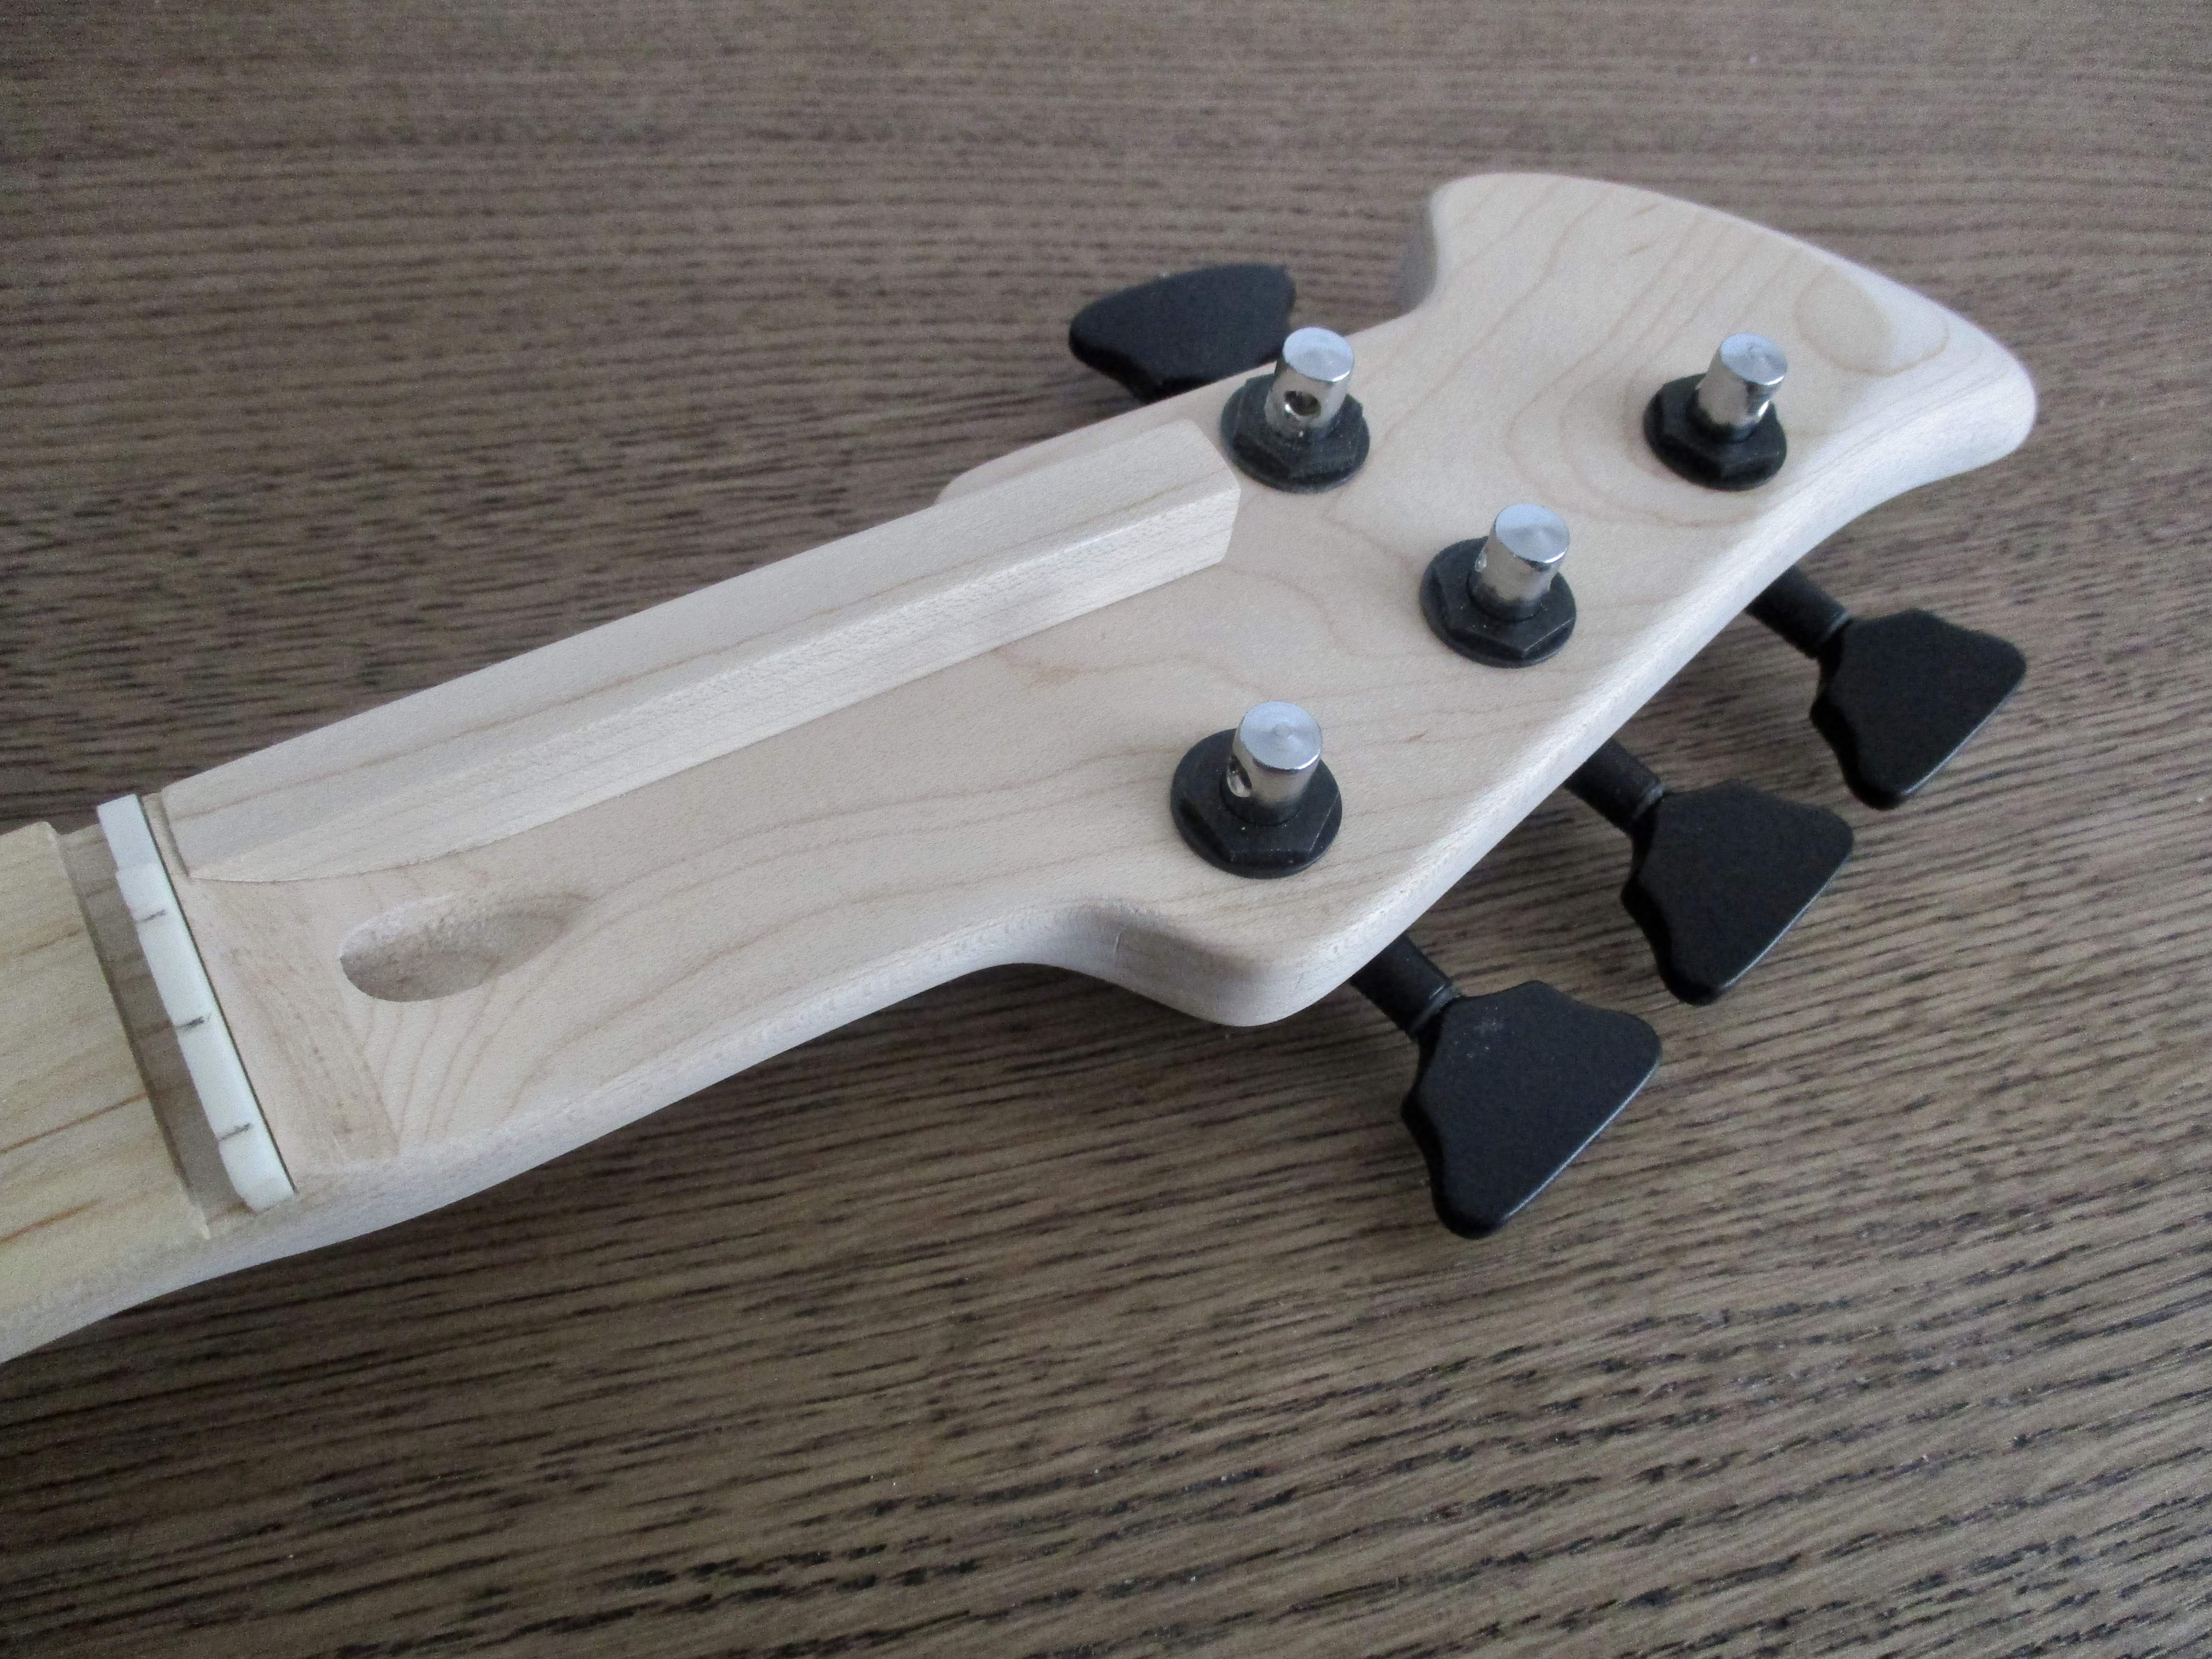
I screwed on the extension while it's in progress as it may need to change or be altered. The lower screw didn't split the wood - it just looks that way as it centered over a dark vain in thee wood. Hard to discern in this pic but I've filed/sanded (deeply rounded off) the edge below the 3 tuner side for ergo comfort if fretting the D# and E on the extension. Works well - very comfy.
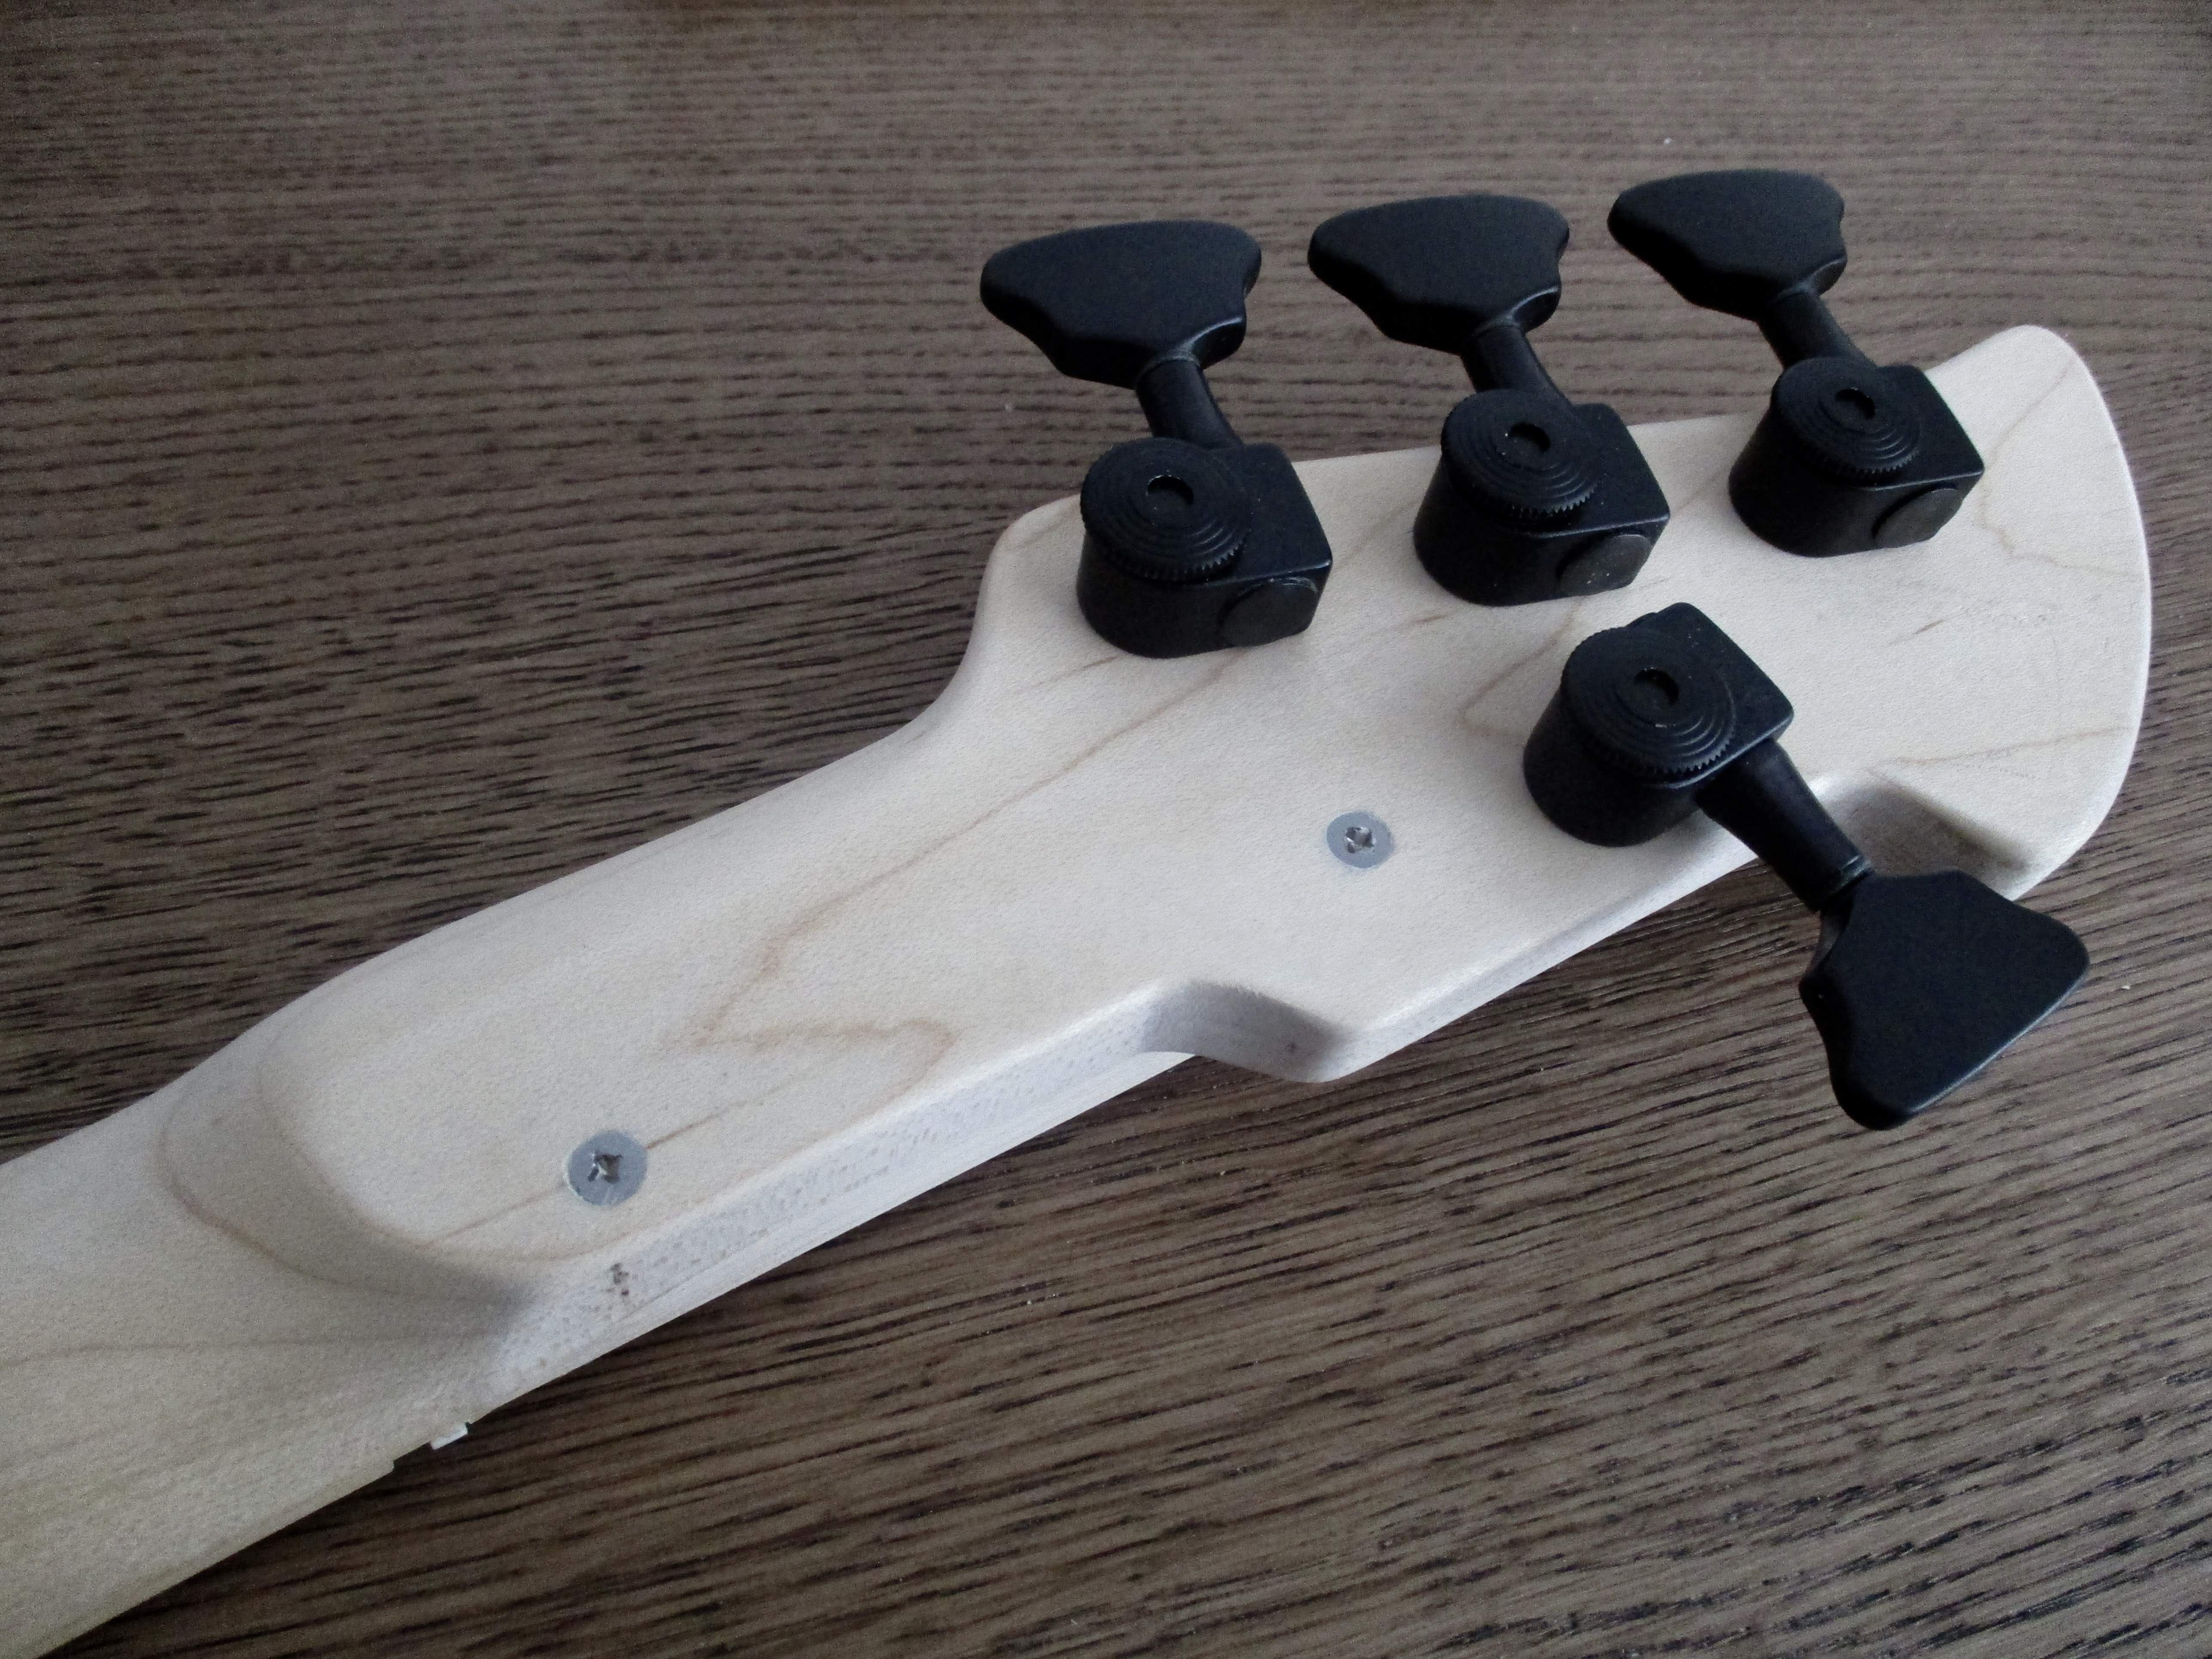
Widened the nut slot and cut back the nut to level the E section to the fb/extension. Further work on it after the zero fret is installed. I need to order a fret-saw from Stew-Mac so no further work until that arrives.
This side stays flat - it's where the capo will live. I'm going to design and fabricate my own version of the Kubicki Ex-Factor capo after some reverse-engineering. The design goal is a unit that is light, durable, minimal and easy to engage/disengage. As Phil's design met those points to a T, it will be tough to come up with something revolutionarily different - but I have some ideas related to ergonomics and aesthetics.
I screwed on the extension while it's in progress as it may need to change or be altered. The lower screw didn't split the wood - it just looks that way as it centered over a dark vain in thee wood. Hard to discern in this pic but I've filed/sanded (deeply rounded off) the edge below the 3 tuner side for ergo comfort if fretting the D# and E on the extension. Works well - very comfy.

wmhill
Inactive
- Aug 20, 2012
- 4,054
- 17,209
- Disclosures
- MTD basses endorsed artist Bartolini pickups emerging artist TECAMP bass players gear endorsed
- Jun 30, 2010
- 49,603
- 222,060
- Disclosures
- musician/artist/owner - Gildaxe
With the nut slid forward in the slot, won't you have intonations issues?
With the zero fret installed below the nut (centered where the nut was centered), the nut will just hold the strings in place side to side. The zero fret, which is a bit higher than the other frets, will take the function/place of the nut with the strings resting on that fret. Another way to think of it is that the top of the zero-fret will be right at the lowest point on each string slot of the nut. The E part of that zero fret will be the same height as the fingerboard frets (filed lower) so once the capo is lifted/disengaged it becomes an extended fb to open D. (with a mini-fret diving the extension)
Last edited:
wmhill
Inactive
- Aug 20, 2012
- 4,054
- 17,209
- Disclosures
- MTD basses endorsed artist Bartolini pickups emerging artist TECAMP bass players gear endorsed
gotcha!With the zero fret installed below the nut (centered where the nut was centered), the nut will just hold the strings in place side to side. The zero fret, which is a bit higher than the other frets, will take the function/place of the nut with the strings resting on that fret. Another way to think of it is that the top of the zero-fret will be right at the lowest point on each string slot of the nut. The E part of that zero fret will be the same height as the fingerboard frets (filed lower) so once the capo is lifted/disengaged it becomes an extended fb to open D. (with a mini-fret diving the extension)

That's a cool design! Though, I have a question: what's the advantage of a drop D extension over using a 36" scale bass and tuning it to D standard? Then you'd have extra notes for all the strings, not just the lowest, and a partial capo could give you the Drop D tuning...

- Jun 30, 2010
- 49,603
- 222,060
- Disclosures
- musician/artist/owner - Gildaxe
That's a cool design! Though, I have a question: what's the advantage of a drop D extension over using a 36" scale bass and tuning it to D standard? Then you'd have extra notes for all the strings, not just the lowest, and a partial capo could give you the Drop D tuning...
Thanks! That would be another way of going about it. My thought was to have a neck design that would bolt on to a standard body without having to reposition the bridge. I chose 32" scale to keep the reach from getting too far. And although more notes on a 4 string could be useful - having the non-disruptive drop-D was my only aim. I got the Stew-Mac fret saw yesterday so later today I'll continue work on the neck. A couple hrs of work overlap from last week is first priority...
Even easier than that is just downtuning the E string to D (drop D) and playing that way. After a few weeks, it becomes quite natural. I did this for a long time before finally moving to five strings. I think the point here though is the design and construction exercise to build something unique that accomplishes the goals within the confines of the design/build parameters.That's a cool design! Though, I have a question: what's the advantage of a drop D extension over using a 36" scale bass and tuning it to D standard? Then you'd have extra notes for all the strings, not just the lowest, and a partial capo could give you the Drop D tuning...
Plus with JIO's art/design/visual communication skills, I bet tosses his laundry in a pile on the bed and it lands in a perfect self-portrait...

- Jun 30, 2010
- 49,603
- 222,060
- Disclosures
- musician/artist/owner - Gildaxe
Even easier than that is just downtuning the E string to D (drop D) and playing that way. After a few weeks, it becomes quite natural. I did this for a long time before finally moving to five strings. I think the point here though is the design and construction exercise to build something unique that accomplishes the goals within the confines of the design/build parameters.
Plus with JIO's art/design/visual communication skills, I bet tosses his laundry in a pile on the bed and it lands in a perfect self-portrait...
hah! I like how you summarized my point Beej, but it really started with owning/playing Ex-Factors - I just liked having the low D available w/o needing to transcribe on the fly. In some ways what you said made me wonder about what it would be like to just leave the E string tuned to D all the time and just get comfortable playing it like that for everything. But then, when would you get a chance to scratch your nose or adjust your glasses as I do playing the occasional open E string?
 Anyway.., it went from there to wanting that on a non-headless neck and here we are today! I understand how a 5 string made such less appealing but (still) being a 4 string player who occasionally plays a 5 string, it just offers something to make playing more efficient as I'm not one to think much while I play and use habit & muscle memory to my advantage.
- Jun 30, 2010
- 49,603
- 222,060
- Disclosures
- musician/artist/owner - Gildaxe
Did a little work on the neck - filled the widened nut slot with maple and used my new fret saw to cut the slot. Realized I needed another Stew Mac order, and their fret cutter was on sale so ordered one and a length of their highest/widest fret-wire. Don't have much free time right now anyway so will get back into it on the other side...

Hey, in my idle browsing today, I came across this invention called a "String Drop". I know you've started creating your own, but it's another interesting one. [Invalid or Expired Link Removed]
Hola, JIO...not sure if you've seen this: Paul Jackson - The Headhunter
look under "galleries", "new bass". Mr Jackson had ESP build him a custom bass w/custom extender system, a lot like the Kubicki design.
As you're poking around for designs, thought u might want to see this if you haven't already, good luck!
MJ
look under "galleries", "new bass". Mr Jackson had ESP build him a custom bass w/custom extender system, a lot like the Kubicki design.
As you're poking around for designs, thought u might want to see this if you haven't already, good luck!
MJ
- Jun 30, 2010
- 49,603
- 222,060
- Disclosures
- musician/artist/owner - Gildaxe
Finally had a bit of time to work on this - the zero-fret and 'ramp/extension' is in place so now I need to make the body for it to make sure it works! Still sketching capo concepts - something basic and simple, automatic and effective.