
Enjoy the benefits of a premium membership!
Upgrade Account
-
TalkBass has been independent since 1998. Add your voice.
Create a free account to reply to discussions, view embedded media, and browse with fewer display ads.
Join free Log in
Want zero display ads or expanded classifieds tools? Compare plans.
You are using an out of date browser. It may not display this or other websites correctly.
You should upgrade or use an alternative browser.
You should upgrade or use an alternative browser.
First Build, Performer Copy
- Thread starter mapleglo
- Start date
More options
Who Replied?

I'm going to stop by Lowes (or Home Depot) on the way home tonight and see the options for a small screw extractor. The head sheared off leaving a slightly concave and centered depression in the remaining screw shaft. It's pretty optimal for extraction so long as the extractor itself doesn't fail - and I learned many new curses from my Dad when I was a child as I watched him attempt sheared off screw and bolt extractions while the extractor broke. So I know what I'm up against.
Thanks for the link to that article, xaxxat, that will be my backup plan.
I'm just happy I have that drill press. It's come in pretty handy for this project.
Thanks for the link to that article, xaxxat, that will be my backup plan.
I'm just happy I have that drill press. It's come in pretty handy for this project.

And make sure you pilot hole is the full size of the screw body. Only the thread should be deforming the wood.
And make sure you pilot hole is the full size of the screw body. Only the thread should be defining the wood.
I must have either used too small a drill bit for the pilot hole, or didn't drill deep enough.
That, combined with the defective screw was my undoing. ;P

And make sure you pilot hole is the full size of the screw body. Only the thread should be defining the wood.
This is very important advice...
Similar thing happened to me lastime mapleglo.
The only difference is it happened on the neck joint, which is quite a PITA...

Well, the extraction failed. The shear was not so concave or centered as I thought. I did manage to drill about half the screw out, but at this point, my only options are to drill a plug, or just leave it in there and use the 2 outside screws to hold the bridge. I don't think that's too much of a problem as the strings are going through the body, so the bridge just needs to be held in place. There will be minimal string tension on it.
After a good night's sleep, I decided to take one last stab at the broken stud. I decided to try a different approach, by using a bit from my dremel, with the idea that I'd just grind out the remaining metal left from the screw stud. At first, like the drill bit, the dremel bit was sliding off the face of the broken screw top. So I pushed the bit almost all the way into the chuck of the drill press, to help prevent the bit from being pushed off the surface of the screw. As I approached the point where the chuck was almost hitting the face of the bass, I'd pull the bit slightly more out of the chuck.
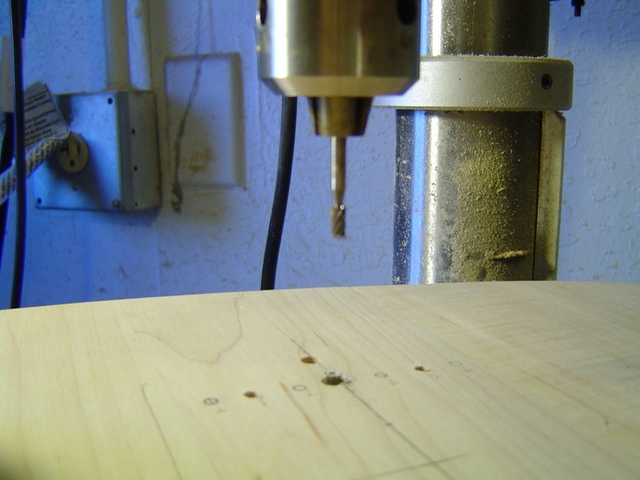
It seems I got most of it, certainly enough where another screw would not only go into the hole, but actually still bit into the wood.
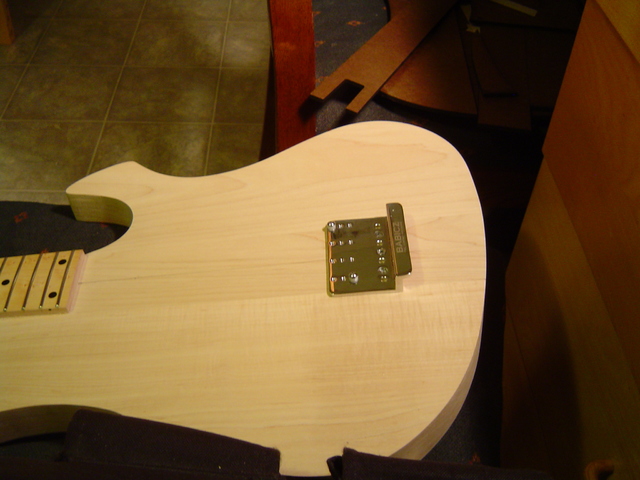
The bridge is mounted. Now on to the holes for the string ferrules.
It seems I got most of it, certainly enough where another screw would not only go into the hole, but actually still bit into the wood.
The bridge is mounted. Now on to the holes for the string ferrules.
After drilling the holes for the string throughs, I made a template for the ferrules.
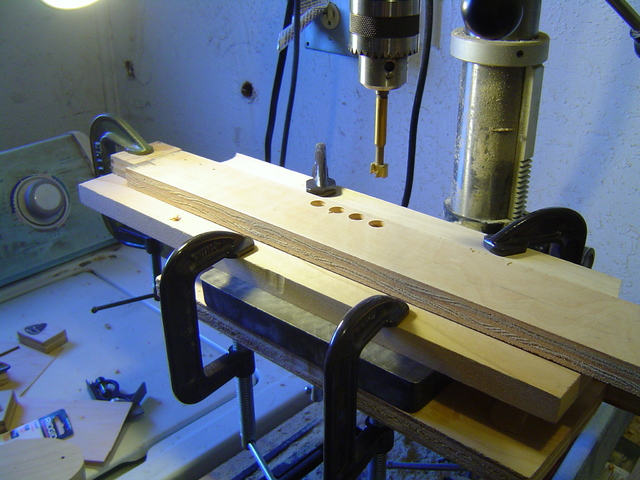
I clamped that to the body and drilled the ferrule holes. I made them just deep enough for the ferrules to fit, adding slightly more depth in case I wanted to flush mount them.
Learning from my previous error with the pilot hole size for the bridge, I slightly enlarged the ferrule holes to allow the ferrules to be hand pressed in, allowing subsequent removal for finishing.
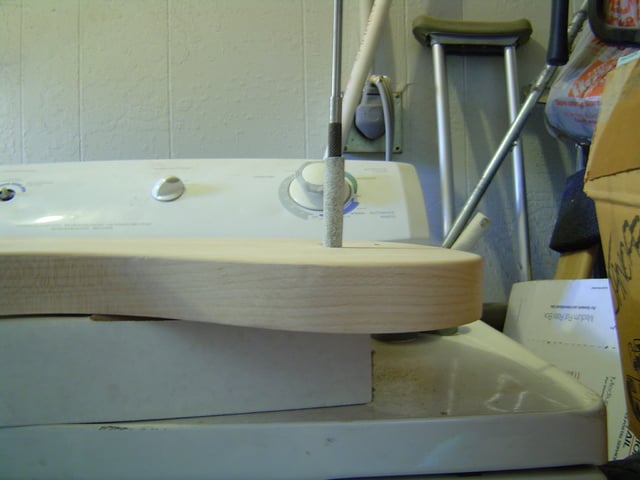
Ferrules installed.
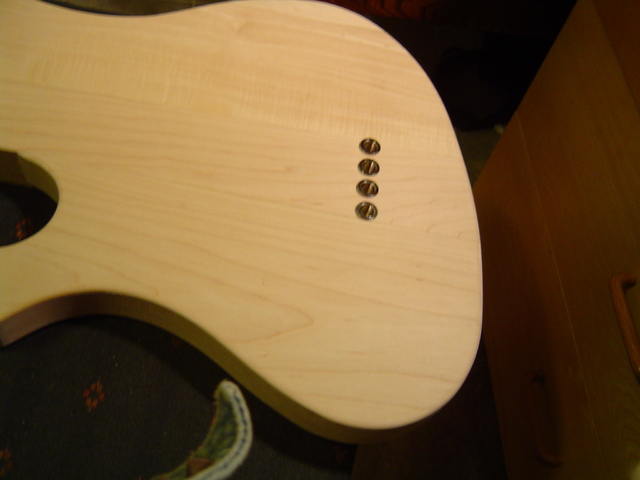
After that, I reinstalled the bridge, and strung it up. It's Alive!
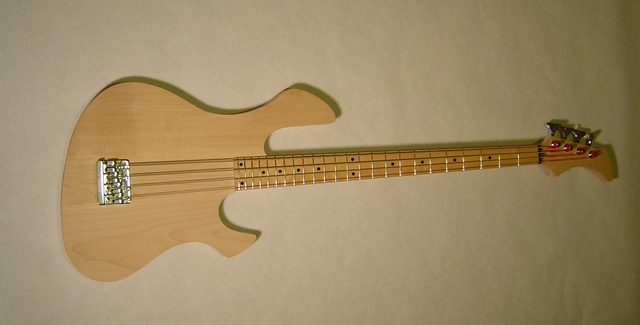
Sounds nice and bright with the Rotosounds. I don't want to play it too much as the neck is bare wood, but so far, it's got a nice, almost jazz bass feel to it. Now I can order pickups and pots. I'm pretty much decided on the HB-1 Rickenbacker pickups. They're less expensive on the Sam Ash website than the Ric site.
I also wanted to relay the wonderful customer service experience I had this morning with Jeff Babicz. I sent an email asking about a replacement screw for the one I sheared off, expecting to hear a reply sometime next week. Literally, within minutes of sending the email, he responded, and mind you, this is on a Saturday morning. He provided instructions in getting a replacement screw, and it's on the way. That's the way to run a company.
I clamped that to the body and drilled the ferrule holes. I made them just deep enough for the ferrules to fit, adding slightly more depth in case I wanted to flush mount them.
Learning from my previous error with the pilot hole size for the bridge, I slightly enlarged the ferrule holes to allow the ferrules to be hand pressed in, allowing subsequent removal for finishing.
Ferrules installed.
After that, I reinstalled the bridge, and strung it up. It's Alive!
Sounds nice and bright with the Rotosounds. I don't want to play it too much as the neck is bare wood, but so far, it's got a nice, almost jazz bass feel to it. Now I can order pickups and pots. I'm pretty much decided on the HB-1 Rickenbacker pickups. They're less expensive on the Sam Ash website than the Ric site.
I also wanted to relay the wonderful customer service experience I had this morning with Jeff Babicz. I sent an email asking about a replacement screw for the one I sheared off, expecting to hear a reply sometime next week. Literally, within minutes of sending the email, he responded, and mind you, this is on a Saturday morning. He provided instructions in getting a replacement screw, and it's on the way. That's the way to run a company.

- Jun 30, 2010
- 49,592
- 221,985
- Disclosures
- musician/artist/owner - Gildaxe
Ferrules installed.
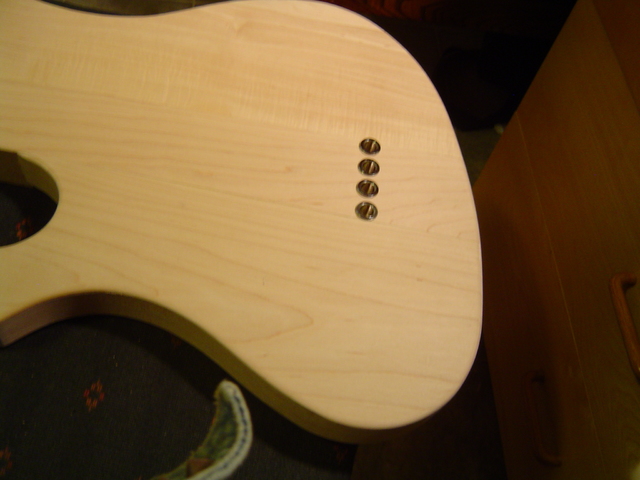
After that, I reinstalled the bridge, and strung it up. It's Alive!
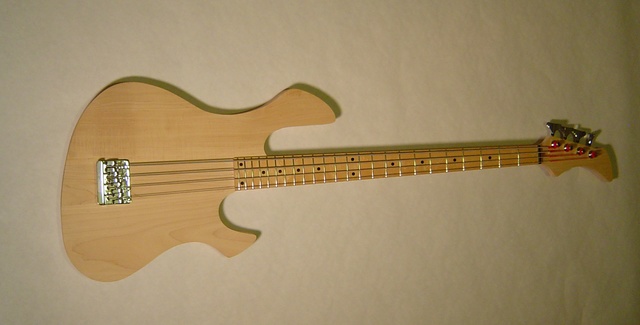
Super! - good call installing the larger barreled string ferrules
Thanks!
So I go to order the Rickenbacker HB1 Humbucker Pickups and Sam Ash is out of stock. Google informs me that Haight Ashbury Music Center has them, and they're in stock, and at the same price. Unfortunately, they only have 1. I suppose I could order them direct from Rickenbacker, but they want $95.00 each, compared to the $79.99 from either Sam Ash or Haight Ashbury.
I'll wait a few days and try again, perhaps look through eBay as well.
So I go to order the Rickenbacker HB1 Humbucker Pickups and Sam Ash is out of stock. Google informs me that Haight Ashbury Music Center has them, and they're in stock, and at the same price. Unfortunately, they only have 1. I suppose I could order them direct from Rickenbacker, but they want $95.00 each, compared to the $79.99 from either Sam Ash or Haight Ashbury.
I'll wait a few days and try again, perhaps look through eBay as well.
So I started adjusting some settings, including intonation and neck relief, and the action still seems a bit high. The neck is dead straight now, and the string height adjustment on the bridge is at the lowest setting. Im thinking I may have to sink the bridge into the body a bit. The bridge is made as a Fender replacement, where the fretboard on the bolt-on neck would be somewhat higher than with a neck through. Comments and concerns are welcome.
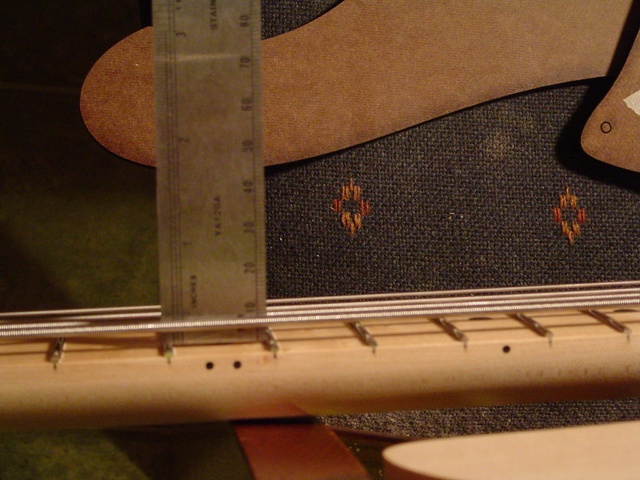

Since you cannot tilt the neck like on bolt-ons you can't do anything else to lower the action. Or you can try to find lower profile bridge. I'd sink the bridge.So I started adjusting some settings, including intonation and neck relief, and the action still seems a bit high. The neck is dead straight now, and the string height adjustment on the bridge is at the lowest setting. Im thinking I may have to sink the bridge into the body a bit. The bridge is made as a Fender replacement, where the fretboard on the bolt-on neck would be somewhat higher than with a neck through. Comments and concerns.
Marko

Re-rout the neck pocket so it's at a slight angle, maybe 1.5 - 2.5 degrees.
EDIT:
OK, that won't work...
I was considering using Carvin necks for a bit, and they're really nice for what they offer.
Would you consider surface routing the entire face of the body?
Obviously it's MUCH easier to accomplish before it's glued up, but it's really the way to go if you use one of those necks with no neck angle and a non-TOM style bridge.
The fretboard is just a bit too close to the face of the body portion of the neck.
EDIT:
OK, that won't work...
I was considering using Carvin necks for a bit, and they're really nice for what they offer.
Would you consider surface routing the entire face of the body?
Obviously it's MUCH easier to accomplish before it's glued up, but it's really the way to go if you use one of those necks with no neck angle and a non-TOM style bridge.
The fretboard is just a bit too close to the face of the body portion of the neck.
Re-rout the neck pocket so it's at a slight angle, maybe 1.5 - 2.5 degrees.
EDIT:
OK, that won't work...
I was considering using Carvin necks for a bit, and they're really nice for what they offer.
Would you consider surface routing the entire face of the body?
Obviously it's MUCH easier to accomplish before it's glued up, but it's really the way to go if you use one of those necks with no neck angle and a non-TOM style bridge.
The fretboard is just a bit too close to the face of the body portion of the neck.
Sorry, but I can't see any benefits of doing surface routing the entire body instead of just routing the bridge recess. It will create a bigger room for error, especially the area closer to the neck.
In my opinion (I could be absolutely wrong), looking at thickness of the body from the previous images, thining it out by doing surface routing the entire body wouldn't be good. It will make the body too thin, which can cause neck dive.
Also, if you decided to go active, some preamps have tall circuit board (like mike pope or glockenklang), that require a minimum cavity height around 30mm.
However, like I said, I could be absolutely wrong.
Harry
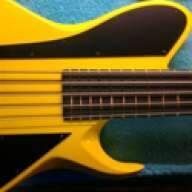
Yeah I had the same problem with my neck through build. I never had the foresight to build the neck a touch higher... probably due to planning the whole build without having all the parts in hand.
So I routed the bridge down. I had a problem where I couldn't drop the bridge any lower because then I wouldn't be able to load new strings from the rear and have access to the intonation adjusters. So I just live with my "slightly higher than I'd like" action.
I'll never make that error again and I will never build a bass again where the bridge needs routing in... it makes the pickups sit lower in the body and your string height to the face of the body is too close also for comfortable playing. (when I play I rest my thumb on the pickup but now the pickup is so far in that I don't get a nice thumb rest).
You could possibly route your body top down enough to add a new top and then also add a new bottom to compensate for the thickness. Routing the bridge is the quickest and simplest way forward and because you're string-through it should make life a bit easier.
So I routed the bridge down. I had a problem where I couldn't drop the bridge any lower because then I wouldn't be able to load new strings from the rear and have access to the intonation adjusters. So I just live with my "slightly higher than I'd like" action.
I'll never make that error again and I will never build a bass again where the bridge needs routing in... it makes the pickups sit lower in the body and your string height to the face of the body is too close also for comfortable playing. (when I play I rest my thumb on the pickup but now the pickup is so far in that I don't get a nice thumb rest).
You could possibly route your body top down enough to add a new top and then also add a new bottom to compensate for the thickness. Routing the bridge is the quickest and simplest way forward and because you're string-through it should make life a bit easier.
Thank you for all your replies. I could lower the entire surface of the body top, but that seems like a lot of work compared to just sinking the bridge. It doesn't have to go far, maybe just the thickness of the bridge itself. And I agree that the body is pretty thin as it is, just over 1¼" so I'm not sure that lowering the entire body face is the way to go. The only adjustment that will be a little more difficult to access will be the intonation adjustment screws, so I'll be sure to dial that in now. Maybe even leaving the area behind the bridge lowered as well to maintain easy intonation screw access.
After all the work I've put in, and all the challenges I've overcome (with all your help I might add), I'm not willing to live with action that's too high. It's interesting, I never even considered the measurement between the surface of the fretboard and the surface of the body. Had I known, I would have lowered that before I glued on the body wings. The things one learns with their first build.
Well, I guess I'll start on a template that matches the bridge.
After all the work I've put in, and all the challenges I've overcome (with all your help I might add), I'm not willing to live with action that's too high. It's interesting, I never even considered the measurement between the surface of the fretboard and the surface of the body. Had I known, I would have lowered that before I glued on the body wings. The things one learns with their first build.
Well, I guess I'll start on a template that matches the bridge.
Regarding the pickups, I'm currently looking at Classic Amplification replacement Rick Pickups:
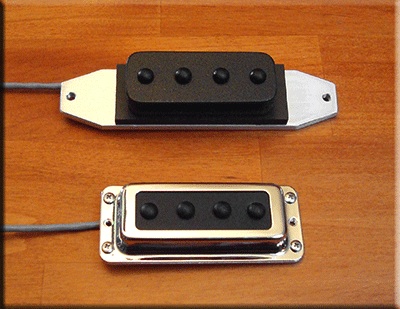
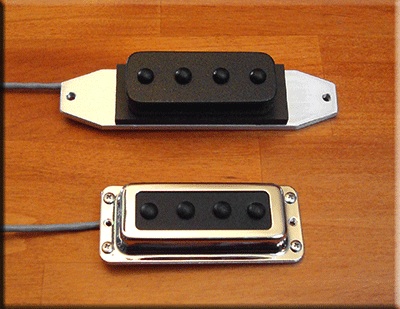
They want just about $250.00 for the set with covers. They seem to get pretty good reviews, and even though they are single coil, they also appear to be well shielded. Anyone have experience with these?
They want just about $250.00 for the set with covers. They seem to get pretty good reviews, and even though they are single coil, they also appear to be well shielded. Anyone have experience with these?
Thank you for all your replies. I could lower the entire surface of the body top, but that seems like a lot of work compared to just sinking the bridge. It doesn't have to go far, maybe just the thickness of the bridge itself. And I agree that the body is pretty thin as it is, just over 1¼" so I'm not sure that lowering the entire body face is the way to go. The only adjustment that will be a little more difficult to access will be the intonation adjustment screws, so I'll be sure to dial that in now. Maybe even leaving the area behind the bridge lowered as well to maintain easy intonation screw access.
After all the work I've put in, and all the challenges I've overcome (with all your help I might add), I'm not willing to live with action that's too high. It's interesting, I never even considered the measurement between the surface of the fretboard and the surface of the body. Had I known, I would have lowered that before I glued on the body wings. The things one learns with their first build.
Well, I guess I'll start on a template that matches the bridge.
You could do something like what this person did http://www.talkbass.com/forum/showthread.php?p=14645775, but carve it in a way so it become a unique feature of the body, or create a cover from the maple off-cuts that will sit on top of that routing part, and use magnets instead of screws.
That way you will still be able to adjust the intonation at anytime.
Just an idea...

Maybe even leaving the area behind the bridge lowered as well to maintain easy intonation screw access
I think that would be the best way to go.
- Jun 30, 2010
- 49,592
- 221,985
- Disclosures
- musician/artist/owner - Gildaxe
Regarding the pickups, I'm currently looking at Classic Amplification replacement Rick Pickups:
They want just about $250.00 for the set with covers. They seem to get pretty good reviews, and even though they are single coil, they also appear to be well shielded. Anyone have experience with these?
So does using this Ric type of pu's lead to incorporating a pickguard? (at least regarding the bridge pu)


