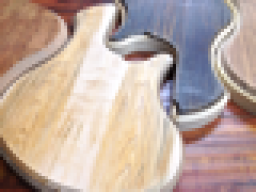
Here are some progress shots of the carving. This is still rough, but coming along nicely. You may also notice that I've cleaned up the little piece of transition block that was sticking out as well as routed the control cavity.

Here is a better shot of the transition. It's still straight right now. I have to pick up a rounded chisel and a curved scrapper before I can smooth it out any more. I might just keep it straight though. It's a little different (which I like), and functionally it still gives you better access to the higher "frets". My biggest challenge so far has been to not nick the neck since it's already been shaped. I've been using lots and lots of tape over the neck to help protect it.

The tummy cut is actually being more difficult than I thought it would be. The line on the back looks smooth, but I'm having a hard time smoothing out the line on the edge. That area needs some more work.
I've made two control cavity covers so far and I'm not sure I like either. I was going to go with Jatoba thinking it would tie into the neck laminate, but I think the color is just too different. Then I made one out of Maple thinking that it would tie into the recent carving. I'm not sure I like that either. I might just end up using black plastic or a piece of Ebony. I would have to buy another piece of Ebony though (if I can get something that small as a cut off or piece of scrap). I don't want to buy a full fingerboard and waste it for a control cavity cover.


Here is a better shot of the transition. It's still straight right now. I have to pick up a rounded chisel and a curved scrapper before I can smooth it out any more. I might just keep it straight though. It's a little different (which I like), and functionally it still gives you better access to the higher "frets". My biggest challenge so far has been to not nick the neck since it's already been shaped. I've been using lots and lots of tape over the neck to help protect it.
The tummy cut is actually being more difficult than I thought it would be. The line on the back looks smooth, but I'm having a hard time smoothing out the line on the edge. That area needs some more work.
I've made two control cavity covers so far and I'm not sure I like either. I was going to go with Jatoba thinking it would tie into the neck laminate, but I think the color is just too different. Then I made one out of Maple thinking that it would tie into the recent carving. I'm not sure I like that either. I might just end up using black plastic or a piece of Ebony. I would have to buy another piece of Ebony though (if I can get something that small as a cut off or piece of scrap). I don't want to buy a full fingerboard and waste it for a control cavity cover.




 I find cabinet scrapers indispensible for most parts of building, get a bunch! When you get your scrapers, I recommend you get a flat bastard-cut file and an edge burring rod, and ONLY use those for scraper maintenance! a fresh edge makes all the difference in how well they work. Here's a good article.