• TalkBass has been independent since 1998. Add your voice.
    Create a free account to reply to discussions, view embedded media, and browse with fewer display ads.
    Join freeLog in
    Want zero display ads or expanded classifieds tools? Compare plans.

Mandocello conversion

Ok, it’s the weekend so I can do stuff again. Despite ending my second job (private music studio) last June, I am finding the time I managed to free up washed away like a sand castle in the tide. Right now homework with the kids is taking up most of my time after school. Family comes first, but hopefully we will build a better groove so I can carve out a few hours for myself during the week. If not I can’t complain, I did this to myself.

Anyway, enough of my bellyaching, I need to make clamps today. I have a few things planned, but here is where I am starting. Here is a spool clamp I made a few years back:
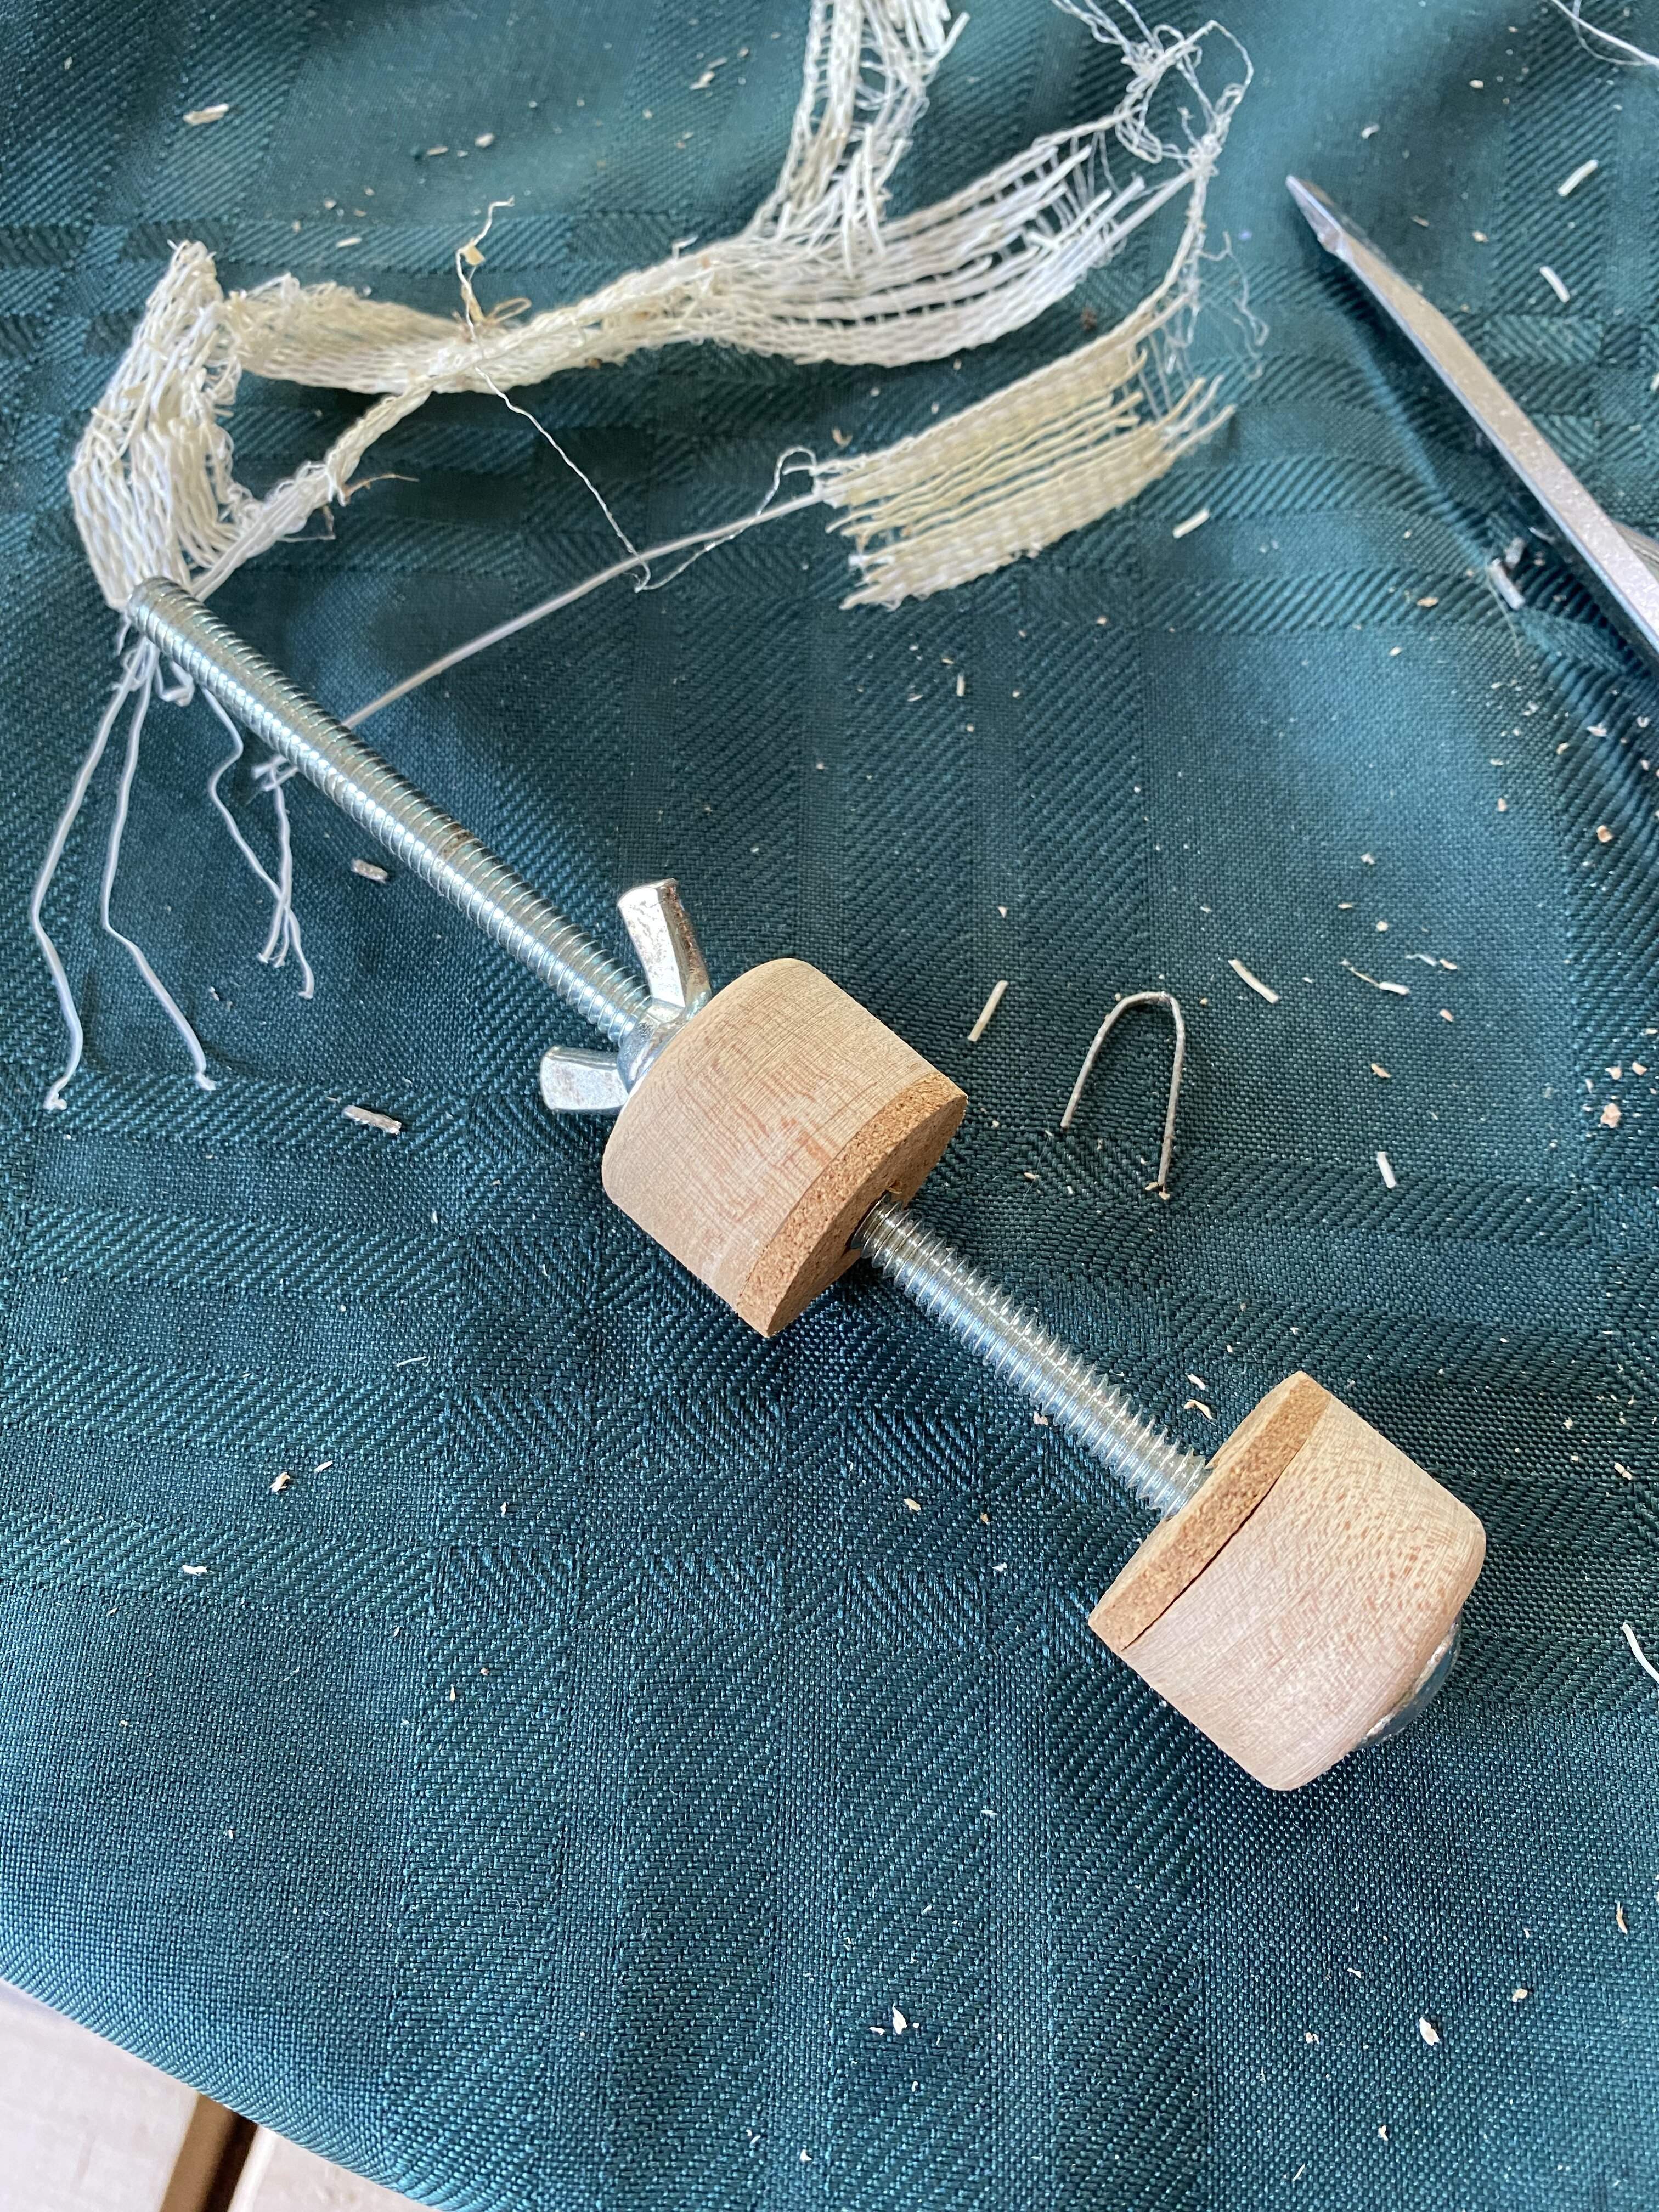
CAF6F4F9-7C64-4992-83D3-EBD8E6E9AD4B.jpeg

I don’t think most or any of you will need to see the process to understand this simple clamp, but sometimes it is fun to watch how people approach things. It gives you a chance to point out mistakes and say things like “hmm, that’s an interesting way to do it” or “I’ll be surprised if it works but whatever” or “that’s wrong”.

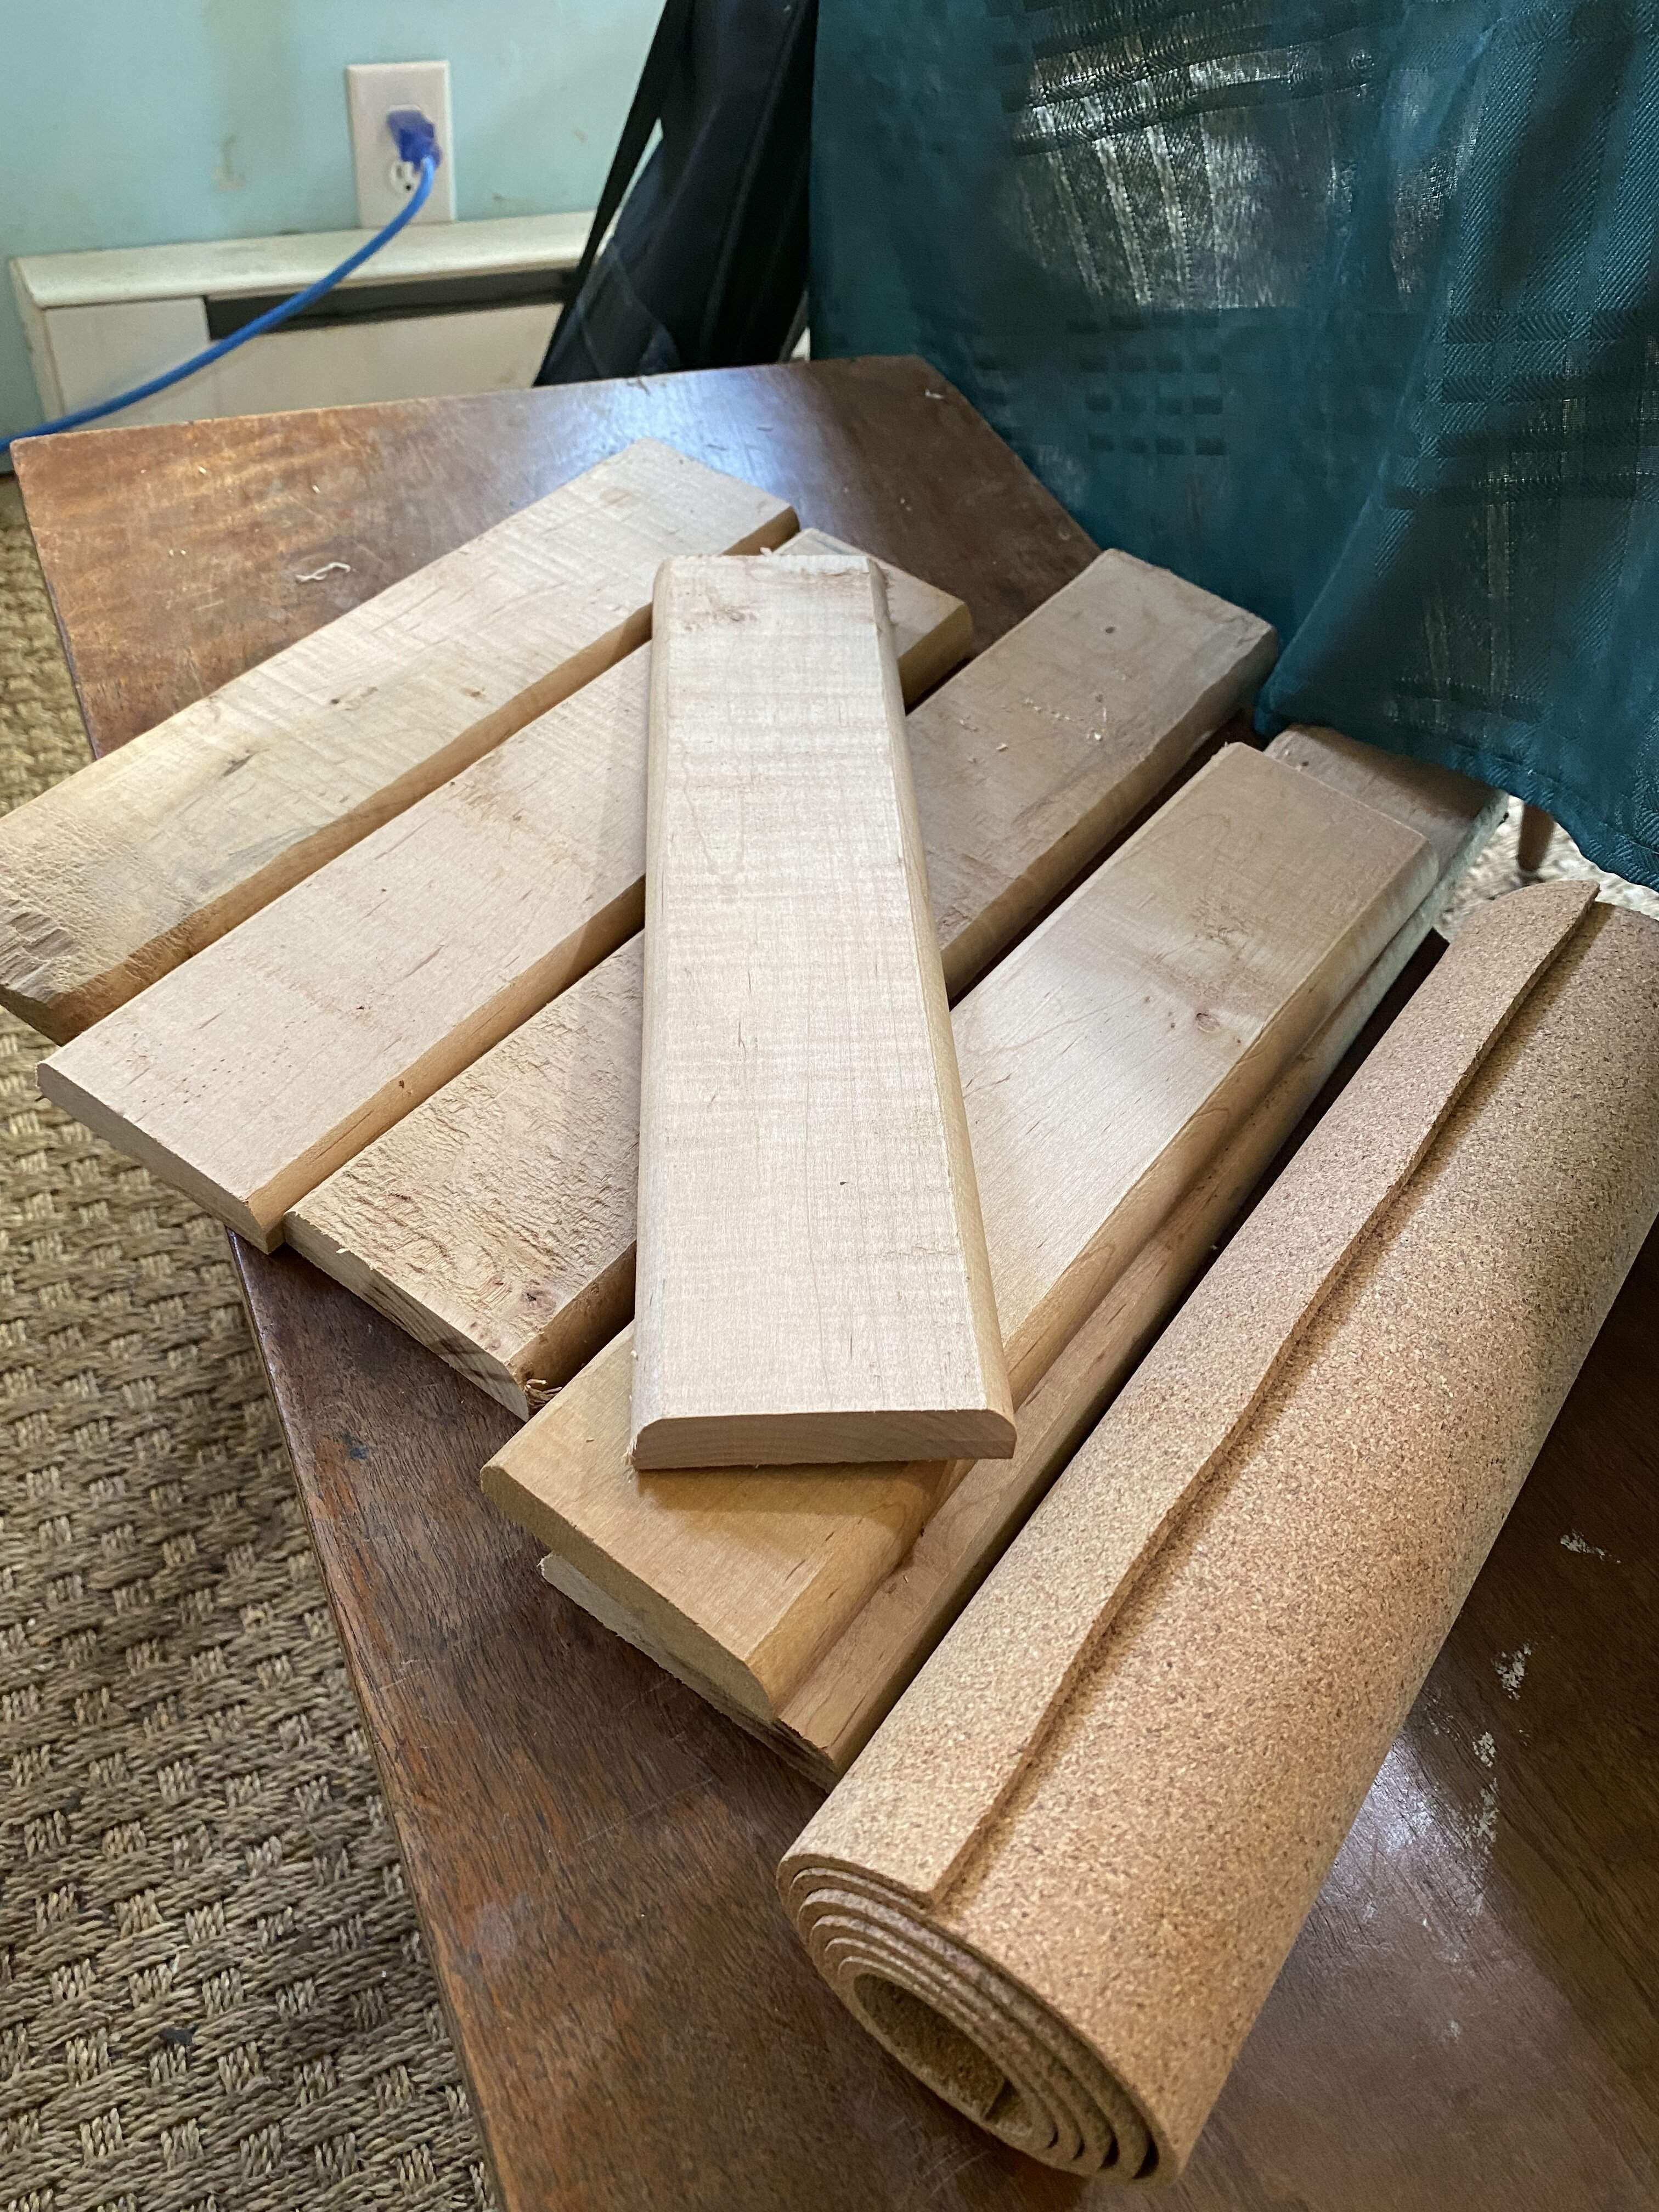
I made a set for spot repairs on my school instruments, and I have just enough to glue a uke body. I need a lot more for this project. The wood I am using are some maple mattress supports from one of my kid’s old beds. It is good hard wood, and some pieces even have a bit of flame. Each piece will yield 20-24 spools, so I should get at least 40 spool clamps out of this bunch. I have more wood if I need more after that.
795A4BE3-1982-4E58-81CE-3BDF1259A8E8.jpeg

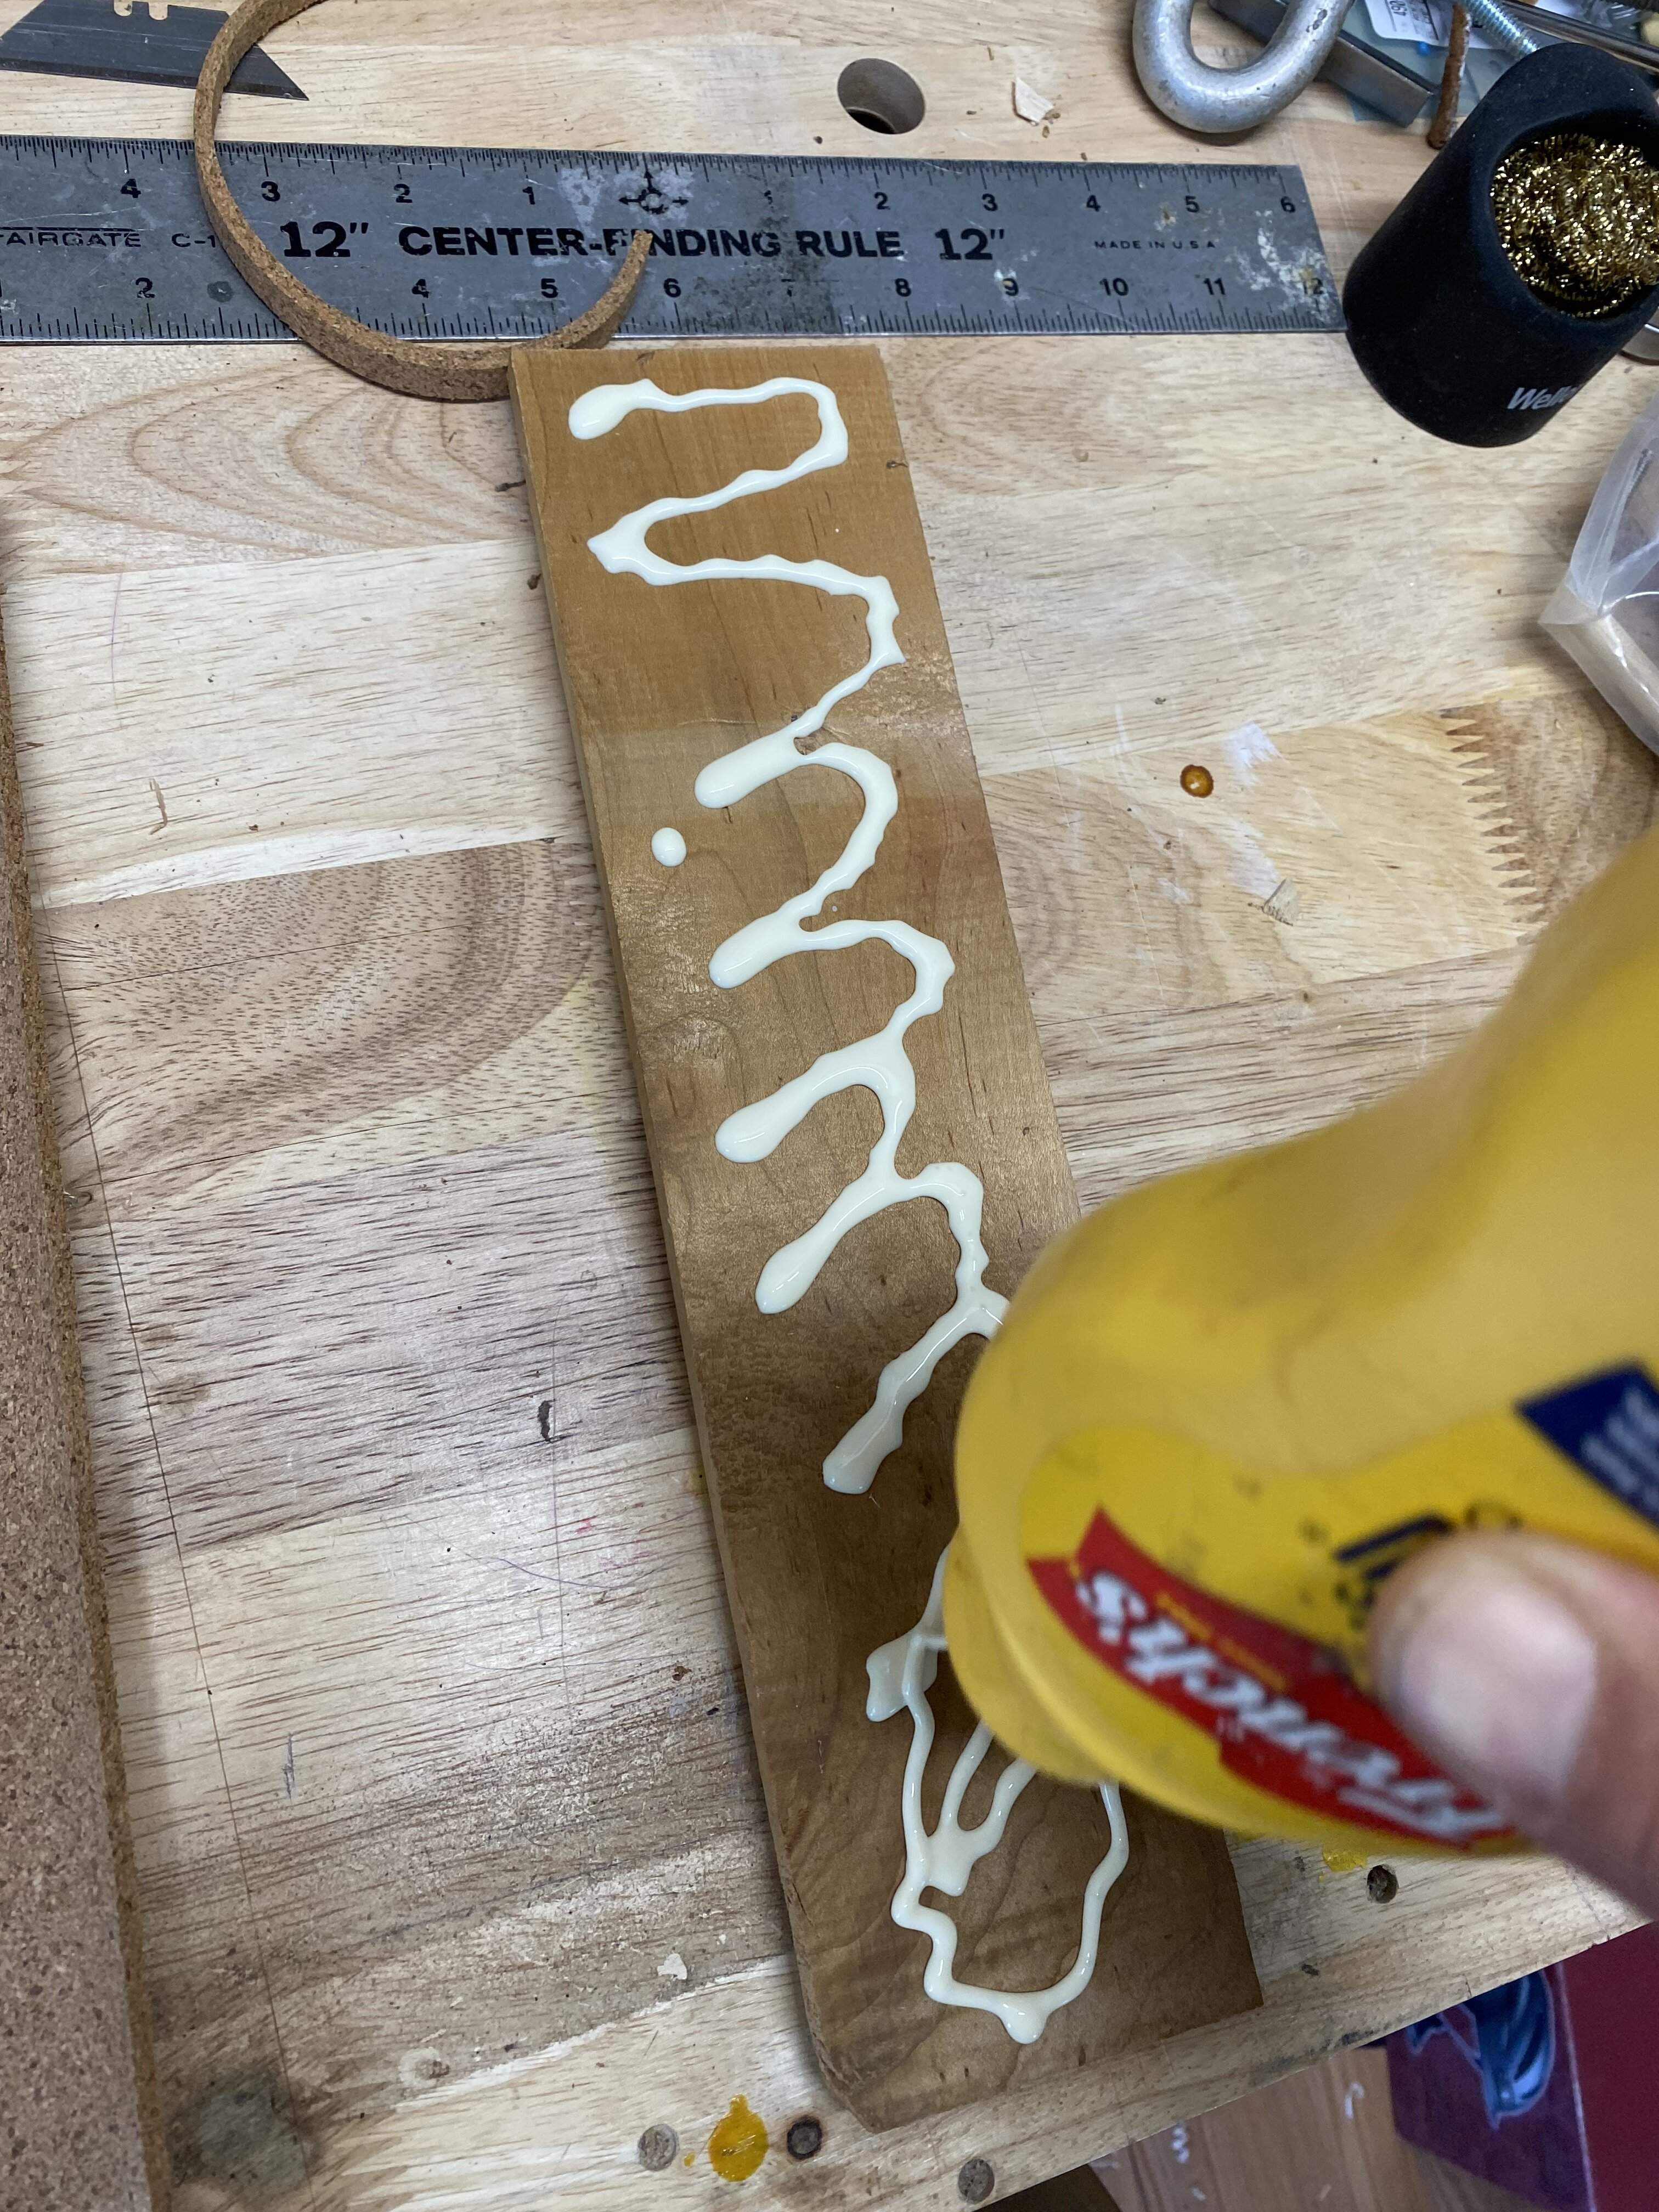
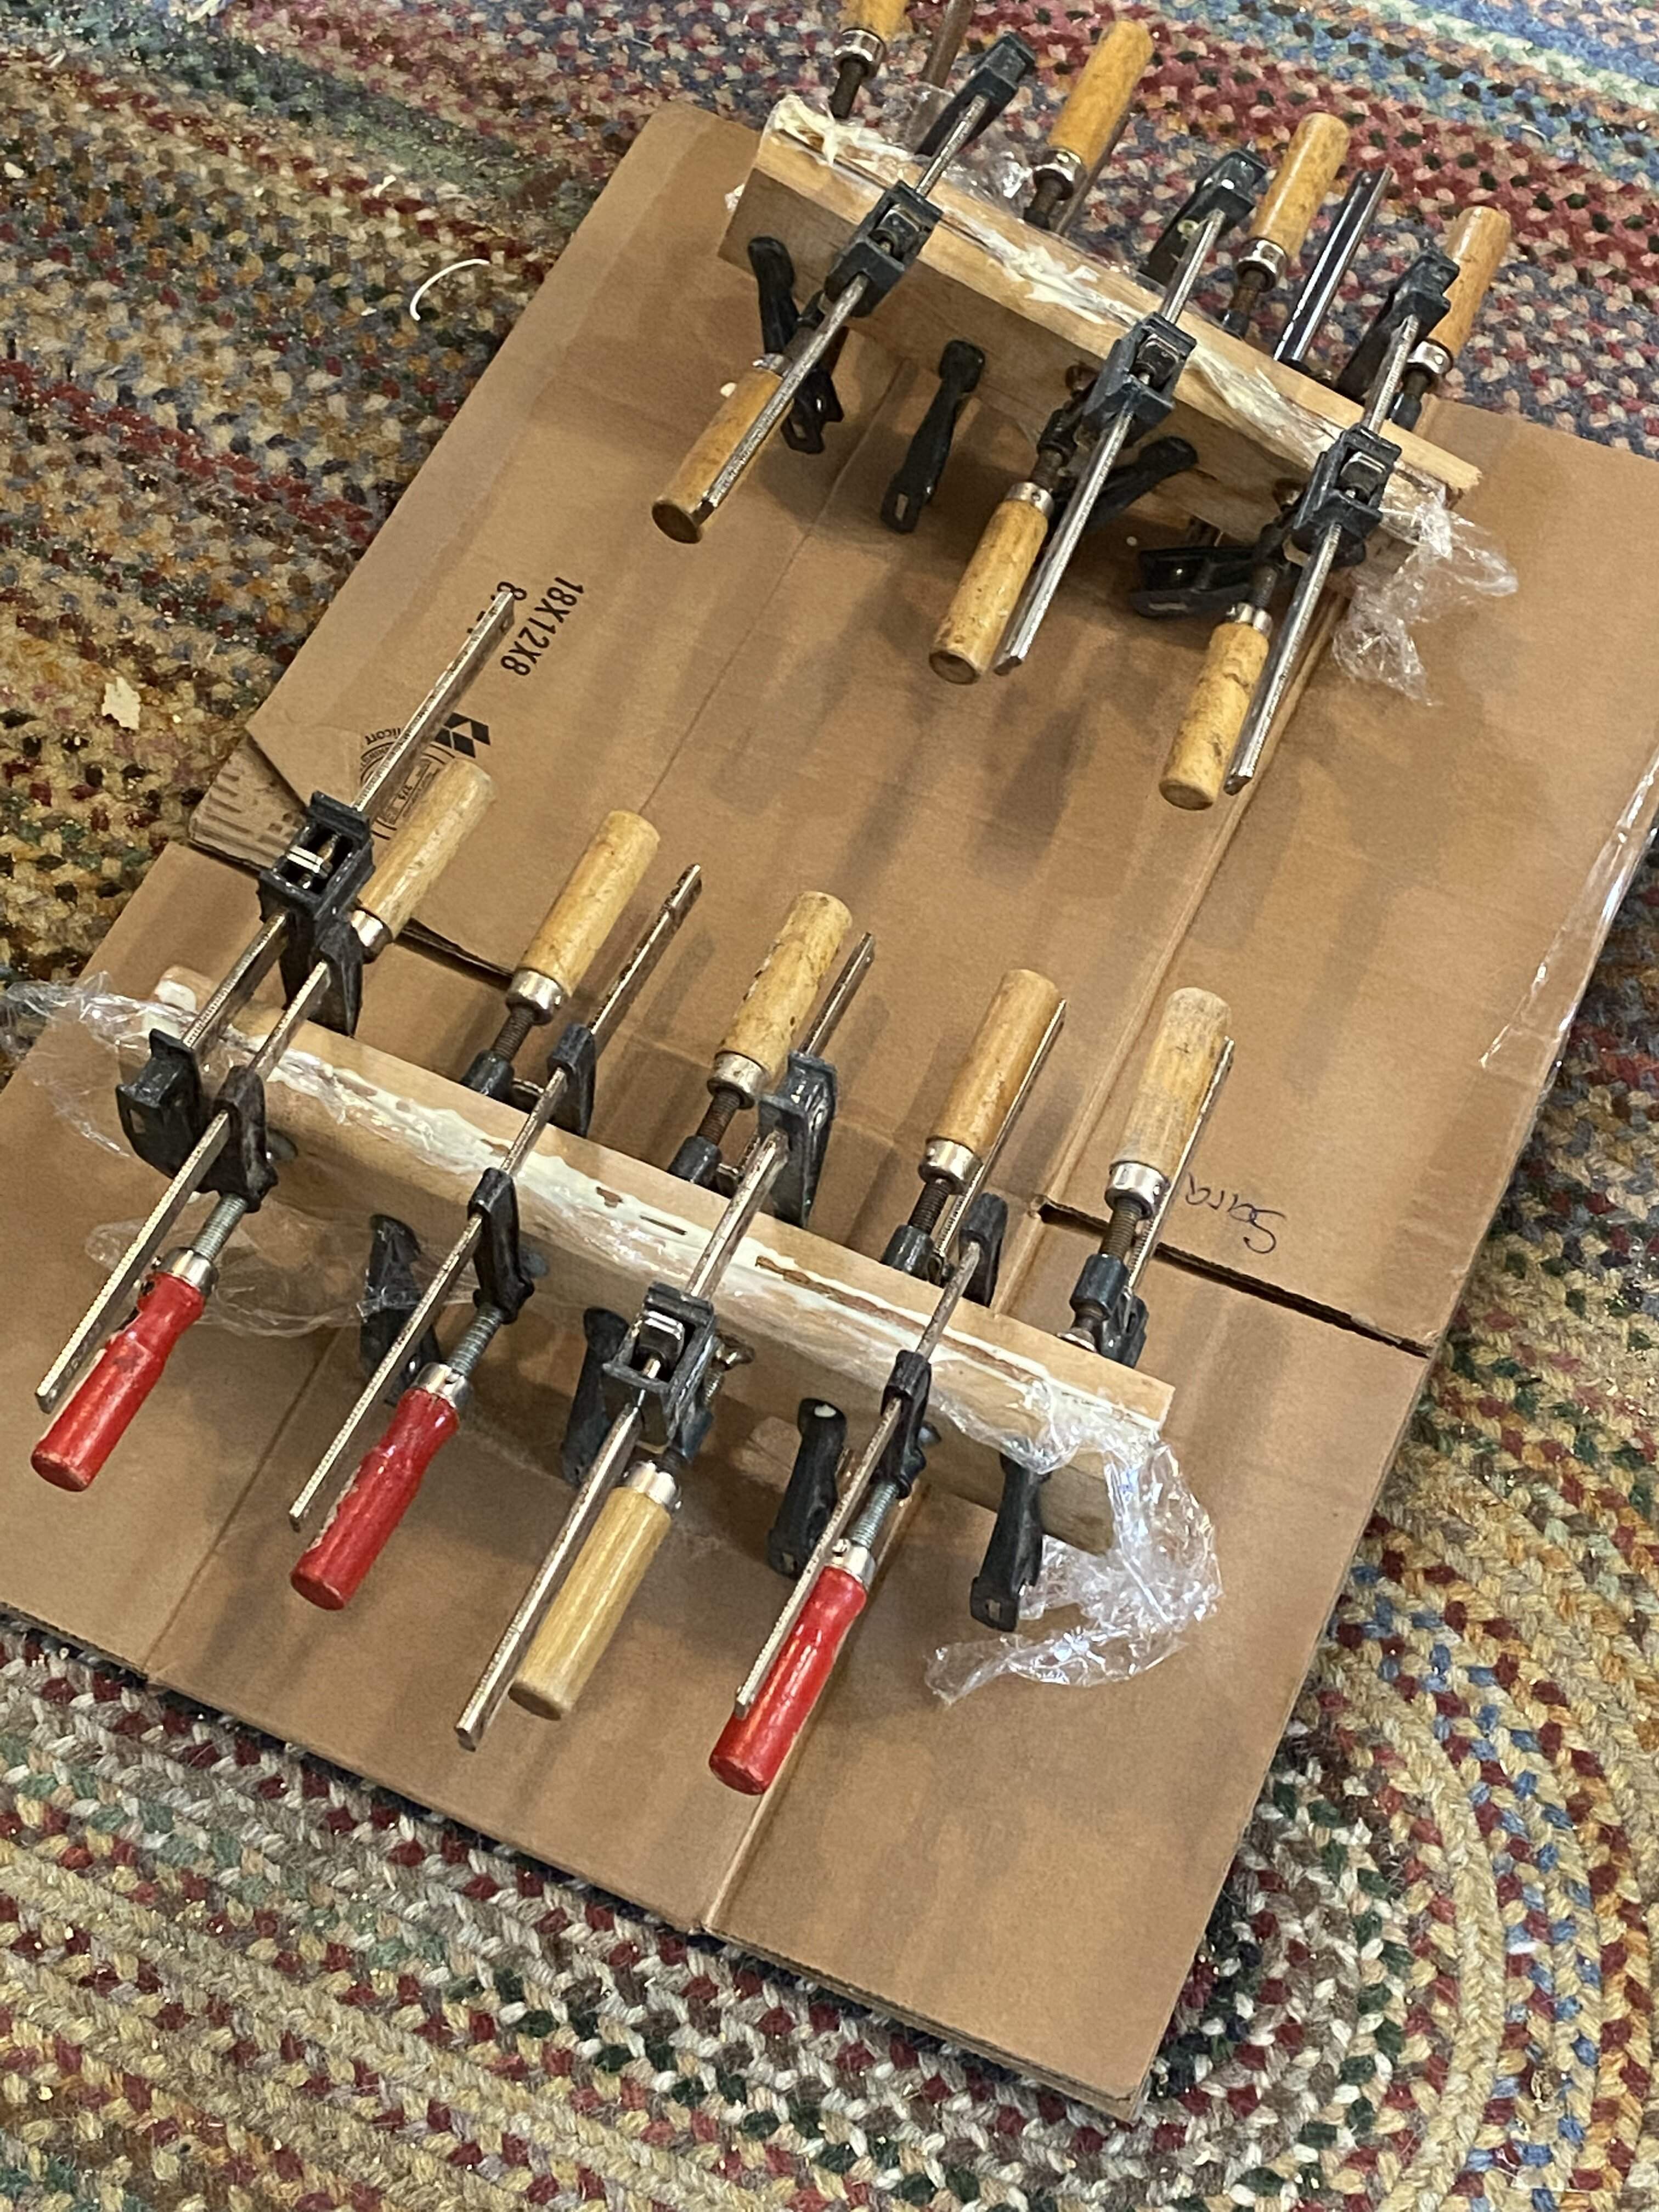
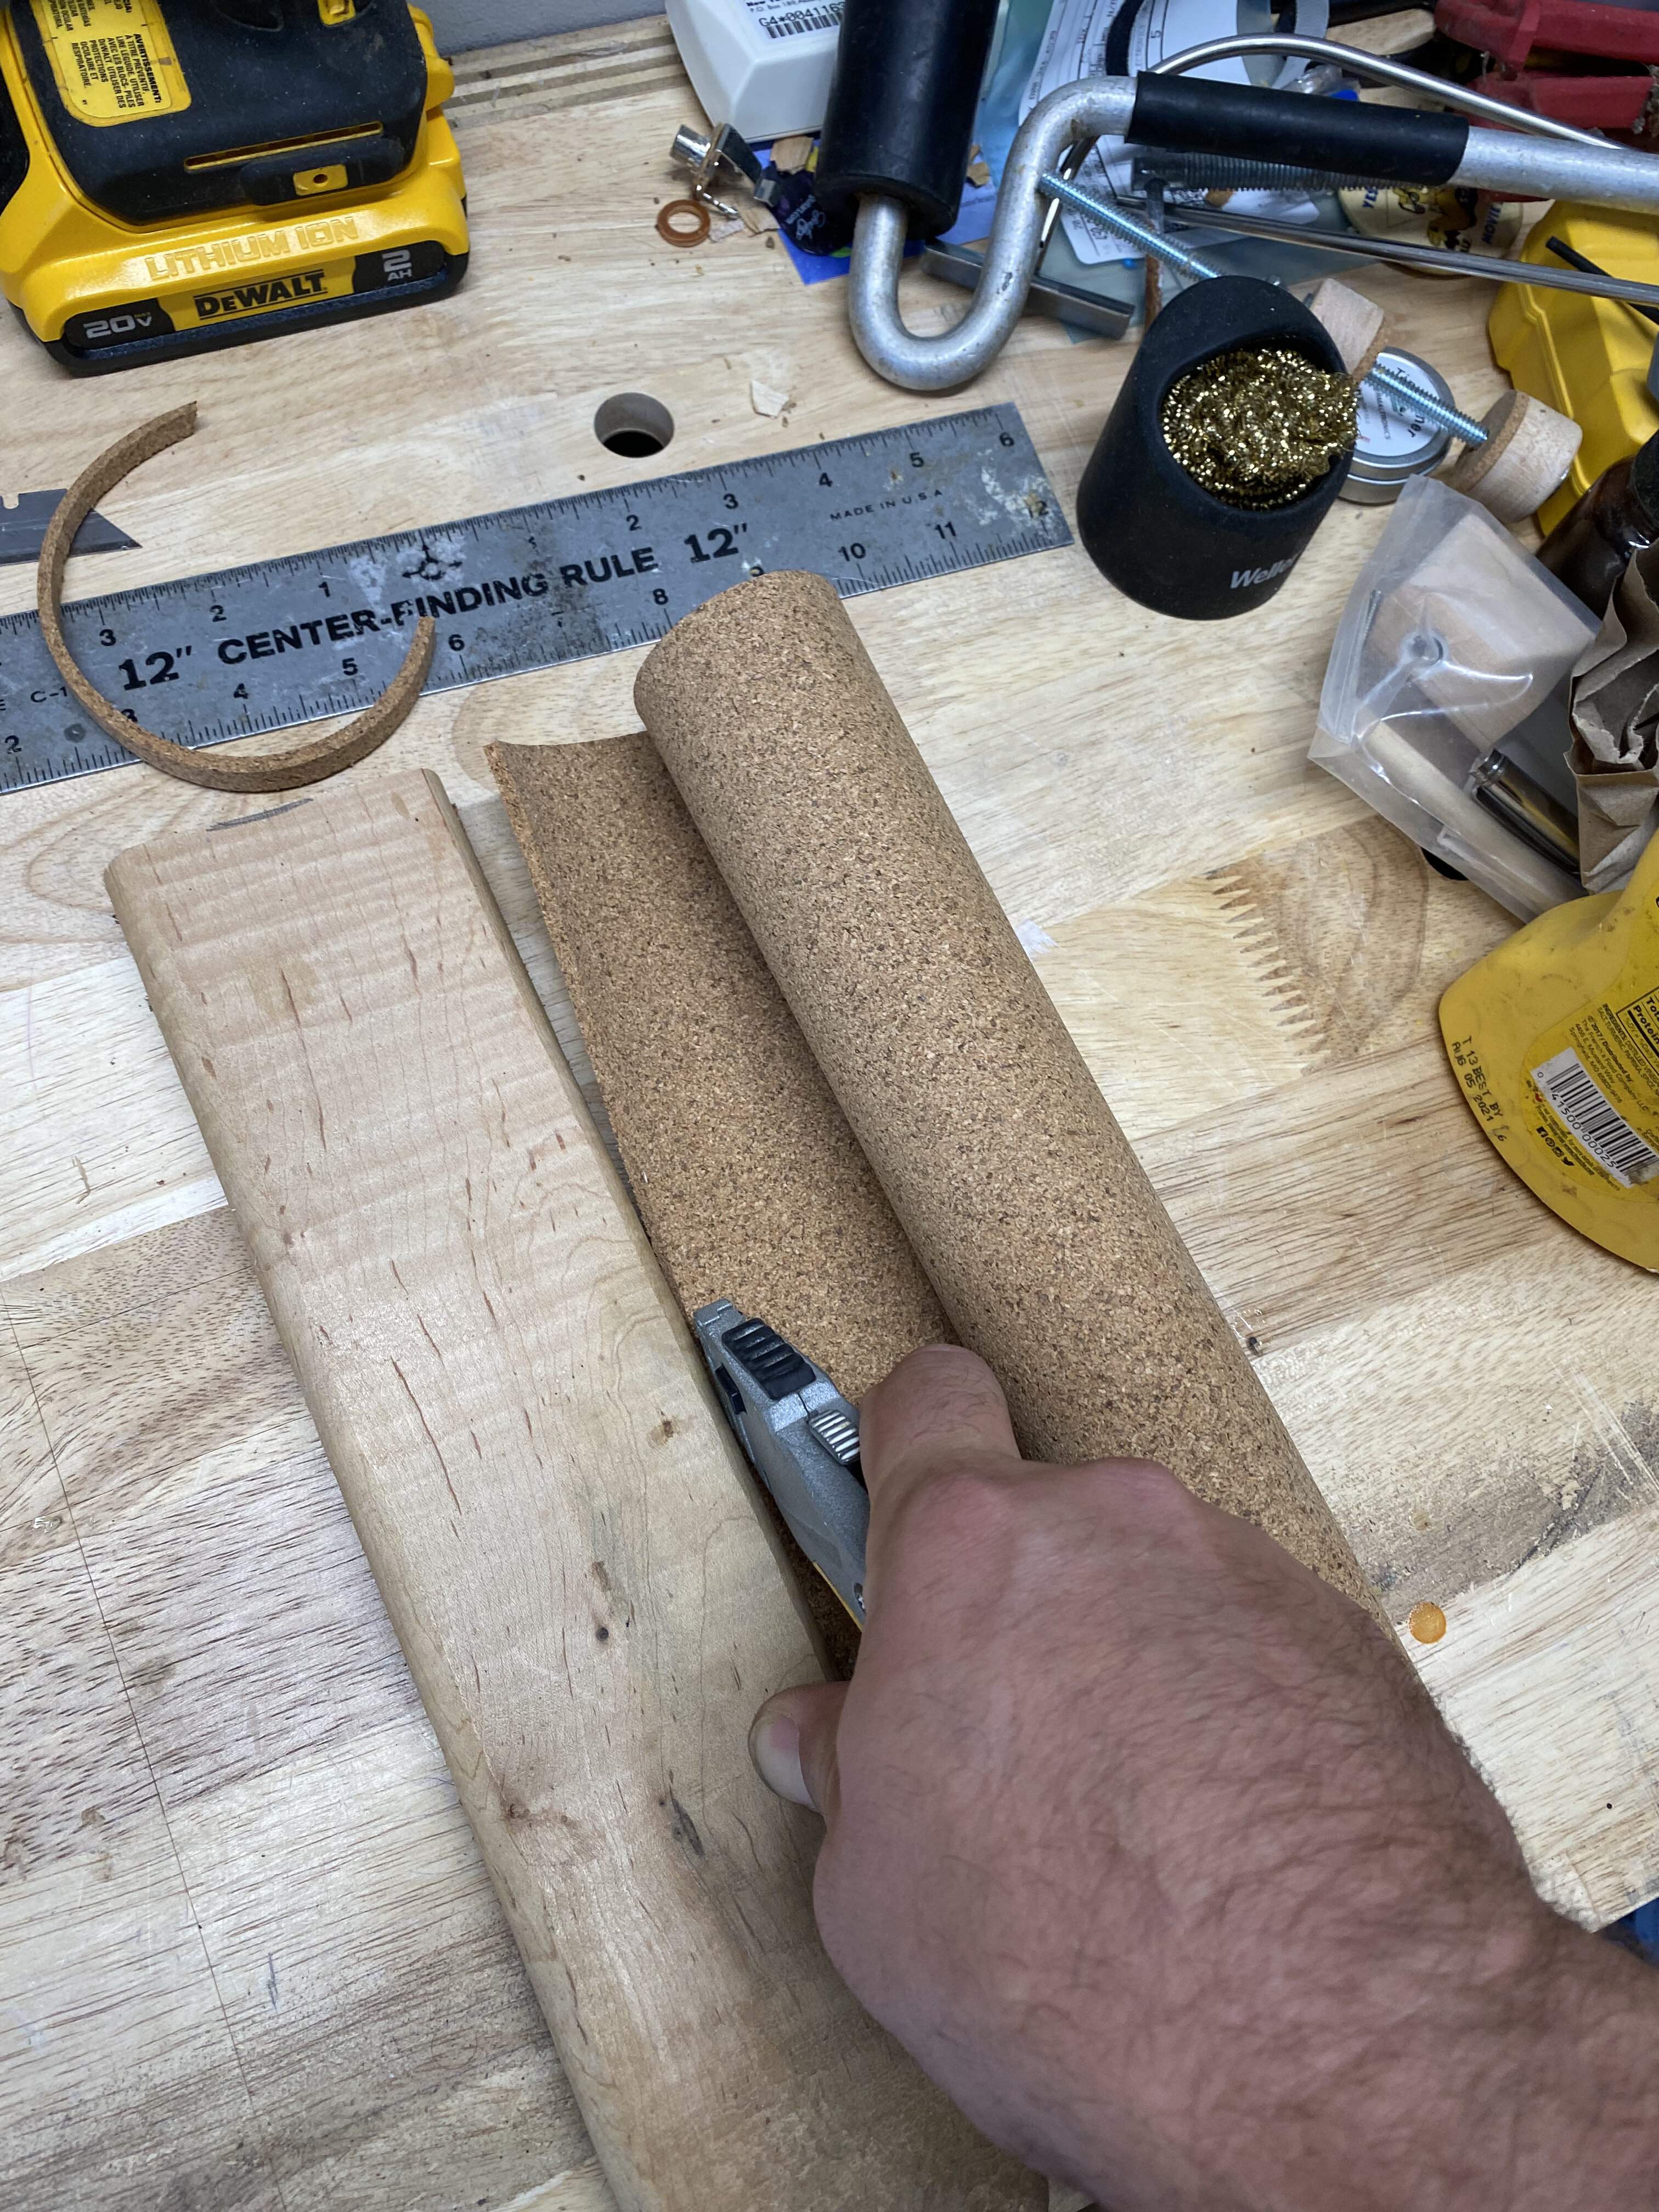
After cutting the boards into manageable sizes, I sliced some 1/8” cork to match the pieces. I then spread wood glue on the wood, applied the cork sheet, then some plastic wrap (I prefer wax paper as a glue block but am out), and do a mirror image with the other board and cork. Clamp and wait. Later tonight I will take off the clamps and start cutting my spools.
B716E51A-B4AC-4C87-AC9C-2D4ADCF4436F.jpeg
C2CA7792-6755-4B6B-AD4D-9DDCF5E5C3EF.jpeg
4BCE3D43-5257-4560-9CE0-3E52CE17242B.jpeg
 
Ok, working on a Halloween costume for my oldest, a centaur butt with a pvc skeleton, spray foam body, and articulated legs that will move with her actual legs. Neat. My wife is going to handle the fur and clothing part.
56D8D03F-8F82-4FC0-8EA9-80A83C037086.jpeg

Now I can get back to my clamps. I took off the clamps and wiped off any excess glue, you don’t want that on the cork. Chucked up a 1” hole saw with a 1/4” center bit, and adjusted the hole saw and drill press so the bit will go all the way through but not the saw. Trust me, this is the easier way as opposed to drilling through in one go. The hole saw does have a slot to get a screwdriver in there to push things out but it isn’t easy.

I cut about halfway through on my first pass. I made markings in the wood for the all of the pieces, so it goes quickly. Then I flip the board and index the drill in the through-hole. When it meets in the middle the spool is sticking halfway out the the hole saw and I can just pull it out after stopping the drill press. Then you are left with kindling and spools, cork attached.
98C2D2B4-F5F2-4282-8C25-3E17D0A43D5E.jpeg
6990B8DE-A19C-4FDB-BB13-D1FD565F535B.jpeg
BE1C2216-9D37-4813-94D9-9B735915D7A6.jpeg
69C0151D-3E6C-40C7-935D-EACA07F124F3.jpeg


Now you can set up your assembly station, I have 1/4” carriage bolts, wing nuts, and washers. Start by popping a spool into a carriage bolt wood side first (cork facing away from the bolt head). Then place another spool the opposite way.
72BC37CF-33DB-4491-89C5-687DFE30D903.jpeg

72A2295D-5469-4C8E-B73F-4BFF2A39360A.jpeg

using a bench dog hole, whack the bolt head a few times to seat it flush into the maple spool.
06D4D1E6-422C-4C87-A8BE-D32651D4B997.jpeg
45681078-97B7-4E03-8D4A-90F02DB07F2E.jpeg


Now add a washer followed by a wing nut. Then repeat.
8C03996A-2B86-4EC3-9167-A2A4D7A45B19.jpeg
FEDD577D-7904-4F21-A57E-834EC646CC94.jpeg

Technically these are done and functional at this point, but when I make my own tool I like it to look nice. Hopefully it will be around for a while. So we move back to the drill press…
 
Last edited:
This part is cool. The also shows why these are relatively expensive to buy per unit from a luthier supply, the materials are cheap but there is a lot of hand labor.

Set up a stand for your clamps and chuck one up into the drill press. If your wife bought you a fancy variable speed model go ahead and dial down the rpm.

Use a file like a lathe tool to get the big stuff off, follow up with 80 grit sandpaper and 220. I use the file and sandpaper to put a small round over on the top and bottom as well. Avoid hitting the wing nut!

Then I hit it with some amber shellac, taking care to avoid the cork. Now we have one pretty spool clamp, 39 or so more to go.
25CEE0A7-4F8C-4BD9-A861-CCCEF3818071.jpeg
01E504DE-9930-4DF2-8E3C-87DEB42026BF.jpeg
DBC13E45-09E2-4C7C-BD36-B53FF65E474F.jpeg
6C170057-EB25-4AB4-9F2E-9AD0DF135296.jpeg
DBC13E45-09E2-4C7C-BD36-B53FF65E474F.jpeg
B6F84586-1E41-439D-9B52-E5E104D0E0EC.jpeg
803D06D8-02E2-4BE2-82A3-5618D834D486.jpeg
3B48587F-DB9E-48A1-8FF0-A55BBE39F0A5.jpeg
 
I'm struggling to imagine how you will use the spool clamps. Guess I'll have to wait and see.

We'll need a pic of the centaur in full glory!
Good question! You see these a lot in acoustic instrument building and repair. I have them around for seam separations between the top and sides of violin-family instruments, but have also used them for joining uke and balalaika tops to sides.

They apply plenty of pressure if needed, but are touch responsive via the wing nuts. Another advantage is you can use wedges to press in sides on a repair. Often it is difficult to get the sides and top to line back up perfectly on a repair like this, but once you apply pressure to the clamps you can shove a wedge in if the side is bulging out. The downside is you need enough to go around the whole instrument.

They are also very light compared to a general wood clamp, and don’t need cauls to avoid damage to the instrument, and are much less likely to crush the sides.
BB2111EA-7617-4C89-B19C-A0D51867E111.jpeg
4519B636-BDD7-40A1-B6AF-34585FBE216B.jpeg
AF1979EC-E7E5-4C05-B184-B6A80111DA4F.jpeg

Another option would be a full body caul, but I probably won’t ever use that again. These will be around forever. You won’t see a ton of use on solid body electric instruments, but they could be helpful on a chambered body with a separate top.
 
For the glue-up, I cut up a paper bag and taped it on around the perimeter, right up to the top edge. This way if there is any glue squeeze I can just pull it off with the tape. Then I spread some glue and proceeded to clamp. Besides the three quick grips for the neck block, the spools do all the work.

I had to press the sides in towards the bottom, but it feels like it is mostly all good. The threaded rod is right up against the body, so that should prevent any bulging out, or at least mitigate it, as it dries.

Looks neat! I’ll let that dry overnight.
AA39D038-0B78-491A-951A-E5A93E2CB7D9.jpeg
1612DDE0-0FAC-4319-A8EB-5214EEDD4E71.jpeg
BC4C4935-2082-48EA-84E6-20B2967F9F9D.jpeg
95256FE0-6D78-4712-BF56-C7DCA8B5CA54.jpeg
329F5B0F-62E7-414E-80CA-0AFFD999F501.jpeg
 
While the top sets I figured I would see what this looked like under the finish. To my disappointment there wasn’t a AAA flame maple top, not even a faux spruce. Looks like mahogany, which seems about right. Kay and harmony used a ‘false flame’ effect where they sprayed bands across the top and back, but I don’t like that or the pinstripes around the perimeter.

In case I didn’t mention it, I bought this for $60 and it is a test bed for my repair lessons to practice techniques. I don’t think anyone will get upset I am stripping a Kay junker, but wanted to give fair warning.

I don’t think I will bind this as it isn’t something we covered yet, although I do have the tools. I think I have some luan that is similar, might do a red translucent finish. It is getting kind of chilly to spray but I may be able to make it happen in my little workshop, I will have electricity out there in a few weeks.
4E2B2421-FB08-4FD3-9FDD-FB4EB42E9CC8.jpeg
 
As a side note, I am seriously considering whipping up a new neck for this. I am swinging between the ridiculous notion of making a new neck for a $60 guitar and the concern that the poplar neck that it came with will not withstand the pull of the mandocello strings.

I have some cherry I salvaged from an old scrapped bed frame, color matches up really nicely. It wouldn’t cost me anything but the time. I can also self-justify in a way because I don’t have the skills to make an acoustic arch top body, but I am fairly confident I can swing an acoustic dovetail neck.

I just am not all that confident that the carbon fiber rod will handle the stress one it’s own, the poplar neck is really soft wood. Hmmm…
 
On this guitar probably not too much, it is just pressed plywood. If I had a vacuum setup I would seriously consider that, but I don’t think I have any way to get a veneer to contour to the arched top.
And if you did have a vacuum-bag setup, you'd want to have done that before gluing the top on, unless you were looking to demonstrate how vacuum can crush things...
 
  • Like
Reactions: instrumentalist
The balalaika evolved from the domra, which does have a bowl back, but I’m not sure where that one came from. I did build a balalaika last year though! I can muscle through the Tetris theme and nothing else.View attachment 4434581

The balalaika has a lot in common with the three string lap dulcimer, tuned E E B (although there are lots of variations in tuning).

Cool instrument. I like the artwork by Nora too,
 
Join is solid all around, no gaps, feels strong. There is one spot about 2” long on the upper bout where the top protrudes about 1/32”, but everywhere else is pretty much perfectly lined up. Very cool! Now I am going to sand this body and clean up some damage to the back of the dovetail area. Very pleased with the outcome, I have never glued a top onto something this big.
4CD41415-7942-44B4-9DFF-6088D9FFFE57.jpeg
06D02858-5BBF-42C6-8693-1DAF21BBC70A.jpeg
1257AEAC-28CE-4CC8-A541-14F68D87E060.jpeg