
Enjoy the benefits of a premium membership!
Upgrade Account
-
TalkBass has been independent since 1998. Add your voice.
Create a free account to reply to discussions, view embedded media, and browse with fewer display ads.
Join free Log in
Want zero display ads or expanded classifieds tools? Compare plans.
You are using an out of date browser. It may not display this or other websites correctly.
You should upgrade or use an alternative browser.
You should upgrade or use an alternative browser.
My "on the cheap" CNC router build
- Thread starter scottyd
- Start date
More options
Who Replied?
FWIW, I have the plans for a Momus CNC. I Started cutting the ply and got the metal parts, but the TX heat has zapped my motivation. Waiting for some more reasonable temperatures before I resume.

FWIW, I have the plans for a Momus CNC. I Started cutting the ply and got the metal parts, but the TX heat has zapped my motivation. Waiting for some more reasonable temperatures before I resume.
I can understand that, It's very hot my friend! I'm only a few miles south of you. The momus is very nice, I like the design.
All designs are a compromise, and the Momus seems like a good set of trade-offs for my space. I like that the frame is also the enclosure, and provides the function of controlling sound and dust while also being rigid (basically a 3d torsion box). It is limited in cutting size, but I am sure that this won't be my last machine. And although I was tempted to do my own design, I chose to build one from plans to avoid making some of the mistakes that I'd otherwise make while figuring out the electronics and software.
My next one will probably be larger, and primarily welded steel. But first things first...
My next one will probably be larger, and primarily welded steel. But first things first...

Btw, anyone else who has built one please feel free to show pictures and information on how you've done it.
Here is an old post about mine:
Project Bloodline | Page 4 | TalkBass.com
I didn't build the machine frame, though.
I have one more tip for you, btw. If you haven't already, get shielded cables for the spindle motor and stepper motors. Motors like that generate lots of noise which could lead to crashes. This is especially important if you have any sensors on the machine frame. (Like limit switches) Also get good quality cable that can handle constant movement.

These little gems came in today. Which means I can get a little more done this weekend to this project.
They're adjustable backlash nuts for the acme rod that ultimately will move the axis' on the machine. If I had my metal lathe already setup at my new shop I could have made these pretty easily. Oh well..another time.
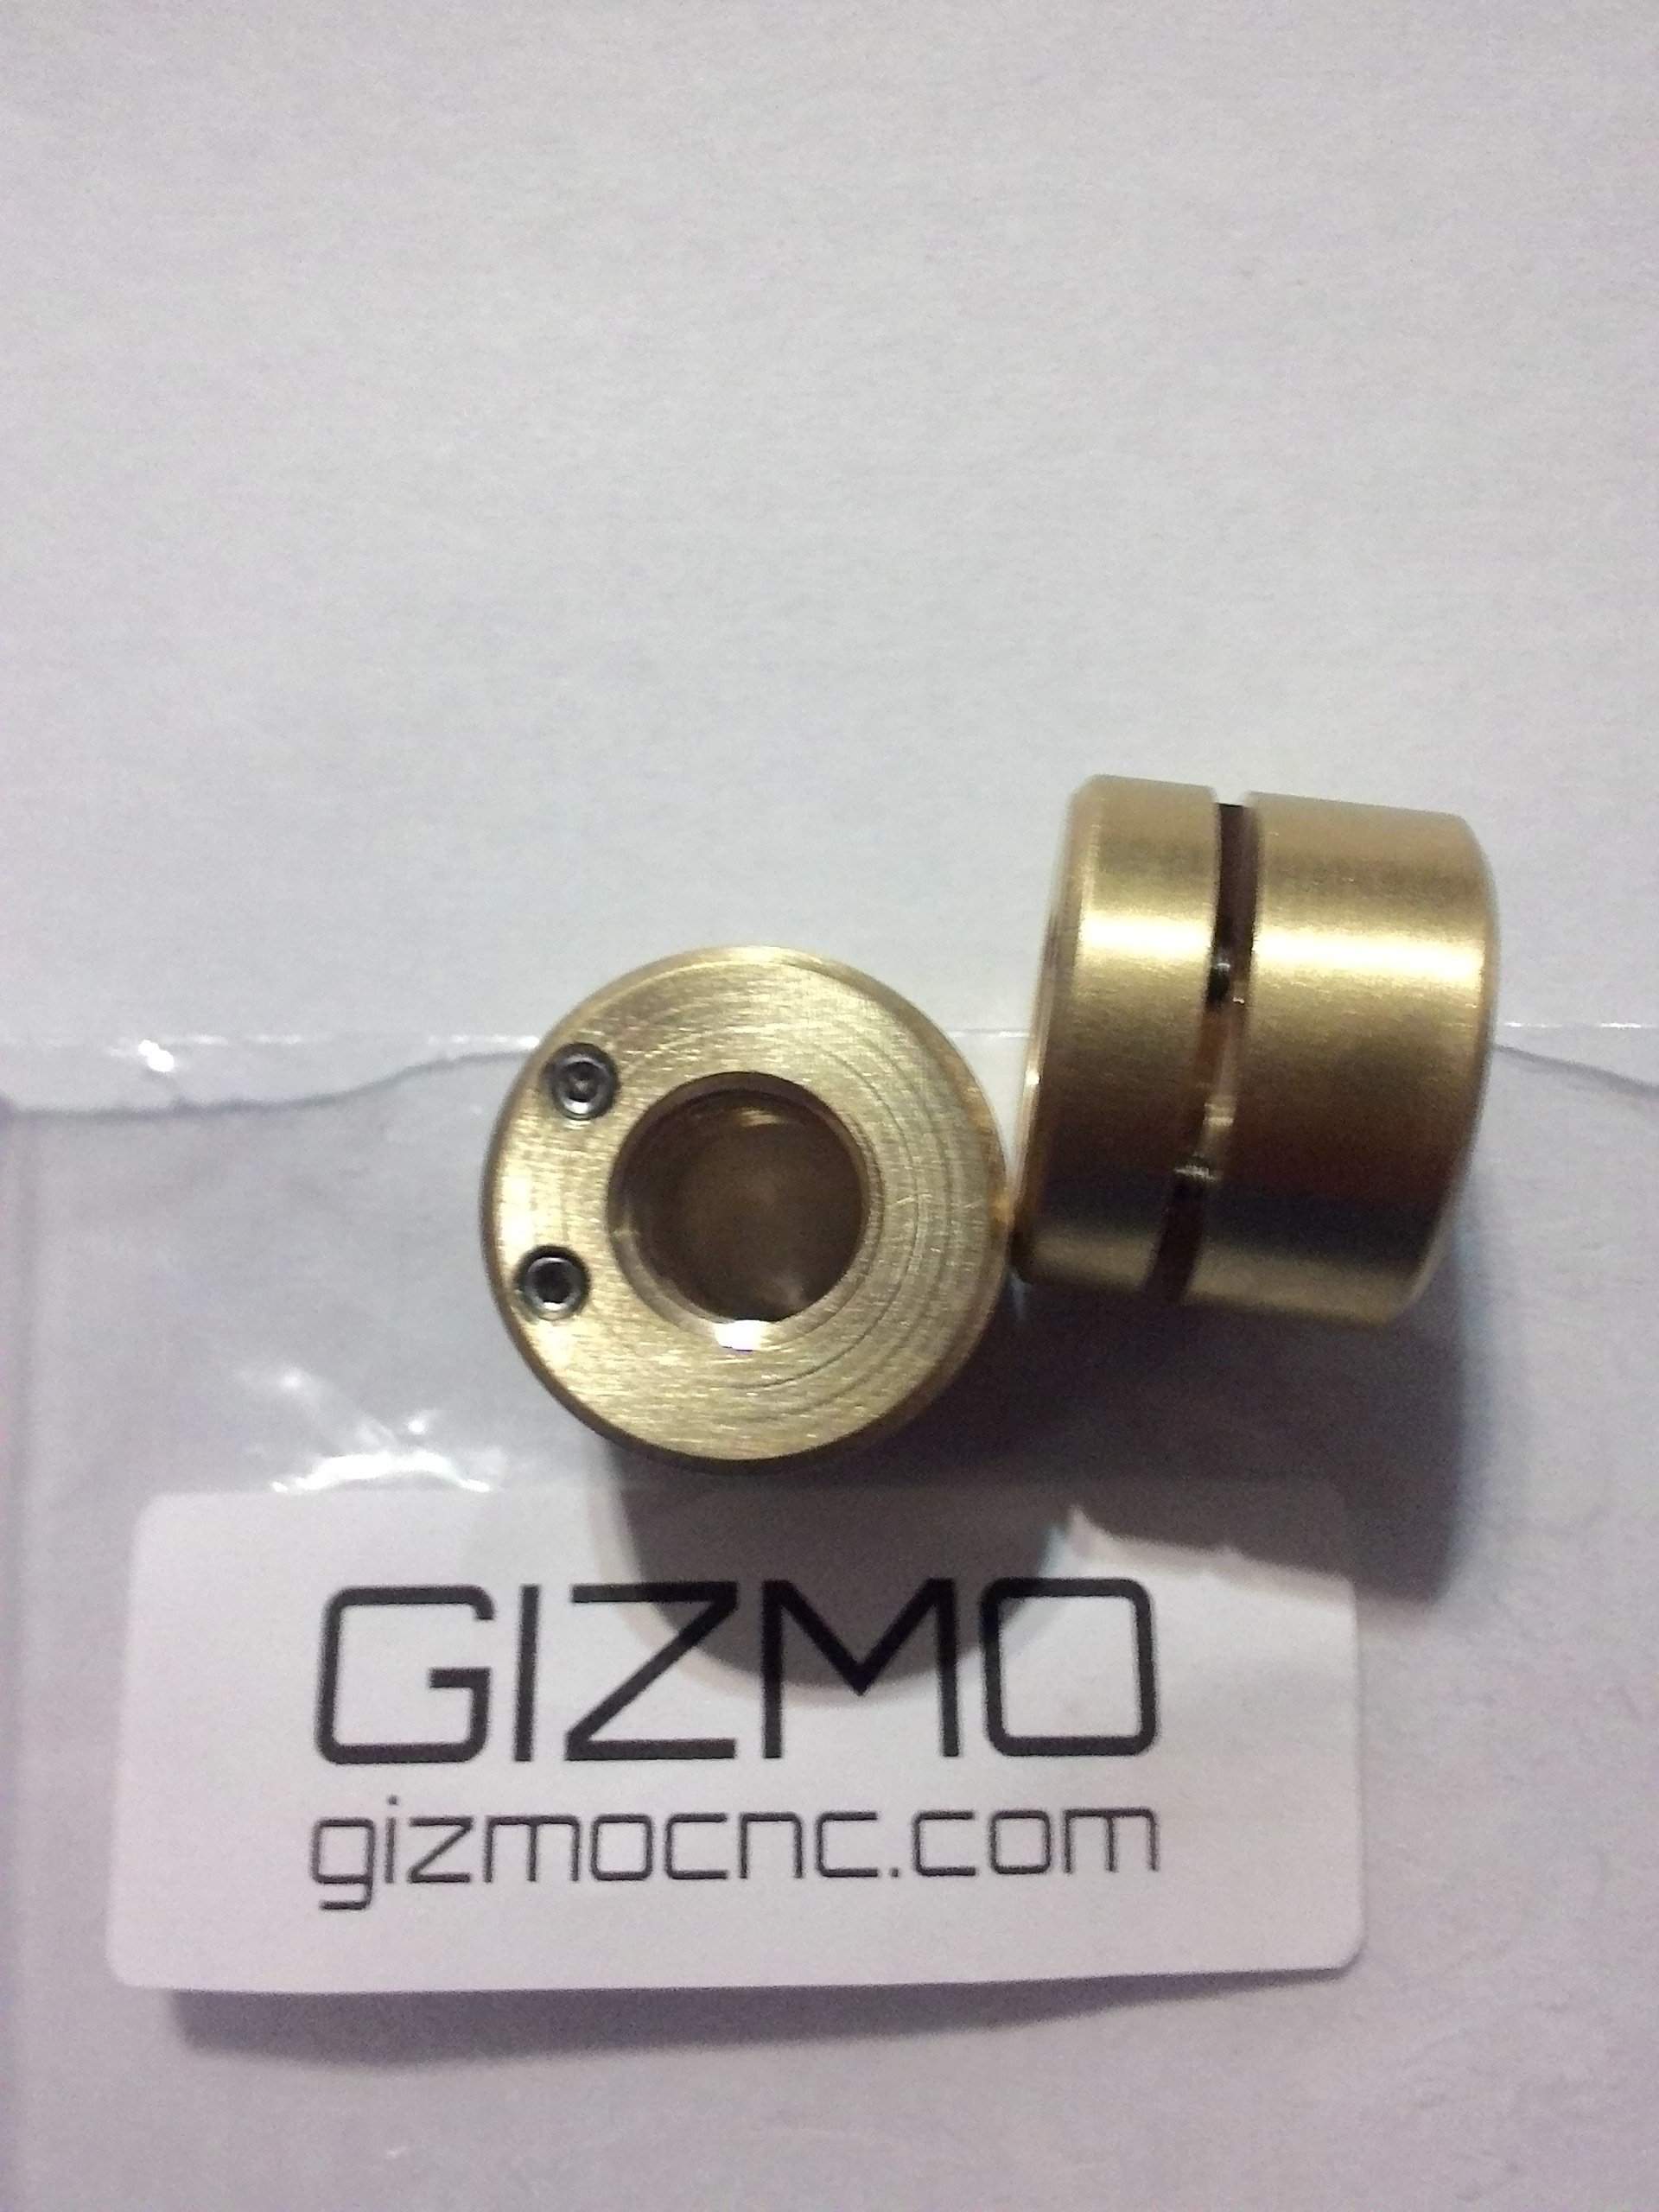
They're adjustable backlash nuts for the acme rod that ultimately will move the axis' on the machine. If I had my metal lathe already setup at my new shop I could have made these pretty easily. Oh well..another time.
Here is an old post about mine:
Project Bloodline | Page 4 | TalkBass.com
I didn't build the machine frame, though.
I have one more tip for you, btw. If you haven't already, get shielded cables for the spindle motor and stepper motors. Motors like that generate lots of noise which could lead to crashes. This is especially important if you have any sensors on the machine frame. (Like limit switches) Also get good quality cable that can handle constant movement.
That bass you built is beautiful. Looks like you made great use of the CNC, I noticed you also have a mill, do you prefer the cnc to it now?
That bass you built is beautiful. Looks like you made great use of the CNC, I noticed you also have a mill, do you prefer the cnc to it now?
Thanks.

Which one i prefer depends on what I'm doing. The CNC require way more work to set up since I don't have a workshop to have it permanently set up in, but if i need to make something complex and/or precise the CNC is the way to go.
A CNC works really well if you have multiple parts that need to be identical as long as you spend some time up front to make jigs.
If i just want to mill small stuff the small manual mill is much quicker to set up.

Worked on this a little. Made a temporary little bracket for the backlash nut, mounted it and started setting up the acme rod that'll move gantry.


I sure love the Ebay Make Offer feature... I score another set of long linear bearings for cheap. This set will be used for the Y axis. They're 5/8" which is the size of the rod I salvaged.

I also received these little bearings. They will hold the lead screws in place and allow them to spin.

Once I get the x axis lead screw situated I can start reinforcing the gantry and bed.
I also received these little bearings. They will hold the lead screws in place and allow them to spin.
Once I get the x axis lead screw situated I can start reinforcing the gantry and bed.
A little more work

I'm able to Chuck my drill to it and move the axis under motor power for the first time. It's smooth, has a little chatter when the lead screw extends the gantry all the way. Reading up on it I've found that I should preload the threaded rod to keep it tought so it doesn't vibrate. Simple solution

Most important, after a very scrutinizing inspection the Shop Foreman Mr. Jones gave his nod of approval. Now time to brace the bed and start on the other axis'

I'm able to Chuck my drill to it and move the axis under motor power for the first time. It's smooth, has a little chatter when the lead screw extends the gantry all the way. Reading up on it I've found that I should preload the threaded rod to keep it tought so it doesn't vibrate. Simple solution
Most important, after a very scrutinizing inspection the Shop Foreman Mr. Jones gave his nod of approval. Now time to brace the bed and start on the other axis'




Hopkins
Commercial User
I cant wait to see this machine in action.
Me either, depending how useful I find this I may opt for a professional one some day. I'm finding a few flex points that I need to tighten up for rigidity but over all its going well.
Last night I fought with the lead screw for this axis, the place I purchased it from sent me a bent one. I've got it a little straighter but it's frustratingly not perfect.
It'll move left to right fine but at the most right position it tightens up and gets firmer to move.


Just a random thought, but shouldn't those linear bearings be mounted with the opening facing down?
It looks like they are drilled and tapped on the sides, too.
My guess is they will be only half as effective mounted as they are currently:


It looks like they are drilled and tapped on the sides, too.
My guess is they will be only half as effective mounted as they are currently:
Latest posts
-

-
What Frequency Response is Actually Needed for Low Tuning?
- Latest: bass player 53
-

-
-
